

ViewSonic ViewBook Pro VNB131, VS13060 User Manual

- User Guide
- Guide de l’utilisateur
- Bedienungsanleitung
- Guía del usuario
- Pyководствопользователя
- Οδηγόςχρηστών
- 使用手冊(繁中)
ViewBook Pro
ViewSonic
®
Model No. : VS13060

ViewSonic VNB131 i
Compliance Information
CE Conformity for European Countries
The device complies with the EMC Directive 2004/108/EC and Low
Voltage Directive 2006/95/EC.
Following information is only for EU-member states:
The mark shown to the right is in compliance with the Waste Electrical
and Electronic Equipment Directive 2002/96/EC (WEEE).
The mark indicates the requirement NOT to dispose the equipment as
unsorted municipal waste, but use the return and collection systems
according to local law.
If the batteries, accumulators and button cells included with this
equipment, display the chemical symbol Hg, Cd, or Pb, then it means
that the battery has a heavy metal content of more than 0.0005%
Mercury, or more than 0.002% Cadmium, or more than 0.004% Lead.
R&TTE Compliance Statement
This wireless module device complies with the Essential Requirements of the
R&TTE Directive of the European Union (1999/5/EC). This equipment meets
the following conformance standards:
ETSI EN 300 328
EN 301 489-01
EN 301 489-17
NotiedCountries:Germany, UK, Netherlands, Belgium, Sweden, Denmark,
Finland, France, Italy, Spain, Austria, Ireland, Portugal, Greece, Luxembourg,
Estonia, Latvia, Lithuania, Czech Republic, Slovakia, Slovenia, Hungary,
Poland and Malta.

ViewSonic VNB131 ii
Important Safety Instructions
1. DO NOT press or touch the LCD Screen. DO NOT place the notebook PC
with small items, they may scratch LCD Screen or enter the notebook PC.
2. DO NOT expose the notebook PC to dirty or dusty environments. Keep
the environment clean and dry.
3. DO NOT place the notebook PC on uneven or unstable work surface.
4. DO NOT place or drop objects on the top of the notebook PC. DO NOT
shove any foreign objects into the notebook PC. DO NOT cover the LCD
Screen strongly.
5. DONOTexposethenotebookPCtostrongmagneticorelectricalelds;
DONOTplacetheoppydisknearoronthenotebookPC,thatmay
causealossofdataontheoppydisk.
6. DO NOT leave the notebook PC facing the sun as it can damage the LCD
Screen, especially when in the car.
7. SAFE TEMPERATURE: This notebook PC should only be used in
environments with ambient temperatures between 5°C (41°F) and
35°C(95°F).
8. DO NOT expose the notebook PC to or use near liquids, rain, or moisture.
9. Caution: risk of explosion if battery is replaced by an incorrect type.
Dispose of used batteries according to the instructions.
10. DO NOT throw the notebook PC in municipal waste. Check local
regulations for disposal of electronic products. Please recycle the Battery
Pack, and check with your Local Authority or retailer for recycling advice.
11. The notebook PC and the Adapter may produce some heat during
operation or charging. DO NOT leave the notebook PC on your lap or
any part of your body in order to prevent discomfort or injury from heat
exposure.
12. INPUT RATING: Refer to the rating label on the notebook PC and be sure
that the Power Adapter complies with the rating. Only use accessories
speciedbythemanufacturer.
13. Check the connections between the main unit and attachments before
turning on the notebook PC.
14. DO NOT use the notebook PC while eating food, avoid dirtying the
notebook PC.

ViewSonic VNB131 iii
15. DO NOT insert anything into the notebook PC that may result in short
circuit or damage the circuit.
16. Power off the notebook PC, if you want to install or remove some external
devices, which do not support hot-plug.
17. Disconnect the notebook PC from the electrical outlet and remove any
installed batteries before cleaning the notebook PC. Keep the notebook
PC and its accessories away from children.
18. DONOTdisassemblethenotebookPC,onlyacertiedservicetechnician
should perform repairs on your computer.
19. Only use Battery Packs approved by the manufacturer or else damage
may occur.
20. The notebook PC has apertures to disperse heat. DO NOT place the
notebook PC on soft objects (e.g.: bed, sofa, your lap), or else the
notebook PC may become hot and the system may halt.

ViewSonic VNB131 iv
Declaration of RoHS Compliance
This product has been designed and manufactured in compliance with Directive
2002/95/EC of the European Parliament and the Council on restriction of the
use of certain hazardous substances in electrical and electronic equipment
(RoHS Directive) and is deemed to comply with the maximum concentration
values issued by the European Technical Adaptation Committee (TAC) as
shown below:
Substance
Proposed Maximum
Concentration
Actual
Concentration
Lead (Pb) 0,1% < 0,1%
Mercury (Hg) 0,1% < 0,1%
Cadmium (Cd)
0,01% < 0,01%
Hexavalent Chromium (Cr6+)
0,1% < 0,1%
Polybrominated biphenyls (PBB)
0,1% < 0,1%
Polybrominated diphenyl ethers (PBDE)
0,1% < 0,1%
Certain components of products as stated above are exempted under the
Annex of the RoHS Directives as noted below:
Examples of exempted components are:
1.Mercuryincompactuorescentlampsnotexceeding5mgperlampandin
otherlampsnotspecicallymentionedintheAnnexofRoHSDirective.
2.Leadinglassofcathoderaytubes,electroniccomponents,uorescenttubes,
and electronic ceramic parts (e.g. piezoelectronic devices).
3. Lead in high temperature type solders (i.e. lead-based alloys containing 85%
by weight or more lead).
4. Lead as an allotting element in steel containing up to 0.35% lead by weight,
aluminium containing up to 0.4% lead by weight and as a cooper alloy
containing up to 4% lead by weight.

ViewSonic VNB131 v
Copyright Information
Copyright © ViewSonic® Corporation, 2009. All rights reserved.
Microsoft®, Windows®, Windows NT®, and the Windows® logo are registered
trademarks of Microsoft® Corporation in the United States and other countries.
ViewSonic®, the three birds logo, OnView®, ViewMatch™, and ViewMeter® are
registered trademarks of ViewSonic® Corporation.
Intel®, Pentium®, and Atom™ are registered trademarks of Intel Corporation.
Disclaimer: ViewSonic® Corporation shall not be liable for technical or editorial
errorsoromissionscontainedherein;norforincidentalorconsequential
damages resulting from furnishing this material, or the performance or use of
this product.
In the interest of continuing product improvement, ViewSonic® Corporation
reservestherighttochangeproductspecicationswithoutnotice.Informationin
this document may change without notice.
No part of this document may be copied, reproduced, or transmitted by any
means, for any purpose without prior written permission from ViewSonic®
Corporation.
Product Registration
To meet your future needs, and to receive any additional product information as
it becomes available, please register your product on the Internet at:
www.viewsonic.com. The ViewSonic® Wizard CD-ROM also provides an
opportunity for you to print the registration form, which you may mail or fax to
ViewSonic®.
For Your Records
Product Name:
Model Number:
Document Number:
Serial Number:
Purchase Date:
VNB131
ViewSonic NoteBook
VS13060
VNB131-1_UG_ENG Rev. 1B 12-14-09
Product disposal at end of product life
ViewSonic® is concerned about the preservation of our environment. Please
dispose of this product properly at the end of its useful life. For the recycling
information, please refer to our website:
1. USA: www.viewsonic.com/company/green/recycle-program/
2. Europe: www.viewsoniceurope.com/uk/support/recycling-information/
3. Taiwan: recycle.epa.gov.tw

ViewSonic VNB131
Table of Contents
Chapter 1 Introduction.......................................................................... 1
1.1 Package Checklist ................................................................................................1
1.2 Specications ......................................................................................................2
1.3 Knowing the Parts ...............................................................................................3
Top view
..........................................................................................................3
Base view ........................................................................................................
5
Left view .........................................................................................................
7
Right view .......................................................................................................
7
1.4 Notebook usage ..................................................................................................8
Battery usage ..................................................................................................
8
Installing the battery ........................................................................................
8
Removing the battery .......................................................................................
9
Connecting to the AC power supply ...................................................................
9
Startup .........................................................................................................10
Shutdown ......................................................................................................10
Indicators ......................................................................................................11
Touchpad ......................................................................................................12
Touchpad basics
.............................................................................................12
Multi-Finger Touchpad ....................................................................................
13
Using the keyboard ........................................................................................15
Lock keys and embedded numeric keypad .......................................................
15
Windows keys ................................................................................................
16
Hotkeys .........................................................................................................
16
Chapter 2 BIOS Setup Utility ...............................................................17
2.1 When to Use BIOS Setup ...................................................................................17
2.2 How to Run BIOS Setup .....................................................................................17
2.3 Control Keys ......................................................................................................17
2.4 Boot Device Priority ...........................................................................................18
2.5 BIOS Menu .......................................................................................................18
2.5.1 Main Menu ...........................................................................................18
2.5.2 Advanced Settings .................................................................................19
2.5.3 Security Settings ...................................................................................19
2.5.4 Boot Settings ........................................................................................20
2.5.5 Exit Settings ..........................................................................................21
Chapter 3 System Recovery ................................................................22
How to restore the previously backed up system in Windows .....................................22
Restore the backed up system under DOS mode .......................................................
25
Rescue the data under DOS mode ............................................................................
28
Troubleshooting ..................................................................................31

ViewSonic VNB131 1
Chapter 1 Introduction
1.1 Package Checklist
Thank you for choosing ViewSonic ViewBook Pro.
Please check if the packaging or any of the below listed accessories are damaged or
missing, in which case please contact with ViewSonic local representative ofce.
• ViewBook Pro notebook computer
• Power Cord
• Power Adapter
• Quick Start Guide
• ViewSonic User Guide CD Wizard
• System Recovery Disc or Driver disc (recovery disc comes with models bundled with
an operating system only)
• Lithium-lon Battery
• Screen Wiping Cloth
* The items listed above are for reference only, and are subject to change without notice.
* Depending on the model you purchased, the actual appearance of your notebook may vary from that
shown in this manual.

ViewSonic VNB131 2
1.2 Specications
CPU - INTEL® CoreTM 2 Duo Processor ULV SU7300
Chipset - Intel® GS45/40+ICH9M
LCD Screen
- 34cm/13.3” WXGA color TFT-LCD with LED Backlight
- Resolution: 1280*800 pixels
Power Management
- ACPI V3.0
- S0, S3, S4, S5 support
System Memory
- DDR2 667/800MHz (Single Channel)
- DDR2 SO-DIMM slot supports up to 2GB (one slot)
Mass Storage
- Support SATA HDD
- 6.35cm/2.5” 9.5mm HDD
User Interface
- 7 in 1 Card Reader (supports MS/MS Pro/MS Duo/SD/miniSD/
MMC/RSMMC)
Note: MS Duo, miniSD, RSMMC, MS Pro require an adapter
- 2 x 4-pin USB2.0 Ports
- 1 x VGA Port
- 1 x HDMI Port
- 1 x CD-ROM/Second battery/Module (Optional)
- 1 x Express card Slot
- 1 x MIC
- 1 x Line Out
- 1 x RJ45 Port
- 1 x DC-In Port
Audio
- Azalia Codec supports 2.1 channel output
- Built-in audio connector and mic connector
Digital Camera - Build-in 1.3 megapixels camera
Ethernet LAN - 10/100Mbps Fast Ethernet Support
Wireless LAN - Mini PCI-E interface, supports 802.11b/g/n
Bluetooth - Bluetooth™ v2.1+EDR
Battery
- 6 cells Li-Ion battery pack, 10.8V/47.52Wh, suppor ts an
additional 3-cell Li Ion Battery Pack (Optional)
Dimensions
- 322 x 239 x 17~25 mm
- 12.68 x 9.41 x 0.67~1 inch
Weight - Less than 1.5 kg/3.30 lbs (including 3 cell Li-Ion battery pack)
ViewSonic VNB131 3
1.3 Knowing the Parts
After having checked the package and installed your ViewBook Pro, let’s get familiar
with its parts.
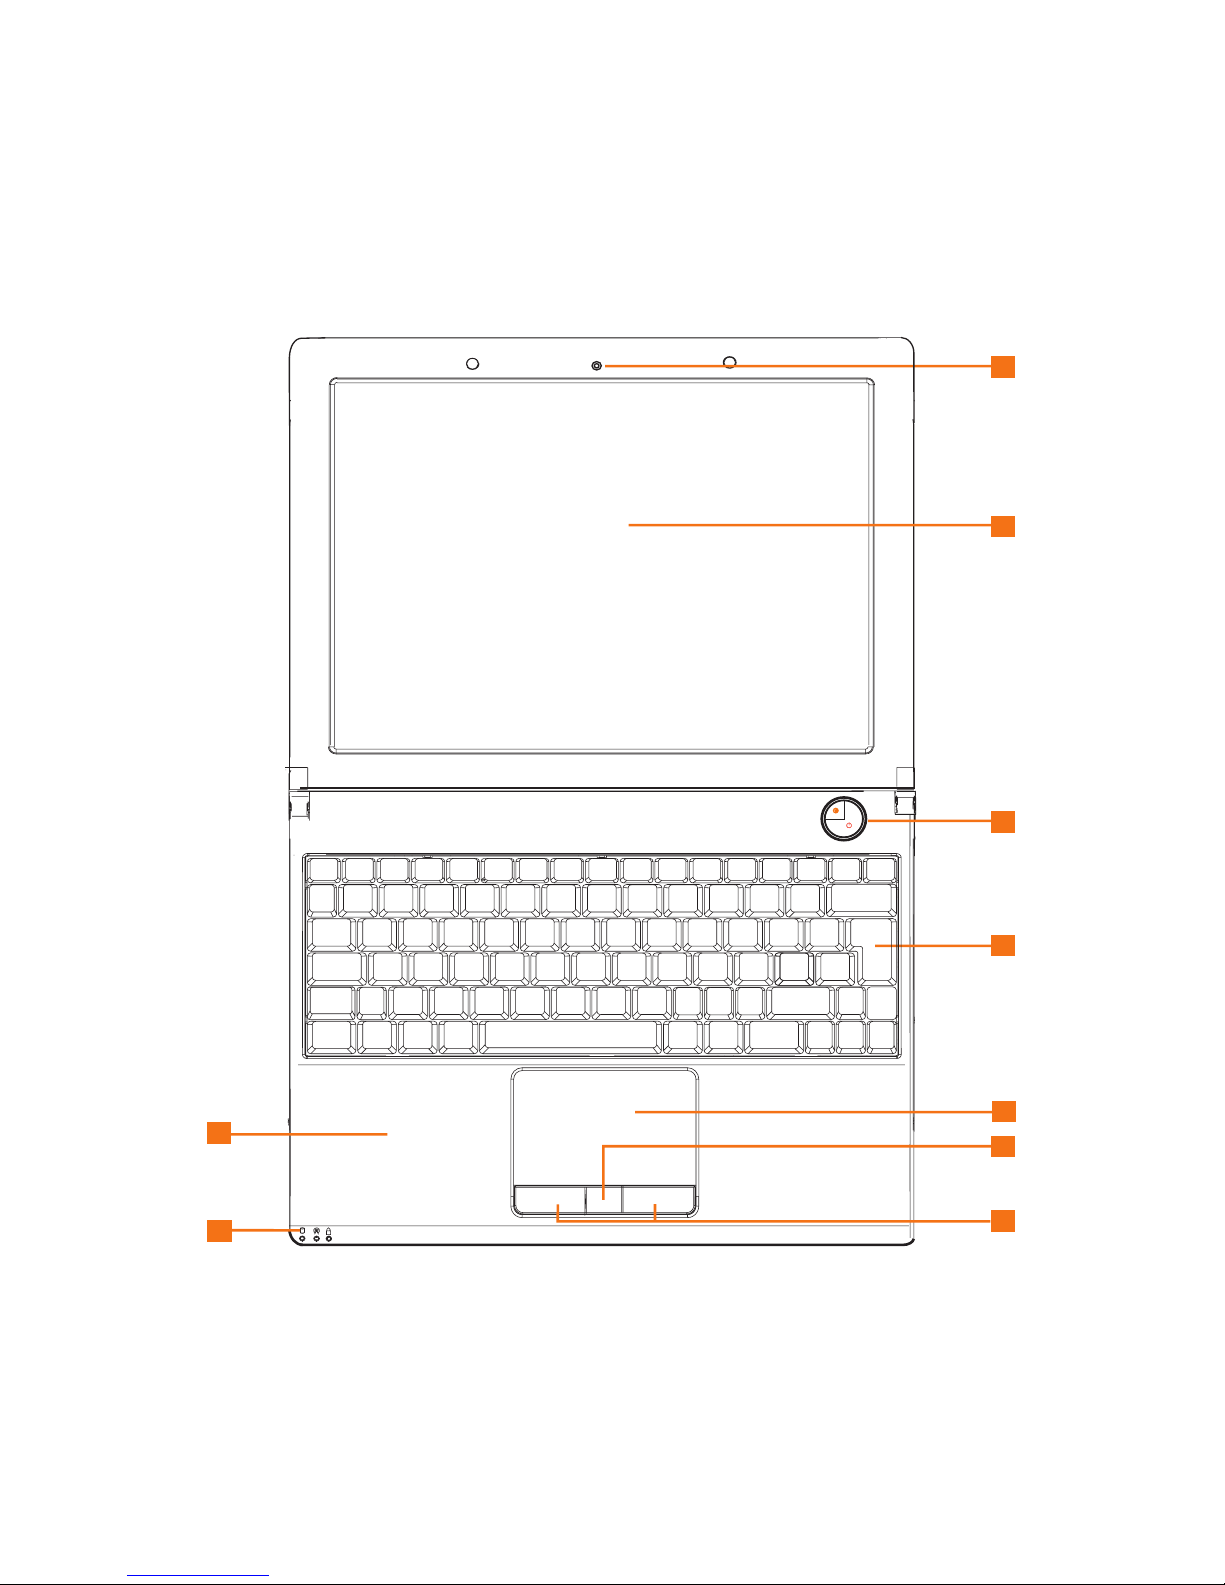
Top view
1
1
1
4
5
8
7
6
3
2
9
ViewSonic VNB131 4
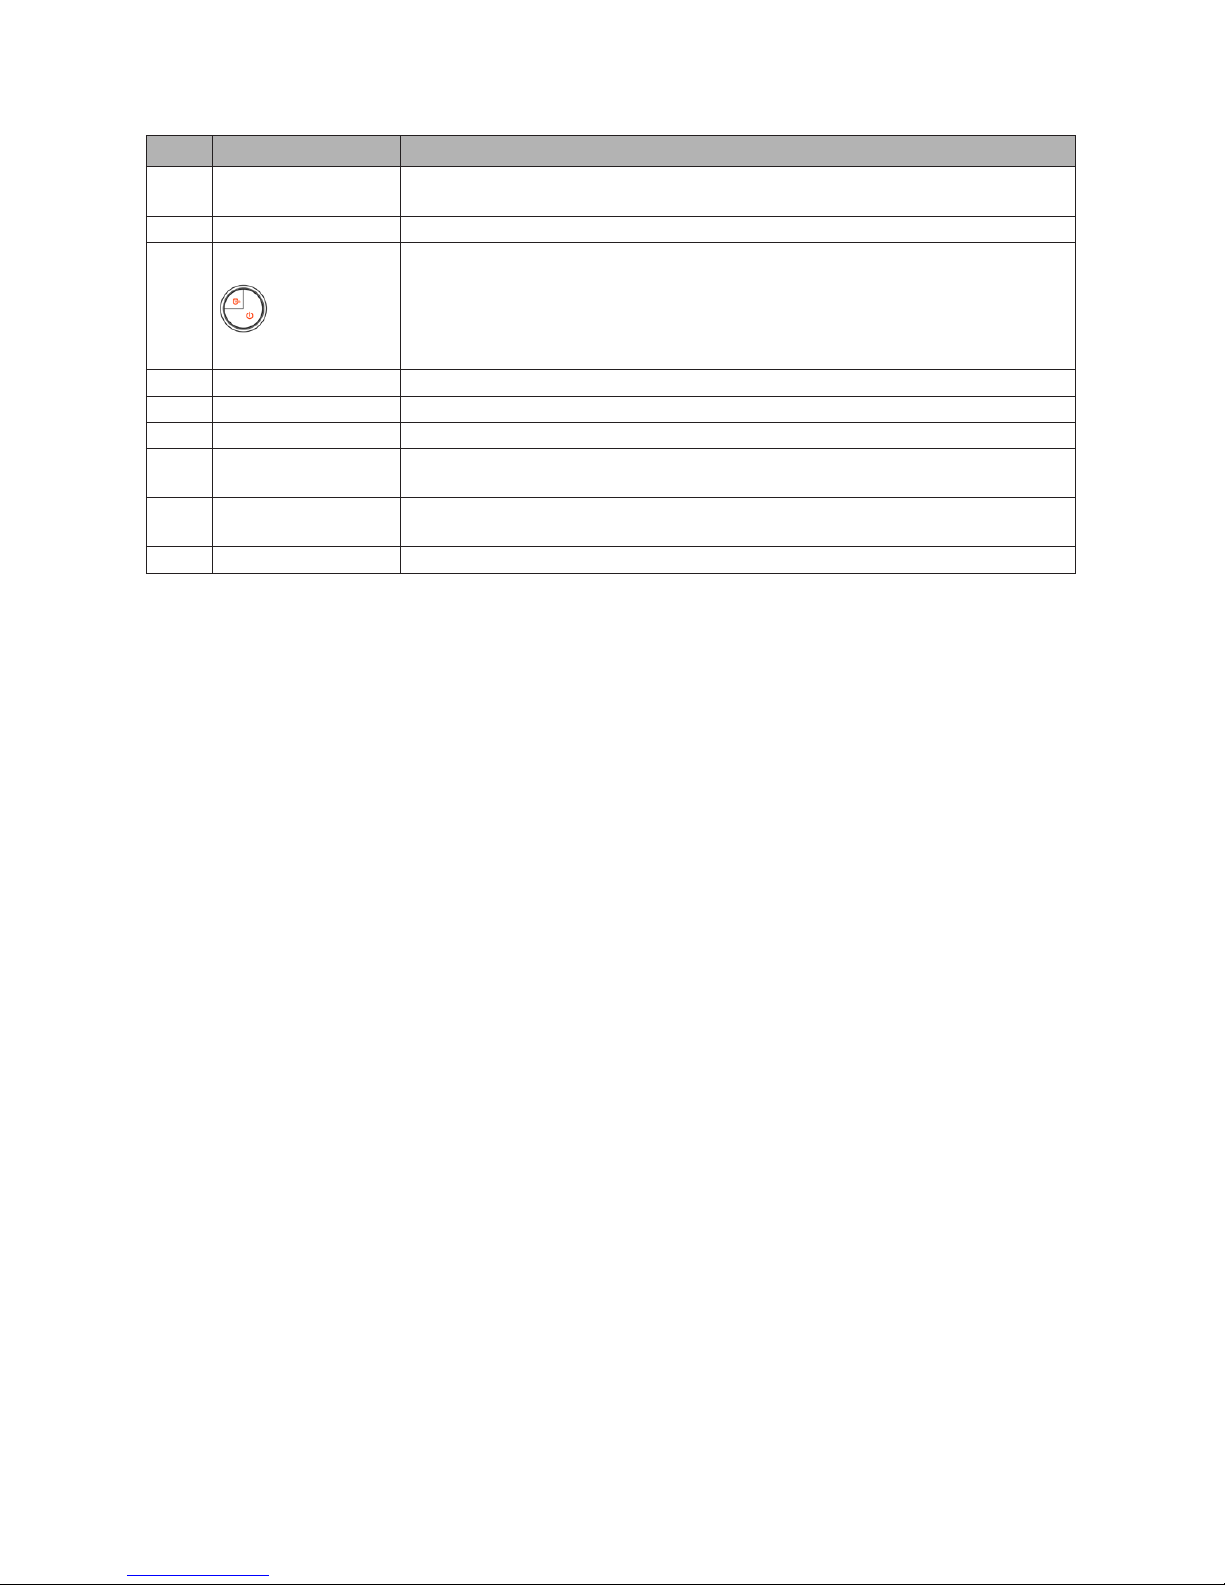
NO. Item Description
1 Built-in Camera
The built-in camera allows you to snap a photo or create a video chat or
video conference with just a click.
2 Display screen Also called Liquid-Crystal Display (LCD), displays computer output.
3
Power and
hard disk
locking button
Pressing power button turns your notebook on and off. Pressing the antitheft lock button activates the ViewSensor; if anyone attempts moving your
ViewBook Pro, the notebook will sound an alarm; to unlock your notebook
or deactivate the alarm you must input your password or use the ngerprint
scanner.
4 Keyboard A full-size keyboard with dedicated Windows® keys.
5 Touchpad Touch-sensitive pointing device which functions like a computer mouse.
6 Fingerprint sensor Collects and recognizes ngerprint information. (Optional)
7
Click buttons (left
and right)
The left and right buttons function like the left and right mouse buttons.
8 Status indicators
Light-Emitting Diodes (LEDs) that light up to show the status of the
computer’s functions and components.
9 Palmrest Comfortable support area for your hands when you use the computer.
ViewSonic VNB131 5
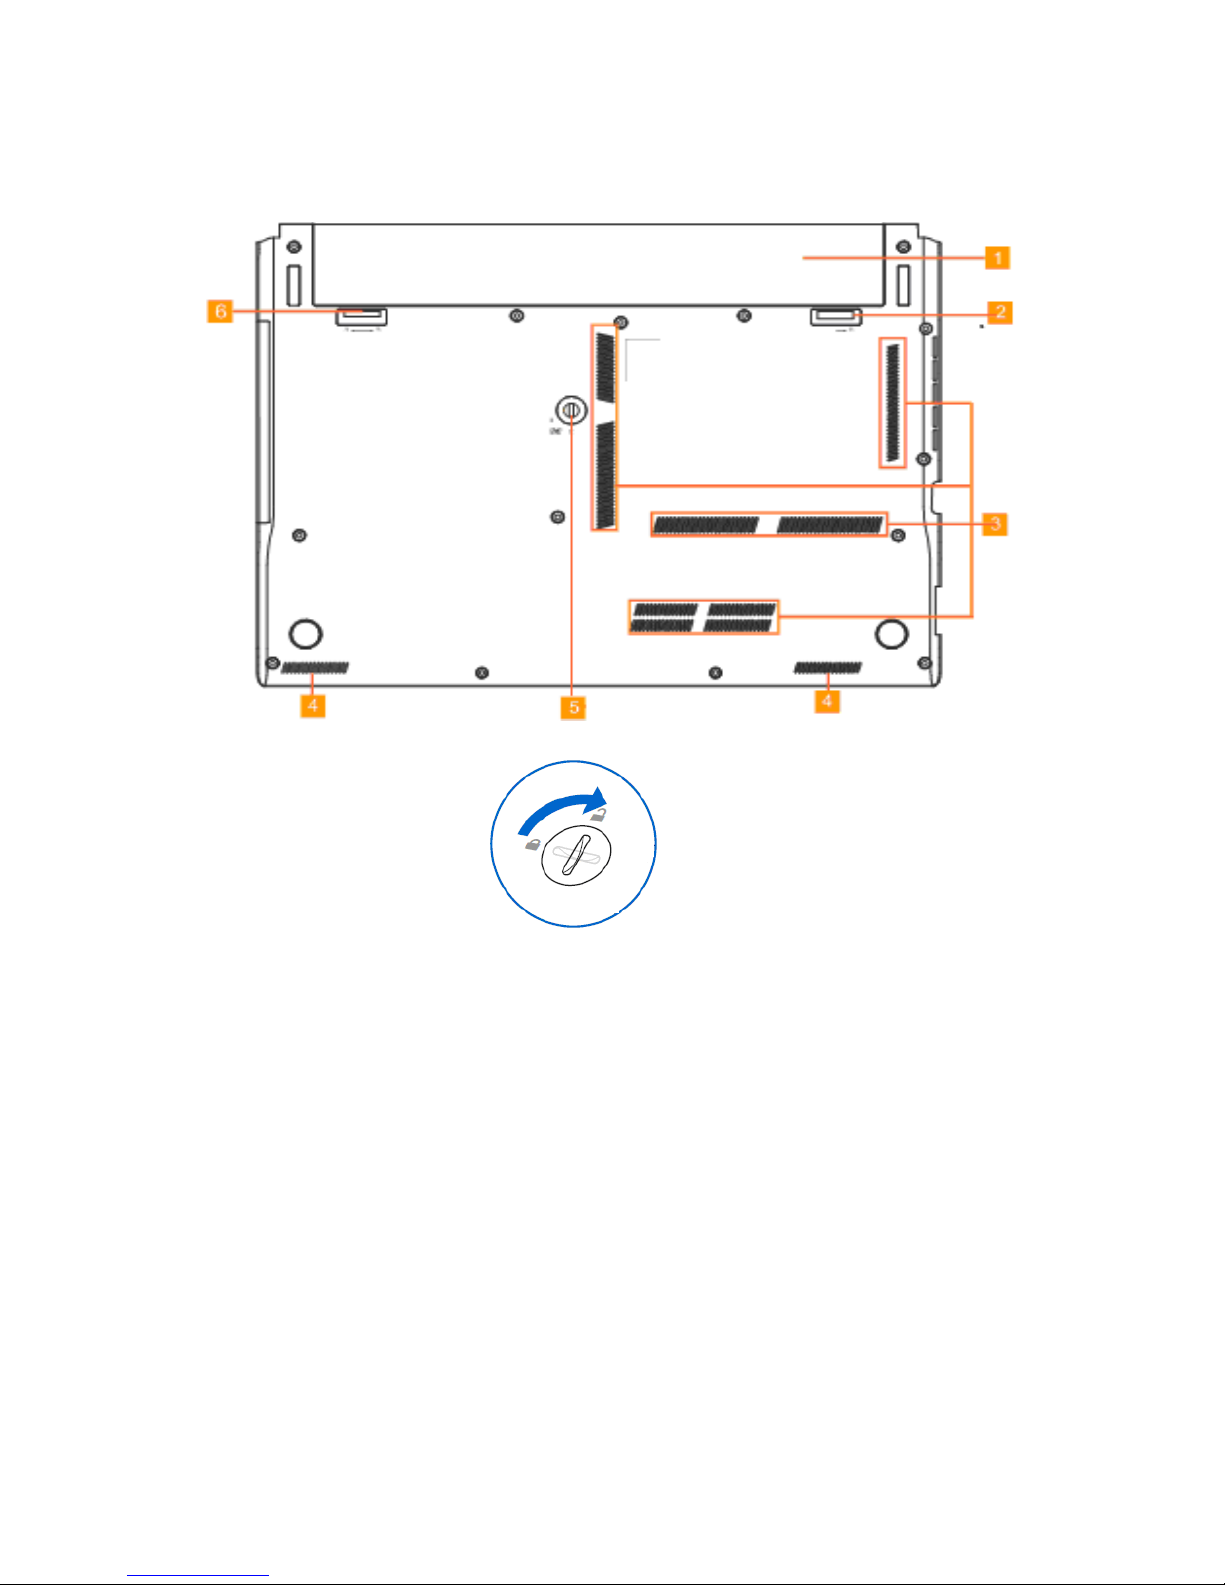
Base view

ViewSonic VNB131 6
NO. Item Description
1 Battery Pack
The battery pack is automatically charged when your ViewBook Pro is
connected to an AC power source. It maintains power to your ViewBook Pro
when AC power is not connected. This allows for use of ViewBook Pro when
AC power outlet is not available. Battery time varies with the way you use
your ViewBook Pro. The battery pack cannot be disassembled and must be
purchased as a single unit.
2
Battery Lock Manual
The manual battery lock is used to keep the battery pack secured. Move the
manual lock to the unlocked position to insert or remove the battery pack.
Move the manual lock to the locked position after inserting the battery pack.
3 Fan Outlets
These are vents for the fan to dissipate heat from the computer’s internal
components. Do not block or place the computer in such a position that you
inadvertently allow the outlets to become blocked.
4 Speakers Left and right speakers deliver stereo audio output.
5
CD-ROM locking
knob
Place your ViewBook Pro up side down, use a at tool like a screwdriver or a
coin to whirl the knob clockwise, the knob will unlock the bay. Now you can
pull out the Super Multi Drive and install the Secondary Battery Pack or an
expansion module.
6
Battery Lock Spring
The spring battery lock keeps the battery pack secured. When the battery pack
is inserted, the spring battery lock will automatically lock. When removing the
battery pack, this spring lock must be retained in the unlocked position.
 Loading...