

Page 1
15"/17/19TFT-LCDmonitor""
V152/V174/V192
USERMANUAL
www.viewera.com
Page 2

TABLEOFCONTENTS
ImportantSafetyInstructions 1
13
1.1Generalinformation3
1.2Features3
1.33
24
2.1Assembly4
2.2Signalcableconnection5
2.3Powercordconnection5
2.4Audiocableconnection5
2.5Poweron5
2.6Selftestpattern5
2.7Adjustthepicture6
36
3.1PowerON/OFFswitch6
3.2PowerLEDindicator6
3.3OSDcontrolkeys6
3.4OSDmenu7
3.5Safetymode11
3.6Timingguide11
3.7Plug&Play12
3.8Powermanagement12
3.9Volumeadjust12
413
515
6
……………………………………………………………………………………
. ……………………………………………………………………………………………………
………………………………………………………………………………………
……………………………………………………………………………………………………
……………………………………………………………………………………………………
. …………………………………………………………………………………………
……………………………………………………………………………………………………
…………………………………………………………………………………
……………………………………………………………………………………
……………………………………………………………………………………
……………………………………………………………………………………………………
……………………………………………………………………………………………
……………………………………………………………………………………………
. ………………………………………………………………………………………………………
………………………………………………………………………………………
…………………………………………………………………………………………
……………………………………………………………………………………………
……………………………………………………………………………………………………
…………………………………………………………………………………………………
…………………………………………………………………………………………………
…………………………………………………………………………………………………
………………………………………………………………………………………
………………………………………………………………………………………………
. ……………………………………………………………………………………………………
. ………………………………………………………………………………………
Introduction
Installingthemonitor
Operation
Specification
packagecontents
. ………………………………………………………………………………………
. ………………………………………………………………………………………………………
. ………………………………………………………………………………………………………
15
715
816
DeadPixelPolicy
Warranty&CustomerService
Windowssetup
TroubleShooting
Page 3

ImportantSafetyInstructions
1.Readthemanualcarefullybeforeusingthemonitor.
2.Savetheseusermanualforlateruse.
3.Unplugthemonitorfromthepowersourcewhenyoucleanthemonitor.Don'tuseliquid
cleanersoraerosolcleaners.Useclothtocleanit.Ifitdoesn'tdo,pleaseuseLCDscreen
cleaners.
4.Don'tuseattachmentnotrecommendedastheymaycausehazards.
5.Pleasegrasptheplugtounplugtheconnectorfromthewalloutlet.Don'tpullthepowercord
tounplugit.
6.Don'tplaceanythingonthepowercordorsteponit.
7.Don'tplacethemonitornearwatersourcesuchasbathtub,washbowl,sink,laundry tub,
swimmingpooletc.
8.Theslotsaredesignedforventilation,simultaneouslytokeepthemachineryworkableand
protectitfromoverheating.Forthesamereason,pleasedonotplacethemonitoronthebed,
sofa,carpetsorothersimilarsurface.Don'tplacethemonitornearoroverheatsourceor
placeinbuilt-ininstallation.
9.Keep5cmawayfromthewallorothergoods.
10.Thismonitorcanonlyusethepowersourceindicatedonthelabel.Ifyouhavequestions,
pleaseconsultyourdealer.
11.Assafetymeasure,thismonitorisequippedwithathree-wiregroundstyleplug.Ifyoucan't
inserttheplugintooutlet,contactyourelectriciantoreplaceyouroutlet.Don'tdefeatthe
safetypurposeofthegrounding-typeplug.
1
Page 4

13.Placethemonitorinsafeplacewherethecordwillnotbeabusedbypersonsworkingonit.
14.Followallthewarningsandinstructionsillustratedonthemanual.
15.Don'toverloadthewalloutletsandextendcordsasthiscanresultinfireorelectricshocks.
16.Don'tremoveoropenthecovertoservicethismonitoryourself.Itmayexposeyouto
dangerousvoltageorotherhazardsbeforeallservicingtoqualifiedservicepersonnel.
17.Unplugthismonitorfromtheoutletandreferservicingtoqualifiedservicepersonnelunder
thefollowingconditions.
Thepowercordisfrayedordamaged.
Themonitorhasbeendroppedorthecabinethasbeendamaged.
Whenthemonitordisplaysadistinctchangeinperformance,thisindicatesaneedfor
service.
18.Thepowercordisthemaindevicetodisconnectthepower.
19.Unplugthepowercordwhenyoudonotuseitforalongtime..
20.Placethemonitoringoodventilationandprotectitfromstronglight,overheatinganddamp
environment
21.Thismonitormustbestoredintemperature-2055.Otherwise,itmaycausepermanent
damage.
12.Pleasemakesurethattheoutletandpowercordcanaffordthetotalelectricityofthe
products.
●
●
●
℃~
℃
2
Page 5

3
1.Introduction
Thismonitorisahigh-performanceintelligentmulti-scanningcolormonitor.ItiswithTFTLCDscreen
andMCUdigitalcontrolwithoutradiationandglary.Theshapeistinyandthinadaptingtosmallplaces,save
yourmoreplace.
Color:16.7M
PowersavingcompliantwithEPAenergystarandVESADPMS.
Autocolorbalance.Whenconnectedtodifferentgraphicadapter,themonitorcancalibratesthewhiteand
blackreferencevoltage.
Plug&play,compatiablewithWindows9X&ME&NT&2000&XPandVESADDC1/2B.
Pleasemakesurethatallofthefollowingitemsareincludedbeforeoperatingthismonitor.
1.1GeneralInformation
1.2Features
1.3Checkthelist
●●●●
■
■
■
■
LCDmonitor(includebase)
ACadapter(optional)
Powercord,VGAsignalcable,DVI-Dsignalcable(optional),audiocable(optional)
User'smanual,passcertificate,warrantycertification
Page 6
4
Ifanyofabovelisteditemsaremissing,pleasecontactyourdealerfortechnicalsupport.
2.Installingthemonitor
Pleaseconsiderthefollowingadvicebeforeyouinstallyour
monitor.
Chooseaplacethatreflectslesstoplaceyourmonitor.
Generally,thereisasuitableanglewithawindow.
Thepeakofthemonitorshouldbealittlelowerthanyour
eyeswhenyousitdown.
Youwillfeelcomfortablewiththeslopingscreen.
Position
Highness
Inclination
Fig.1
Audiocable
Powercord
VGAcable
DVIcable
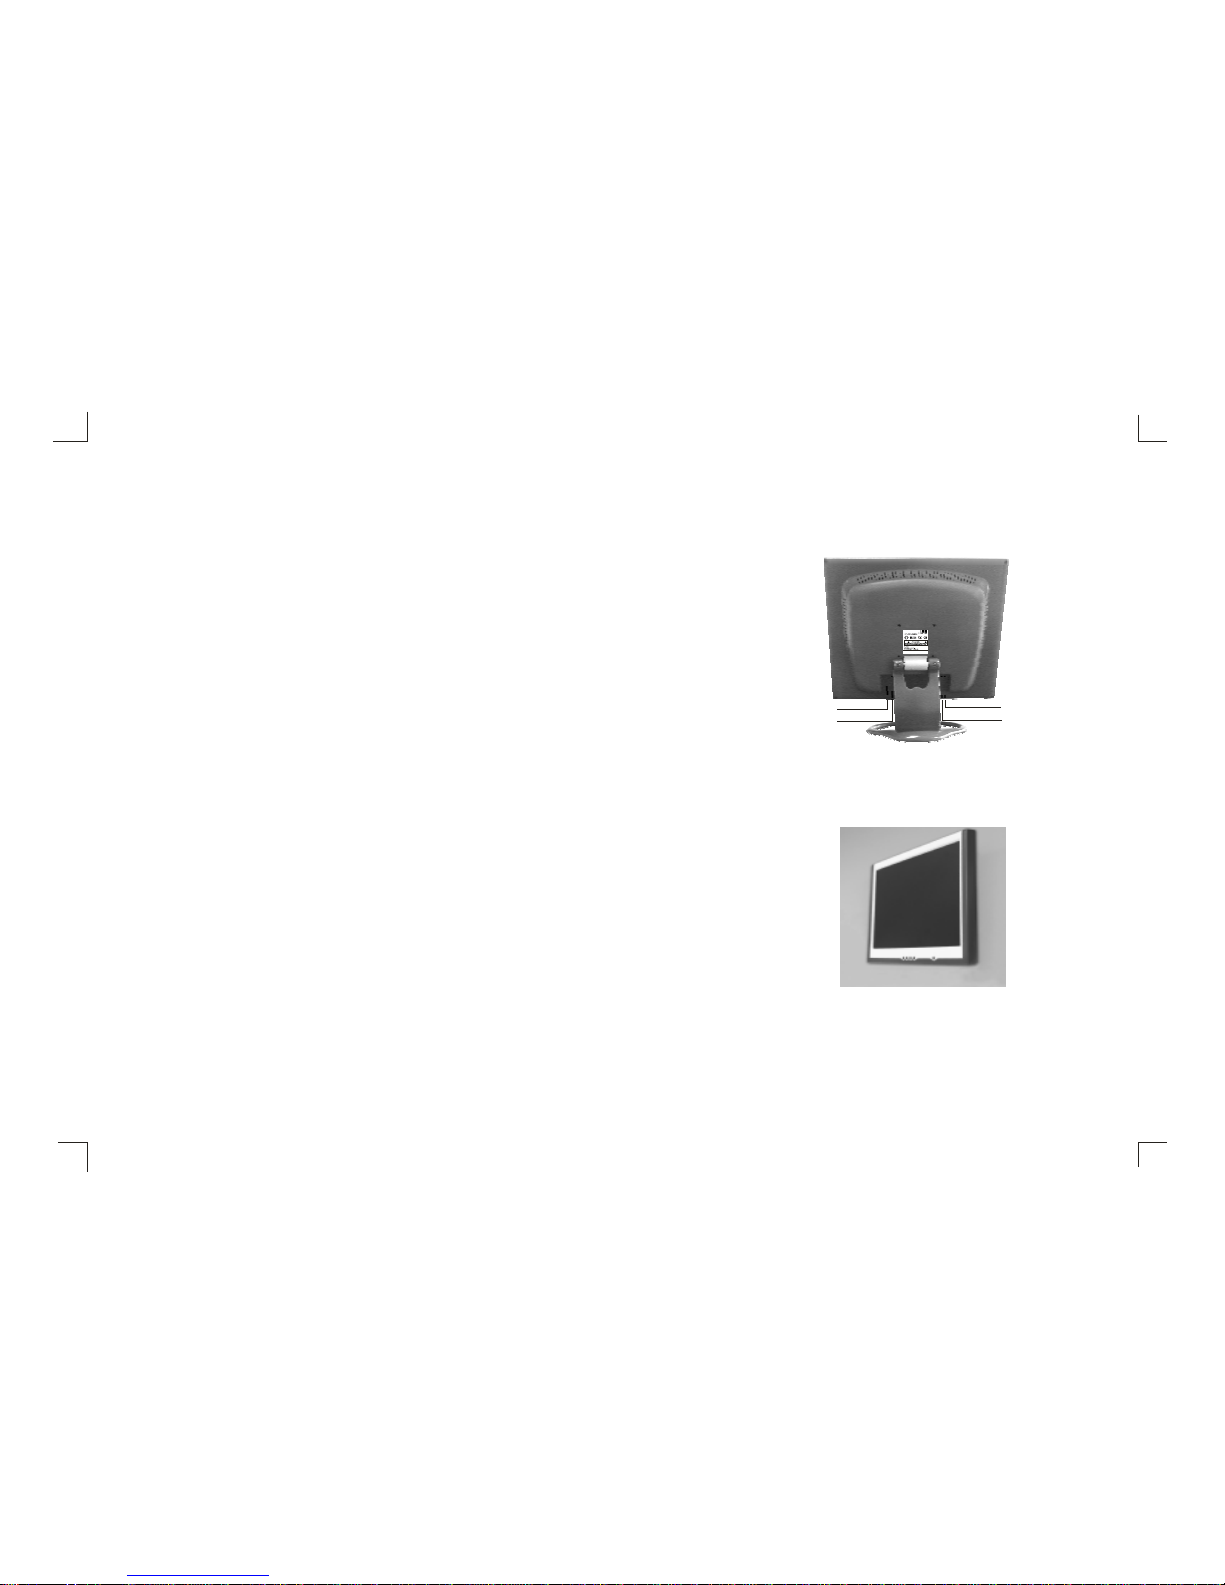
2.1Assembly
Takethemonitorfromthecarton,fixbaseandknighthead
withscrew[Fig.1].
VESAHangingstyle
Theclientmayputthemonitoronthewall.Ifyouusethestyle,
youneedpurchasethehangingsubassemblywhichaccords
withVESAstandard.Operationasthese[Fig.2]:
(1)Takeaparttheplasticcoverofaxisofrotation,screw
threebolts.
(2)Cleanupthesignalcable,powercordandaudiocable.
(3)Fixhangingsubassemblyonthebackcovertohangup
themonitoronthewall.
●
Fig.2
(Optional)
Page 7

AUTO
-
+
Power
LEDIndicator
5
Fig.4Fig.3
2.2Signalcableconnection
orDVIlockfPlugoneconnectorofthesignalcableintotheVGAportandthetwoboltstoensureirm
grounding.Thenplugtheotheroneintothemonitorandlockthetwobolts.
PlugonesideofthepowercordintotheACadapterandtheothersideintoACpowersourceoutlet,thenplug
theoutputsideoftheACadapterintothepowerportatthesideofmonitor.
PlugonesideoftheaudiocableintothePCaudioport,thenplugtheothersideintotheaudioportofthe
monitor.
Switchonthepowertoboththemonitorandyourcomputer.Afterthemonitorispoweron,theLEDlightsup
greenorblue.IftheLEDbecomesredandflashing,pleasecheckthevideosignalcableconnection.Ifthe
LEDisoff,pleasepresspowerswitchslightly.
Ifthereisnohorizontalorverticalsync.signal,yourmonitorwilldisplayFig.3toIndicatenosignalinput.After
afewseconds,themonitorwillcomeintowaitingandsavingpowermode;ifthemonitorreceivesthevideo
signal,itwillreturntothenormalmode.
2.3Powercordconnection
2.4Audiocableconnection
2.5Poweron
2.6Selftestpattern
Page 8

3.1Poweron/offswitch
3.2PowerLEDindicator
3.3OSDcontrolkeys
Thisisaslighttouchdigitalcontrolkey.Itisusedtoturnthemonitoronoroff.
Whenthemonitorisworking,thepowerLEDisgreenorblue.Ifthemonitorisinsavingpowermode,
thepowerLEDwillberedandflashing.Ifyouturnoffthemonitor,thepowerLEDwillbeoff.Whenthe
LEDisoff,themonitorisoff,butthepoweradapterison.Forsecurity,youshouldturnoffpoweradpater
whileyoudon'tusethemonitor.
3.3.1Autokey
Thiskeyisusedtocompleteauto-adjustingfunction,itmakethemonitortobethebestvisual
displaystatusinVGAmode.ThiskeyisusedtoswitchVGAandDVIsignalinDVImode.
3.3.2+/-key
Thesetwokeyscancompletethenavigaterightorleftandchoosethecontrolofthemenufunction.
Theadjustmentvaluecanbesetdirectlyby+/-key.
3.3.3key
Confirmationkeycanshowthemenuandcompletetheconfirmationfunction.
2.7Adjustthepicture
Inordertoobtainthebestvisualdisplay,youneedadjustit,pleaserefertochapter3"theOperationofthe
monitor".
OSDcontrolpanel
Fig.4iselevation.Othermodelsdifferinkey-presspositionandfrontpanel.
3.Operation
6
Page 9

3.4OSDmenu
3.4.1ThemeaningofthemenuinVGAmode[asFig.5]:
1.autoadjustment2.brightness3.contrast
4.H-position5.V-postion6.clock
7.phase8.signalsource9.coloradjustment
10.volume(optional)11.sharpness
12.OSDposition/transparence13.recall
14.language15.exit16.selectedfunctionname
17.resolution18.H-frequency19.V-frequency
20.progressivebarofadjustment
21.percentageofadjustment
22.customerLOGO
23.OSDdisplaytime
7
Fig.5DVIMODEL()
1024X768H48.0KHV60.0H::ZZ
S
1024X768H48.0KHV60.0H::ZZ
Fig.5VGAMODEL()
CONTRAST
CONTRAST
Page 10

3.4.2ThemeaningofthemenuinDVImode[asFig.6]
1.brightness2.contrast3.sharpness
4.volume(optional)5.OSDmenudisplaytime
6.transparence7.OSDposition
8.signalsource9.9300k10.7800k
11.6500k12.User13.Recall14.Language
15.Eixt16.selectedfunctionname
17.resolution18.H-frequency19.V-frequency
20.progressivebarofadjustment
21.precentageofadjustment
22.customerLOGO
Fig.6
1024X768H48.3KHV60.0H::ZZ
9300
USER
7800
6500
BRIGHTNESS
Fig.7 Fig.8
8
Page 11

3.4.3Functiontable
9300
7800
6500
USER
W-B
Displaycontents
Autoadjustment
Brightness
Contrast
H-position
V-position
Clock
Phase
Color
Volume
Sharpness
Recall
Language
Exit
OSDdisplaytime
OSDadjustment
OSDV-position
OSDtransparency
9300K
7800K
6500K
Usermode
Autocolorbalance
Signalsource
OSDH-position
Adjustthecontrast
Adjustthebrightness
Movethescreentowardleftorright
Movethescreentowardupwardordownward
Adjustthefrequencyofpixel
Adjustthephaseofpixelclock
Adjustthesharpnessofthepicture
Adjustthecolorsofthepicture
Set9300Kcolortemperature
Set7800Kcolortemperature
Set6500Kcolortemperature
Setusermode
Autocolorbalance
Adjustthevolume
AdjusttheOSDdisplaytime
AdjusttheparameterofOSD
Movethemenutowardleftorright
Movethemenutowardupwardordownward
SettingOSDtransparency
Resetfactorysetting
Languageselection
ExchangesignalmodebetweenVGAandDVI
Exitthemenu
Function
Automaticallyadjusttoobtainthebestsetting
9
Page 12

3.4.2Specialfunction
1.Coloradjustment():whenthefunctionisselected,the
monitorwillcomeintothesub-menu[Fig.7],thereare
functionsthatcanbeselected:a,9300k;
USER;e,W-B.SelectingUSER,youwill
usermodeandyoucanmakeadjustmenttoR/G/B
toobtainyoursatisfyingcolor;SelectingW-B,it
colorbalancemode,andthemonitorwill
adjustthewhite-blackcolorreferencevoltage
optimalcolorbalance.
2.R/G/Badjustment():In"USER"mode,the
willautomaticallyenterR/G/Badjustmentmode,push
""key,therelativeoptionswillflash,thenadjustitby"+/-"
key.Thenpush""keyagaintoexit.
fiveb,7800k;
c,6500k;d,enter
values
willenter
automatically
toobtain
monitor
3.Language().
Therearesixlanguagetoselect[Fig.8].
ENG.:English
FRE.:French
DEU.:German
ITA.:Italian
ESP.:Spanish
PYC.:Russian(TUR.:TurkishorPOR.:Portuguese)
4.PositionofOSDmenu():Whenyouselecttheitem,youcanadjustH-positionandV-position
ofOSDmenuandtransparence[asFig.9:Fig].
.
VGA10:DVI
BR G
TEXT
INTERNET
ENTERTAIN
30%
OSDH-POSITION
Fig.9VGA
30%
OSDH-POSITION
Fig.10DVI
3.4.4Specialfunction
1.Coloradjustment():whenthefunctionisselected,the
monitorwillcomeintothesub-menu[Fig.7],thereare
functionsthatcanbeselected:a,9300k;
USER;e,W-B.SelectingUSER,youwill
usermodeandyoucanmakeadjustmenttoR/G/B
toobtainyoursatisfyingcolor;SelectingW-B,it
colorbalancemode,andthemonitorwill
adjustthewhite-blackcolorreferencevoltage
optimalcolorbalance.
2.R/G/Badjustment():In"USER"mode,the
willautomaticallyenterR/G/Badjustmentmode,push
""key,therelativeoptionswillflash,thenadjustitby"+/-"
key.Thenpush""keyagaintoexit.
fiveb,7800k;
c,6500k;d,enter
values
willenter
automatically
toobtain
monitor
3.Language().
ENG.:English
FRE.:French
DEU.:German
ITA.:Italian
ESP.:Spanish
PYC.:Russian(TUR.:TurkishorPOR.:Portuguese)
4.PositionofOSDmenu():Whenyouselecttheitem,youcanadjustH-positionandV-position
ofOSDmenuandtransparence[asFig.9:Fig].
、
VGA10:DVI
10
Therearesixlanguagestoselect[Fig.8]
Page 13

5.Sharpnessadjustment():Adjustthesharpnessofthepictureonthescreen.
Whenthevideosignalexceedsthefrequencyrangeofthemonitor,themonitorMCUwillstop
horizontalandverticalscanninginordertoprotectthemonitor.Fig.11willbedisplayonthescreen.
Afterafewseconds,themonitorwillenterturn-offmode.Youneedrestartcomputerand
resetthefrequencyrange.
3.5Safetymode
the
Fig.11()V152
1
2
3
4
5
6
VGA
SVGA
XGA
720X400
640X480
800X600
1024X768
1024X768
1024X768
H: -
V: -
H: -
V: -
H: +
V: +
H: -
V: -
H: -
V: -
H: +
V: +
V:70.0Hz
H:31.468KHz
V:60.0Hz
H:31.469KHz
V:60.3Hz
H:37.879KHz
V:60.0Hz
H:48.363KHz
V:70.0Hz
H:56.476KHz
V:75.0Hz
H:60.023KHz
28.322MHz
25.175MHz
40.0MHz
65MHz
75MHz
78.75MHz
NO. Mode Resolution
Polarity
Bandwidth
H-Frequency
3.6Timingguide
OUTOFRANGE
WORKINGFREQUENCYRANGE
HF:30KHz-60KHz
VF:55Hz-75Hz
Max.Res:1280X768
CURRENTMODE:
HF:69.0KHz
VF:85Hz
11
OUTOFRANGE
WORKINGFREQUENCYRANGE
HF:30KHz-80KHz
VF:55Hz-75Hz
Max.Res:1280X1024
CURRENTMODE:
HF:94.0KHz
VF:84.9Hz
Fig.11(B)V174/V192
V152
Page 14

12
VGA
640480×
1
2
3
SVGA 800600×
60Hz
72Hz
75Hz
31.5KHz
37.9KHz
37.5KHz
25.175MHz
31.5MHz
31.5MHz
4
5
60Hz
72Hz
40MHz
50MHz
37.9KHz
48.1KHz
6
75Hz
49.5MHz
46.9KHz
NO. Mode Resolution
Ver.frequency Hor.frequency
Pixelclock
12
13 75Hz
64KHz108MHz
135MHz 80KHz
60Hz
SXGA 12801024×
Recommendedmode:1280X1024@60Hz
1152864×
9
10
11
1280960×
75Hz 60KHz78.75MHz
75Hz
60Hz
108MHz
105MHz
67.5KHz
60KHz
1024768×
1024768×
7
8
60Hz
70Hz
48.4KHz
56.5KHz
65MHz
75MHz
XGA
Recommendedmode:1024768@60Hz×
V174/V192
Page 15

V192
V174
V152
13
MonitortypeTFTLCD
Surface disposal Anti glary
Active area 304.128mm ×228.096mm
Viewableangle:
H
V
MAX. Brightness 250cd/m
2
MAX. contrast 400:1
Responsetime tr/t
f
4/12ms
-75/75
-70/70
° +
°
° +
°
4.Specification
3.7Plug&Play
3.8Powermanagement
3.9Volumeadjust
ThismonitormeetsthestandardofVESADDC.WhenusingvideocardwithVESADDC1/2B,itwillauto-scan
videofrequency,outputpower,functionandotherdatatoPCwhencomputerison.Itwillgotoproperconnectionmodeandproperresolutionfrequency.
ThismonitorcomplieswithEPAenergystarrequirementandmeetsVESADPMSstandard.
Thefollowingisthedescriptionofthepowerindicatorforthepowersavingmode[Fig.12].
AdjustthevolumebyOSDmenuandsoftwareofthePC.
MODEPowerindicatorPowerconsumption
On Green or blue
<30W
Stand by/suspend Redflashing <5W
Off Off
<3W
(includepoweradaptersconsumption)'
Fig.12
<40W <45W
<5W <5W
<3W <3W
Model
Anti glary Anti glary
337.920mm×270.336mm 376.32mm×301.056mm
-80/80
-70/70
° +
°
° +
°
-80/80
-80/80
° +
°
° +
°
300cd/m
2
250cd/m
2
500:1 600:1
4/12ms 2/10ms
V152
V174
V192
Page 16

540℃℃~
20%80%~
- ℃℃2055~
Environment
Operatingtemperature
Humidity
Storagetemperature
Dimension(LWH)××
Unpacking
Packing
Weight
Netweight
Grossweight
3.5kg
5.0kg
360150350mm××
3
418165395mm××
3
14
Atmospherepressure 86kpa104kpa~
V-frequency 55Hz75Hz~
PowersupplyforAdapter 100V-240VAC 60Hz/50Hz
Powersupplyfor monitor 12VDC 3.3A
Rated voltage and MAX.Consumption 12VDC 30W
Inputconnector 15pinsD-Sub or DVI-D
Powersaving control Yes
ComplywithEPAenergystarstandardsYes
ComplywithEuropeanCEYes
Plug&PlayYes
Max.resolution 1024768@75Hz×
Inputresistance 753±%
Ω
H-frequency 30KHz60KHz~
Model
12801024@75Hz×
753±%
Ω
30KHz81KHz~
55Hz75Hz~
100V-240VAC 60Hz/50Hz
12VDC 4.2A
12VDC 40W
pins D-Sub or DVI-D(optional)
Yes
Yes
Yes
Yes
540℃℃~
20%80%~
- ℃℃2055~
86kpa104kpa~
393150390mm××
3
455165440mm××
3
5.0kg
7.0kg
12801024@75Hz×
753±%
Ω
30KHz81KHz~
55Hz75Hz~
60Hz/50Hz
12VDC 4.2A
12VDC 45W
pins D-Sub or DVI-D(optional)
Yes
Yes
Yes
Yes
540℃℃~
20%80%~
- ℃℃2055~
86kpa104kpa~
430150420mm××
3
490165465mm××
3
6.0kg
8.0kg
100V-240VAC
V152
V174
V192
Page 17

15
NoteThisspecificationissubjecttochangewithoutnotices.:
5.DeadPixelPolicy
6.Warranty&CustomerService
7.Windowssetup
For1280X1024,pleasesettoSXGA1280X1024@75Hz
DeadpixelsontheTFTLCDpanelaresometimesinevitable.ViewEraguaranteesthatthemonitorwillbereplacedif
thenumberofdeadpixelsonourmonitorismorethan5pixels.Nodeadpixelwarrantymaybeprovidedduringthepromotionperiod.
ViewErawarrantsthemonitorforoneyearonparts,laborandtheLCDpanelfromthedateofpurchase.Fordetail
warrantyinformation,pleaserefertoourwebsitehttp://www.viewera.com/warranty.htm
ContactyourViewEraretailerorViewEraforaftersaleservice.
YoumaycontactViewEraCustomerServicefortechnicalsupportorRMAasbelow:
1.ByMail:328PaseoTesoro,Walnut,CA91789
2.ByTelephone:(909)595-3624
3.ByFax:(909)595-3526
4.ByE-mail:Tech.Support-support@viewera.com
RMArma@viewera.com
Thebusinesshoursare9:00am6:00pmPST,MonFri.
Forthebestview,pleasesetthemonitortypeinWindows.
Pleaseselectasfollowing:
ControlPanel>Monitor>Setting>Advance>Monitor>Change>ShowallList...>Stand>
Warranty
CustomerService
“”
Page 18

For1024X768,pleasesettoXGA1024X768@75Hz“”
8.TroubleShooting
1)Poweronbutnopicture
MakesuretheVGAcableistightlyconnectedfromthevideooutputconnectoronthevideocardtothevideoinputconnector
onthemonitor.
Makesureyouareusingthestandardpoweradaptercomingwiththemonitor.
Checkyourvideocardifthedriveriscorrectlyinstalled.Ifthereisnovideosignalfromthevideocard,OINPUTSIGNAL
willshowonthescreen.
2)Wrongorabnormalcolors
Ifanycolor(red,green,orblue)ismissing,checkvideocabletomakesureitissecurelyconnected.Loosepinsinthe cable
connectorcancauseabadconnection.
3)Thetextandiconlookblurry
→
“”
→
→
→
16
Page 19

7)OutofRang
Thefirstthingyouneedtocheckisthescreenresolution.UsuallyutofRangeiscausedbyimproperresolutionsetting.Youcan
recovertheproperscreenresolutionasthefollowingstepsforWindows:(Assumedthattheoptimalresolutionandfr equencysetting
is1280x1024@60Hz.)
Bootthecomputerinto(F8)[repeatedly]atstartup.
Gotodoubleclickon,clickontheTAB,andclickonthebutton.
ThenClickontheTAB,clickandchangethescreenresolutionto1280x1024.(Youcan
select16bitor32bitcolorwhichdependsonyourvideocardcapability.)
Select
Clickonand.
After clickingbutton,amessagewillbedisplayedourdesktophasbeenreconfigured.Doyouwantto
keepthesesettings
Clickand.ThenclickOKontheDisplayPropertieswindow.
RestartyourPC
Afteryourestart,gobacktoListAllModestoadjustyourscreenrefreshrateto60Hertz.
TheOutofRangemayhappenifyouswitchmonitorAtomonitorBforyourPC.WheneveryouchangethemonitorforyourPC,
yourPCmaydetectitasanewhardwareandautomaticallyinstallaproperdriverforthemonitor.So,youwillhaveboth monitorA
andmonitorBdriversonyourPC.SometimesthetwomonitordriversmayconflicteachotherandcauseOutofRange.Youcan
resolveutofRangebyuninstallingbothmonitordriversandrebootyourPC.TheWindowswillautomaticallydetectthenew
hardwareandinstallaproperdriverforthemonitor.Hereisaquickwaytouninstallthemonitordrivers:
Rightclickon,selectandclickon.Clickon,select
andclickon+infrontofMonitor.Thenyoucanseeoneofthemonitordriverscalled.Aquickway
istouninstallallthemonitordriversandthenletWindowsautomaticallydetectthenewhardware.(Rightclickonthemonitordriver
andselectUninstall).RestartyourPC.
→“”
“”“”
“”
“”
“ ”“”
“”“
”
“”“”“”
“”
“”
“”
“”
“”“”“”“”“”
“”“”“”
“”
VGAMode
ControlPanelDisplaySETTINGSADVANCED
AdapterListAllModes
1280by1024,HighColor(16bit),DefaultRefresh
OK APPLY
APPLY
YesOK
MyComputerPropertiesHardwareDeviceManagerMonitor
PlugandPlayMonitor
→
→“”
→“”
→
→
LCDmonitorhasanativeresolutionwhichpixelsareproducedbycellsinfixedpositions.Whenaresolutiondifferentfromthenative
resolutionischosen,theLCDmonitorusesvariousinterpolationmethodstoachievethepseudoresolution.Toachievetheoptimumviewingquality,choosethenativeresolutionofthepanelisrecommended.
UseAutoTuningfunctiontoadjustimagequalityontheOSDmenuoryoucanholdbutton2for3secondstodoautotuning.
4)Displaypositionisincorrect
UseAutoTuningfunctiontoadjustimagepositionontheOSDmenuoryoucanholdbutton2for3secondstodoautotuning.
5)Speakershavenosound
MakesuretheaudiocableistightlyconnectedfromtheaudiooutputjackonthePCtotheaudioinputjackonthemonitor.
6)Residueimage
Ifanimageremainsonthescreenforanextendedperiodoftime,itmaybeimprintedinthescreenandleavearesidueimage.Itis
characteristicofliquidcrystalandisnotmalfunctionordeteriorationoftheliquidcrystal.Theresidueimagewilldisappearaftera
periodoftime.ItisrecommendedtosetupthescreensaverforyourLCDmonitor.
17
 Loading...