

Vertex Wireless VW210, WV240 User Manual

1
Table of Contents
Table of Contents
Technical Specification ………….2
1. Product Overview …………..….3
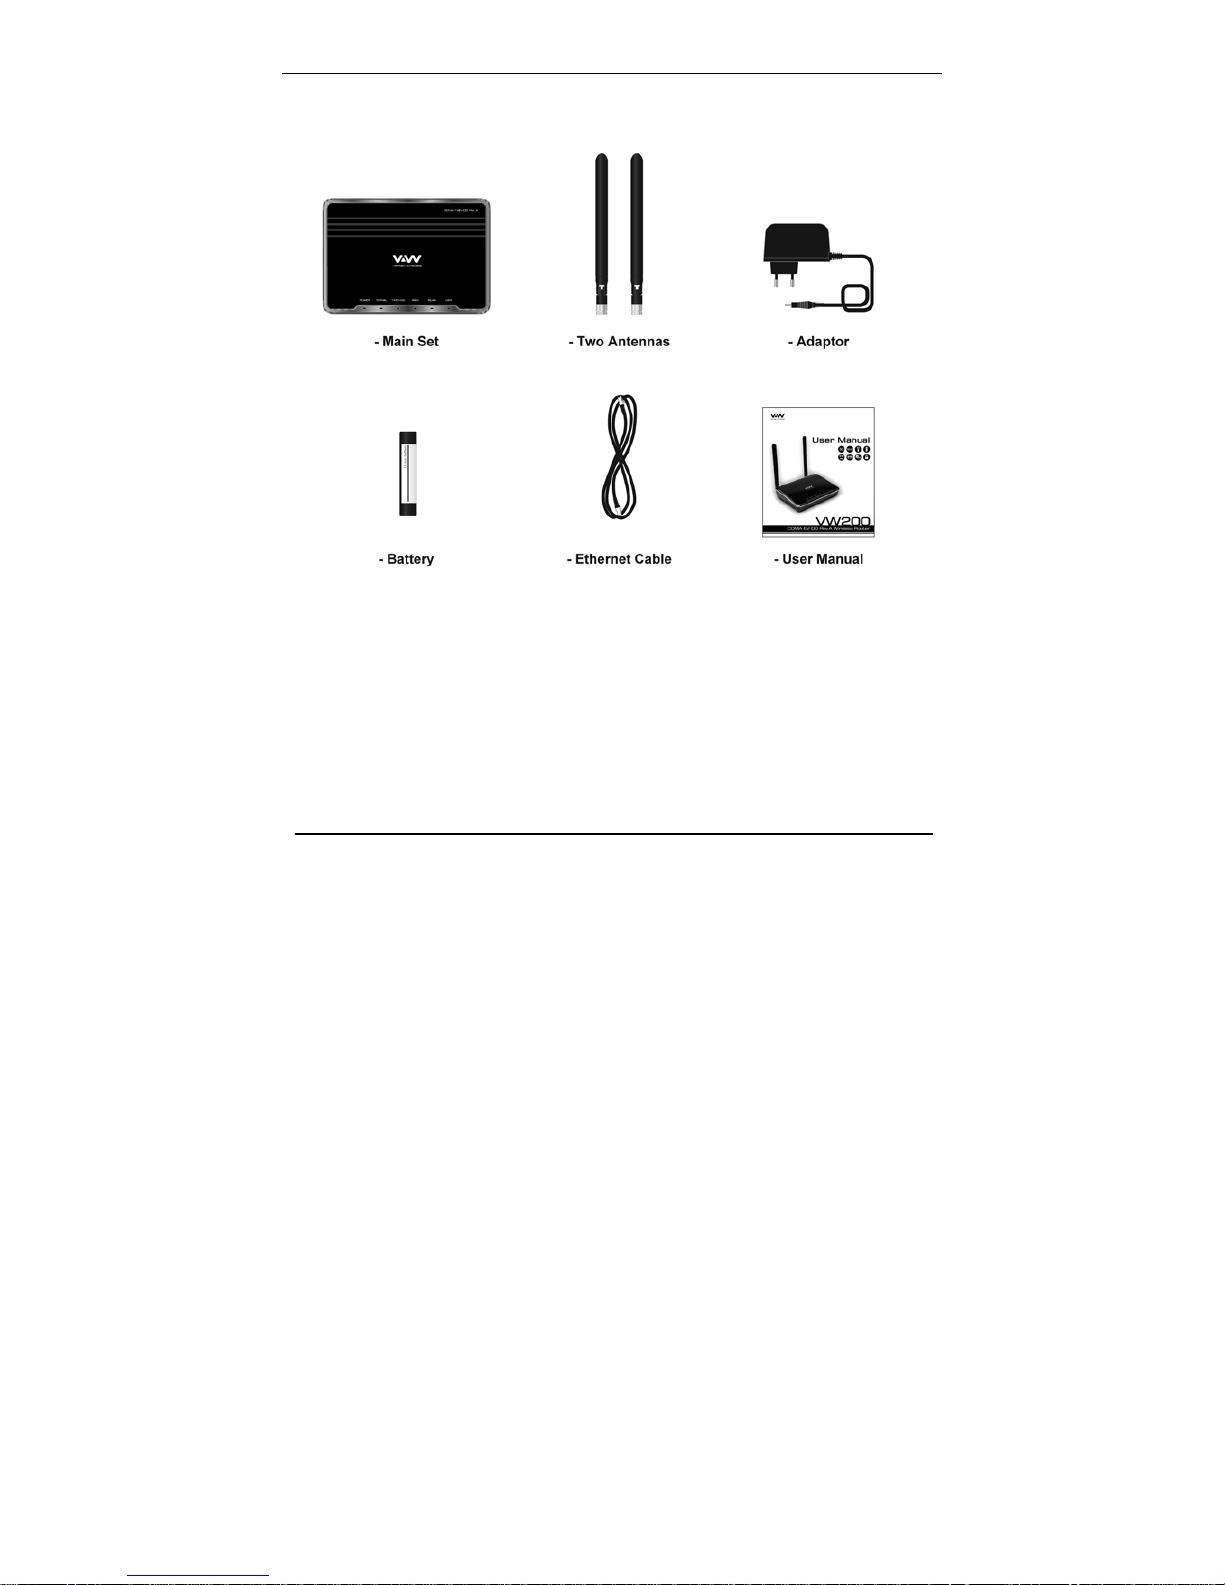
Package Contents ……………… 3
System Requirements………..… 3
Features ………….……….……...4
Hardware Overview ……………. 5
2. Installation ….………..………….8
3. Configuration .……..…………....9
Web-based Configuration ……... 9
Basic Setup ...……………………10
Connection Setting ...……….10
Status ..………………………11
Advanced Setup ………………..12
IP Setup ……………………..12
Wireless Setup ……………..14
Traffic Control ………………19
Security ……………………...22
Utility ………………………....26
4. Administrator .…………………31
5. Status …………………………...33
Troubleshooting ………...……….34

2
Technical Specifications
Technical Specifications
Standards
IEEE 802.11g
IEEE 802.11b
Wireless Signal Rates
54Mbps 48Mbps
36Mbps 24Mbps
18Mbps 12Mbps
11Mbps 9Mbps
6Mbps 5.5Mbps
2Mbps 1Mbps
Security
64/128-bit WEP
WPA-PSK
WPA-PSK2
Frequency Range
2.4GHz to 2.483GHz
CDMA Frequency Range
VW210 – Rx: 463 ~ 468MHz
Tx: 453 ~ 458MHz
VW240 – Rx: 859.64 ~ 893.37MHz
Tx: 824.64 ~ 848.37MHz
Rx: 1930 ~ 1989.95MHz
Tx: 1850 ~ 1909.95MHz
Channel Bandwidth
CDMA 1.23MHz
External Antenna Ty pe
Two detachable reverse SMA Antenna
LEDs
Power Signal
1x/EVDO WAN
WLAN LAN
Operating temperature
-20 °C ~ +60 °C
Storage temperature
-30 °C ~ +70 °C
Humidity
5 ~ 95%
Dimension
150(W)x130(D)x30.5(H)mm
Operating time
Working time: 2.5Hrs
Standby time: 4.2Hrs
AC Adaptor
AC 110~240V, 50~60Hz
DC 5.0V / 2.0A
3
Section 1 – Product Overview
Packages Contents
System Requirements
• Broadband Internet connection with RJ45 (Ethernet connection)
• At least one computer with an installed wireless network interface card or
adaptor
• TCP/IP networking protocol installed on each computer
• Internet browser

4
Section 1 – Product Overview
Features
• Faster Wireless Networking – The VW200 provides up to 54Mbps wireless
connection with other 802.11g wireless clients.
• Compatible with 802.11b Devices – The VW200 is still fully compatible with
the IEEE 802.11b standards, so it can connect with existing 802.11b PCI, USB
and Cardbus adapters.
• Advanced Firewall feature – The Web-based user interface displays a
number of advanced network management features including:
Filter Scheduling – These filters can be scheduled to be active on certain
days or for a duration of hours or minutes.
Parental Controls – Easily applied content filtering based on MAC
Address, and/or URL.
Secure Multiple/Concurrent Sessions – The VW200 can pass through
VPN sessions. It supports multiple and concurrent IPSec and PPTP
sessions, so users behind the VW200 can surely access corporate
network.
*Maximum wireless signal rate derived from IEEE Standard specification. Actual data throughput will vary.
CDMA Network conditions and environmental factors, including volume of network traffic, building materials and
construction, and network overhead, lower actual data throughput rate. Environmental conditions will adversely
affect wireless signal range.
5
Section 1 – Product Overview
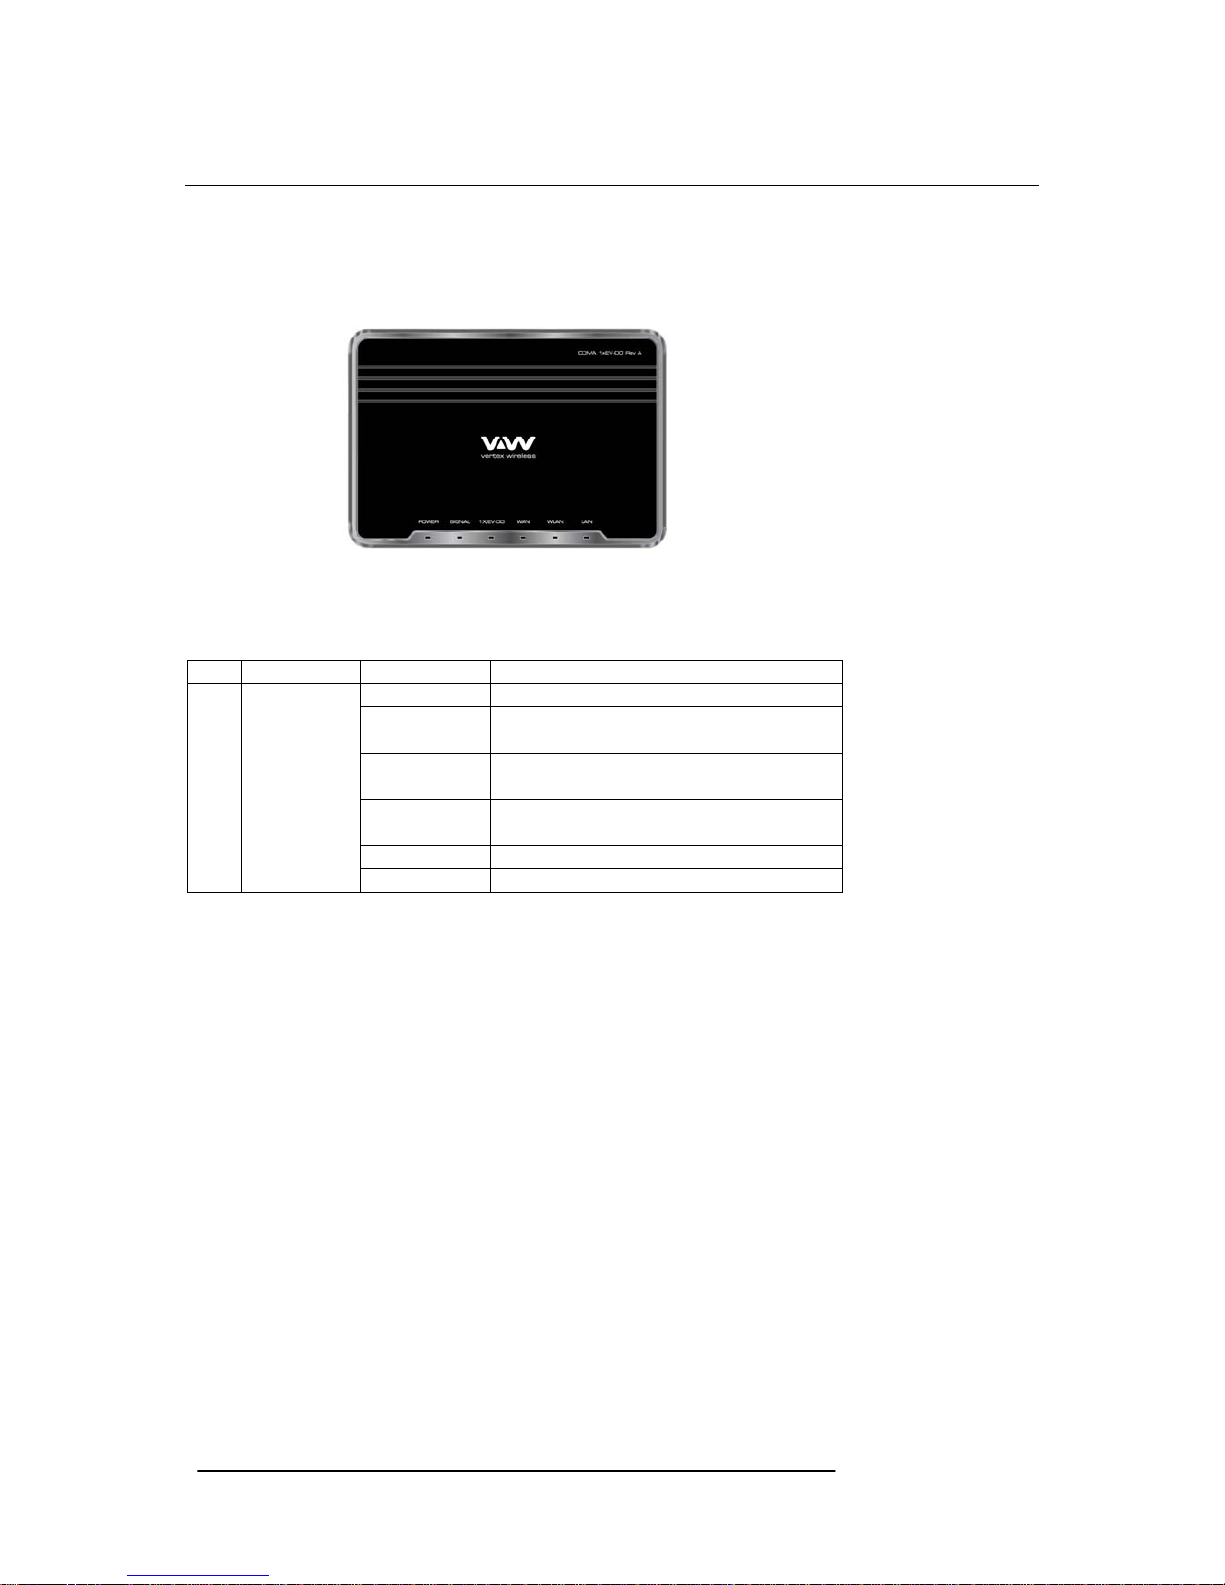
Hardware Overview
Router Front Panel
The panel of the VW200 contains the status lights to verify various conditions
Item Function Activity Description
1 Power OFF Power is not supplied to the router
Solid Blue Power is supplied to the router with either
Adapter or Battery (Full charged)
Solid Violet Power is supplied to the router with half
battery
Solid Red Power is supplied to the router with low
battery
Blinking Blue Charging the battery
Blinking Red Error with charging battery (bad battery, etc)
6
Section 1 – Product Overview
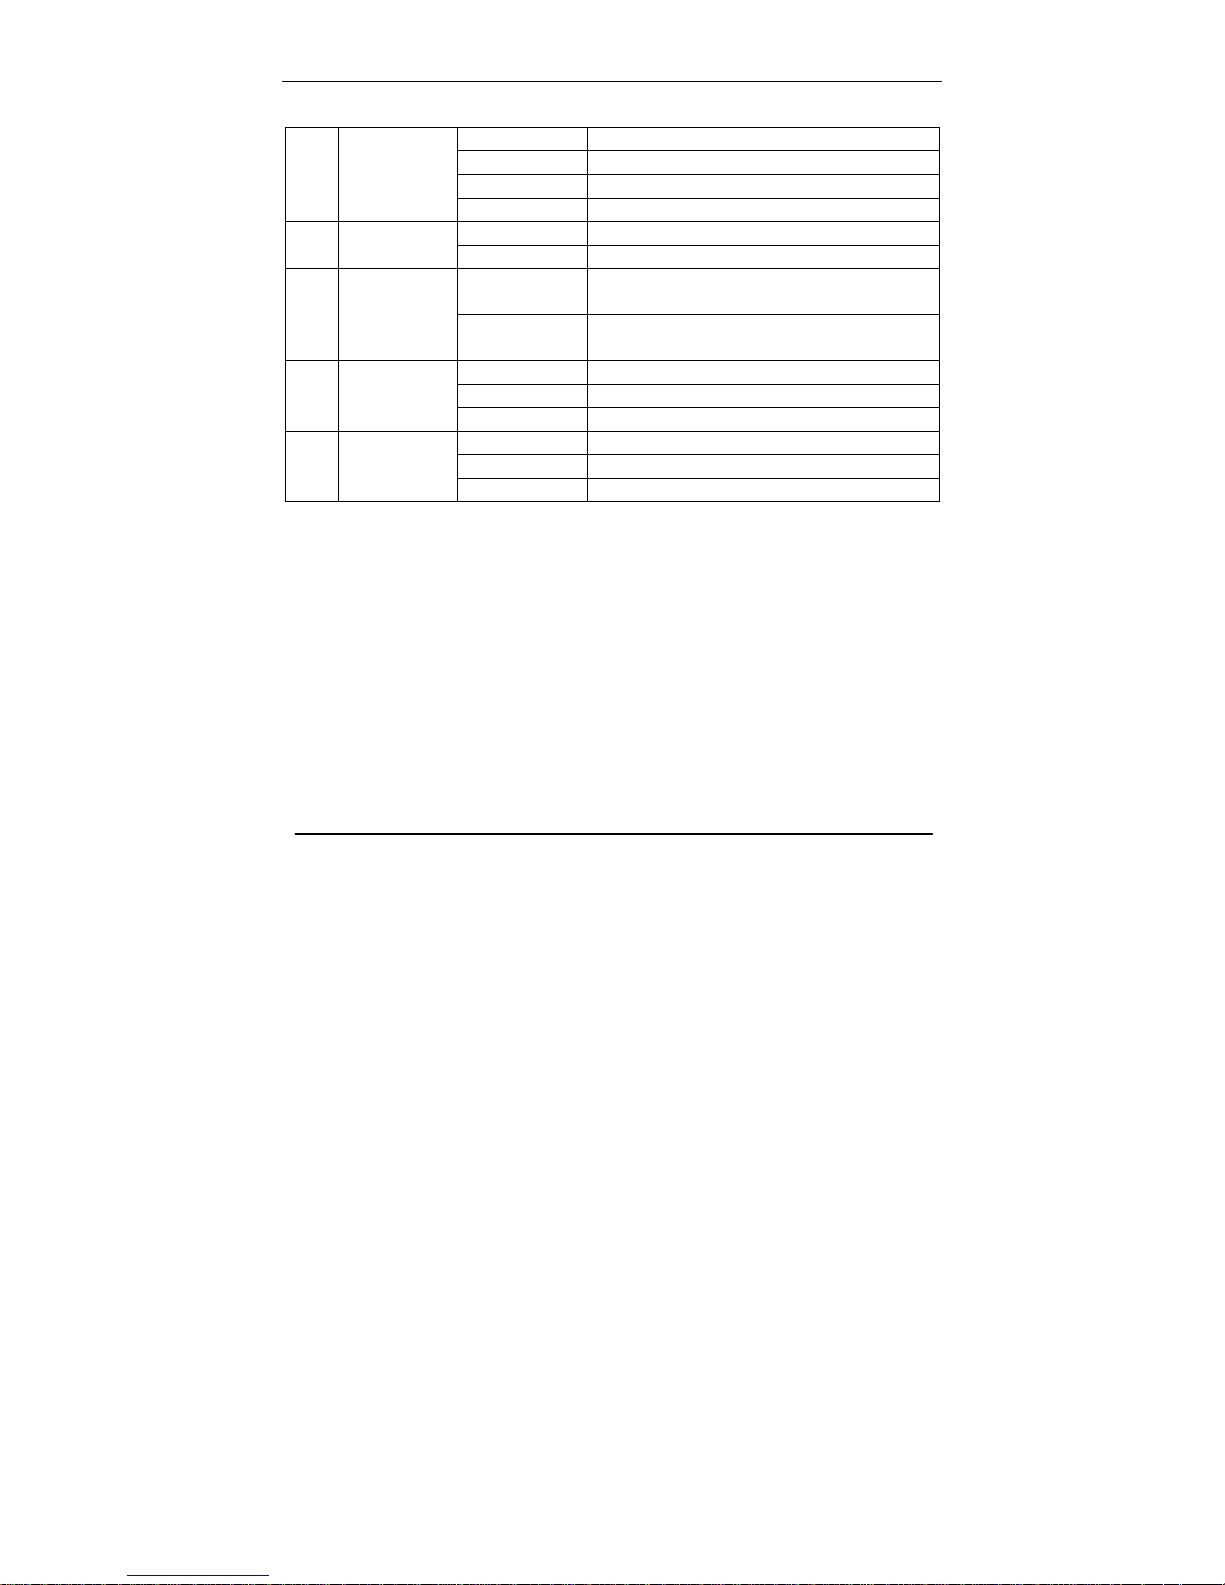
Router Front Panel (continued)
2 Signal OFF No 1x or EV-DO signal
Solid Blue Strongest level
Solid Violet Medium level
Solid Red Low level
3 1x/EV-DO OFF Router is connected to 1x
Solid Blue Router is connected to EV-DO
4 WAN OFF Modem is not connected to the Network.
i.e: dormant or idle mode
Solid Blue Modem is connected to the Network.
i.e: traffic channel is established
5 WLAN OFF No Wi-Fi is used
Solid Blue Wi-Fi is activated
Blinking Blue Active data passed through Wi-Fi
6 LAN OFF No RJ45 (Ethernet) connection is used
Solid Blue RJ45 connection is in use
Blinking Blue Active data passed through the port
7
Section 1 – Product Overview
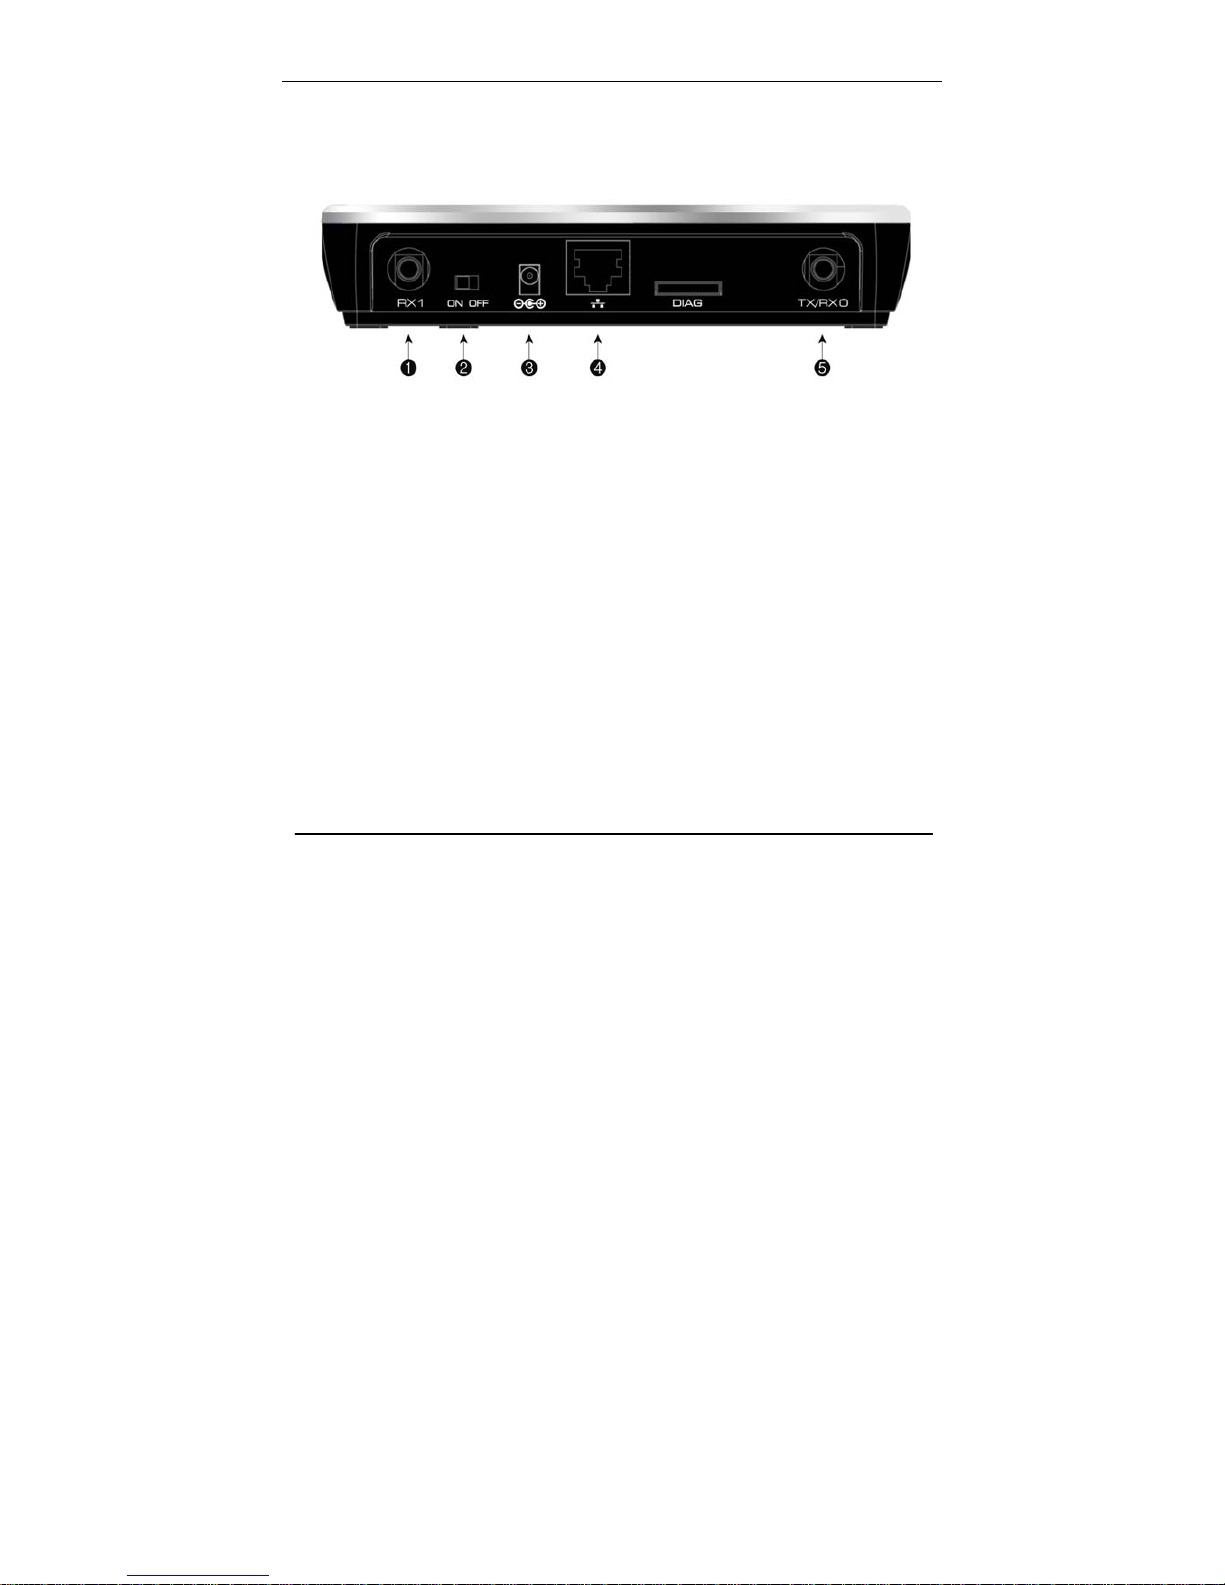
Router Back Panel
The rear panel of the VW200 contains the items in the list that follows
1. CDMA Diversity Antenna connector
2. Power Switch
3. AC power adapter outlet
4. Ethernet ports for connecting the router to local computers
5. CDMA Main Antenna connector
Note: Restore factory settings button is placed at the bottom of the router

8
Section 2 – Installation
Wireless Installation Considerations
The VW200 wireless router let your network using a wireless connection from virtually
anywhere within the operating range of your wireless network. However, the number,
thickness and location of walls, ceilings, or other objects that the wireless signals must
pass through, may limit the range. Typical ranges vary depending on the types of
materials and background RF noise in your home or business.
1. Router should be placed at the position with good CDMA signal.
2. Keep the number of walls and ceilings between the VW200 and other
network devices to a minimum-each wall or ceiling can re duce your ad apter ’s
range from 1~30 meters. Position your devices so that the number of walls or
ceilings is minimized.
3. Building Materials make a difference. A solid metal door or aluminum studs
may have a negative effect on range. Try to position access points, wireless
routers, and computers so that the signal passes through drywall or open
doorways. Materials and objects such as glass, steel, metal, walls with
insulation, water (fish tanks), mirrors, file cabinets, brick, and concrete will
degrade your wireless signal.
4. Keep your product away (at least 1~2 meters) from electrical devices or
appliances that generate RF noise.
5. If you are using 2.4GHz cordless phones or X – 10 (wireless products such
as ceiling fans, lights, and home security systems), your wireless connection
may degrade dramatically or drop completely. Make sure your 2.4GHz phone
base is as far away from your wireless devices as possible. The base
transmits a signal even if the phone is not in use.
9
Section 3 – Configuration
Configuration
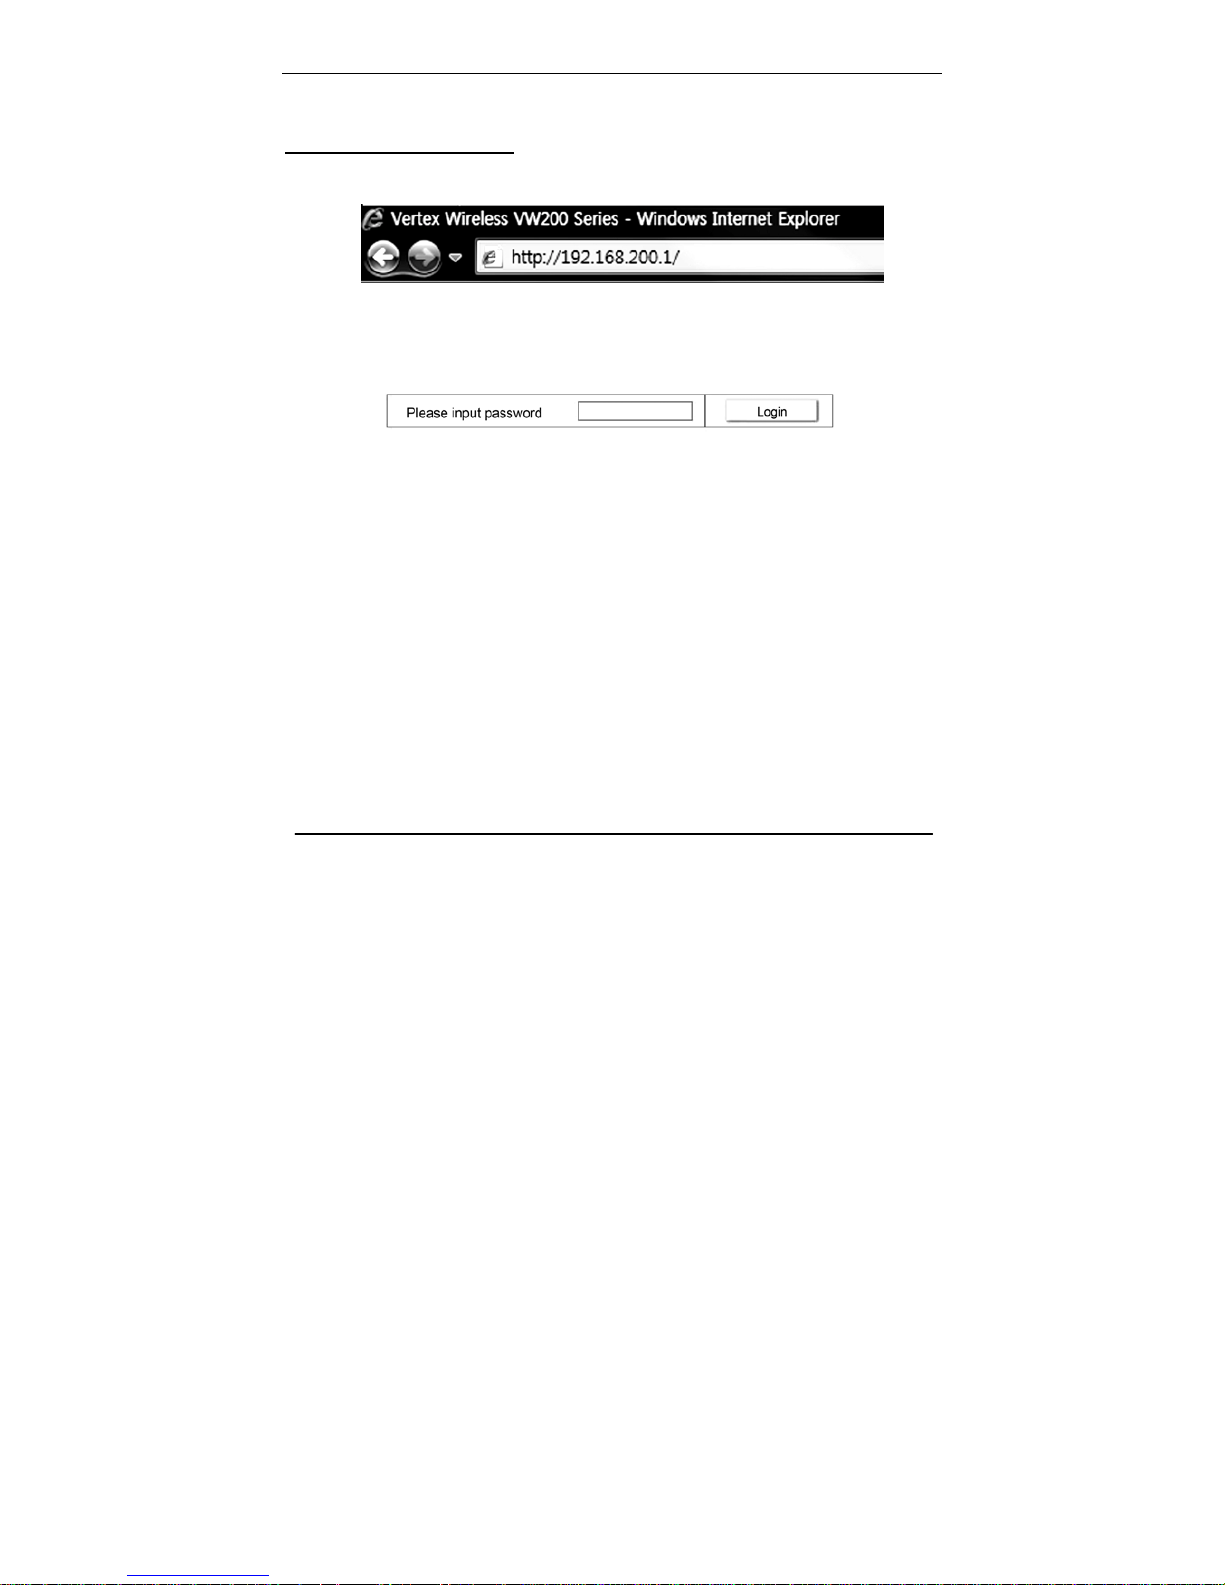
Web-based Configuration
Please open a web-browser and enter the IP address of the router (192.168.200.1)
You will see the Router’s login page in your browser window. Enter login password and
press “Login” button to log in.
Note: The Router ships with no password entered. In the login screen, leave the password blank and click the
“Login” button to log in.
10
Section 3 – Configuration
Basic setup
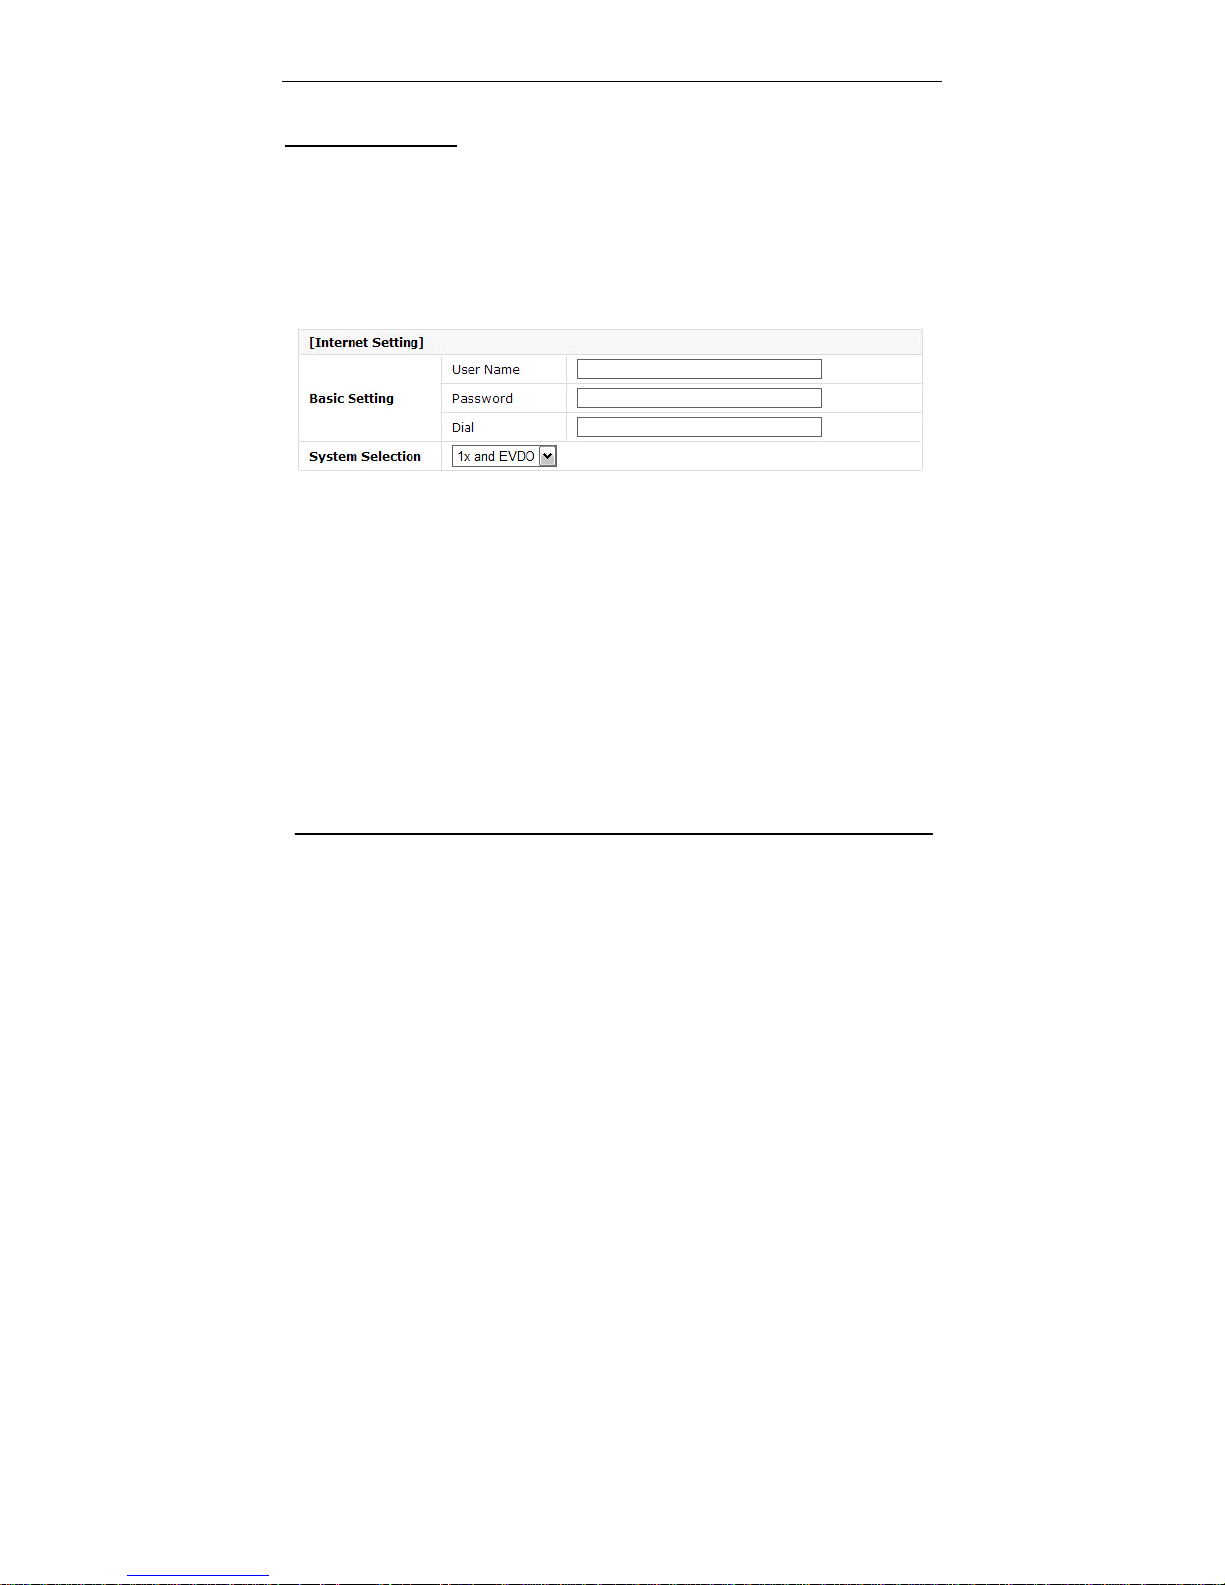
Connection Setting
[Internet Setting]
Basic setting: Enter your PPP user name, password and Dial (Provided
by operator. Default dial: #777)
System Selection: Select the CDMA system from the drop-down menu:
1x and EVDO, 1x, and EVDO
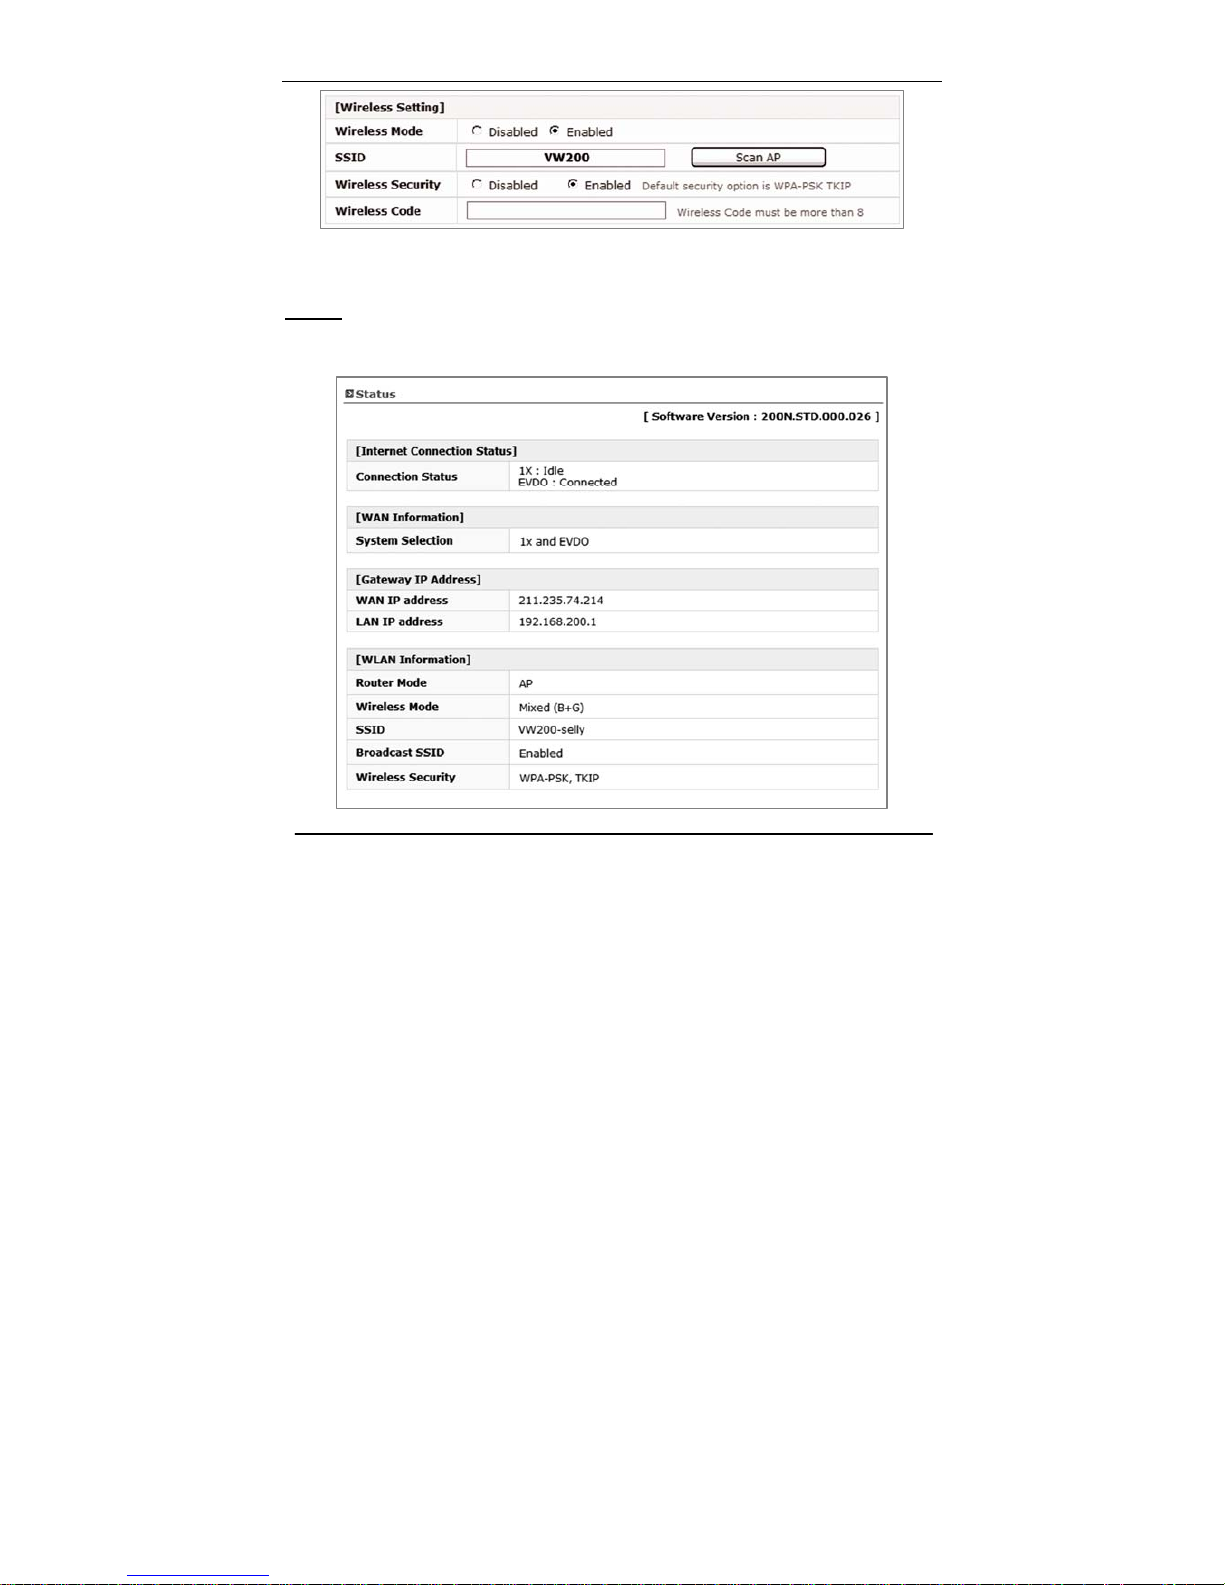
[Wireless Setting]
Wireless Mode: Select Enabled to use Wi-Fi feature otherwise select
Disabled. If you select Enabled, SSID and Wireless
Security will be displayed below
SSID: Service Set Identifier is the name of your wireless
network. Create a name using up to 32 characters.
Wireless Security: Select Enabled to use Wireless Security otherwise select
Disabled. If you select Enabled, Wireless Code will be
displayed below (Default security option is WPA-PSK
TKIP. If you want to have more option, go to Wireless
Setup under Advanced Setup)
11
Section 3 – Configuration
Wireless Code: Enter security code for WPA PSK TKIP encryption if you want to
use Wi-Fi security option
Status
You can check current Router status via this menu.
 Loading...