

Page 1

Verizon 4G LTE
Network Extender
User Guide
Network Systems
Document Version 1.3
June 2016
Samsung Electronics America
Page 2
© 2016 SAMSUNG Electronics Co. Ltd.
All Rights Reserved. No part of this document may be photocopied, reproduced, stored in a retrieval
system, or transmitted, in any form or by any means whether, electronic, mechanical, or otherwise
without the prior written permission of SAMSUNG Electronics Co., Ltd.
No warranty of accuracy is given concerning the contents of the information contained in this
publication. To the extent permitted by law no liability (including liability to any person by reason of
negligence) will be accepted by SAMSUNG Electronics Co., Ltd., its subsidiaries or employees for
any direct or indirect loss or damage caused by omissions from or inaccuracies in this document.
SAMSUNG Electronics Co., Ltd. reserves the right to change details in this publication without
notice.
This user guide should be read and used as a guideline for properly installing and/or operating
the product.
This user guide may be changed for system improvement, standardization and other technical
reasons without prior notice.
Updated user guides are available at:
https://systems.samsungwireless.com/
For questions on the user guides or their content, contact
NetSys Tech Writer@sta.samsung.com
Page 3

WARNING! This product contains chemicals known to the State of California to
cause cancer and birth defects or other reproductive harm.
Intellectual Property
All Intellectual Property, as defined below, owned by or which is otherwise the
property of Samsung or its respective suppliers relating to the SAMSUNG device,
including but not limited to, accessories, parts, or software relating thereto (the
“4G LTE Network Extender”), is proprietary to Samsung and protected under
federal laws, state laws, and international treaty provisions. Intellectual Property
includes, but is not limited to, inventions (patentable or unpatentable), patents,
trade secrets, copyrights, software, computer programs, and related documentation
and other works of authorship. You may not infringe or otherwise violate the
rights secured by the Intellectual Property. Moreover, you agree that you will not
(and will not attempt to) modify, prepare derivative works of, reverse engineer,
decompile, disassemble, or otherwise attempt to create source code from the
software. No title to or ownership in the Intellectual Property is transferred to you.
All applicable rights of the Intellectual Property shall remain with SAMSUNG and
its suppliers.
Open Source Software
Some software components of this product, including but not limited to
‘PowerTOP’ and ‘e2fsprogs’, incorporate source code covered under GNU
General Public License (GPL), GNU Lesser General Public License (LGPL),
OpenSSL License, BSD License and other open source licenses. To obtain the
source code covered under the open source licenses, please visit:
http://opensource.samsung.com.
Verizon 4G LTE Network Extender User Guide v1.3 iii
©Samsung
Page 4

Disclaimer of Warranties; Exclusion of Liability
EXCEPT AS SET FORTH IN THE EXPRESS WARRANTY CONTAINED ON
THE WARRANTY PAGE ENCLOSED WITH THE PRODUCT, THE
PURCHASER TAKES THE PRODUCT “AS IS”, AND SAMSUNG MAKES NO
EXPRESS OR IMPLIED WARRANTY OF ANY KIND WHATSOEVER WITH
RESPECT TO THE PRODUCT, INCLUDING BUT NOT LIMITED TO THE
MERCHANTABILITY OF THE PRODUCT OR ITS FITNESS FOR ANY
PARTICULAR PURPOSE OR USE; THE DESIGN, CONDITION OR
QUALITY OF THE PRODUCT; THE PERFORMANCE OF THE PRODUCT;
THE WORKMANSHIP OF THE PRODUCT OR THE COMPONENTS
CONTAINED THEREIN; OR COMPLIANCE OF THE PRODUCT WITH THE
REQUIREMENTS OF ANY LAW, RULE, SPECIFICATION OR CONTRACT
PERTAINING THERETO. NOTHING CONTAINED IN THE INSTRUCTION
MANUAL SHALL BE CONSTRUED TO CREATE AN EXPRESS OR
IMPLIED WARRANTY OF ANY KIND WHATSOEVER WITH RESPECT TO
THE PRODUCT. IN ADDITION, SAMSUNG SHALL NOT BE LIABLE FOR
ANY DAMAGES OF ANY KIND RESULTING FROM THE PURCHASE OR
USE OF THE PRODUCT OR ARISING FROM THE BREACH OF THE
EXPRESS WARRANTY, INCLUDING INCIDENTAL, SPECIAL OR
CONSEQUENTIAL DAMAGES, OR LOSS OF ANTICIPATED PROFITS OR
BENEFITS.
Modification of Software
SAMSUNG IS NOT LIABLE FOR PERFORMANCE ISSUES OR
INCOMPATIBILITIES CAUSED BY YOUR EDITING OF REGISTRY
SETTINGS, OR YOUR MODIFICATION OF OPERATING SYSTEM
SOFTWARE.
USING CUSTOM OPERATING SYSTEM SOFTWARE MAY CAUSE YOUR
DEVICE AND APPLICATIONS TO WORK IMPROPERLY. YOUR CARRIER
MAY NOT PERMIT USERS TO DOWNLOAD CERTAIN SOFTWARE, SUCH
AS CUSTOM OS.
Samsung Electronics America (SEA), Inc
Address:
85 Challenger Road
Ridgefield, New Jersey 076 60
Phone: 1-800-SAMSUNG (726-7864)
Phone: 1-888-987-HELP (4357)
Internet Address:
www.samsung.com
©2016 Samsung Electronics America, Inc. Samsung is a registered trademark of
Samsung Electronics Co., Ltd.
Do you have questions about your Samsung Mobile Device?
For 24 hour information and assistance, we offer a new FAQ/ARS System
(Automated Response System) at: www.samsung.com/us/support
Verizon 4G LTE Network Extender User Guide v1.3 iv
©Samsung
Page 5

Contents
Preface viii
Relevance ....................................................................................................................................... viii
Conventions in this Document ....................................................................................................... viii
Revision History .............................................................................................................................. viii
Organization of This Document ...................................................................................................... ix
Related Documentation .................................................................................................................. ix
Personal and Product Safety ........................................................................................................... ix
Chapter 1 Getting Started 1
Introduction ..................................................................................................................................... 1
Features ........................................................................................................................................... 2
System Requirements ...................................................................................................................... 3
Network Extender Basics ................................................................................................................. 4
Chapter 2 Network Extender Setup 5
Chapter 3 Network Extender Admin Website (Local) 10
Sign In ............................................................................................................................................. 11
Connected Devices Page ................................................................................................................ 13
Settings ........................................................................................................................................... 14
About .............................................................................................................................................. 17
Chapter 4 Configuring Your Device 21
External GPS Antenna .................................................................................................................... 22
Chapter 5 Troubleshooting 23
Power/Status Indicator Light is Not Turning On ............................................................................ 23
Network Extender has not acquired a GPS fix even after an hour ................................................. 23
Unable to Place Call Using Network Extender ............................................................................... 23
Power/Status LED Indicator is Blinking .......................................................................................... 24
Alarms ............................................................................................................................................ 24
Appendix Acronyms 28
Verizon 4G LTE Network Extender User Guide v1.3 v
©Samsung
Page 6

Contents
List of Figures
Figure 1. Verizon Wireless 4G LTE Network Extender .................................................................................... 1
Figure 2. Box Contents .................................................................................................................................... 2
Figure 3. Optional Wall Mount Bracket (sold separately) ............................................................................... 2
Figure 4. Components - Front and Rear View ................................................................................................. 4
Figure 5. Network Extender Placement .......................................................................................................... 5
Figure 6. Connect the Ethernet Cable and Power ........................................................................................... 6
Figure 7. Network Extender Home Page ....................................................................................................... 10
Figure 8. Network Extender Login Pop-Up Window ..................................................................................... 11
Figure 9. Quick Reference Icons .................................................................................................................... 12
Figure 10. Network Extender Connected Devices Page .................................................................................. 13
Figure 11. Network Extender Network Settings Tab ....................................................................................... 14
Figure 12. Network Extender Advanced Settings Tab ..................................................................................... 15
Figure 13. Network Extender Change Password Tab ...................................................................................... 16
Figure 14. Network Extender Status & Alerts Tab .......................................................................................... 17
Figure 15. GPS Tab .......................................................................................................................................... 18
Figure 16. Performance Tab ............................................................................................................................ 19
Figure 17. Support Tab .................................................................................................................................... 20
Verizon 4G LTE Network Extender User Guide v1.3 vi
©Samsung
Page 7

Contents
List of Tables
Table 1. Destination Ports ............................................................................................................................ 21
Table 2. Firewall Settings ............................................................................................................................. 21
Table 3. Alarms in the Network Extender Display ....................................................................................... 24
Table 4. Alarms in the Network Extender Admin Website (Local) ............................................................... 26
Verizon 4G LTE Network Extender User Guide v1.3 vii
©Samsung
Page 8
Preface
Model
Release
Symbol
Description
Version
Date
Description
This user guide describes how to install the 4G LTE Network Extender and
provides cable connection specifications.
Relevance
This user guide applies to the following products/software
SLS-BU103 1.0.0.20
Conventions in this Document
Samsung Networks product documentation uses the following conventions.
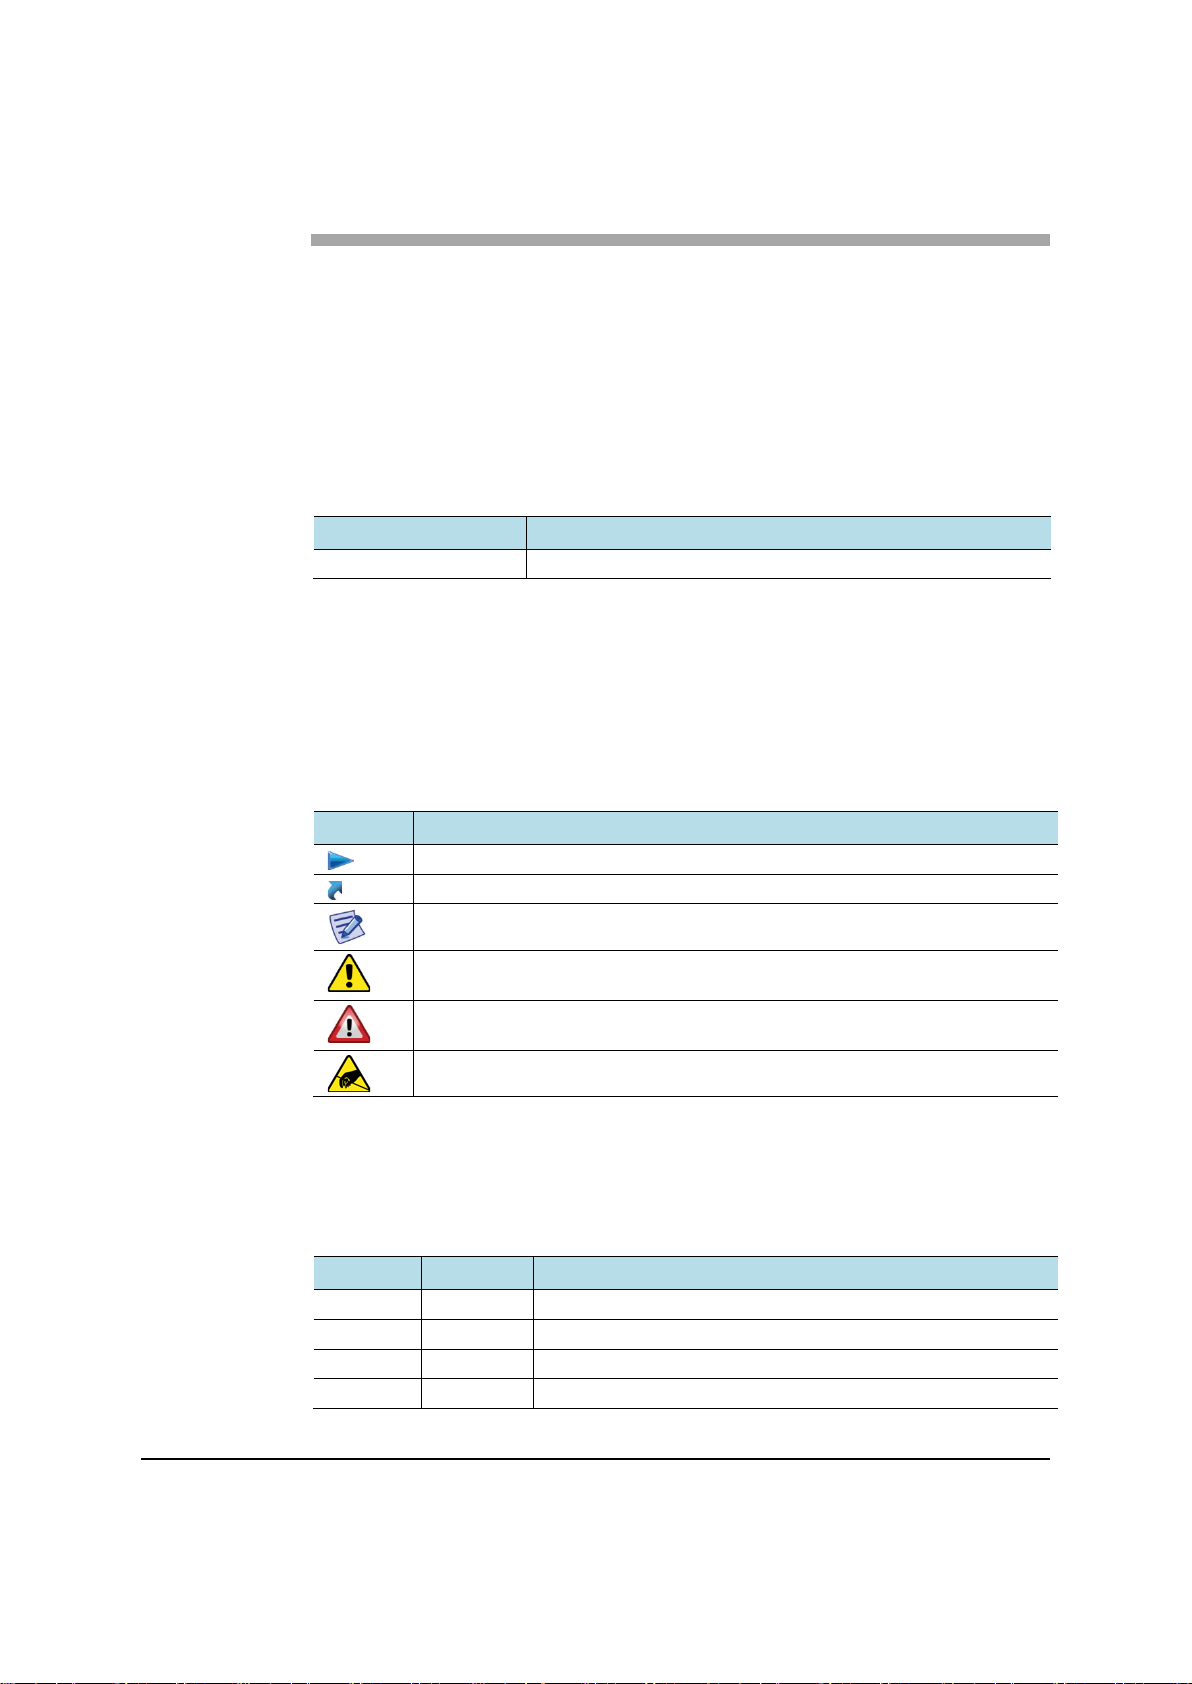
Symbols
Indicates a task.
Indicates a shortcut or an alternative meth od.
Provides additional information.
Provides information or instructions that you should follow to avoid service
failure or damage to equipment.
Provides information or instructions that you should follow to avoid personal
injury or fatality.
Provides antistatic precautions that you should observe.
Revision History
The following table lists all versions of this document.
1.0 11/10/2015 First version
1.1 6/15/2016 Second version
1.2 6/22/2016 Third version
1.3 6/24/2016 Fourth version
Verizon 4G LTE Network Extender User Guide v1.3 viii
©Samsung
Page 9
Preface
Section
Title
Description
Organization of This Document
Chapter 1 Getting Started Provides an overview of the Network
Chapter 2 Device Setup Describes the procedures needed to
Chapter 3 Network Extender Admin
Website (Local)
Chapter 4 Configuring Your Device Provides detailed information
Chapter 5 Troubleshooting Provides information to trouble shoo t
Appendix A Acronyms List of terms.
Related Documentation
• Verizon 4G LTE Network Extender Quick Start Guide
Extender.
set up the Network Extender.
Describes the Network Extender
Admin Website (Local).
regarding firewall settings.
STS LED statuses.
• Verizon 4G LTE Network Extender Product, Safety and Warranty
Personal and Product Safety
FCC Radiation Exposure Statement
To ensure the safety of users, the FCC has established criteria for the amount of
radio frequency energy various products may produce depending on their intended
usage. This product has been tested and found to comply with the FCC’s exposure
criteria.
Place your Network Extender at least 10 feet away from products that generate
electromagnetic radiation (e.g., microwave oven).
The installation of the base unit should allow at least eight inches (20 centimeters)
between the base and persons to be in compliance with FCC RF exposure
guidelines.
Verizon 4G LTE Network Extender User Guide v1.3 ix
©Samsung
Page 10
Chapter 1
Getting Started
Introduction
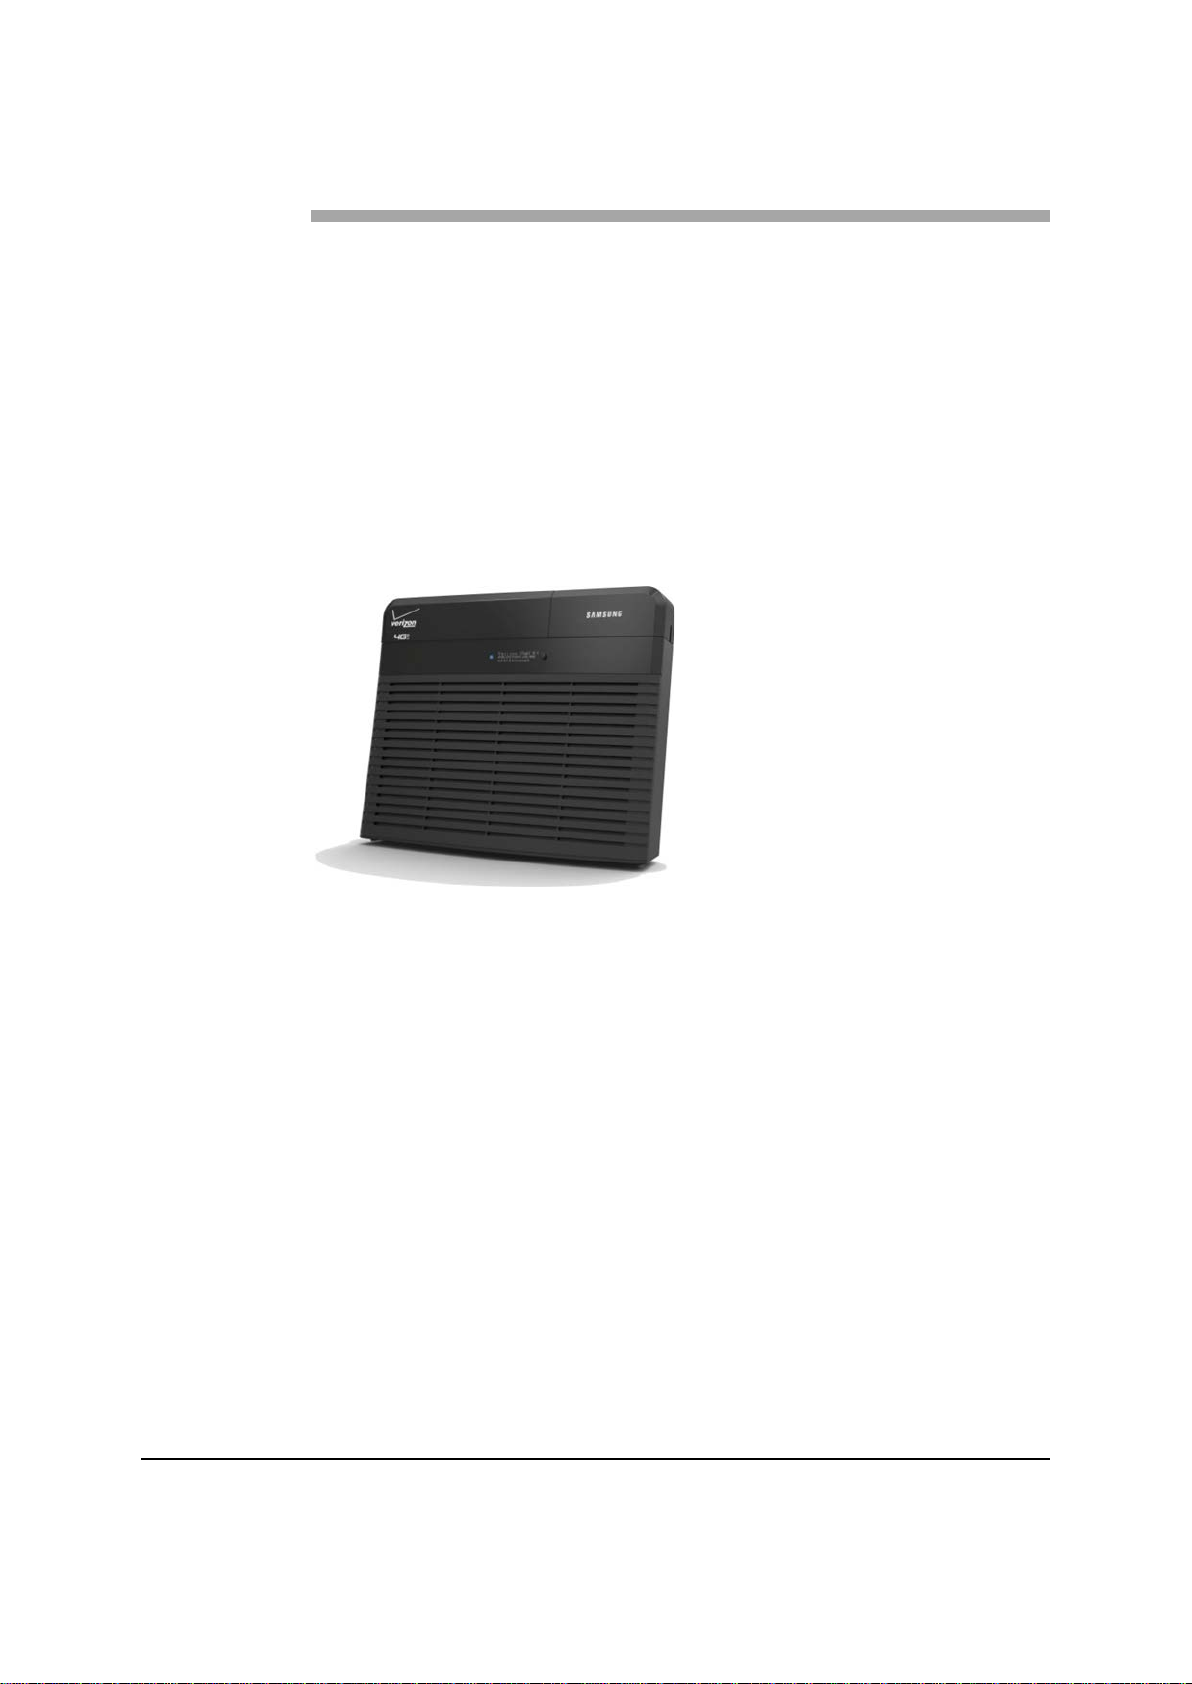
Congratulations on the purchase of your Verizon Wireless 4G LTE Network
Extender. The 4G LTE Network Extender offers enhanced in-building 4G LTE
wireless coverage of up to 7500 square feet circular coverage and capacity of up to
7 active users.
This user guide introduces you to Network Extender service and all the features of
your new device.
Figure 1. Verizon Wireless 4G LTE Network Extender
Verizon 4G LTE Network Extender User Guide v1.3 1
©Samsung
Page 11

Chapter 1 Getting Started
Features
The Network Extender provides the following features:
• This Network Extender is a simple to install device that provides enhanced in-
building wireless service without having to change your existing mobile
phone.
• This Network Extender allows users to easily install and configure the system
by connecting to an existing broadband network.
• This Network Extender supports an embedded web server, which allows you
to customize your IP settings. For more information, see the Network Extender
Admin Website (Local) chapter.
The Network Extender box contains:
• Network Extender
• GPS antenna cable
• Ethernet cable
• Power adaptor
• Quick Start Guide
• Product Safety and Warranty Manual
Figure 2. Box Contents
The following optional wall mount bracket is sold separately. Please contact your
Verizon sales representative for details.
Figure 3. Optional Wall Mount Bracket (sold separately)
Verizon 4G LTE Network Extender User Guide v1.3 2
©Samsung
Page 12

Chapter 1 Getting Started
System Requirements
• This device only supports Verizon Wireless 4G LTE mobile handsets with
Advanced Calling enabled as shown in “Making a Call on Your Network
Extender” section.
• Internet Access: This Network Extender must be connected to an available
LAN port on a router or modem with always-on Internet access with minimum
download speed of 10 Mbps and upload speed of 5 Mbps. Speeds of 20 Mbps
download and 10 Mbps upload or higher are recommended.
• GPS signal: This Network Extender requires a continuous GPS signal from the
provided GPS antenna. For ini ti al GPS fix , fo u r stro ng GPS satellite signals
must be available.
• Home satellite broadband access is not supported.
Verizon 4G LTE Network Extender User Guide v1.3 3
©Samsung
Page 13

Chapter 1 Getting Started
For advanced users only. Depress for 10 seconds
to reset to factory default.
Network Extender Basics
This section will guide you through the basic features and functions of your
Network Extender.
The included GPS antenna is required for the automated setup process and is
necessary in the event the mobile phone is used to call for emergency service s
while in the coverage area of the Network Extender.
Figure 4. Components - Front and Rear View
The Network Extender includes the following key features and connections:
1 Power/Status Indicator shows the unit is on and in service.
2 LCD Display shows status messages and device icons indicating the number
of LTE devices connected to the Network Extender and the number of GPS
satellites tracked.
3 Display Button scrolls the LCD display to provide additional information
about the device when in operation.
4 GPS Antenna is located under the GPS antenna cover on the top right of the
Network Extender. Slide the cover open to provide access to the GPS antenna
so it can be relocated if needed. See the Configuring Your Device chapter.
5 LAN Port allows you to connect an Ethernet cable to establish communication
between the Network Extender and your broadband router. This connection
port is then used to transmit voice and data through the Internet to the Verizon
wireless network.
6 Reset Button allows you to reset the device to factory default settings. Use a
pen to push and hold the reset button for 10 seconds. The Power/Status
Indicator will then become solid blue, indicating that the device is resetting.
Any manually configured parameters will require reconfiguration.
7 12V DC Power Input is used to power the Network Extender when connected
Verizon 4G LTE Network Extender User Guide v1.3 4
©Samsung
to the AC power adaptor. Use only the provided power adapter as using any
other power source may damage the Network Extender.
Page 14

Chapter 2
Network Extender
Setup
This section outlines the procedures needed to set up the Network Extender.
1 Confirm your package contains all components.
2 Review the Product Safety and Warranty document included in the package
before installing the Network Extender.
3 For best results, place the Network Extender in an elevated location, such as
the top of a bookshelf or cabinet.
Figure 5. Network Extender Placement
4 Plug one end of the provided Ethernet cable into an available LAN port on
your router and the other end into the LAN port on your Network Extender (1).
5 Plug the power supply connector into the DC 12V power port located at the
rear of the Network Extender (2). Insert one end of the power cord into the
power supply and then plug the other end into an available outlet (3).
Verizon 4G LTE Network Extender User Guide v1.3 5
©Samsung
Page 15

Chapter 2 Network Extender Setup
Figure 6. Connect the Ethernet Cable and Power
6 A GPS signal is required for proper operation and E911 service. If a GPS
signal is not acquired after 30 to 60 minutes, please see “Configuring Your
Device” section.
To see the status of the GPS acquisition, use the Admin website (Local) shown in
“Network Extender Admin Website (Local)” section.
7 When the Network Extender is plugged in, the Power/Status LED indicator
will be solid blue.
Verizon 4G LTE Network Extender User Guide v1.3 6
©Samsung
Page 16

Chapter 2 Network Extender Setup
8 The initial startup of the Network Extender will take 30-60 minutes. During
this process, the LED will blink.
9 After the Network Extender successfully starts up, the LED will return to solid
blue and the display will show “In Service.”
10 Once the Network Extender is running, check the following indicator lights:
o The GPS Indicator shows the GPS acquisition status and number of GPS
satellites currently tracked .
o The Connected Devices shows the number of devices connected to the
Network Extender with an active session.
11 Press the button next to the display to show additional information about your
Network Extender. The display will automatically step through the following
information: Device IP address, Network Extender MAC ID, Timing Source,
Device Name and CSG Mode.
Verizon 4G LTE Network Extender User Guide v1.3 7
©Samsung
Page 17

Chapter 2 Network Extender Setup
12 Making a Call on Your Network Extender
Once the Network Extender is in service, your phone must be within 50 feet of
the unit.
To verify your Verizon phones are connected to the Network Extender:
a) Make sure your Verizon Wireless 4G LTE mobile handset has the
Advanced Calling feature turned on.
b) Dial #48 from your mobile phone and listen for the following
confirmation: “You are under 4G LTE Network Extender coverage …”
c) Some phones may show a home icon when connected to the
Network Extender.
The Network Extender’s coverage depends on environmental factors, such as
physical structures and the streng th of extern al cell to w ers.
To turn on Advanced Calling on your 4GLTE Verizon Wireless handset, follow
the steps below for your device’s operating system:
• Android™: Go to Settings > Advanced Calling and turn ON service.
On some devices, it may be found in Wireless Calling, HD Voice or VoLTE call.
Verizon 4G LTE Network Extender User Guide v1.3 8
©Samsung
Page 18

Chapter 2 Network Extender Setup
• Apple® iOS: Go to Set tin g s > Cellular > Cellular Data Options > Enable LTE
> Voice & Data. Additionally, on the “My Verizon” Mobile App, enable
Advance Calling feature for your phones.
• Windows®: Go to Settings > Cellular+SIM > SIM settings and turn ON
Advanced Calling.
Verizon 4G LTE Network Extender User Guide v1.3 9
©Samsung
Page 19

Chapter 3
Network Extender
Admin Website
(Local)
This section contains detailed information regarding the Network Extender Admin
Website (Local) where you can see the device status and make changes to settings.
To access settings and manage the Network Extender, sign in to the web interface
by following these steps:
1 Use a computer connected to the same LAN as the Network Extender.
2 Press the button next to the display on the device to see your Network
Extender’s IP address.
3 Open a browser and enter the IP address of the Network Extender into the
address bar: http://<ip address of network extender>. Note, the IP address of
the device (once acquired) can be found in the LCD display by stepping
through via the display button.
Figure 7. Network Extender Home Page
Verizon 4G LTE Network Extender User Guide v1.3 10
©Samsung
Page 20

Chapter 3 Network Extender Admin Website (Local)
Sign In
Once you are at the Welcom e Page, click Sign In in the top right hand corner of
the screen. The default administrator password is LteFemtØ. (Case sensitive. Note
that the last character is a numeral zero.)
The default password and all Network Extender settings can be set back to default
by pressing the reset button located on the back of the unit for more than 10
seconds.
Figure 8. Network Extender Login Pop-Up Window
The Welcome page shows basic device information such as the Network
Extender’s MAC address, GPS fix location, device name and IP address.
Verizon 4G LTE Network Extender User Guide v1.3 11
©Samsung
Page 21

Chapter 3 Network Extender Admin Website (Local)
The quick reference icons on the upper right of the Welcome page indicate device
operation, GPS acquisition, number of devices connected, and login status.
Figure 9. Quick Reference Icons
This icon will appear on your phone if the Network Extender is in service.
The map icon will show a pin point if GPS acquisition is complete. If GPS
acquisition is still in progress, the icon will have a crossed out circle icon next to
it.
The number next the device icon indicates the number of devices connected to the
Network Extender with an active session.
Clicking on the question mark icon will display a help screen for the related page.
Verizon 4G LTE Network Extender User Guide v1.3 12
©Samsung
Page 22

Chapter 3 Network Extender Admin Website (Local)
Connected Devices Page
The connected devices page shows the current connected users as well as the peak
Network Extender capacity utilization over the last hour and 24 hour period. The
value reported is the peak for that period.
Figure 10. Network Extender Connected Devices Page
The capacity utilization chart shows the hourly trend of the device capacity in use
over the last 8 hour period.
Verizon 4G LTE Network Extender User Guide v1.3 13
©Samsung
Page 23

Chapter 3 Network Extender Admin Website (Local)
Settings
The Network Extender Network Settings tab allows you to enable/disable DHCP.
If DHCP is disabled, you can also set the DNS information, default gateway, IP
address and subnet mask. The backhaul limit (affects uplink speeds served by the
Network Extender only) and MTU size can also be set here. Information regarding
device settings is in the “Configuring Your Device” chapter.
Figure 11. Network Extender Network Settings Tab
Verizon 4G LTE Network Extender User Guide v1.3 14
©Samsung
Page 24

Chapter 3 Network Extender Admin Website (Local)
The Network Extender Advanced Settings tab allows you to set the device output
power and view neighboring cell towers detected during the boot up scan. This tab
provides information on how the device is positioned with other Network
Extenders in the network as well as Verizon cell sites.
Figure 12. Network Extender Advanced Settings Tab
Verizon 4G LTE Network Extender User Guide v1.3 15
©Samsung
Page 25

Chapter 3 Network Extender Admin Website (Local)
The Network Extender Change Password tab allows you to change the local
Admin Password for the device. In the event of a lost password, pressing the
RESET button for 10 seconds will reset the device to factory default settings.
Figure 13. Network Extender Change Password Tab
Verizon 4G LTE Network Extender User Guide v1.3 16
©Samsung
Page 26

Chapter 3 Network Extender Admin Website (Local)
About
The Status & Alerts tab on the About page shows the connectivity status,
operational status and alerts that can be used for diagnostics and troubleshooting.
If the connectivity status shows a servers as “not reachable”, confirm that the
Network Extender is properly connected to the router, has acquired an IP Address.
For LAN/Routers with a firewall enabled, please see “Configuration Your Device”
chapter.
Figure 14. Network Extender Status & Alerts Tab
Verizon 4G LTE Network Extender User Guide v1.3 17
©Samsung
Page 27

Chapter 3 Network Extender Admin Website (Local)
Figure 15. GPS Tab
The GPS tab on the About page shows the GPS satellite IDs and their signal
strength. The Network Extender requires continuous GPS signal. If GPS signal is
lost, the unit can operate using the Network Extender's internal clock rather than
GPS timing, for approximately 24 hours, after which it shall cease being
operational.
Verizon 4G LTE Network Extender User Guide v1.3 18
©Samsung
Page 28

Chapter 3 Network Extender Admin Website (Local)
The Performance tab on the About page shows bandwidth utilization charts. There
are two graphs for bandwidth utilization:
• The first graph is a 15 minute trend, updated every 30 seconds. This graph
starts populating when you arrive on this screen. It will start over if you move
to another screen and then come back to this one. Every data point on the
graph represents the peak value for a 30 second interval.
• The second graph is an eight hour trend, updated every hour. This graph will
maintain the his to r y whether you stay on this screen or not. Every data point
represents the peak value for that hour.
Figure 16. Performance Tab
Verizon 4G LTE Network Extender User Guide v1.3 19
©Samsung
Page 29

Chapter 3 Network Extender Admin Website (Local)
The Support tab on the About page contains the contact information for customer
support.
Figure 17. Support Tab
Verizon 4G LTE Network Extender User Guide v1.3 20
©Samsung
Page 30

Chapter 4
Configuring Your
Device
Source
Destination
Protocol
Destination Port
Notes
Network Element
IP Address
Fully Qualified Domain Name (FQDN)
The 4G LTE Network Extender is designed to connect and automatically configure
with minimal user involvement, though in some cases, depending on the firewall
settings, some settings may need to be adjusted on the local LAN. This section
contains detailed information regarding the fi r ew a ll settings that are applicable for
network administrators.
Table 1. Destination Ports
Network
Extender
Network
Extender
Network
Extender
Network
Extender
VzW SeGW Network Extender ESP/50 NA When NAT/PAT is not present
GPS Assistance Server UDP 52428
DNS Server UDP/TCP 53
VzW SeGW UDP
VzW SeGW ESP/50 NA When NAT/PAT is not present
500/4500
More than one port may be
used for multiple device
installation
The following tab le lis ts th e IP addresses of each of the network elements that
need to be included.
Table 2. Firewall Settings
GPS Server 209.210.15.73 gps.vzwfemto.com
69.78.145.119
69.78.145.122
69.78.34.151
Security Gateway
Private DNS
69.78.34.154
69.78.82.87
69.78.82.90
69.78.226.55
69.78.226.58
108.61.73.243
192.95.20.208
sg.vzwfemto.com
0.north-america.pool.ntp.org
1.north-america.pool.ntp.org
Verizon 4G LTE Network Extender User Guide v1.3 21
©Samsung
Page 31

Chapter 4 Configuring Your Device
External GPS Antenna
If your 4G LTE Network Extender cannot receive a GPS signal, it may be
necessary to improve the reception by installing the extension cable and then
repositioning the GPS antenna outside the unit. This section outlines the
installation and relocation of the external GPS antenna.
To relocate the GPS antenna of the Network Extender, follow these steps:
1 Turn off the Network Extender.
2 Firmly press down on the open groove (top right).
3 Slide the protective cover to the right to expose the rectangular GPS antenna.
4 Pull the GPS antenna away from the Network Extender.
5 Remove the GPS antenna from its compartment.
6 Connect the GPS antenna to one end of the provided GPS cable.
7 Connect and secure the other end to the port on the Network Extender (within
the GPS antenna compartment).
8 Place the antenna near a window where the GPS signal is stronger. You can
use double-sided tape to secure the bottom of the GPS antenna to its new
location. Do not cover the antenna with tape.
9 Replace the cover on the station and thread the cable through the opening at
the base of the cover.
10 Turn on the Network Extender to allow the detection of available GPS satellite
signals. Note, four GPS satellites (strong signals) are needed to acquire a GPS
location fix and may take up to 60 minutes.
11 If a GPS fix still cannot be acquired, check the GPS signal in the Admin
Website’s GPS status page. If the device does not have 4 or more strong GPS
satellite signals, place the GPS antenna in another location to receive a
stronger signal. In some scenarios, an outdoor GPS antenna (not included)
may be needed if adequate GPS signal is not availab le indoo rs.
Verizon 4G LTE Network Extender User Guide v1.3 22
©Samsung
Page 32

Chapter 5
Troubleshooting
This section provides some troubleshooting tips for the Network Extender.
Power/Status Indicator Light is Not Turning On
• Make sure the power adapter is securely connected to a working power outlet.
• Make sure the power adapter’s connector is securely inserted into the DC 12V
port on the back of the Network Extender.
Network Extender has not acquired a GPS fix even after an hour
• If possible, move the Network Extender to a new location with fewer
surrounding obstructions. The new location should be in an open area and
closer to a window.
• Unplug the power adapter for 10 seconds and then plug it back in again. This
allows the Network Extender to re-initiate its startup se qu ence during which
it detects the Ethernet connection, GPS signal, and communication with the
Verizon Wireless network.
• If the GPS signal is not detected even in the new location, install the GPS
extension cable and reposition the GPS antenna, as shown in the Configuring
Your Device.
• The GPS antenna must stay connected to the Network Extender at all times
for operation.
Unable to Place Call Using Network Extender
• Verify the device is powered on and in service.
• Check that the router is communicating properly with your ISP. The Internet
activity LED on your router and the back of the Network Extender should be
blinking.
• Check that advanced calling is in use as found in the Network Extender
Setup.
• Verify that your phone is connected to the Network Extender by dialing #48.
Verizon 4G LTE Network Extender User Guide v1.3 23
©Samsung
Page 33

Chapter 5 Troubleshooting
Alarm
Description
Troubleshooting
Power/Status LED Indicator is Blinking
A blue blinking LED indicates the Network Extender is not operational. It may be
starting up, attempting to connect to the Verizon Wireless Network or waiting for
GPS. Please check the LCD display and status page on the Admin Website to
narrow the problem.
Confirm your Network Extender was activ ated at the time of purchase. If your
Network Extender has not already been activ ated, ca ll Ve rizon Wirele ss Cu stom er
Service at (800) 922-0204 or *611 from your Verizon Wireless mobile phone and
select the option for technical support.
Before contacting Verizon Wireless Customer Service, confirm the following:
• Is the Internet activity LED on your router blinking?
If it is not, then there may be a communication problem between your
Network Extender and the router. Check that the router is communicating
properly with your ISP. For further router troubleshooting tips, please review
either the router manufacturer's printed or online documentation.
• Does the GPS icon show the GPS is tracking one or more satellites?
If not, the Network Extender may not be receiving a GPS signal. Move the
GPS antenna as shown in the Configuring Your Device chapter.
Alarms
The following alarms may appear on the display of the Network Extender. These
alarms will be displayed on the Network Extender Admin website (local).
Table 3. Alarms in the Network Extender Display
Out of Service
Ethernet Port Down
Out of Service
MME Communication
Failure
GPS Failure
See User Guide
Out of Service
Device Overheated
The Ethernet port or
connection is not working.
The unit has a
communication failure
with the Verizon network.
The GPS unit is not
working.
The unit has overheated. Your device is overheating. Please move the unit to an
The port connecting your device to the internet is not
operational. Please check that your Ethernet cable is
connected correctly and the switch, router, or internet
gateway is powered on.
There is a communication failure preventing your
device from functioning correctly. Please unplug your
device and then plug it back in again. If the problem
persists for an hour, please contact Veriz on Wireless
Customer Service.
There is a failure in the GPS module preventing your
device from functioning correctly. Please make sure
that the GPS antenna is installed in a location near a
window as shown in the Configuring Your Device
chapter. If the problem persists for an hour, please
contact Verizon Wireless Customer Service.
area with an ambient temperature between 0-50
degrees Celsius (32 -122 degrees Fahrenheit) and
make sure the device is in a well ventilated location.
Verizon 4G LTE Network Extender User Guide v1.3 24
©Samsung
Page 34

Chapter 5 Troubleshooting
Alarm
Description
Troubleshooting
Out of Service
Transmission Over
Power
Out of Service
High Radio Interference
Out of Service
Modem Failure
Out of Service
For Maintenance
Setup Failure
See User Guide
Out of Service
Incorrect Bandwidth
Device Not Activated
Call Verizon Support
Out of Verizon’s
Service Area
The output power of the
device is out of tolerance.
The unit is exposed to a
high level of radio
interference.
The device radio unit is
out of service.
The unit is out of service
due to maintenance
mode.
The device fails to
download software and/or
configuration.
The unit is assigned
incorrect bandwidth.
The device fails to
authenticate to Verizon
network.
The device fails to come
into service due to
unlicensed area.
Please unplug your device and then plug it back in
again. Wait for 10 minutes and check if the alarm is
cleared. If the problem persists, please contact
Verizon Wireless Customer Service.
If the problem persists after 10 minutes, please
relocate the unit to a different area at least 100 feet
away.
Please unplug your device and then plug it back in
again. Wait for 10 minutes and check if the alarm is
cleared. If the problem persists, please contact
Verizon Wireless Customer Service.
The operator puts the device in maintenance mode.
Wait for an hour and check if the alarm is cleared. If
the problem persists, please contact Verizon Wireless
Customer Service.
There is a communication problem in the network
preventing downloading files necessary for setting the
device up. Please unplug your device and then plug it
back in again. Wait for 10 minutes and check if the
alarm is cleared. If the problem persists, please
contact Verizon Wireless Customer Service.
The unit is incorrectly configured by Verizon network.
Please unplug your device and then plug it back in
again. Wait for 10 minutes and check if the alarm is
cleared. If the problem persists, please contact
Verizon Wireless Customer Service.
The device might not be provisioned in the Verizon
network yet. Please unplug your device and then plug
it back in again. Wait for 10 minutes and check if the
alarm is cleared. If the problem persists, please
contact Verizon Wireless Customer Service.
You might be located in an area where no Verizon
service is allowed. Please unplug your device and
then plug it back in again. Wait for 10 minutes and
check if the alarm is cleared. If the problem persists,
please contact Verizon Wireless Customer Service.
Verizon 4G LTE Network Extender User Guide v1.3 25
©Samsung
Page 35

Chapter 5 Troubleshooting
Alarm
Description
Troubleshooting
The following table lists critical alarms that can halt the functioning of the
Network Extender. These alarms will be displayed in the Network Extender
Admin Website (Local) chapter.
Table 4. Alarms in the Network Extender Admin Website (Local)
PROCESS_DOWN An application block is
deactivated/terminated.
DISK_FULL Disk usage has exceeded
a threshold.
MEMORY_FULL Memory usage has
exceeded a threshold.
OVERLOAD Average CPU load has
exceeded a threshold.
CLOCK_FAIL The clock is abnormal. There is a failure preventing your device from
PORT_DOWN Outer Ethernet port is
down.
FUNCTION_FAIL All RU paths are disabled. There is a failure preventing your device from
OVER_POWER RU output power has
exceeded the normal
range.
TOD_MSG_MISSED TOD message is not
received from GPSR.
There is a temporary process alert but your device is
still functioning correctly. No action is needed and the
alert should clear itself. If the alert persists please see
the troubleshooting section of the user guide.
There is a temporary disk usage alert but your device
is still functioning correctly. This alert should clear
itself. If the alert persists for a long time please check
the number of users in the "Connected Devices" tab
and see the capacity section of the user guide.
There is a temporary memory usage alert but your
device is still functioning correctly. This alert should
clear itself. If the alert persists for a long time please
check the number of users in the "Connected Devices"
tab and see the capacity section of the user guide.
There is a temporary CPU load alert but your device is
still functioning correctly. This alert sho uld cl ear itse lf.
If the alert persists for a long time please check the
number of users in the "Connected Devices" tab and
see the capacity section of the user guide.
functioning correctly.
If you are using GPS, please ensure that the GPS
antenna is installed in a location near the window. If
you are not able to receive GPS information after
repositioning the antenna, you may need to purchase
and install an external outdoor antenna. You may
need to check your firewall settings as defined in the
user guide.
If you still experience an issue after checking your
GPS installation, please see the troubleshooting
section of the user guide.
The port connecting your device to the internet is not
operational. Please check that your Ethernet cable is
connected correctly and the switch, router, or internet
gateway is powered-on.
functioning correctly. Please restart your device. If the
problem still persists, please contact Verizon Wireless
Customer Care.
There is a failure preventing your device from
functioning correctly. Please conta ct Verizon Wireless
Customer Care.
There is a failure preventing your device from
functioning correctly. Please verify if the GPS antenna
is properly installed. Please contact Verizon Wireless
Customer Care if the issue is not resolved.
Verizon 4G LTE Network Extender User Guide v1.3 26
©Samsung
Page 36

Chapter 5 Troubleshooting
Alarm
Description
Troubleshooting
need to purchase and install an outdoor GPS antenna.
LOCKING_FAIL No GPS signal can be
received.
The device is not receiving GPS information. Please
ensure that the GPS antenna is installed in a location
near the window. If you are not able to receive GPS
information after repositioning the antenna, you may
need to purchase and install an external outdoor
antenna. Please see the GPS outdoor antenna section
of the user guide.
FUNCTION_FAIL GPSR module failure due
to e.g. self test failure,
power failure, EPC
(Electronic Frequency
Control) exceeding normal
The device is attempting to receive GPS information. If
the issue persists for more than one hour, please
ensure that the GPS antenna is installed in a location
near the window. If you are not able to receive GPS
information after repositioning the antenna, you may
operation range,
OCXO/TCXO failure, etc.
Please see the GPS outdoor antenna section of the
user guide.
FREQUENCY_
HOLDOVER_EXCEED
GPS signal has been lost
for 24 hours.
The device has lost GPS signal for 24 hours and can
no longer provide service. Please ensure that the GPS
antenna is installed in a location near the window. If
you are not able to receive GPS information after
repositioning the antenna, you may need to purchase
and install an external outdoor antenna. Please see
the GPS outdoor antenna section of the user guide.
HOLDOVER_EXCEED GPS signal has been lost. The device has lost GPS signal can no longer provide
service. Please ensure that the GPS antenna is
installed in a location near the window. If you are not
able to receive GPS information after repositioning the
antenna, you may need to purchase and install an
external outdoor antenna. Please see the GPS
outdoor antenna section of the user guide.
TEMPERATURE_HIGH Temperature has
exceeded a threshold.
Your device is over-heating. Please locate the unit in
an area with an ambient temperature between 0-50
degrees Celsius inline with the user guide.
SERVICE_OFF Serv ice cann ot be
provided due to abnormal
service condition.
The Network Extender is currently not in service.
Please check the System Status, System History, GPS
Status or any other alerts to determine if the unit is in
the process of starting up or if there is any other
condition preventing it from coming into service.
MME_
COMMUNICATION_
FAIL
The 4G Network Extender
cannot communicate with
backend servers.
The Network Extender cannot communicate with
Verizon’s Network. Please check the LAN/Firewall
settings, connectivity status and available bandwidth to
see if any LAN or internet issue may be preventing the
unit from communicating with backend servers. If the
problem persists, please contact Verizon Wireless
Customer Service.
Verizon 4G LTE Network Extender User Guide v1.3 27
©Samsung
Page 37

Appendix Acronyms
AC Alternating Current
B/H Backhaul
CPU Central Processing Unit
CSG Closed Subscriber Group
DC Direct Current
DHCP Dynamic Host Configuration Protocol
DNS Domain Name System
ESP Enhanced Security Payload Protocol
FCC Federal Communications Commission
FQDNs Fully Qualified Domain Names
GPS Global Positioning System
GPSR GPS Receiver
HD High Definition
HTTP HyperText Transport Protocol
ID Identifier
IP Internet Protocol
IPSEC Internet Protocol Security - System of Protocols
ISP Internet Service Provider
LAN Local Area Network
LCD Liquid Crystal Display
LED Light Emitting Diode
LTE Long Term Evolution
MAC Media Access Control
MTU Maximum Transmission Unit
NAT Network Address Translator
PAT Port Address Translation
RF Radio Frequency
RU Radio Unit
SeGW Security Gateway
SIM Subscriber Identity Module
TCP Transmission Control Protocol
TCXO Temperature Controlled Oscillator
TOD Time Of Day
UDP User Datagram Protocol
Verizon 4G LTE Network Extender User Guide v1.3 28
©Samsung
Page 38

Verizon 4G LTE Network Extender
User Guide
©2016 Samsung Electronics Co., Ltd.
All rights reserved.
Document Version 1.3
 Loading...