

Page 1
Translation of the original manual
compiled: 20.04.16
51026_51029_BA_en_Version_05
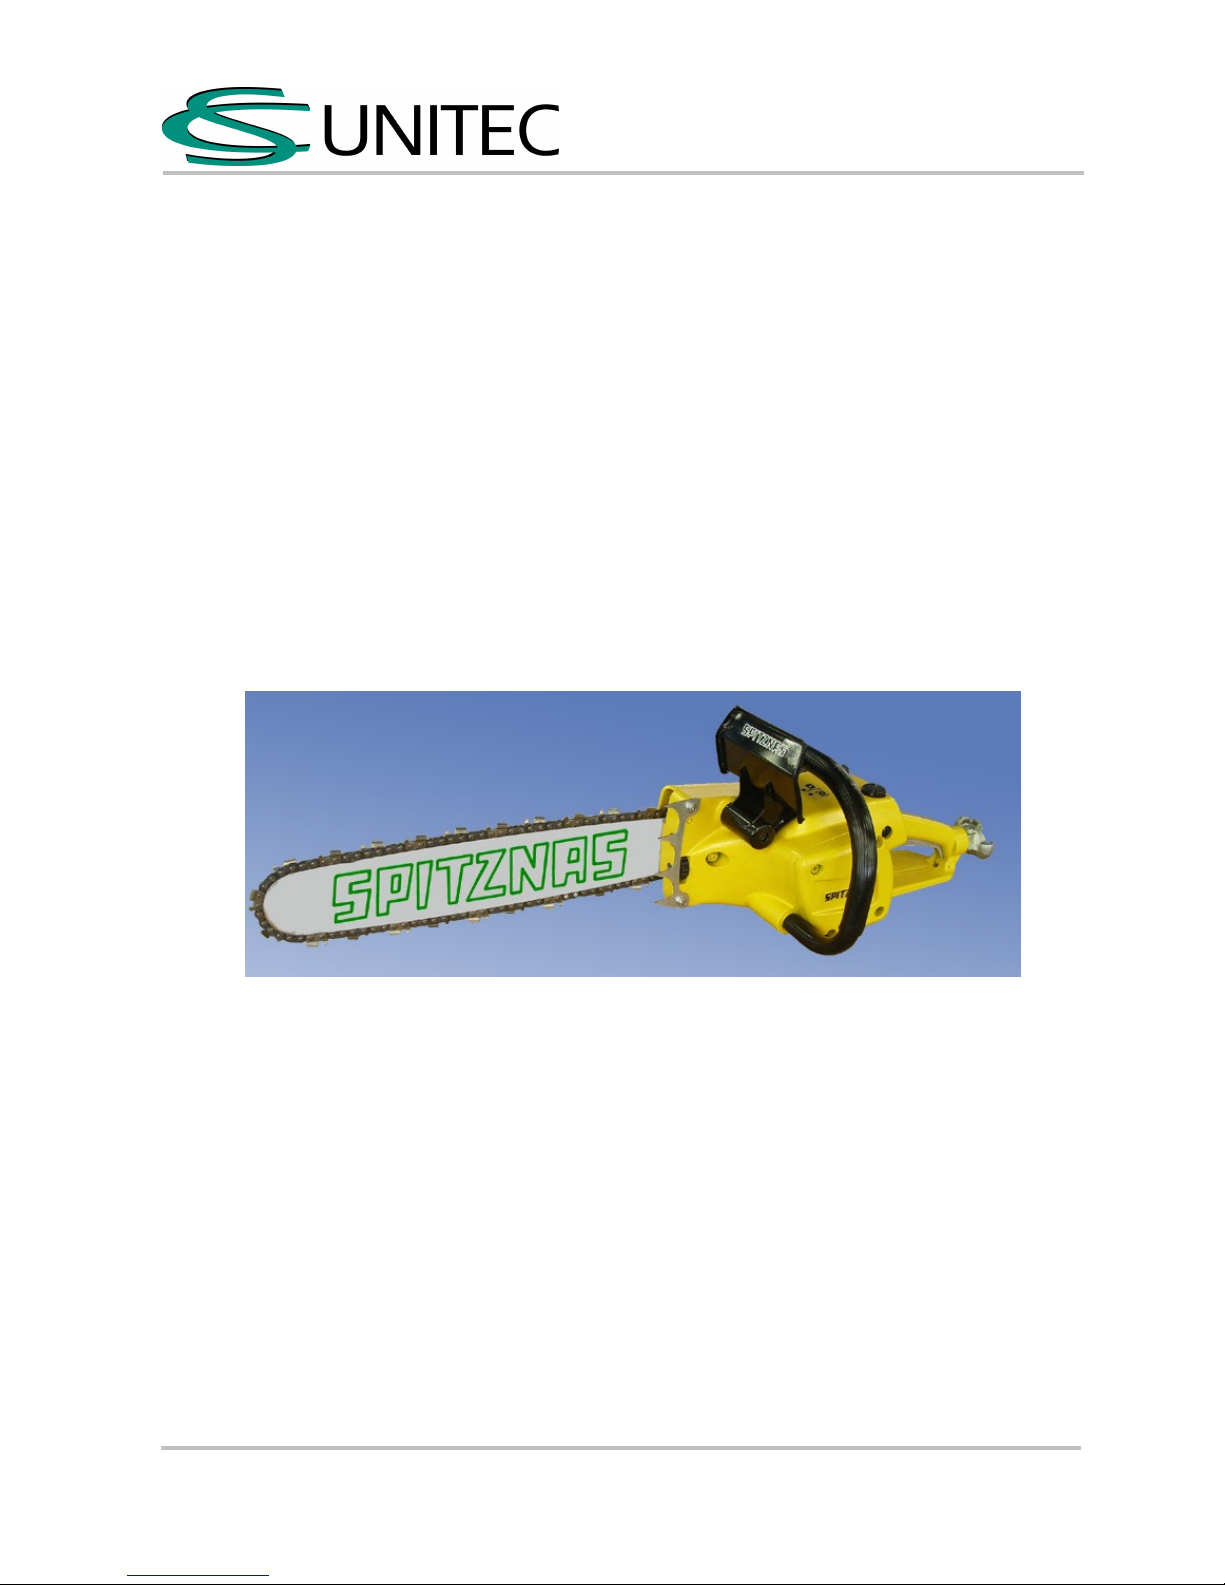
Pneumatic
Chain Saw
Type 5 1026
5 1027
5 1028
5 1029
Tech. Doc. No. 519
Illustration can differ from the original
Operation and
Maintenance Manual
CS Unitec, Inc. • Toll-free: 800-700-5919 • Ph: 1-203-853-9522 • Email: info@csunitec.com • www.csunitec.com
Page 2
P n e u m a t i c C h ai n Saw
5 1 0 26 – 5 1029
51026_51029_BA_en_Version_05
Page 1 of 34
Contents
Page
Technical Specification
2
Main Features 2-3
Cutting Sets 4
Labelling 4
Use 4
Signal Word and Symbol definition 5
Employer‘s Obligations 6
Operator’s Obligations 6
Safety Instructions 7-12
Danger Zones 13
Safety Instructions for the Work Place 13-14
Safety Instructions for the Transport 14
Operation Instruction 14-17
Maintenance and Upkeep 17-27
ChainType 28-29
Safety Assembly Parts 30
Spare Parts and Accessories 30
Troubleshooting 31
Disassembly- Re-assembly 31
Environmental Regulations 31
Storage 31
Disposal 31
Miscellaneous 32-33
Declaration of Conformity 34
CS Unitec, Inc. • Toll-free: 800-700-5919 • Ph: 1-203-853-9522 • Email: info@csunitec.com • www.csunitec.com
Translation of the
original manual
compiled: 20.04.16
Page 3

P n e u m a t i c C h ai n Saw
5 1 0 26 – 5 1029
51026_51029_BA_en_Version_05
Page 2 of 34
Technical Specification
Type
5 1026 – 5 1028 5 1029 0010
Operating pressure 6 bar
Housing material Aluminium Aluminium coated and Zamak
Chain bar length, usable 40 cm
Air consumption 2.9 m³/ min
Capacity 3 kW
Motor speed 6500 1/min
Max. chain speed 21 m/s
Pneumatic connection R 3/4 “ i
Min. ID of hose 15 mm
Weight without bar and chain 8.5 kg 9.5 kg
Number of teeth of the chain wheel 8
Chain braking time < 0.12 Sec.
Noise pressure level 102.6 db(A)
Noise power level 113.7 db(A)
Vibration (acc. to ISO 22867) < 2.5 m/s²
ATEX classification
- II 2 G c T5 - I M 2 c T5
Main Features
5 1026 xxxx Cutting of wood an wooden objects
5 1027 xxxx Cutting of plastic with water cooling
(4 l/ min water at 3 bar, Ø water hose, inside. min. 7 mm)
5 1028 xxxx Type for under water use
5 1029 xxxx Use in underground coal mining
Attention!
The last four digits of the type description with XXXX refer to the different cutting sets respectively to
the usable bar lengths.
CS Unitec, Inc. • Toll-free: 800-700-5919 • Ph: 1-203-853-9522 • Email: info@csunitec.com • www.csunitec.com
Translation of the original manual
compiled: 20.04.16
Page 4

P n e u m a t i c C h ai n Saw
5 1 0 26 – 5 1029
51026_51029_BA_en_Version_05
Page 3 of 34
5 1026 00 Standard
5 1027 00 with water cooling
5 1028 00 with exhaust duct underneath the saw
5 1029 00 like the standard saw, but coated
CS Unitec, Inc. • Toll-free: 800-700-5919 • Ph: 1-203-853-9522 • Email: info@csunitec.com • www.csunitec.com
Translation of the original manual
compiled: 20.04.16
Page 5
P n e u m a t i c C h ai n Saw
5 1 0 26 – 5 1029
51026_51029_BA_en_Version_05
Page 4 of 34
Cutting Sets
Type Bar length Chain pitch
X XXXX 0070 27 cm
0.404”
X XXXX 0010
43 cm
X XXXX 0050 63 cm
X XXXX 0060 73 cm
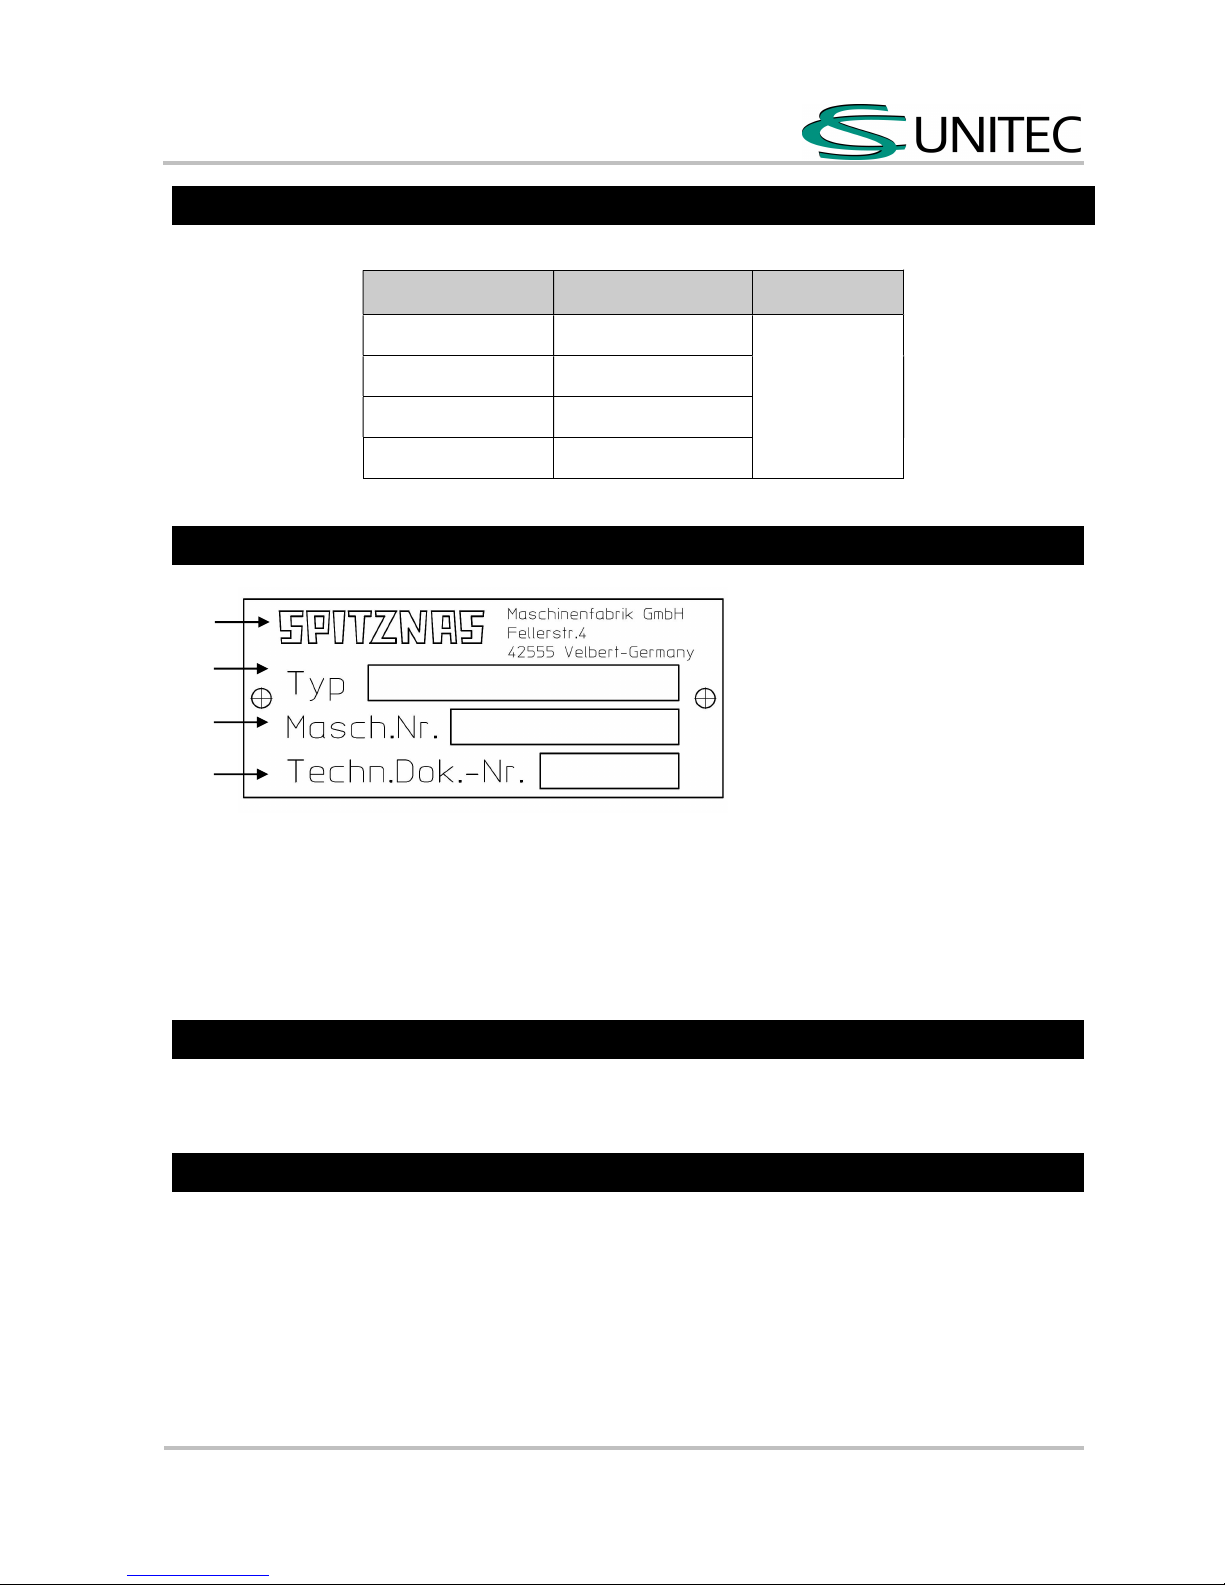
Labelling
1
2
3
4
1 – Name and adress of the company
2 – Type description
3 – Description of the series (the first two digits refer to the year of manufacturing and the rest
refers to the series)
4 – Indication of the technical ATEX document number
Intended Use
Cutting of wood and plastics in dry, wet and explosive areas (depending on the type and
classification)
Improper Use
Any use deviating from the intended use as described is considered to be improper use.
Working without personal protection equipment.
Operating the machine in an explosive area, for which the machine is not approved.
CS Unitec, Inc. • Toll-free: 800-700-5919 • Ph: 1-203-853-9522 • Email: info@csunitec.com • www.csunitec.com
Translation of the original manual
compiled: 20.04.16
Page 6
P n e u m a t i c C h ai n Saw
5 1 0 26 – 5 1029
51026_51029_BA_en_Version_05
Page 5 of 34
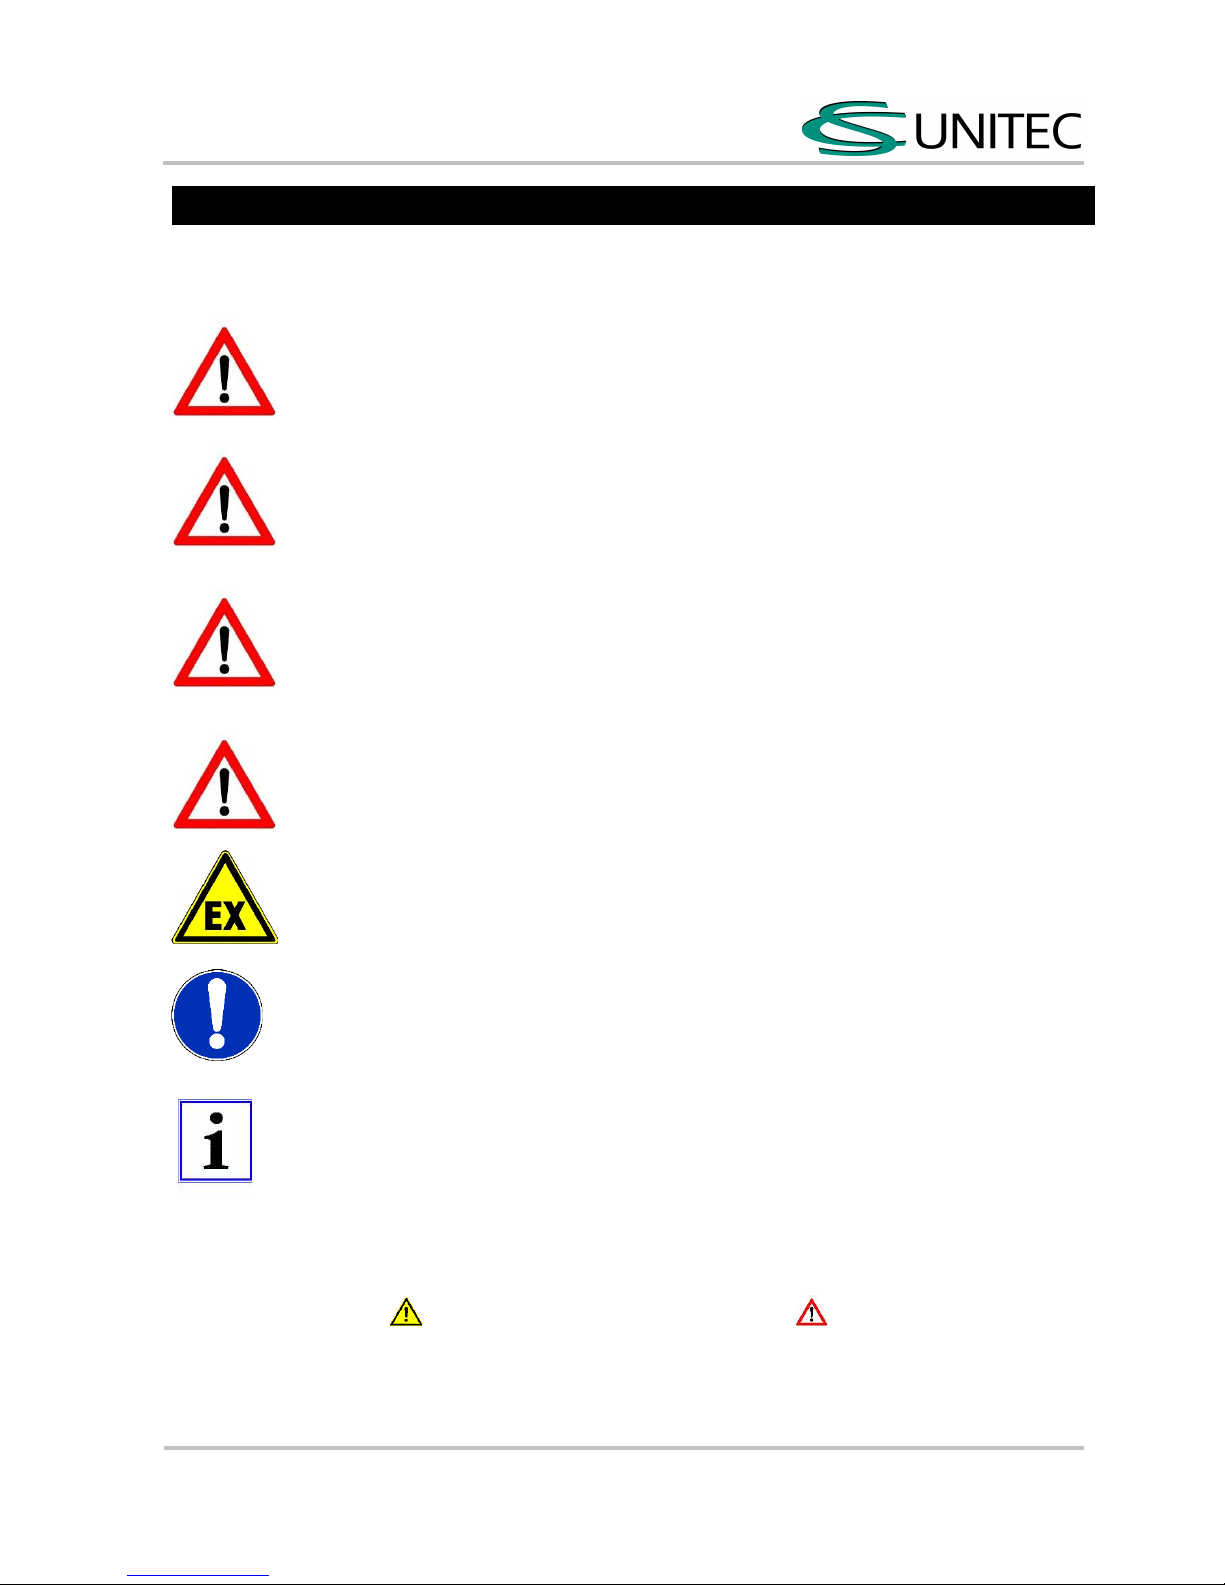
Signal Word and Symbol Definition
The signal words and symbols used in the technical documentation (safety instructions, operating
booklet, etc.) have the following meaning:
DANGER
Indicates an immediate danger, which causes serious injuries or even death,
if not avoided.
WARNING
Indicates a threatening danger, which can cause serious injuries or even
death, if not avoided.
CAUTION
Indicates a danger or unsafe procedure which can cause injuries to a person
or material damages, if not avoided.
Notice
Indicates a potentially dangerous situation which can cause damage to the
product or its surroundings, if not avoided.
ACHTUNG – Danger of explosion
Complementary regulations and instructions apply in explosive areas.
Observe the safety instructions of the employer as well.
NOTICE
Gives recommendations and important hints for handling the product.
IMPORTANT
Indicates tips and other particularly useful information.
REMARK:
In each case the symbol used cannot replace the safety text. The text must always be fully read. In
some cases other symbols will be used with the signal words.
The normative symbol was replaced by an informative symbol , in order to increase the
attention.
CS Unitec, Inc. • Toll-free: 800-700-5919 • Ph: 1-203-853-9522 • Email: info@csunitec.com • www.csunitec.com
Translation of the original manual
compiled: 20.04.16
Page 7

P n e u m a t i c C h a i n S a w
5 1 0 26 – 5 1 0 2 9
51026_51029_BA_en_Version_05
Page 6 of 34
Owner Obligations
Generally, the machine operator is responsible for correct conditions/ operation of the machine and
adherence to the safety regulations. The machine is built according to the level of technology and
the recognized technical safety regulations. However there is still a risk of accidents to the operator
or third parties or damage to the machine or other objects.
All current regulations and specifications which apply to the site of operation in regards to accident
prevention, installation of electrical and mechanical systems as well as radio interference must be
observed.
IMPORTANT
The operator must make sure that…
Assessment of the specific risks, which can occur due to any use of the machine,
was done
the function of the safety equipment is regularly checked.
the safety symbols and safety notes on the machine/device and the operating instruction booklet
are observed.
the safety instructions and the operating instruction booklet are available completely and in
legible condition on site with the machine.
The operator is obliged to only allow personnel to work on the machine who…
are familiar with the basic work environment safety rules and accident preventing regulations
and who have have been instructed in the correct use of the machine.
have read and understood the safety and warning notes in the operating instruction booklet as
well as all other documentation pertaining to the machine.
have been tested at regular intervals in regards to their safety-conscious operation of the
machine.
Safety-conscious operation
Additionally to the safety instructions listed in this booklet and to the intended use, the following
safety instructions are valid:
Accident prevention instructions, safety and operation regulations
Explosion protection directives
Safety rules for handling dangerous substances
Standards and laws being effective
Operator Obligations
All persons who are assigned to work with the machine are obligated to:
- always pay attention to the basic safety and accident preventing regulations.
- always read and follow the safety and warning notes in the operating instruction booklet.
CS Unitec, Inc. • Toll-free: 800-700-5919 • Ph: 1-203-853-9522 • Email: info@csunitec.com • www.csunitec.com
Translation of the original manual
compiled: 20.04.16
Page 8
P n e u m a t i c C h a i n S a w
5 1 0 26 – 5 1 0 2 9
51026_51029_BA_en_Version_05
Page 7 of 34
Safety Instructions
Any power tool can be dangerous.
Please follow these simple procedures.
They are for your protection.
Special safety measures are necessary at working with the chain saw.
Working with it is a lot faster than with an axe or hand saw and because you
are working with a high speed chain.
The clothing has to be appropriate and shall not hinder.
Wear tight clothes with cut protection inlay - insert-combined suit, no working
suit!
There should be no clothing, no scarf, no tie, no jewels – that can possibly get
into wood or undergrowth. Take care of long hair (hair-net)!
Wear tight and non-slip gloves -made of chromium leather, preferably!
Wear safety boots with maximal grip and steel cap!
Use a hard hat if parts could fall down!
Wear ear protection!
Wear safety goggles!
Wear personal noise protection – like e. g. ear flaps!
Consider sufficient cooling and lubrication of chain and bar.
Observe the accident prevention regulations of the employer’s liability insurance association.
Who is working with such a saw for the first time, should be instructed by the seller how to
handle it or should take part at a special course of instruction.
Minors are not allowed to work with such a saw except for juveniles over the age of 16, who get
trained under supervision.
Keep children, animals and viewers away!
The user is reported for accidents or risks, which can be against other people or their property!
Do only give the motor saw to people who know the model and its handling and do always give
the operating instructions to them.
CS Unitec, Inc. • Toll-free: 800-700-5919 • Ph: 1-203-853-9522 • Email: info@csunitec.com • www.csunitec.com
Translation of the original manual
compiled: 20.04.16
Page 9

P n e u m a t i c C h a i n S a w
5 1 0 26 – 5 1 0 2 9
51026_51029_BA_en_Version_05
Page 8 of 34
Who is working with a motor saw has to be fit
- awake, healthy and in good shape
- has to lodge working breaks in good time
- is not allowed to work with such a saw while you are under the influence of
- medication, alcohol, or other drugs, because that can affect the reaction.
With hear protecting that has been put on, you have to be attentive and careful, because the
recognizing of dangerous sounds (screaming, signal sounds, etc.) is disturbed.
Do not work alone!
You have to keep a position where other people can hear you, if an accident happens and you
start screaming.
Do only use attachments, which have been delivered by SPITZNAS or have been explicitly
released for the attaching!
Other attachments are not allowed to be used, because they could lead to bigger dangers.
SPITZNAS takes out any liability for person- and property damage, in which use of not
approved attachments has occurred.
Before starting the saw
Check if the saw is in safe condition.
Observe the corresponding chapter in the operating manual:
The guide (bar) has to be fixed properly
Chain has to be tensioned properly
Valve lever and valve lever latch have to be fingertip easy.
Valve lever has to rebound into the neutral position by itself.
Do not make changes concerning the operating and safety equipment!
Keep the handles clean and dry from resin – for the safe guiding of the motor saw!
Correct operation pressure (see technical specifications)
Chain-break must be in proper condition
When working in explosive areas, pay attention to proper lubricating and cooling of the
chain and the bar.
The chain saw should only be used in totally safe condition (Danger of accident).
Starting the chain saw
The chain saw is only used by one person. Do not tolerate other people in the working area!
Do always hold the saw tight in both of your hands for the proper guiding.
The right hand is holding the rear handle (even left-hander) - pipe handle and handle should be hold
tight with the thumb.
CS Unitec, Inc. • Toll-free: 800-700-5919 • Ph: 1-203-853-9522 • Email: info@csunitec.com • www.csunitec.com
Translation of the original manual
compiled: 20.04.16
Page 10
P n e u m a t i c C h a i n S a w
5 1 0 26 – 5 1 0 2 9
51026_51029_BA_en_Version_05
Page 9 of 34
Make sure that you are standing very solidly.
Put the saw under full power into the cut and place the spiked strip fixed- only then start to cut.
Defend dangers in general
When you have put on the ear protection, you need to be very attentive and careful because
you cannot recognize dangers soon enough (sounds like screams, signals etc.)
If there is a danger, immediately switch off the motor.
Do not put parts of the body into the enlarged sawing range of the chain.
Pull the saw out of wood only if the chain is still working.
Never work without a stop. The saw can possibly pull the worker to the front.
Work attentively and quietly,
- only with good light and clear sight
- do not get others in danger,
- attentive working is important.
Use a guide which is as short as possible
Be careful at slickness,
when wet, snow, ice, on slopes or uneven off-road,
on fresh peeled wood (bark).
When you work in higher altitude, a lift working platform should always be used! Never
work on a ladder!
Never work in unsolid places!
Never work above shoulder level!
Never work with only one hand!
Chain saw shall only be used for cutting, not for lifting up or
scooping away cut-off pieces.
Only wood or wooden things shall be cut.
Do not let foreign substances touch the saw. Stones, nails, etc. can sling away and
can damage the chain and the chain saw can possibly bound up!
CS Unitec, Inc. • Toll-free: 800-700-5919 • Ph: 1-203-853-9522 • Email: info@csunitec.com • www.csunitec.com
Translation of the original manual
compiled: 20.04.16
Page 11
P n e u m a t i c C h a i n S a w
5 1 0 26 – 5 1 0 2 9
51026_51029_BA_en_Version_05
Page 10 of 34
At the slope do always stand at the top or at the side of the log or of the laying tree.
Take care of the down-rolling logs!
Danger of stumbling!
You can fall over roots, stumps of trees or ditches:
Be careful when you cut spilling wood. There is a danger of injuring with spilling pieces of
wood.
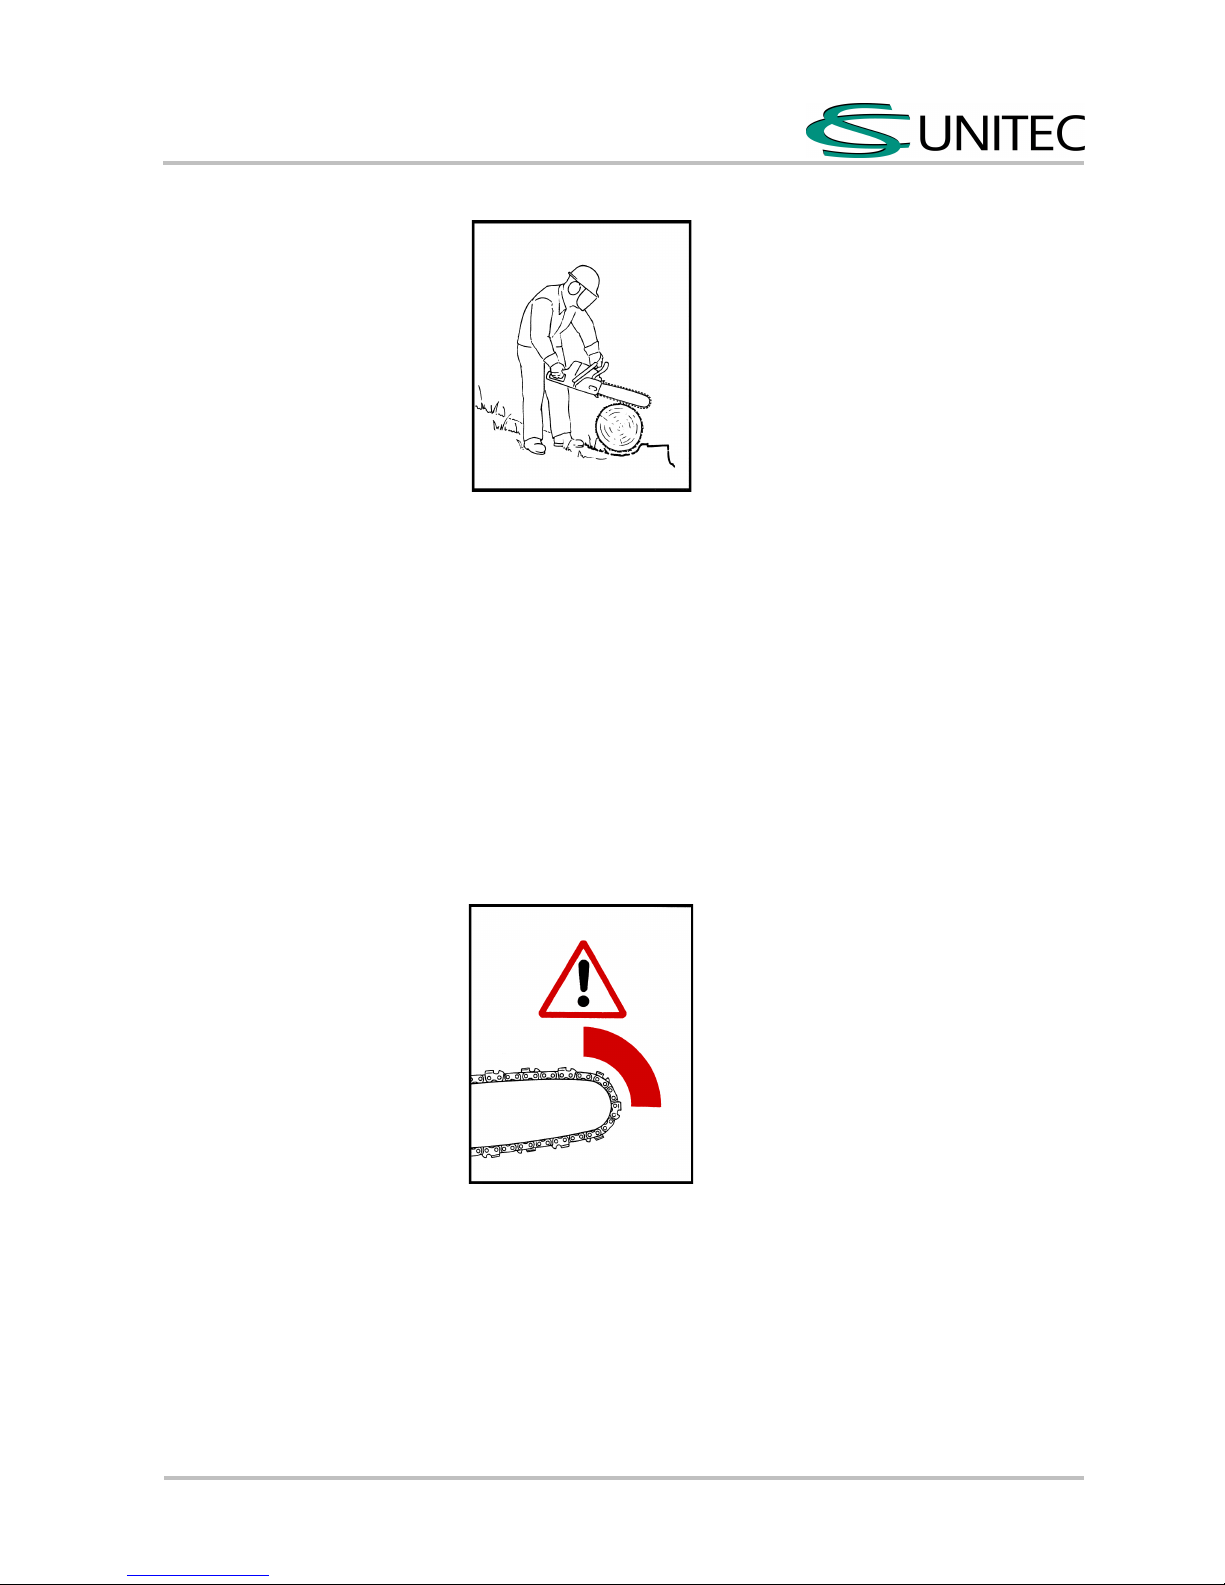
Danger because of kickback! Kickback can lead to deadly cutting injury!
If a kickback happens, the saw suddenly can sling towards the user, e.g.
if the chain hits unintentionally wood or a hard object in the area around the upper
quarter of the bar nose.
If the chain on the bar nose gets stuck in the cut.
Reducing danger of kickback
Hold the saw tightly with both hands and safe grip
Do only cut with full power
Do always watch the bar nose
Do not cut with the bar nose
Do not bend forward so far
Do not cut above shoulder level
Do only put the bar very carefully in the cut
Do only "plunge", if you are familiar with that working
procedure
CS Unitec, Inc. • Toll-free: 800-700-5919 • Ph: 1-203-853-9522 • Email: info@csunitec.com
• www.csunitec.com
Translation of the original manual
compiled: 20.04.16
Page 12

P n e u m a t i c C h a i n S a w
5 1 0 26 – 5 1 0 2 9
51026_51029_BA_en_Version_05
Page 11 of 34
Pay attention to the position of the trunk and to the forces which close the cutting slot and
can jam the chain
Do only work with an appropriately sharpened and tensioned chain. The clearance of the depth
limiter should not be too large.
Decreasing the danger of accidents
Quick-stop chain-brake:
With this the danger of injuring can be reduced in certain situations, but the kickback itself
cannot be avoided. When releasing the chain-brake the chain comes to standstill in a split
second as described in paragraph „Chain-break“.
Cutting set:
Kickback arms, properly sharpened chains as well as a bar with a little bar head
decrease danger of kickback.
It is a lot safer to avoid kickback with clever and proper work.
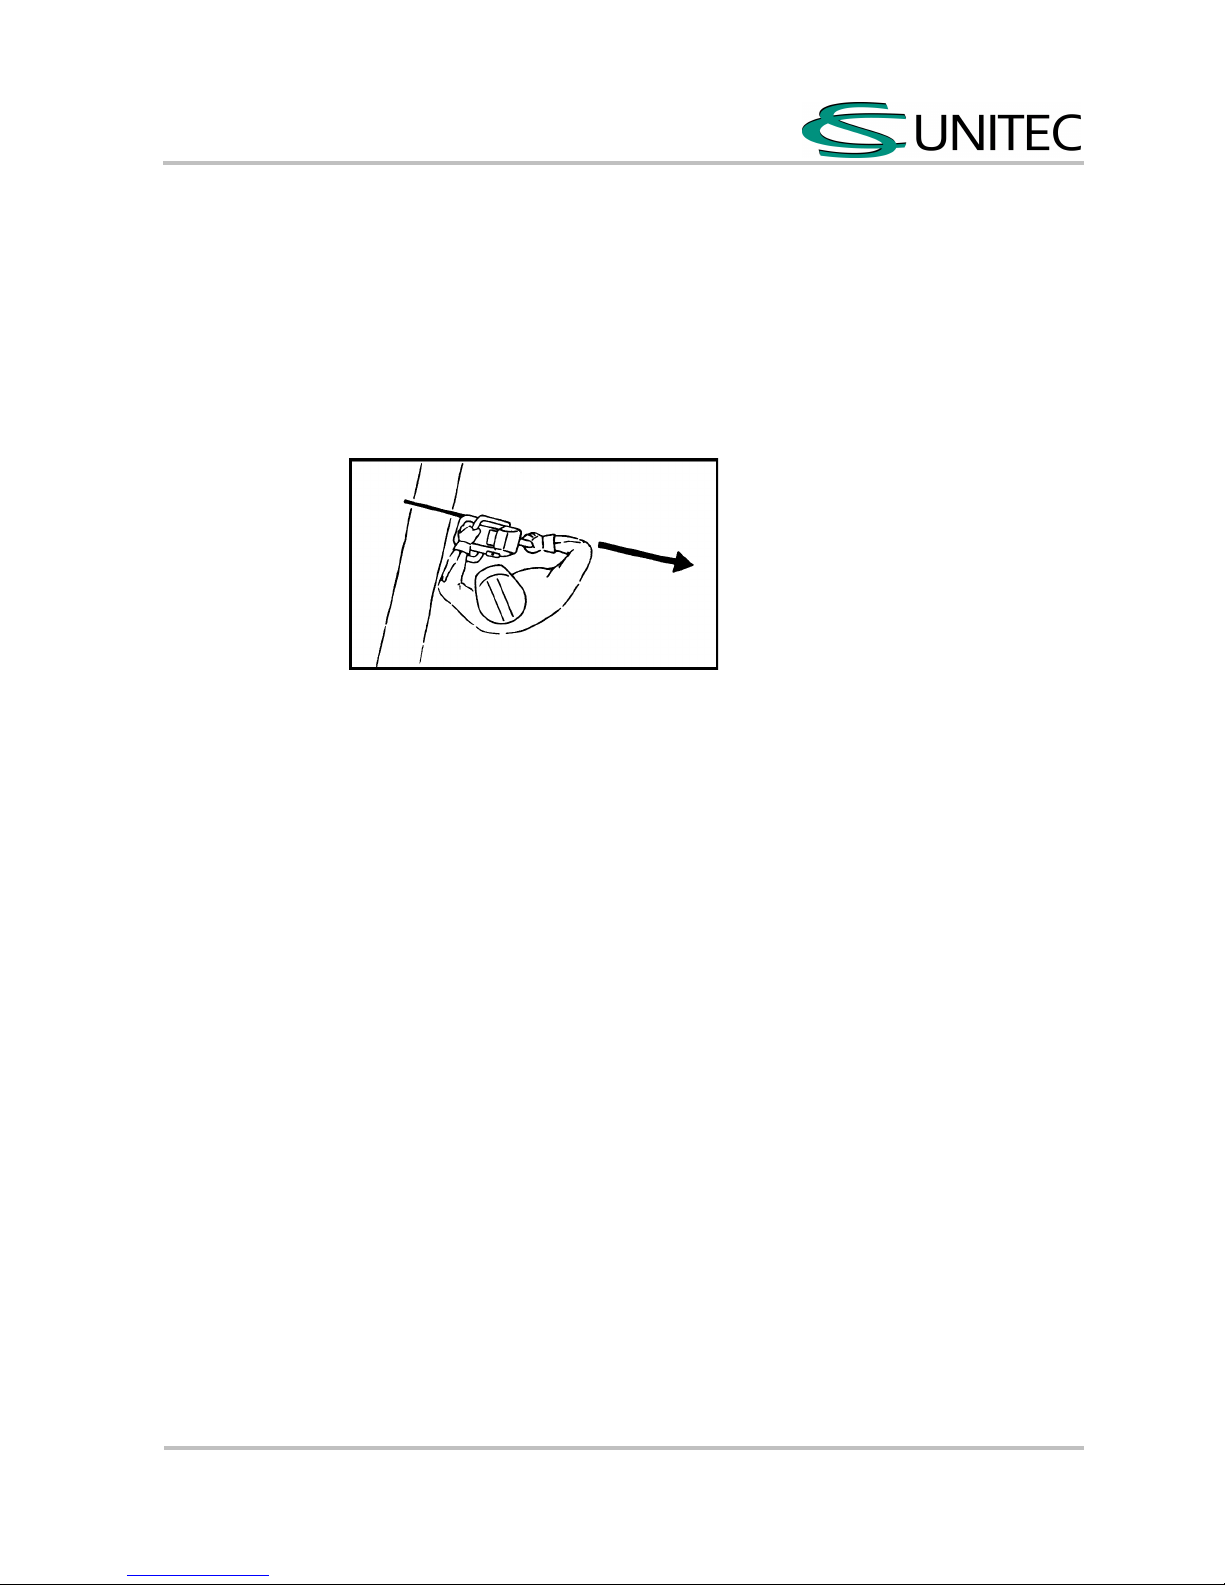
Avoid drawing in and rebound!
A = To draw in
If at the cutting with the subside of the bar (forehand-cut), the chain jams or touches a tough
object in the wood, the chain saw can be abruptly pulled towards to the trunk.
The spiked strip shall always be fixed safely!
CS Unitec, Inc. • Toll-free: 800-700-5919 • Ph: 1-203-853-9522 • Email: info@csunitec.com • www.csunitec.com
Translation of the original manual
compiled: 20.04.16
Page 13

P n e u m a t i c C h a i n S a w
5 1 0 26 – 5 1 0 2 9
51026_51029_BA_en_Version_05
Page 12 of 34
B = Rebound
The chain saw can be pushed back towards the operator, if during cutting with the upper side of
the bar (backhand-cut) the chain touches a tough object in the wood.
Danger Zones
Operational
condition
---------------Life phase
Normal function Malfunction Improper use Expected use
Transport Transport of the
machine in an
inoperable
condition
Dropping the
machine
Transport of the
machine in an
operable condition
unknown
Start-up
Operation
Operating the
machine with
designated device
unknown unknown Working without
device
Operation Machine only
works with
actuated valve
Machine runs
without actuated
valve
Valve is blocked in
actuated condition
unknown
Machine moves the
tool
Tool blocks unknown unknown
Maintenance Operation at a
maintenance unit
Breakdown of the
machine
unknown unknown
CS Unitec, Inc. • Toll-free: 800-700-5919 • Ph: 1-203-853-9522 • Email: info@csunitec.com • www.csunitec.com
Translation of the original manual
compiled: 20.04.16
Page 14

P n e u m a t i c C h a i n S a w
5 1 0 26 – 5 1 0 2 9
51026_51029_BA_en_Version_05
Page 13 of 34
Safety Instructions for Prevention of Workplace Hazards
WARNING
The following applies unless otherwise stated in the machine’s
operating instructions booklet:
The machine is not insulated to protect against an electrical power surge.
CAUTION– Risk of injury!
Hands can be squeezed, entangled or otherwise hurt. Keep hands away
from areas being labeled with this warning symbol.
Caution – risk of injury!
Remove all sources of danger which could lead to slipping, tripping or falling
(e.g. slippery surface, hoses, cables).
Keep the work area clean and dry
PROHIBITION
Eating, drinking and smoking are forbidden during operation.
ATTENTION – Danger of explosion!
Only use the machine according to the intended use.
The machine is designed for the use in areas exposed to explosion hazards as
well. Please observe:
The generation of heat and possibly the generation of sparks is
characteristic for cutting work.
Work places nearby should always be protected from flying sparks, e. g.
by movable walls or curtains.
Flammable and explosive substances have to be removed from the work
area before starting the work.
Among others, this applies for dust deposits, cardboard, packing, textile,
wood and splints, but for flammable fluids and gas as well.
Make sure there is adequate lighting.
Be extra careful in unfamiliar surroundings. There is a risk of hidden hazards such as electric lines
or other supply lines.
Make sure when operating the machine that no electrical cables, gas pipes or similar equipment
could be damaged.
Use suitable and personal protective equipment.
CS Unitec, Inc. • Toll-free: 800-700-5919 • Ph: 1-203-853-9522 • Email: info@csunitec.com • www.csunitec.com
Translation of the original manual
compiled: 20.04.16
Page 15

P n e u m a t i c C h a i n S a w
5 1 0 26 – 5 1 0 2 9
51026_51029_BA_en_Version_05
Page 14 of 34
Safety Instructions for Prevention of Transport Hazards
DANGER
Improper transport
Danger to life by parts falling down! Damage of the machine!
Never attach the machine to the connection line.
Do not work or stay under suspended loads.
NOTICE
Separate the machine from any external energy source before transportation.
Check that the machine is undamaged and in proper condition.
Always install chain protection – also for transports at short distances and for storage.
Only carry the chain saw at the handle pipe – guide bar pointing backwards!
When transporting in vehicles:
Prevent saw from tilting and from damages. When the chain saw is not used, it has to be stored in a
way that it does not endanger others.
Operation Instruction
Maintain the saw regularly. Make only maintenance and repairs that have been described in the
Operating Manual.
Let other work be done by SPITZNAS service. Only original SPITZNAS spare parts should be used.
Do not change anything at the chain saw. The safety could be endangered.
Disconnect from air supply
for checking tension of chain
for tensioning the chain
for changing the chain
for clearing a fault
Check the chain catcher,
Replace it, if damaged.
Pay attention to sharpening instructions for proper handling of chain and bar.
Keep chain in a perfect shape, properly sharpened and tensioned and lubricated.
Replace chain, guide and sprocket in due time.
Keep motor and chain lubricating oil only in correctly labelled and approved containers.
CS Unitec, Inc. • Toll-free: 800-700-5919 • Ph: 1-203-853-9522 • Email: info@csunitec.com • www.csunitec.com
Translation of the original manual
compiled: 20.04.16
Page 16

P n e u m a t i c C h a i n S a w
5 1 0 26 – 5 1 0 2 9
Translation of the original manual
compiled: 20.04.16
51026_51029_BA_en_Version_05
Page 15 of 34
ATTENTION!
In case of malfunction of the chain brake, stop chain saw immediately – Risk of injury!
Contact CS Unitec service!
Do not use the chain saw until this problem is not solved (see chapter „Chain brake“).
Assembling of bar and chain
Pitch of the chain has to be adjusted to spacing of the sprocket and the bar and the thickness of
drive link has to be adjusted to the width of the groove of the bar.
Turn-off nuts and remove cover.
Turn adjusting wheel to the left, until clamp nut (2) lies close to the left of housing recess.
Loosening the chain-brake:
Press hand protection (3) against the pipe handle.
Pull on protecting gloves. Put on the chain (starting at the bar nose).
CS Unitec, Inc. • Toll-free: 800-700-5919 • Ph: 1-203-853-9522 • Email: info@csunitec.com • www.csunitec.com
Page 17

P n e u m a t i c C h a i n S a w
5 1 0 26 – 5 1 0 2 9
51026_51029_BA_en_Version_05
Page 16 of 34
Put the guide bar over the screws (4). (The cutting edges have to face to the right) and put the fixing
bore (5) over the pin of the clamp nut. At the same time put the chain over the sprocket (6). Turn
adjusting screw (7) to the right, until the chain still hangs out a little bit and the noses of drive links are
put into bar groove.
Attach the cover back and tighten the nuts lightly by hand.
After this, adjust tension of chain. (Paragraph „Adjust tension of chain“)
Assembly of spiked strip
2 x screw M 6
at motor housing
Tensioning the saw chain
Adjust tension during operation:
Stop motor and disconnect it from air supply. Only then loosen the nuts (1)!
Lift bar nose and screw clamp nut (1) with a screwdriver to the right until the chain lies at
the underside of the bar. Go on lifting up the bar and tighten the nuts (1) very strongly.
Check chain tension
Stop the motor.
Put on protecting gloves!
The chain has to lie at the underside of the bar and it has to be pulled over the guide bar by hand
when the chain brake is released.
If necessary, adjust tension.
A new chain has to be adjusted more often than a chain which is already used for a longer period.
CS Unitec, Inc. • Toll-free: 800-700-5919 • Ph: 1-203-853-9522 • Email: info@csunitec.com • www.csunitec.com
Translation of the original manual
compiled: 20.04.16
Page 18

P n e u m a t i c C h a i n S a w
5 1 0 26 – 5 1 0 2 9
51026_51029_BA_en_Version_05
Page 17 of 34
Check chain tension more often – paragraph „During the operation“!
Maintenance and Upkeep
Basic Safety Instructions:
Caution
Skin exposure to hazardous dusts may cause severe dermatitis. Dust present
at the work place could be disturbed during the maintenance procedure and
inhaled.
Clean machine and work place before maintenance work.
NOTICE
Only use original SPITZNAS service tools, in order to avoid damage.
Make sure that the technical data according to the instruction manual has
been adhered to after all maintenance work.
PROHIBITION
Eating, drinking and smoking are forbidden during maintenance and repair
work.
WARNING
Maintenance and repair work on pneumatic equipment:
Air under pressure can cause severe injury.
Unpressurize the pneumatic equipment of the machine prior to maintenance
and repair work.
Replace hose lines regularly as a preventative measure, even when there is
no visible damage. (Pay attention to the manufacturer’s information)
CS Unitec, Inc. • Toll-free: 800-700-5919 • Ph: 1-203-853-9522 • Email: info@csunitec.com • www.csunitec.com
Translation of the original manual
compiled: 20.04.16
Page 19

P n e u m a t i c C h a i n S a w
5 1 0 26 – 5 1 0 2 9
51026_51029_BA_en_Version_05
Page 18 of 34
NOTICE
After completing maintenance and repair work and before restarting
production make sure that…
all materials, tools and other equipment which were required for maintenance
or repairs have been removed from the work area of the machine.
any fluid leaks have been removed.
all safety devices on the machine are functioning properly.
the oil level was checked.
fixtures of screw connections are checked.
any removed container covers, screens or filters have been re-assembled.
Inspection and maintenance can be done by the operator, disassembly and re-assembly of the
machine have to be executed by qualified staff only. Incorrect assembly can lead to danger of
accident for the operator and to defects on the machine.
ATTENTION
Parts can be damaged when falling down!
ATTENION
– Danger of explosion!
Generation of sparks during maintenance work !
Observe local safety instructions.
NOTICE
Avoid applying any force when disassembling and re-assembling the machine.
WARNING
Unintentional start of the machine. Risk of injury by moving assembly parts!
Prevent machine from unintentional starting .
Only work on the machine, when all lines are disconnected.
WARNING
Operating supplies being dangerous to health !
Risk of injury!
Observe legal regulations.
Take preventive measures for persons and environment.
WARNING
Hot surface
Risk of injury!
Let the machine cool down to ambient temperature.
WARNING
Improper lifting/ moving of heavy assembly groups or assembly parts.
Injury to persons and damage to material!
Use appropriate means of transport, hoisting devices and clamp devices for
moving heavy assembly groups or assembly parts.
CS Unitec, Inc. • Toll-free: 800-700-5919 • Ph: 1-203-853-9522 • Email: info@csunitec.com • www.csunitec.com
Translation of the original manual
compiled: 20.04.16
Page 20

P n e u m a t i c C h a i n S a w
5 1 0 26 – 5 1 0 2 9
51026_51029_BA_en_Version_05
Page 19 of 34
WARNING
Lacking stability
Squeezing of hands and feet!
Prevent machine/ parts from tilting, falling over or falling down during
re-assembly/ disassembly
NOTICE
Spitznas service is at your disposal for all maintenance, upkeep and assembly
work.
Service life and performance of the chain saw are determined by
a) Degree of air purity
b) Lubrication and maintenance
To a) Blow the air hose clear before connecting it to the saw. Install dirt and water separators
upstream of the saw, if it is not possible to prevent the formation of rust and water
condensation in the air distribution lines.
To b) The motor is lubricated by the lubricator installed in the handle. Fill the lubricator with resin-
and acid-free SAE 5W – SAE 10W lubricating oil. Thick flowing oil will clog the vanes and
affect the start-up and performance of the motor. Only proper maintenance can ensure
constant performance, reduction in wear and thus, a decrease in operating costs and an
increase in service life.
We therefore highly recommend installing service units upstream of the machine.
Observe the comments in the information sheet “Maintenance of Pneumatic Tools”!
Closed greased ball bearings must not be flushed.
After use, clean the saw and rinse it with light oil or provide alternate corrosion protection.
Regularly check and clean the air inlet screen.
In winter, or when using very moist air, an antifreeze lubricant, such as BP Energol AX 10,
Kilfrost or Kompranol should be used.
Replace wear parts – in particular the vanes – when necessary.
Vanes are considered worn, if their width is less than 16 mm.
Lubricating the saw chain is done automatically by the second lubricating system.
The oil tank situated in the motor housing, size approx. 250 ccm, has to be filled with chain saw oil
before starting. It contains oil for approx. 2 working hours. You can check, if oil is conveyed to the
chain, by holding running saw with the bar pointing downwards and, if adjustment is correct, an oil
trace will be clearly observed on a light coloured floor or paper.
Use machine oil with adhesive additive of a viscosity of 49-55 c ST (6.5 – 7.5 E) at 50°C (122 F).
CS Unitec, Inc. • Toll-free: 800-700-5919 • Ph: 1-203-853-9522 • Email: info@csunitec.com • www.csunitec.com
Translation of the original manual
compiled: 20.04.16
Page 21

P n e u m a t i c C h a i n S a w
5 1 0 26 – 5 1 0 2 9
51026_51029_BA_en_Version_05
Page 20 of 34
Filling in chain lubricating oil
- Clean the tank screw-cap and the area around, so that the tank cannot get dirty.
- Use a hopper for re-filling of motor oil and chain oil
- Avoid smoking and naked flame
Adjustment of chain lubrication
When having removed the locking screw item 25, you can see the adjusting screw item 23.
The oil delivery is reduced by tightening, when releasing the screw the oil delivery is increased.
In most of the cases, it will be sufficient to tighten or release the screw by 1/4 to 1/2 turn of a thread.
Attention!
Due to risk of injury, the oil adjustment is only done at standstill of the saw.
The oil reservoir has to be tight (pressure admission).
If the flow in the oil tank does not change, lubricating oil delivery can be interrupted.
Check chain lubrication. Clean the oil passages, possibly look for the SPITZNAS service.
Checking the chain lubrication
The chain always has to sling off little oil.
CS Unitec, Inc. • Toll-free: 800-700-5919 • Ph: 1-203-853-9522 • Email: info@csunitec.com • www.csunitec.com
Translation of the original manual
compiled: 20.04.16
Page 22

P n e u m a t i c C h a i n S a w
5 1 0 26 – 5 1 0 2 9
51026_51029_BA_en_Version_05
Page 21 of 34
Never work without chain lubrication! If the chain is working dryly, the cutting set can be destroyed
in short time.
Before starting the work always check chain lubrication and the oil level in the tank.
Every new chain needs a run-in period time of 2 to 3 minutes.
After running in, check chain tension and adjust it, if necessary.
Paragraph „Checking chain tension“!
Chain brake
Blocking the chain with the chain brake
When emergency
Hand guard to the bar nose- with the left hand- or automatically- by the kickback:
The chain gets blocked and stops
Releasing the chain brake:
Pull the hand guard to the pipe handle.
Tip: Before opening the handle valve (except for the function control) and before cutting,
the chain brake has to be released.
The chain brake works only, if no change will be made on the hand guard.
Controlling of function of chain brake
Every time before starting work: block the chain (hand guard against nose of the bar and open the
valve of the handle for a short time (max. 3 sec.) The chain should not run either. The hand guard has
to be clean and easy to move.
CS Unitec, Inc. • Toll-free: 800-700-5919 • Ph: 1-203-853-9522 • Email: info@csunitec.com • www.csunitec.com
Translation of the original manual
compiled: 20.04.16
Page 23

P n e u m a t i c C h a i n S a w
5 1 0 26 – 5 1 0 2 9
51026_51029_BA_en_Version_05
Page 22 of 34
Maintenance of chain brake
The chain brake is subjected to normal wear. For serving a good performance, it has to be maintained
by well trained personnel (e.g. service) at regular intervals:
Professional fulltime work every three months
Half-professional (Agriculture & Construction) twice a year
Hobby and free-time user once a year
Keeping the bar proper
Turn over the bar after every sharpening of the chain or replacing the chain to avoid wear
out on one side only especially at the return steering at the underside.
Clean regularly
1 = Oil inlet hole
2 = Oil outlet port
3 = Bar groove
During the first period of operation
Always pay attention to:
Opening of valve only with released chain brake. Opening of valve at blocked chain brake (chain is
stalled) causes in a short time damages on the chain drive (chain brake).
During operation
Check tension of chain more often!
A new chain has to be adjusted more often than one that is in use for longer time!
In cold state:
The chain must lean against the bottom side of the bar but it has to be still pulled around the bar by
hand. If necessary, adjust tension of the chain again. Paragraph “Tensioning the chain“!
With operating temperature:
The chain stretches and slacks. The drive links at the bottom side of the bar shall not come out of the
groove. Otherwise the chain can spring out.
Adjust tension of the chain, paragraph „Tensioning the chain“!
After work it is important to relieve tension! During cooling the chain shrinks. A chain which is not
relieved from tension can possibly damage the rotor shaft and the bearing.
After operation:
Relieve tension of chain, if it was tensioned during work at operation temperature.
CS Unitec, Inc. • Toll-free: 800-700-5919 • Ph: 1-203-853-9522 • Email: info@csunitec.com • www.csunitec.com
Translation of the original manual
compiled: 20.04.16
Page 24

P n e u m a t i c C h a i n S a w
5 1 0 26 – 5 1 0 2 9
51026_51029_BA_en_Version_05
Page 23 of 34
Chain shrinks during cooling. A chain which is not relieved from tension can possibly damage the
bearings.
A longer shut down of the machine:
Look at chapter „Storing the saw“
Sharpening the chain
Lowering the depth limiter
1. When sharpening your chain with a file holder, the clearance of the depth limiter must be checked
and adjusted, if necessary after sharpening.
2. Check the clearance of the depth limit at least after every third sharpening, and after every
sharpening when cutting frozen wood.
3. Place depth limiter gauge on cutting tooth. If depth limiter is too high, file off protruding part with a
flat file (Fig. 1)
4. Round off front edge of depth limiter. Its original shape must be preserved (Fig. 2).
General Filing Instructions
1. Place file holder on top of tooth and depth limiter.
2. First file all cutting teeth 3. Keep marks on file
on one side using an outward, holder parallel to chain.
cutting stroke. Then file the cutting
teeth on the other side.
Fig 2 Fig 1
angular
mark
Fi
le holder
file
CS Unitec, Inc. • Toll-free: 800-700-5919 • Ph: 1-203-853-9522 • Email: info@csunitec.com • www.csunitec.com
Translation of the original manual
compiled: 20.04.16
Page 25

P n e u m a t i c C h a i n S a w
5 1 0 26 – 5 1 0 2 9
51026_51029_BA_en_Version_05
Page 24 of 34
4. All cutting teeth must be of equal length 5. Always completely file away any damage
Areas on side plate and top of tooth.
The chain supplied with the saw is to be sharpened at the following angles:
Hold file holder at a 10° upward tilt
Chain Repair
Shortening and lengthening the chain
(Chain added between two left-hand cutting teeth)
(Two coupling links and one drive link between cutting teeth)
Most chain saws are assembled with one coupling link between a right-hand and a left-hand cutting
tooth, however there are also chains which are assembled differently due to their length (number of
drive links). If a chain must be shortened or lengthened, it is best to do so at this point. However do
not insert more than two coupling links between two cutting teeth.
Important: When shortening the chain, always remove the standard drive link and not the
safety link.
side plate
top of tooth
CS Unitec, Inc. • Toll-free: 800-700-5919 • Ph: 1-203-853-9522 • Email: info@csunitec.com • www.csunitec.com
Translation of the original manual
compiled: 20.04.16
Page 26

P n e u m a t i c C h a i n S a w
5 1 0 26 – 5 1 0 2 9
51026_51029_BA_en_Version_05
Page 25 of 34
Replacing broken drive links
(Grind off rivet heads if necessary)
Lay chain in the corresponding recess of the anvil with the cutting tooth always pointing
upward. Press out rivets
Installation of new parts
1. File the running surface of new 2. Place coupling link with
chain links so that they are the rivets on a flat surface.
the same as those of the worn links.
File back new cutting teeth so that
they correspond to the worn ones.
3. Join ends of chain. 4. Place side plate of coupling
link with mark facing up.
Flatten rivet heads with ball end of
hammer.
Rivet Removal
9 2550 0040
correct wrong
CS Unitec, Inc. • Toll-free: 800-700-5919 • Ph: 1-203-853-9522 • Email: info@csunitec.com • www.csunitec.com
Translation of the original manual
compiled: 20.04.16
Page 27

P n e u m a t i c C h a i n S a w
5 1 0 26 – 5 1 0 2 9
51026_51029_BA_en_Version_05
Page 26 of 34
Chain Bar
Important
:
Bars are designed only for the purpose of guiding the chain, and should
never be used as crowbars. Turning, twisting, and using the bar as a lever
will shorten its service life and void the warranty.
The bar of your chain saw needs as much care as the chain. The running surfaces must be flat
and smooth, and the groove must not be expanded. Inspect the groove as shown below:
Place straightedge against bar and If the chain tilts so that there
cutting tooth. If there is clearance is no clearance between the
between the straightedge and the bar, bar and the straightedge, the
the bar is OK. groove is worn.
Replace chain bar!
Bar Condition Cause
Worn groove
Wear due to long service.
Shallow groove, narrow running surface.
Chain tilted. Cutting teeth damaged on one
side. Drive link tongues worn.
Blueish areas on running surface
Groove compressed in the areas.
Friction of drive links has caused heating
and blue coloration.
clearance
clearance
no
Chain tilted
S
T
R
A
I
G
H
T
E
D
G
E
S
T
R
A
I
G
H
T
E
D
G
E
CS Unitec, Inc. • Toll-free: 800-700-5919 • Ph: 1-203-853-9522 • Email: info@csunitec.com • www.csunitec.com
Translation of the original manual
compiled: 20.04.16
Page 28

P n e u m a t i c C h a i n S a w
5 1 0 26 – 5 1 0 2 9
51026_51029_BA_en_Version_05
Page 27 of 34
Reinforcement chipped
Bar used improperly. Saw jammed in the cut.
Log slid over bar.
Running surface scored
Improper use caused extreme lateral
pressure on the running surface at the bar
nose. A common problem most often caused
by log slippage.
Cavities in bar
Impact of the chain behind the reinforced
area of the bar as a result of the insufficient
chain tension. Dull cutting teeth. Extreme
pressure applied to front area of the bar.
Sprocket
A damaged sprocket will ruin your chain. Replace a damaged sprocket immediately; the
cost is only ¼ that of a new chain. It is therefore uneconomical to run new chains on old sprockets.
Avoid the problems caused by damaged sprocket:
1. Check it each time you mount a new chain, and replace it if it shows signs of wear.
2. Always make sure that the chain tension is sufficient.
Maintaining the chain clean and sharpen.
Cutting without problems with the right sharpened chain.
A saw which was well sharpened pulls itself without problems and light pushing in the wood.
Do not work with a blunt or damaged chain. This leads to a high human exertion, not satisfying
result, and a high wear.
Cleaning and checking the chain - for cracks in the chain links or rivets.
Renew damaged and used chain parts and adjust them to the others and correct them.
Important!
Keep the following angles and dimensions. A chain with a wrong sharpening especially too low
depth limiter can lead to high kickback slope of the saw – danger of injury!
Choose sharpening tools which fit to the pitch of the chain – allowed pitches of the chain, see
„Technical Specification“.
The size for the pitch of the chain (e.g. 3/8“) is stamped in the area of the depth limiter of every
cutting tooth.
Do only use special chain files!
Other files do not fit in shape and cut
The assignment of the filing diameter does only work after the pitch of the chain.
Look at the table at the bottom of this chapter.
A = sharpening angle
B = front angle
CS Unitec, Inc. • Toll-free: 800-700-5919 • Ph: 1-203-853-9522 • Email: info@csunitec.com • www.csunitec.com
Translation of the original manual
compiled: 20.04.16
Page 29

P n e u m a t i c C h a i n S a w
5 1 0 26 – 5 1 0 2 9
51026_51029_BA_en_Version_05
Page 28 of 34
Chain Type
Type of chain Angle
A H
Rapid-Micro (RM) 30 85
Rapid-Super (RS) 30 60
Picco-Micro (OM/PMN) 30 85
Mould of teeth:
Micro = Half-chisel tooth
Super = Chisel tooth
Sprocket: 5 1026 7070
Pitch: 0,404“
Thickness of the drive wheels: 0,063“
Type Oregon 59 LG-61 E
The stipulated values for the angles A and B achieve automatically, if you use the stipulated files
and filing machines and if there is a right adjusting.
The angles have to be the same to all teeth of the chain. If the angles differ from each other: the
running of the chain is rough, uneven, and the wear gets tougher – this can go on to the break of the
chain.
As these requirements can be fulfilled only after enough and intense practicing:
Use a file holder!
Controlling the angle
Filing gauge * (look list) a versatile tool for the check of sharpening angle and front angle, the height
of the depth limiter, length of tooth, depth of the groove and for the cleaning of the groove and oil
inlet bores.
Proper sharpening
- if using the file holder and FG 1:
- the chain still stays on the guide bar
- if necessary fix the guide bar
- block the chain - hand guard to the front
- for going on pulling back the chain pull the hand guard to the hand pipe
- sharpen often (do not take away much) - for simple re-sharpening two to three file lines are
enough
- file only from the inner side to the outer
- the file only graps in the forward line - if you move at back lift it up.
- Guide the file:
Horizontal (in a 90°- angle to the side surface of the guide bar) corresponding to the
mentioned angles - of the markings on the file supports
- Do not file the connecting links and drive links
- Turn the files in regular spaces, to avoid wear on one side only
- Remove file burr with a piece of hard wood
- Check the angle with the file gauge.
All cutting theeth must have the same length.
CS Unitec, Inc. • Toll-free: 800-700-5919 • Ph: 1-203-853-9522 • Email: info@csunitec.com • www.csunitec.com
Translation of the original manual
compiled: 20.04.16
Page 30

P n e u m a t i c C h a i n S a w
5 1 0 26 – 5 1 0 2 9
51026_51029_BA_en_Version_05
Page 29 of 34
When the length of the teeth is unequal also the height of the teeth is different and that causes a
rough running of the chain and cracks in the chain.
File all cutting teeth to the length of the shortest. This can last very long so you better do this in a
work shop with an electric sharpening machine.
The following workings relate to normal operating conditions.
If the conditions get tougher (much dust coming up, very strongly resining wood, tropical wood, etc.)
and longer work time every day you have to shorten the mentioned intervals.
before starting work
after work or daily
weekly
monthly
at breakdown
at damage
if necessary
Complete saw
Visual Checking
(condition, tightness)
X
cleaning X
Valve lever,
Valve lever latch
Functional gauging X
Chain brake
Functional gauging X X
checking by SPITZNAS Service X
Lubricating oil tank
checking X X
Chain lubrication
checking X
Chain
checking, taking care for
sharpness
X X
checking chain tension X X
sharpening X
Guide bar
checking (wear, damage) X
cleaning and turning X X
deburring X
replacing X X
Sprocket
checking X
Accessible screws and nuts
(excepted adjusting screws)
tightening X
Chain catcher
checking X
replacing X
Storing the saw
(At operating breaks from about 3 months on)
- Take off chain and guide bar, clean them and spray them with protective oil.
- Clean the saw properly
- Fill the lubricating oil tank.
- Store the saw at a dry and safe place.
- Protect it from unauthorized use (e.g. from children).
CS Unitec, Inc. • Toll-free: 800-700-5919 • Ph: 1-203-853-9522 • Email: info@csunitec.com • www.csunitec.com
Translation of the original manual
compiled: 20.04.16
Page 31

P n e u m a t i c C h a i n S a w
5 1 0 26 – 5 1 0 2 9
51026_51029_BA_en_Version_05
Page 30 of 34
Safety Assembly Parts
Components Material number
Sprocket 5 1026 7070
Brake band 5 1026 1320
Brake spring 9 1804 0200
Front handle 5 1026 2110
Rear handle 5 1026 1910
5 1029 1910
Front handle protection 5 1026 6800
Spare Parts and Accessories
When ordering, please enter the type description. So you can make it easier buying a new cutting
set. Guide bar, chain and sprocket are wear parts. So if you buy these parts, it is enough to indicate
the description of the chain saw, part number and the description of the spare parts.
Only genuine Spitznas spare parts may be used. There is no warranty for damages and liability is
disclaimed, if non-original spare parts and accessories are used.
The repairing of the machine is allowed authorized expert companies only.
The accessories applicable with our machine are listed in our brochure.
ACCESSORIES
Length Application Order number
Chisel chain 27 cm wood 5 1007 9960
43 cm wood 5 1007 9930
63 cm wood 5 1007 9940
73 cm wood 5 1007 9970
Carbide-tipped saw chain 27 cm plastic 5 1021 9960
43 cm plastic 5 1005 9950
63 cm plastic 5 1021 9940
73 cm plastic 5 1005 9970
Chain bar 27 cm 5 1005 7160
43 cm 5 1005 7120
63 cm 5 1005 7140
73 cm 5 1005 7170
Sprocket 5 1026 7070
Maintenance unit (portable) with pressure regulator ¾” 9 2406 0260
Combination wrench 9 1316 0080
CS Unitec, Inc. • Toll-free: 800-700-5919 • Ph: 1-203-853-9522 • Email: info@csunitec.com • www.csunitec.com
Translation of the original manual
compiled: 20.04.16
Page 32

P n e u m a t i c C h a i n S a w
5 1 0 26 – 5 1 0 2 9
51026_51029_BA_en_Version_05
Page 31 of 34
Troubleshooting
Problem Cause Remedy
a Machine does not
start
Air not connected Connect and open air line
b Machine rotates too
slowly
Operating pressure too low Increase operating pressure (on
the machine ) to 6 bar
d Other problems Contact authorized expert
company
Disassembly – Re-assambly
Disassembly and re-assembly: see repair instruction.
Environmental Regulations
When working on or with the equipment, it is imperative to observe all
requirements in regards to waste- disposal and proper recycling.
In particular during installation, repair and maintenance work, water damaging
agents, such as
- lubricating grease and oil,
- hydraulic fluid,
- coolant,
- solvent containing cleaning agents
must not leak into the ground or reach the sewage system.
These materials must be stored, transported, contained and disposed of in
suitable containers!
Storage
Unused machines and machine tools should be kept in a dry, closed room. Keep them free from
damaging influences such as damp, frost or large temperature fluctuations as well as mechanical
damage
Disposal
Worn/ defect machine tools must be disposed of according to regional/ national specifications.
Fully disassemble machine for the necessary disposal.
Separate materials according to local environmental specifications.
Properly dispose lubricating, cooling or cleaning agents, which are harmful to the environment, in
order to avoid environmental contamination.
CS Unitec, Inc. • Toll-free: 800-700-5919 • Ph: 1-203-853-9522 • Email: info@csunitec.com • www.csunitec.com
Translation of the original manual
compiled: 20.04.16
Page 33

P n e u m a t i c C h a i n S a w
5 1 0 26 – 5 1 0 2 9
51026_51029_BA_en_Version_05
Page 32 of 34
Maintenance of Pneumatic Tools
Only proper maintenance can
ensure constant performance,
reduction in wear and thus, a
decrease in operating costs and an
increase in service life.
Our pneumatic tools are equipped
for an operating pressure of 6 bar.
A regulator setting for an operating
pressure of 4 bar is possible as well
as expedient for grinding machines
with a built-in regulator so as to
take full advantage of the speed
prescribed for the corresponding
grinding wheels.
Pneumatic tools should not run
empty, because this results in heat
and higher wear. The compressed
air
should be clean and dry. This is
guaranteed by a proper pneumatic
system. Blow through the
pneumatic hose before connecting
it. For the economical use of
pneumatic tools. The prescribed air
quantities are necessary, i. e. , the
line, armatures and hoses must
have the required cross sections so
that the flow pressure remains
constant. Proper lubrication is a
must; for this reason, our
pneumatic tools usually have builtin oilers. Which are located
between the inlet valve and the
motor, and which function in any
position. In smaller and lighter hand
tools, these oilers must often be left
out, because the machines would
then be too heavy and not
easy to manage. In such cases,
lubrication must be carried out by
service units or by manual hose
oilers. We recommend service units
for permanently installed
workplaces (see accessories list).
However, where longer hose lines
are necessary. line oilers built into
the hose lines are more effective.
The distance between the tool and
oiler should not be more than 5 m.
Most of pneumatic tools have
located at the connection a lined-up
screen, which is to be regularly
checked and cleaned.
After ending a working task, the
machines are to be flushed with a
thin oil, or protected some other
way against corrosion.
Visible grease nipples ar provided
for regular lubrication of the gears
with a grease gun. Note the
following for grease lubrication:
Every 60 hours of operation check
striking mechanism, friction
bearings and antifriction bearings; if
necessary, grease them. Every 300
hours of operation grease the gears
and antifriction bearings anew.
In the case of impact wrenches,
use a grease gun to grease the
anvil guide before beginning daily
work or every 6 to 8 hours.
All inner parts must be lubricated
before storing for longer periods of
time in order to prevent rusting.
It is recommended to check the vanes and
bearings at regular intervals.
Store pneumatic tools in dry rooms only.
Lubricating oils to be used:
Generally SAE 5 W to SAE 10
For gearless impact wrenches and small
grinders, only SAE 5 W.
For damp compressed air, oils are to be
used that take up water
( without losing the lubricating effect) and
that contain anticorrosive additives. At
lower temperatures (especially for work
outside) it may be necessary to use an
antifreeze lubricant (e.g. Kilfrost, BP
Energol AX 10, Kompranol N 74).
For saw-chain lubrication on chain saws:
Machine oil with adhesive additive,
viscosity c ST 49-55’
(6.5-7.5 E)/ 50°C
Greases ( free of resins and acids) Multi-purpose greases for
antifriction and friction bearings
Special greases for high-speed miter gears
Designation in accordance with DIN
51502
Consistency class (DIN 51818)
Saponification type
Dripping point
Worked penetration
Temperature range
K L 2 k
2
Lithium
185 °C
265 to 295
-25°C to + 125°C
G 000 h
00
Sodium
145°C
400 to 410
-25°C to + 100°C
Before starting:
Check correct oiler
setting!
CS Unitec, Inc. • Toll-free: 800-700-5919 • Ph: 1-203-853-9522 • Email: info@csunitec.com • www.csunitec.com
Translation of the original manual
compiled: 20.04.16
Page 34

P n e u m a t i c C h a i n S a w
5 1 0 26 – 5 1 0 2 9
51026_51029_BA_en_Version_05
Page 33 of 34
Oiler Types Used
on or with Our Tools
Oiler to mount on the machine or connect in the
hose line
Setting the oiler: The adjustment screw item 2 is visible
after removing the screw plug item 3. Theoil supply is
decreased by tightening the screw, and by loosening
the screw, more oil gets into the machine. In most
cases it is sufficient to tighten or loosen the screw by
¼ or ½ of a turn. When plugged, clean borehole
(dia. 2 mm) with wire.
Correct setting; When under pressure and with the
filler screw (item 4) open, the oil must bubble slightly.
The fillint lasts for approx. 8 operating hours.
Line oiler
For stationary pneumatic machines and motors, the
lubrication is carried out by lined-up oilers for
horizontal or vertical installation.
Setting of oilers: Shut off air supply. Open plug item 3.
Loosen visible lock nut item 5 with a socket wrench.
Using a screw driver turn back the tightened screw
plug item 4 by ¼ to ½ of a turn and then lock again.
No oil is to get into the borehole “a” when filling. Close
plug item 3 and open the air supply.
Correct setting: A piece of paper held for a short time
in front of the outlet must be coated with oil without
drops forming.
Transparent oiler
For installing in permanently equipped workplaces
(especially for type using service units – see
accessories list)
The transparent supply containers allow for good
checking as well as for good setting possibility by
means of a screw driver via a set screw with visible
dripping. (The set screw is above the lateral thread
connection – turning to the right for less oil; turning to
the left for more oil) The setting (2 to 5 drops per
m³/min air consumption) is to be carried out when air is
flowing through, i.e., when the machine is running.
CS Unitec, Inc. • Toll-free: 800-700-5919 • Ph: 1-203-853-9522 • Email: info@csunitec.com • www.csunitec.com
Translation of the original manual
compiled: 20.04.16
Page 35

P n e u m a t i c C h a i n S a w
5 1 0 26 – 5 1 0 2 9
51026_51029_BA_en_Version_05
Page 34 of 34
D e c l a r a t i o n o f C o n f o r m i t y
as defined in the European Union Machine Directive 2006/42/EC and in the
EU-ATEX-Directive 2014/34/EU for usable machines
We, the company
SPITZNAS Maschinenfabrik GmbH, Fellerstraße 4, 42555 Velbert– Langenberg,
declare that the following product
Description: Pneumatic Chain Saw
Model 5 1026
5 1027
5 1028
5 1029 *
in the version supplied by us, complies with the European Union Machine Directive
2006/42/EC and the EU-Directive 2014/34/EU (ATEX – group II, category 2, G c T 5
respectively *group I, category M2, c T 5).
Applied harmonized norms are:
DIN EN ISO 12100
DIN EN ISO 11681-1
DIN EN 1127-1
DIN EN 1127-2
DIN EN 13463-1
DIN EN 13463-5
The EC type approval test was done by:
DPLF
Deutsche Prüf- und Zertifizierungsstelle
für Land- und Forsttechnik GbR
Spremberger Straße 1
D-64823 Groß-Umstadt
EC type approval no.: K-EG 2011/6024
According to section 13 (1) ii) of the Directive 2014/34/EU the technical documentation is
deposited under reference no. 557/ Ex- Ab 1700/11 at the following office:
TÜV Rheinland Industrie Service GmbH
Moltkeplatz 1, 45138 Essen
(Registration No. 0035
for the scope of
the Directive 2014/34/EU)
Name of the authorized person for documentation: Mr. Simon Witt
Address of the authorized person for documentation: see manufacturer’s address
42555 Velbert, 20.04.2016
CS Unitec, Inc. • Toll-free: 800-700-5919 • Ph: 1-203-853-9522 • Email: info@csunitec.com • www.csunitec.com
Translation of the original manual
compiled: 20.04.16
Page 36

51026_51029_BA_en_Version_05
22 Harbor Ave, Norwalk, CT 06850 USA
Toll-free: 1-800-700-5919 (USA & Canada)
Phone: 203-853-9522 (outside USA & Canada)
Fax: 203-853-9921
E-Mail:
info@csunitec.com Internet:
www.csunitec.com
Translation of the original manual
compiled: 20.04.16
 Loading...