

3012A WIRELESS NUMERIC KEYPAD & MINI MOUSE
Product information
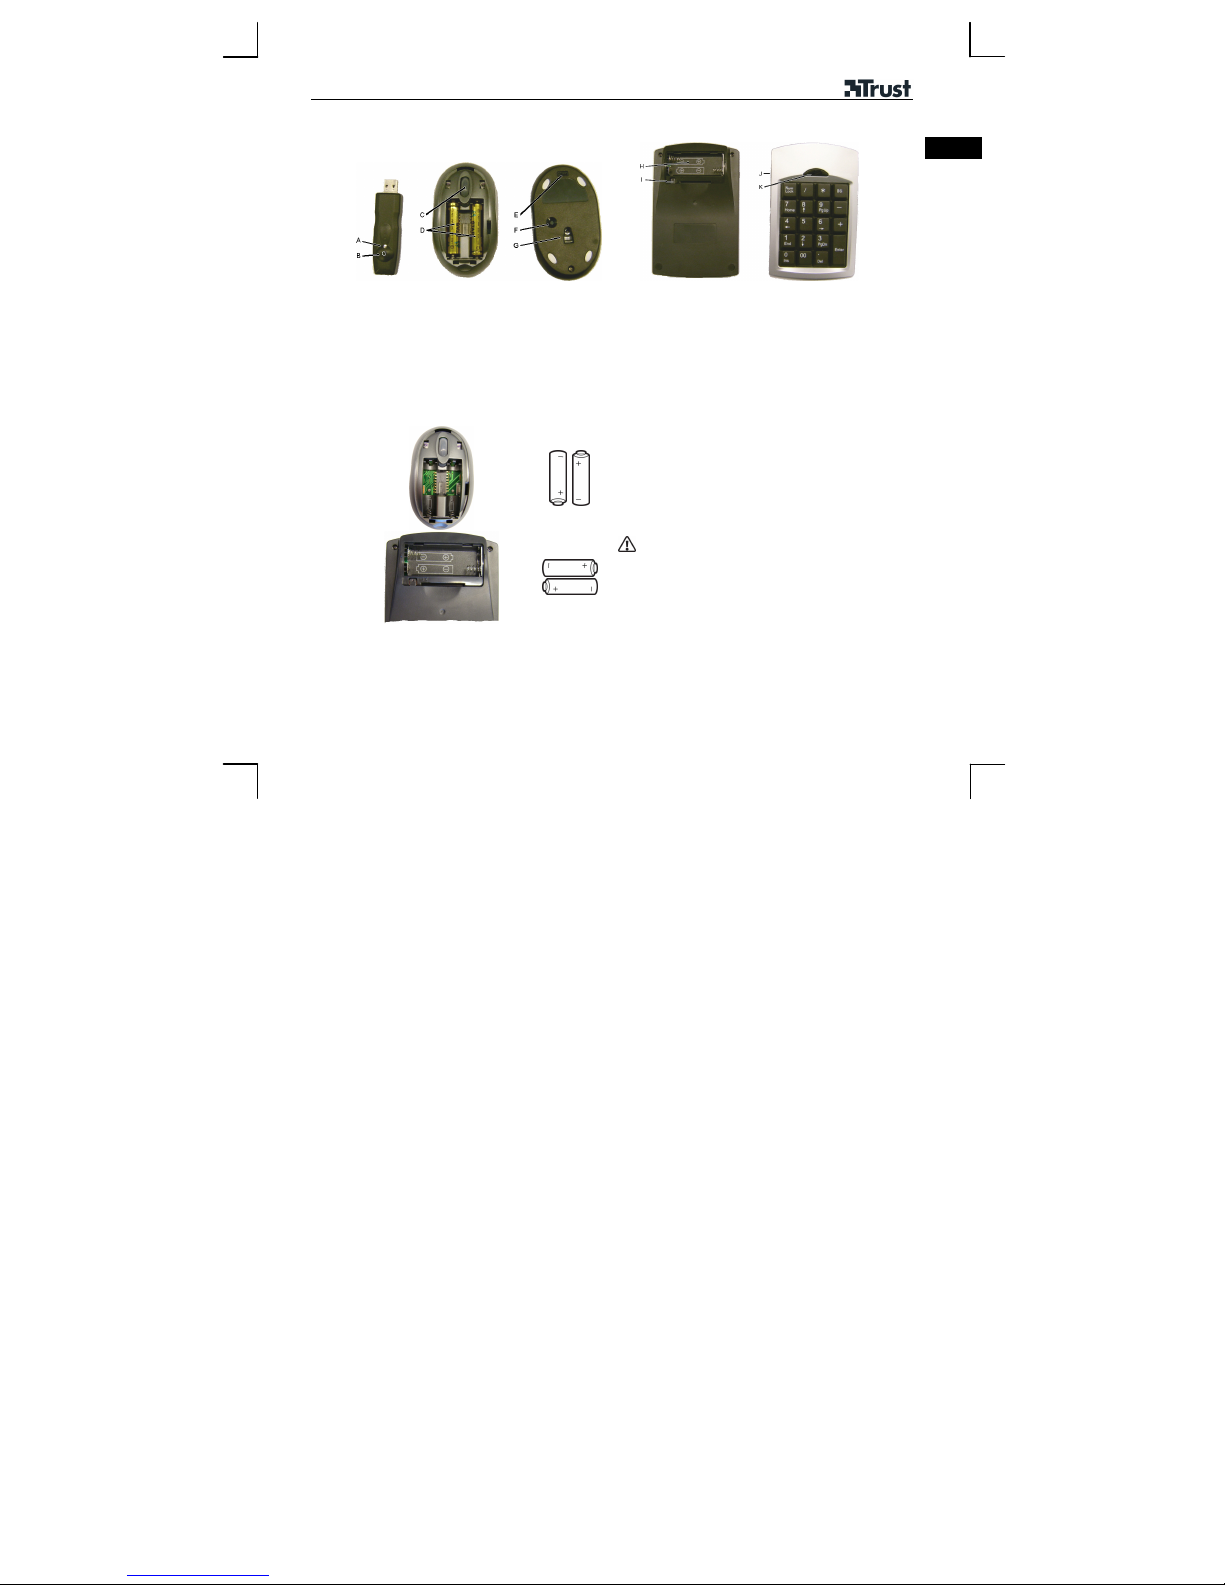
Receiver Mouse Keypad
A: Indicator
B: Connection button
Installation
1
C: Scroll wheel
D: Battery holder
E: On/Off switch
F: Connection button
G: Optical motion sensor
H: Battery holder
I: Connection button
J: On/Off switch
K: Calculator button
Open the battery cover.
Insert the batteries.
Close the battery cover (only for the mouse).
Make a new connection after replacing the
batteries (see steps 4a and 4b).
UK
1
3012A WIRELESS NUMERIC KEYPAD & MINI MOUSE
2
Windows 98SE
2A
…
3
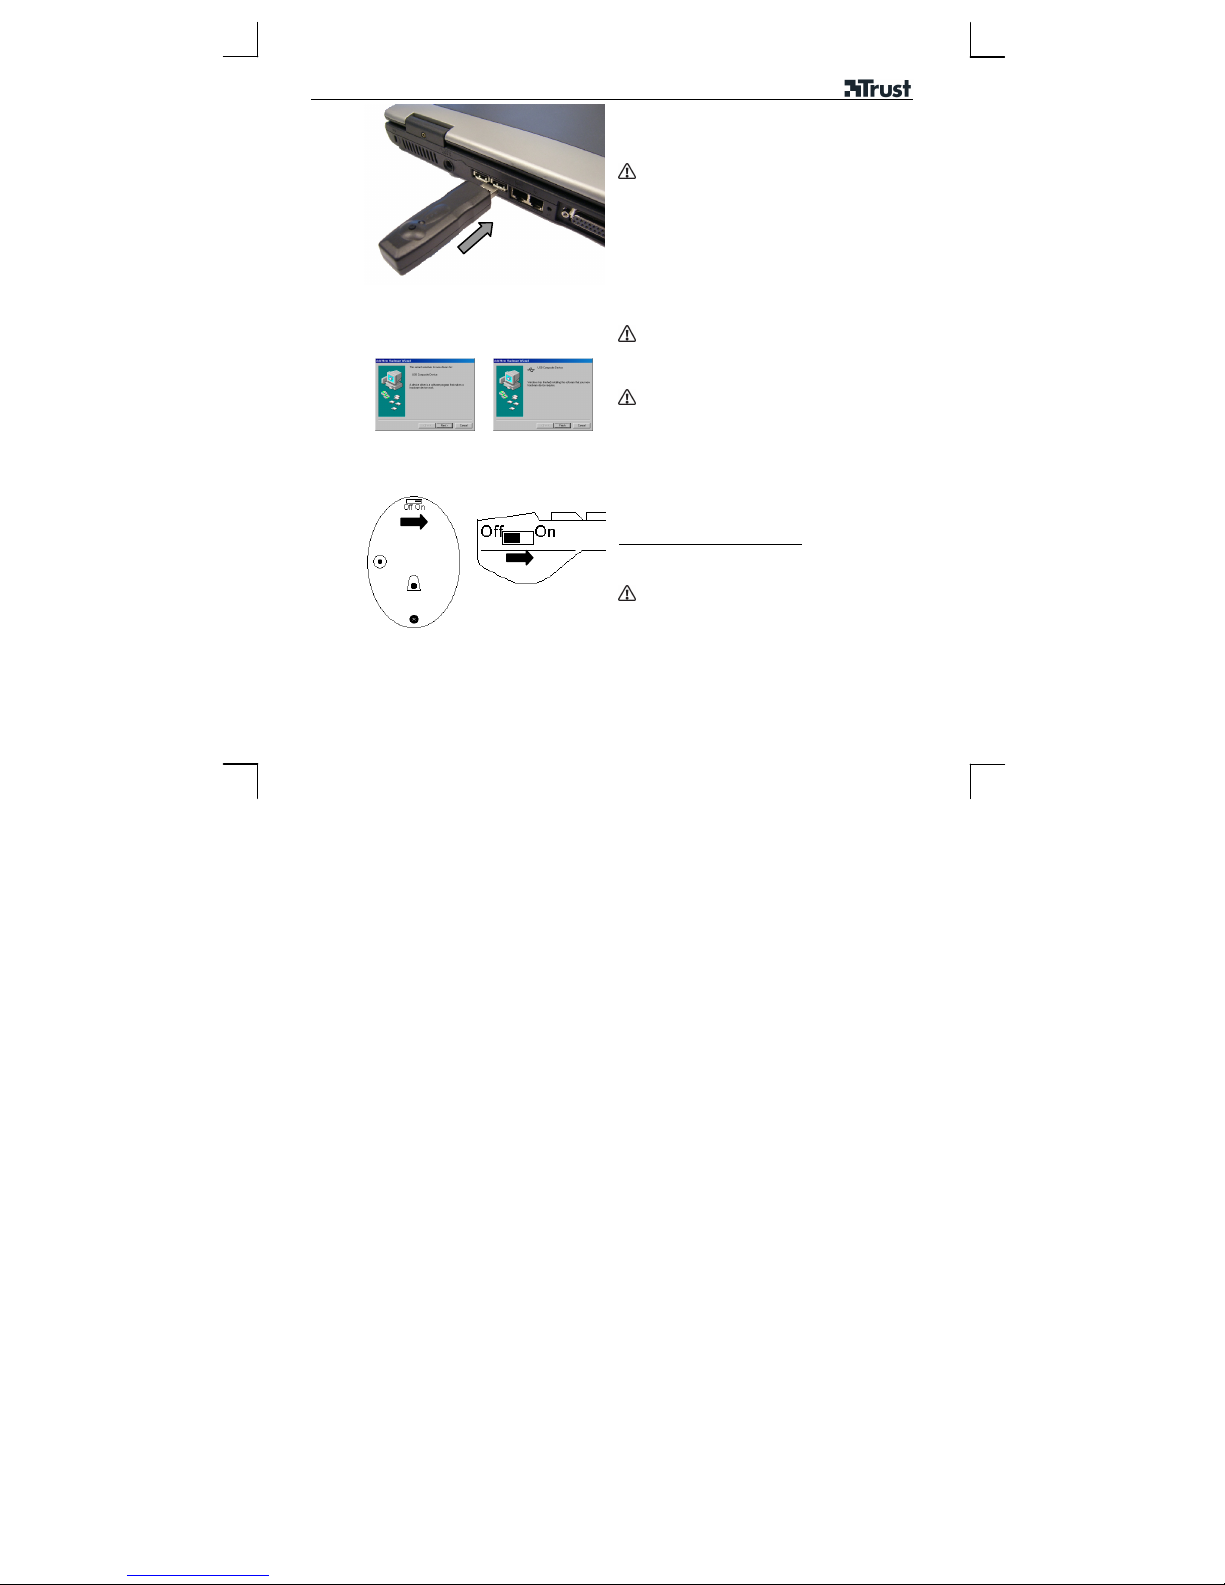
Start Windows (98 SE or a later release).
Connect the receiver to a USB port.
Use the USB extension lead if the receiver
blocks the USB port.
New hardware will be detected.
• Windows 98SE: Æ 2A , 3
Windows 2000, Windows ME and Windows XP:
•
the driver will be installed automatically. Æ 3
Windows 98SE:
Follow the on-screen instructions.
Leave your existing mouse connected to your
computer for the installation process. If it has
already been removed, use the Tab and Enter
keys on your keyboard.
Insert the W indows 98SE Installation CD-ROM
into your CD-ROM drive.
Three components will be installed. If necessary,
specify the location of the files at the Windows 98SE
CD-ROM.
Turning on the mouse and keypad
Mouse: Set the On/Off switch to “ON”
Set the On/Off switch to “ON”
Keypad:
Set the switches to "OFF" during transport.
2
 Loading...