

Triton Safeguard+ Instructions For Use Manual
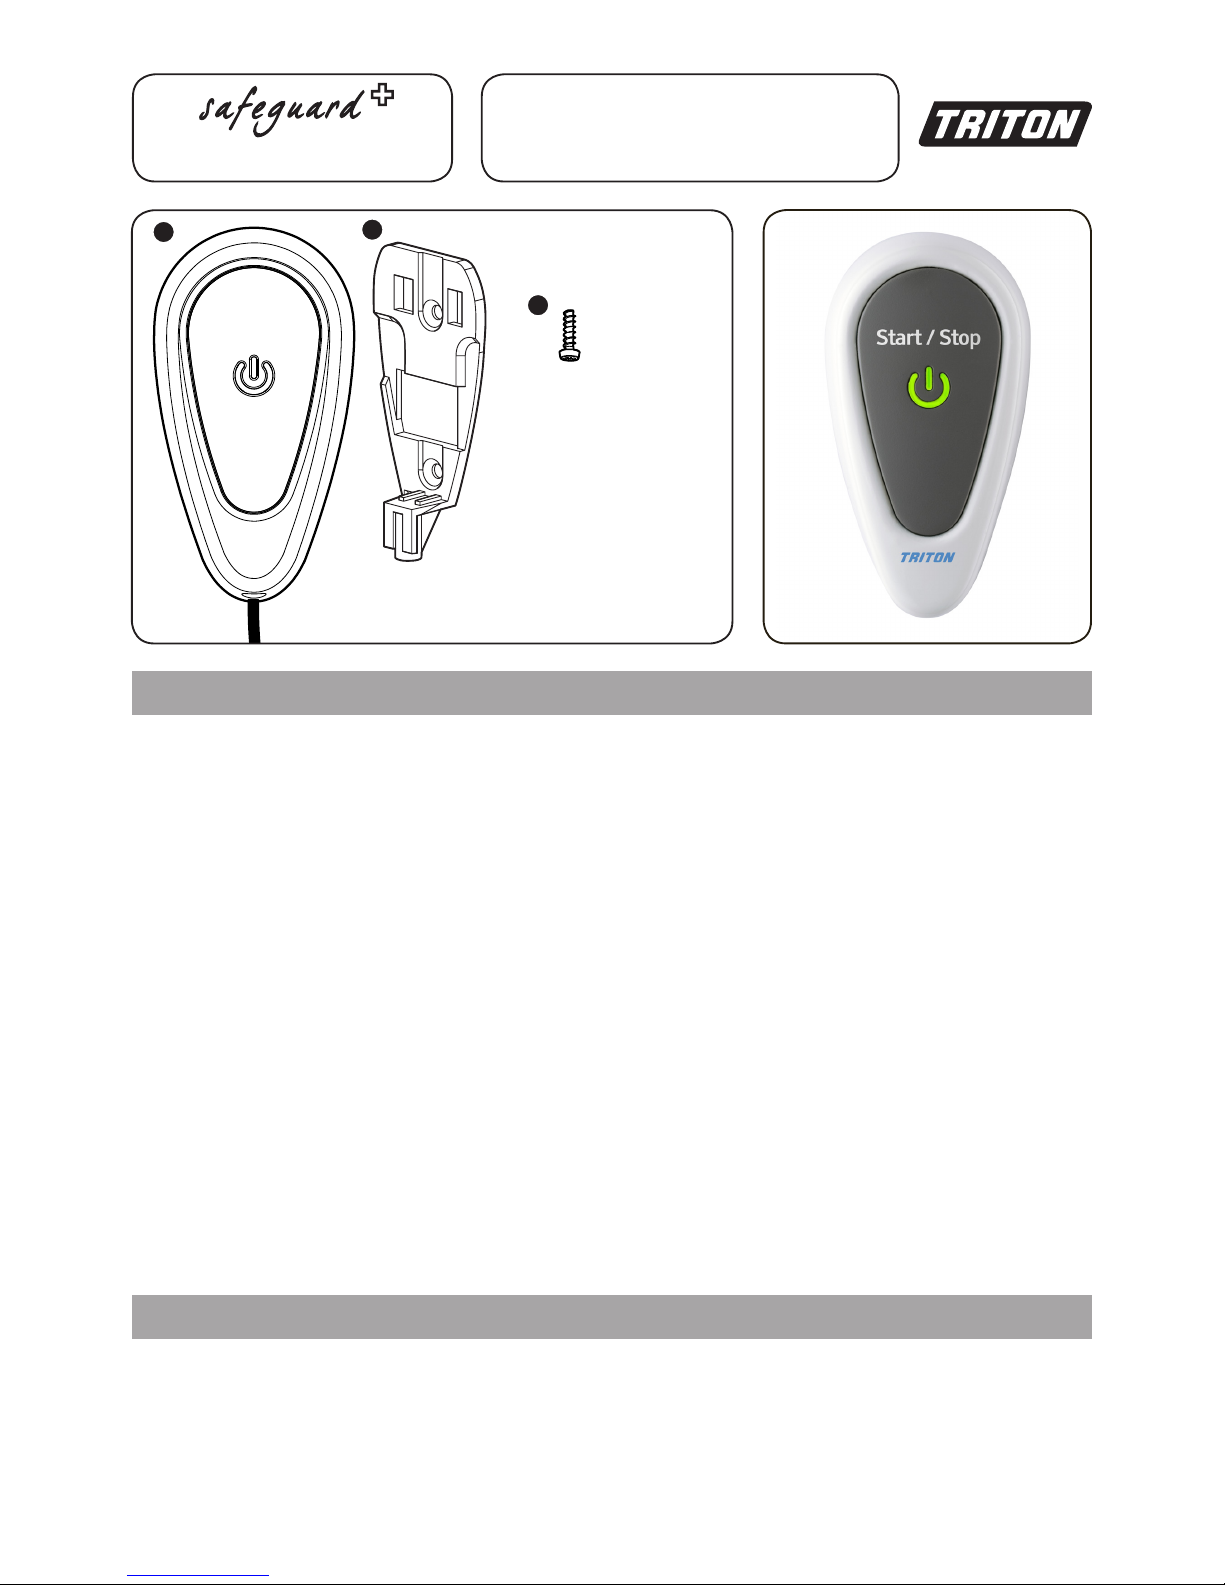
Remote Start Stop
Fig.1
1
2
3
User Instructions
2181072 A - March 2014
Do not use abrasive or solvent cleaning fluids. The Remote
Start/Stop should be cleaned using a soft cloth and warm
water.
MAIN COMPONENTS
Component Pack
1 Remote Start/Stop and 5m cable
2 Wall bracket
3 Cover Screw
Using The Safeguard+ Remote Start/Stop
To start the shower using the remote
Press the Remote Start/Stop button and immediately the
shower will activate and water will begin to flow. An audible
bleep will be heard from the shower upon start up (if option is
selected.)
To stop the shower using the remote
Press the Remote Start/Stop button. An audible bleep will be
heard from the unit and water will cease to flow.
(If the timed shutdown option is selected 1 bleep will be heard
to inform the user that they have 1 minute of showering time
remaining. Finally 5 bleeps will sound to alert the user to the
end of the showering time before the unit switches off.)
Cleaning The Safeguard+ Remote Start/Stop
Fig.1
Electrical Connections Of The Safeguard+ Remote Start/Stop
ELECTRICAL CONNECTIONS
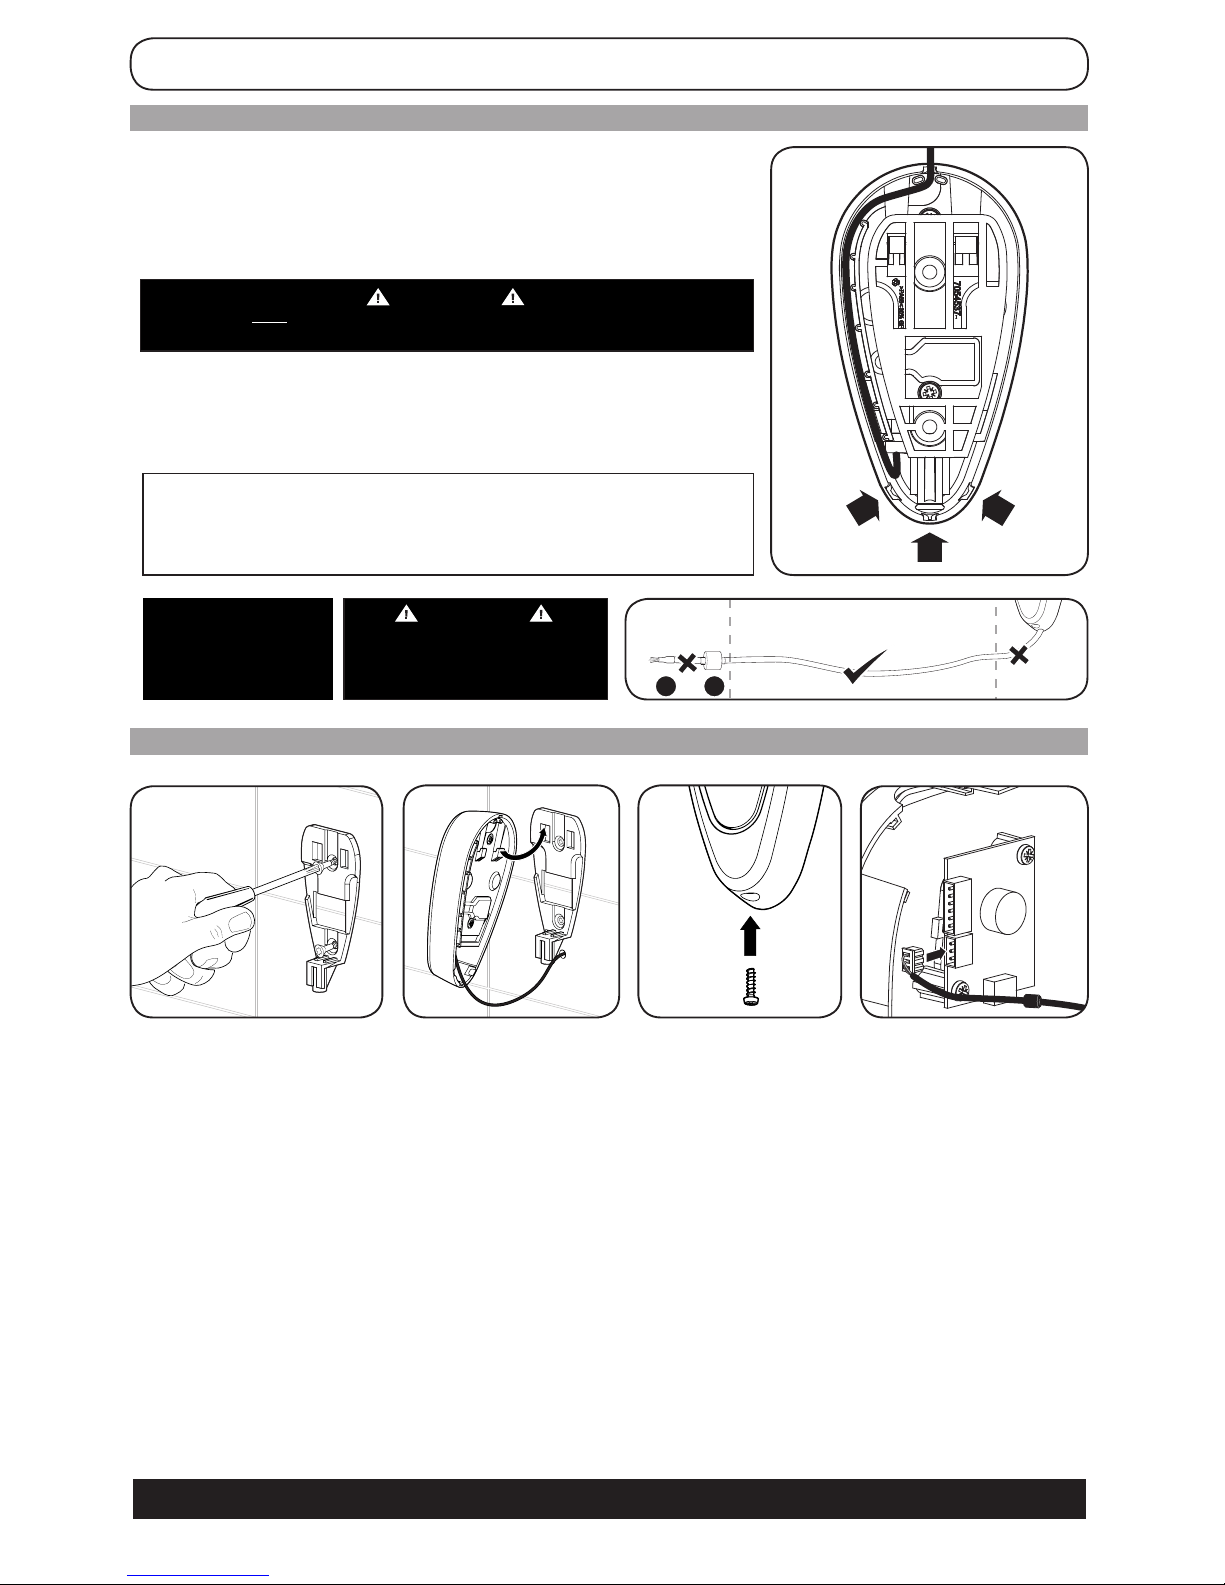
CABLE ROUTING.
Fig.2 shows a schematic wiring diagram displaying the alternative routes the control cable
can take to exit the remote. The control cable can exit through three points at the base of
the remote and one at the top. Alternatively a hole can be drilled into the wall allowing the
remote to be wired from behind (Fig.4).
DO NOT Route cable in contact with 240Vmains cable.
Note: If shortening the cable please remove the excess from the middle section (Fig.3).
DO NOT shorten the cable between the connector (1) and the suppression (2). When
shortening the cable please ensure that the cable colours are rematched. Failure to do
this will impair the operation of the shower and will also invalidate the guarantee.
Installing The Safeguard+ Remote Start/Stop
FITTING THE CONTROL PANEL BRACKET
IMPORTANT: Leave enough free play in the cable to allow for future removal of the remote for servicing purposes.
DO NOT switch on the electricity supply until the remote is housed on the wall using the bracket.
WARNING
COVER RETAINING SCREW
ONLY the SUPPLIED SCREW should be
used. The use of none supplied screw WILL
invalidate product specications & warranty.
Triton Showers
Triton Road
Nuneaton
Warwickshire CV11 4NR
Triton is a division of Norcros Group (Holdings) Limited
TRITON reserve the right to change product specification without prior notice. E&OE. © TRITON SHOWERS 2014
Customer Service: 0844 980 0750
Trade Installer Hotline:
0844 980 0730
Fax:
0844 980 0744
www.tritonshowers.co.uk
E-mail: serviceenquiries@tritonshowers.co.uk
Extended Warranty AVAILABLE NOW. Call 0844 980 0740 for more details.
TRITON STANDARD GUARANTEE
With the exception of accessories, Triton guarantee the
product against all manufacturing defects for a period of
2 years (for domestic use only) from the date of purchase,
provided that it has been installed by a competent person in
full accordance with the tting instructions.
All accessories such as shower heads, hoses and riser rails
carry a 1 year parts only guarantee against manufacturing
defects.
Any part found to be defective during this guarantee period
we undertake to repair or replace at our option without
charge so long as it has been properly maintained and
operated in accordance with the operating instructions, and
has not been subject to misuse or damage. This product
must not be taken apart, modied or repaired except by a
person authorised by Triton. This guarantee applies only to
products installed within the United Kingdom and does not
apply to products used commercially. This guarantee does
not affect your statutory rights.
What is not covered:
1. Breakdown due to: a) use other than domestic use by
you or your resident family; b) wilful act or neglect;
c) any malfunction resulting from the incorrect use or
quality of electricity, gas or water or incorrect setting
of controls; d) failure to install in accordance with this
installation guide
2. Claims for missing parts once the product has been
installed.
3. Repair costs for damage caused by foreign objects or
substances.
4. Total loss of the product due to non-availability of parts.
5. Compensation for loss of use of the product or
consequential loss of any kind.
6. Call out charges where no fault has been found with the
appliance.
7. The cost of repair or replacement of pressure relief
devices, showerheads, hoses, riser rails and/or wall
brackets, isolating switches, electrical cable, fuses and/or
circuit breakers or any other accessories installed at the
same time.
8. The cost of routine maintenance, adjustments, overhaul
modications or loss or damage arising therefrom,
including the cost of repairing damage, breakdown,
malfunction caused by corrosion, furring,
9. Call out charges where the water supply cannot be
isolated, this includes consequential losses arising from
unserviceable supply valves.
4-12-2012 - 2 yr elec
UK SERVICE POLICY
In the event of a product fault or complaint occurring, the following
procedure should be followed:
1. Telephone Customer Service on 0844 980 0750 having available,
your details including post code, the model number and power
rating of the product, together with the date of purchase and, where
applicable, details of the particular fault.
2. If required, the Customer Service Advisor will arrange
for a qualied engineer to call.
3. All products attended to by a Triton service engineer must be installed
in full accordance with the Triton installation guide applicable to the
product. (Every product pack contains an installation guide, however,
they can also be bought via our Customer Service Spares Department).
4. Our engineer will require local parking and if a permit is required this
must be available to the engineer on arrival at the call.
5. It is essential that you or an appointed representative (who must
be over 18 years of age) is present for the duration of the service
engineer's visit. If the product is in guarantee you must produce proof
of purchase.
6. Where a call under the terms of guarantee has been booked and
the failure is not product related (i.e. scaling and furring, incorrect
water pressure, pressure relief device operation or electrical/plumbing
installation fault) a charge will be made. A charge will also be issued
if nobody is at home when the service engineer calls or adequate
parking/permit is not available.
7. If the product is no longer covered by the guarantee an up front xed
fee will be charged before the site visit.
8. Should proof of purchase not be available on an “in-guarantee” call,
or should the service engineer nd that the product is no longer
under guarantee, the engineer will charge the same xed price and
the customer will be expected to pay the engineer before he leaves.
If payment is not made on the day an administration charge will be
added to the xed charge.
9. If a debt is outstanding from a previous visit, or from any other Triton
purchase, Triton reserves the right to withhold service until the debt
has been settled.
10. Triton takes the health, safety and wellbeing of its employees very
seriously and expects customers to treat all staff members with respect.
Should any employee feel threatened or receive abuse, either verbally
or physically, Triton reserves the right to withhold service and will
support the employee with a legal prosecution.
Replacement Parts Policy
Availability: It is the policy of the manufacturer to maintain parts
availability for the duration of production and a period of ve years
thereafter, in accordance with industry standards.
Spare parts are available via our website, www.tritonshowers.co.uk,
or by telephoning Triton Customer Service Spares Department.
Payment should be made by credit/debit card (excluding American
Express or Diners Card). Payment can also be made by pre-payment
of a pro forma invoice by cheque or money order.
Telephone orders are based on information given during of the call.
Before contacting Triton, please verify your requirements
using the information contained in the supplied user guide.
Triton cannot accept liability for incorrect part identication.
For the latest Terms & Conditions, please see:
www.tritonshowers.co.uk
Fig.2
Fig.4 Fig.5 Fig.6
Fig.7
Mark the two holes using the wall bracket as a guide before drilling and plugging the holes using suitable fixings. Make sure the wall
bracket is securely held in place before continuing.
Note: The mounting bracket must be fitted on the surface of the tiles (Fig.4).
Once you have selected your chosen cable routing using Fig.2 attach the Remote Start/Stop to the bracket as shown in Fig.5.
Locate the fitting tabs on the back of the Remote Start/Stop with the corresponding slots in the wall bracket. Then simply slide the
remote upwards to locate over the screw housing.
Assemble the remote to the wall bracket at the base using the screw provided (Fig.6).
Finally plug the control cable into the socket provided on the PCB housed in the back of the shower cover. (Fig.7)
1.
2.
3.
4.
5.
SITING OF THE REMOTE
Product is IPX4 rated and
therefore can be sited in Zone 1.
Installation Instructions
WARNING
Remote Start/Stop MUST be secured to the wall. The control cable should either be surface clipped, hidden via
trunking conduit or concealed in the wall.
Fig.3
SHORTENING THE CONTROL CABLE.
The Triton Remote Start/Stop is supplied with a 5m control cable to allow for a varied
choice of positioning. However if you wish to shorten the cable you can.
1 2
 Loading...