

Page 1
GPS Pathfinder
®
Office
Getting Started Guide
Page 2

Page 3

GPS Pathfinder® Office
Getting Started Guide
Version 2.90
Part Number 34231-29-ENG
Revision A
January 2002
Page 4

Corporate Office
Trimble Navigation Limited
Mapping and GIS Division
645 North Mary Avenue
Post Office Box 3642
Sunnyvale, CA 94088-3642
U.S.A.
Phone: +1-408-481-8940, 1-800-545-7762
Fax: +1-408-481-7744
www.trimble.com
Copyright and Trademarks
© 1999–2002, Trimble Navigat ion Limited. All
rights reserved. For STL support, the GPS
Pathfinder Office software uses the Moscow
Center for SPARC Technology adaptation of the
SGI Standard Template Library. Copyright ©
1994 Hewlett-Packard Company, Copyright ©
1996, 97 Silicon Gr aphics Computer Systems,
Inc., Copyright © 1997 Moscow Center for
SPARC Technology.
The following limited warrantie s gi ve y ou specif ic
legal rights. You may have others, which vary
from state/jurisdiction to state/jurisdiction.
Software and Firmware Limited Warranty
Trimble warrant s that this Trimble software
product (the “Software”) shall substantially
conform to Trimble’s applicable published
specifications for the Software for a period of
ninety (90) days, starting from the date of
delivery.
Warranty Remedies
Trimble's sol e lia bil ity a nd you r exclusive remedy
under the warranties set forth above shall be, at
Trimble’s option, to repair or replace any Product
or Software that fails to c onf or m to suc h wa rranty
(“Nonconforming Product”) or refund the
purchase price paid by you for any such
Nonconforming Pr oduct, upon your return of any
Nonconforming Product to Trimble.
The Globe & Triangle logo, Trimble, QuickPlan,
and TerraSync are trademarks of Trimble
Navigation Limited.
Aspen, Asset Surveyor, Ge oEx pl or e r, and GPS
Pathfinder are trademarks of Trimble Navigation
Limited, registered in the United States Pa tent an d
Trademark Office.
All other trademarks are the property of their
respective owners.
Printed in the United States of America. Printed
on recycled paper.
Release Notice
This is the January 2002 release (Revision A) of
the GPS Pathfinder Office Getting Started Guide,
part number 34231- 29-ENG. It applies to version
2.90 of the GPS Pathfinder Office software.
Warranty Exclusions
These warranties shall be ap plied only in the e ven t
and to the extent that: (i) the Products and
Software are properly and correctly installed,
configured, interfaced, stored, maintained and
operated in accordance with Trimble's relevant
operator's manual and specifications, and; (ii) the
Products and Software are not modified or
misused. The preceding warranties shall not apply
to, and Trimble shall not be responsible for, any
claim of warranty infringement is based on (i)
defects or performance problems that ari s e from
the combination or utilization of the Product or
Software with products, information, systems or
devices not made, supplied or specified by
Trimble; (ii) the operation of the Product or
Software under any specifica tio n oth e r than , or i n
addition to, Trimble's standard specifications for
its products; (iii) the unautho rized m odif icati on or
use of the Product or Software; (iv) damage
caused by lightning, other electrical discharge, or
fresh or salt water immersion or spray; or (v)
normal wear and tear on consumable parts (e.g.,
batteries).
Page 5

THE WARRANTIES ABOVE STATE TRIMBLE’S
ENTIRE LIABILITY AND YOUR EXCLUSIVE
REMEDIES PERFORMANCE OF THE PRODUCTS
AND SOFTWARE. EXCEPT AS EXPRESSLY
PROVIDED IN THIS AGREEMENT, TRIMBLE
FURNISHES THE PRODUCTS AND SOFTWARE
AS-IS, WITH NO WARRANTY, EXPRESS OR
IMPLIED, AND THERE IS EXPRESSLY
EXCLUDED THE IMPLIED WARRANTIES OF
MERCHANTABILITY AND FITNESS FOR A
PARTICULAR PURPOSE. THE STATED EXPRESS
WARRANTIES ARE IN LIEU OF ALL
OBLIGATIONS OR LIABILITIES ON THE PART
OF TRIMBLE ARISING OUT OF, OR IN
CONNECTION WITH, ANY PRODUCTS OR
SOFTWARE. SOME STATES AND
JURISDICTIONS DO NOT ALLOW LIMITATIONS
ON DURATION OF AN IMPLIED WARRANTY, SO
THE ABOVE LIMITATION MAY NOT APPLY TO
YOU.
Limitation of Liability
TO THE MAXIMUM EXTENT PERMITTED BY
APPLICABLE LAW, TRIMBLE SHALL NOT BE
LIABLE TO YOU FOR ANY INDIRECT, SPECIAL,
OR CONSEQUENTIAL DAMAGES OF ANY KIND
OR UNDER ANY CIRCUMSTANCE OR LEGAL
THEORY RELATING IN ANY WAY TO THE
PRODUCTS OR SOFTWARE, REGARDLESS
WHETHER TRIMBLE HAS BEEN ADVISED OF
THE POSSIBILITY OF ANY SUCH LOSS AND
REGARDLESS OF THE COURSE OF DEALING
WHICH DEVELOPS OR HAS DEVELOPED
BETWEEN YOU AND TRIMBLE. BECAUSE SOME
STATES AND JURISDICTIONS DO NOT ALLOW
THE EXCLUSION OR LIMITATION OF LIABILITY
FOR CONSEQUENTIAL OR INCIDENTAL
DAMAGES, THE ABOVE LIMITATION MAY NOT
APPLY TO YOU.
IN ANY CASE, TRIMBLE'S SOLE LIABILITY,
AND YOUR SOLE REMEDY UNDER OR FOR
BREACH OF THIS AGREEMENT, WILL BE
LIMITED TO THE REFUND OF THE PURCHASE
PRICE OR LICENSE FEE PAID FOR THE
PRODUCTS OR SOFTWARE.
Page 6

Page 7

Contents
About This Manual
Scope and Audience. . . . . . . . . . . . . . . . . . . . . . . . . . . .ix
Related Information . . . . . . . . . . . . . . . . . . . . . . . . . . . . x
Technical Assistance . . . . . . . . . . . . . . . . . . . . . . . . . . .xi
Your Comments. . . . . . . . . . . . . . . . . . . . . . . . . . . . . .xi
Document Conventions . . . . . . . . . . . . . . . . . . . . . . . . . xii
1 Introduction
2 Installation
Introduction . . . . . . . . . . . . . . . . . . . . . . . . . . . . . . . . 4
Hardware and Software Requirements . . . . . . . . . . . . . . . . . . 4
Installing GPS Pathfinder Office on a Standalone Computer. . . . . . . 5
Installing or Upgrading the Software . . . . . . . . . . . . . . . 5
Installing GPS Pathfinder Office on a Network. . . . . . . . . . . . . 20
Network Server Installation . . . . . . . . . . . . . . . . . . . 20
Network Client Installation . . . . . . . . . . . . . . . . . . . 21
3 Basics of Operation
Introduction . . . . . . . . . . . . . . . . . . . . . . . . . . . . . . . 24
Starting the GPS Pathfinder Office Software . . . . . . . . . . . . . . 24
Setting the Time Zone . . . . . . . . . . . . . . . . . . . . . . 25
Selecting a Project . . . . . . . . . . . . . . . . . . . . . . . . 25
Application Window . . . . . . . . . . . . . . . . . . . . . . . . . . 26
Windows . . . . . . . . . . . . . . . . . . . . . . . . . . . . . . . . 28
Saving the Window Layout . . . . . . . . . . . . . . . . . . . 28
GPS Pathfinder O ffic e Getting Started Guide v
Page 8

Contents
Map Window. . . . . . . . . . . . . . . . . . . . . . . . . . . 29
Time Line Window. . . . . . . . . . . . . . . . . . . . . . . . 29
Manipulating and Moving the Windows. . . . . . . . . . . . . 30
Toolbars . . . . . . . . . . . . . . . . . . . . . . . . . . . . . . . . . 35
Types of Toolbars in the GPS Pathfinder Office software . . . . 35
Displaying a Toolbar. . . . . . . . . . . . . . . . . . . . . . . 36
Floating a Toolbar . . . . . . . . . . . . . . . . . . . . . . . . 36
Selecting a Tool in a Toolbar. . . . . . . . . . . . . . . . . . . 37
Standard Toolbar . . . . . . . . . . . . . . . . . . . . . . . . . 38
Project Toolbar . . . . . . . . . . . . . . . . . . . . . . . . . . 39
Mouse Toolbar . . . . . . . . . . . . . . . . . . . . . . . . . . 39
Utility Toolbar . . . . . . . . . . . . . . . . . . . . . . . . . . 41
Shortcut Menus . . . . . . . . . . . . . . . . . . . . . . . . . . . . . 42
Measurement Units . . . . . . . . . . . . . . . . . . . . . . . . . . . 43
Available Units . . . . . . . . . . . . . . . . . . . . . . . . . . 44
Exiting the GPS Pathfinder Office Software . . . . . . . . . . . . . . 45
4 Tutorial
Introduction . . . . . . . . . . . . . . . . . . . . . . . . . . . . . . . 48
Scenario . . . . . . . . . . . . . . . . . . . . . . . . . . . . . . . . . 49
Lesson 1: Configuring the GPS Pathfinder Office Software . . . . . . 50
Starting the GPS Pathfinder Office Software . . . . . . . . . . 50
Setting the Local Tim e Zone . . . . . . . . . . . . . . . . . . . 51
Selecting a Project . . . . . . . . . . . . . . . . . . . . . . . . 52
Selecting a Coordinate System. . . . . . . . . . . . . . . . . . 55
Lesson 2: Preparing to Collect Data . . . . . . . . . . . . . . . . . . 57
GPS Data Collection . . . . . . . . . . . . . . . . . . . . . . . 57
Features. . . . . . . . . . . . . . . . . . . . . . . . . . . . . . 58
Attributes. . . . . . . . . . . . . . . . . . . . . . . . . . . . . 58
Opening a Data Dictionary. . . . . . . . . . . . . . . . . . . . 59
Printing the Data Dictionary . . . . . . . . . . . . . . . . . . . 65
Transferring Data to a Data Collector . . . . . . . . . . . . . . 66
vi GPS Pathfinder Office Getting Started Guide
Page 9

Contents
Lesson 3: Differentially Correcting the Field Data . . . . . . . . . . . 67
Lesson 4: Viewing and Editing the Data . . . . . . . . . . . . . . . . 75
Opening the Data Files. . . . . . . . . . . . . . . . . . . . . . 76
Displaying the Map and Time Line Windows . . . . . . . . . . 77
Loading the Background Files . . . . . . . . . . . . . . . . . . 78
Configuring the Map Window . . . . . . . . . . . . . . . . . . 85
Viewing the Attributes of a Feature . . . . . . . . . . . . . . . 89
Viewing the Offset of a Feature . . . . . . . . . . . . . . . . . 90
Printing the Data . . . . . . . . . . . . . . . . . . . . . . . . . 91
Lesson 5: Exporting Data to a GIS or CAD System . . . . . . . . . . 94
Lesson 6: Updating the Data . . . . . . . . . . . . . . . . . . . . . . 98
Editing the Tutorial Data Dictionary. . . . . . . . . . . . . . . 99
Saving the Data Dictionary . . . . . . . . . . . . . . . . . . .105
Importing Data From a GIS . . . . . . . . . . . . . . . . . . . 106
Lesson 7: Back in the Office . . . . . . . . . . . . . . . . . . . . . . 112
Opening the Updated Data File . . . . . . . . . . . . . . . . .113
Finding a Feature. . . . . . . . . . . . . . . . . . . . . . . . .113
Viewing the Positions of a Feature. . . . . . . . . . . . . . . .115
Using Layers to View a Feature . . . . . . . . . . . . . . . . . 116
Viewing the Status of a Feature . . . . . . . . . . . . . . . . . 118
Measuring Distances . . . . . . . . . . . . . . . . . . . . . . .119
Exporting Data to Update the GIS . . . . . . . . . . . . . . . .120
Lesson 8: Special Lesson . . . . . . . . . . . . . . . . . . . . . . . .121
Batch Processing . . . . . . . . . . . . . . . . . . . . . . . . .121
Managing Waypoints. . . . . . . . . . . . . . . . . . . . . . . 128
A Troubleshooting
Introduction . . . . . . . . . . . . . . . . . . . . . . . . . . . . . . .136
Installation Problems . . . . . . . . . . . . . . . . . . . . . . . . . .136
Map and Time Line Display . . . . . . . . . . . . . . . . . . . . . .137
Printers and Plotters. . . . . . . . . . . . . . . . . . . . . . . . . . .139
GPS Pathfin der Off ice Getti ng Sta rted Guide vii
Page 10

Contents
Internet Problems . . . . . . . . . . . . . . . . . . . . . . . . . . . .140
Connection Problems. . . . . . . . . . . . . . . . . . . . . . .140
Files Not Present on the Internet Server . . . . . . . . . . . . . 142
Web Map Server Problems . . . . . . . . . . . . . . . . . . . . . . .144
Internet Connection Problems . . . . . . . . . . . . . . . . . . 145
Web Map Server Connection Problems . . . . . . . . . . . . . 145
General . . . . . . . . . . . . . . . . . . . . . . . . . . . . . . . . . 148
Index
viii GPS Pathfinder Office Getting Started Guide
Page 11

About This Manual
Welcome to the GPS Pathfinder® Office software. This software,
together with its associated utilities, provides all the functionality you
need to correct, view, and edit GPS data collected in the field, and to
export it in a format suitable for your GIS, CAD, or spatial database
system. This manual describes how to install, set up, and use the GPS
Pathfinder Office software.
Scope and Audience
Even if you have used other Global Positioning System (GPS)
products before, Trimble recommends that you spend some time
reading this manual to learn about the special features of this product.
We assume you are familiar with basic GPS and GIS concepts, which
are explained in the Mapping Systems Genera l Refe rence. If you are
not familiar with GPS:
• Read the booklet GPS, A Guide to the Next Utility (available
from Trimble).
• Visit our website, www.trimble.com, for an interactive look at
Trimble and GPS.
Trimble assumes that you are familiar with Microsoft Windows, and
know how to use a mouse, select options from menus and dialog
boxes, make selections from lists, and use online Help.
GPS Pathfinder O ffi ce G e ttin g Started Guide ix
Page 12

About This Manual
Related Information
Other manuals in this set include the Mapping Systems General
Reference. This manual introduces the basic principles of using GPS
to make maps. It pro vides the b ackgrou nd informat ion you need to use
Trimble Navigation Limited’s mapping products including GPS
receivers, data collectors, and software.
Other sources of related inf ormation are:
• Help – The software has built-in, context-sens itive online Help
that lets you quickly find the information you need. Access it
from the Help menu. Alternatively, click the Help button in a
window, or press
like an onlin e manual . Use the scr oll b u ttons to mo v e from page
to page.
• Release Notes – The release notes describe new features of the
product, information not included in the documentation, and
any changes to the documentation.
• Readme.rtf file – The release notes are also available as a
readme.rtf file. To read this file, double-click it or use a text
editor to open it. The installation program also copies it into the
program directory (C:\Program Files\GPS Pathfinder Office\).
[F1]
. This comprehensive Help system reads
• World Wide Web (WWW) site – For an interactive look at
Trimble, visit our site on the World Wide Web
(www.trimble.com). You can also download the latest software
updates, language files, and documentation.
• Trimble training courses – Consider a training course to help
you use your GPS system to its fullest potential. For more
informati on, visit the Trimble website at
www.trimble.com/support/training.htm.
x GPS Pathfinder Office Getting Started Guide
Page 13

Technical Assistance
If you have a problem and ca nnot f ind the infor mation you nee d in the
product documentation, contact your local distributor.
Alternatively, request technical support using the Trimble website at
www.trimble.com/support/support.htm.
Your Comments
Your feedback about the supporting documentation helps us to
improve it with each revision. To forward your comments, do one of
the following:
• Send an e-mail to ReaderFeedback@trimble.com.
• Complete the Reader Comment Form at the back of this manual
and mail or fax it according to the instructions at the bottom of
the form.
If the reade r comment form is not available, send comments and
suggestions to the address in the front of this manual. Please mark it
Attention: Technical Publications Group.
About This Manual
GPS Pathfinder O ffi ce G e ttin g Started Guide xi
Page 14
About This Manual
Document Conventions
The document conventions are as follows:
Convention Definition
Italics identifies softw ar e menu s, men u comm ands , di alog
Helvetica Narrow represents messages printed on the screen.
Courier Bold represents information that you must type in a
Helvetica Bold identifies a software command button.
[Ctrl]
is an example of a hardware function key that you
box es, and the dialog box fields.
software screen or window.
must press on a personal computer (PC). If you
must press more than one of these at the same
time, this is represen ted b y a p lus sign, fo r e xample ,
[Ctrl]+[C]
.
xii GPS Pathfinder Office Getting Started Guide
Page 15

CHAPTER
1
Introduction 1
The GPS Pathfinder® Office software is produced by Trimble
Navigation Limited for managing and processing data collected using
Trimble mapping and GIS data collection systems. It provides all of
the tools that you need for managing a data collection project,
handling data from the entire range of mapping and GIS data
collection systems that use Trimble Global Positioning System (GPS)
receivers.
The software runs under the following Microsoft operating sy stems:
• Windows 95
• Windows 98
• Windows NT 4.0
• Windows 2000
• Windows Me
• Windows XP
The GPS Pathfind er Office software lets you:
• plan the best times to collect GPS positions, using the
QuickPlan™ mission planning utility
Page 16

1 Introduction
• create separate projects, which lets you manage the data
associated with these projects effectively and conveniently
• construct and edit data dictionaries, which are used to control
the data collection operation and ensure that the collected d ata
is complete, accurate, and compatible with your GIS, CAD
package, or database
• convert data from a GIS or database format to the Trimble SSF
format so that you can take the data back into the field to check
and update it
• transfer files to and from handheld data collectors and field
computers
• display and edit collected data in the office, optionally
overlaying this data onto a vector or raster background, or a
Web Map Server map.
• process the GPS positional data to improve its ac curacy
• export the collected, processed, and edited data to a GIS, CAD,
or database format
• produce a scaled plot as a paper record of the data
2 GPS Pathfinder Office Getting Started Guide
Page 17

CHAPTER
2
Installation 2
■ Introduction
■ Hardware and software requirements
■ Installing the GPS Pathfinder Office software on a standalone computer
■ Installing the GPS Pathfinder Office software on a network
Page 18

2 Installation
2.1 Introduction
This chapter describes how to ins tall a ne w copy of th e GPS Pathf inder
Office software and how to upgrade the software from a previously
installed version.
Use the following components when you install the GPS Pathfinder
Office software:
• The GPS Pathfinder Office software installation CD
• Your computer
• The existing GPS Pathfinder Office security key (if you are
upgrading from version 2.11 or earlier)
• The existin g GPS Pathfinder Office software (if you are
upgrading from version 2.50 or later)
• Serial number and authorization key
2.2 Hard war e an d So ftware Requirements
The minimum requirements to r un the GPS P athf inder Of f ice softw are
are:
• a Pentium PC, 133 MHz or faster with math coprocessor
• 32 MB RAM and 160 MB of free disk space for a standard
installation (with space for data files)
• SVGA screen (gray scale or color)
• 1 RS232 serial port (for data collector communication)
• Keyboard with mouse or trackball
• CD-ROM drive
• Microsoft Windows Me, Windows 98, Windows 95,
Windows XP, Windows 2000, or Windows NT version 4.0
(service pack 4 or later)
• Internet Explorer version 4.0 or later
4 GPS Pathfinder Office Getting Started Guide
Page 19

Installation 2
2.3 Installing GPS Pathfinder Office on a Standalone
Computer
This section explains how to:
• install the GPS Pathfinder Office software on a standal one
computer
• upgrade from a previous version of the GPS Pathfinder Office
or GEO-PC software on a standalone computer
T o insta ll or upgrade t he GPS Pathf inder Of f ice softw are on a netw ork,
see page 20.
2.3.1 Installing or Upgrading the Software
The installation program uses the name, serial number, and
authorization key you enter to detect whether you are upgrading from
an existing installation or installing the software for the first time.
If the serial number indicates that you are upgrading, the installation
proceeds only if the previous version is still installed on your
computer. Make sure that the latest version of the GPS Pathfinder
Office software is in stalled to a different folder from your current
(earlier) v ersion. If the e arlier v ersion req uires a sec urity ke y , this must
be connected to your computer for the upgrade to proceed.
You can choose the language that the GPS Pathfinder Office software
will use: English, Chinese, French, German, Japanese, Korean,
Portuguese, Russian, or Spanish.
If you install a language for which Help files are not a v ailable, you can
still install Help files in another language.
If you are running virus-scanning software that checks all files,
Trimble r ecommen ds that you set i t to che ck progr am f iles only, while
installing the GPS Pathfinder Office software. Otherwise the
installation may run very slowly.
GPS Pathfinder O ffic e Gett ing Started Guide 5
Page 20
2 Installation
Before you install or upgra de the GPS Pathfinder Office software:
• Close all Windows programs.
• Have Microsoft Windows Me, Windows 98, Windows 95,
Windows XP, Windows 2000, or Windows NT version 4.0
(service pack 4 or later) installed on the computer.
• Make sure that you have local or domain administration rights,
if you are running Windows 2000 or Windows NT. For more
information, see your system administrator.
To install or upgrade the GPS Pathfinder Office software:
1. Turn on the computer and start Microsoft Windows.
2. Insert the GPS Pathfinder Office CD in the CD-ROM drive of
your computer.
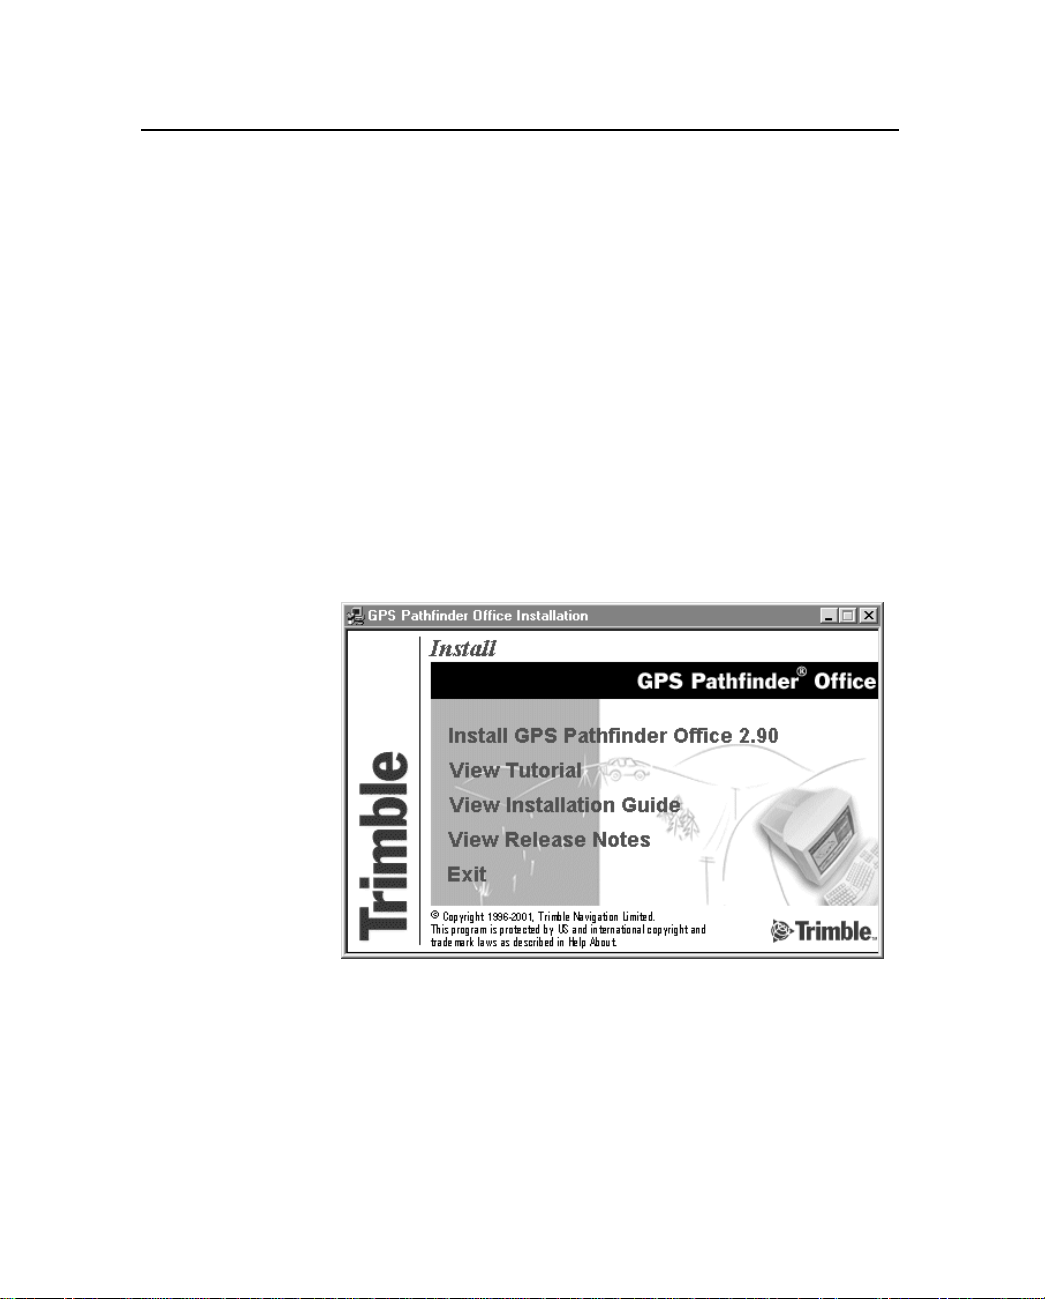
The Setup program should start automatically:
If the Setup program does not start automatically:
– On the Windows taskbar, click Start and selec t the Run
command. The Run dialog appear s. In the Open field, type
d:\msetup.exe (the drive letter may be different on your
computer) and click OK.
6 GPS Pathfinder Office Getting Started Guide
Page 21
Installation 2
C
Warning – If you are installing GPS Pathfinder Office under Windows XP
or Windows 2000 and you do not have administrator rights, a Windows
dialog appears asking if you want to continue to install GPS Pathfinder
Office under the current account, or if you want to install it under an
administrative account. When you click
procedure stops. To successfully install GPS Pathfinder Office under
Windows XP or Windows 2000, refer to the GPS Pathfinder Office
Release Notes.
OK to continue, the installation
3. Click Install GPS Pathfinder Office 2.90.
After a short loading period, the Select Setup Language dialog
appears.
4. Select the language that you require to run the installation and
click
Next. To run the rest of the GPS Pathfinder Office
software in a language other than English, you must download
the appropriate language update from the Web. For more
information, see page 17.
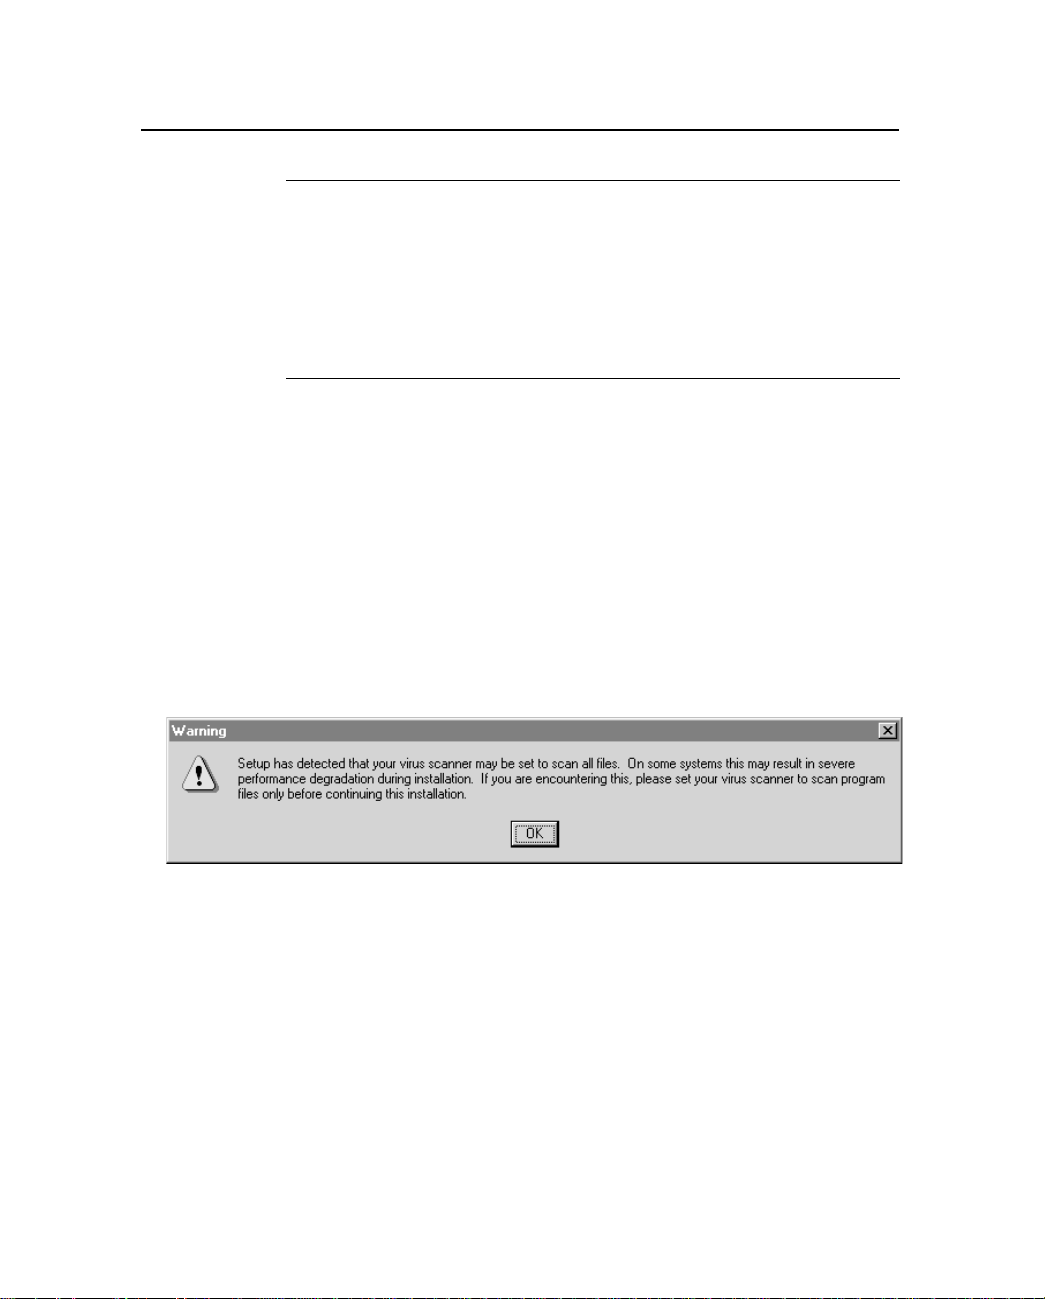
5. If your computer has a virus scanner running, the following
message appears:
6. Click OK. The Welcome dialog appears.
Note – If you are running an early version of Windows 95 that
does not have the Microsoft Distributed Component Object
Model (DCOM
upgrade some syste m files. Click
1
) installed, a message appears asking you to
Yes. The files will be updated.
Restart your comput er an d t hen start the GPS Pathfinder Office
installation process again.
1.
DCOM, a technology that enables software components to communicate directly with each other across
networks, including the Internet and intranets.
GPS Pathfinder O ffic e Gett ing Started Guide 7
Page 22
2 Installation
7. Read the information in this dialog. You are reminded to close
all Windows programs. Clicking
Cancel now (or at any later
stage) stops the installation process without installing any files
on the computer.
8. Click Next.
The Software Lic ense Agreement dialog appears.
9. Read the information in this dialog and click Yes to agree to the
license conditions. Click
No to stop the installation process
without installing any files on the computer.
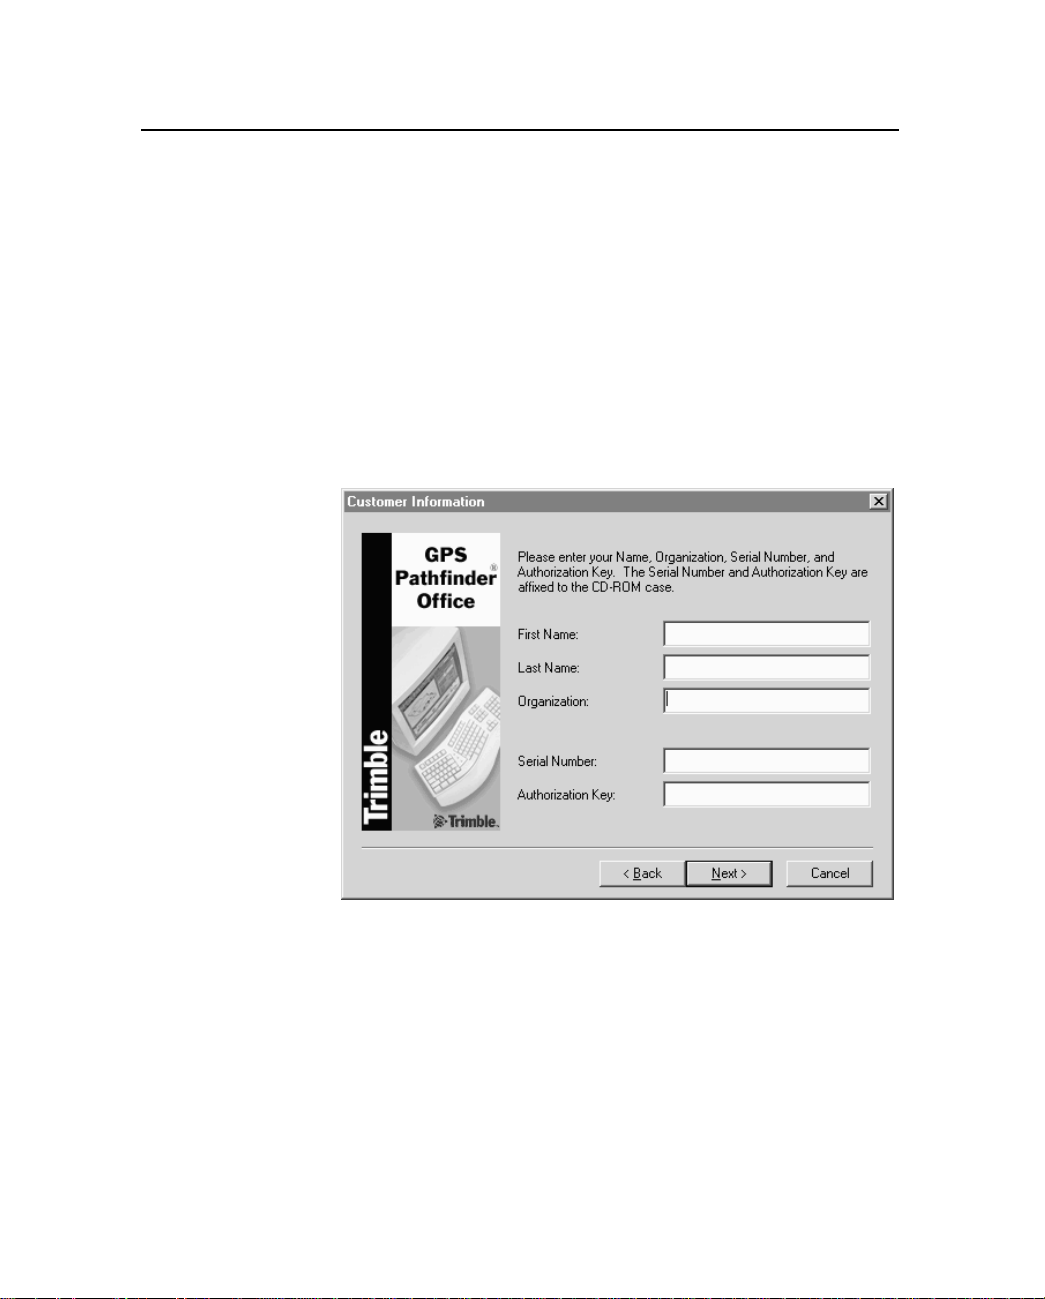
The following dial og appea rs :
10. Enter the following information:
a. In the First Name and Last Name fields, enter your name.
b. In the Organization field, enter t he name of the c ompany or
organization that you represent.
c. In the Serial Number field, enter the serial number exactly
as shown on the GPS Pathfinder Office CD-ROM case.
8 GPS Pathfinder Office Getting Started Guide
Page 23
Installation 2
d. In the Authorization Key field, enter the authorization key
as shown on t he GP S Pa thf in der Office CD-ROM case ( the
capitalization does not matter).
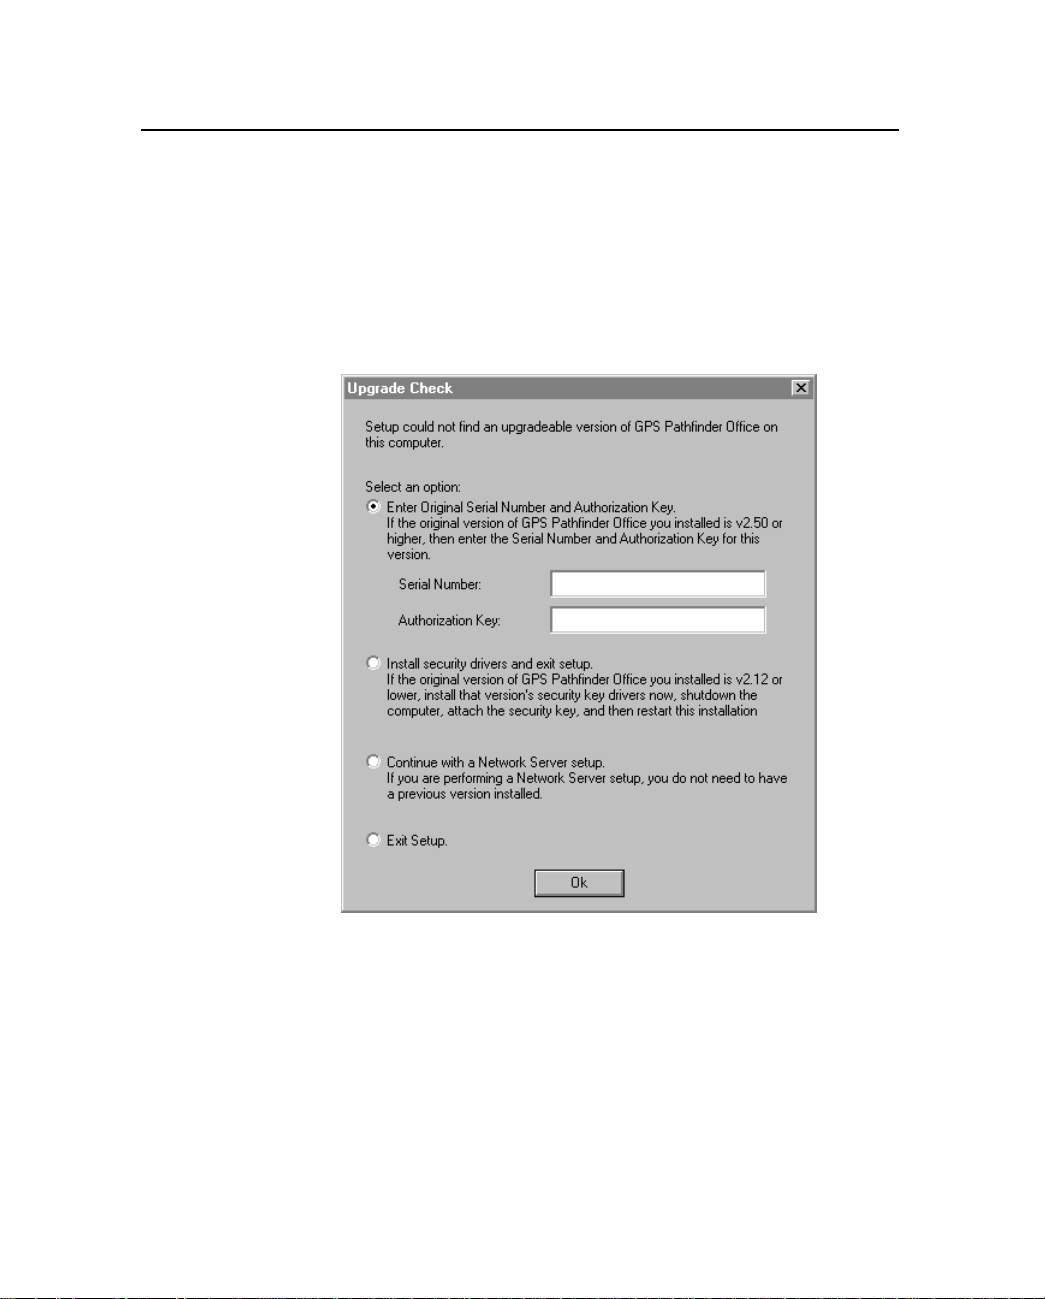
11. Click Next. If you are upgrading from a previous version of the
GPS Pathfinder Office software, and the installation program
cannot find an earlier version of the software to upgrade, the
following dialog appears:
12. Select one of the options in the dialog, and follow the
accompanying instructions.
If you select an option that requires a serial number and
authorization key, make sure that these are from your original
installation of the GPS Pathfinder Office software—not f rom
any subsequent upgrade installations.
GPS Pathfinder O ffic e Gett ing Started Guide 9
Page 24
2 Installation
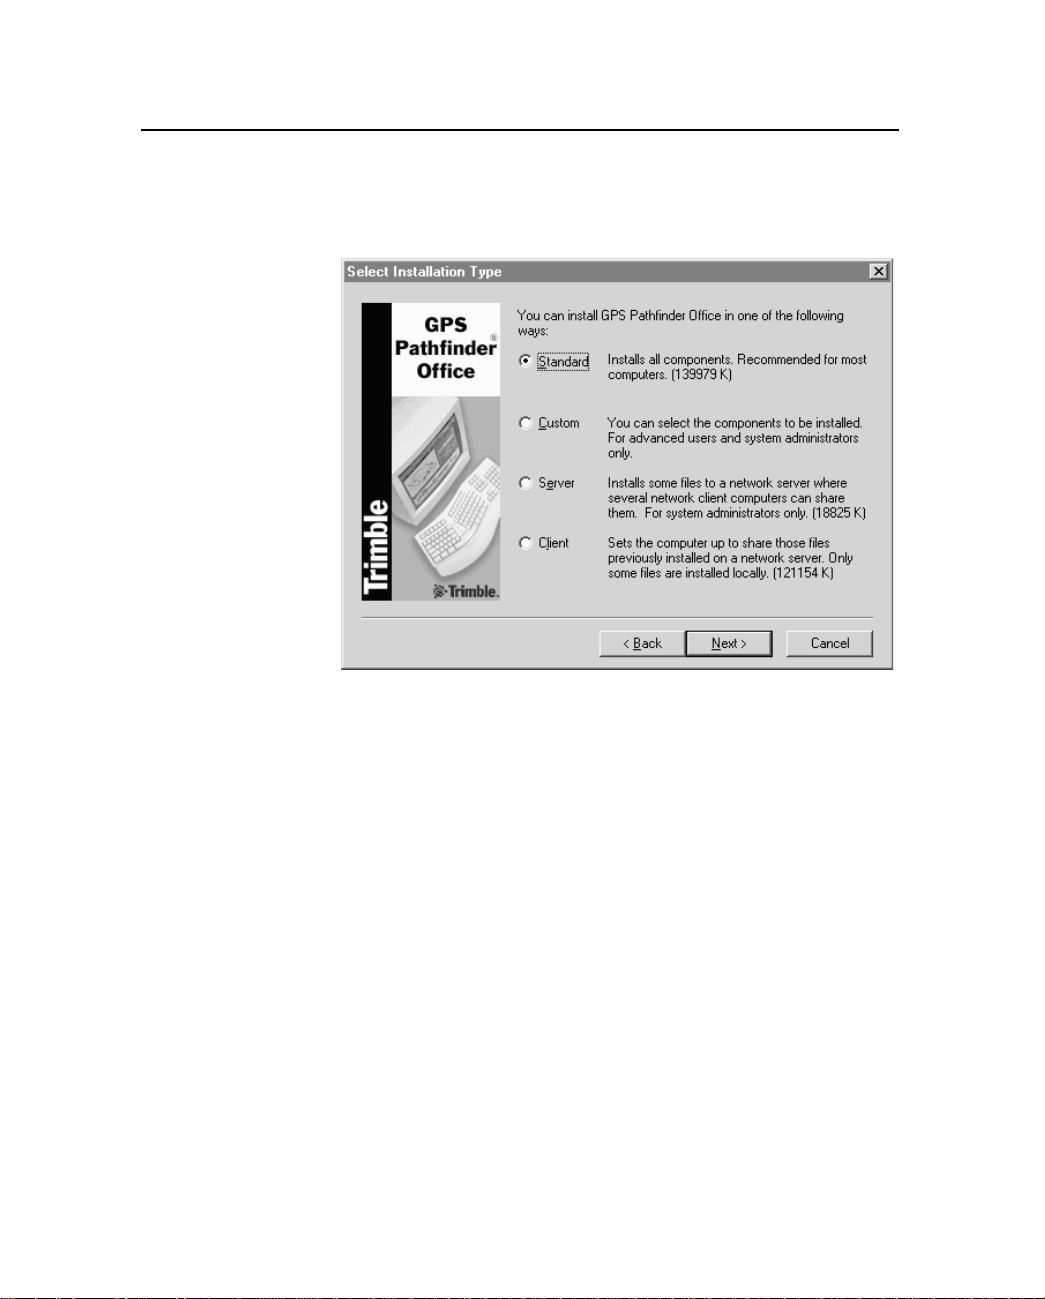
Once you correctly enter the serial number and authorization
key, or if you selected the network s er v e r se tup, when you click
OK in the Upgrade Check dialog, the following dialog appears:
13. Do one of the following:
– Select Standard to begin the default installation.
This option installs all components of the GPS Pa thfinder
Office software.
– Select Custom to begin a custom installation.
This option lets you choose the components of the GPS
Pathfinder Office software to be installed. Select it if you
want to save disk space and if you know that you only
require certain components installed. When you select this
option and click
appears.
Note – To install GPS Pathfinder Office onto a network as a
server or client installation, see page 20.
14. Click Next.
10 GPS Pathfinder Office Getting Started Guide
Next, the Select Components dialog
Page 25
Installation 2
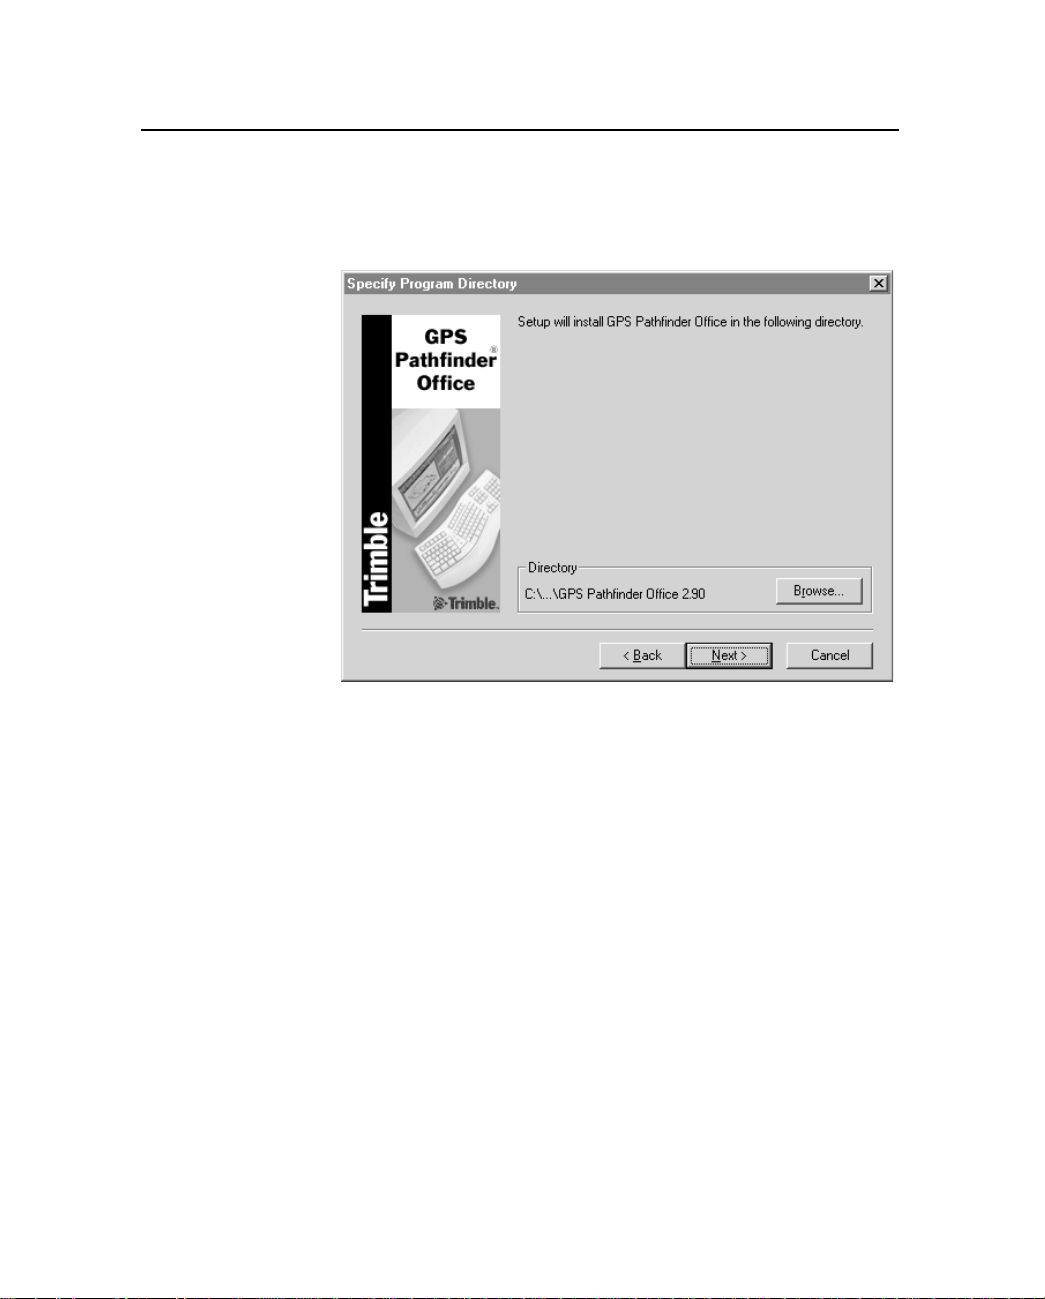
If you chose the Custom option above, go to Step 17.
If you chose the Standard option above, the following dialog
appears:
15. Select the folder where you want to install the GPS Pathfinder
Office software. By default, the folder is C:\Program Files\GPS
Pathfinder Office 2.90. To change it, click
Browse.
16. Click Next.
GPS Pathfinder Office Getting Started Guide 11
Page 26
2 Installation
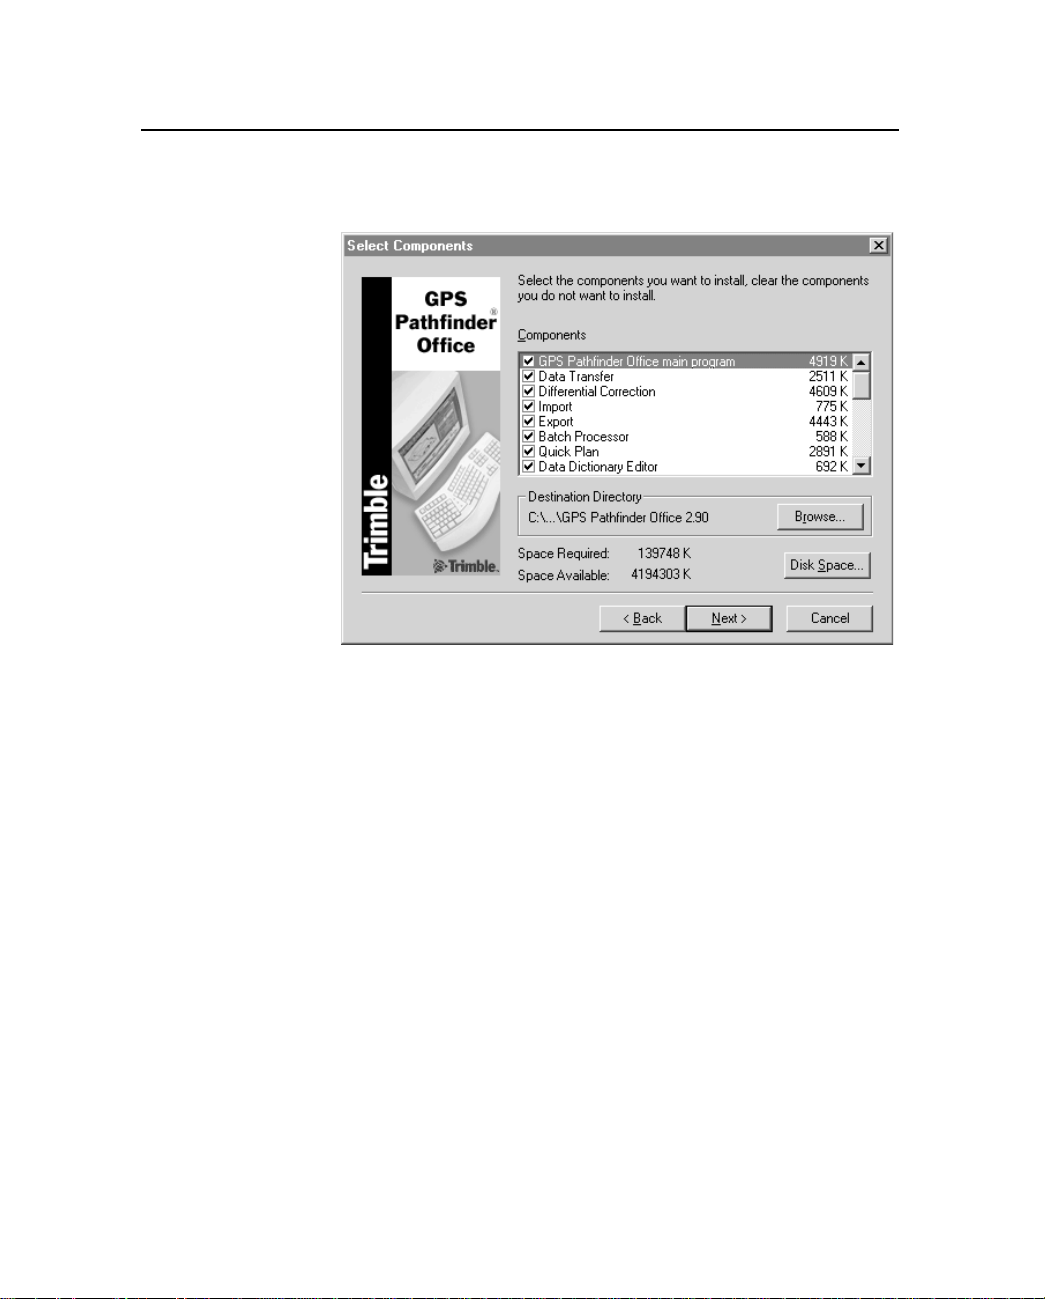
If you chose the Custom optio n at St ep 13, the following dialog
appears:
By default, all components ar e selected; this is equivalent to
performing a Standard installation.
17. Clear the check box beside any components you do not want to
install.
The Destination Directory field displays the folder where the
selected components of the GPS Pathfinder Office software are
installed. By default, this is set to C:\Program Files\GPS
Pathfinder Office 2.90. To change it, click
12 GPS Pathfinder Office Getting Started Guide
Browse.
Page 27
Installation 2
18. Click Next.
If you have not installed the GPS Pathfinder Office software or
another Trimble software product before, the Specify Trimble
Common Files Destination Directory dialog appears:
a. In the Directory group, select the folder where you want to
install common components used by the GPS Pathfinder
Office sof tware and ot her T rimble products . By default, t he
folder is C:\Program Files\Common Files\ Trimble. To
change it, click
Browse.
b. Click Next.
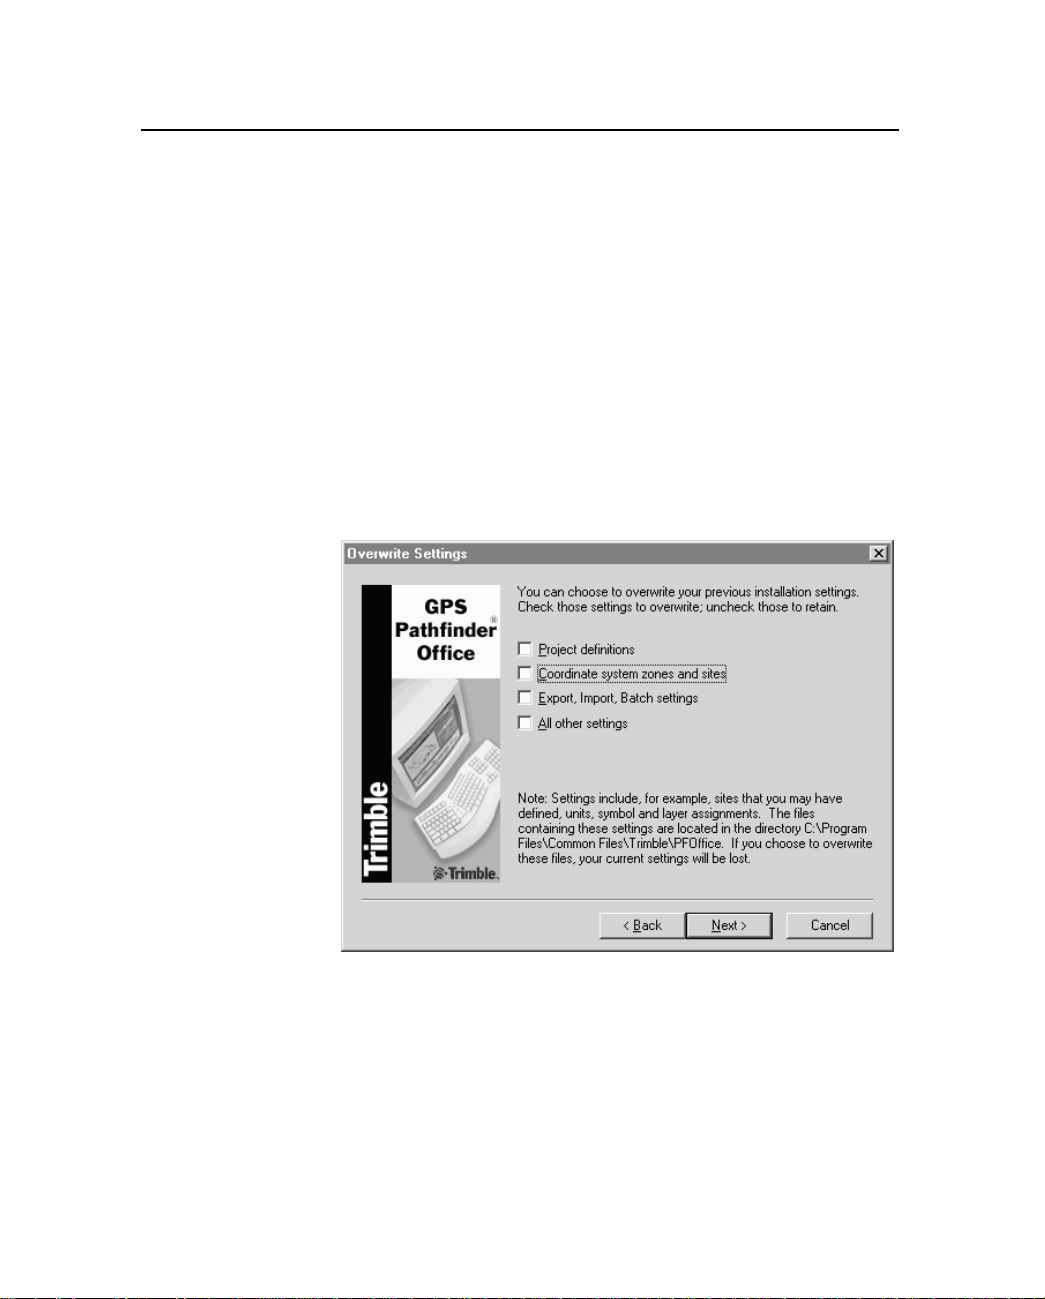
19. If the GPS Pathfinder Office software is already installed on
your computer, the following dialog appears:
GPS Pathfinder Office Getting Started Guide 13
Page 28

2 Installation
20. If you want to overwrite the settings defined in a previously
installed version of GPS Pathfinder Office select the check
boxes beside thos e settings. Do not select any settings you w ant
to keep.
– Select the Pr o ject de f i niti ons check box to ins tall new GPS
Pathfinder Office project definitions. Any project
definitions that have bee n cr ea te d in a previous installation
of the GPS Pathfinder Office software will be overwritten.
The data in those project folders is not deleted.
– Select the Coordinate system zones and sites check box to
overwrite all coordinate systems. Do not select this check
box if you have created custom coordinate systems.
– Select the Export, Import, Batch settings check box to
overwrite all export, import, and batch settings. Do not
select this check box if you have created custom export,
import, or batch settings.
– Select the All other setti ngs chec k box to o ve rwrit e custo m
icons for points and the default window settings.
21. Click Next.
The Specify Data Directory dialog appears.
22. In the Directory group, sel ect the folder wh ere you w ant to store
projects and data. Th e f irst time you creat e a project , this wi ll be
the default folder. The tutorial files are also installed in this
folder. By default, this is set to C:\Pfdata. If necessary, click
Browse to change it.
Note – To avoid upgrade problems, Trimble recommends that
you set your default data folder to be a folder on your local
drive.
23. Click Next.
14 GPS Pathfinder Office Getting Started Guide
Page 29

Installation 2
If you are running Windows Me, Windows 98, or Windows 95,
the following dialog appears:
GPS Pathfinder Office may require changes to be made to the
autoexec.bat file on the computer. Any changes that need to be
made are shown in this dialog.
If you do not w an t th e Setu p p rogra m to auto mati call y mak e the
changes for you, select the option to save the changes to a
separate file or to do nothing.
–Click Next.
Note – Even if you do not mak e t he ch ange s now, the changes to
the autoexec.bat file must be made at some stage for the DOS
utilities pr o vided with the GPS Pathfinder Of fice sof twar e to run
correctly.
The Setup program begins installing files. A progress bar
indicates how far the installation has advanced.
GPS Pathfinder Office Getting Started Guide 15
Page 30
2 Installation
Depending on the installation options you have chosen, several
other messages may appear. For example, if you install the
Export or Import utilities, a message relati ng to the installation
of the Microsoft Data Access Components (MDAC) software
may appear.
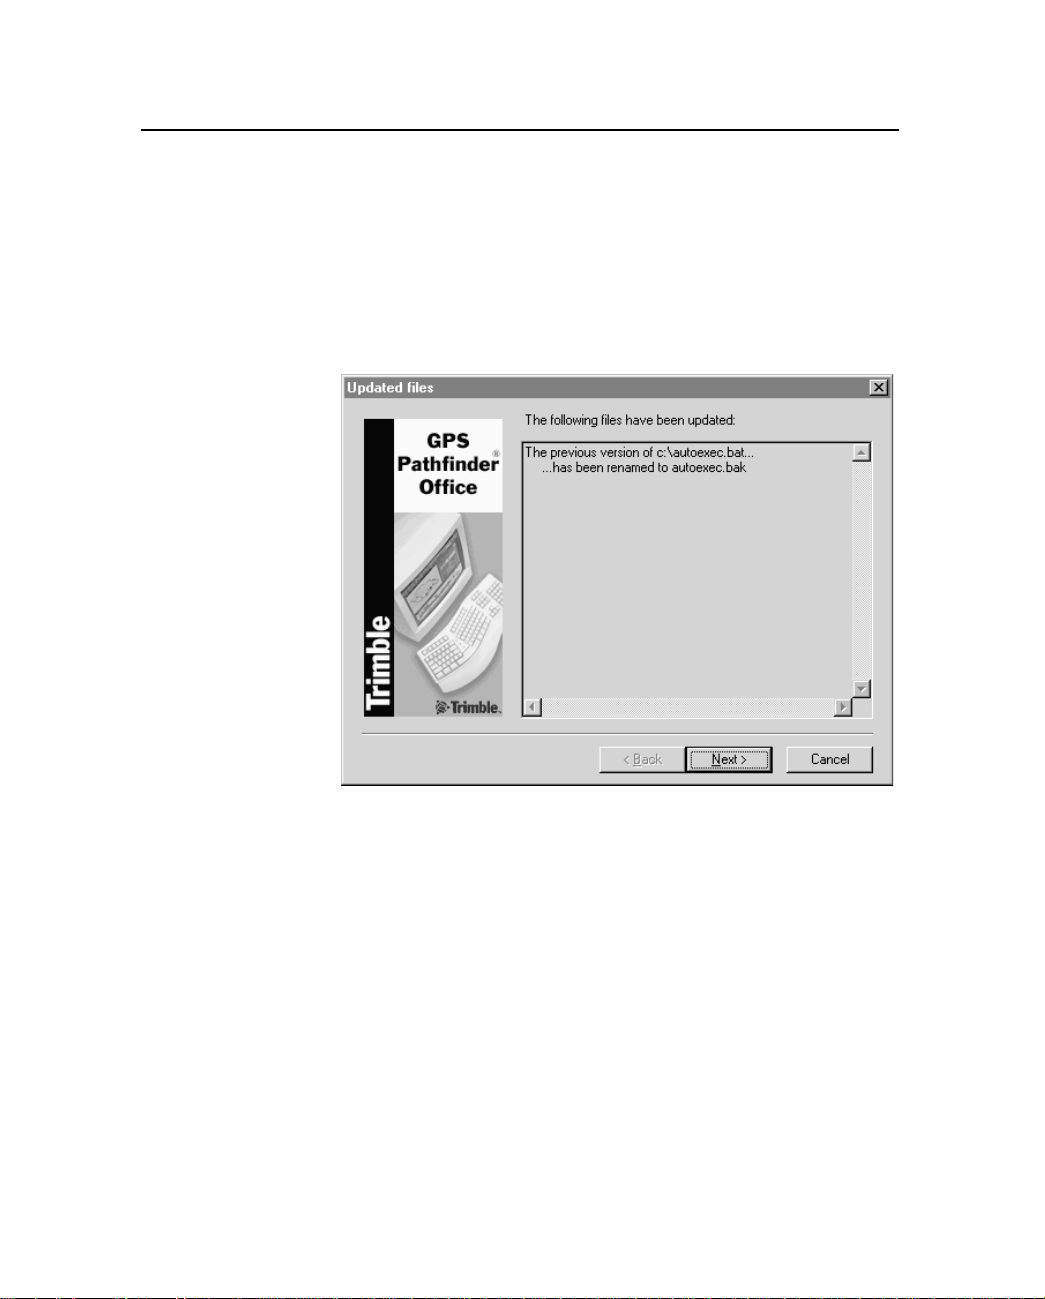
If system files have been updated during the installation
process, the following dialog appears:
Backup copies of the original system files are made, as shown
in the dialog.
24. Click Next.
The Tutorial dialog appears.
If you hav e not used the GPS P athfinder Office softwar e bef ore,
Trimble recommends that you work through the tutorial.
25. Click View Tutorial to view or print the tutorial.
16 GPS Pathfinder Office Getting Started Guide
Page 31

Installation 2
26. Click Next. The following dialog appea rs:
27. Select one of the following options and then click Next:
– Check for updates now
Select this option t o ch eck the Trimble website now for the
latest GPS Pathfinder Office software, documentation, and
language updates. (You must have an Internet c onnection.)
The GPS Pathfinder Office Updater utility starts.
– Check for updates later
Select this option to chec k the T rimble websi te later for the
latest GPS Pathfinder Office updates. (To do this, from the
Windows Start menu select Programs / Trimble GPS
P athf inde r 2.90 / Trimble GPS P athf inder Updater, or from
the GPS Pathfinder Office software select Help / Check for
new GPS Pathfinder Office updates now.)
For more information about the GPS Pathfinder Updater utility ,
refer to the Help.
GPS Pathfinder Office Getting Started Guide 17
Page 32

2 Installation
28. Click Next. The following dialog appea rs:
29. T o re gist er the GPS P at hfi nder Of f ice so ftware , select one of th e
following options:
– Register via the Internet (web access required)
This option starts your Web browser and takes you to
Trimble’s website so you can register the software. You can
choose to be notified via e-mail about upgrades and new
functionality with the GPS Pathfinder Office software or
with other Trimble products.
– Register by fax or mail
Select this option if you do not have access to the Internet.
The file register.txt opens w ith the customer information
that you entered in Step 10 (page 8) already filled in.
Complete the rest of the details and print the file, then fax
or mail to the address listed in the file.
18 GPS Pathfinder Office Getting Started Guide
Page 33

Installation 2
– Register later
Select this option if you prefer to register at a later date.
When you are ready to register the software, open the GPS
Pathfinder Office software and select one of the following
commands:
Help / Registration / Via Internet
Help / Registration / Via Fax or Mail
30. Click Next.
– If you need to restart your computer before running GPS
Pathfinder Office, the following dialog appears:
Do one of the following:
–Click Yes if you want to restart the computer now.
–Click No if you want to return to the Windows desktop, to
close down any open programs before you restart the
computer.
After you restart the computer you can run the GPS
Pathfind er Office software.
GPS Pathfinder Office Getting Started Guide 19
Page 34

2 Installation
In some cases, the following dialog may appear:
31. Click OK to complete the installation.
2.4 Installing GPS Pathfinder Office on a Network
This section explains how to install the GPS Pathfinder Office
software on a network. This includes both server and client
installations. A network installation should be performed by the
system administrator.
2.4.1 Network Server Installation
A network server installation of the GPS Pathfinder Office software
installs some files to a network serve r wher e net w ork cl ient comp uters
can share th em. This must be carried out by a sy stem administrator
only. Once it is complete, it is necessar y to carry out a network client
installation on each user’s computer.
To perform a network server installation:
1. Follow Step 1 through Step 11 beginning on page 6.
If you are upgradi ng from a pre vious v ersion and the inst allation
program cannot find a version of the GPS Pathfinder Office
software to upgrade, the Upgrade Check Failed dialog appears.
2. You are performing a network server setup, so you do not have
to install the previous version. Select the Continue with a
Network Server setup option and click
20 GPS Pathfinder Office Getting Started Guide
OK.
Page 35

The following dial og appea rs :
3. Select the Server option and click Next.
The Specify Server Program Directory dialog appears.
Installation 2
Shared files, such as program files will be stored on the
network.
4. In the Directory group, select the folder on the network where
the GPS Pathf in der Offic e sof tw are will be installed. To change
the network drive and folder, click
5. Continue the installation from Step 23, on page 14.
2.4.2 Network Client Installation
A network client installation sets up the computer to share those files
previously installed on a network server. Only some files are installed
locally. Once the GPS Pathfinder Office software is in stalled on a
network dri v e, you need to set up a Start menu gr oup and i con for e ach
network user.
GPS Pathfinder Office Getting Started Guide 21
Browse.
Page 36

2 Installation
To perform a client installation:
1. Follow Step 1 through Step 11 of Installing GPS Pathfinder
Office on a Standalone Computer, beginning on page 6.
The following dial og appea rs :
2. Select the Client option and click Next.
The Specify Data Directory dialog appears.
3. In the Directory group, select the folder on the network where
you have installed the GPS Pathfinder Office software shared
files. This must be the same folder that you chose in Step 4 of
the network server install on page 21. If necessary, click
Browse to select the folder.
The GPS Pathfinder Office software will install the client
components in the common area of your hard drive.
4. Continue the installation from Step 23 on page 14.
22 GPS Pathfinder Office Getting Started Guide
Page 37

CHAPTER
3
Basics of Operation 3
In this chapter:
■ Introduction
■ Starting the GPS Pathfinder Office software
■ Application window
■ Windows
■ Toolbars
■ Shortcut menus
■ Measurement units
■ Exiting the GPS Pathfinder Office software
Page 38

3 Basics of Operation
3.1 Introduction
This chapter describes the way the GPS Pathfinder Office software
and its utilities work. It also explains how to work with the software.
Trimble assumes that you know how to use dialogs, windows, and
other aspects of the Windows environment.
3.2 Starting the GPS Pathfinder Office Software
To start the GPS Pathfinder Office software, do one of the following:
•Click on the Windows taskbar, then select Programs /
GPS Pathfinder Office.
• Double-click the GPS Pathfinder Office
shortcut icon on the desktop:
The GPS Pathfinder Office logo appears while the
program is loading, followed by the GPS Pathfinder
Office applicat ion wind ow ( see Applic ation Window,
page 26).
24 GPS Pathfinder Office Getting Started Guide
Page 39

3.2.1 Setting the Time Zone
The first time you start the GPS Pathfinder Office software, you are
asked to set th e t ime z one . It is important to co nfigure GPS Pathfinder
Office for the local time zone. If you do not, the time records in field
data files display as GPS time, which approximates Greenwich Mean
Time. For instructions on how to do this, see Setting the Local Time
Zone, page 51.
3.2.2 Selecting a Project
When you first start the GPS Pathfinder Office after installation, the
Select Pr oj ec t dialog appears.
A project is a set of folders on the computer that store the data f ile s for
a particular job. They let you separate the data into different areas on
the computer so you can keep track of different jobs separately. For
instructions on how to select a project, see Selecting a Project,
page 52.
Basics of Operation 3
GPS Pathfind er O ffic e Get t ing Started Guide 25
Page 40

3 Basics of Operation
3.3 Application Window
When you start GPS Pathfinder Offi ce, its application window
appears. The GPS Pathfinder Office application window (with the
Map and Time Line window open) is shown in Figure 3.1.
The … does the following … For more
information, see …
Title bar displays the name of the software (GPS
Pathfinder Office), followed by the name of the
current data file, if a data file is open. In this
case tutor ial.ssf.
Toolbars offers convenient access to frequently used
operations and utilities.
Map window shows the open file along with any background
files.
Time Line window shows a visual display of when the data was
collected along a linear time axis
Positio n Properties
window
Feature Properties
window
Status bar displays information about the current project,
lets you view the positions of a f eature . You can
also delete a position.
lets you view and change the attributes of a
feature or note in GPS Pathfinder Office.
for example, the coordinate system selected.
–
page 35
page 77
page 77
page 89
page 89
–
26 GPS Pathfinder Office Getting Started Guide
Page 41

Map window Position Properties window
Basics of Operation 3
Time Line window Feature Properties window
Title BarToolbars
Figure 3.1 GPS Pathfinder Office application window
GPS Pathfind er O ffic e Get t ing Started Guide 27
Status bar
Page 42

3 Basics of Operation
3.4 Windows
The GPS Pathf in der Office software makes extens ive use of windows.
There are two main windows:
•The Map window
•The Time Line window
For more information, see Map Window, page 29 and Time Line
Window, page 29.
When you run the GPS Pathfinder Office software for the first time, a
default arrangement of windows appears on the screen. You can
change this, so that the GPS Pathfinder Office software starts with the
windows you want open.
3.4.1 Saving the Window Layout
You can set up the windows you want to open automatic al ly when th e
GPS Pathfinder Office software starts. To set the window layout for
subsequent sessions:
1. Resize and position the GPS Pathfinder Office windows so that
they are the way you want them.
2. From the Options menu choose Save Window Layout on Exit so
that it has a check mark () beside it.
3. Exit the GPS Pathfinder Office software.
4. Each time you subsequently start the GPS Pathfinder Office
software, it recreates the last arrangement of windows that you
had when you closed the software.
28 GPS Pathfinder Office Getting Started Guide
Page 43

3.4.2 Map Window
The Map window is the primary means of viewing your data. It
provides a plan view of the area. The Map window can display the
features you ha ve collecte d, the waypo ints in the current waypoint file,
and any number of background maps:
You can select the features, waypoints, and notes to view information
about them, or change them.
Basics of Operation 3
3.4.3 Time Line Window
The Time Line window provides an alternative view of your data. It
displays the features and notes you have recorded in the current data
file along a time axis (it does not display waypoints or backgrounds):
You can select the features and notes to view information about them,
or change them.
GPS Pathfind er O ffic e Get t ing Started Guide 29
Page 44

3 Basics of Operation
3.4.4 Manipulating and Moving the Windows
You can manipulate the Map and Time Line windows like any other
window. You can move them, resize the m , zoom in and out, and ‘pan’
around the display.
Zooming
In both the Map and Time Line windows, you ca n:
• zoom in to view information in greater detail
• zoom out to view a greater area
• zoom to exte nts to view all the information in the win dow
• zoom to the scale that the map was previously set to
To zoom in:
1. Click the Zoom In tool: . Alternatively, select View / Zoom /
In.
The tool remains depressed.
2. Move the poi nter over the window.
It now displays as a magnifying glass with cross-hairs
which mark the position of the pointer:
3. Do one of the following:
– Click a position in the window.
The scale of the window is halved, and the position
becomes the new center of the window.
30 GPS Pathfinder Office Getting Started Guide
Page 45

Basics of Operation 3
– Drag the pointer across the window until you produce a
rectangle that contains the data you want to zoom in on:
The smaller the area, the greater the scale change.
Release the mouse button. The window zooms in on the
rectangle you defined, so that the contents of the rectangle
now occupies the whole window.
Zooming out is the opp osi te of zooming in and works in a similar way.
To zoom out:
1. Click the Zoom Out tool: . Alternatively, select View /
Zoom / Out.
The tool remains depressed.
2. Move the pointer over the window. It becomes .
GPS Pathfind er O ffic e Get t ing Started Guide 31
Page 46

3 Basics of Operation
3. Do one of the following:
To zoom to extents:
1. Click the Map or Time Line window, to make it the active
2. Click the Zoom Extents tool: . Alternatively, select View /
– Click a position in the window. The scale of the window is
doubled, and the position becomes the new center of the
window.
– Drag the pointer across the window until you produce a
rectangle. The smaller the rectangle, the greater the scale
change will be. Release the mouse button. The scale of the
window changes, and the area previously displayed in the
whole window now occupies the rectangle.
window.
Zoom / Extents.
The window now displays all the information for the visible
layers in th e currently-open files. The previously selected tool
remains selected.
To zoom to the previous scale:
1. Click the Map or Time Line window, to make it the active
window.
2. Click the Zoom Previous tool . Alternatively, select View /
Zoom / Previous.
The window now displays information at the scale used before you
last zoomed or panned.
Panning
You can shift the contents of the Map and Time Line windows, so that
they display a different area or time period of the data file. You can
also configure the windows so that they pan automatically to include
the currently selected item.
32 GPS Pathfinder Office Getting Started Guide
Page 47

Basics of Operation 3
To pan across the window:
1. Click the Pan tool: . Alternatively, select View / Pan.
The tool remains depressed.
2. Move the poi nter over the window.
The pointer becomes .
3. Do one of the following:
– Click a position in the window. That position becomes the
new center of the window.
– Drag the pointer in the direction and for the distance you
want to pan. A dotted line indicating the amount the
window view will move appears as you drag the pointer:
Release the mouse button. The contents of the window
shifts in the direction and for the distance indicated by the
dotted line.
GPS Pathfind er O ffic e Get t ing Started Guide 33
Page 48

3 Basics of Operation
To automatically pan the Map or Time Line windows to any selected
item:
1. Click the Auto-pan to Selection tool . Alternatively, select
2. Do one of the following:
View / Auto-pan to Selection.
A check mark () appears beside the menu command.
– Select a feature using Edit / Find Feature or Data / Feat ure
Properties. The Map or Time Line window (whichever is
active) automatically pans so that the item is displayed.
– Select a waypoint using Data / Waypoint Properties. The
Map window automatically pans so that t he item is
displayed.
B
Tip – You can use this option to locate a feature or w aypoint which is hard
to find on the Map or Time Line window.
Selecting an Item
You can select items displayed on the Map or the Time Line window.
Only one item (one feature, note, or waypoint) can be selected at a
time.
• If a feature is selected in the Map or Time Line window, it is
selected in both windows. It also appears in the Feature
Properties window. (If the Feature Properties window is not
open, double-click a feature.)
• If a waypoint is selected on the Map window, it is also selected
in the Waypoint Propert ie s window.
• If a note is selected in the Time Line window, it is also selected
in the Feature Properties window.
A selected point feature, waypoint, or note has a frame around it, for
example:
34 GPS Pathfinder Office Getting Started Guide
Page 49

Basics of Operation 3
A selected line or area feature is drawn with a thicker line type, for
example:
To select an item, do one of the following:
• Double-click the item to select it. The Feature Properties
window or Waypoint Properties window opens.
• Click the item using the Select tool. It is shown as selected and
the window it is in becomes the active window, if it was not
already.
3.5 Toolbars
A toolbar is a series of buttons tha t provide quick access to frequently
used operations. Tools with related functions are grouped together.
Some tools display a dialog; other tools change the pointer, and some
start utility programs.
3.5.1 Types of Toolbars in the GPS Pathfinder Office software
The GPS Pathfinder Office software has four toolbars:
This toolbar … is called … For more information, see …
Standard page 38
Project page 39
Mouse page 39
Utility page 41
GPS Pathfind er O ffic e Get t ing Started Guide 35
Page 50

3 Basics of Operation
3.5.2 Displaying a Toolbar
You can show or hide a toolbar.
To display a toolbar:
1. Select Options / Toolbars. There are four toolbars in the
Toolbars submenu: Standar d, Project, Mouse, and Utility.
B
Tip – To display the Toolbar submenu you can also right-click on the edge
of the toolbar area.
2. If a toolbar is visible, a check mark () appears besi de its
name. Sele ct the toolbar in the submenu to remove the
checkmark. The toolbar disappears.
Select an un-checked toolbar to make the toolbar appear again.
3.5.3 Floating a Toolbar
You can move a toolbar from its ‘docked’ position and create a
‘floating’ toolbar, so that the toolbars are in a more convenient
location for you.
To make a floating toolbar:
1. Place the mouse an ywhere within the area of the t oolbar , but not
directly over a button.
2. Click once and hold the mouse down (the toolbar is depressed).
3. Drag the toolbar away from its docked position while
continuing to hold the mouse down.
4. Release the mouse at a position where you want to place the
floating toolbar.
To move a floating toolbar to any position on the desktop, drag the
toolbar by its title bar.
To change the shape of a floating toolbar, use its window border to
resize it.
36 GPS Pathfinder Office Getting Started Guide
Page 51

To close a floating toolbar, click in a floating toolbar’s close box.
T o ret urn the tool bar to its pre viously doc ked posi tion, double -click i ts
title bar . Alt ernati v ely, drag it back to the toolbar area. Toolbars can be
docked in any order.
3.5.4 Selecting a Tool in a Toolbar
To select a tool in the toolbar, do one of the following:
• Click the tool (button) on the toolbar.
• Select the equivalent menu command.
Basics of Operation 3
B
Tip – Position the pointer over any tool. A small yellow popup window
(ToolTip) appears, showing the name of the tool. Additional information
appears in the status bar at the bottom of the application window.
GPS Pathfind er O ffic e Get t ing Started Guide 37
Page 52

3 Basics of Operation
3.5.5 Standard Toolbar
The Standard toolbar contains tools
for file and window operations:
Click this
button …
to activate
this tool …
Open opens a data file(s) File / Open
Save saves a data file File / Save
Print prints a data file File / Print
Map opens the Map window View / Map
Time Line opens the Time Line window View / Time Line
Feature
Properties
Position
Properties
Waypoint
Properties
which does the following … The menu command
equivalent is …
opens the Feature Properties
window
opens the Position Properties
window
opens the Waypoint Properties
window
Data / Feature Properties
Data / Pos ition Properties
Data / Waypoint
Properties
38 GPS Pathfinder Office Getting Started Guide
Page 53

3.5.6 Project Toolbar
The Project toolbar contains tools
for managing projects:
Basics of Operation 3
Click this
button …
3.5.7 Mouse Toolbar
to …
display the name of the folder set for the present project.
Change the project by selecting a project name from the drop-down
list
display the amount of free disk space on the drive where the current
project is stored
open the folder named in the Current Project drop-down list box in a
Windows Explorer view
The Mouse toolbar contains too ls
for the mouse and view actions:
Click this
button …
to activate
this tool …
Select lets you select an ite m in the Map
Measure lets you measure distances
Delete Block lets you delete all positions with in
which does the following … The menu command
equivalent is …
Edit / Select
or Time Line window .
The pointer always appears as
an arrow. Click on an item in the
Map or Time Line window to
select that item.
Data / Measure
between two or more points, and
areas within a polygon.
Edit / Delete Block of
a selected rectangle.
Positions
GPS Pathfind er O ffic e Get t ing Started Guide 39
Page 54

3 Basics of Operation
Click this
button …
to activate
which does the following … The menu command
this tool …
Pan lets you pan across the contents
of the Map or Time Line
windows, so that a different part
of the window is displayed.
Zoom In lets you zoom in on a part of the
Map or Time Line window.
This magnifies the display by
decreasing the scale.
Zoom Out lets y ou z oo m out on the Map or
Time Line window.
This lets you see a greater area
by increasing the scale.
Zoom
Extents
acts on the Map or Time Lin e
window (whichever is the active
window).
It changes the scale so that the
window displays all the
information for the visible layers
in the currently open files.
Zoom
Previous
lets you undo the last zoom or
pan command and return to the
previous view.
Auto-pan to
Selection
configures the Map and Time
Line windows to always display
the current ly selected item.
equivalent is …
View / Pan
View / Zoom / In
View / Zoom / Out
View / Zoom / Extents
View / Zoom / Previous
View / Auto-pan to
Selection
40 GPS Pathfinder Office Getting Started Guide
Page 55

3.5.8 Utility Toolbar
The Utility toolbar contains to ols
for opening utility programs:
Basics of Operation 3
Click this
button …
to open the … The menu command equivalent is …
Batch Processor utility Utilities / Batch Processor
Trimble Data Transfer utility Utilities / Data Transfe r
Differential Correction utility Utilities / Differential Correction
Export utility Utilities / Export
Grouping utility Utilities / Grouping
Combine utility Utilities / Combine
Data Dictionary Editor utility Utilities / Data Dictionary Editor
QuickPlan utility Utilities / QuickPlan
Import utility Utilities / Import
GPS Pathfind er O ffic e Get t ing Started Guide 41
Page 56

3 Basics of Operation
3.6 Shortcut Menus
When you open a file, there are a
number of functions that you can
perform in the folder vie w window.
Right-click in the folder view
window (while no object is
selected) and the following menu
appears:
If you select an object in the folder
view window and right-click it, a
different menu appears. The commands in this menu vary depending
on the type of object selected.
You can right-click on a feature in
the Map or Time Line window to
display the shortcut menu, as show n
opposite with the fire hydrant
selected.
For line and area features, an
additional command, Delete
Position, appears.
42 GPS Pathfinder Office Getting Started Guide
Page 57

3.7 Measurement Units
Many fields in the GPS Pathfinder Office software's dialogs and
windows contain numeric values; you can specify the units for
displaying or entering these values.
Select Options / Units. The following dialog appears:
Basics of Operation 3
Use this dialog to choose units for distance, area and velocity, as well
as the formats for display of offsets and bearings. The default values
and options are shown above.
T o set uni ts for coor dinates and he ights, and t he referenc e for altitude s,
select Options / Coordinate System.
GPS Pathfind er O ffic e Get t ing Started Guide 43
Page 58

3 Basics of Operation
B
Tip – Let the GPS Pathfinder Office software convert your data into the
configured units. Simply enter the value followed by the abbreviation for
the units it is in. For example, if meters is the configured unit, and you
enter 10 ft, it is converted to 3.048 m. This applies only to fields that
contain distances, offsets, heights, or coordinates.
Values that you enter into a field are often in a particular unit, for
example meters. The field displays an abbreviation for the unit after
the value, so that you know the current units.
Note – A ‘?’ in a te xt ent ry box r e pr esents nothing . It is the def ault nul l
string, and it appears when a value was not entered in the field. To
specify a different null string, select Options / Style of Display.
3.7.1 Available Units
Table 3.1 lists the available units and their abbreviations.
Table 3.1 Unit abbreviations
Unit Abbreviation
Meters m
Feet ft
Inches in
Kilometers km
Millimeters mm
Miles mi
Namibian meters nam
Yards yd
Nautical Miles nm
US Survey Feet USft
44 GPS Pathfinder Office Getting Started Guide
Page 59

Basics of Operation 3
3.8 Exiting the GPS Pathfinder Office Software
To exit the GPS Pathfinder Office software:
1. Select File / Exit. If a data f ile i s still o pen and ther e are unsa v ed
changes, a message appears:
2. Click Yes to save and close the data file and quit GPS
Pathfinder Office.
The GPS Pathfinder Office application window closes.
GPS Pathfind er O ffic e Get t ing Started Guide 45
Page 60

3 Basics of Operation
46 GPS Pathfinder Office Getting Started Guide
Page 61

CHAPTER
4
Tutorial 4
In this chapter:
■ Introduction
■ Scenario
■ Lesson 1: Configuring the GPS Pathfinder Office software
■ Lesson 2: Preparing to collect data
■ Lesson 3: Differentially correcting the field data
■ Lesson 4: Viewing and editing the data
■ Lesson 5: Exporting data to a GIS or CAD system
■ Lesson 6: Updating the data
■ Lesson 7: Back in the office
■ Lesson 8: Special lesson
Page 62

4 Tutorial
4.1 Introduction
This chapter explains how to colle ct and maintain d ata for a GIS, an d
process the collected data using the GPS Pathfinder Office software. It
contains step-by-step instr uctions for the main tasks involved.
The tutorial lessons are designed to be completed in sequence, with
each lesson using the results from the previous lesson. The exception
is Lesson 8: Special Lesson, which has no effect on the other lessons
and can be done independently. The lessons assume that the GPS
Pathfinder Office softwa re’s default settings are unchanged. If they
have been changed, the software may behave differently.
The lessons use sample files supplied with the GPS Pathfinder Office
software. By default, these sample files are located in the
\Pfdata\Tutorial folder. If they have been deleted, reload them from the
installation CD using a Custom installation, and select the Tutorial
Files check box. For more information on installation, see Chapter 2,
Installation.
Note – This tutorial assumes that you ar e famil iar with GPS and using
the Windows software environment.
48 GPS Pathfinder Office Getting Started Guide
Page 63

Tutorial 4
Table 4.1 lists the lessons in this tutorial.
Table 4.1 Tutorial lessons
Lesson Approximate time to
complete
1. Configuring the GPS Pathfinder Office Software 3 minutes
2. Preparing to Collect Data 5 minutes
3. Differentially Correcting the Field Data 7 minutes
4. Viewing and Editing the Data 15 minutes
5. Exporting Data to a GIS or CAD System 3 minutes
6. Updating the Data 12 minute s
7. Back in the Office 15 minutes
Subtotal 60 minutes
8. Special Lesson 10 minutes
Total 70 minutes
4.2 Scenario
The local City Government maintains a GIS of its public assets. This
includes street signs, utility poles, parks and their amenities, parking
lots, and other types of assets. Information is stored about each asset,
including its condition and other information specific to each type of
asset.
Your task is to prepare the data dictionary so that the field crews can
collect the required information, process the data using the
GPS Pathfinder Office software, and then export it to your GIS.
A few months later, the data needs to be updated, so you must then
import the data from your GIS into the GPS Pathfinder Office
software, update the data dictionary, and send the field crews out with
the data so t hat they can update information on the assets.
GPS Pathfind er O ffic e Get t ing Started Guide 49
Page 64

4 Tutorial
4.3 Lesson 1: Configuring the GPS Pathfinder Office
Software
There are three options in the GPS Pathfinder Office software that are
important to configure before you use it.
This lesson shows you how to:
• set the local time zone
• select a project
• select a coordinate system
It takes approximately three minutes to complete.
4.3.1 Starting the GPS Pathfinder Office Software
To start the Product software, do one of the following:
•Click on the Windows taskbar, then select Programs /
GPS Pathfinder Office.
• Double-click the GPS Pathfinder Office
shortcut icon on the desktop:
The GPS Pathfinder Office logo appears while the
program is loading, followed by the Product
application window.
50 GPS Pathfinder Office Getting Started Guide
Page 65

4.3.2 Setting the Local Time Zone
You must configure GPS Pathfinder Office for the local time zone. If
you do not, the time records in field data files display as GPS time,
which approximates Greenwich Mean Time. Normally, you set the
local time zone once (and whenever summer time changes are
necessary).
To set the local time zone:
1. The first time you start the GPS Pathfinder Office software, you
are asked to set the time zone:
2. Click Yes.
3. The Time Zone Settings dialog automatically appears. If it does
not, select Options / Time Zone. The following dialog appears:
Tutorial 4
4. From the Time Zone field, select the time zone for your current
location.
GPS Pathfind er O ffic e Get t ing Started Guide 51
Page 66

4 Tutorial
B
B
4.3.3 Selecting a Project
Tip – If the local time zone is not available, click New Time Zone. The
Add Time Zone dialog appears. Enter the name of the time zone and the
offset from Greenwich Mean Time. For example, if the time zone is 9
hours and 45 minutes behind Greenwich, enter -9:45 as the offset. Click
OK.
5. Click OK to save the time zone settings and close the dialog.
Tip – To display GPS times at any stage, select Greenwich Mean Time
(+0:00) instead of the local time zone.
A project is a set of folders on the computer that store the data f ile s for
a particular job. They let you separate the data into different areas on
the computer so that you can keep track of different jobs separately.
You must decide how you want to use projects to separate the data.
You may want to hav e a dif fe rent proj ect for e ach dif fere nt site y ou are
working on, or you may have a project for each of your clients.
Note – If you include i nvalid characters, such as ?, +, >, or “ ”, when
naming a new project, you will receive an error message.
A project defines where certain types of files are stored on the
computer. Each project can point to a different set of folders. The
types of files that are distinguished by projects are:
• data files, including files created by importing from a GIS
• base files
• exported GIS or CAD format files
• backup copies of field data files
Each of these file types can be assigned a different default folder. By
default, this folder is selected whenever you open or save one of the
above types of files. In most cases you are not limited to just this
folder, but it serves as a useful default.
52 GPS Pathfinder Office Getting Started Guide
Page 67

Tutorial 4
The types of data that are not distinguished by projects are:
• data dictionaries
• waypoint files
• background files
• configuration files
These four types of files can be stored in projects if you want.
However, if you change projects the default folder will not change.
Usually these types of files are stored separately from project data so
that they can be accessed easily by all projects.
To select a project:
1. When you start the GPS Pathfinder Office software, the Select
Project dialog appears automatically:
B
If this dialog does not appear, select File / Projects to display it.
Tip – To stop the Select Project dialog appearing each time you start GPS
Pathfinder Office, clear the Display this dialog at start-up check box.
GPS Pathfind er O ffic e Get t ing Started Guide 53
Page 68

4 Tutorial
2. From the Project Name field, select Tutorial.
3. Look at the folders that are defined for this project:
The folder … Is defined as … Description
project \Pfdata\Tutorial This is the main project folder where the data files
are stored.
Whenever you open, save, or import a data file, this
folder will be selected by default.
backup \Pfdata\Tutorial\Backup A folder within the main project folder.
This is the folder where backup copies of the field
data are kept. Backup copies are made when files
are transferred from a data collector to the office
computer.
export \Pfdata\Tutorial\Export A folder within the main project folder of
Pfdata\Tutorial.
This is the folder where an y exported GIS or CAD
format files will be created by default.
base file \Pfdata\Tutorial\Base A folder within the main project folder of
Pfdata\Tutorial.
When selecting base files for differential correction,
by default, the software looks in this folder. If you
have one central folder for all base files, you can
define this folder explicitly when creating your own
projects. For example, if all of the base data resides
on a network folder, n:\Basedata, enter this folder in
the Base files field. The s ame rule holds f or the o the r
folders of a project.
4. Click OK to accept the tutorial project.
54 GPS Pathfinder Office Getting Started Guide
Page 69

Tutorial 4
B
4.3.4 Selecting a Coordinate System
Tip – For an introduction to projects, and for more information on the
Select Project dialog, see the topic Projects in the GPS Pathfinder Office
Help.
You need to use a coord inate system that is suitable for the area in
which you are collecting data. For example, in order to display
collected GPS positions in relation to a background map, the GPS
Pathfinder Office software must be able to relate GPS latitud e and
longitude coordinates to north and east coordinates on the map. It is
also critical that you have the correct coordinate s ystem se lect ed when
you:
• enter waypoint coordinates
• print or plot the map
• export coordinates to a GIS or spatial database
• import features from a GIS or spatial database
• enter manual positions
In the GPS Pathfinder Office software you can choose the correct
coordinate system by selecting a coordinate system and an associated
zone, or by selecting a local site. To properly specify a system, you
need to select a zone and/or datum. Your choice affects the display of
the field data, but not the data itsel f.
B
B
Tip – For an introduction to the concepts of coordinate s ystems and zones
(and the associated concepts of a datum, an ellipsoid, and a geoid), refer
to the Mapping Systems General Reference.
Tip – The currently selected coordinate system is displayed in the status
bar.
GPS Pathfind er O ffic e Get t ing Started Guide 55
Page 70

4 Tutorial
For this project, you need to select a UTM coordinate system:
1. Select Options / Coordinate System. The following dialog
appears:
2. Make sure that the Select By group is set to the Coordinate
System and Zone option.
3. Set the System fie ld to UTM.
4. Set the Zone field to 10 North.
5. Set the Datum field to NAD 1983 (Conus).
6. Set the Altitude Measured From group to the Mean Sea Level
(MSL) option.
7. Make sure that the Geoid Model group is set to the Defined
Geoid (EGM96 (Global)) option.
8. Set the Coordinate Units field to Meters.
9. Set the Altitude Units field to Meters and click OK.
56 GPS Pathfinder Office Getting Started Guide
Page 71

4.4 Lesson 2: Preparing to Collect Data
This lesson introduces you to the concepts of:
• GPS data c ollection
•Features
• Attributes
It shows you how to:
• open a data dictionary
• print a data dictionary
• transfer a data dictionary to a data collector
It takes approximately five minutes to complete.
4.4.1 GPS Data Collection
Organizations such as utility companies, scientific organizations, and
local governments have billions of dollars of fixed assets and
equipment located throughout their region. They must be able to
accurately locate, monitor, and mai ntain these asset s.
Tutorial 4
The large task of managing the se assets i s greatl y reduced wit h the use
of proper field information management tools such as GPS data
collection systems and GIS databases.
Information on assets can be collected in the field using a data
collector. A data collector logs information in the form of ‘features’
and ‘attributes’.
GPS Pathfind er O ffic e Get t ing Started Guide 57
Page 72

4 Tutorial
4.4.2 Features
A feature is a physical object or an event in the real world for which
you want to coll ect positi on and des criptive information. For e xample ,
you may want to collect information about lakes or roads.
Each feature has a feature name. Feature names are equivalent to
themes or layers in a GIS or CAD system. Each occurrence of a
feature is equivalent to a re cord in that theme or laye r i n a GIS s yst em.
GPS data collector use feature classification to determine the way the
data collection software logs GPS positions.
A feature can be one of three different types. See Table 4.2.
Table 4.2 Features
Feature type Examples
Point Accident sites
Line Paths
Water faucets in a park
Pipelines
Area Lakes
Wetlands
4.4.3 Attributes
You can define a set of attri butes for each feature t ype. An attrib ute is a
piece of descrip tiv e informat ion about th e feature. F or e xample, for th e
feature, Path, you could have the attribute, Width. Each Path feature
that you collect in the field will have its own value for this attribute.
For each attribute you must define an attribute name. Attribute names
are equivalent to items, columns, or fields in a GIS or CAD system.
58 GPS Pathfinder Office Getting Started Guide
Page 73

An attribute can be one of six different types. See Table 4.3.
Table 4.3 Attributes
Attribute type Example
Menu The surface type for a path
Numeric The width of a path
Text The name of the path
Date The date when information about the Path feature was
collected
Time The time when information about the Path feature was
collected
File Name Linking the Path feature to an image of the feature on a
computer
4.4.4 Opening a Data Dictionary
A data dictionary is a des criptio n of the f eatures and attr ib utes rel e v ant
to a particular project or job. A data dictionary structures data
collection; it does not contain the actual information collected in the
field (positions and actual attribute values for each occurrence of a
feature).
Tutorial 4
A data dictionary is used in the field to control the collection of
features and attributes. For example, you may want to collect
information about power poles, lakes, and roads. Therefore you can
create a data dictionary that contains a list of all these features.
It is important t o unde rstand da ta dict ionarie s and ho w the y ar e used in
the field to control feature and attribute collection. A data dictionary
prompts you to enter information; it can also limit what you enter to
ensure data inte grit y and c ompatibi lit y with y our GIS o r CAD system.
Although data dictionari es are not al w ays required for fi eld work, th ey
do make collecting, updating, and processing data easier and faster.
GPS Pathfind er O ffic e Get t ing Started Guide 59
Page 74

4 Tutorial
A data dictionary consists of the following elements:
• A list of features to be colle cted in the field
• A list of attributes (if any) that describe each feature
A data dictionary shou ld contai n all the feat ures for whi ch you w ant to
collect information. You can have different data dictionaries for
different projects , for e xample, a roa d map data dictio nary and a utili ty
data dictionary. You can only use one data dictionary at a time in the
field. If you want to collect information about roads at the same time
as information about util iti es, it i s impor tan t to put al l th e fea tures into
one data dictionary.
To open a data dictionary:
1. Select Utilities / Data Dictionary Editor.
Alternatively, click .
The Data Dictionary Editor utilit y star ts :
60 GPS Pathfinder Office Getting Started Guide
Page 75

Tutorial 4
2. Open the Tutorial.ddf file in the Pfdata\Tutorial folder. To do
this, do one of the following:
–Click .
– Select File / Open.
3. Go to th e folder C:\Pfdata\Tutorial and select the file
Tutorial.ddf, and then click
Open. The following dialog
appears:
GPS Pathfind er O ffic e Get t ing Started Guide 61
Page 76

4 Tutorial
4. Click OK to accept the default settings and open the file. The
data dictionary editor opens and you will see a number of
features and their attributes:
5. Look at the Features column:
This symbol … indicates that the feature is a …
6. Now view some features and their attributes. Select the Fire
Hydrant feature.
62 GPS Pathfinder Office Getting Started Guide
point
line
area
Page 77

Tutorial 4
7. The Attributes column shows you three defined attributes:
–Color
– Number of
Spouts
– Last
Inspection
Date
8. Click on each of
these attributes
in turn.
Notice that the
right panel
shows
information
about the
currently selected attribute.
In this example, the number to be entered in the field must be a
whole number. There can be a minimum of one spout and a
maximum of 10 spouts. The default number of spouts is 2.
9. In the Features
list, select the
Path feature.
10. Click on each of
the attributes.
There are two
attributes this
time:
– Surface
Type
– Width
GPS Pathfind er O ffic e Get t ing Started Guide 63
Page 78

4 Tutorial
11. In the Features
list, select the
Parking lot
feature.
There is just one
attribute:
– Surface
type
It has the v al ues:
– Asphalt
– Concrete
–Turf
Notice the * shown beside the value Asphalt. This means that
Asphalt is the default value. Set ting a default saves field cr ews
from entering repetitive data and also makes collecting data
simpler and faster.
You do not need to make any changes to the data dictionary at this
stage. In the next section you will print the data dictionary.
64 GPS Pathfinder Office Getting Started Guide
Page 79

4.4.5 Printing the Data Dictionary
To view the entire data dictionary description in text form, you can
print it. You may want to keep a printout of each of your data
dictionaries in case they are accidentally deleted.
Tutorial 4
B
Tip – To check the prin ter set up and fon t b efore pr inting , sele ct
File / Print Setup or File / Set Printer Font.
To preview the data dictionary printout before you actually print it:
1. Select File / Print Preview. The following window appears:
2. Click Print, check your pri nter se ttings a nd click OK to send the
data dictio nary to the printer.
3. Select File / Exit to close the Data Dictionary Editor.
You are now ready to transfer the data dictio nar y to the dat a colle ctors
so that your three field crews can go out and collect some data.
GPS Pathfind er O ffic e Get t ing Started Guide 65
Page 80

4 Tutorial
4.4.6 Trans ferring Data to a Data Collector
You need to transfer the data dictionary to the data collector so that
your three field crews can use it in the field to collect data.
T o do this, you w ould use the Data T ran sfer utility. The opening dialog
of the Data Transfer utility is shown below:
For the purpose of this tutorial, we have done this for you.
66 GPS Pathfinder Office Getting Started Guide
Page 81

Tutorial 4
4.5 Lesson 3: Differentially Correcting the Field Data
The data has been collected in the field by the three field crews. It has
been transferred back to the office computer and now you need to
process it.
You can significantly improve the accuracy of field data through a
process called differential correction. Thi s require s a set of ‘bas e’ f iles
that are collected at a known location at the same time that the field
data files are collected. Many regions have Community Base Stations
or Trimble Reference Stations that can supply this base data, or you
can use a second data collector to collect your own base data. For
more information, refer to the Differential Correction Help.
The base files for the tutorial are in the Pfdata\Tutorial\Base folder
(the folder that was def ine d for base f iles in the tu torial pro ject). There
are two base files. These files came from a Community Base Station
and each spans one hour.
This lesson shows you how to:
• differentially correct the field data collected by your three field
crews
It takes approximately seven minutes to complete.
GPS Pathfind er O ffic e Get t ing Started Guide 67
Page 82

4 Tutorial
To differentially correct the field data:
1. In the GPS Pathfinder Office software, click the Differential
Correction tool
, or select Utilities / Differential
Correction.
The Differential Correction utility appears:
68 GPS Pathfinder Office Getting Started Guide
Page 83

Tutorial 4
2. In the Rover Files group, click Browse to sele ct th e data f i les t o
be differentially corrected. The following dialog appears:
B
By default, the Pfdata\Tutorial folder is selected, a s this is the
default fold er for data files that was defined when we selected
the project (see Selecting a Project, page 52). There are three
data (rover) files available that have the filename of
‘Tutd ataX.ssf’. These data files were collected at the same ti m e
by three different field crews. You need to correct all three files.
3. Select the three files Tutdata1.ssf, Tutdata2.ssf, and
Tutdat a3.ssf, the n click
the dialog.
Tip – To select the three files, click Tutdata1.ssf, hold down
Tutdata2.ssf then Tutdata3.ssf.
The three files appear in the Sel ected Files field in the upper left
portion of the dialog.
Open to confi rm the s electio n a nd cl ose
GPS Pathfind er O ffic e Get t ing Started Guide 69
[Ctrl]
, and click
Page 84

4 Tutorial
4. In the Base Files group, click Local Search to select the base
files. The following dialog appears:
This dialog lets you set a folder from which the software
automatically select s base f iles, ba sed on the sta rt and end ti mes
of the rover files.
5. Make sure that the Folder field contains the base folder as
defined in the Tutorial project. The software searches for the
displayed files in the search fo lder.
6. Click Search to start the search. When the search is complete,
the following window appears:
70 GPS Pathfinder Office Getting Started Guide
Page 85

Tutorial 4
The dialog shows the three data fi les, which were collected in
the field, along with their start and end times. Each file has
100% in the Coverage column. This indicates that the data file
is completely covered by the base files that have been found in
the base files folder for the project.
We will use these two base files to differentially correct the
rover files.
7. Click OK to confirm the selection. The Reference Position
dialog appears:
The reference position is the known location at which the base
files were collected.
Note – As these base files come from a Community Base
Station, the displayed reference position is accurate and
correct. However, if you collected your own base data, the
refer enc e position could be incorr ect or absent . In this case, you
must know the re ference position and enter it in this dialog. An
inaccurate reference position will result in errors in the
correct ed dat a.
GPS Pathfind er O ffic e Get t ing Started Guide 71
Page 86

4 Tutorial
8. The first time this dialog appears, either the coordinate system
appears as Lat/Long or the last coor dinat e system use d appears .
If necessary, click
Change and change the coordinate sys tem to
match the coordinate system that is shown in the status bar of
the GPS Pathfinder Office software (UTM, 10 North, NAD
1983 (Conus), EGM96 (Global), and then click
OK to confirm
the reference position. You are returned to the Differential
Correction dialog:
The data files and base files are now displayed in the
Differential Correction dialog. The File Extension field is se t
to
.cor. This is the extension that the differentia lly corrected
output files will have. For example, the corrected version of
Tutdata1.ssf will be called Tutdata1.cor.
9. In the Processing group, make su re the S mart Code and Car rier
Phase Processing option is selected. This is the default setting
and it is the most thorough type of processing.
72 GPS Pathfinder Office Getting Started Guide
Page 87

10. Confirm that the settings are the same as shown here:
Tutorial 4
11. Click OK to start the differential correction process.
12. If the message 3 file(s) may be overwritten. Continue? appears, click
Yes to continue. A series of progress bars indi cate s th e stat us of
the operation.
GPS Pathfind er O ffic e Get t ing Started Guide 73
Page 88

4 Tutorial
When the process is complete, the following message appears:
13. 100% of the positions were corrected. Click Close to remove
the message without displaying the correction log.
In real use, if not all of the positions were corrected, you can
click
More Details to display a log file to help you track down
the source of the error.
74 GPS Pathfinder Office Getting Started Guide
Page 89

4.6 Lesson 4: Viewing and Edit ing the Data
You now need to visually check the data before you export it to a GIS
or spatial database. This is to confirm that all the expected data is
there, and to look for any unwanted positions.
This lesson shows you how to:
• open the data files
• select a coordinate system
• display the Map window
• display the Time Line window
• load the background files
• configure the Map window
• view the attributes of a feature
• view the offset of a feature
It takes approximately fifteen minutes to complete.
Tutorial 4
GPS Pathfind er O ffic e Get t ing Started Guide 75
Page 90

4 Tutorial
4.6.1 Opening the Data Files
You m ust open the data files in the GPS Pathfinder Office software to
view them. You can open as many files as you like together, but you
can only edit files if they are opened individually.
To open data files:
1. Select File / Open. The following dialog appear s:
The three files that were just created by the Differential
Correction utility are selected by default.
2. Click Open to confirm the selection.
76 GPS Pathfinder Office Getting Started Guide
Page 91

4.6.2 Displaying the Map and Time Line Windows
There are two methods available to display the data. The first is the
Map window, where the file appears along with any background files.
The second is the Time Line window, which presents a visual display
of when the data was collected along a linear time axis.
To display the Map and Time Line windows:
1. Select View / Map. The Map window appears:
Tutorial 4
B
2. Select View / Time Line. The Time Line windo w appear s:
Tip – If the Map window is not open and no files are loaded, select View /
Map to automatically open the Open Data Files dialog. This is a handy
shortcut for opening the data files. The same rule applies for the Time
Line window.
GPS Pathfind er O ffic e Get t ing Started Guide 77
Page 92

4 Tutorial
4.6.3 Loading the Background Files
You can specify one or more backgrou nd fi les, such a s street maps a nd
aerial photographs, fo r display in the Map windo w. These files provide
a background for the field data files.
There are two types of background files:
• Vect or files (or drawings)
• Raster files (or images)
Vector files
A vector file loads and transforms into any coordinate system
The vector file Streets.dxf has its coordinates stored as
Latitude/Longitude (WGS-84), but the coordinate system for the
project is currently set to UTM.
We will need to specify that this file is set to the Latitude/Longitude
coordinate system so that the GPS Pathfinder Office software can
automatically transform the file from that coordinate system into
UTM.
Raster files
Raster files must be displayed in the coordinate system to which they
are ‘geo-referenced’. Geo-referencing involves matching the pixels in
a raster file to real-world coordinates. All raster files must be
geo-refere nced before they ca n be loaded into t he GPS Pathfinder
Office software.
The raster file Aerial.bmp is geo-referenced in the UTM coordinate
system, and UTM is the coordinate system for the project.
You can load this file without setting the coordinate system.
You will load the two background files one at a time so that you can
see what each background file looks like individually.
78 GPS Pathfinder Office Getting Started Guide
Page 93

Tutorial 4
To load the background file Streets.dxf:
1. Select File / Background. The Load Background Files dialog
appears.
2. Click Add. The following dialog appears:
3. Select the file Streets.dxf and click Open to return to the Load
Background Files dialog.
The following message appears, reminding you to set the
correct coordinate system for the new background files (you
will do this in Step 5):
GPS Pathfind er O ffic e Get t ing Started Guide 79
Page 94

4 Tutorial
4. Click OK to clear the message. The following dialog appears:
The check mark to the left of the filename indicates that the file
loads when you close the dialog.
80 GPS Pathfinder Office Getting Started Guide
Page 95

Tutorial 4
5. You need to specify that thi s f ile is se t to the La titude/ Longitude
coordinate system, so click
Change. The Coordinate System
dialog appears:
GPS Pathfind er O ffic e Get t ing Started Guide 81
Page 96

4 Tutorial
a. Change the System field to Latitude/Longitude. (The
Datum field automatically changes to WGS 1984.)
b. Click OK to accept the selected coordinate sy stem and
zone, and return to the Load Background Files dialog:
6. Click OK to load the background file and close the dialog.
82 GPS Pathfinder Office Getting Started Guide
Page 97

Tutorial 4
The Map window displays the background Streets.dxf file:
7. Start to load the second background file, Aerial.bmp, following
Step 1 through Step 4 above.
W e do not need to change the coordinate system for this file as it
is geo-refe renced in the UTM coordinate system, which is the
coordinate system for this project:
GPS Pathfind er O ffic e Get t ing Started Guide 83
Page 98

4 Tutorial
8. Click OK to accept the selected coordinate system and to close
this dialog.
A progress bar appears while the files are loading. When it is
finished, the Map window should look like this:
84 GPS Pathfinder Office Getting Started Guide
Page 99

4.6.4 Configuring the Map Window
You can configure the Map window to only show certain information.
For example, you can change the symbols or line colors used to
display features to make it easier to differenti ate between features.
You can also hide features in the data file or layers in the background
files to make it easier to view the data.
Feature style setti ngs are shared b y the TerraSync™ software, v2.1 0 or
later, so you can have a common feature style in the office and in the
field. An y chan ges in one place af f ects the ot her whe n you t ransf er th e
files.
To change the style of point features:
1. Select View / Layers / Features. The following dialog appears:
Tutorial 4
B
2. We will not change the symbol assigned to the Fire Hydrant
feature, however, we will change its color and size. To change
the symbol details, select the Fire Hydrant feature (click on the
word Fire Hydrant) and then click
Tip – You can also change the symbol of a selected feature, by
double-clicking on the name of the feature. Alternatively, in the Map
window, right-click on a feature and select the <feature name> Layer
Symbol command.
GPS Pathfind er O ffic e Get t ing Started Guide 85
Symbol.
Page 100

4 Tutorial
The dialog
opposite appears:
3. In the Font list,
make sure that
Trimble GPS
Pathfinder is
selected.
4. Leave the Style
field as is. This
field shows the
assigned ‘style
number’ of a
feature.
B
B
Tip – If you know the style number of a sy mbol, you can enter it directly in
the Style field. For a table of assigned Trimble GPS Pathfinder symbol
style numbers, refer to the GPS Pathfinder Office Help.
5. In the Size field, change the size of the symbol from the default
of 15 to 20.
Tip – To view all the symbols for a font, click Change. The Select Style
dialog appears. Select a different font, and then choose a symbol. Click
OK.
6. In the
F oreground list,
select the color
yellow. The
changed symbol
appears in the
symbol preview
area of the Fire
Hydrant dialog:
86 GPS Pathfinder Office Getting Started Guide
 Loading...