

Page 1
CFX-750™ Display with the EZ-Steer® Assisted Steering System
Quick Reference Card
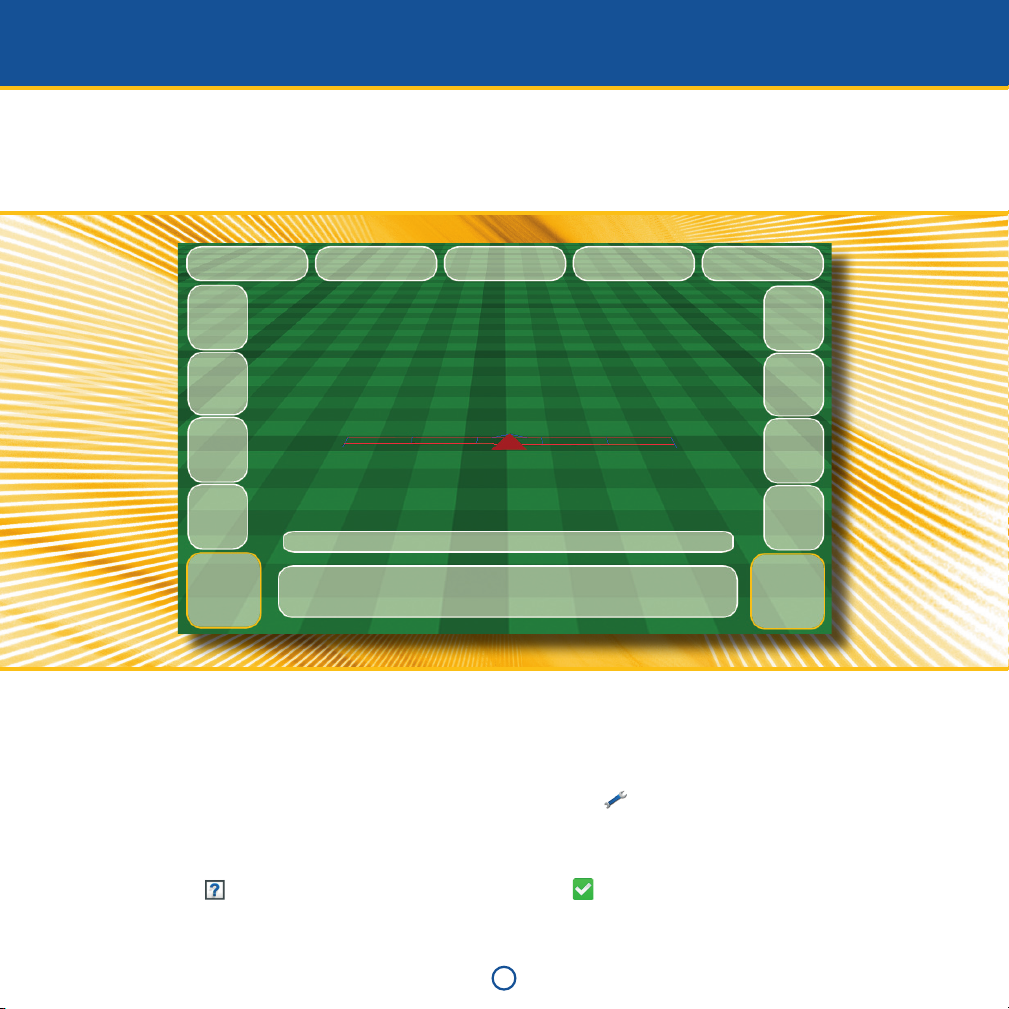
RUN SCREEN
The CFX-750™ display is a touchscreen display that is configured and run by tapping the icons that appear on the display screen. The icons
on the screen will vary depending on the applications you are running. The image below shows the areas where each main function can
be found on the screen when running in the field.
GPS qualtiy indicator
Status
Settings
View
Quick
Access
Coverage Engage
Offline distance Vehicle Speed
Field status
Banner bar
Status bar
Data icons
Guidance
Mapping
Field
Auto
Steer
QUICK START WIZARD
By default, the Quick Start Wizard appears every time you turn on the CFX-750 display. It enables you to easily confirm or change
important system settings before you begin working.
SETUP AND CONFIGURATION
Features can be set up or configured manually from the Run screen by tapping the button.
HELP
The CFX-750 display has built-in, context-sensitive Help that lets you quickly find information you need. To access Help from any
configuration screen, tap . When you are finished with the Help screen, tap .
Note - For more information on how to use this product, refer to the CFX-750 Display CD.
1
Page 2
SETTING UP THE EZ-STEER SYSTEM
The EZ-Steer® assisted steering system works with the
CFX-750 display’s internal GPS receiver to provide vehicle guidance.
Complete the GPS setup before you calibrate, set up, or run the
EZ-Steer system.
Note - For more information on system calibration and settings,
refer to the EZ-Steer documentation.
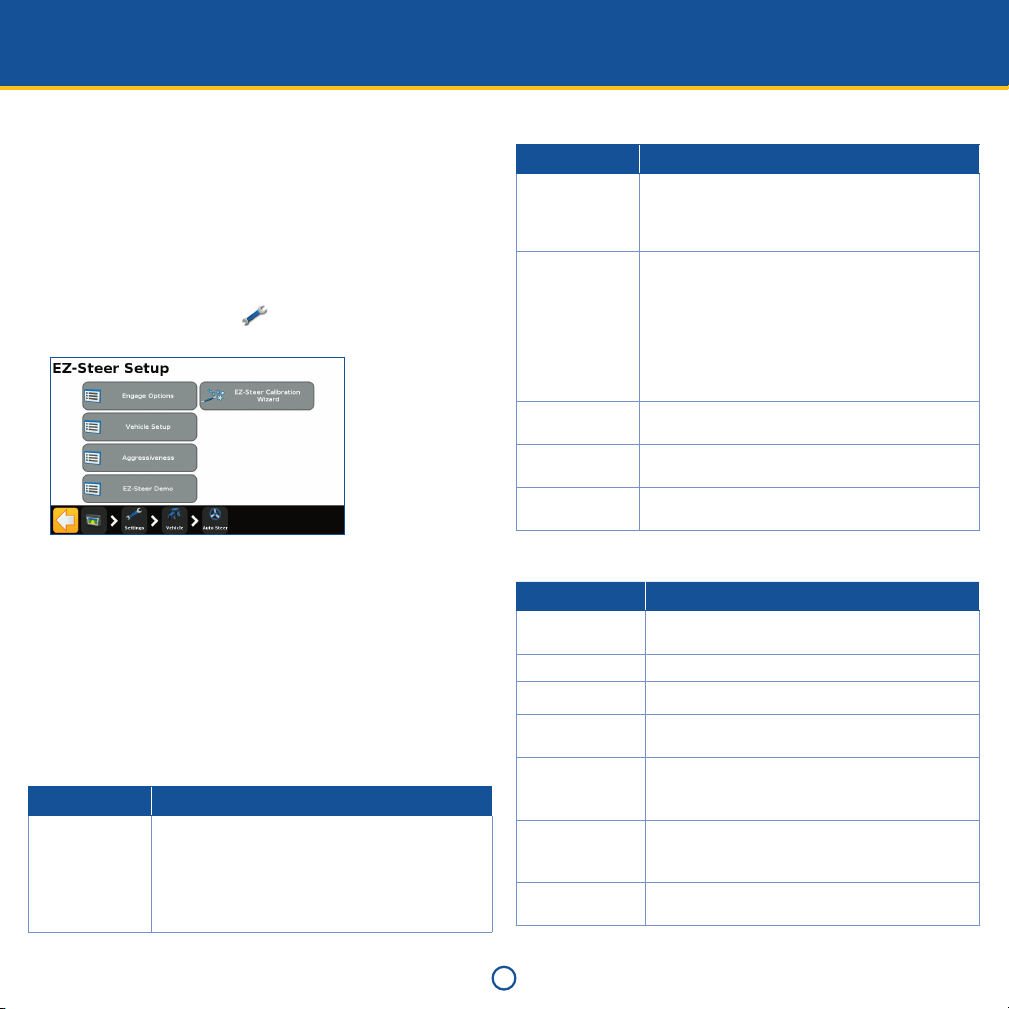
Setup
To view and adjust the settings for the EZ-Steer system:
1. In the guidance screen, tap and then tap Vehicle.
2. Tap
Auto Steer and then tap EZ-Steer Setup:
Note - If the EZ-Steer Setup button does not appear, tap Auto
Steer System Type and then select EZ-Steer for your controller.
The EZ-Steer Setup screen contains the following options:
• Engage Options
• Vehicle Setup
• Aggressiveness
• EZ-Steer Demo
• EZ-Steer Calibration Wizard
The following sections describe each option.
Engage options
Use this option to view and adjust the following settings:
Setting Notes
Minimum/
Maximum speed
The minimum and maximum speeds at which the EZ-Steer
system will disengage:
• Minimum: between 1.0 and 15.9 mph (1.6 and 25.5
kph).
• Maximum: between 1.0 and 18.0 mph (1.6 and 28.8
kph).
Setting Notes
Maximum Angle The EZ-Steer system will not engage when the vehicle is
Engage/Disengage
Offline
Override sensitivity Control how much force is required to disengage the
EZ-Steer external
switch
EZ-Steer operator
timeout
heading toward the guidance line at an angle greater than
the Maximum Angle.
Enter an angle between 5 and 45 degrees.
• Engage offline: The system will not engage when
the vehicle is offline further than the Engage Offline
distance. Enter a distance between 0’ 5” and 27’ 0”
(0.2 and 8.2 m).
• Disengage offline: The system will automatically
disengage when the vehicle is offline further than the
Disengage Offline distance. Enter a distance between
0’ 6” and 27’ 00” (0.2 m and 8.2 m).
system. Enter an increment between 1-100%
Enable or disable additional safety features.
Enter a time between 1-60 minutes.
Vehicle Setup
Setting Notes
Vehicle type Enter the type of vehicle on which the EZ-Steer system
Wheelbase See Entering vehicle measurements.
Antenna height See Entering vehicle measurements.
Antenna to axle
offset
Angle per turn Adjust the angle that the wheels turn during one full
Freeplay left/right Adjust this setting if the vehicle is consistently off to the
Motor speed Control the speed of the EZ-Steer drive wheel
will be installed.
See Entering vehicle measurements.
rotation of the steering wheel.
Enter an angle between 2-149 degrees.
right or left of the guidance line.
Enter a measurement of 0-12” (0-30.48 cm).
motor.
2
Page 3

Setting Notes
Motor direction is
reversed
Sprayer steering
delay
Swather steering
delay
Select yes or no.
Account for time lags with vehicle steering. Enter a value
between 0.1-1.5.
Account for time lags with vehicle steering. Enter a value
between 0.1-1.5.
Aggressiveness
Setting Notes
Online aggressiveness Control how aggressively the EZ-Steer system corrects
Approach
aggressiveness
CALIBRATING THE EZ-STEER SYSTEM
deviations from the guidance line.
Enter a value between 50-150%.
Control how fast the EZ-Steer system steers the
vehicle onto the guidance line.
Enter a value between 50-150%.
Before you begin to use the display you must calibrate the EZ-Steer
system. To do this, complete the Quick Start Wizard that appears
the first time that you use the display.
To view and adjust the settings for the EZ-Steer system:
1. In the guidance screen, tap and then tap Vehicle.
2. Tap
Auto Steer and then tap EZ-Steer Setup:
Note - If the EZ-Steer Setup button does not appear, tap Auto
Steer System Type and then select EZ-Steer for your controller.
3. In the EZ-Steer Setup screen, tap EZ-Steer Calibration
Wizard. The wizard guides you through the following
processes:
– Entering your vehicle measurements
– T2 roll calibration
– EZ-Steer calibration
Note - To complete the above processes, you must have GPS
connected.
Entering vehicle measurements
For optimum guidance, you must take accurate vehicle
measurements and enter them into the display.
Note - Do not enter calibration numbers from EZ-Guide Plus or
EZ-Steer T2 systems. This may cause very poor vehicle control,
including swerves and/or large oscillations.
To streamline the calibration process, you may want to take the
vehicle measurements and record them for entry later on.
The techniques for taking vehicle measurements are described
below; to learn about implement measurements, see the User
Guide.
Before you take the measurements, position your vehicle as
follows:
• Park the vehicle on level ground.
3
Page 4

• Make sure that the vehicle is straight, with the centerline of the
body parallel to the wheels.
Take the vehicle measurements:
To measure Measure from the ...
Wheelbase
Antenna
height
Center (the axle) of the front wheel to the center of the back
wheel.
Note that the wheelbase measurement for:
• Tracked vehicles, is exactly half of the length of the track
• Articulated 4WD vehicles, is half of the distance between
the center of the front and rear wheels.
Ground to the top of the GPS antenna.
• Turn the vehicle around and ensure the wheels are over the
positions marked in the previous step.
• Remain stationary while the system calculates the roll offset.
This takes approximately 20 seconds.
EZ-Steer calibration
In this step you must drive and engage on a straight AB line in a
clear field:
1. Begin driving and tap
2. Drive 160 feet and then tap
A series of calibration screens will allow you to adjust any
settings as necessary.
.
.
Antenna to
axle offset
Center (the axle) of the front or rear wheel to the top of the
GPS antenna.
Note - Make sure that you take this measurement to within
7.6 cm (3 in.) as an incorrect distance may result in poor
steering performance.
Take the measurement from the antenna to the correct point of
your vehicle, as follows:
• Rear axle: MFWD, Sprayer, Floater, Truck
• Front axle: 4wd tractor, Combine
• Track center: Tracked tractor
If the antenna is:
• in front of the axle, enter a Forward distance
• behind the axle, enter a Behind distance
T2 roll calibration
Calibrating the T2 roll sensor enables the display to calibrate terrain
compensation in the EZ-Steer controller. This step requires you to:
• Enter an accurate value for controller orientation.
• Park the vehicle and mark the inside of both sets of wheels.
• Remain stationary while the system calculates the roll offset.
This takes approximately 20 seconds.
Note - This image represents an ideal offline distance.
Angle per Turn: Adjust the angle the wheels turn during one full
rotation of the steering wheel.
Approach Aggressiveness: Control how fast the system steers the
vehicle onto the current guidance line.
Online Aggressiveness: Control how aggressively the system
corrects deviations from the current guidance line.
Freeplay Offset: Adjust the steering if the vehicle has a greater
freeplay offset in one direction or the other.
Override Sensitivity: Control how much force is required to
disengage the system.
4
Page 5

PERFORMANCE TIPS
Curve Auto steering Accuracy in Headlands
It is possible to engage the EZ-Steer system on headlands with
sharp corners at the edge of the field. However, the EZ-Steer
system may be unable to drive around these sharp bends. Use one
of the following methods to compensate:
• Manually steer the vehicle around the corner. Once you have
rounded the corner, re-engage the EZ-Steer system.
• In the Engage Options screen, increase the Disengage Offline
distance.
Vehicle-specific performance
Before you use the EZ-Steer system, consider the following
performance suggestions.
Vehicle type Performance tip
2WD tractor With tractors that have SuperSteer (for example, New
Holland TG), if the tractor has a SuperSteer front axle,
for best performance:
• Reduce the Online Aggressiveness value.
• Line up close to the swath and make certain that
the front wheels are straight before engaging the
EZ-Steer system.
• To get smoother performance when the vehicle is
pulling an implement over tilled ground, enable
the Diff-Lock. This prevents the machine from
pulling sharply to the left or right. If you are
calibrating on a hard surface, turn off Diff-Lock.
4WD tractor The EZ-Steer system can be installed on Case IH STX
tractors with Accusteer. For optimal performance,
disable Accusteer using the switch in the cab (if
possible).
Vehicle type Performance tip
Sprayer • It is common for these vehicles to have slow
steering. To compensate for this, use high
aggressiveness.
• If you experience large, slow oscillations, increase
the aggressiveness.
• When you configure the system on a sprayer, the
Sprayer steering delay setting is available on the
Vehicle Setup screen.
• Some sprayers have steering that is slow to react
after you turn the steering wheel.The system uses
the steering delay setting to compensate for this
slowness and ensure that steering corrections
occur at the correct point.
Swather • When you configure the system on a swather, the
Swather steering delay setting is available on the
Vehicle Setup screen.
• Some swathers have steering that is slow to react
after the steering wheel is turned. The system uses
the steering delay setting to compensate for this
slowness and ensure that steering corrections
occur at the correct point.
• To improve the performance of your swather,
adjust the Swather steering delay setting by a
small amount (0.1 seconds) at a time. Test the
result between each adjustment.
After using the EZ-Steer system
• Any time that you are not using the EZ-Steer system, pivot the
EZ-Steer motor away from the steering wheel.
• Before you leave the vehicle turn off the EZ-Steer system power
switch or remove the power plug.
5
Page 6

CFX-750™ Display with the EZ-Steer® Assisted Steering System
Quick Reference Card
OPERATION
Calibrate and set up the EZ-Steer system before operation.
Engaging the system
Before you can engage the EZ-Steer system, you must:
• open a field in the guidance screen
• define an AB line
• position the vehicle within the configured engage limits
To engage the system:
1. Point the nose of the vehicle toward the guidance line and drive
at operational speed.
2. Do one of the following:
– From the guidance screen, tap
– Press the optional remote engage foot pedal.
.
Disengaging the system
The EZ-Steer system automatically disengages when one of the
following happens:
• The vehicle is outside the configured engage limits.
• You pause the system.
• GPS positions are lost.
• You tap the Engage button on the guidance screen.
You can manually disengage the EZ-Steer system by turning the
steering wheel (this overrides the electric motor). Check this
setting before you start using the system by engaging on a line
and then turning the wheel until the system disengages. To adjust
the amount of force required to disengage the system, change the
Override Sensitivity in the Engage Options screen.
Engage status indicators
Engage status Icon color
Ready to engage
Engaged
Cannot engage
Antenna
CFX-750 power cable
CFX-750 display
Antenna cable
Basic power cable
(P/N 67258)
EZ-Steer motor cable
EZ-Steer motor
CFX-750 power to
EZ-Steer cable
(P/N 75742)
*94020-86*
P/N 94020-86-ENG
© 2010. Trimble Navigation Limited. All rights reserved. Trimble, the Globe and Triangle logo, and EZ-Steer are trademarks of Trimble Navigation
Limited, registered in the United States and in other countries. CFX-750 is a trademarks of Trimble Navigation Limited.
Version 1.00, Rev A (December 2010).
6
 Loading...