

Page 1
TR-43
The Triax TR-43 Terrestrial Receiver has been fully programed and
tested.
When you first set up you’re TR 43 and there is no pictures press the
“SOS” button on the Remote Control.
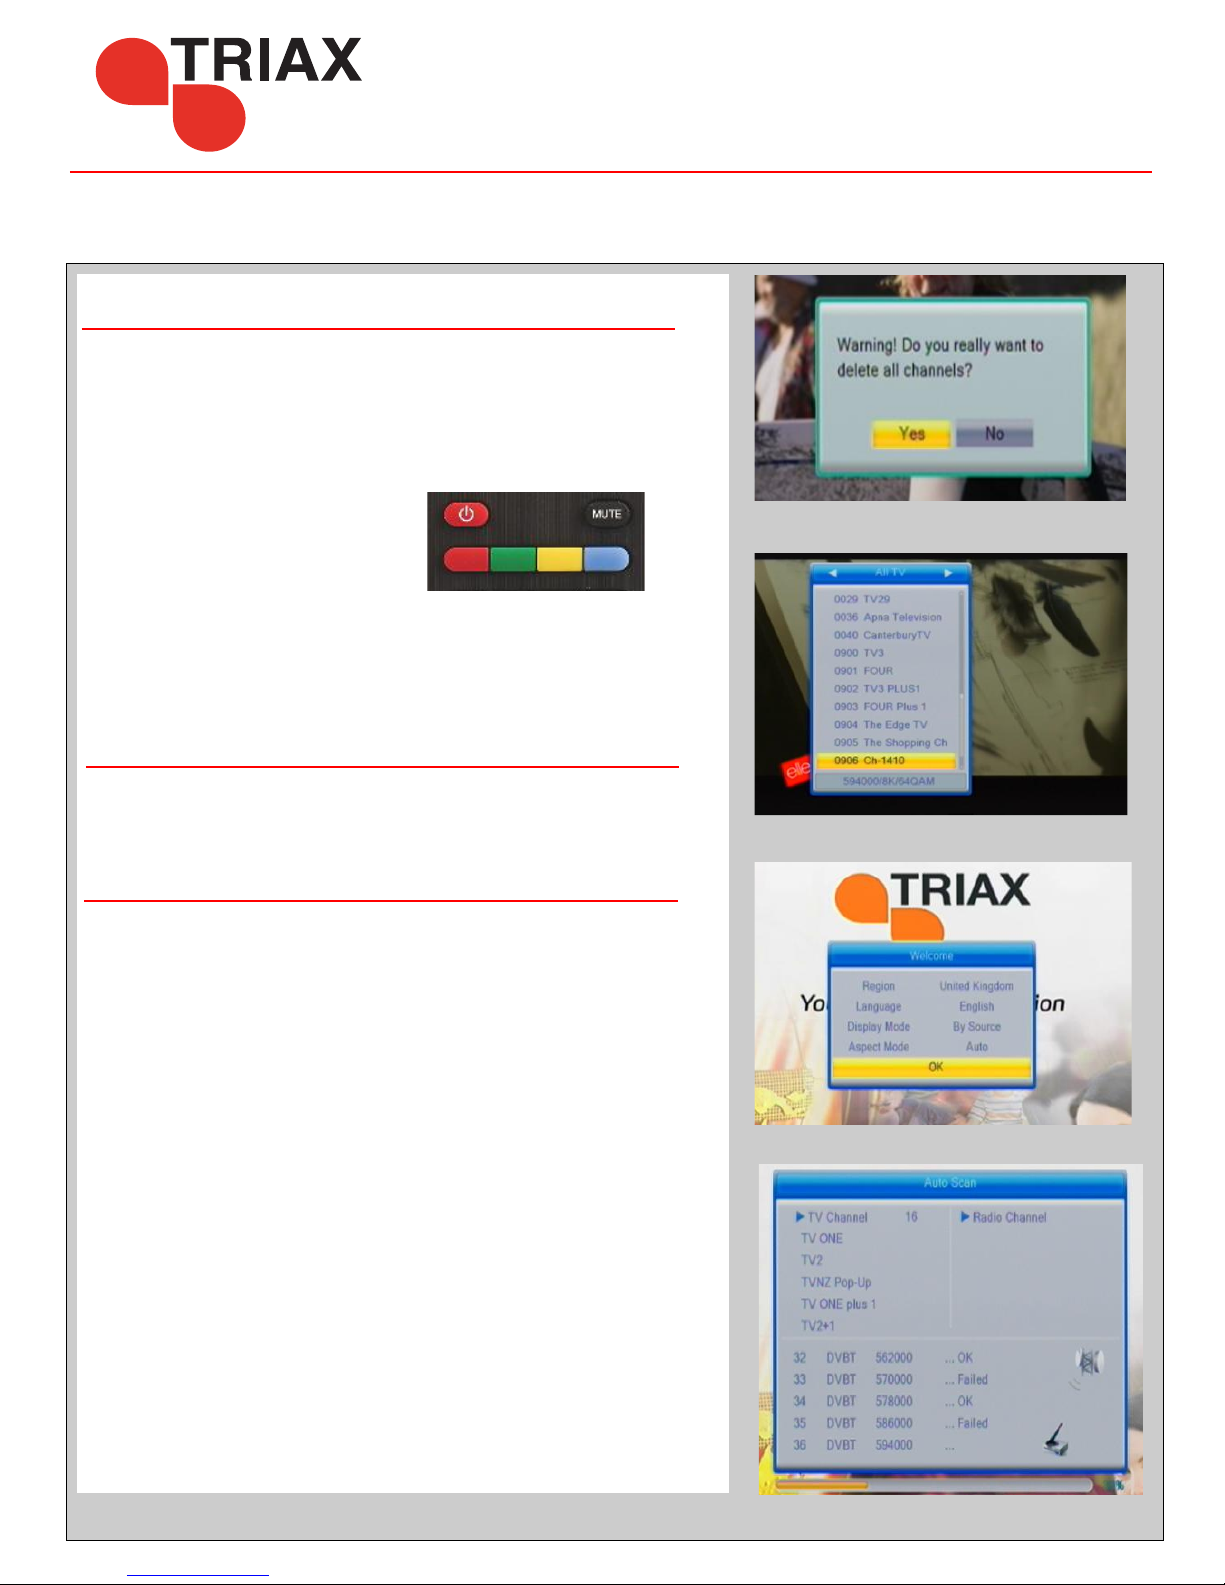
Agree to the Warning
The TR 43 Will now automatically
update it channels.
NOTE: If you have channels out of order after the scan is complete (fig 2)
please wait a minute or two and then repeat the above process.
Automatic search for channels.
To search for new channels on Freeview if they are not added
automatically press the “SOS” and follow the steps as above.
Initial Set up - Out of the Box.
Recover from a Factory Reset
If for some reason you’re TRiax TR-43 has been reset (Factory Defaulted)
you will be prompted to set the Receiver up From scratch (fig 3)
Please set up the TR-43 Receiver as per fig 3.
Region: United Kingdom
Language: English
Display Mode: By Source or 1080p_50Hz (if using HDMI only)
Aspect Mode:Auto
You will now see the TR-43 Scanning for channels, do not panic if you see
some of the lines showing Failed. This is normal as we do not broadcast on
every available Frequency.
NOTE: If you have channels out of order after the scan is complete (fig 2)
please wait a minute or two and then follow the Initial Set up steps above.
When you do an auto scan the receiver may find temporary channels
or feeds - these channels may only work on the Receiver for hours
or days, just enjoy these channels while they are working
Only the Freeview channels are full time channels.
Thank you for choosing the Triax TR43 this terrestrial receiver is built to a high standard and is designed for many years use
There are many settings in Terrestrial receivers that if not set correctly can cause you to loose pictures.
Please read through this guide so you can understand your Triax product better -
Please remember every Triax TR43 is fully tested before shipping so if you cannot get pictures please refer to the help chart supplied.
(fig 1)
(fig 1)
(fig 2)
(fig 3)
(fig 4)
SOS
Page 2
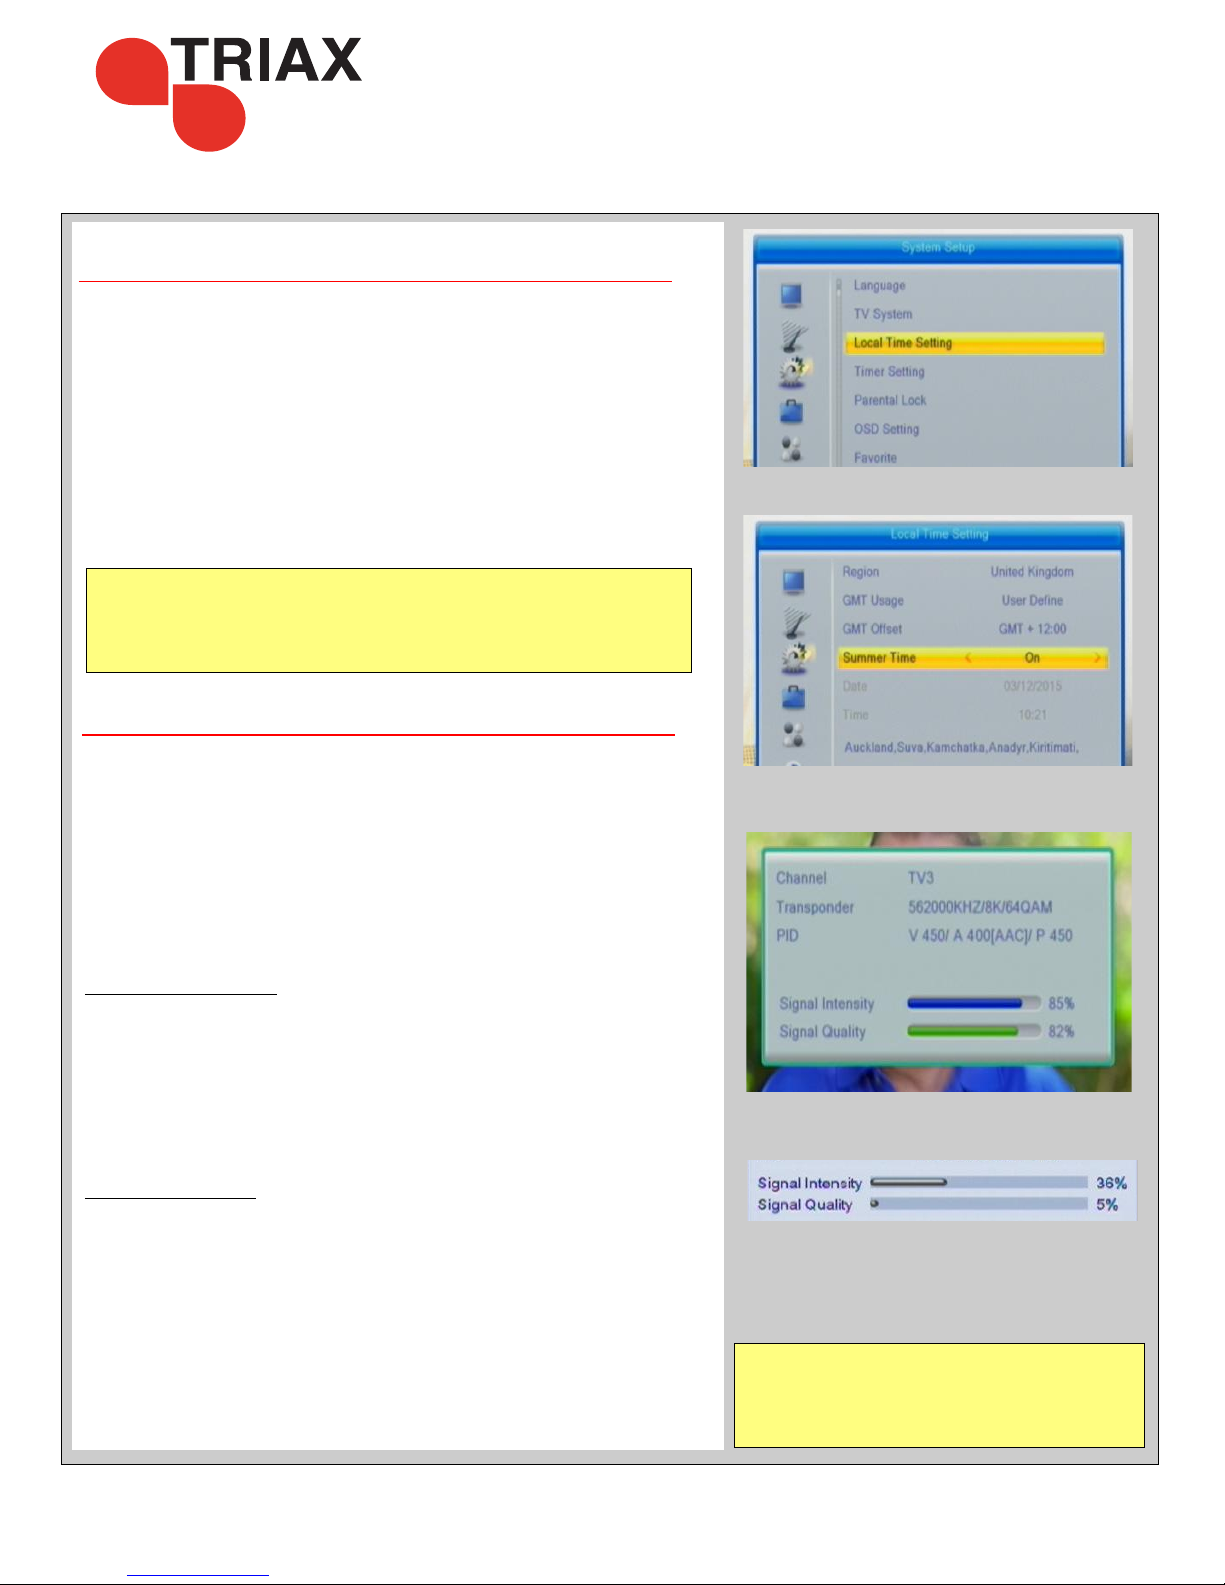
Signal Finder Function
Press the ‘INFO’ button three times on the remote control.
This will bring up the Signal finder function
- This is to help you align your Aerial or check the Aerial.
On this screen you will get Signal Intensity bars , Signal Quality Bars,
Tuner Status etc,
Important: This only works correctly if the TR-43 Receiver has been
set up previously to work in your area
SIGNAL INTENSITY:
This is the strength of the Terrestrial signal being received
all Aerials will give a level of signal even if you are not
aligned to the transmitter correctly.
So this bar should be giving you some reading if connected to a Aerial
and or cable correctly.
If you have an empty signal intensity then you may have a
connection problem or a fault in your system
SIGNAL QUALITY:
Once you align onto the correct transmission tower your signal quality will
increase and the Signal Status will become ‘Locked’ / Coloured (Fig 7)
Now all you have to do is get the highest Signal Intensity and Quality
by peaking your Aerial - Then enjoy Digital TV.
Note: Depending on the quality and strength of the signal you get from
the Transmission Tower in your area it may be necessary to upgrade to a
Digital Quality Yagi Aerial or add a Masthead Amplifier to get good
quality signal.
Aerial aligned and working correctly
Aerial not connected or not Set up Correctly
DO NOT POWER THE TR-43 UNTIL All
CONNECTIONS HAVE BEEN MADE
Making connections after powering can cause electrical
damage to the TR-43 or your Television
This will not be covered under warranty
TR-43
Setting the Time
Press the ‘MENU’ button on your remote control.
Scroll down to ‘System Setup’ (the cog) as shown by fig 5.
and choose ‘Local Time Setting’
Leave the region set to United Kingdom.
GMT Usage: User Defined
GMT Offset: GMT +12:00
Once you have set the time correctly exit the menu. It is recommended
to power reset (turn on and off at the wall) to save the settings.
(fig 5)
(fig 6)
Daylight Savings: During Daylight Savings turn ‘Summer Time’ ON
when the clocks roll back for winter come into this menu and turn
‘Summer Time’ OFF
(fig 6)
(fig 7)
(fig 8)
Page 3

TR-43
VERY IMPORTANT INFORMATION & TIPS
Do NOT connect the receiver to the mains supply until
HDMI / SCART & Aerial leads are connected:
Warranty will be void if installed without good ventilation.
If you connect to an existing Aerial and have no pictures you may have to rescan for channels refer to Initial
set up in this guide to see how to do this. Or you may have to change the picture format for HD & SD Tv’s
After a factory default of the TR-43 TV channels will all be lost - please see set up after factory reset above.
Always turn the TR-43 off at the power socket when it’s not being used to watch TV - This is a safety message
My Triax TR-43 was installed by:
USB Recording basics.
By using USB stick or HDD (1TB or smaller) with the TR-43 you can record
and playback TV.
If this feature is not turned on in your TR-43 you can enable this by the
following.
Press the Menu button and scroll down to REC
Press the ‘Blue Button’ (DVR Set) - choose DVR Type (REC + TMS)
The PVR function is now turned on.
Here you can also format a new drive,
We suggest that you use a drive under 1TB and that it is formated using the
TR-43 in NTFS format. If the drive is not recognised then you may have to
format the drive on a computer -
Use the ‘Yellow button’ to format from this menu.
Setting a Timed Recording
Press ‘Menu’, on your remote control and scroll down to the System Setup
menu. Choose ‘Timer Setting’ and then choose an available timer slot. Press
OK to configure.
Set up your recording to run once, weekly or monthly. Set timer service as
record and sleet the channel, date and start / finish times.
When finished highlight and press ‘OK’ the timer event will be added to
the list
To Play Back ,
Press the ‘MEDIA’ button using the remote control.
Select the recording and press ‘OK’ to start watching
Page 4

Can you get the TR-43
menu on the TV
My TR-43 is not working
NO
Is the TR-43 Display
illuminated?
Does the display look like
a clock
12:00 ?
NO
Press the ‘Red’ Power
button on the remote
control as the unit is in
stand by mode
YES
Check your power supply
/
Unplug the Aerial
connection and try again.
you may have a short on
your Aerial cable
NO
YES
Check the AV cable
is in the correct sockets
on the TV
Yellow - Yellow
Red - Red
White - White
is the SCART Connector
pushed in correctly
check the HDMI
connection (if used)
Still no menu?
Make sure the TV is in AV
or HDMI mode,
This may be by pressing
the AV or input button on
the remote
it may also have a button
like
Please refer to your TV
manual on how to get AV
channels working.
YES
Do you have “NO Signal”
Press the Info Button
and get the Signal bars
on the screen
YES
Do you have Signal
Intensity
Do you have Signal
Quality
YES
You Should have pictures,
Check all the channels
YES
NO
Please refer to the page 1
to check for new channels
and to insure that the
channels have been
loaded correctly for you
area of New Zealand.
NO
You may not be
connected to the Aerial
correctly,
or there could be a fault in
your system.
Please check your
connections
Please be careful not to
short the Aerial
connection on the TR-43
as this can cause a failure
in the box
NO
For other problems
You may need some professional help,
However if you are outside of Christchurch please note before a TR-43 is shipped it is tested and seen working
with picture & sound at our distribution centre. Please insure you have followed the Initial Setup on page 1.
My SHD10 Remote is not Working
Please check the batteries are in correctly ,
please test with new battery’s If you have a Digital Camera or phone with camera
- turn the camera on
and point the remote to the camera (in the dark)
you can see the remote IR flashing when you
press the remote buttons - if the remote is working.
+
+
+
_
IR transmitter
remote
All Triax TR-43 Receivers are shipped after testing working with
Picture & Sound in New Zealand
So if it is not working please follow below for some help.
www.digitalimports.co.nz
Check the power is
connected to the tr-43
+
_
 Loading...