

Page 1
Digital Terrestrial set-top box
Part No. 305105
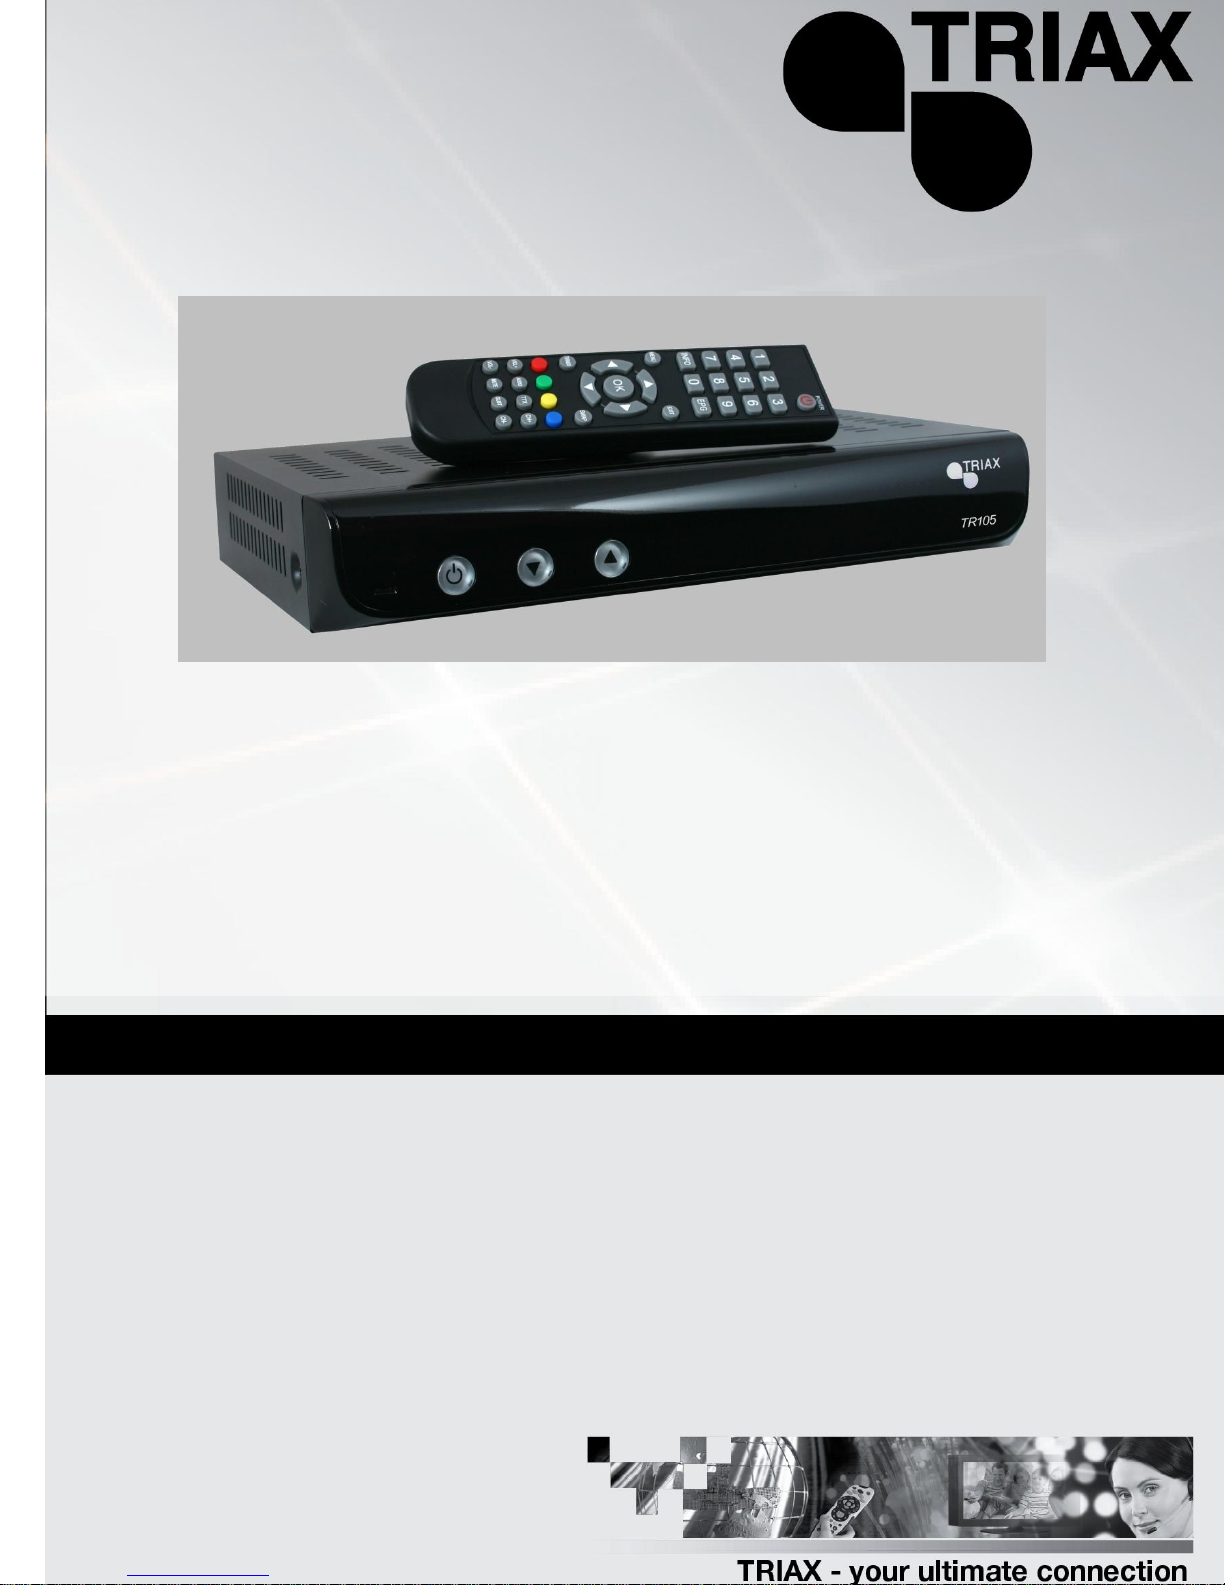
TRIAX TR 105
1
Page 2

2
Page 3

Contents
1. Forward …………….………………………………………………………………………..…………..5
2. Copyright..………………………………………………………………..………………….….………..5
3. Warranty…….……………………………………………………………………………….….………..5
4. Intended Use…….…………………………………………………………………………….….……..5
5. Safety Precautions…………………………………………………………………………….….……..6
6. Correct Handling of Batteries……………..………………………………………………….….……..6
7. Declaration of Conformity………………………………….……….…………………………..……....7
8. General Information……………………………………………………………………………………..8
8.1 For your safety…………………………………………………………………………….…….…..8
8.2 Specification………………………………………………………………………………………….8
8.3 Packaging……………………………………………………………………………….…………..10
8.4 General operation of the Triax TR 105…………………………………………………….….…10
8.5 Remote Control Unit, (RCU)………………………………………………………………………11
8.6 Front Panel………………………………………………………………………..………………...12
8.7 Rear Panel………………………………………………………………….……………………….12
8.8 Main Features……………………………………………………………….………………………13
9. First Time Installation…………………………………………………………….……………………….13
9.1 Switching On……………………………………………………………...…………………………13
9.2 Language List………………………………………………………………………………………..13
9.3 Channel Search……………………………………………………………………………………..14
10. Navigating the Menu Screens…………………………………………………………………………….15
10.1 Main Menu………………………………………………………………………………………….15
10.2 Channel Manager……………………………………………………………………….…………16
10.3 System Installation……………………………………………………………………………..….17
10.4 System Configuration……………………………………………………………………………...17
10.5 Accessories………………………………………………………………………………………...19
11. Channel list……..………………………………………………………………………………………….19
12. Favourite List………………….…………………………………………………………………………...20
13. Electronic Program Guide (EPG)………..………………………………………………………………21
14. Using the Interactive Service…………………………….………………………………………………22
15. Channel Banner……………………………………………………….…………………………………..22
16. Volume and Mute Controls…………………………………..…………………………………………..22
17. Channel UP / Channel DOWN…………………………………………………………………………..23
18. Quick Channel Listing…………………………………………………………………………………….23
19. Swap……………………………………..…………………………………………………………………23
20. Subtitles………………………….…………………………………………………………………………23
21. TV / Radio…………….……………………………………………………………………………………23
22. Exit………………….………………………………………………………………………………………23
3
Page 4

4
Page 5

1.Forward
This User Guide is intended to help you operate your Digital Terrestrial receiver, (called ‘receiver’ for
short), as intended, safely and to the best advantage.
We assume that the user of the receiver has a general knowledge of how to handle consumer
electronic equipment. Everyone who installs, connects, operates, cleans or disposes of this receiver
must take the time to read the complete contents of this User Guide.
Please ensure that the User Guide is kept safe place near the receiver.
2.Copyright
Not to be copied, used or translated in part or whole without prior consent in writing except
approval of ownership of copyright and copyright law.
3.Warranty
This warranty does not cover parts which may become defective due to misuse of the information
contained in this manual.
4. Intended Use
The receiver is used for receiving free-to air Digital Terrestrial signals. It is exclusively intended for
this purpose and may only be used for this. This also includes adherence to all information in this
operating manual, in particular the safety instructions.
Any other use is deemed to be not as intended and can lead to damage to property or even personal
injury. In addition it means the immediate invalidation of the warranty.
The manufacturer accepts no liability for damage which arises from use which is not as intended.
5
Page 6
5. Safety Precautions
Warning! Important Safety Instruction
CAUTION: TO REDUCE THE RISK OF ELECTRIC SHOCK, DO NOT REMOVE
COVER(OR BACK).NO USER SERVICEABLE PARTS INSIDE, REFER SERVICING
TO QUALIFIED SERVICE PERSONNEL.
Safety precautions:
The receiver has been manufactured in accordance with international safety standards .For your own
safety you should read the notes on safety precautions carefully, and take note of them ,before operating
your new receiver .For your own safety please be sure to follow these safety precautions ;
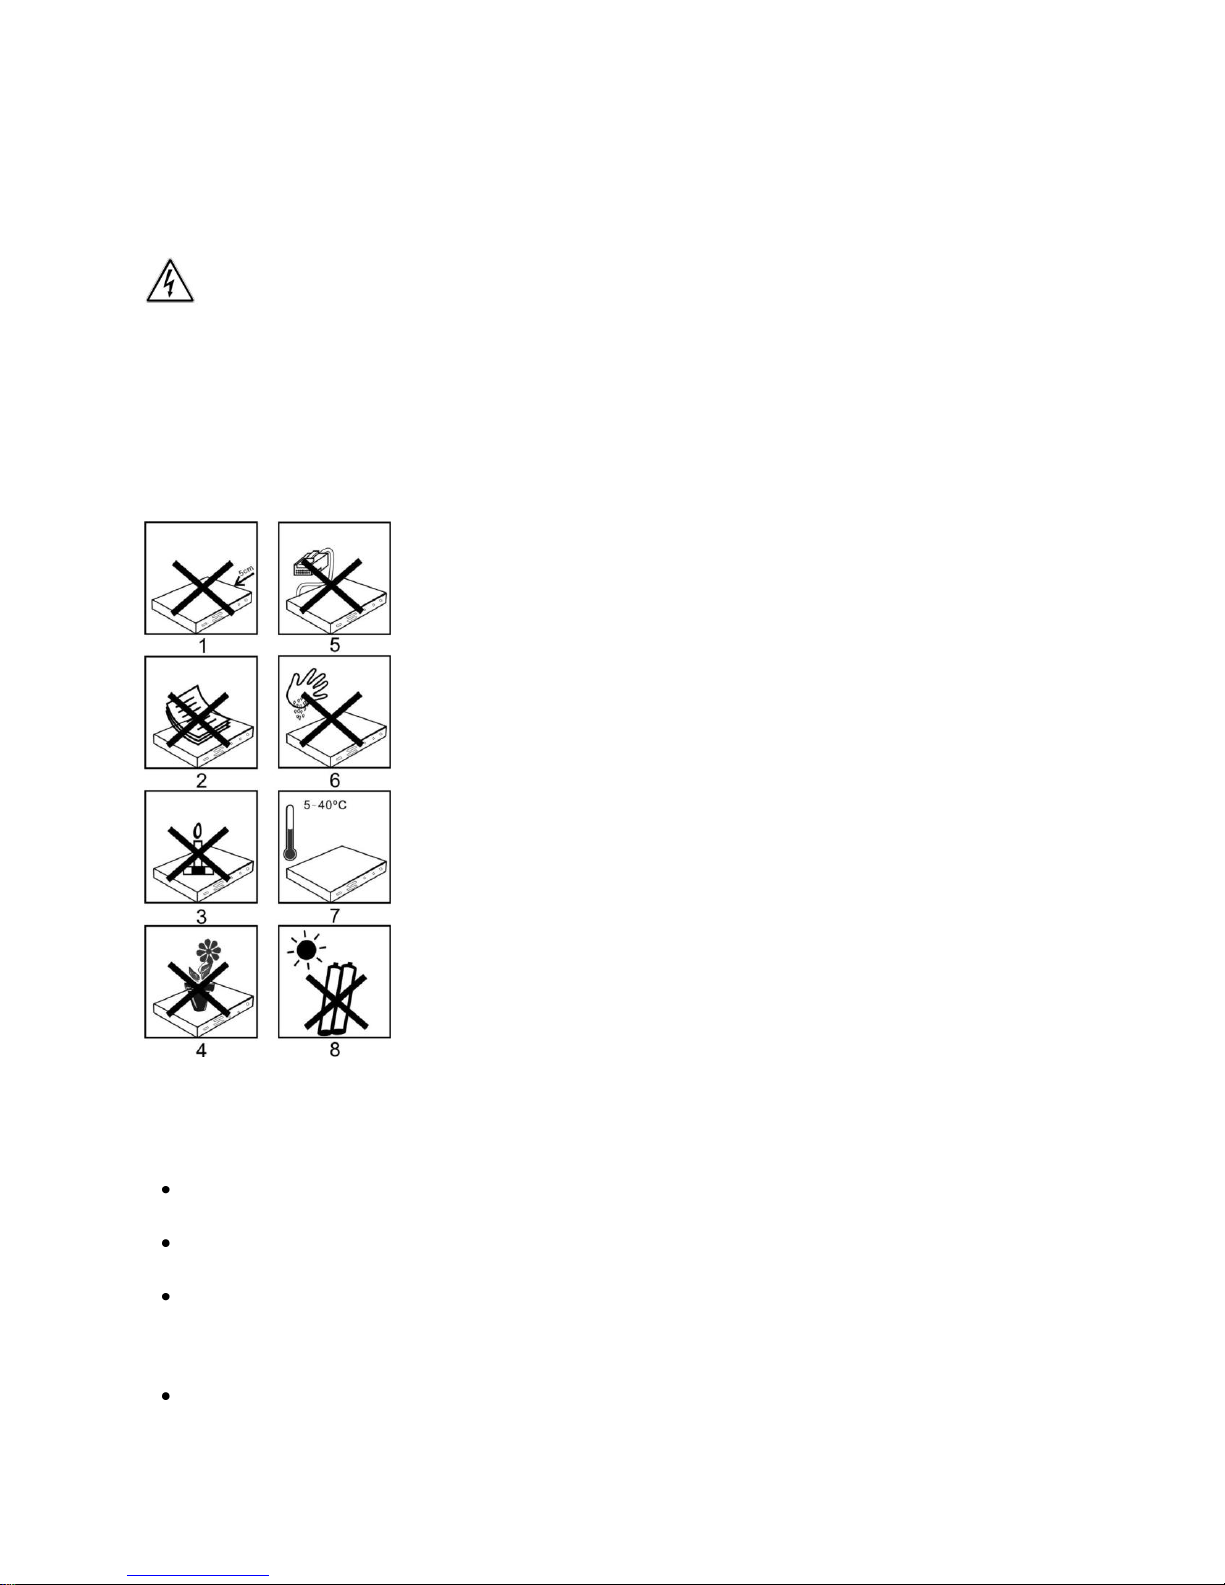
1. When installing the receiver, ensure there is a gap of approximately
5cm around the receiver to enable air to circulate freely and prevent
overheating.
2 Do not install this equipment in a confined space such as a book case or
similar unit. The ventilation should not be impeded by covering the
ventilation openings with items such as newspaper, table-cloths, curtains
etc.
3, No naked flame sources, such as lighted candles, should be placed on
the apparatus;
4, The receiver shall not be exposed to dripping or splashing;
No objects filled with liquids, such as vases.
5, The mains plug is used as a disconnect device, the disconnect
device shall remain readily operable.
6, Power cord must be placed correctly. Do not touch the power
Cord and switch when your hands are damp or wet.
7, The normal operating temperature of the receiver is between
5ºC and 40ºC. Use the apparatus only in moderate climates
(Not in tropical climates).
8, The batteries shall not be exposed to excessive heat such as sunshine,
etc. Please take note of the battery handling advice below.
6. Correct Handling of Batteries:
Batteries can contain toxins. Take care that the batteries do not get into children’s hands. Children
might put batteries in their mouths and swallow them.
Leaking batteries can cause damage to the remote control. If the receiver is not used for a long
time, take the batteries out of the remote control.
Batteries may contain toxins that damage the environment. For this reason, it is absolutely
essential that you dispose of the batteries in accordance with the legal provisions that are in force
in your country at the time. Never throw batteries away in your normal household refuse. This is a
requirement of the WEEE directive.
The battery shall not be exposed to excessive heat such as sunshine, fire etc
6
Page 7

7. Declaration of Conformity
Company Name: Triax UK Ltd
Company Address: Abergorki Industrial Estate,
Treorchy, Rhondda-Cynon-Taff
CF42 6DL, UK
Object of the Declaration: Triax TR 105 Digital Terrestrial Receiver, 305105.
The object of the declaration described above is in conformity with the requirements of the following
documents:
Low voltage directive 2006/95/EC
EMC Directive 2004/108/EC
WEEE Directive 2002/96/EC
RoHS Directive 2002/95/EC
REACH Regulation 1907/2006/EC
CE Marking Directive 93/68/EEC
Packaging Directive 94/62/EC
The product identified above complies with the relevant EC Directives by meeting the following standards:
BS EN55013:2001+A1:2003+A2:2006 Test Limits for STB Receivers Disturbance Characteristics
BS EN55020:2007 Test Limits for STB Receivers Immunity Characteristics
BS EN60065:2002:A1:2006+A11:2008 Audio and Video Equipment Safety Requirements
BS EN 61000-3-2:2006 Test Limits for EMC Harmonic Currents
BS EN61000-3-3:1995+A1:2001+A2:2005 Test Limits for EMC Voltage Changes and fluctuations
The Declaration of Conformity is made in relation to the associated tests carried out and verified by our
suppliers and their authorised test facilities.
Signed for and on behalf of:
TRIAX UK LTD
KEVIN EDWARDS………………………………………………………………………QUALITY MANAGER.
24th November 2009
7
Page 8

8. General Information
Terrestrial
Tuner
Tuner
STV4100B Tuner on board
Input frequency
VHF 177.5 MHz~235.5 MHz;
UHF 474 MHz ~858 MHz
Standard
DVB-T (ETS 300 744)
Channel Bandwidth
7/8MHz
COFDM System
FFT 2K, 4k ,8K
Hierarchical supported
Demodulation type
QPSK, 16QAM, 64QAM
Guard Interval
1/32, 1/16, 1/8, 1/4 active symbol duration
FEC
1/2, 2/3, 3/4, 5/6, 7/8
System
CPU
STi5162GBB
Transport
DVB De-multiplexer
Serial Flash memory
2MBytes
System memory
16MBytes
The TRIAX TR 105 is a Digital Terrestrial Receiver which allows you to receive Freeview channels. This
user’s guide covers the installation of the TRIAX TR 105 and the necessary steps to operate various
features.
8.1 For Your Safety
Allow clear space around the TRIAX TR 105 for sufficient ventilation
Do not cover the TRIAX TR 105 or place it on a unit that emits heat
Use a soft cloth and a mild solution of washing liquid to clean the casing (with the receiver switched
off and disconnected)
Do not connect or change cables when the TRIAX TR 105 is plugged in
Do not remove the cover
8.2 Specification
8
Page 9

Video Decoder
CPU Core
STi5162GBB
Video Standards
MPEG-1 ISO/IEC 11172-2
MPEG-2 MP@ML and MP@LL, ISO/IEC 13818-2
Field / Frame rate
50/25 Hz, 60/30 Hz
SD decoding capability
interlaced/progressive mode
576i and,480i
Aspect ratio
4:3, 16:9, Letter Box, auto
Video Output
TV Scart (CVBS/RGB),
Output modes
480i,576i
Audio Decoder
CPU Core
ST20
Audio Standards
ISO/IEC 11172-3 Layers I/II; Single/Dual/Joint
mode
Audio output
TV/(AL/AR)
USB2.0 HOST
None
Rear panel
interface
RF Input connector
RF Output connector
IEC type, Female, 75 ohm
IEC type, male, 75 ohm
RCA
AL/AR
TV/Scart(CVBS/RGB output)
TV/Scart(CVBS/RGB/ AL/AR output)
RS 232
Data
Front Panel
LED =Power on / standby ; key =Standby CH+ CH; IR
Power
requirements
Mains input voltage
200-240VAC~
Mains input frequency
50/60 Hz
Rated Output Power
6W
9
Page 10

8.3 Packaging.
When unpacking the TRIAX TR 105 make sure that all of the following items are included in the
packaging.
1 x TR 105 Receiver
1 x Remote Control Unit (RCU)
1 x Battery pack for RCU
1 x Scart Lead
1 x User’s Guide
1 x Retune Instructions.
8.4 General Operation of the TRIAX TR 105.
The operation of your TRIAX TR 105 is based on a series of user friendly on screen displays and menus.
These menus will help you get the most from your TRIAX TR 105, guiding you through installation,
channel organising, viewing and many other functions.
All functions can be carried out using the buttons on the RCU, while the Standby, Ch+ and Ch- functions
can also be carried out using the buttons on the front panel.
Please be aware that new software may change the functionality of the TRIAX TR 105.
Should you experience any difficulties with the operation of your TRIAX TR 105, please consult the
relevant section of this manual, including Troubleshooting, or alternatively call your dealer.
10
Page 11

8.5 Remote Control Unit, (RCU):
Figure 1: Remote Control Unit
11
Page 12

8.6 Front Panel
Standby
Ch+ / Ch-
Aerial In
Audio Out
Scart Output
Mains Lead
Serial Data Port
RF Out
Figure 2: Front Panel
8.7 Rear Panel:
Figure 3: Rear Panel
12
Page 13

8.8 Main Features:
Easy to use graphic interface
MPEG-2 Digital Compliant
MHEG-5 Interactive services via the ‘Red’ button.
7 Day Electronic Program Guide (EPG)
DVB Subtitle supported
Fully agile modulated RF output
Channel editing functions
Favourite Lists
Wakeup Timer
CVBS, RGB Video Output
Automatic ‘Logical Channel Numbering’, (LCN).
9. First Time Installation:
9.1 Switching On:
a) Connect the TR 105 to the mains supply
b) The front panel LED illuminates.
9.2 Language List
When the TR 105 is switched on for the first time, or there is no channel information stored in the receiver,
the Triax logo will be displayed plus a list of languages.
Using the buttons, select the language corresponding to the country where you are residing, (The
default language is English).
Press ‘OK’ to select.
13
Page 14

9.3 Channel Search.
When the language is selected, the Receiver will automatically search for services being transmitted in
the corresponding country’s frequency range.
The auto scan is carried out in two stages. Initially the Digital Multiplex details will be listed, after which TV
and Radio channels within each Multiplex will be listed. The auto scan will take a couple of minutes to
complete.
14
Page 15

10. Navigating the Menu Screens:
10.1 Main Menu:
The Main Menu screen consists of 4 main categories:
Channel Manager
System Installation
System Configuration
Accessories
Use the Up/Down or Left/ Right buttons to toggle between options.
There follows a summary of the functions within each category:
15
Page 16

10.2 Channel Manager:
a) Channel Organiser:
Press the following buttons on the RCU to carry out the following functions:
1 – To ‘Lock’ a channel in the channel list.
2 – To ‘Skip’ a channel in the channel list.
3 – To ‘Delete’ a channel from the channel list.
4 – To ‘Move’ a channel in the channel list
5 – To ‘Rename’ a channel in the channel list.
Press ‘OK’ and ‘Exit’ to Select.
b) Favourite List:
This allows the user to compile a series of personal favourite channel lists. There are 8 categories
to choose from, numbered 1 to 8. Use the ▲▼buttons to select a channel and then enter the
number to place the channel in the required favourite group, e.g. number ‘1’ for News, ‘8’ for
family etc. A symbol will be placed alongside the selected channel.
To remove a Favourite channel from an existing list, press ‘0’, (None).
Pressing ‘OK’ will save the data.
To access the favourite lists:
Press ‘OK’ to display the channel list
Press the RED button on the RCU.
Use the ‘<’ and ‘>’ buttons to toggle between Favourite group and Channels.
Press ‘OK’ to select the channel.
To exit Favourite mode, select ‘All’ (Note: When in Favourite mode, certain functions may not be
accessible)
c) New Channel:
This allows the user to enter a new channel, (PID information is required).*
Press ‘Exit’ to return to Main Menu.
d) Edit Channel:
This allows the User to manually edit channel parameters such as PID settings.*
Press ‘Exit’ to return to Main Menu.
e) Delete All:
This gives the user an option of deleting:
All TV services
All Radio Services
All Carriers
* Warning: Changing PID information will result in you losing the channel. Only change the PID settings if
you know the correct PID settings for the new channel.
16
Page 17

10.3 System Installation:
a) Auto Scan:
This allows the user to rescan the receiver for new or changed channels. The user is prompted as
to whether existing stored channel information is deleted or not.
b) Manual Scan:
This allows the user to scan a specific UHF channel. The user is prompted to enter the UHF
channel to be scanned. The required channel is selected using the ‘<’ and ‘>’ buttons.
Press ‘OK’ to start the scan, ‘EXIT’ to return to the Main Menu.
c) Delete Multiplexes:
This allows the user to delete unwanted Multiplexes. Use the ▲▼buttons to select a Multiplex
and the ‘<’ and ‘>’ buttons to select the multiplex to be deleted. When selected a tick appears
alongside the selected Multiplex.
The user is asked to confirm the delete, if YES is selected, the Multiplex is deleted.
Press ‘EXIT’ to return to the Main Menu.
10.4 System Configuration:
a) System Set Up:
i) ‘Language’: This allows the user to set up the preferred language settings, where
applicable. The user can also activate the ‘Hearing Impaired’ feature.
ii) On Screen Display, (OSD):
This allows the user to adjust the appearance of the OSD.
‘Theme’ changes the background colour,
‘OSD Timeout’: This allows the user to set the time, in seconds, that an
information banner is displayed
‘Banner Position’: This allows the user to alter the position of the information
banner on the screen, (top or bottom).
‘Logical Channel Number, (LCN)’: This lists channels in a logical order within the
channel list. The default setting is for this to be ON.
Press ‘EXIT’ to return to the Main Menu.
17
Page 18

iii) TV:
This allows the user to adjust the TV and Receiver settings:
‘Aspect Ratio’: Allows the user to adjust the Aspect Ratio output to suit the TV being used. ‘Auto’
(default), 4:3 Panscan, 4:3 Letterbox and 16:9 are available.
‘Analogue Output’: Allows the user to toggle between ‘CVBS’ (default) and ‘RGB’ Outputs.
‘Auto Standby’: The TR 105 will automatically enter Standby, in order to save power, if the receiver
is switched on and un-activated for a period of 3 hours. The user can disable this feature if required.
‘Sleep Timer’: This allows the user to select a period of time after which the TR 105 automatically
enters standby. It is user selectable between 0 to 120 Minutes.
iv) Time:
This allows the user to adjust time and date information. ‘Auto’ and ‘Manual’ modes are selectable.
Pressing ‘OK’ or ‘EXIT’ saves settings and returns to the Main Menu.
v) Wakeup Timer:
This allows the user to set up a ‘Timer Event’. Up to 8 timers can be set, either manually or via the
EPG, (Electronic Program Guide). A timer can be set so that the TR 105 automatically switches on,
(from Standby mode), to a pre-set channel or welcome message, at a set time and for a set
duration. Repetitive ‘Timer Events’ can also be set for ‘Once’, ‘Daily’ or ‘Weekly’ periods. Toggle
through the options using the ▲▼ and ‘<’ and ‘>’ RCU buttons.
Pressing ‘OK’ or ‘EXIT’ saves settings and returns to the Main Menu
vi) Parental Lock
This allows the user to enter a ‘Parental Rating’ and a four digit Password to
prevent unauthorised viewing of programs. The default password is ‘0000’.
Warning: Once you change the password, please keep it safe.
b) Start-up Channel:
This allows the user to set up the TR 105 so that it will power up to a pre-set channel.
Use the ‘<’ or ‘>’ buttons to activate or deactivate and the ▲▼ buttons to select the required
Startup channel.
Pressing ‘OK’ or ‘EXIT’ saves settings and returns to the Main Menu.
18
Page 19

c) R.F. Setup:
This allows the User to set up the R.F. Output Mode and Modulated R.F. Channel.
Toggle through the options using the ‘<’ and ‘>’ RCU buttons. The R.F. Mode can be set to PAL I
or PAL BG, (PAL I default), and the Modulated UHF R.F. Output Channel can be set to channel
21 to 68, (default 36).
Pressing ‘OK’ and ‘EXIT’ saves settings and returns to the Main Menu.
d) Audio Description:
This allows the user to activate or deactivate the ‘Audio Description’ function. This is an audio
sub-carrier which provides additional audio to assist users with impaired eyesight.
10.5 Accessories:
a) Factory Default:
This allows the user to reset the TR 105 back to the condition that it left the factory. All user
settings and previously stored channels will be lost. The user is prompted to confirm if a factory
reset is to be carried out to prevent accidentally erasing information.
b) S/W Upgrade via OTA:
If this option is selected, the TR 105 will search for software upgrades being transmitted over
the air. A banner is displayed during the search and the user is prompted if no software is
detected. Press ‘EXIT’ to cancel the search.
c) Version:
This gives the current Hardware and Software information for the TR 105.
Press ‘OK’ or ‘EXIT’ to return to the Main Menu.
11. Channel List:
When viewing a channel, the user can call up the channel list by pressing ‘OK’. The current
channel list is displayed together with a preview screen and channel details.
The user can now press the RED RCU button to access any Favourite lists which have been set
up.
19
Page 20

12. Favourite List:
To access the favourite lists:
i) Press ‘OK’ to display the channel list
Ii) Press the RED button on the RCU – the Favourite menu is displayed.
iii) Use the ‘<’ and ‘>’ buttons to toggle between Favourite group and Channels.
iv) Select the required Favourite group. Channels within that group will be displayed.
v) Use the ‘<’ and ‘>’ buttons to access the channel list and press ‘OK’ to select the
channel.
To exit Favourite mode, select ‘All’ (Note: When in Favourite mode, certain functions may not be
accessible)
20
Page 21

13. Electronic program Guide (EPG):
Press the ‘EPG’ button on the RCU to enter the Electronic Program Guide.
The EPG lists the channels vertically and the programs and time information horizontally.
The TR 105 supports a 7 day EPG..
Navigate around the EPG screen using the ▲▼ RCU buttons to select the channel and the
‘<’ and ‘>’ RCU buttons to select the program.
The coloured RCU keys can be used to select the following:
Press Green – Jumps forward to the next day’s programs.
Press RED – Jumps back to the previous day’s programs.
Press Yellow - Automatically sets a timer for the selected program. When a timer has been
set, the selected program will be highlighted in yellow on the EPG screen.
Pressing ‘OK’ on a selected program will refresh the program being previewed. Pressing ‘OK’
will also display a short but extended description of the selected channel.
21
Page 22

14. Using the Interactive Service:
Certain channels will offer an Interactive service. The Interactive pages will contain user
information such as News, Weather, Sport and much more. This service is accessed by using
the RED or Text button on the RCU.
To operate the Interactive services, (on the participating channels):
Press the RED button on the RCU to open the Interactive services.
Press the EXIT button on the RCU to exit the Interactive services.
Alternatively, press the TEXT button on the RCU to open the Interactive services.
Pressing the TEXT button again exits the Interactive service.
Pressing the EXIT button also exits the Interactive services.
Use the ▲▼and ‘<’ and ‘>’ RCU buttons to navigate within the Interactive pages.
Press ‘OK’ to select a page.
Use the RCU’s coloured keys to select options within the displayed page.
If Subtitles are set to ON and the user presses the TEXT button, then the subtitles will be
switched off and the Interactive service will open. When the Interactive service is closed,
Subtitles will resume.
Switch Subtitles off before using the RED button to enter Interactive services.
15. Channel Banner:
When switching between channels the ‘Channel Banner’ is displayed. This shows
information such as;
i) Date / time / Channel Name
ii) Special features such as subtitles and audio modes, (if broadcast on the channel)
iii) Signal quality - indicated by a horizontal bar.
iv) ‘Now’ and ‘Next’ information with time elapsed - indicated on a horizontal bar.
16. Volume and Mute Controls:
i) Adjusting the Volume:
The User can adjust the volume of the TR 105 using the VOL+ and VOL- buttons on
the RCU. The volume level can be increased or decreased in 32 increments.
ii) Mute Control:
The User can temporarily switch off the TR 105 audio output by pressing the
‘MUTE’ key on the RCU. To cancel the ‘Mute’ control, press the ‘MUTE’ button
again or press the VOL+ or VOL- buttons.
22
Page 23

17. Channel UP / Channel DOWN:
The User can navigate up or down the Channel List using the Ch+ and Ch- buttons on the RCU.
18. Quick Channel Listing:
While viewing a channel, if the User presses ‘OK’ on the RCU, the Channel List will be displayed.
Using the ▲▼buttons on the RCU, the User can navigate between channels. When ‘OK’ is
pressed, a preview of the channel is shown on the graphic together with channel information. By
pressing ‘OK’ again, the User can select the channel from the list.
19. Swap:
The ‘SWAP’ button on the RCU allows the User to switch between the current and previously
viewed channels.
20. Subtitles:
The User can switch on Subtitles, (when broadcast), by pressing the ‘SUBT’ button on the RCU.
21. TV / Radio:
The user can use the ‘TV/Radio’ button on the RCU to toggle between TV and Radio channels
and to view the TV or Radio Channel Lists.
22. Exit:
If the User wishes to exit a menu screen, press the ‘EXIT’ button on the RCU.
Triax reserves the right to change the specification at any time without prior notice.
Issue 3: December 2009
23
 Loading...