

Page 1
Guía de instalación rápida
TPL-303E2K
TPL-303E
1.01
Page 2

Table of Contents
Español 1
1.
Antes de iniciar
Cómo se instala
2. 2
Troubleshooting 6
1
Version 02.19.2010
Page 3
1. Antes de iniciar
Contenidos del paquete
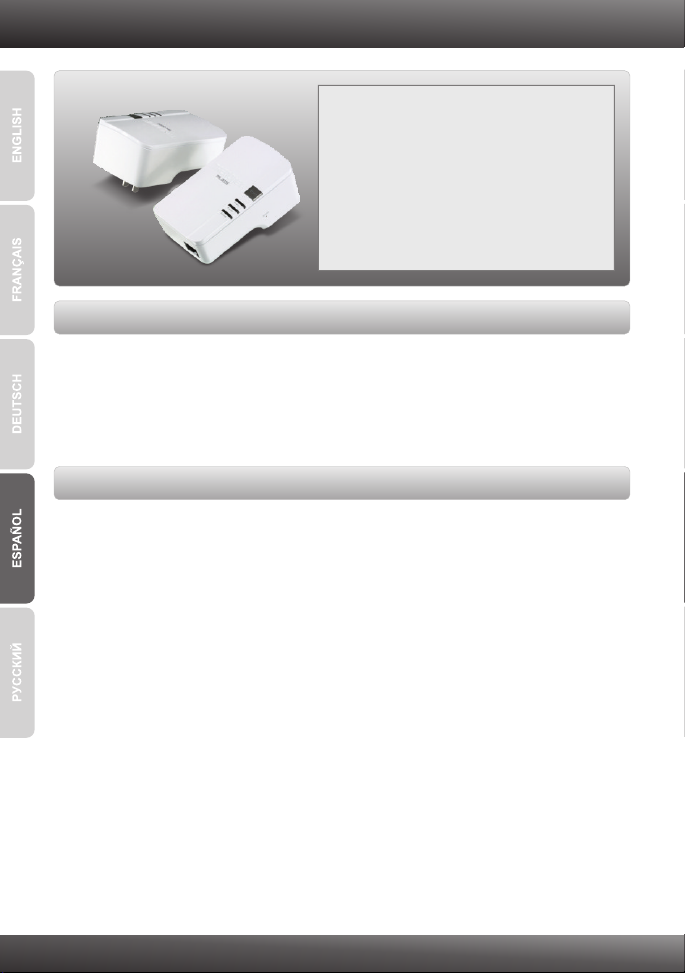
TPL-303E / TPL-303E2K
?
?CD-ROM (herramienta y guía del usuario)
?Guía de instalación rápida multilingüe
?Cable ethernet Cat. 5 (1.8m/6ft.)
Requisitos del sistema
?Unidad de CD-ROM
?Un PC portátil o de escritorio con adaptador de red instalado
?Red Powerline AV network
?Una red por cable a 10/100Mbps si utiliza el TPL-303E como dispositivo puente
Requisitos de servicio
?CPU: 1GHz or above (Windows 7) / 800MHz o superior (Windows Vista) /
300MHz o superior (Windows XP)
?Memory: 1GB RAM o superior (Windows 7) / 512MB o superior (Windows Vista) /
256 MB o superior (Windows XP)
?Windows 7(32/64-bit) / Vista(32/64-bit) / XP(32/64-bit)
1
Page 4
2. Cómo se instala
¡Importante! NO instale el TPL-303E hasta que no se le indique.
Para usuarios de Windows
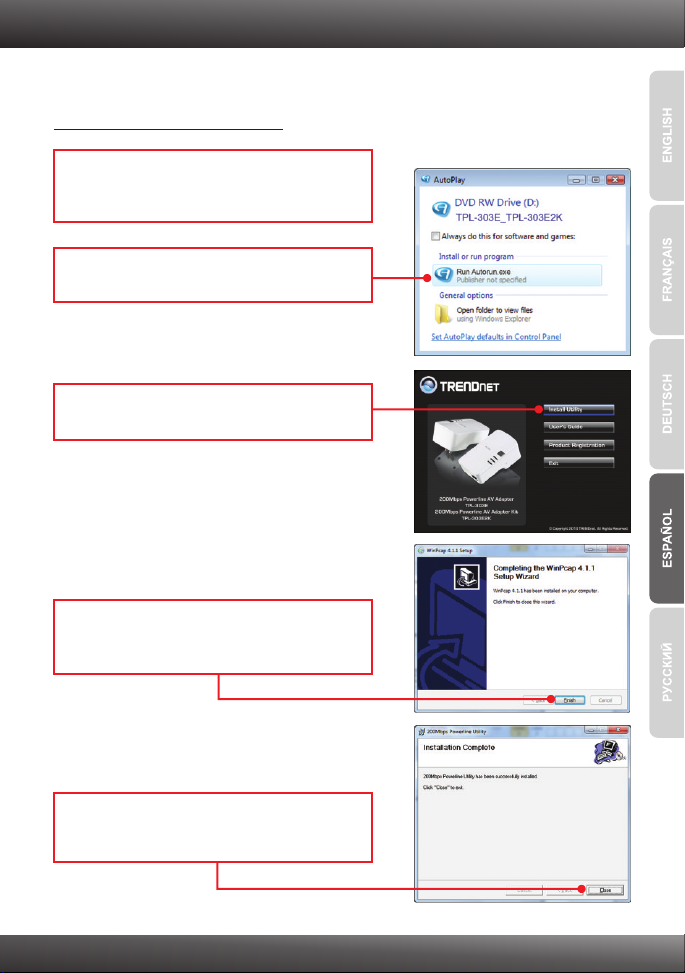
1. Introduzca el CD-ROM del controlador y de la
herramienta en la unidad de CD-ROM de su
PC.
2. Haga clic en Run autorun.exe
(sólo para Windows 7/ Vista).
3. Haga clic en Install Utility
(Instalar herramienta).
4. Siga las instrucciones del asistente de
instalación WinPCap y luego haga clic en
Finish (terminar)
5. Siga las instrucciones del la utilidad Powerline
de 200Mbps y luego haga clic en Close
(Cerrar).
2
Page 5

6. En la parte posterior de la unidad, copie la
contraseña de 12 dígitos del dispositivo.
Nota:
1. NO conecte el TPL-303E a un protector de oleada.
2. Para que los TPL-303E puedan verse mutuamente, cada unidad debe estar
en el mismo interruptor de circuito.
3. Se pueden conectar en red un máximo de 16 TPL-303E.
7. Conecte el TPL-303E a una toma de corriente
disponible.
8. Conecte un cable Ethernet del TPL-303E a un
puerto LAN disponible en su enrutador
(Ej. TEW-639GR).
9. Después conecte un cable Ethernet desde un
puerto LAN disponible en su enrutador a su
PC.
Outlet
10. Enchufe el segundo TPL-303E a una toma de
corriente en donde esté ubicado su PC o
dispositivo de red.
3
Outlet
Page 6

11. En su desktop haga clic doble en el icono de
la utilidad Powerline a 200 Mbps.
12. Seleccionar el TPL-303E alejado y el tecleo
incorpora contraseña.
Nota:
El TPL-303E remoto es el TPL-303E que está conectado a su PC o dispositivo de
red remoto.
13. Incorporar la contraseña alejada del dígito de
TPL-303E 12 y luego haga clic en OK. Ver el
paso 6 para encontrar la contraseña alejada
de TPL-303E.
14. Clic en OK.
15. Repita los pasos 8-10 para el segundo
TPL-303E.
Nota:
El nombre de red del defecto es HomePlugAV. Si el nombre de red de tu red
existente de la línea eléctrica no es HomePlugAV, debes cambiar esto en la utilidad.
4
Page 7

16. Haga clic en la pestaña de privacidad. Si
quiere cambiar el Nombre de la Red
Privada, introduzca el nombre deseado de la
red privada y luego haga clic en Set All
Devices (Ajustar todos los dispositivos).
17. Clic en OK.
18. Clic en OK.
19. Conecte un cable CAT-5e/6 del TPL-303E a
su PC remoto, o aplicación del netbook.
20. Verifique que las luces LED de poder, P-Link y
E-Link estén en verde en todas las unidades
TPL-303E.
Outlet
La instalación ha sido completada
Para obtener información más detallada sobre la configuración y las opciones de
configuración avanzadas de la , por favor consulte la sección de
resolución de problemas en el CD-ROM de la Guía del Usuario, o el sitio Web de net
en http://www.trendnet.com.
TPL-303E/TPL-303E2K
TREND
Registre su producto
Para asegurar los más altos niveles de servicio y apoyo al cliente, registre su producto
en línea en: www.trendnet.com/register Gracias por elegir TRENDnet.
5
Page 8

Troubleshooting
1. I inserted the TPL-303E/TPL-303E2K CD-ROM into my computer's CD-ROM Drive and the
installation menu does not appear automatically. What should I do?
1. For Windows 7, if the installation menu does not appear automatically, click on the
Windows Icon on the bottom left hand corner of the screen,, click the “Search programs
and files” box, and type D:\autorun.exe, where “D” in “D:\autorun.exe” is the letter
assigned to your CD-ROM Drive, and then press the ENTER key on your keyboard
2. For Windows Vista, if the installation menu does not appear automatically, click Start, click
the Start Search box, and type D:\autorun.exe where "D" in "D:\autorun.exe" is the letter
assigned to your CD-ROM Drive, and then press the ENTER key on your keyboard.
3. For Windows XP, if the installation menu does not appear automatically, click Start,
click Run, and type D:\autorun where "D" in "D:\autorun.exe" is the letter assigned to your
CD-ROM Drive, and then press the ENTER key on your keyboard.
2. I have verified that my Powerline device is connected to my workstation, but I cannot
detect other Powerline devices. What should I do?
1. Verify that you are using Cat 5e or Cat. 6 Ethernet cables.
2. Press the Sync button on your TPL-303Es for 3 seconds then let go.
3. Open up the 200Mbps Powerline Utility and click scan.
4. Verify the network name of your Powerline network. Then go to the Privacy tab in the
200Mbps Powerline Utility, type in the network name and click Set Local Device Only.
5. Verify that the power outlet the TPL-303E is plugged into is on the same electrical power
distribution and/or circuit breaker box.
6. Reset your TPL-303Es. Take a pin or paperclip and press the reset button for 15
seconds. The reset button is located on the side of the TPL-303E.
3 I can detect my Powerline devices on my Powerline network, but I cannot connect to the
Internet. What should I do?
1. Make sure you are not connecting the device into a surge protector.
2. Make sure that your Router is connected to the Internet.
3. Make sure your TCP/IP settings are set to Obtain an IP address automatically (see the
steps below).
Windows 7
1. Go into the Control Panel, click Network and
Internet, click Network and Sharing Center,
click Change Adapter Settings and then rightclick the Local Area Connection icon and then
click Properties.
2. Click Internet Protocol Version 4(TCP/IPv4)
and then click Properties. Then click on
Obtain an IP address automatically.
6
Page 9

Windows Vista
1. Go into the Control Panel, click Network and
Internet, click Network and Sharing Center,
click Manage Network Connections and then
right-click the Local Area Connection icon
and then click Properties.
Windows XP
1. Go into the Control Panel, double-click the
Network Connections icon and then right-click
the Local Area Connection icon and then click
Properties.
2. Click Internet Protocol Version 4(TCP/IPv4)
and then click Properties. Then click on
Obtain an IP address automatically.
2. Click Internet Protocol (TCP/IP) and then click
Properties. Then click on Obtain an IP
address automatically.
4. I tried changing the Private Network Name and applying it to all of my TPL-303E devices,
but “Some devices could not be added to your network” error appears. I can no longer see
any of the remote TPL-303E. What should I do?
1. Open up the TRENDnet Powerline Utility, click the Privacy tab, click Use Default (Public
Network) and then click Set Local Device Only.
2. Make sure to add each remote TPL-303E's password. See step 12 in Section 2 (How to
Install).
5. I have a HomePlug 1.0 or HomePlug Turbo network. Can I use this with my network?
The TPL-303E is not backwards compatibile with HomePlug 1.0 or HomePlug Turbo.
If you still encounter problems or have any questions regarding the TPL-303E/TPL-303E2K,
please refer to the User's Guide included on the Utility CD-ROM or contact TRENDnet's Technical
Support Department.
7
Page 10

Page 11

Copyright ©2010. All Rights Reserved. TRENDnet.
 Loading...