

Page 1
Anleitung zur Schnellinstallation
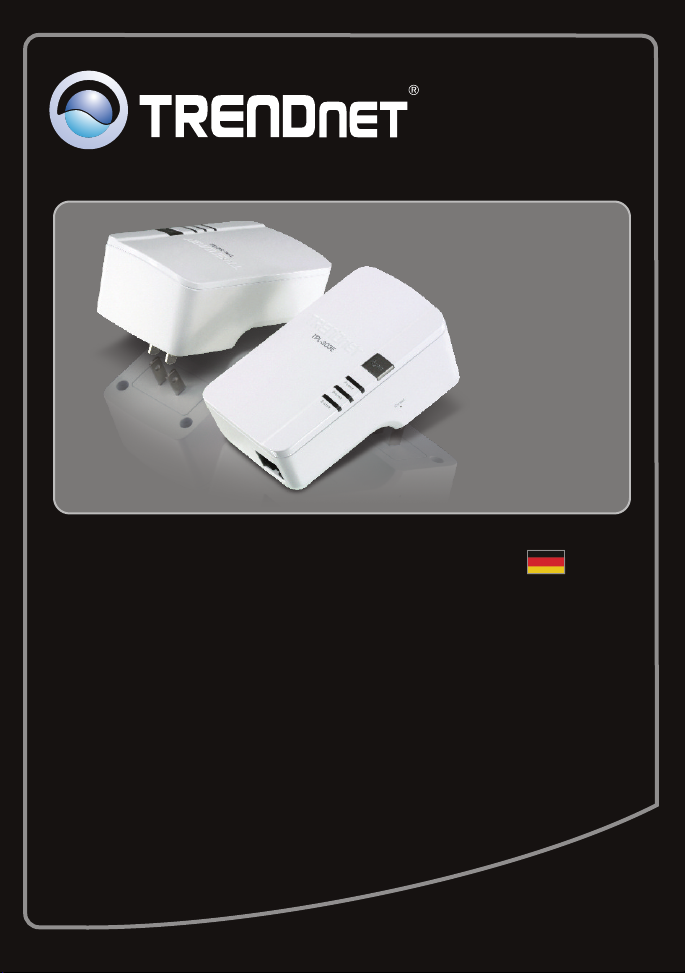
TPL-303E2K
TPL-303E
1.01
Page 2

Table of Contents
Deutsch
1. B
evor Sie anfangen
Installation
2. 2
1
Troubleshooting 6
1
Version 02.19.2010
Page 3
1. Bevor Sie anfangen
Packungsinhalt
TPL-303E_TPL303E2K
?
?CD-ROM
(Dienstprogramm & Bedienungsanleitung)
?Mehrsprachige Installationsanleitung
?Kat. 5 Ethernet Kabel (1.8m/6ft.)
Systemanforderungen
?CD-ROM-Laufwerk
?Desktop-oder Laptop-Computer mit installiertem Netzwerk-Adapter
?Vorhandenes Powerline AV-Netzwerk
?Verdrahtetes 10/100-MBit/s-Netzwerk, wenn der TPL-303E als Brücke genutzt
wird
Gebrauchsanforderungen
?Prozessor: 1 GHz oder schneller (Windows 7 / 800 MHz oder schneller
(Windows Vista) / 300 MHz oder schneller (Windows XP)
?Speicher: 1 GB RAM oder mehr (Windows 7) / 512MB RAM oder mehr
(Windows Vista)/ 256 MB oder mehr (Windows XP)
?Windows 7(32/64-bit) / Vista(32/64-bit) / XP(32/64-bit)
1
Page 4
2. Installation
Wichtig! Installieren Sie den TPL-303E ERST DANN, wenn Sie dazu aufgefordert
werden.
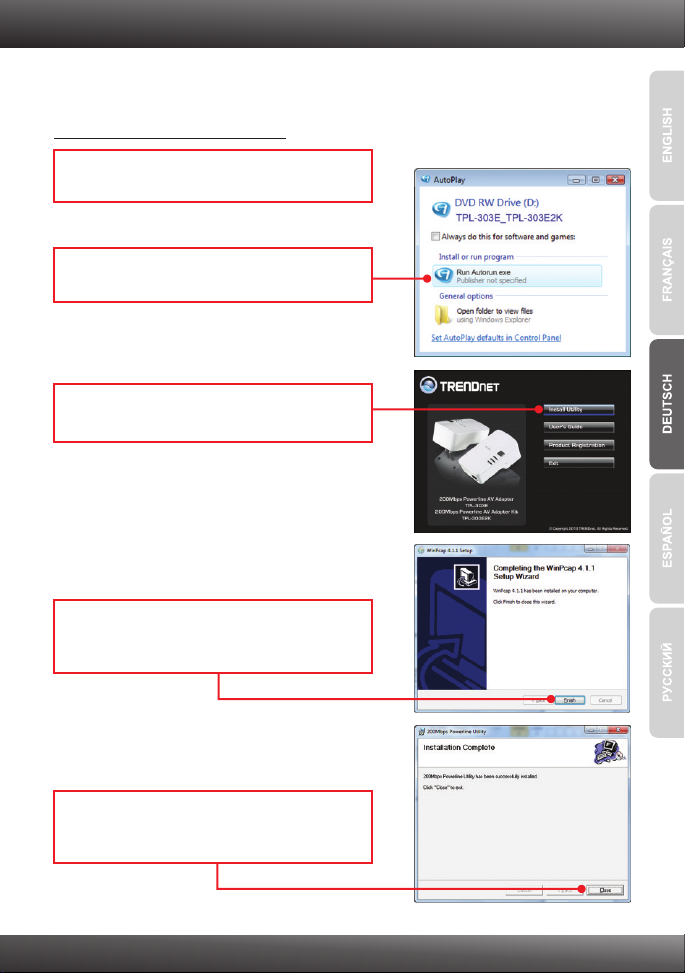
Für Benutzer von Windows
1. Legen Sie die Treiber- und DienstprogrammCD in das CDROM-Laufwerk Ihres Computers.
2. Klicken Sie auf Run autorun.exe
(setup.exe ausführen) (nur Windows 7/Vista).
3. Klicken Sie dann auf Install Utility
(Programm installieren).
4. Folgen Sie den Anweisungen WinPCap
Setup-Assistenten und klicken Sie dann auf
Fertig stellen.
5. Folgen Sie den 200Mbit/s Powerline
Hilfsprogramm-Anweisungen und klicken
Sie dann auf Fertig stellen.
2
Page 5

6. Notieren Sie sich das 12-stellige Kennwort auf
der Rückseite des Geräts.
Hinweis:
1. Stecken Sie den TPL-303E NICHT in eine Steckdosenleiste mit
Überspannungsschutz
2. Damit sich die TPL-303E erkennen können, müssen sie mit dem gleichen
Trennschalter verbunden sein.
3. Ein Netzwerk kann bis zu 16 TPL-303E enthalten.
7. Stecken Sie den TPL-303E in eine Steckdose.
8. Verbinden Sie den TPL-303E über ein
Ethernetkabel mit einem freien LAN-Port Ihres
Routers (z.B. TEW-639GR).
9. Verbinden Sie dann einen anderen LAN-Port
Ihres Routers über ein Ethernetkabel mit Ihrem
Computer.
Outlet
10. Stecken Sie den zweiten TPL-303E in der
Nähe Ihres externen PC oder Netzwerkgeräts
in eine Steckdose.
Outlet
3
Page 6

11. Doppelklicken Sie auf das 200 MBit/s
Powerline Hilfsprogramm-Symbol auf Ihrem
Desktop.
12. Das Fern-TPL-303E vorwählen und Klicken
einträgt Kennwort gt.
Hinweis:
Der externe TPL-303E ist das Gerät, das mit Ihrem externen PC oder
Netzwerkgerät verbunden ist.
13. Das Fern-TPL-303E 12 Stelle Kennwort
eintragen und O.K. anklicken. Schritt 3 sehen,
um das Fern-TPL-303E Kennwort zu finden.
14. Klicken Sie auf OK.
15. Wiederholen Sie die Schritte 12-14 für die
anderen externen TPL-303E.
Anmerkung:
Der Rückstellung Netzname ist HomePlugAV. Wenn der Netzname
deines vorhandenen Starkstromleitung Netzes NICHT HomePlugAV ist, müssen sie
du dieses im Dienstprogramm ändern.
4
Page 7

16. Das Privatleben Tab anklicken. Wenn Sie den
Namen des privaten Netzwerks ändern
möchten, geben Sie den gewünschten
Namen ein und klicken dann auf Set All
Devices (für alle Geräte).
17. Klicken Sie auf OK.
18. Klicken Sie auf OK.
19. Verbinden Sie den TPL-303E über ein
Kat.-5e/6-Kabel mit Ihrem externen PC, oder
andere Netzwerk Apparatur.
20. Stellen Sie sicher, dass die Power, P-Link und
E-Link-LEDs alle grün leuchten auf allen TPL303Es.
Outlet
Ihre Installation ist beendet!
Weitere Informationen zu den Konfigurations- und erweiterten Einstellungen der
TPL-303E/TPL-303E2K finden Sie im Abschnitt „Problembehandlung“ der
Bedienungsanleitung auf der beiliegenden Dienstprogramm-CD oder auf der Website von
TRENDnet unter www.trendnet.com.
Registrieren Sie Ihr Produkt
Nehmen Sie sich bitte einen Moment Zeit und registrieren Sie Ihr Produkt online, so dass Sie
unsere umfassenden Support- und Kundendienstleistungen in Anspruch nehmen können:
www.trendnet.com/register Vielen Dank für den Kauf eines TRENDnet-Produkts.
5
Page 8

Troubleshooting
1. I inserted the TPL-303E/TPL-303E2K CD-ROM into my computer's CD-ROM Drive and the
installation menu does not appear automatically. What should I do?
1. For Windows 7, if the installation menu does not appear automatically, click on the
Windows Icon on the bottom left hand corner of the screen,, click the “Search programs
and files” box, and type D:\autorun.exe, where “D” in “D:\autorun.exe” is the letter
assigned to your CD-ROM Driver, and then press the ENTER key on your keyboard
2. For Windows Vista, if the installation menu does not appear automatically, click Start, click
the Start Search box, and type D:\autorun.exe where "D" in "D:\autorun.exe" is the letter
assigned to your CD-ROM Drive, and then press the ENTER key on your keyboard.
3. For Windows 2000/XP, if the installation menu does not appear automatically, click Start,
click Run, and type D:\autorun where "D" in "D:\autorun.exe" is the letter assigned to your
CD-ROM Drive, and then press the ENTER key on your keyboard.
2. I have verified that my Powerline device is connected to my workstation, but I cannot
detect other Powerline devices. What should I do?
1. Verify that you are using Cat 5e or Cat. 6 Ethernet cables.
2. Press the Sync button on your TPL-303Es for 3 seconds then let go.
3. Open up the 200Mbps Powerline Utility and click scan.
4. Verify the network name of your Powerline network. Then go to the Privacy tab in the
200Mbps Powerline Utility, type in the network name and click Set Local Device Only.
5. Verify that the power outlet the TPL-303E is plugged into is on the same electrical power
distribution and/or circuit breaker box.
6. Reset your TPL-303Es. Take a pin or paperclip and press the reset button for 15
seconds. The reset button is located on the side of the TPL-303E.
3 I can detect my Powerline devices on my Powerline network, but I cannot connect to the
Internet. What should I do?
1. Make sure you are not connected the device into a surge protector.
2. Make sure that your Router is connected to the Internet.
3. Make sure your TCP/IP settings are set to Obtain an IP address automatically (see the
steps below).
Windows 7
1. Go into the Control Panel, click Network and
Internet, click Network and Sharing Center,
click Change Adapter Settings and then rightclick the Local Area Connection icon and then
click Properties.
2. Click Internet Protocol Version 4(TCP/IPv4)
and then click Properties. Then click on
Obtain an IP address automatically.
6
Page 9

Windows Vista
1. Go into the Control Panel, click Network and
Internet, click Network and Sharing Center,
click Manage Network Connections and then
right-click the Local Area Connection icon
and then click Properties.
Windows XP
1. Go into the Control Panel, double-click the
Network Connections icon and then right-click
the Local Area Connection icon and then click
Properties.
2. Click Internet Protocol Version 4(TCP/IPv4)
and then click Properties. Then click on
Obtain an IP address automatically.
2. Click Internet Protocol (TCP/IP) and then click
Properties. Then click on Obtain an IP
address automatically.
4. I tried changing the Private Network Name and applying it to all of my TPL-303E devices,
but “Some devices could not be added to your network” error appears. I can no longer see
any of the remote TPL-303E/TPL-303E2K. What should I do?
1. Open up the TRENDnet Powerline Utility, click the Privacy tab, click Use Default (Public
Network) and then click Set Local Device Only.
2. Make sure to add each remote TPL-303E's password. See step 12 in Section 2 (How to
Install).
2. I have a HomePlug 1.0 or HomePlug Turbo network. Can I use this with my network?
The TPL-303E is not backwards compatibile with HomePlug 1.0 or HomePlug Turbo.
If you still encounter problems or have any questions regarding the TPL-303E/TPL-303E2K,
please refer to the User's Guide included on the Utility CD-ROM or contact TRENDnet's Technical
Support Department.
7
Page 10

Page 11

Copyright ©2010. All Rights Reserved. TRENDnet.
 Loading...