TRAYNOR INTERNATIONAL User Manual

I n t e r n a t i o n a l S e r i e s

IMPORTANT SAFETY INSTRUCTIONS
|
|
|
|
|
|
|
|
|
|
|
|
INSTRUCTIONS PERTAINING TO A |
INSTRUCTIONS RELATIVES AU RISQUE |
||||
RISK OF FIRE, ELECTRIC SHOCK, |
DE FEU, CHOC ÉLECTRIQUE, OU |
||||
OR INJURY TO PERSONS |
BLESSURES AUX PERSONNES |
||||
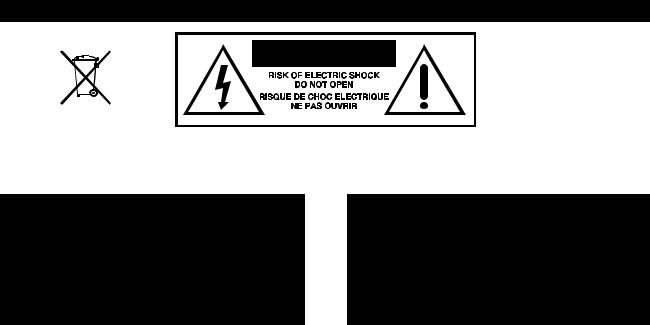
CAUTION:
TO REDUCE THE RISK OF ELECTRIC SHOCK, DO
NOT REMOVE COVER (OR BACK).
NO USER SERVICEABLE PARTS INSIDE.
REFER SERVICING TO QUALIFIED
SERVICE PERSONNEL.
Read Instructions
The Owner’s Manualshould be read and understood before operation of your unit. Please, save these instructions for future reference.
Packaging
Keep the box and packaging materials, in case the unit needs to be returned for service.
Warning
When using electric products, basic precautions should always be followed, including the following:
Power Sources
Your unit should be connected to a power source only of the voltage specified in the owners manual or as marked on the unit. This unit has a polarized plug. Do not use with an extension cord or receptacle unless the plug can be fully inserted. Precautions should be taken so that the grounding scheme on the unit is not defeated.
Hazards
Do not place this product on an unstable cart, stand, tripod, bracket or table. The product may fall, causing serious personal injury and serious damage to the product. Use only with cart, stand, tripod, bracket, or table recommended by the manufacturer or sold with the product. Follow the manufacturer’s instructions when installing the product and use mounting accessories recommended by the manufacturer.
The apparatus should not be exposed to dripping or splashing water; no objects filled with liquids should be placed on the apparatus.
Terminals marked with the “lightning bolt” are hazardous live; the external wiring connected to these terminals require installation by an instructed person or the use of ready made leads or cords.
Ensure that proper ventilation is provided around the appliance.
No naked flame sources, such as lighted candles, should be placed on the apparatus.
Power Cord
The AC supply cord should be routed so that it is unlikely that it will be damaged. If the AC supply cord is damaged DO NOT OPERATE THE UNIT.
Service
The unit should be serviced only by qualified service personnel.
AVIS:
AFIN DE REDUIRE LES RISQUE DE CHOC ELECTRIQUE, N’ENLEVEZ PAS LE COUVERT (OU LE PANNEAU ARRIERE)
NE CONTIENT AUCUNE PIECE
REPARABLE PAR L’UTILISATEUR.
CONSULTEZ UN TECHNICIEN QUALIFIE
POUR L’ENTRETIENT
Veuillez Lire le Manuel
Il contient des informations qui devraient êtres comprises avant l’opération de votre appareil. Conservez S.V.P. ces instructions pour consultations ultérieures.
Emballage
Conservez la boite au cas ou l’appareil devait être retourner pour réparation.
Attention:
Lors de l’utilisation de produits électrique, assurezvous d’adhérer à des précautions de bases incluant celle qui suivent:
Alimentation
L’appareil ne doit être branché qu’à une source d’alimentation correspondant au voltage spécifié dans le manuel ou tel qu’indiqué sur l’appareil. Cet appareil est équipé d’une prise d’alimentation polarisée. Ne pas utiliser cet appareil avec un cordon de raccordement à moins qu’il soit possible d’insérer complètement les trois lames. Des précautions doivent êtres prises afin d’eviter que le système de mise à la terre de l’appareil ne soit désengagé.
Risque
Ne pas placer cet appareil sur un chariot, un support, un trépied ou une table instables. L’appareil pourrait tomber et blesser quelqu’un ou subir des dommages importants. Utiliser seulement un chariot, un support, un trépied ou une table recommandés par le fabricant ou vendus avec le produit. Suivre les instructions du fabricant pour installer l’appareil et utiliser les accessoires recommandés par le fabricant.
Il convient de ne pas placer sur l’appareil de sources de flammes nues, telles que des bougies allumées.
L’appeil ne doit pas être exposé à des égouttements d’eau ou des éclaboussures et qu’aucun objet rempli de liquide tel que des vases ne doit être placé sur l’appareil.
Assurez que lappareil est fourni de la propre ventilation.
Les dispositifs marqués d’une symbole “d’éclair” sont des parties dangereuses au toucher et que les câblages extérieurs connectés à ces dispositifs de connection extérieure doivent être effectivés par un opérateur formé ou en utilisant des cordons déjà préparés.
Cordon d’Alimentation
Évitez d’endommager le cordon d’alimentation. N’UTILISEZ PAS L’APPAREIL si le cordon d’alimentation est endommagé.
Service
Consultez un technicien qualifié pour l’entretien de votre appareil.
safety-4v3.eps • Oct. 26/05

Introduction
The Traynor name has long been associated with great sounding, affordable instrument amplifiers. Since the early 60’s Traynor amplifiers were so reliable that they have earned the reputation as being the ultimate ‘workhorses’ of Rock n’ Roll. Yorkville Sound is proud to continue this tradition with our latest generation of Guitar Mate™, Studio Mate™ & Bass Mate™ instrument combo-amplifiers. These open backed combos are perfect for any guitar or bass player in need of a compact, durable, yet inexpensive rig. Six models are available in the Traynor International Series, each with either Cream or Black Tolex™ covering, matching grille cloth embellished with a ‘chromed-look’ classic Traynor logo.
The Traynor International Series combo-amplifiers come in 10, 15, 20, 30, and 40 watt guitar models as well as 10 and 25 watt bass guitar models. All of the cabinets include metal corners, non-skid rubber feet, LED power indicator, a multi-band EQ, and vintage-style rotary control knobs. Some models have specific features such as separate gain and volume controls, channel indicator LEDs, reverb and chorus effects, headphone and line out jacks, an effects loop, and footswitch capabilities. The Traynor Guitar Mate™, Studio Mate™ and Bass Mate™ amplifiers come with a one year, no-hassle warranty. So, when you’re ready to rock, “grab your Mate!”
General Use
This guitar amplifier can be used in nearly any location. For the best results, you should try to avoid placement near motors, lighting dimmers, or other hum-producing power sources, and please keep away from intense heat sources.
Power
The red LED located beside the Power switch illuminates when the amplifier is turned on. To prevent serious damage, which may void your warranty, be sure that the rated AC line voltage (as shown on the amplifier’s rear panel) agrees with the line voltage available from your AC outlet before connecting the AC power cord.
NOTE: Always turn amplifier’s volume down before turning the power on or off.
Input Jacks (High & Low) - TRM40 and TBM25
The High Input has a higher sensitivity, compared to the Low input jack. The Low inout can be used for lower impedance guitars or to utilize maximum gain. The lower sensitivity input can help you achieve a cleaner sound and can help dampen the sound if your guitar’s output is too hot. This input is useful if your guitar has active pickups.
Volume & Gain Controls
These controls help you adjust the output level (distortion on guitar amps).
Overdrive Switch - TSM10 and TGM15
The Overdrive Switch turns th distortion/overdrive on and off.
Gain Control - TGM20, TRM30 and TRM40
The Gain control regulates the amount of distortion/overdrive on guitar amps.
Volume Control
The Volume Control affects the overall output volume of the amplifier. Rotate counterclockwise for lower gain and clockwise to achieve your desired volume. The Volume must be set higher than the Gain Control (on guitar amplifiers) for a cleaner sound.
Channel 1 Controls - TGM20 TRM30 and TRM40
The Gain control regulates the preamp level to allow more or less distortion. Turn up for more distortion, down for less.
Channel Select Push Button - TGM20, TRM30 and TRM40
This switch enables you to choose which channel your instrument’s signal is sent to. This switch is overidden by the Channel Select Footswitch if enabled (by inserting a footswitch in the jack located on the rear of the unit).
 Loading...