

Page 1

TRAULSEN SEAFOOD DISPLAY CABINETS
Models: TD048HT & TD078HT
training guide
Page 2
1 TRAULSEN TD048HT & TD078HT TRAINING GUIDE 2
Table of Contents
Major Parts List........................................................................1
Daily Start-Up.......................................................................... 2
Basic Operation....................................................................... 3
End of Day............................................................................... 4-5
Routine Maintenance.............................................................. 6
Troubleshooting....................................................................... 7
Major Parts List
Page
Daily Start-Up
Note: Follow End of Day Cleaning Procedure Prior To First Use!
1. Plug Seafood Display Cabinet into properly
sized outlet (115V, 20 amps).
NOTE
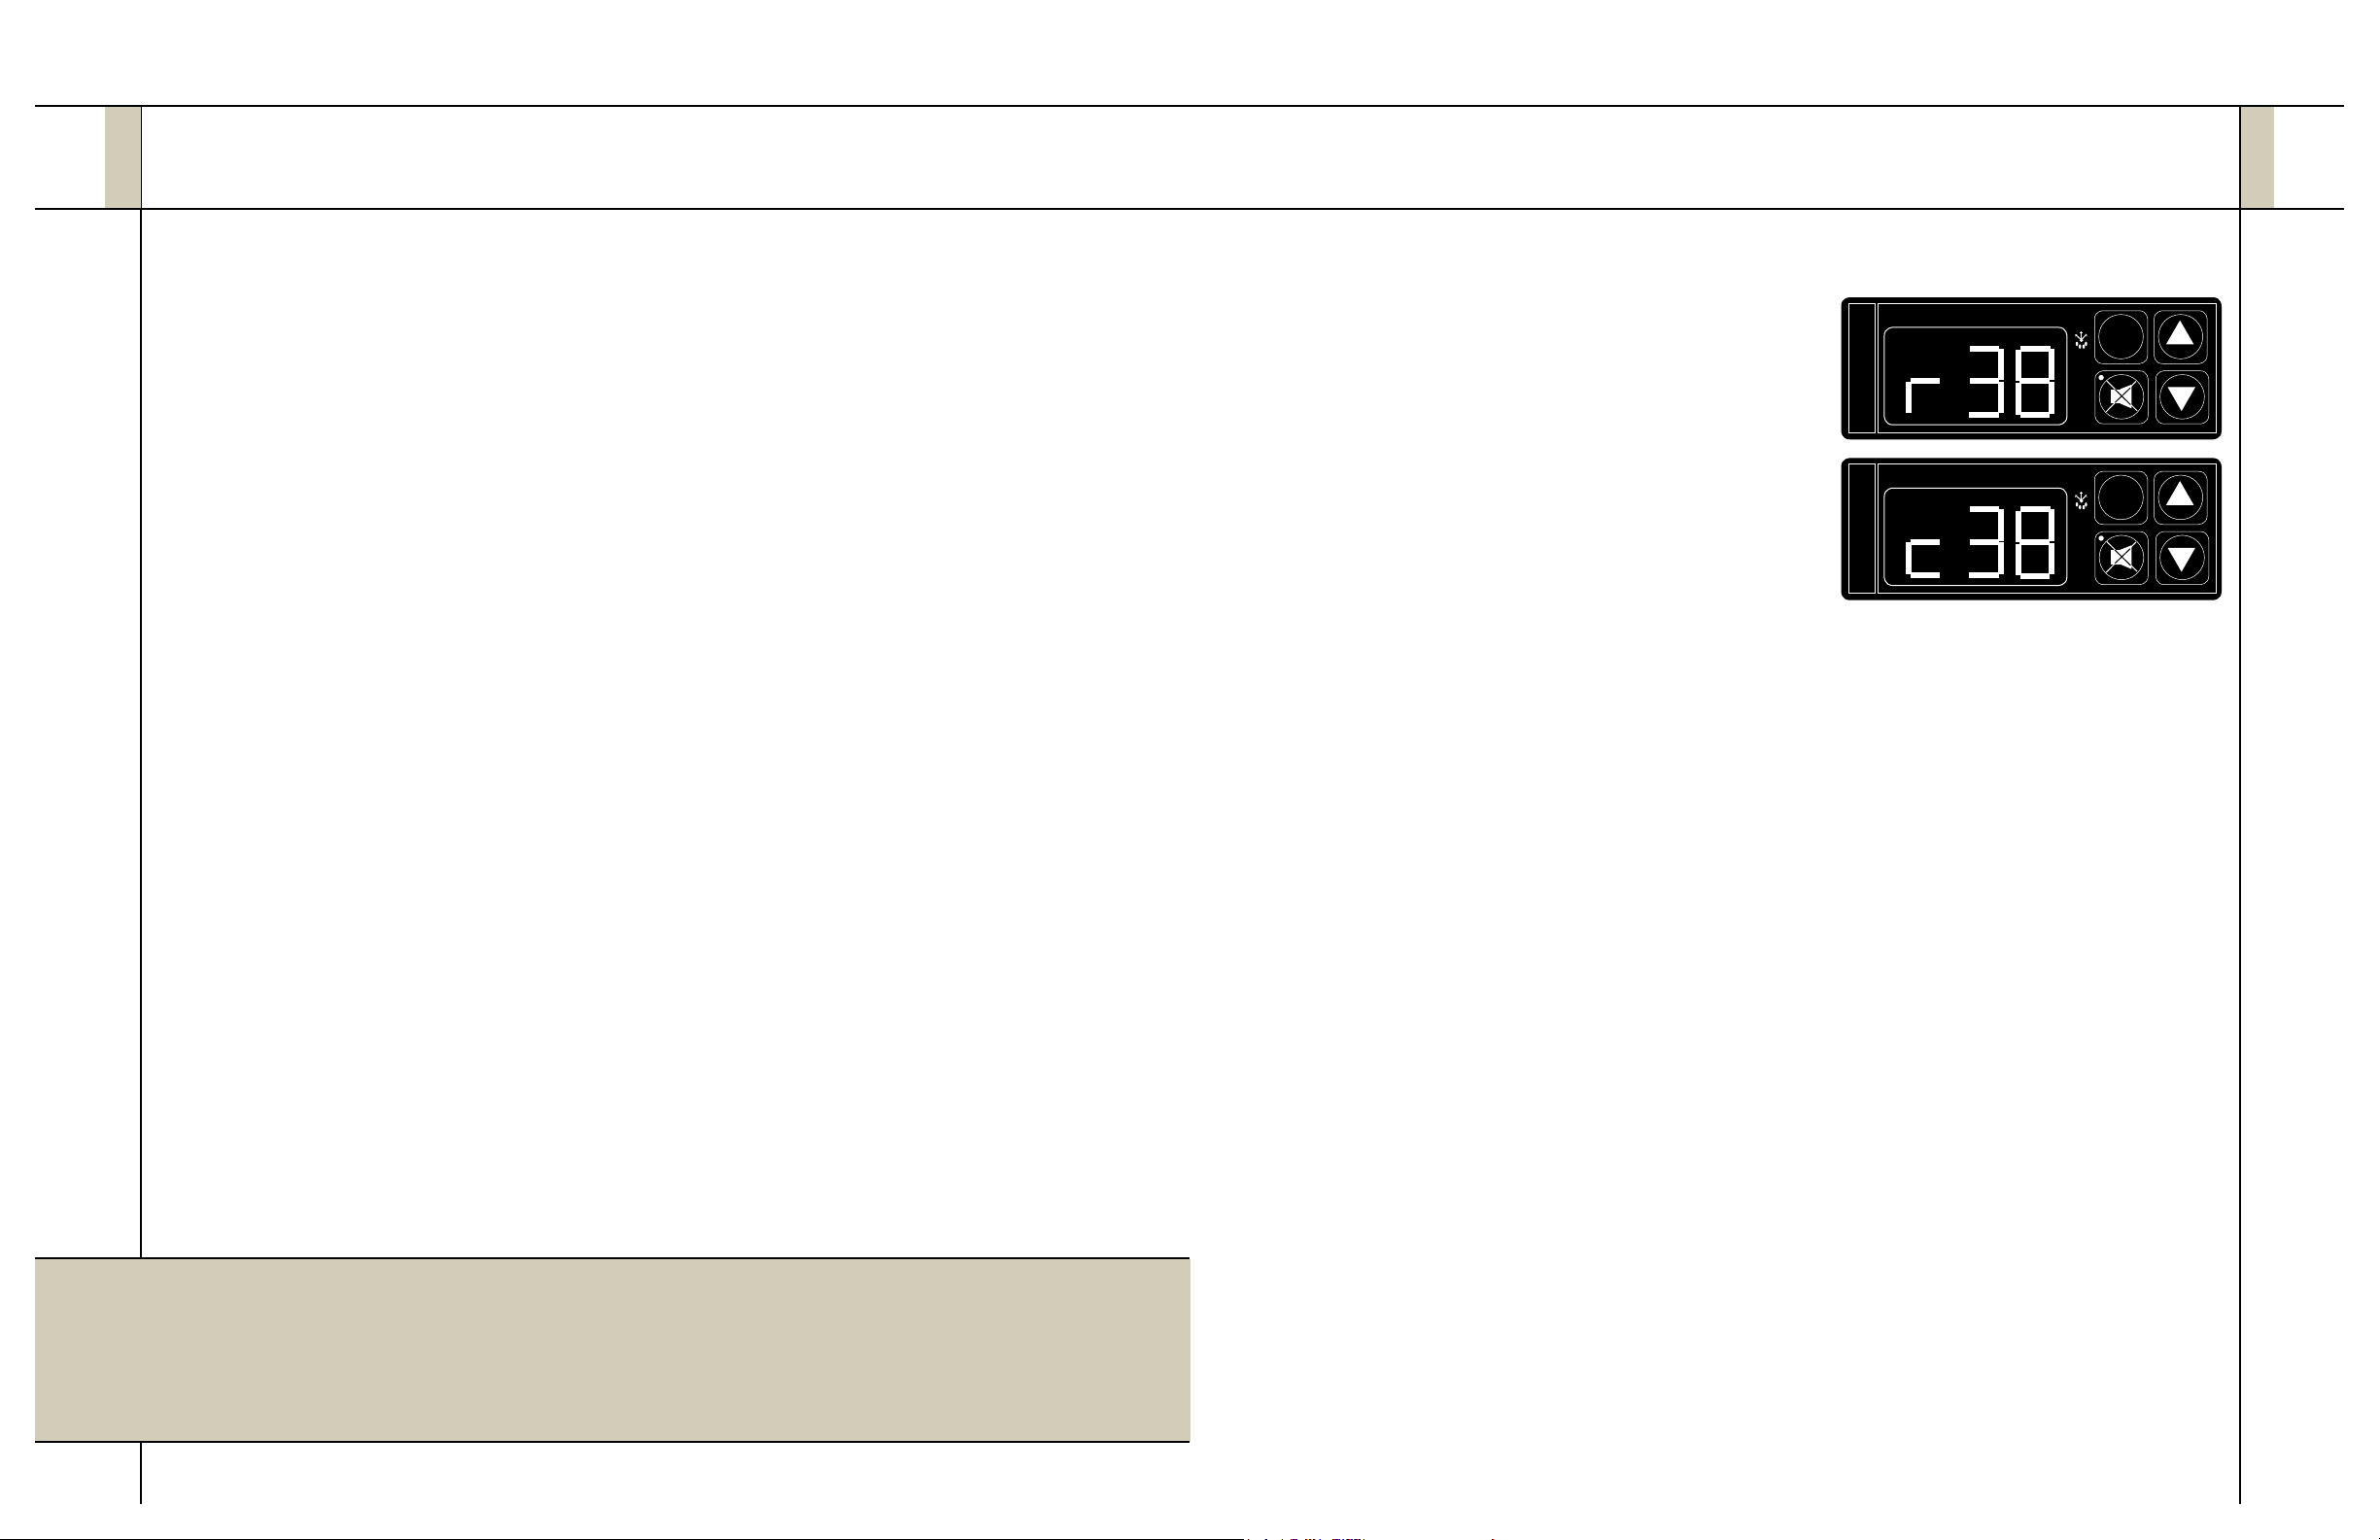
Allow display area and base temps (indicated
by r and c respectively on the control display,
see g. 1) to reach 38• F before loading.
2. Use of ice is optional. If ice is to be used,
load to a depth of no more than 2”.
NOTE
In lieu of ice, parchment or some other
foodsafe paper, is suggested to line the
display area pans.
INTELA-TRAUL
°F °C
REFRIGERATOR
INTELA-TRAUL
°F °C
REFRIGERATOR
SET
SET
g. 1
Rear Locking Bar Product Pan Fan Blade
Front Locking Bar/Air
Deector Assembly
Air-Bafe Product Divider
Need cold food kept safe all day? With Traulsen’s
3. Load product into refrigerated base rst
using clean 18” x 26” sheet pans.
NOTE
Parchment, or some other foodsafe paper,
is suggested to line the sheet pans.
4. Load display area with already cold or
frozen product. Use the plastic dividers
supplied to seperate different products.
5. Lock the doors by sliding the Transport
Latch to the left (see g. 2).
6. Remove from power and immediately move
the Seafood Display Cabinet to the area
where it will be used for the day.
7. Plug the Seafood Display Cabinet into
properly sized outlet within 5-minutes
(115V, 20 amps).
NOTE
Do not load product above Load
Limit Guides as indicated on the
display area sides and dividers.
WARNING!
Pushing against the canopy or
frame may result in damage.
Seafood Display Cabinet you can consider it done!
8. Unlock the doors by sliding the Transport
Latch to the right (see g. 2).
g. 2
Page 3

3 TRAULSEN TD048HT & TD078HT TRAINING GUIDE 4
Basic Operation
Normal Operation
• Displayed product temps should remain
safely cold for up to 8-hours.
• Product stored in the cabinet base should
remain safely cold as long as power is
supplied to the cabinet.
• No “slacking” or freezing should take
place under normal circumstances.
• Some products may exhibit drying after
several hours and require wrapping
to prevent.
• Make use of product from the display
area rst. Replace using product from the
refrigerated base. Be sure to rotate
product and practice First In, First Out.
• Replace product in the refrigerated base
using freshly loaded pans.
Defrost
• Defrost WILL occur automatically every 3-hours.
• Food remaining in the display cabinet WILL remain safe during defrost.
I. Disassembly (required after each use)
1. Remove product from display area rst.
2. Remove sheet pans from refrigerated base.
3. Disconnect cabinet from power supply.
4. Position cabinet over a oor drain or have a large
bucket handy.
5. Remove product dividers (see g. 1).
6. Lift out product pans by grasping them by their
front handle, allowing any ice to slide into the
display area (see g. 2). Set aside.
7. Remove rear locking bar by lifting it up and out from
one side (see g. 3). Set aside.
8. Lift front of air-bafe assembly(s) to close hinge, and
remove from one side (see g. 4). Set aside.
9. Remove front locking bar/air deector assembly by
lifting it up and out from one side (see g. 5).
10. Remove fan blade(s) (see g. 6). Set aside.
11. Place all metal parts in the sink for sanitizing.
Follow procedure on page 5 for care of fan blade(s).
End of Day
g. 1
g. 2
• Defrost cycle in progress is indicated on the control by dEF.
• Time of defrost can be adjusted using the Defrost Lockout feature. Please refer
to your owner’s manual for instructions.
High Water Indicator (when using ice)
1. Ice is expected to slowly melt. Under typical
conditions the Seafood Display cabinet will
not require draining during use.
2. In the event water resulting from melting ice
exceeds holding capacity (approx. 5 gal.) a oat
device will raise a red “draining required” indicator
(see g. 1).
3. Drain cabinet as outlined in steps 1 thru 4 on
page 5.
g. 1
Parts placed near the sink for cleaning and sanitizing.
g. 6
g. 3
g. 4
g. 5
Page 4

5 TRAULSEN TD048HT & TD078HT TRAINING GUIDE 6
End of Day (continued)
II. Cleaning the Cabinet (required after each use)
1. Open the compressor access door.
2. Locate drain hose over a oor drain or large bucket
(see g. 1).
3. Open drain valve by turning clockwise.
4. Spray out the display well and sanitize thoroughly.
Allow all water to run out the drain.
g. 1
4. Close the drain valve by turning counter-clockwise.
Close the compressor access door.
5. Wipe out the refrigerated area behind the doors
using a non-abrasive, non-clorinated, stainless steel
safe cleanser. Leave the door(s) open until next
use.
WARNING!
Spraying water inside the refrigerated area behind the
doors may cause equipment damage and/or injury.
Routine Maintenance
Care of the Display Canopy (required as needed)
1. Disconnect power supply.
2. Remove the screws securing canopy brackets (see
g. 1).
3. Lift curved canopy section(s) towards front, out of
mounting bar bracket, and up and away from the
cabinet (see g. 2).
NOTE
On 78” units the two canopy sections are
connected by a plastic H-Channel.
4. Lift out canopy side pieces.
5. Wash all canopy parts in hot, soapy water.
WARNING!
Use of ammonia or ammonia containing cleaners, such
as windex, will blur and/or craze the plexiglass canopy.
g. 1
III. Cleaning the Fan Blade(s) (required after each use)
1. Throughly clean fan post using alcohol or mineral
spirits and a clean, lint-free cloth.
2. Clean the bearing inside of the fan blade assembly
using a cotton swap moistened with alcohol or
mineral spirits (see g. 1).
3. Place a few drops of the lubricant supplied by
Traulsen into the fan blade assembly rear.
4. Replace the fan blade assembly on the post.
g. 1
6. Allow to air dry and wipe away any water spots using
a clean, dry cloth.
7. Reassemble by reversing steps 1 thru 4.
g. 2
Cleaning the Condenser (required approx. every 90-days)
Cleaning the condenser is critical to insuring proper
performance and long compressor life.
1. Disconnect power supply.
2. Open the compressor access door.
3. Vacuum or brush coil ns clear of any dust or debris
present.
4. Close the compressor access door.
5. Restore power.
g. 1
g. 2
IV. Completion
1. Reassemble cabinet by reversing steps 1 thru 9 on page 4.
NOTE: Leave door(s) open until next use and power is restored.
g. 2
Page 5

7 TRAULSEN TD048HT & TD078HT TRAINING GUIDE
Troubleshooting
PROBLEM: Product temperature too warm.
a. Product placed in cabinet too warm. Replace with properly cold product.
b. Cabinet not plugged in or plugged into incorrectly sized outlet. Plug unit into
properly sized outlet.
c. Product loaded above load limit guides. Load product properly.
d. Too much water allowed to accummulate below display area. Drain display
area well.
e. Fan(s) not properly lubricated. Clean and lubricate fan blade/post(s).
f. Air movement from other source (ceiling register, door draught, fan, etc.)
blowing into display area, disrupting cold air ow over product. Relocate
cabinet to avoid source of air.
g. Door(s) open. Close door(s).
h. Coil iced up due to a) excessive run time, b) excessive ambient temp and/or
humidity, potential refrigeration issue. Call for service only after discounting
reasons A and G.
PROBLEM: Cloudy Display Canopy
a. Upon start-up condensation will often occur on the inside of the canopy. Allow
condensation to dissipate during pull-down.
b. Canopy cleaned with ammonia containing cleaner. Replace canopy.
PROBLEM: Water observed on oor.
a. Drain valve not closed, or not closed completely. Close drain valve completely.
PROBLEM: Seafood Display Cabinet difcult to move.
a. One or more casters in locked position. Unlock all casters before moving.
PROBLEM: Excessive noise.
e. Fan blade(s) not properly lubricated. Clean and lubricate fan blade/post(s).
TR35922 (rev. 3/11)
4401 Blue Mound Road, Fort Worth, TX 76106 • (800) 825-8220 • www.traulsen.com
© 2010 Traulsen. All rights reserved.
 Loading...