

Page 1
Quick Installation Guide
7106505534 REV1.0.0
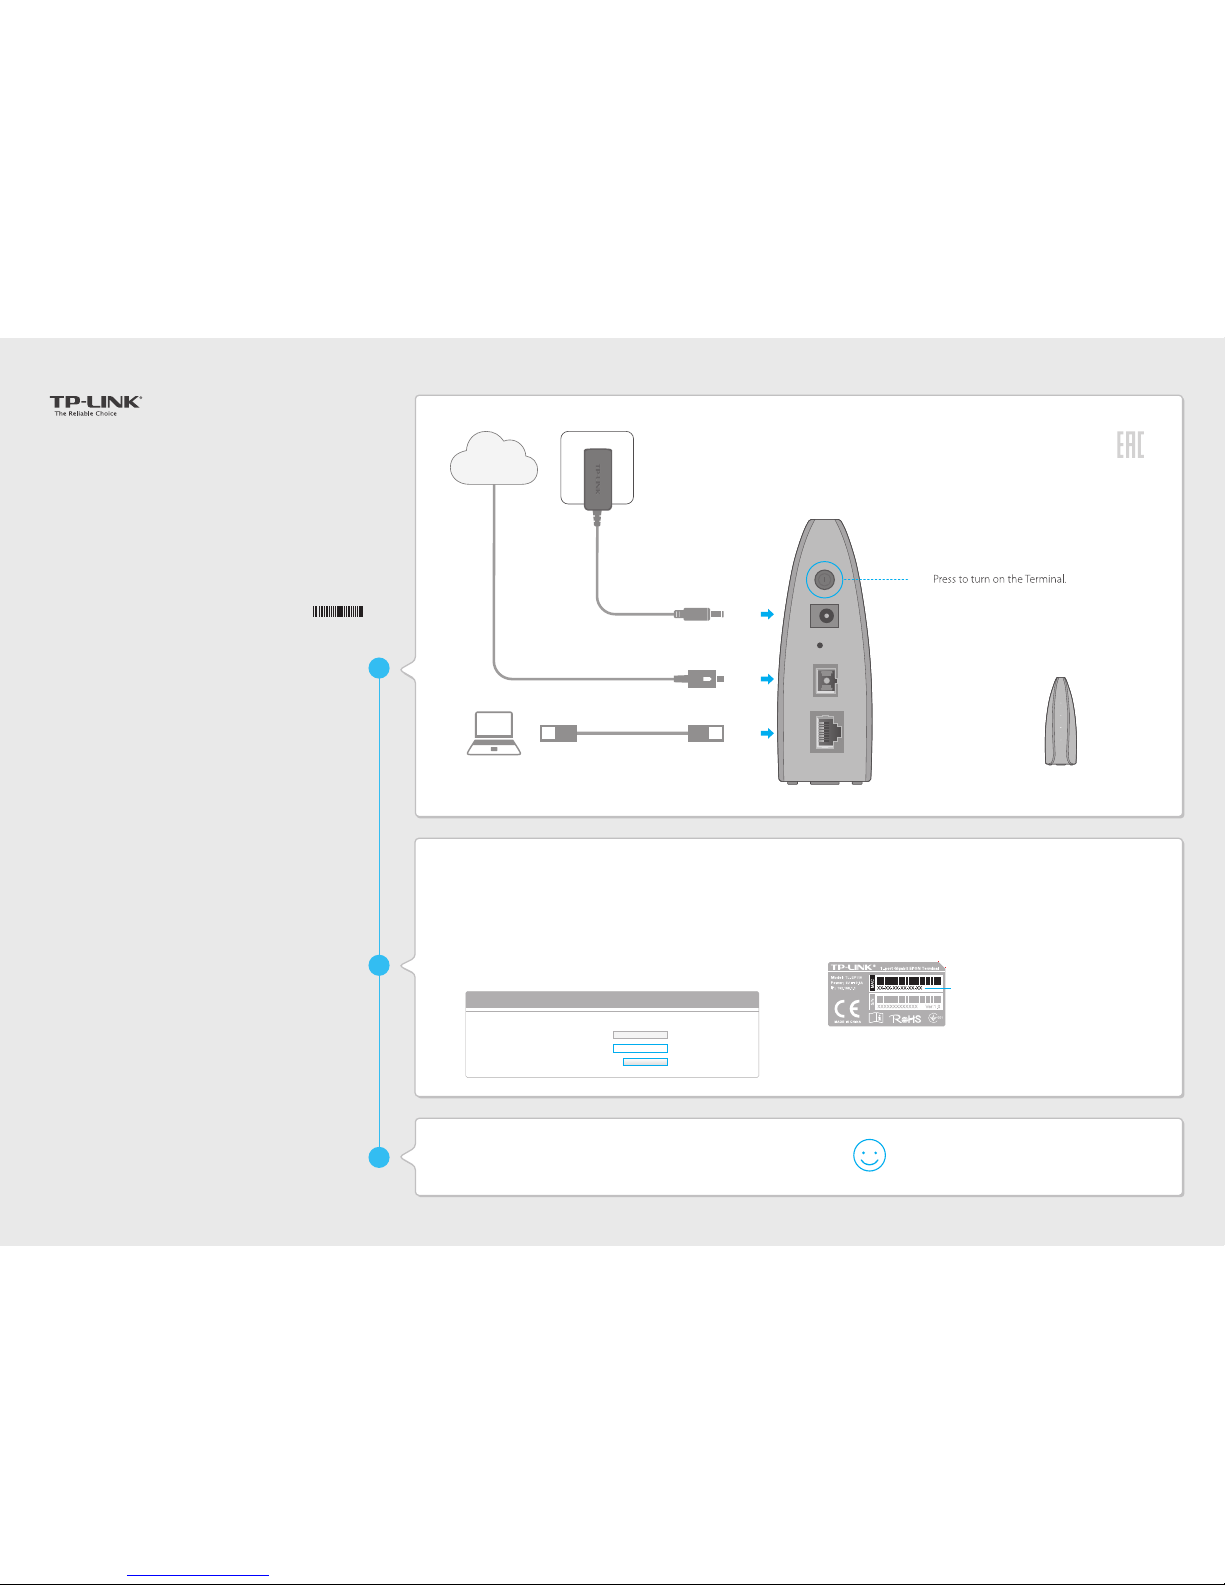
Connect the Hardware
Register the Terminal
Connect to the Internet
1-Port Gigabit EPON Terminal
TL-EP110
If the EPON LED is solid on, please skip to Connect to the Internet.
If your ISP (Internet Service Provider) has provided you the MAC address, follow Method 1 to register the Terminal, otherwise follow Method 2.
1 Open a browser and type http://192.168.1.1 in the address field. Use
admin for both username and password, and then click Login.
Provide the MAC address printed on the product label at the bottom
of the Terminal to your ISP to register the Terminal.
2
Go to Network Setting > PON Certification. Enter the MAC address
provided by your ISP into the New MAC field and click Save.
EPON MAC
PON Certification
Old MAC:
New MAC:
Save
aa:bb:cc:dd:ee:
2
1
3
Internet
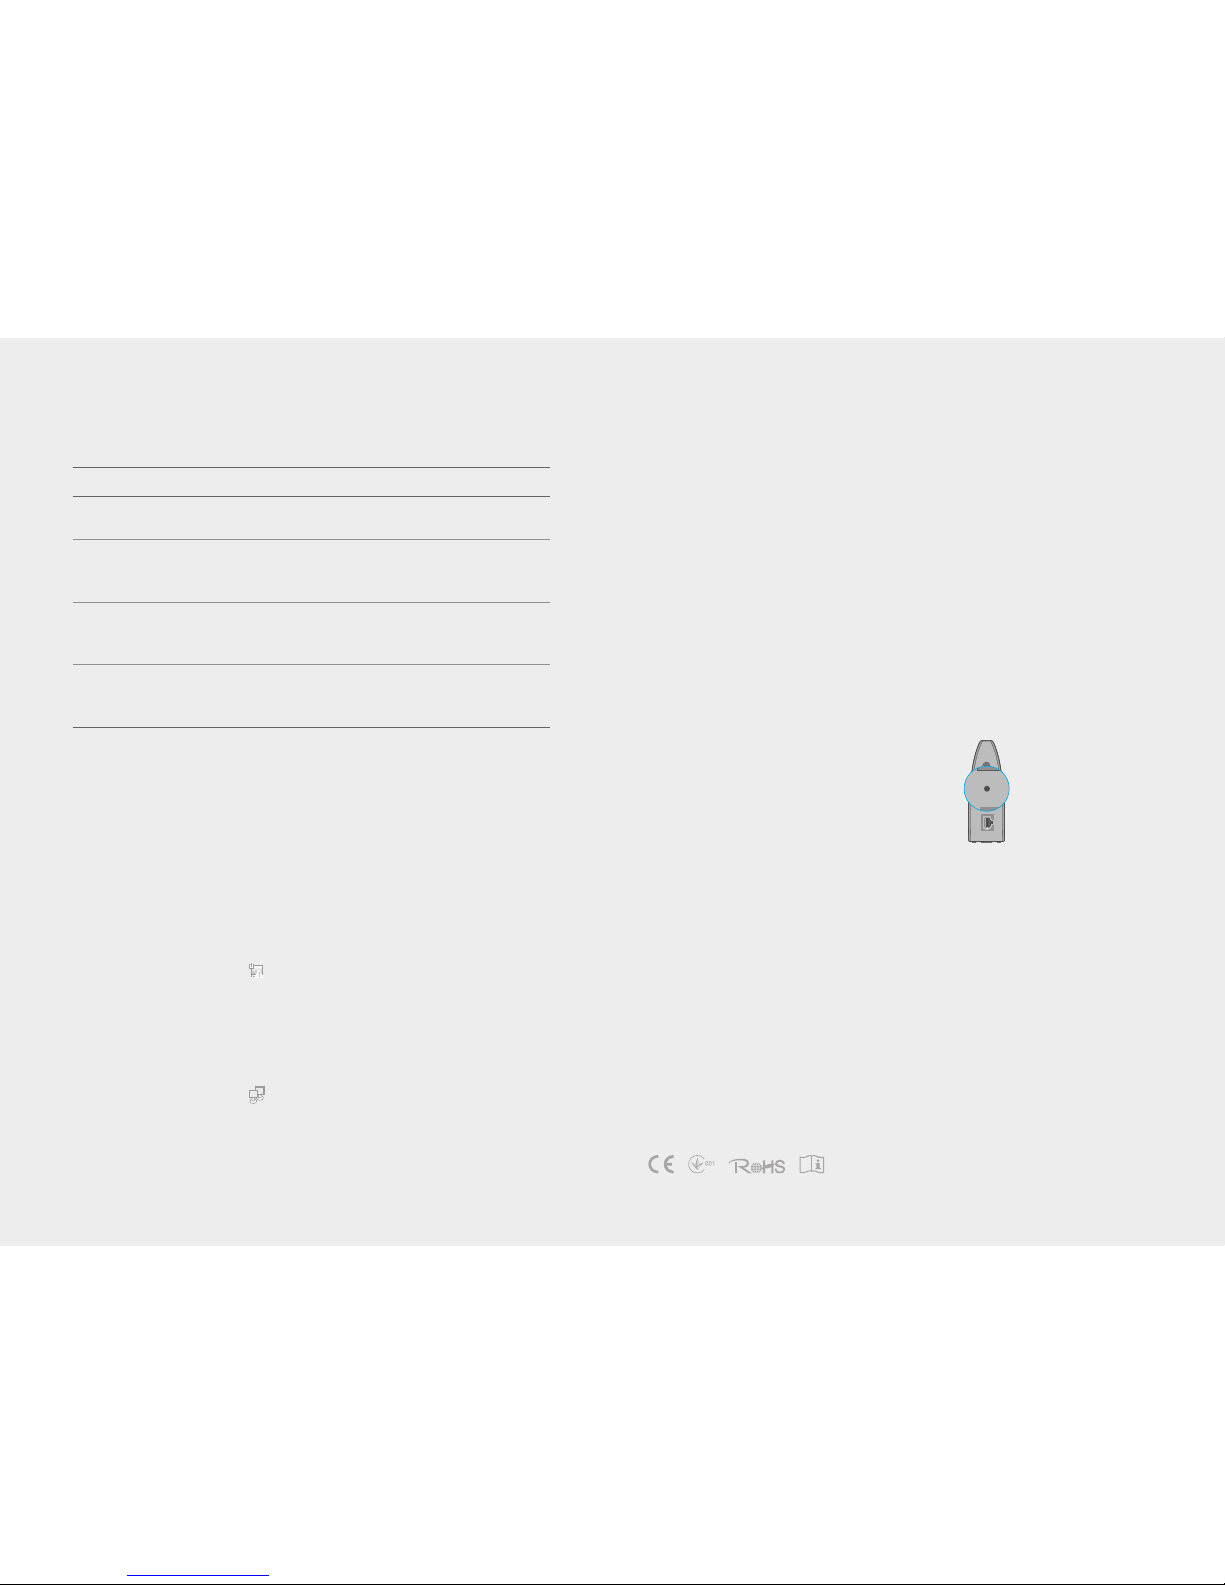
Verify that the hardware connection is
correct by checking these LEDs.
5
Power: On
EPON: On or Flashing
LOS: O
LAN: On or Flashing
Power
EPON
LOS
LAN
Power adapter
Fiber line
Ethernet cable
Terminal
4
ON/OFF POWER
RESET
EPON LAN
Establish your Internet connection according to the ISP's specific
instructions.
Note: If you need assistance, contact your ISP.
Enjoy!
Method 2: Provide the MAC address of your Terminal to the ISP
MAC address
Method 1: Use the MAC address provided by the ISP
Page 2
FAQ (Frequently Asked Questions)
LED Indicators
On
O
On
Flashing
O
On
Flashing
O
On
Flashing
O
Q1. How do I change my computer‘s setting to obtain an IP address automatically?
A. According to your operating system, follow the steps below.
For MAC OS X
1. Click the Apple icon on the upper-left corner of the screen.
2. Go to System Preferences > Network.
3. Select Ethernet in the left panel.
4. Under Configure IPv4, select Using DHCP.
5. Click Apply.
For Windows 7/8/8.1
1. Right-click the Network icon (e.g. ) on the system tray and select Open Network and Sharing Center
> Change adapter settings.
2. Right-click the wired network connection (Local Area Connection or Ethernet by default) and select
Properties.
3. Double-click Internet Protocol Version 4 (TCP/IPv4).
4. Select both Obtain an IP address automatically and Obtain DNS server address automatically, then
click OK.
5. Click OK again to save your configuration.
For Windows XP
1. Right-click the Network icon (e.g. ) on the system tray and select Open Network Connections.
2. Right-click the wired network connection (Local Area Connection by default) and select Properties.
3. Double-click Internet Protocol (TCP/IP).
4. Select both Obtain an IP address automatically and Obtain DNS server address automatically, then
click OK.
5. Click OK again to save your configuration.
!
Power is on.
Power is o.
The Terminal is registered with the ISP.
The Terminal is trying to register with the ISP.
The Terminal is not yet registered with the ISP.
The Terminal is unable to transmit optical signal.
No optical signal is received or the received signal is too weak.
The Terminal is receiving optical signal properly.
A device is connected to the LAN port.
The LAN port is transmitting or receiving data.
No device is connected to the LAN port.
LED Status Indication
LAN
EPON
LOS
Power
Q2. What can I do if I cannot access the web management page?
A1. Make sure that the computer is properly connected to the Terminal via the Ethernet cable.
A2. Make sure that the computer connected to the Terminal is set to obtain an IP address automatically.
Refer to Q1 for instructions.
A3. Make sure that http://192.168.1.1 is correctly entered, or use another web browser and try again.
A4. Disable then enable the network adapter being used.
A5. Restore the Terminal to its factory default settings and reconfigure your Terminal by following the
instructions in this Quick Installation Guide.
Q3. What can I do if I cannot access the Internet?
A1. Make sure that all cables are connected properly and securely to the Terminal.
A2. Check the EPON LED and make sure that it is lit and stable, indicating that the Terminal is registered with
the ISP. If not, make sure that the MAC address provided by your ISP is entered correctly in the Network
Setting > PON Certification page, or the MAC address provided to your ISP to register the Terminal is
correct.
A3. Unplug and reconnect the fiber cable to the Terminal. Wait for 2 minutes and try again.
A4. Uncheck the Enable box in the Network Setting > LAN Setting page to disable DHCP Server, then click
Save and Reboot.
A5. Make sure that you follow your ISP's specific instructions to establish the Internet connection.
A6. Make sure that the computer connected to the Terminal is set to obtain an IP address automatically.
Refer to Q1 for instructions.
A7. Contact your ISP if the problem still exists.
Q4. How do I restore my Terminal to its factory default settings?
©2015 TP-LINK
RESET Button
Press and hold for 5 seconds
ON/OFF POWER
RESET
EPON LAN
ON/OFF POWER
RESET
A. With the Terminal powered on, press and hold the RESET
button on the rear panel of the Terminal until all LEDs turn
back on momentarily, then release the button.
Use only power supplies which are provided by manufacturer
and in the original packing of this product.
 Loading...