

Page 1
WPS
LED Explanations
Connection are available
Not connected
Wireless Network Connection
Quick
Installation
Guide
Option ONE: Using a Web Browser
Option TWO: Using WPS (Wi-Fi Protected Setup)
Option ONE
Using a Web Browser
(RE)
Solid blue: The extender is connected to the
router, and is in a good location.
Solid red: The extender is connected to the
router, but is too far away from the router.
Blinking: WPS connection is in process.
Off: No active connection.
Button Explanations
LED button: To turn all LEDs on or off, press the LED button.
Power button: To turn on or off the extender, press the Power button.
©2015 TP-LINK 7106505885 REV1.1.0
2.4GHz/5GHz
On: The extender is connected to the
2.4GHz/5GHz wireless network of your host
network.
Off: No connection.
POWER
On: The extender is on.
Blinking: The extender is initializing.
Off: The extender is off.
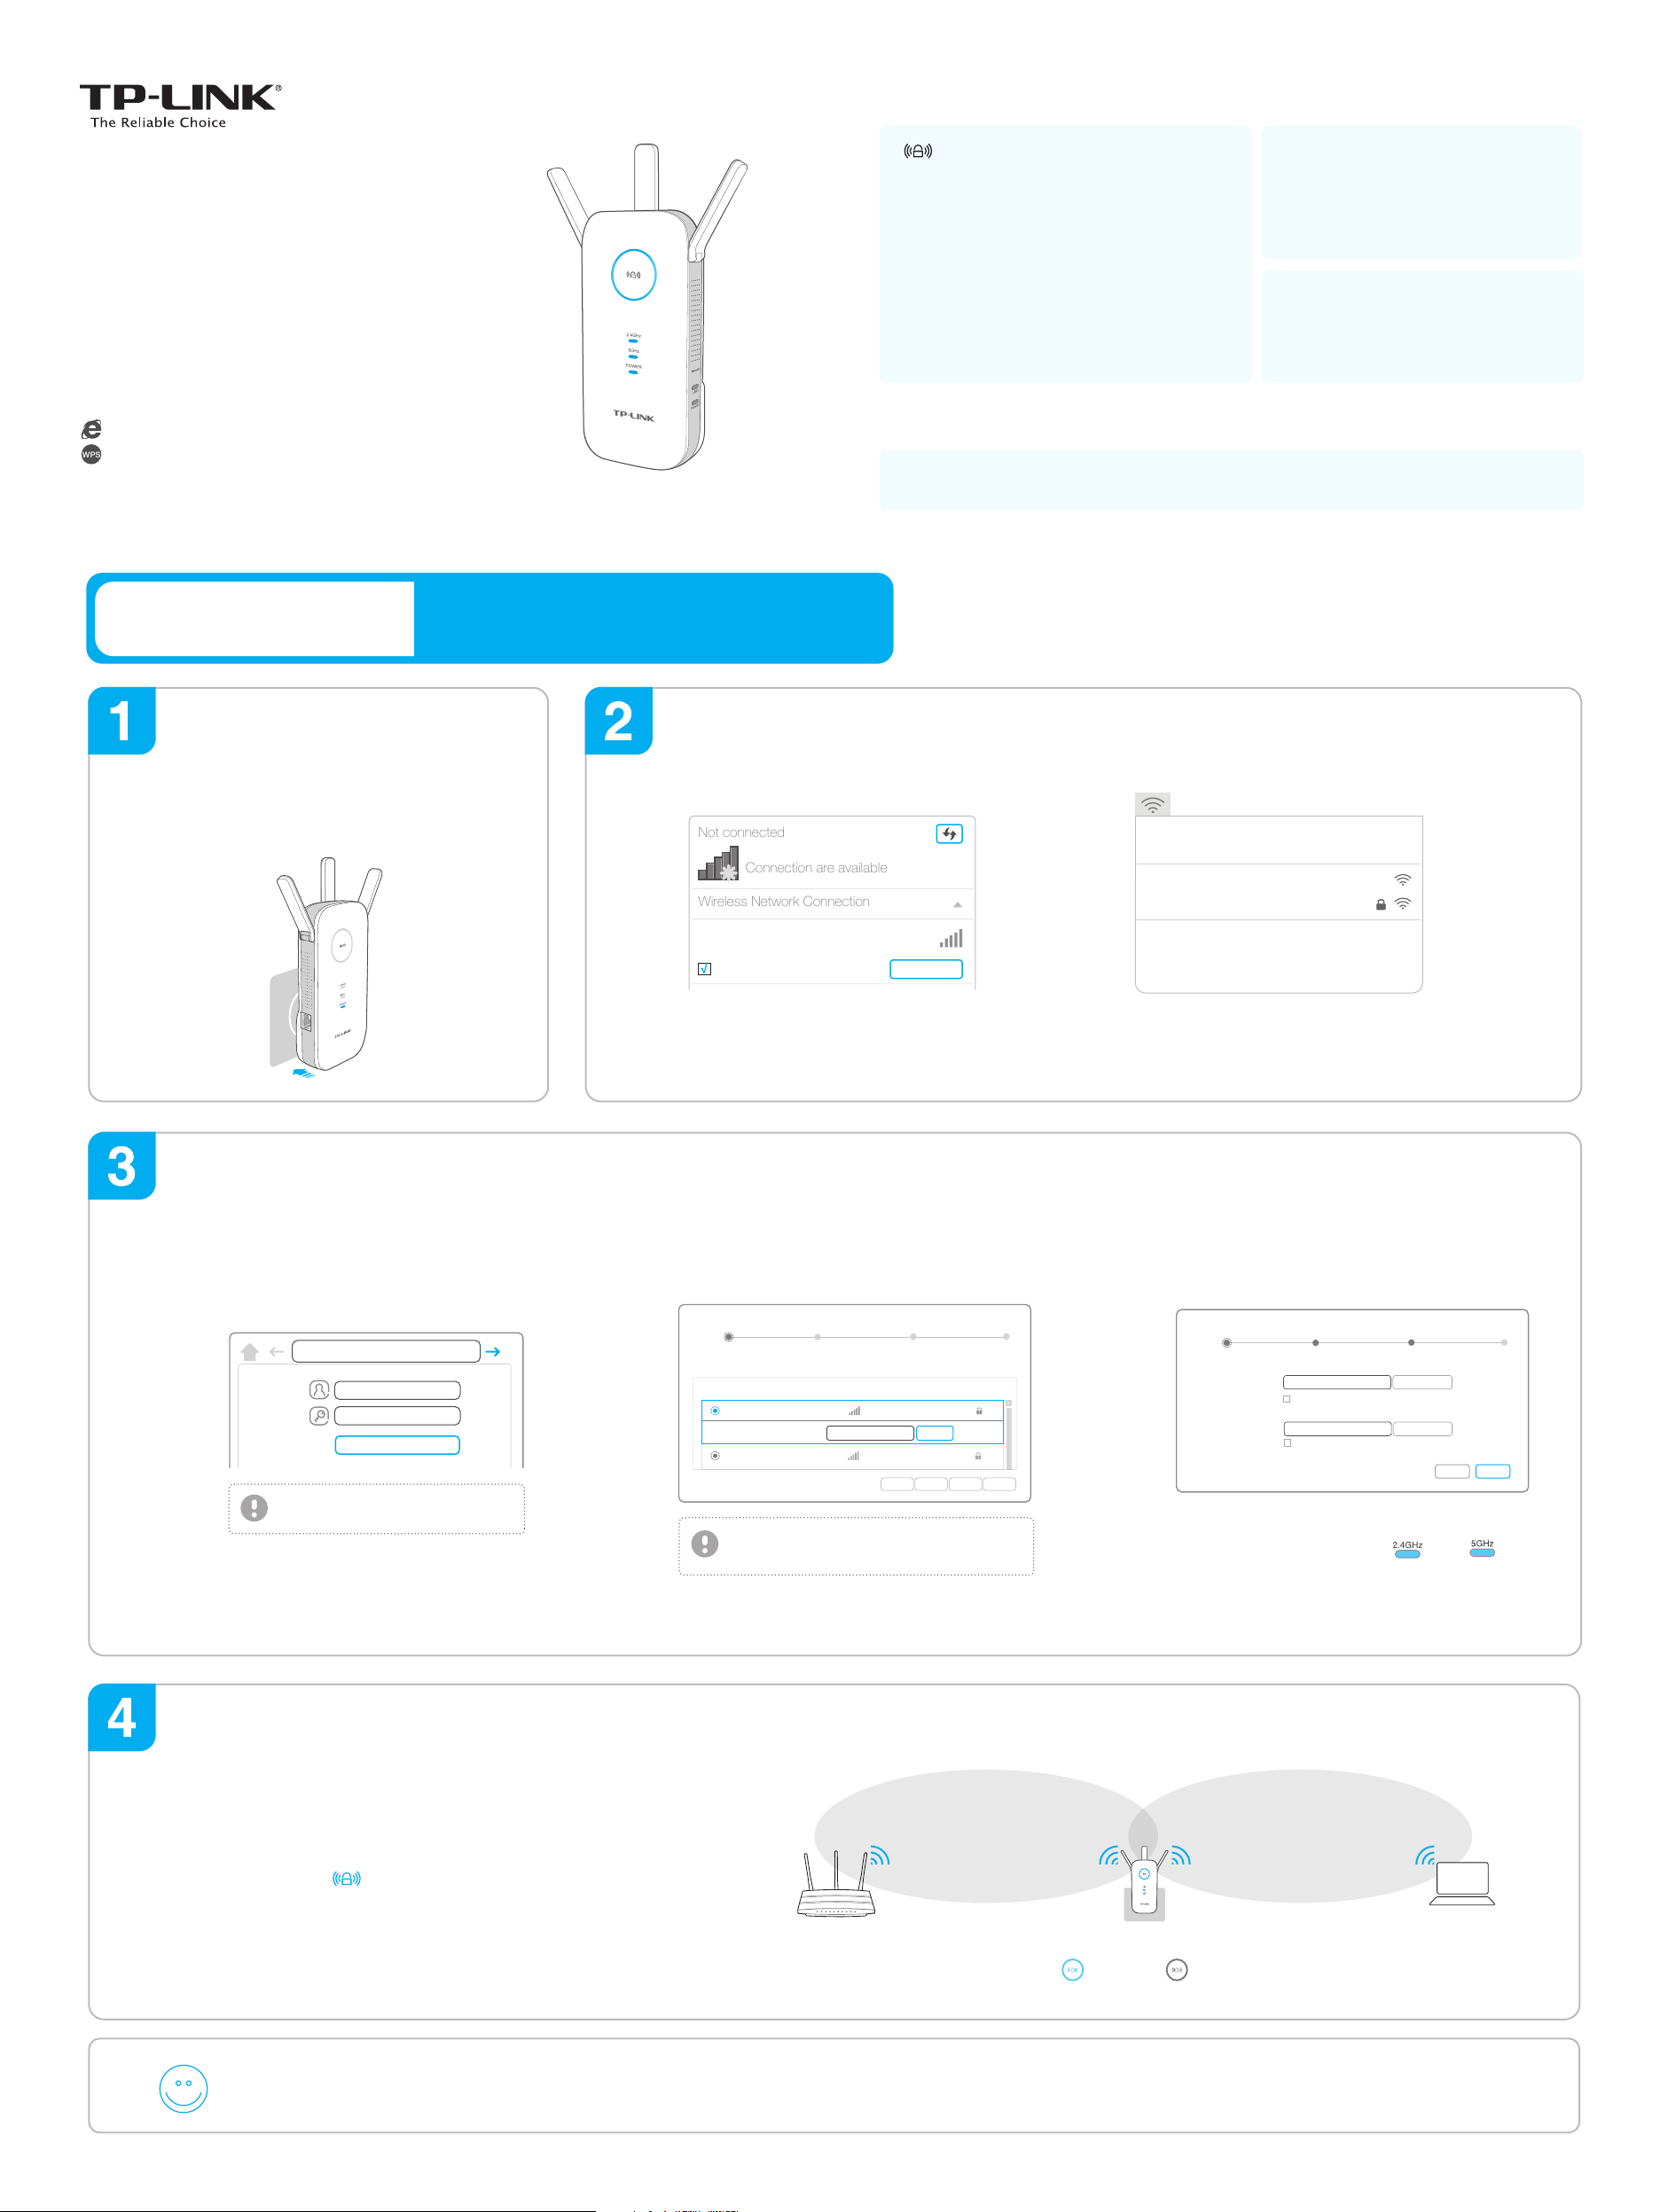
Power on
Plug the extender into an electrical
outlet near your router, and wait until the
POWER LED is lit and solid blue.
Configure
Launch a web browser and type
1
http://tplinkrepeater.net in the address
field. Use admin (all lowercase) for both
Username and Password to log in.
http://tplinkrepeater.net
admin
admin
Login
If the login window does not pop up,
please refer to the FAQ > Q1.
Create a new username and password
2
to log in the web-based interface, then
click Confirm.
Connect to the extender
For Windows Users For Mac OS X Users
Wi-Fi: On
Turn Wi-Fi Off
TP-LINK_Extender_2.4GHz
TP-LINK_Router
TP-LINK_Extender_2.4GHz
√
Connect automatically Connect
Disconnect the Ethernet (wired) connection from
your computer. Click the Wi-Fi icon on the taskbar
and connect to the extender's network :
TP-LINK_Extender_2.4GHz or _5GHz.
Select your router's 2.4GHz and 5GHz host
3
network and enter the password, then click
Next.
2.4GHz Host Network
5GHz Host Network
Please select 2.4GHz Host network or skip this network.
SSIDID Signal
1
Your router wireless name
Host 2.4GHz Password:
2
TP-LINK_123456 23:B5:C0:30:90:06
If your router does not support 5GHz wireless
network, please click Skip to continue.
12345678
Wireless Settings
MAC Address
30:B5:C1:33:99:76
Next
Exit Other... Rescan Skip
Summary
Security
Join Other Network...
Create Network...
Open Network Preferences...
Disconnect the Ethernet (wired) connection from your
computer (if any). Click the Wi-Fi icon in the top right
corner of the screen, and connect to the extender’s
network: TP-LINK_Extender_2.4GHz or _5GHz.
Either keep the same SSIDs as your host
4
network or create new names for the
extended networks, then click Next.
2.4GHz Host Network
Extended 2.4GHz SSID:
Note: The extended 2.4GHz password is the same as your Host password.
Extended 5GHz SSID:
Note: The extended 5GHz password is the same as your Host password.
Verify your wireless settings and click Finish.
5
The corresponding LEDs ( and )
should turn on and stay solid, indicating
successful connections.
5GHz Host Network
Your network name
Hide SSID broadcast
Your network name_5G
Hide SSID broadcast
Wireless Settings
Summary
Copy Host SSID
Copy Host SSID
Back Next
Relocate
Plug the extender into an electrical outlet about halfway
1
between your router(Host Network) and the Wi-Fi dead
zone.
Wait until the LED is lit and solid blue. If not, relocate it
2
closer to the router to achieve a good (or better) signal
quality.
Both extended networks share the same Wi-Fi password as your host network,
Enjoy!
but may have different wireless network names if you customize the names during the configuration.
Host Network
Ideal extender Placement
Blue
Ideal location
Red
Too far away
Extended Network
Page 2
The extender can be used as a wireless adapter to connect any Ethernet-only device (such
as a Blu-ray player, game console, DVR, or smart TV) to your Wi-Fi network.
First, connect the extender to your router using Option ONE or Option TWO, then connect the
extender to your Ethernet-only device via an Ethernet cable.
Option TWO
Smart TV
Game Console
Desktop
Router
Power On Connect
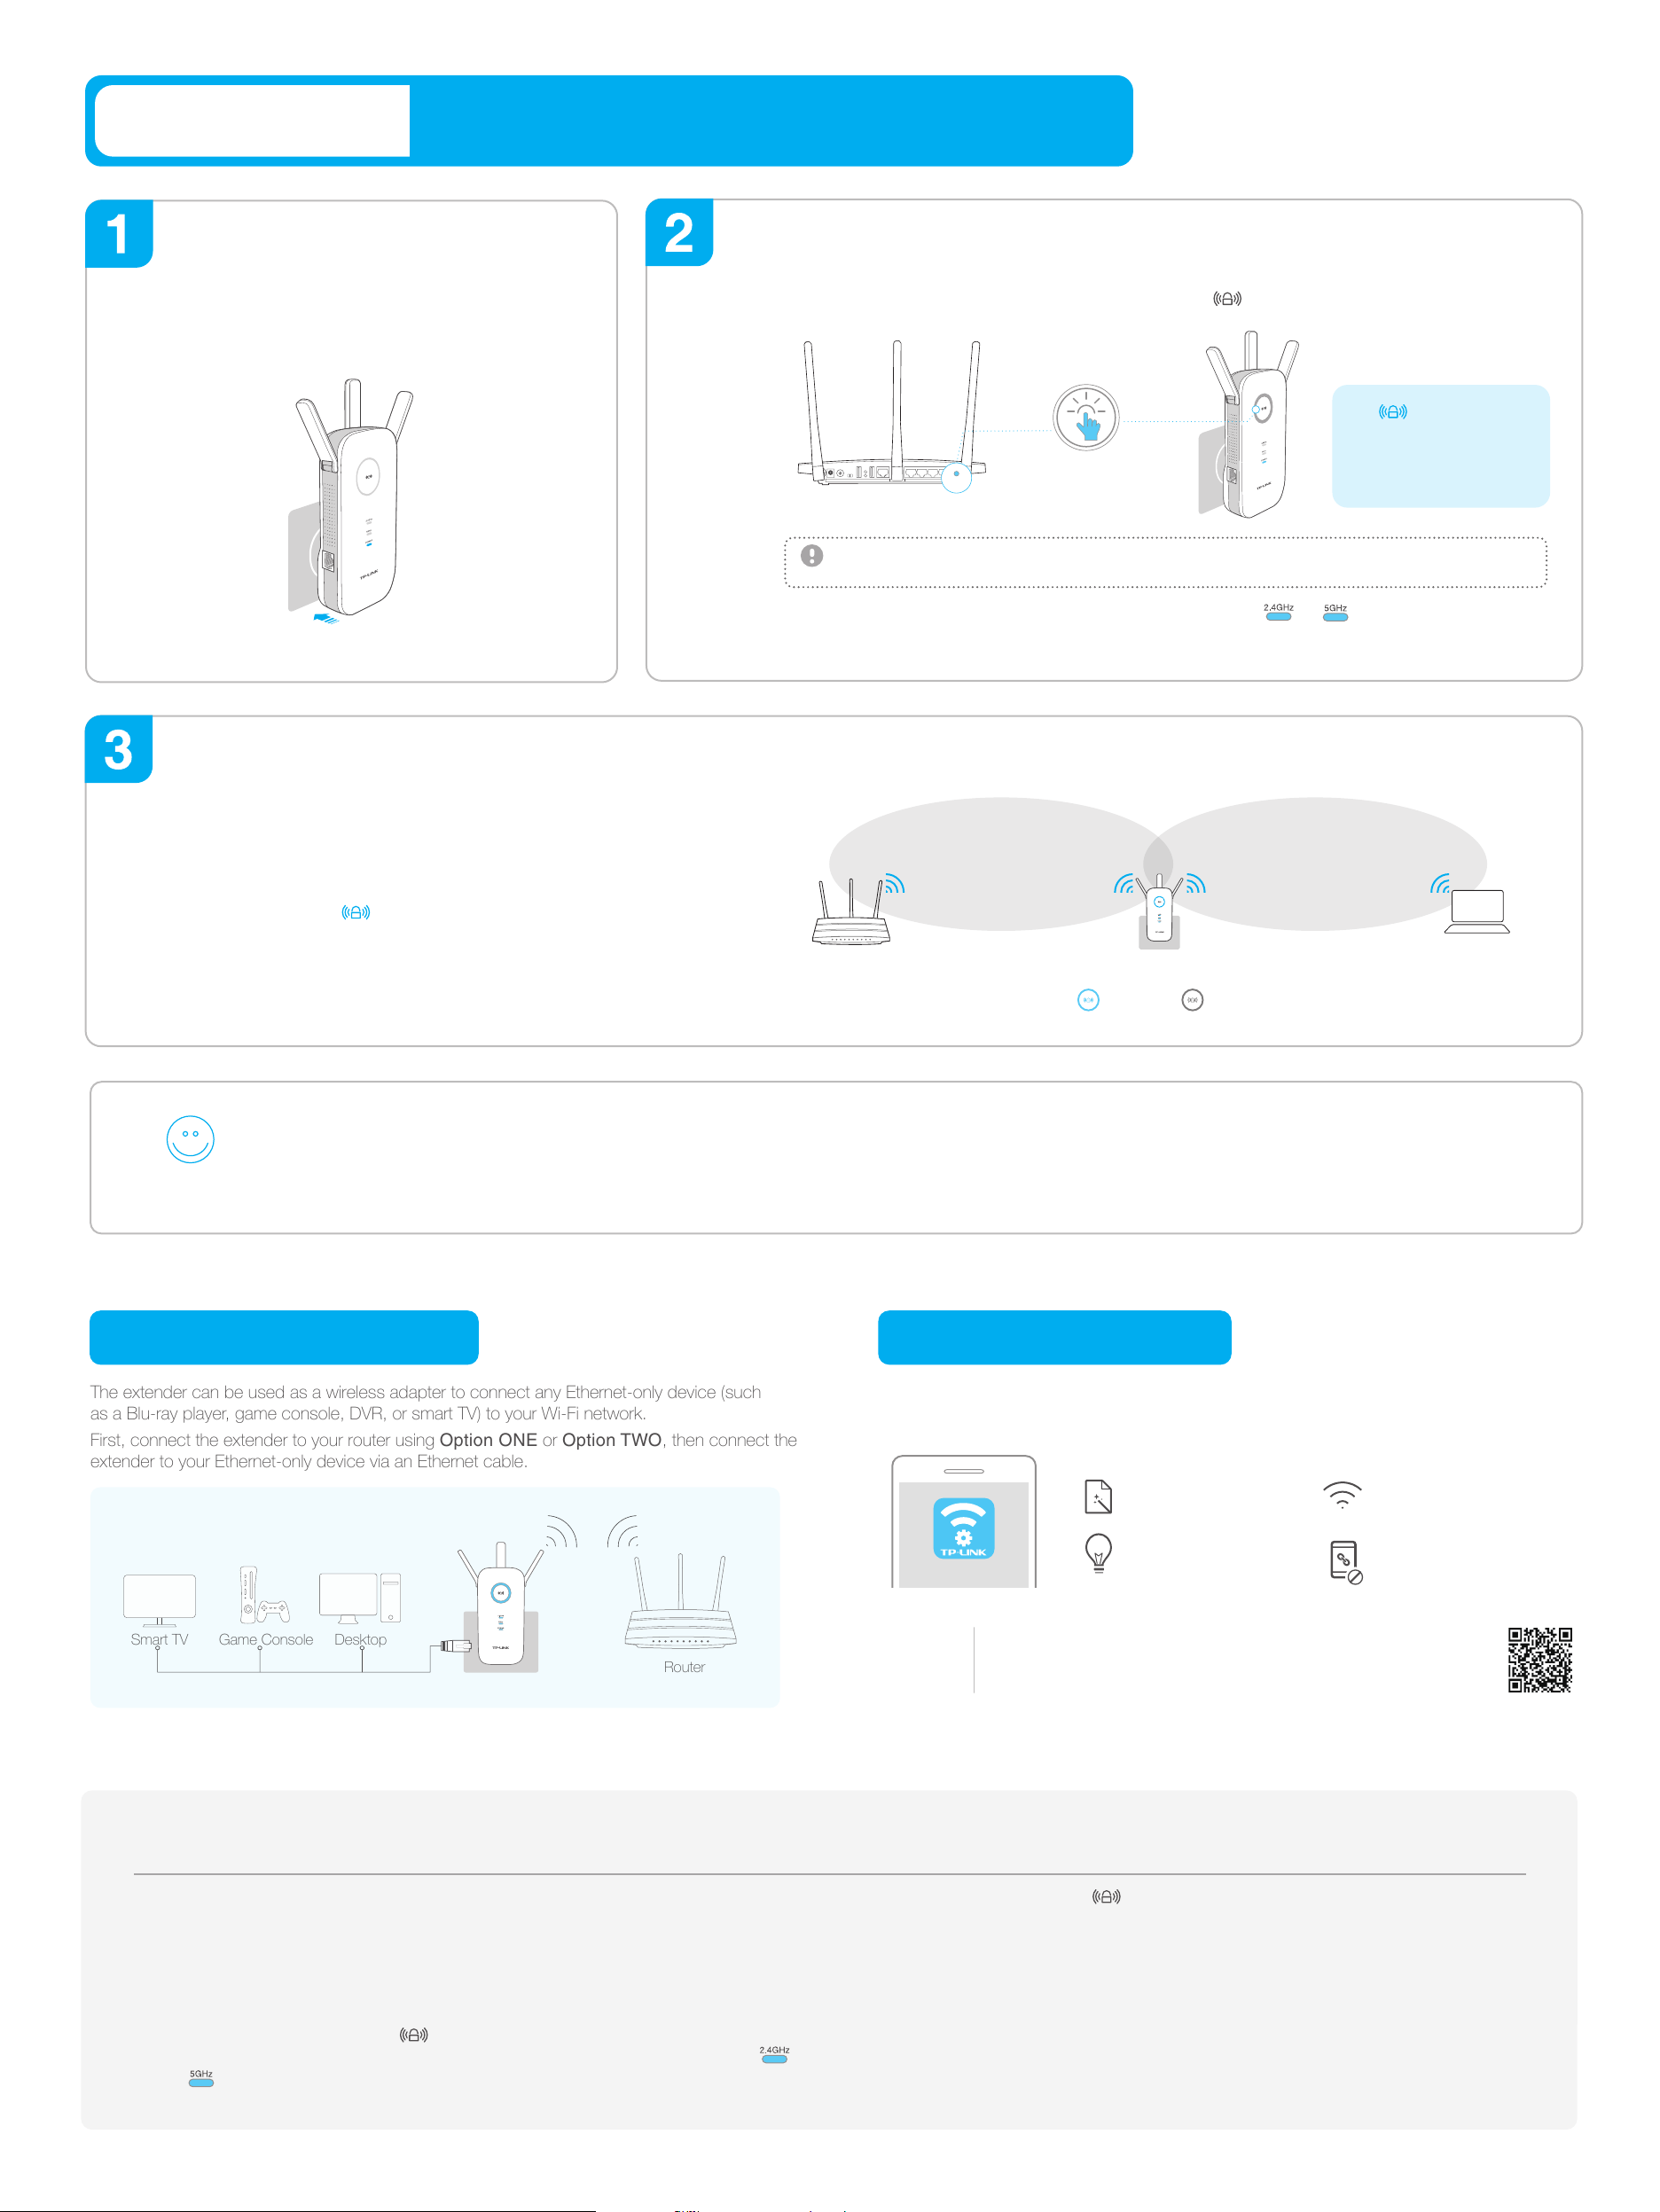
Using WPS (Wi-Fi Protected Setup)
Please use Option ONE if your router does not support WPS.
Plug the extender into an electrical outlet
near your router, and wait until the POWER
LED is lit and solid blue.
Relocate
Press the WPS button on your router, and then press the button on the extender.
1
Press
WPS
For more information about using WPS on your router, please refer to the router manufacturer's user guide.
Some ISP gateways disable the WPS function by default, if the WPS method fails, please use Option ONE.
If you are connecting the extender to a dual-band router but only or
2
LED is on, repeat step 1 again to connect the other band.
The LED should change
from blinking to a solid state,
indicating a successful WPS
connection.
If not, please use Option ONE.
Plug the extender into an electrical outlet about halfway
1
between your router(Host Network) and the Wi-Fi dead
zone.
Wait until the LED is lit and solid blue. If not, relocate it
2
Host Network
closer to the router to achieve a good (or better) signal
quality.
Enjoy!
Both extended networks share the same SSID (network name) and password as your host network.
Ideal extender Placement
Blue
Ideal location
Red
Too far away
Extended Network
Entertainment Adapter
TP-LINK Tether App
Tether app provides a simple, intuitive way to access, manage your extender using
your iOS or Android devices.
Tether
How to
begin?
Frequently Asked Questions (FAQ)
1. Scan the QR code or search the keywords “TP-LINK Tether” to
download the app from the App Store or Play Store.
2. Ensure your smart device is wirelessly connected to the extender.
3. Launch the app and start managing your extended network.
Do initial configuration
of your extender
Turn off the LEDs
at a specific time
Change the basic
extended network settings
Block network access
from specific devices
Q1. What do I do if I cannot access the extender’s web-based interface ?
A1. Make sure your computer is connected to the Extended network SSID or connect your
computer to the extender using an Ethernet cable.
A2. Change the computer’s fixed IP address to “Obtain an IP Address Automatically”.
A3. Verify that http://tplinkrepeater.net is correctly entered in the web browser and press Enter.
Q2. What should I do when the LED is on, but only one band is connected?
A. It depends on your router capabilities. If you are connecting to a dual-band router, but only
or LED is on, press the WPS button on the router and on the extender again to reconnect the
other band.
Q3. What should I do if the LED does not change to solid after completing
Option ONE?
A1. You may have entered the incorrect Wi-Fi password of your host network during the
configuration. Please log into the extender's web-based interface to check the password and try
again.
A2. Please reset the extender and go through the configuration again.
Q4. How do I restore the extender to its factory default settings?
A. While the extender is powered on, press and hold the Reset button until all the LEDs turn on
momentarily.
 Loading...