

Toyota Pius 2010 Repair Manual
ILLUSTRATION
2010 Toyota Prius Repair Manual

2010 Toyota Prius Repair Manual
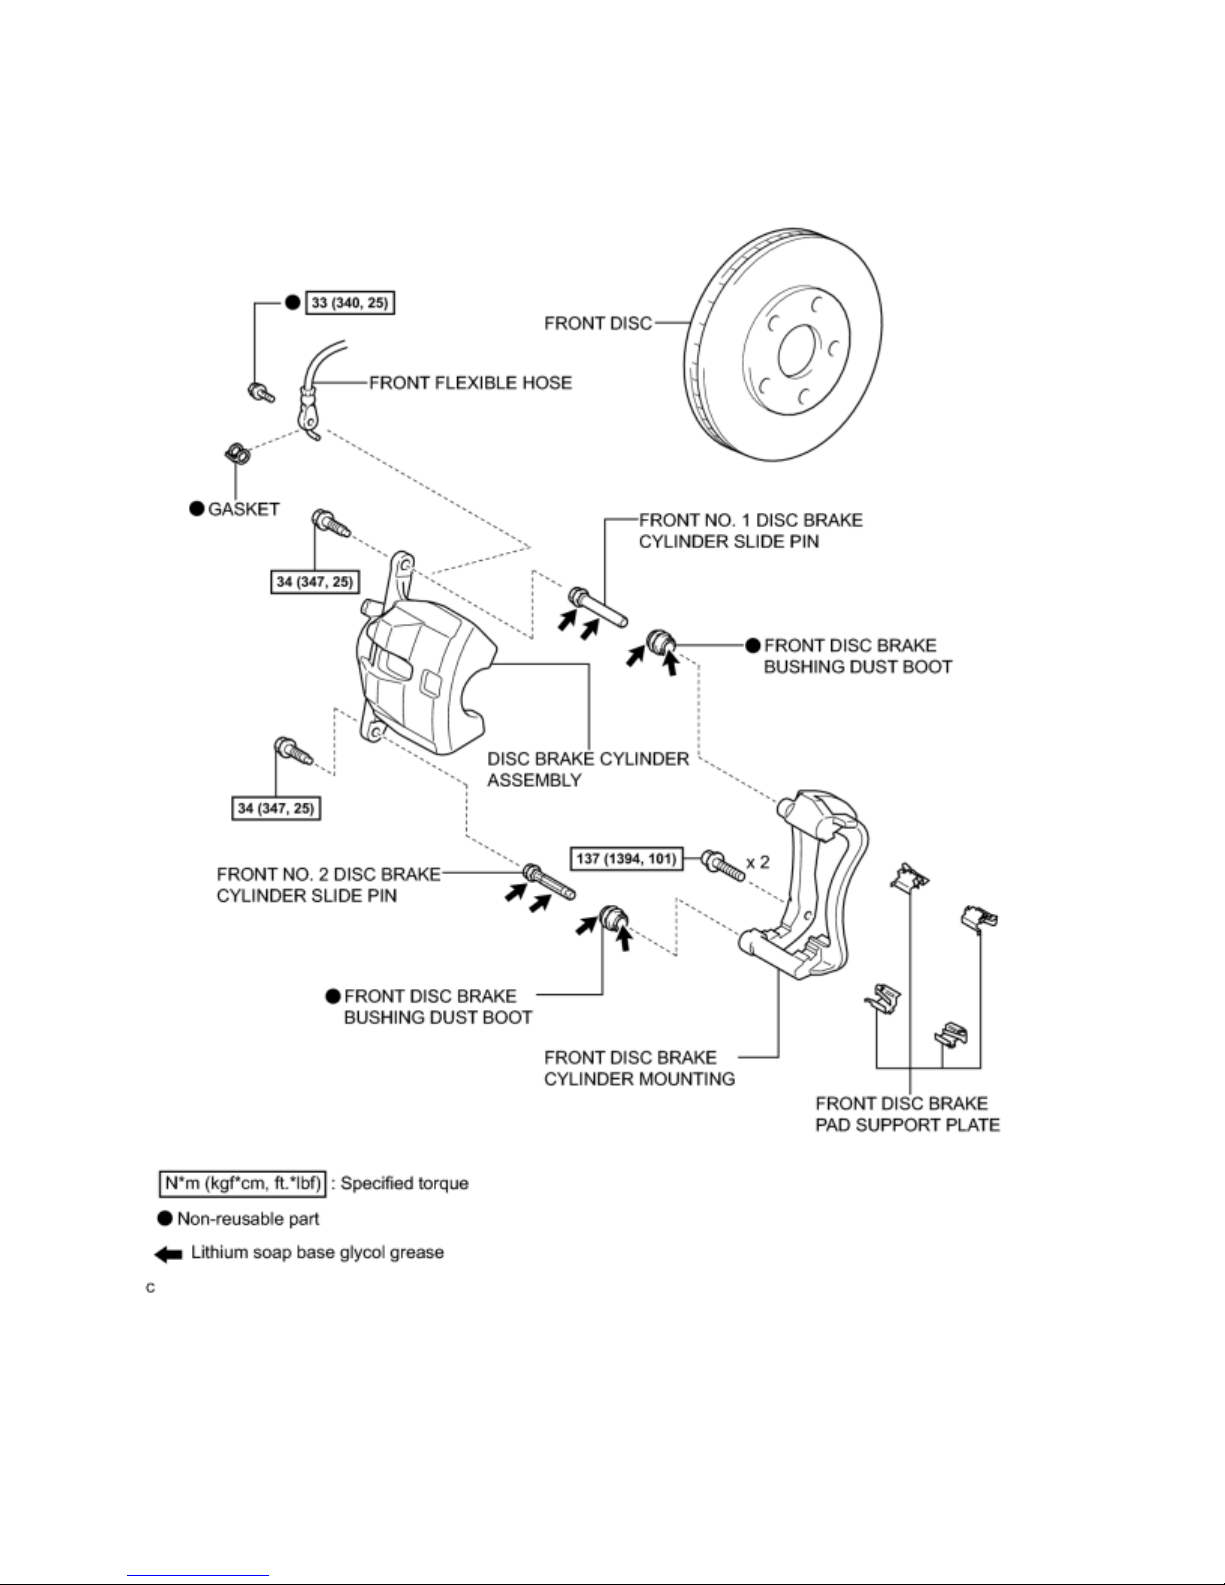
REMOVAL
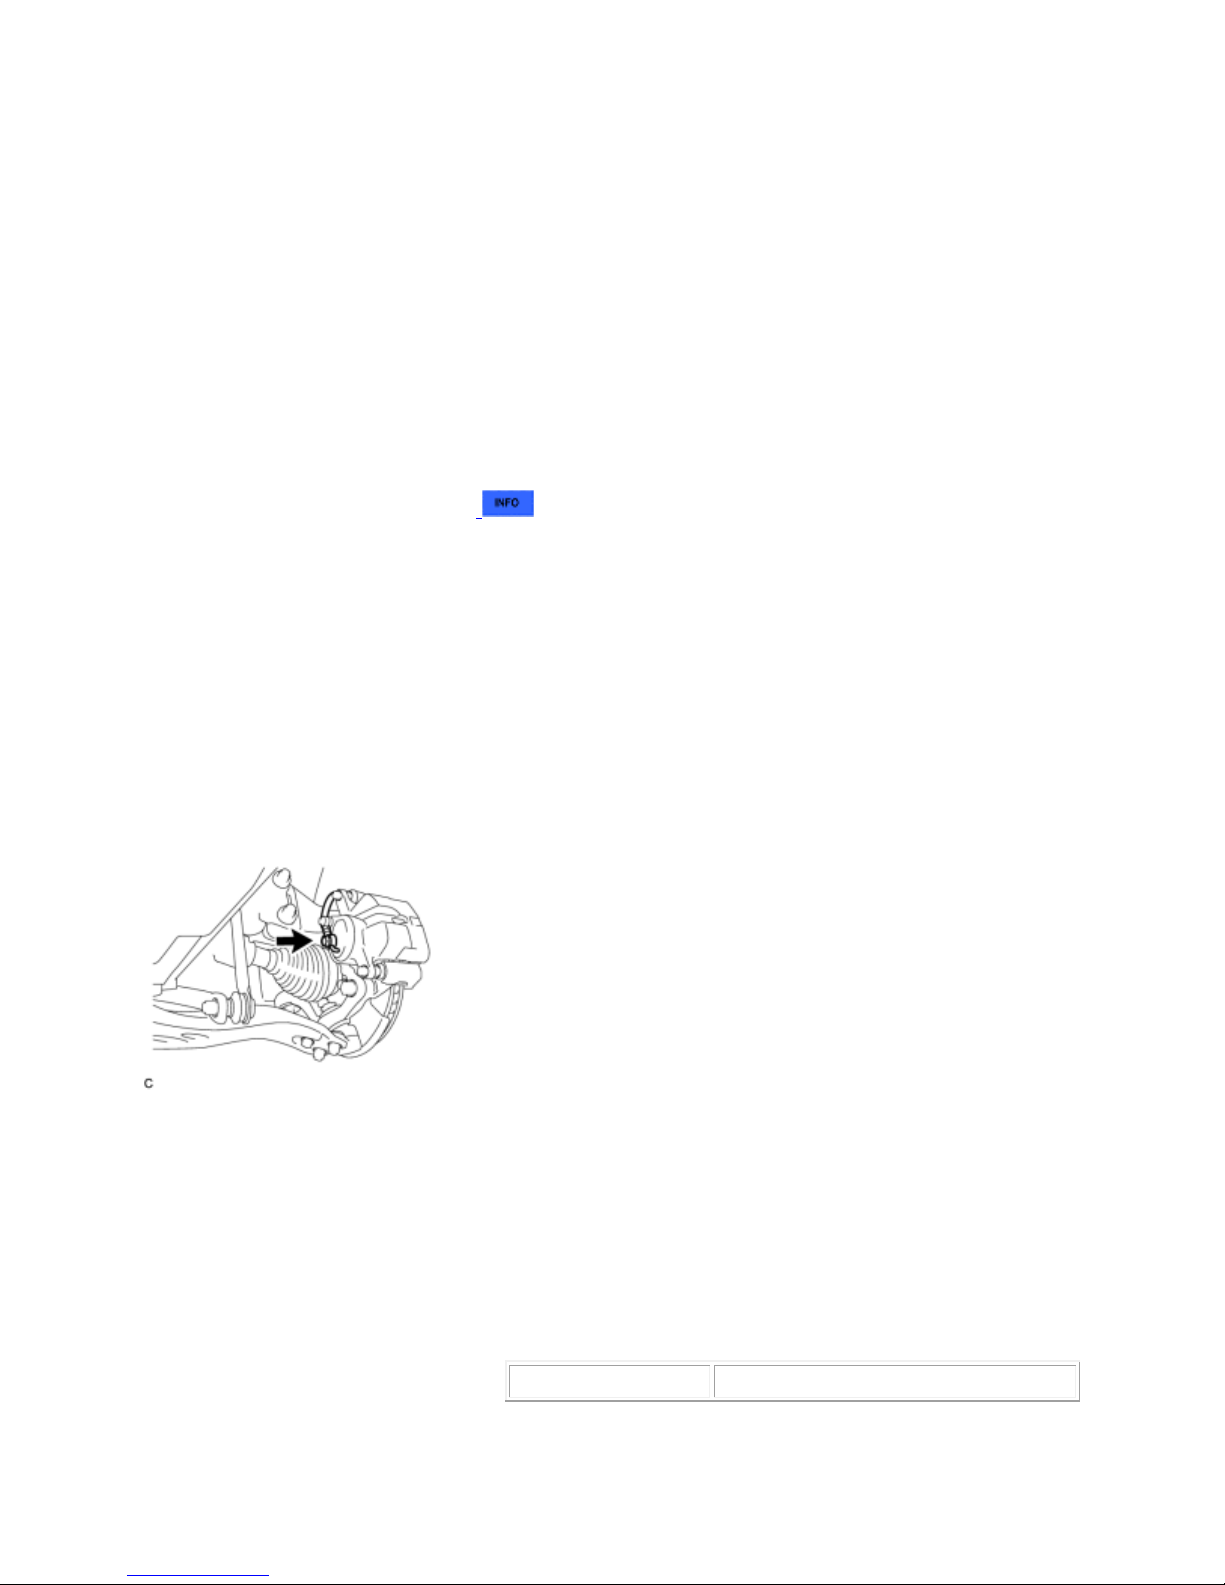
(a) Remove the union bolt and gasket, and separate the
front flexible hose from the disc brake cylinder assembly.
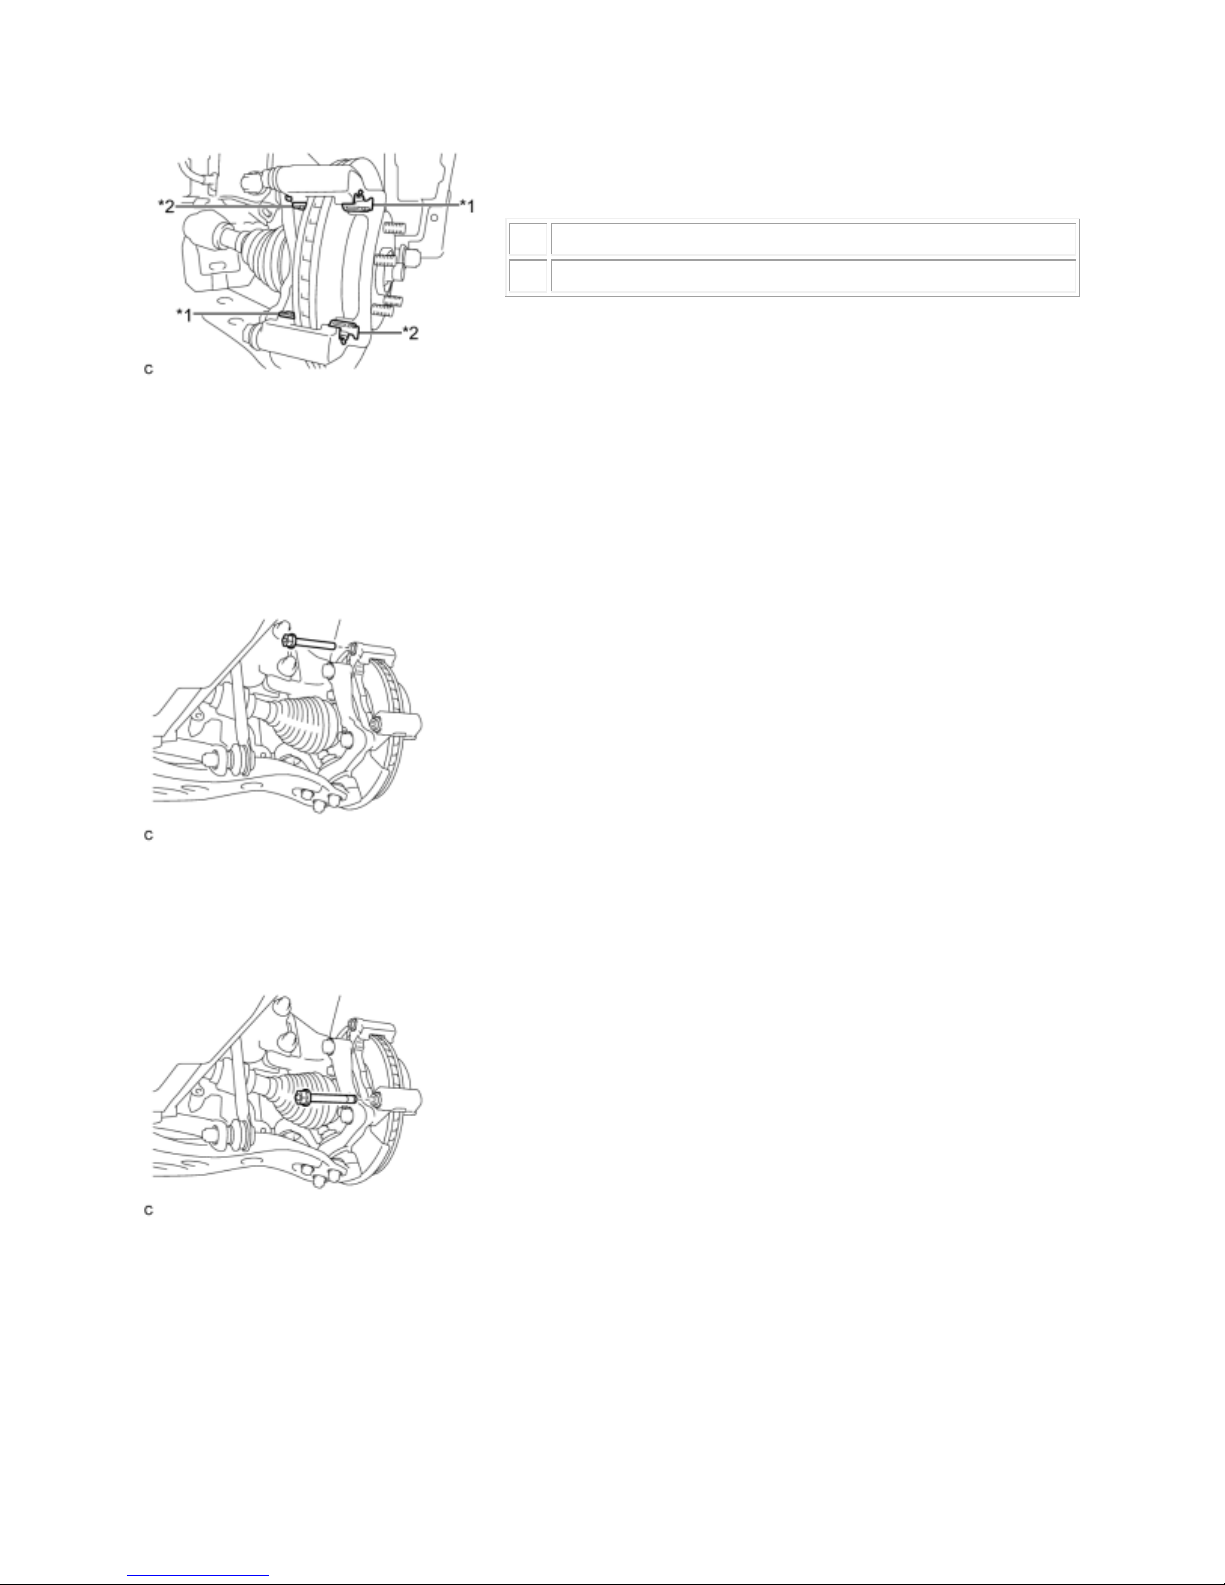
(a) Hold the front disc brake cylinder slide pin, and remove
the 2 bolts and disc brake cylinder assembly.
Text in Illustration
*1
Hold
NOTICE:
When the brake pedal is first depressed after replacing the brake pads or pushing back the disc
brake piston, DTC C1214 may be output. As there is no malfunction, clear the DTC.
HINT:
x Use the same procedure for the LH side and RH side.
x The following procedure is for the LH side.
1. DISABLE BRAKE CONTROL
2. REMOVE FRONT WHEEL
3. DRAIN BRAKE FLUID
NOTICE:
If brake fluid leaks onto any painted surface, immediately wash it off.
4. SEPARATE FRONT FLEXIBLE HOSE
5. REMOVE DISC BRAKE CYLINDER ASSEMBLY
2010 Toyota Prius Repair Manual

*2
Turn
(a) Remove the front No. 1 anti-squeal shim and front No.
2 anti
-squeal shim from each brake pad.
Text in Illustration
*1
Front No. 1 Anti-squeal Shim
*2
Front No. 2 Anti-squeal Shim
(a) Remove the 2 front No. 1 disc brake pad support plates
and 2 front No. 2 disc brake pad support plates from the
front disc brake cylinder mounting.
6. REMOVE FRONT DISC BRAKE PAD
(a) Remove the 2 front disc brake pads from the front disc brake cylinder mounting.
7. REMOVE FRONT ANTI-SQUEAL SHIM
(b) Remove the pad wear indicator plate from each front disc brake pad.
8. REMOVE FRONT DISC BRAKE PAD SUPPORT PLATE
2010 Toyota Prius Repair Manual
Text in Illustration
*1
Front No. 1 Disc Brake Pad Support Plate
*2
Front No. 2 Disc Brake Pad Support Plate
NOTICE:
Each front disc brake pad support plate has a different
shape. Be sure to put an identification mark on each front
disc brake pad support plate so that it can be reinstalled to
its original position.
9. REMOVE FRONT NO. 1 DISC BRAKE CYLINDER SLIDE PIN
(a) Remove the front No. 1 disc brake cylinder slide pin
from the front disc brake cylinder mounting.
(a) Remove the front No. 2 disc brake cylinder slide pin
from the front disc brake cylinder mounting.
(a) Remove the 2 front disc brake bushing dust boots from
the front disc brake cylinder mounting.
10. REMOVE FRONT NO. 2 DISC BRAKE CYLINDER SLIDE PIN
11. REMOVE FRONT DISC BRAKE BUSHING DUST BOOT
2010 Toyota Prius Repair Manual
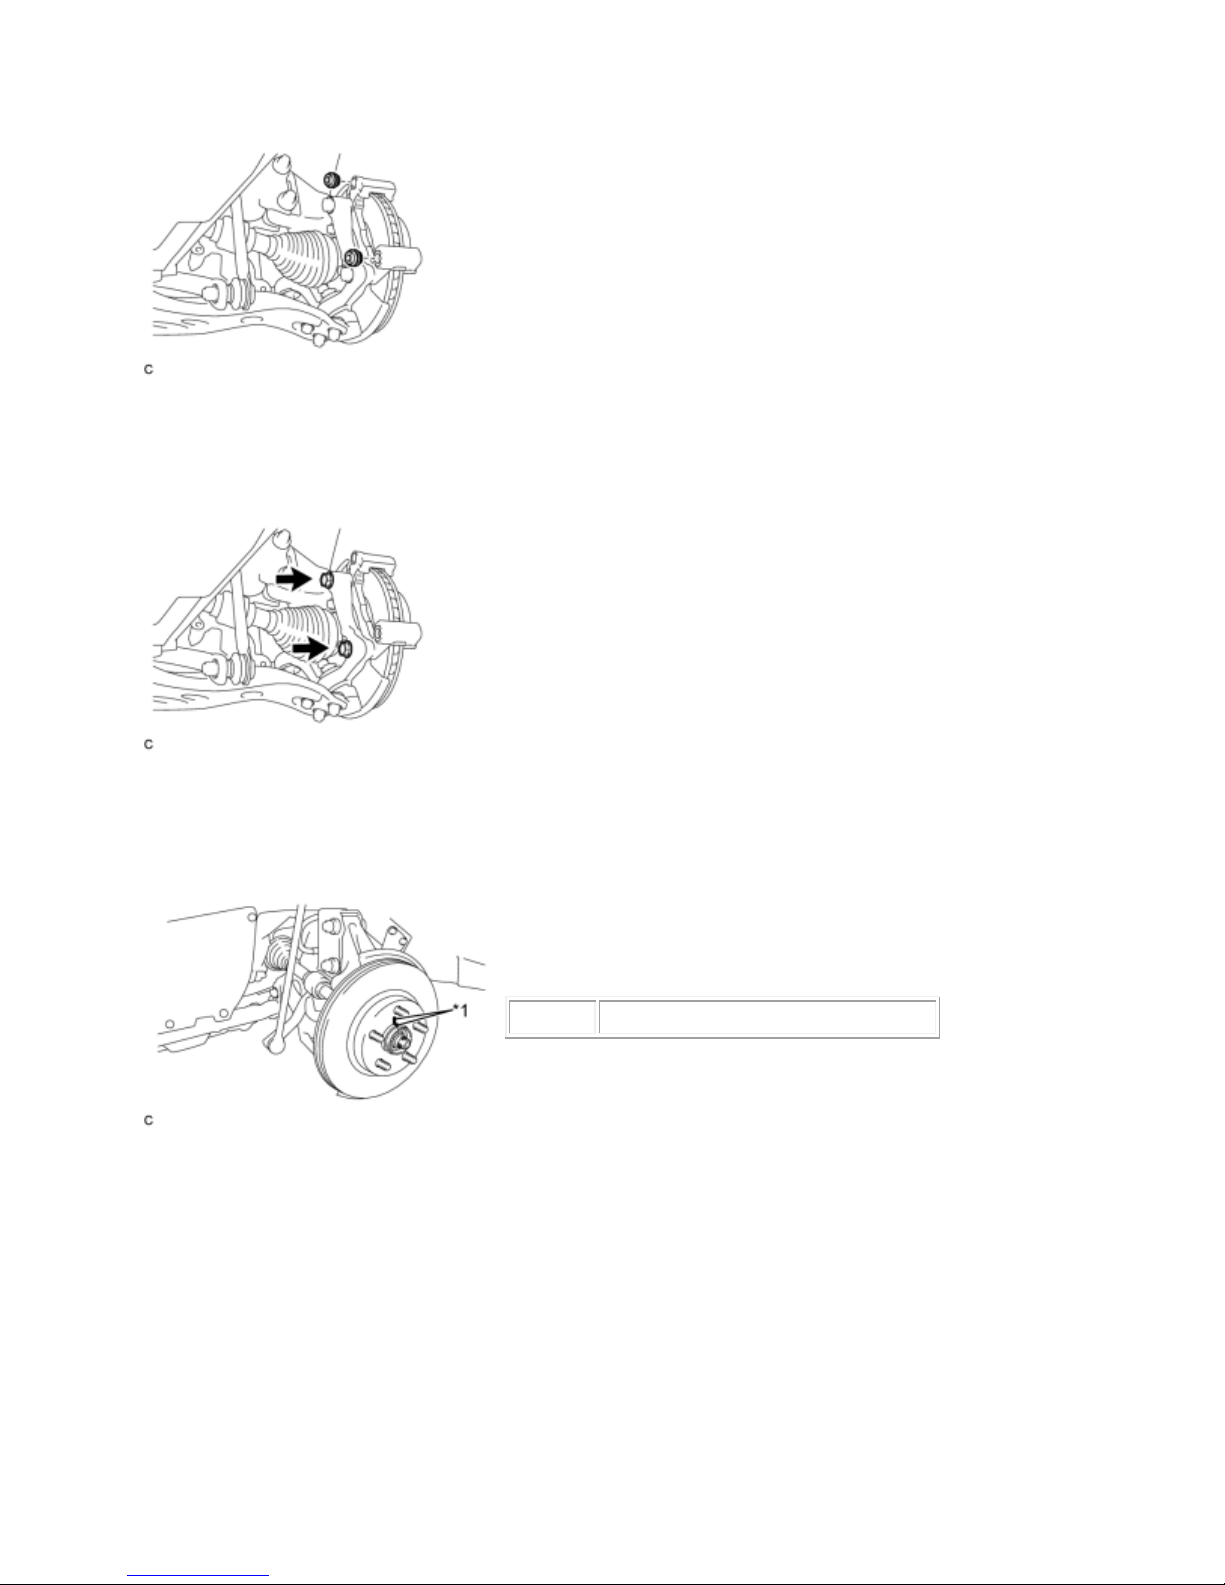
12. REMOVE FRONT DISC BRAKE CYLINDER MOUNTING
(a) Remove the 2 bolts and front disc brake cylinder
mounting from the steering knuckle.
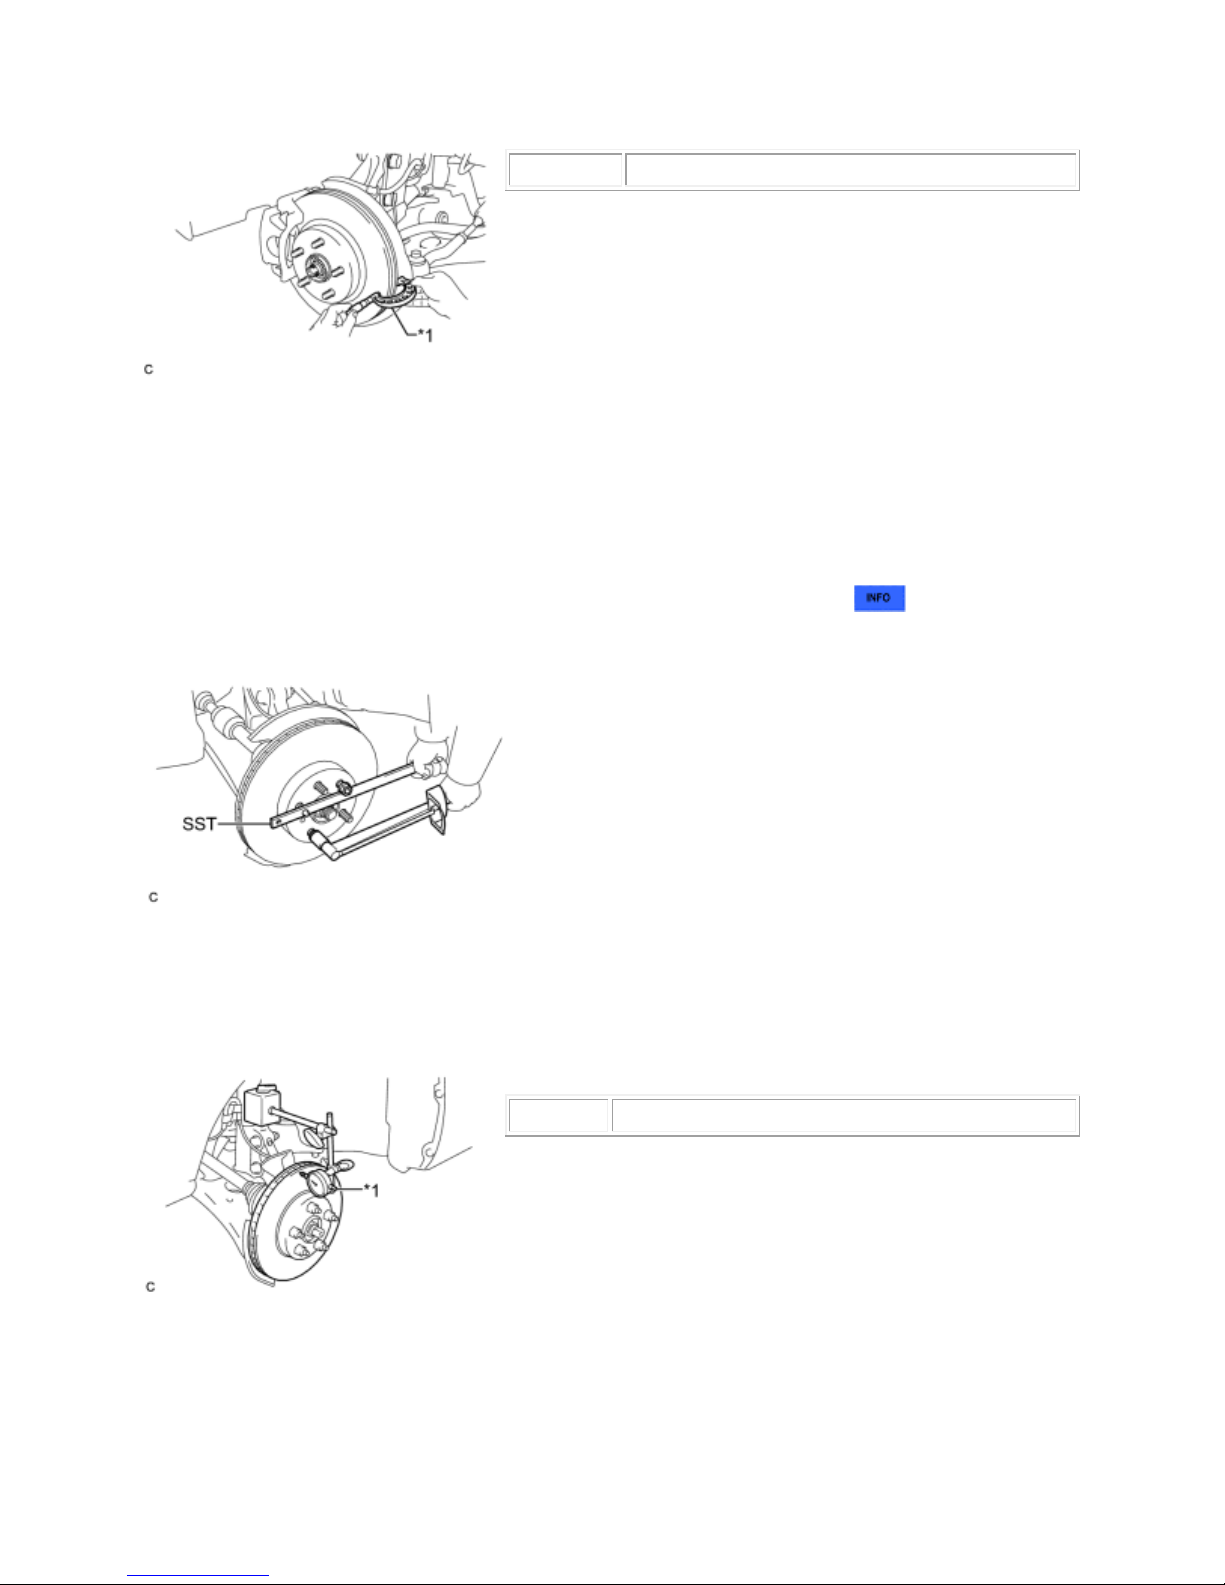
(a) Remove the front disc.
Text in Illustration
*1
Matchmark
HINT:
Put matchmarks on the disc and the axle hub.
13. REMOVE FRONT DISC
2010 Toyota Prius Repair Manual
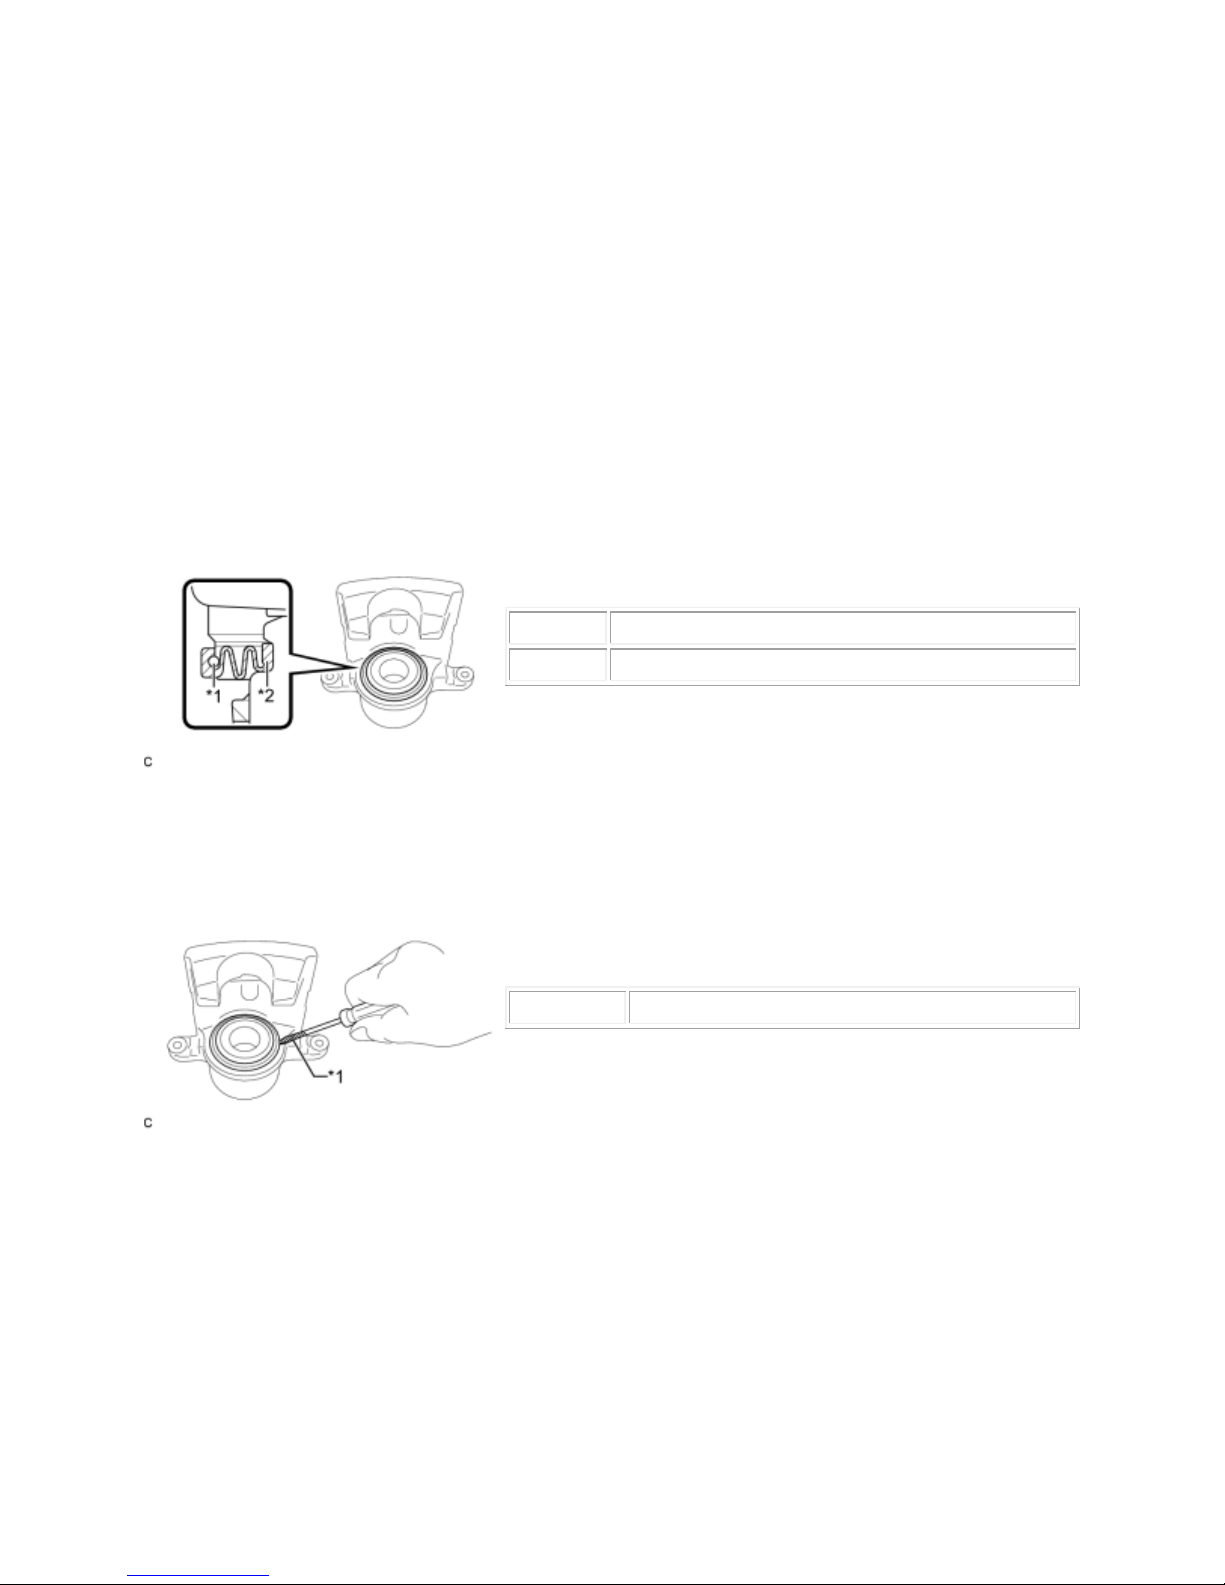
DISASSEMBLY
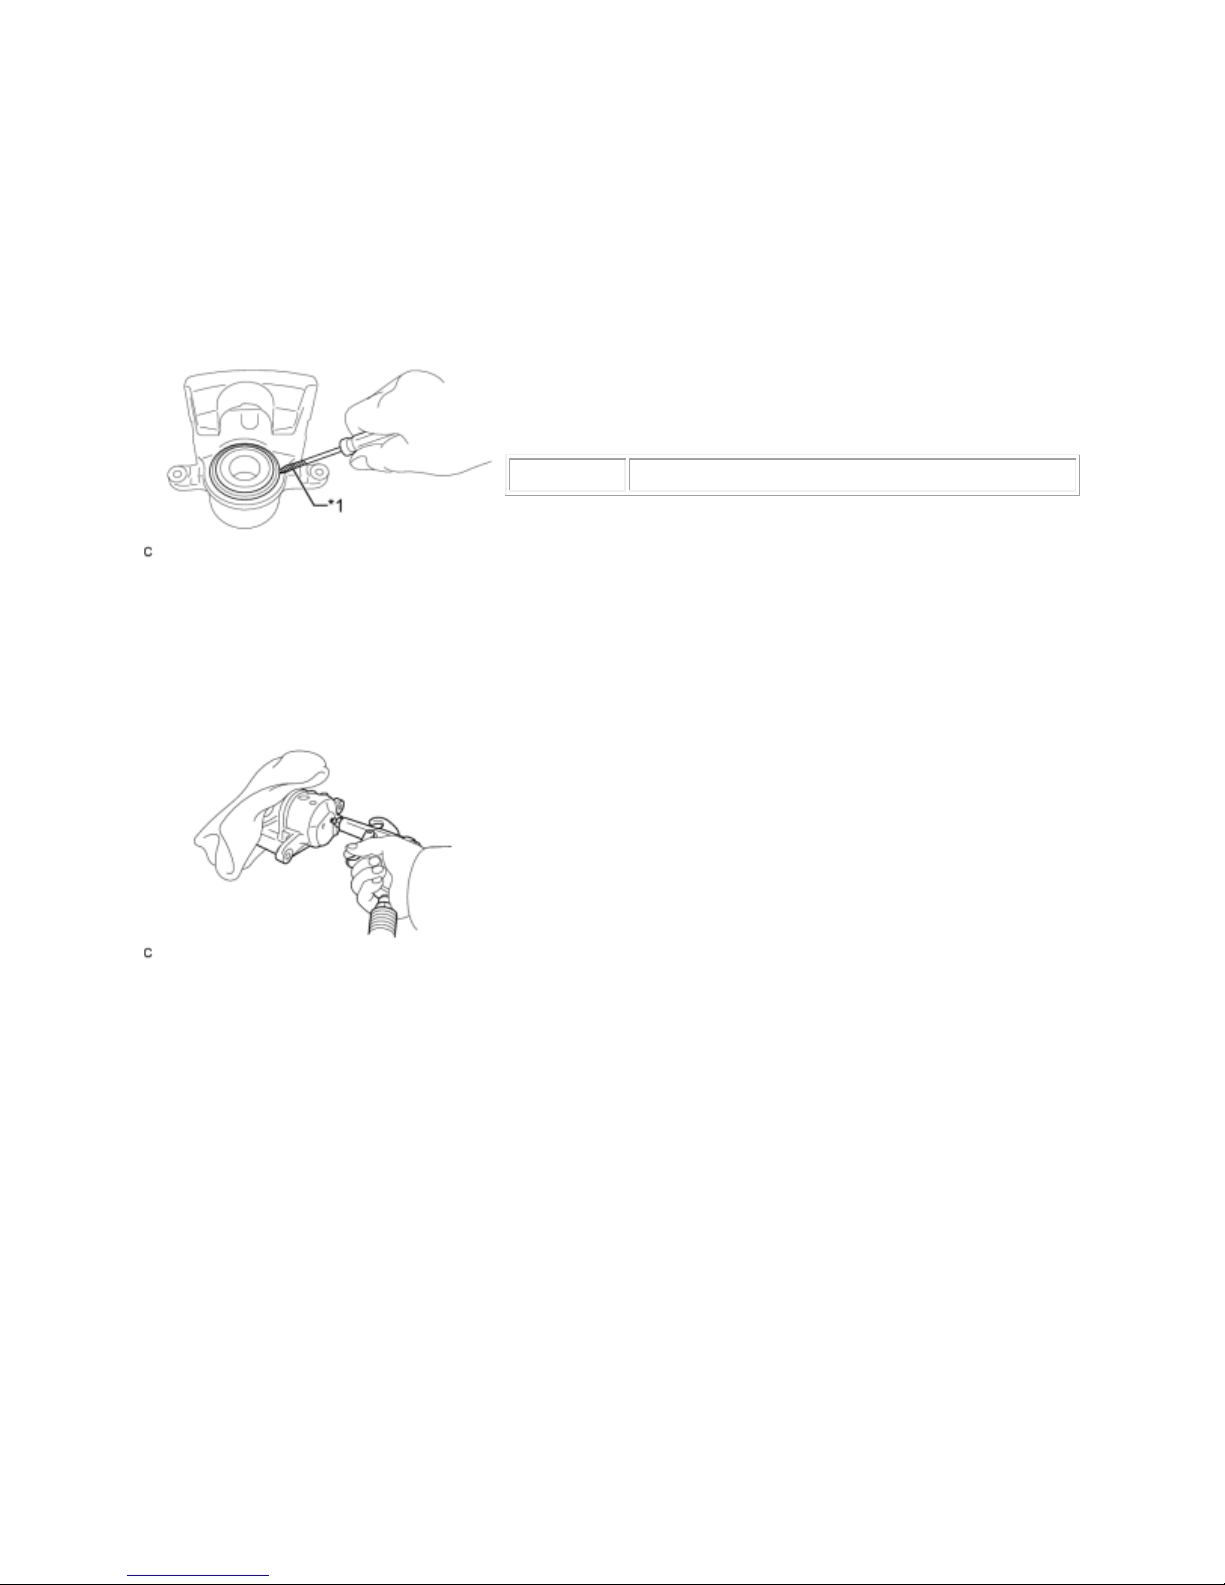
(a) Using a screwdriver with its tip wrapped with vinyl
tape, remove the set ring and cylinder boot from the disc
brake cylinder assembly.
Text in Illustration
*1
Vinyl Tape
NOTICE:
Be careful not to damage the brake piston or cylinder.
(a) Place a piece of cloth between the front disc brake
piston and disc brake cylinder assembly.
(a) Using a screwdriver with its tip wrapped with vinyl
1. REMOVE CYLINDER BOOT
2. REMOVE FRONT DISC BRAKE PISTON
(b) Apply compressed air to remove the front disc brake piston from the disc brake cylinder
assembly.
CAUTION:
Do not place your fingers in front of the piston when using compressed air.
NOTICE:
Do not allow any brake fluid to spatter.
3. REMOVE PISTON SEAL
2010 Toyota Prius Repair Manual

tape, remove the piston seal from the disc brake cylinder
assembly.
Text in Illustration
*1
Vinyl Tape
NOTICE:
Do not damage the inner surface or piston seal groove of
the cylinder.
4. REMOVE FRONT DISC BRAKE BLEEDER PLUG CAP
5. REMOVE FRONT DISC BRAKE BLEEDER PLUG
2010 Toyota Prius Repair Manual
INSPECTION
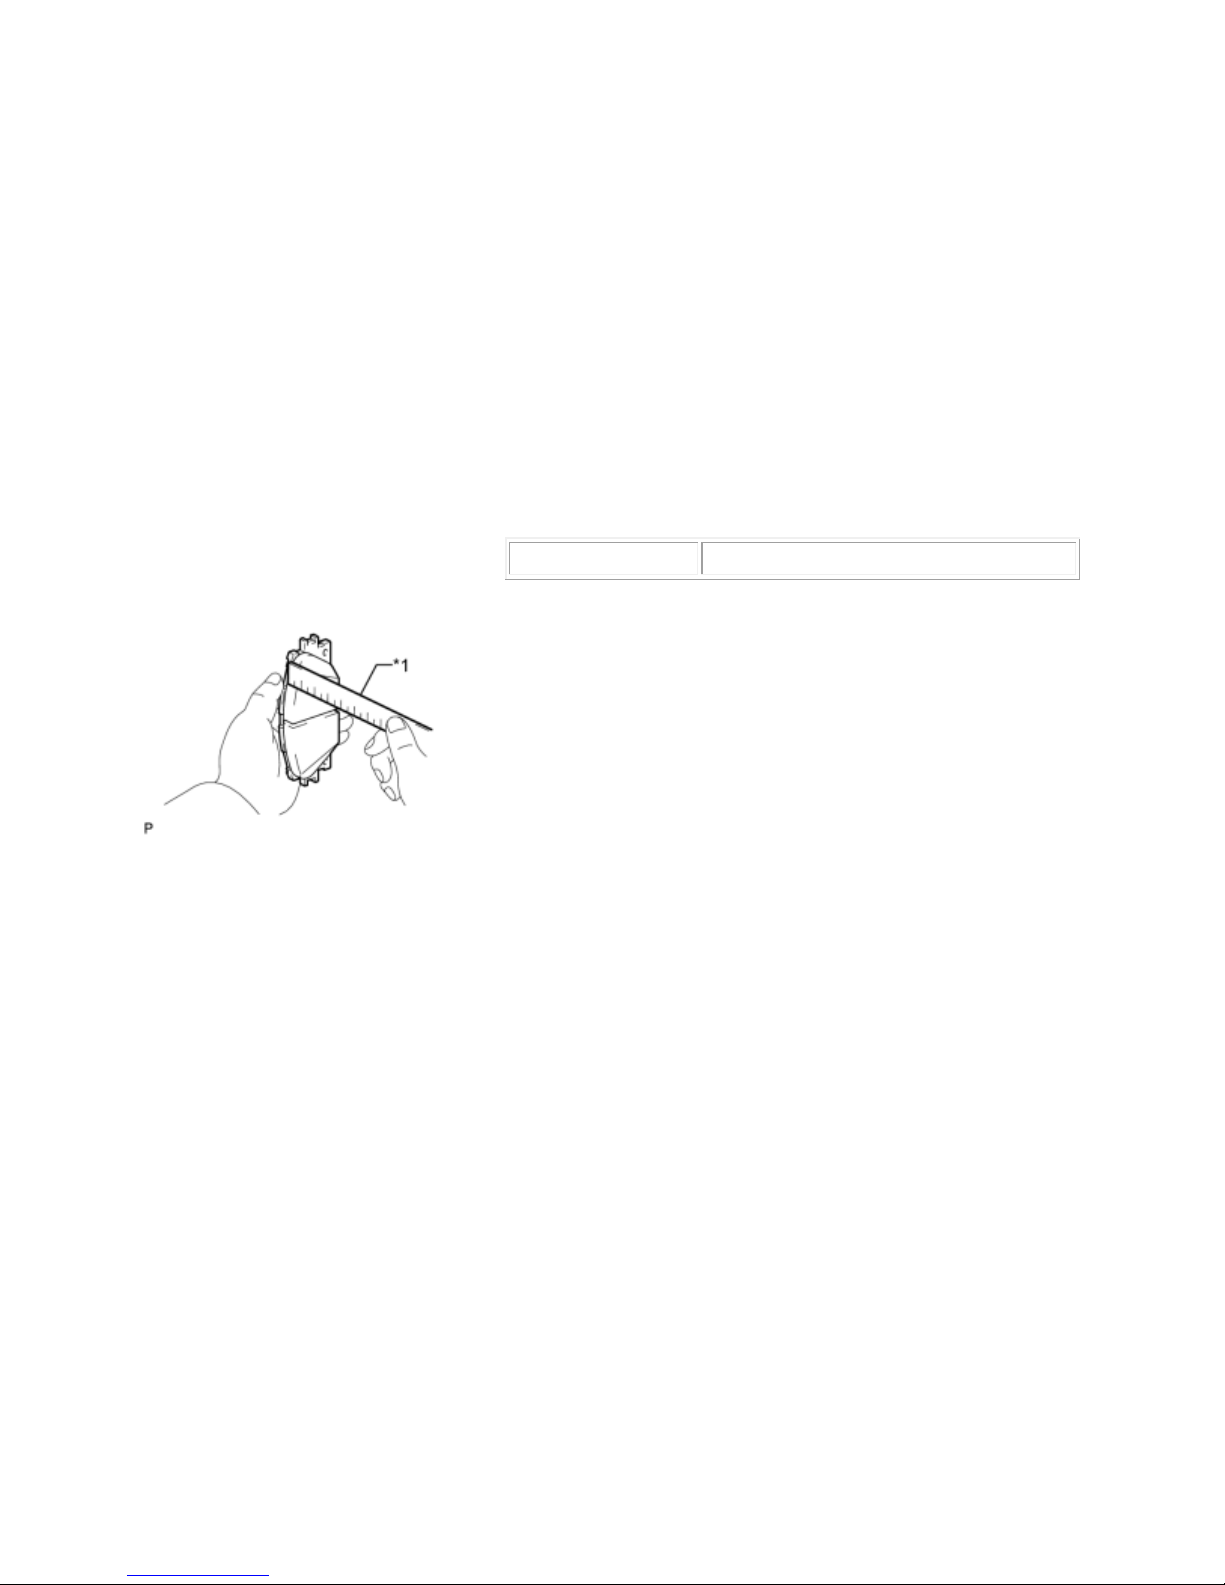
(a) Using a ruler, measure the pad lining thickness.
Text in Illustration
*1
Ruler
Standard thickness:
10.0 mm (0.394 in.)
Minimum thickness:
1.0 mm (0.0394 in.)
If the pad lining thickness is less than the minimum
thickness, replace the disc brake pads.
HINT:
Be sure to check the wear of the front disc after replacing
the brake pads with new ones.
(a) Using a micrometer, measure the disc thickness.
Text in Illustration
1. INSPECT BRAKE CYLINDER AND PISTON
(a) Check the cylinder bore and piston for rust and scoring. If necessary, replace the disc brake
cylinder and piston.
2. INSPECT PAD LINING THICKNESS
3. INSPECT FRONT DISC BRAKE PAD SUPPORT PLATE
(a) Make sure that the front disc brake pad support plates have sufficient rebound, no
deformation, cracks or wear, and that all rust and dirt are cleaned off. If necessary, replace the
front disc brake pad support plates.
4. INSPECT DISC THICKNESS
2010 Toyota Prius Repair Manual
*1
Micrometer
Standard thickness:
25.0 mm (0.984 in.)
Minimum thickness:
22.0 mm (0.866 in.)
If the disc thickness is less than the minimum, replace the
front disc.
(b) Using SST to hold the disc, tighten the disc with the 5
nuts.
SST: 09330
-00021
Torque:
103 N·m (1050 kgf·cm, 76ft·lbf)
(c) Using a dial indicator, measure the disc runout 10 mm
(0.394 in.) away from the outer edge of the front disc.
Text in Illustration
*1
Dial Indicator
Maximum disc runout:
0.05 mm (0.00197 in.)
NOTICE:
Keep the magnet of the dial indicator away from the axle
hub and speed sensor.
5. INSPECT DISC RUNOUT
(a) Inspect the front axle hub bearing looseness and front axle hub runout .
2010 Toyota Prius Repair Manual

If the runout exceeds the maximum value, change the
installation position of the disc to minimize the runout. If
the runout exceeds the maximum even when the
installation position is changed, grind the disc. If the disc
thickness is less than the minimum, replace the front disc.
(d) Remove the 5 nuts and front disc.
2010 Toyota Prius Repair Manual
REASSEMBLY
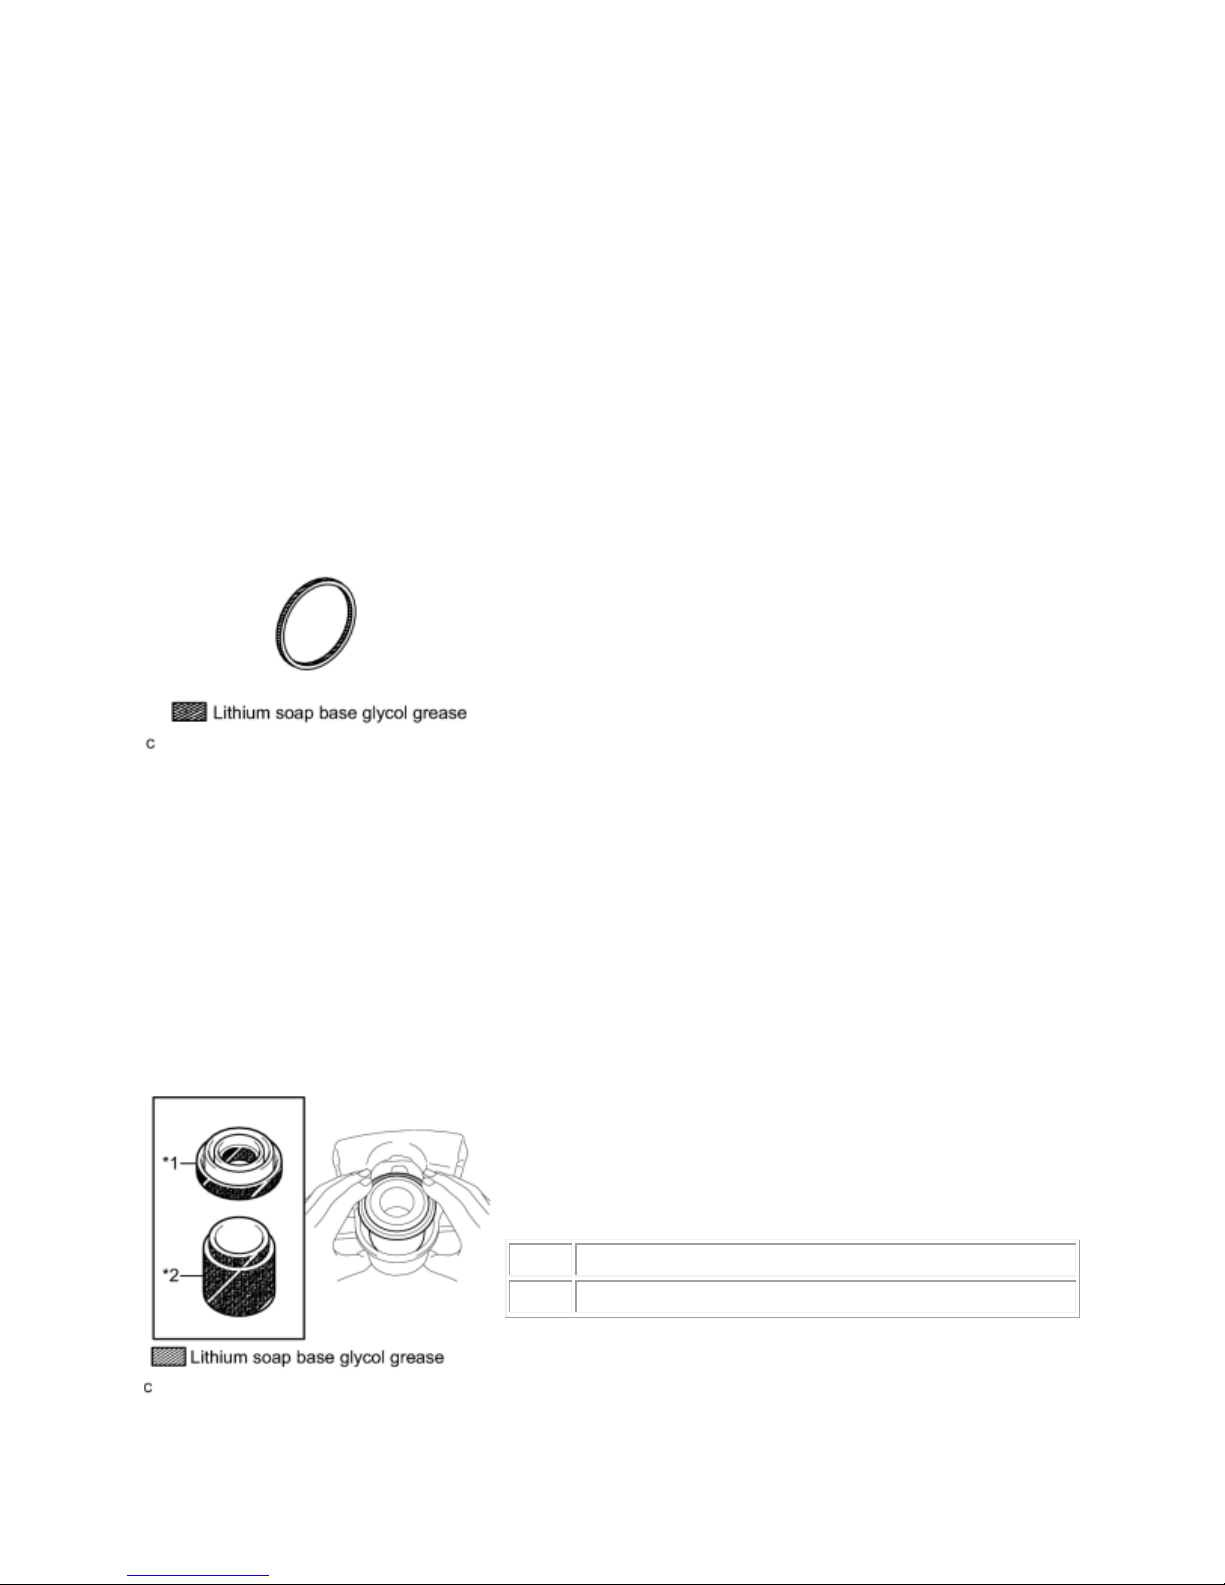
(a) Apply a light layer of lithium soap base glycol grease to
the entire circumference of a new piston seal.
(a) Apply a light layer of lithium soap base glycol grease to
the entire circumference of a new cylinder boot.
Text in Illustration
*1
Cylinder Boot
*2
Front Disc Brake Piston
1. TEMPORARILY TIGHTEN FRONT DISC BRAKE BLEEDER PLUG
HINT:
Fully tighten the front disc brake bleeder plug after bleeding any air left in the system.
2. INSTALL FRONT DISC BRAKE BLEEDER PLUG CAP
3. INSTALL PISTON SEAL
(b) Install the piston seal to the disc brake cylinder assembly.
NOTICE:
Securely install the piston seal into the groove of the disc brake cylinder.
4. INSTALL FRONT DISC BRAKE PISTON
2010 Toyota Prius Repair Manual
(b) Install the cylinder boot to the front disc brake piston.
(a) Install the cylinder boot to the disc brake cylinder
assembly.
Text in Illustration
*1
Set Ring
*2
Cylinder Boot
NOTICE:
Securely install the cylinder boot to the groove of the disc
brake cylinder assembly and front disc brake piston.
(b) Using a screwdriver with its tip wrapped with vinyl
tape, install a new set ring.
Text in Illustration
*1
Vinyl Tape
x
Securely install the set ring to the outer groove of
the cylinder boot.
x Do not damage the cylinder boot.
(c) Apply a light layer of lithium soap base glycol grease to the contact surfaces of the front disc
brake piston, and install it to the disc brake cylinder assembly.
NOTICE:
Do not install the piston forcibly in the disc brake cylinder assembly.
5. INSTALL CYLINDER BOOT
2010 Toyota Prius Repair Manual
 Loading...