

INSTRUCTION
BOOK
EC-1
SERIES
EC-1B
SERIES
LU
A
STITCH
AHEAD
OF
THE
TIMES
T
OMO
TA
sewing
machines

IMPORTANT
PLEASE
READ
CAREFULLY
The
wires
in
this
mains
lead
are
coloured
in
accordance
with
the
following
code:
BLUE-NEUTRAL
BROWN-LIVE
(OR
ACTIVE)
As
the
colours
of
the
mains
lead
of
this
appliance
may
not
correspond
with
the
coloured
markings
identifying
the
terminals
in
your
plug
-
PROCEED
AS
FOLLOWS:
The
earth
plug
pin
is
unnesessary.
As
the
Machine
is
designed
under
double
insulation
structure,
the
earth
wire
is
removed
from
the
machine.
The
wire
coloured
BROWN
must
be
connected
to
the
terminal
marked
L
or
A
or
coloured
RED.
The
wire
coloured
BLUE
must
be
connected
to the
terminal
marked
N
or
coloured
BLACK.
Neither
core
is
to
be
connected
to
the
earth
terminal
of
a
three-pin
plug.
When
leaving
the
machine
or
when
servicing
or changing
mechanical
parts
or
accesso-
ries,
the
machine
must
be
disconnected
from
the
supply
by
removing
the
plug
from
the
socket
outlet.
MAXIMUM
INPUT
OF
LAMP:
15
WATTS
Please
retain
the
packagings
not to
damage
your
machine
in
transit
for
the possible
return
of
repairs
in
the
future.
N.B
(1) If
you
have
purchased
EC-1B,
your
machine
has
the
following
additional
features
in
comparision
with
the
specifications
mentioned
in
this
instruction
book.
1.
Clip
on
Feet
*
2.
Thread
Cutter
3.
Carry
Handle
*
4.
Saftey
Clutch
•
For
some
models,
these
specifications
are
already
mentioned
in
the
book.
(2)
Accessories
shown
in
this
book
in
some
cases
are
optional.
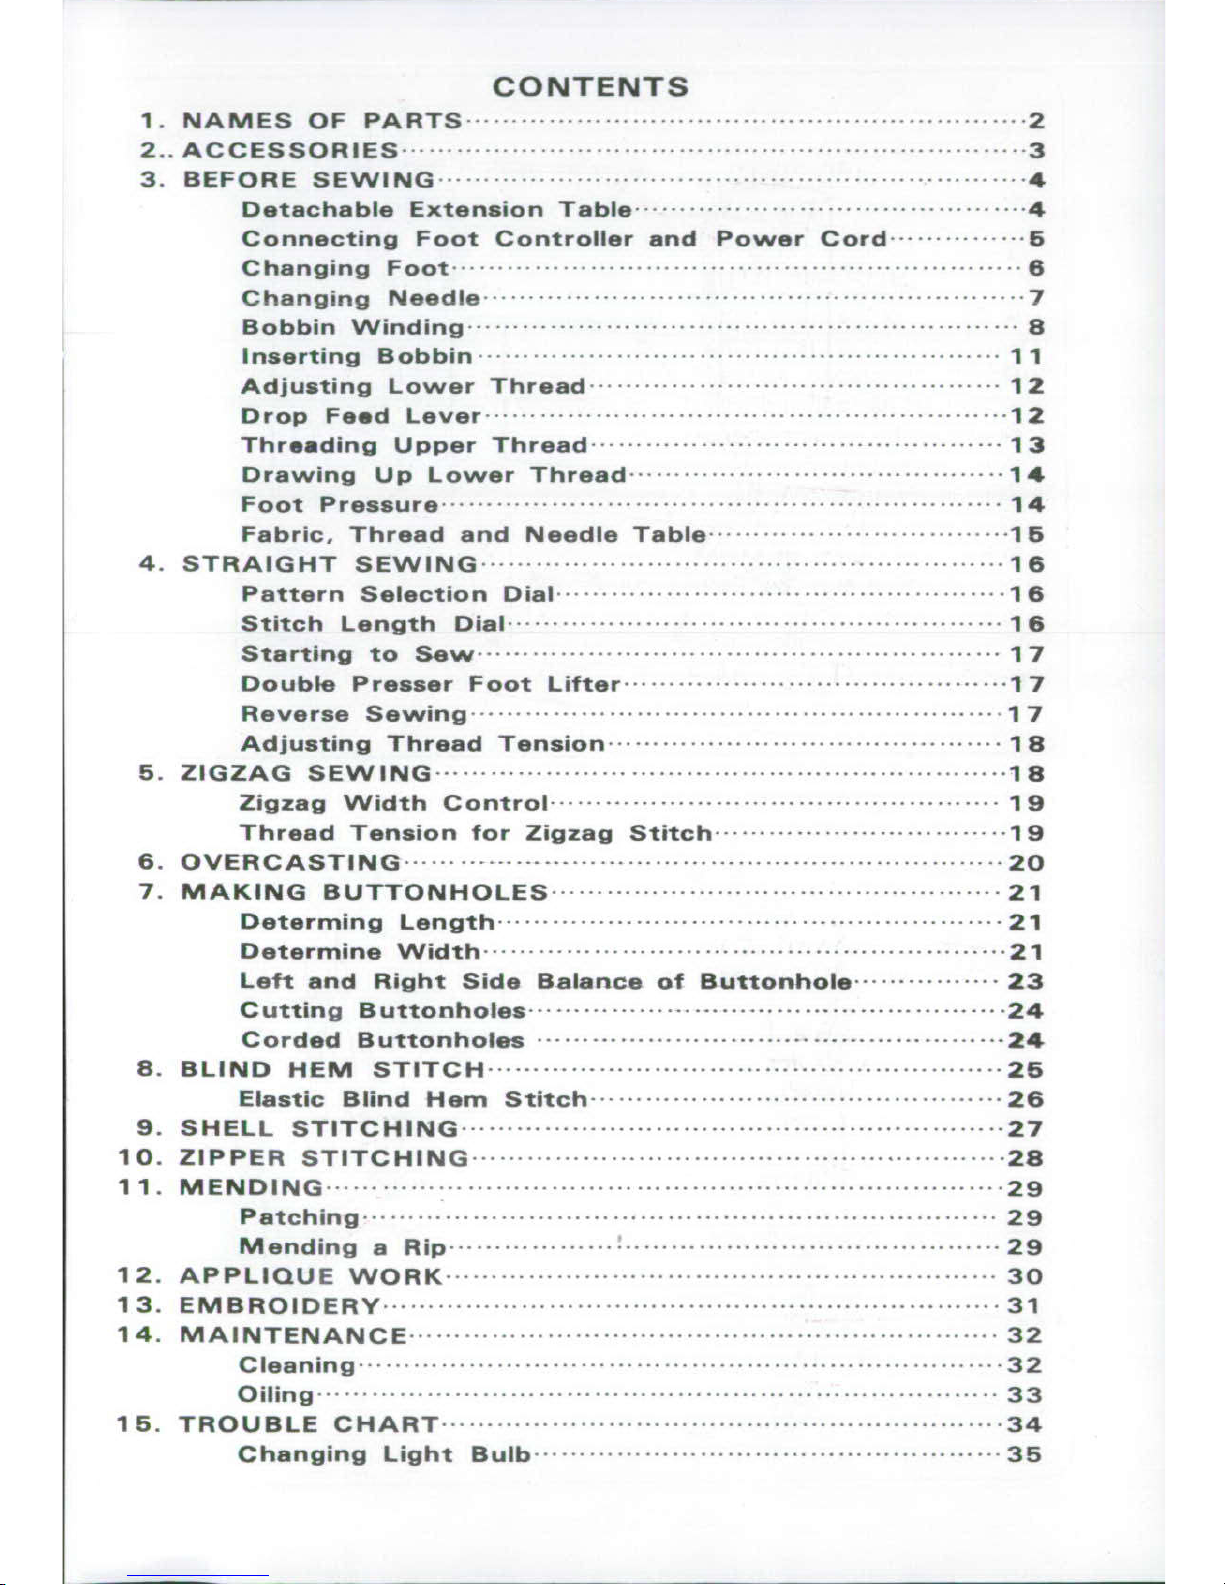
CONTENTS
1 .
N
A M E
S O F
P A R
T S ..
.
-..
..
.
.....
.. .........
2
2.. A C C
ES
SO
R
IES
............
.........
3....
...........
............
...
3
3.
BEFO
RE
SEW
IN
G
......
4...
.......
......
...........
.........
.....
.... 4
Detachable
Extension
Table
.........................
4
Connecting
Foot
Controller
and
Power
Cord
.....
C
hanging
Foot
6..................
........
.
C
hanging
N
eedle
......................................
.................
7
Bobbin
Winding
-------.
....
a
Inserting
Bobbin
.........
...
.......
....
11
Adjusting
Low
er
Thread
....
.......
........
.......
.........
12
D
rop
Feed
Lever
.................................
.................
12
Threading
Upper
Thread
---- 13
Draw
ing
Up
Low
er
Thread
.........................................
14
Foo
t P ressure
........................
...
..........
.........
...........
14
Fabric.
Thread
and
Needle
Table
.15
4.
STRA
IGHT
SEW
ING
....................
1....6....
.......
......
....
i6
Pattern
Selection
Dial
.............
..........
-16
Stitch
Length
D
ial
..........................................
. ..
16
Starting
to
Sew
..........
............
1.........
....
.......
......
17
Double
Presser
Foot
Lifter
-..................
.........
17
Reverse
S
ew
ing
...........
.........
-. .
...........-
.....
.
.....
17
Adjusting
Thread
Tension
.......................
1........
.......
18
S.
ZIG
ZA
G
SEW
IN
G
......
........-............................................
18
Zigzag
Width
Control
..............
....................
19
Thread
Tension
for
Zigzag
Stitch
-............
19
6.
OVERCASTING
.........................................
...................
20
7.
MAKING
BUTTONHOLES
.............................
........
21
D
eterm
ing
Length
.......................................................
2 1
Determ
ine
W
idth
.....................................
............
2 1
Left
and
Right
Side Balance
of Buttonhole
................
23
Cutting
Buttonholes
....................................--....
24
Corded
Buttonholes
..................................................
2 4
8.
BLIND
HEM
STITCH
.......................................
26
Elastic
Blind
Hem
Stitch
...........................................
26
9.
SHELL
STITC
H
ING
..............-..
...................
........
.... ... 27
10.
ZIPPER
STITC
H
IN
G
..
.....................................................
28
1 1 .
M E N D IN G .......................
.....................................
.
.......
- 2
9
P a tc
h
in
g
2 9......................................
.........................
. 2 9
M
ending
a R ip
..........
........
.
.................
...... ......
2
9
12.
A
PPLIQ
U
E W O
RK
...................
...........
........
.....
...
.......
.
30
13.
EM
B
R
O ID
ER Y .......
............................................
3 1
14
.
M A IN T EN
A
N C E
...............................................................
32
C
leaning
..........
.....................
. 3 2
O
ilin g .............................................
...........
..........
.... 3 3
16
.
T
RO U B
LE
C
H A RT
.............................................................
34
C
hanging
Light
Bulb
................
..............
................
35
12
174
25
19
22*
20-2
*22-2
23-'-1-
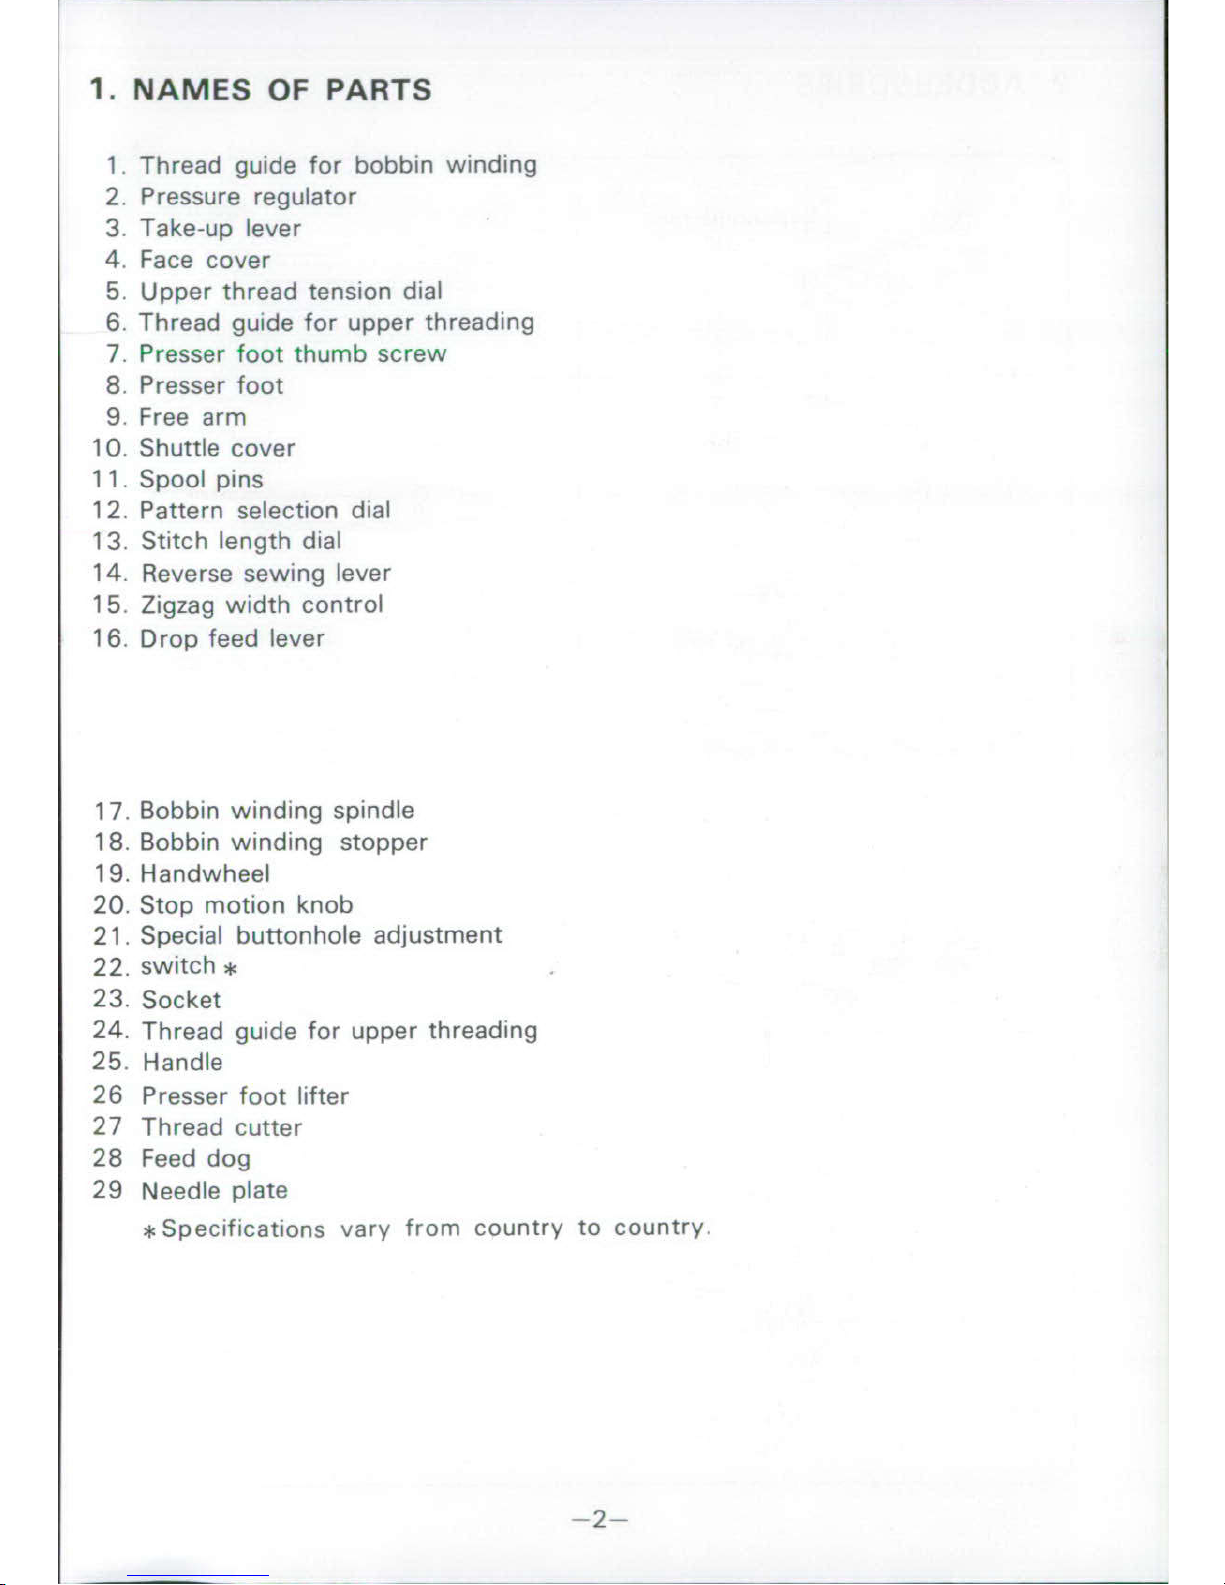
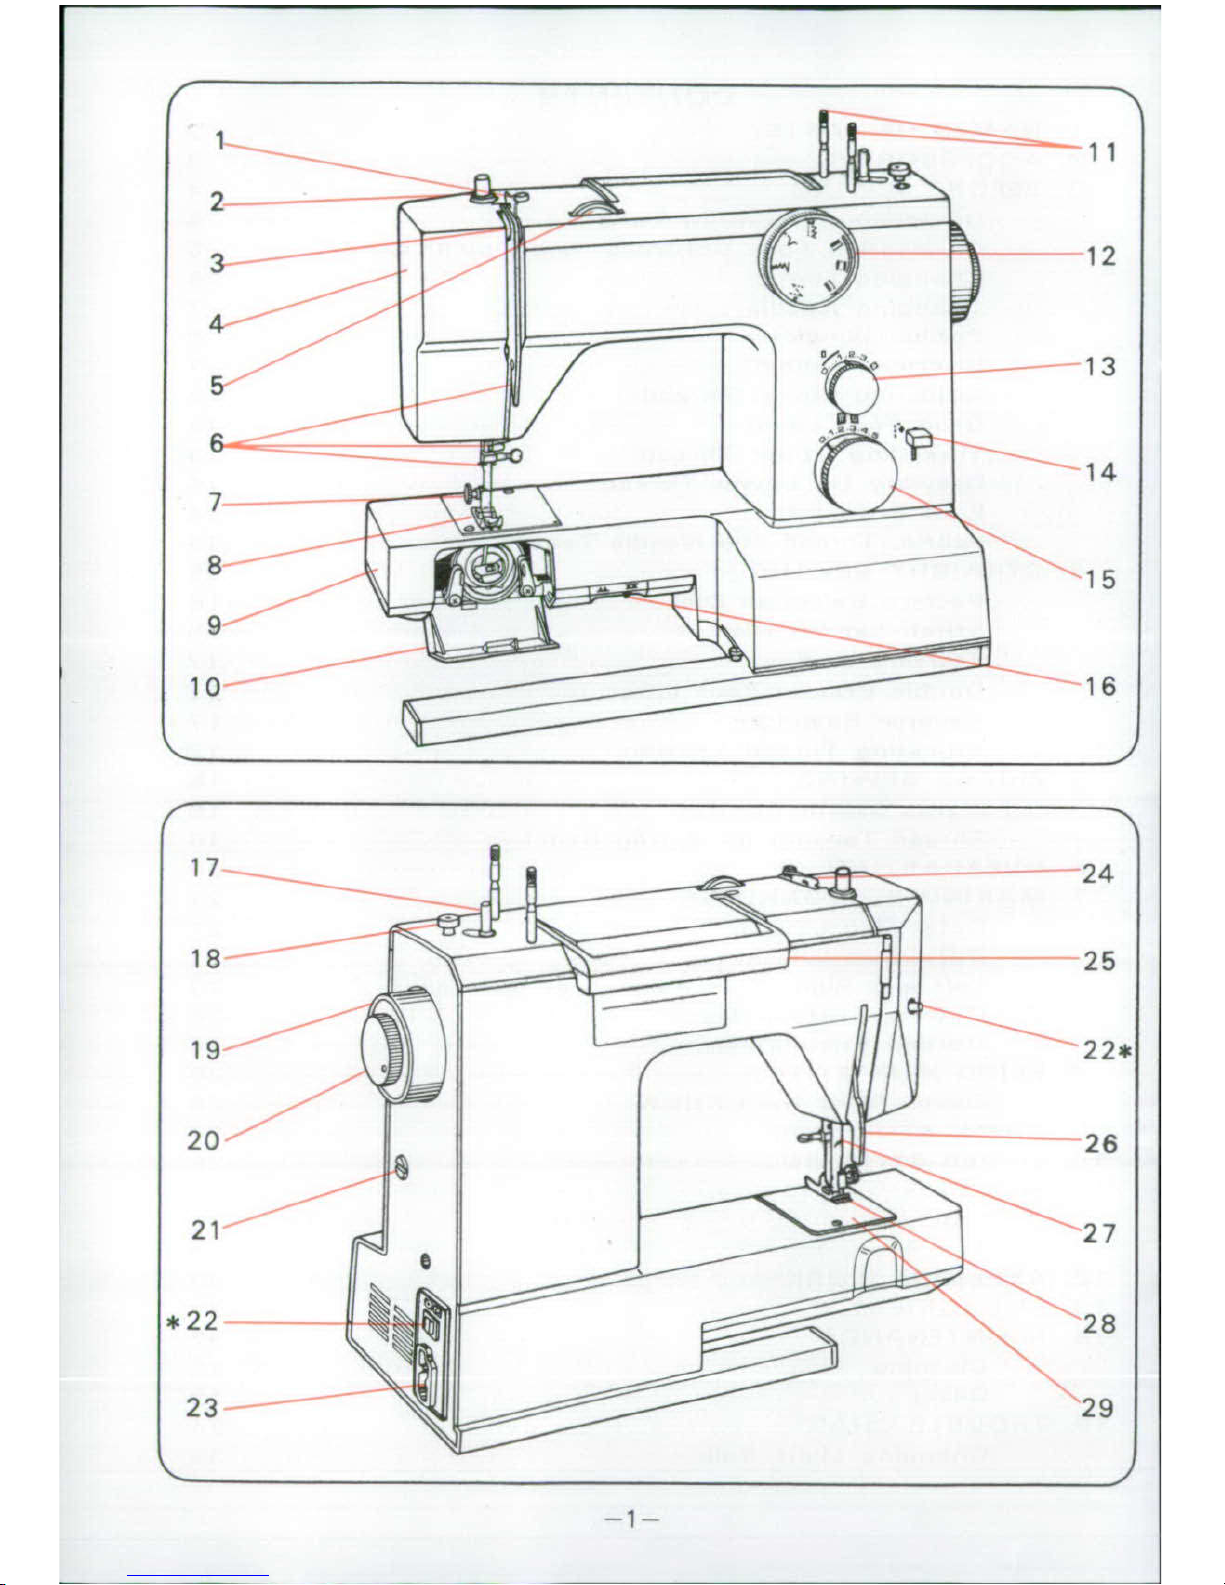
1. NAMES
OF
PARTS
1.
Thread
guide
for
bobbin
winding
2.
Pressure
regulator
3.
Take-up
lever
4.
Face
cover
5.
Upper
thread tension
dial
6.
Thread
guide
for
upper
threading
7.
Presser
foot
thumb
screw
8.
Presser
foot
9.
Free arm
10,
Shuttle cover
11
Spool
pins
12.
Pattern
selection
dial
13.
Stitch
length
dial
14.
Reverse
sewing
lever
15.
Zigzag
width
control
16.
Drop
feed
lever
17.
Bobbin
winding
spindle
18.
Bobbin
winding
stopper
19.
Handwheel
20.
Stop
motion
knob
21.
Special
buttonhole
adjustment
22.
switch,
23.
Socket
24.
Thread guide
for
upper
threading
25.
Handle
26
Presser
foot
lifter
27
Thread
cutter
28
Feed
dog
29
Needle
plate
*Specifications
vary
from
country
to
country.
-2--
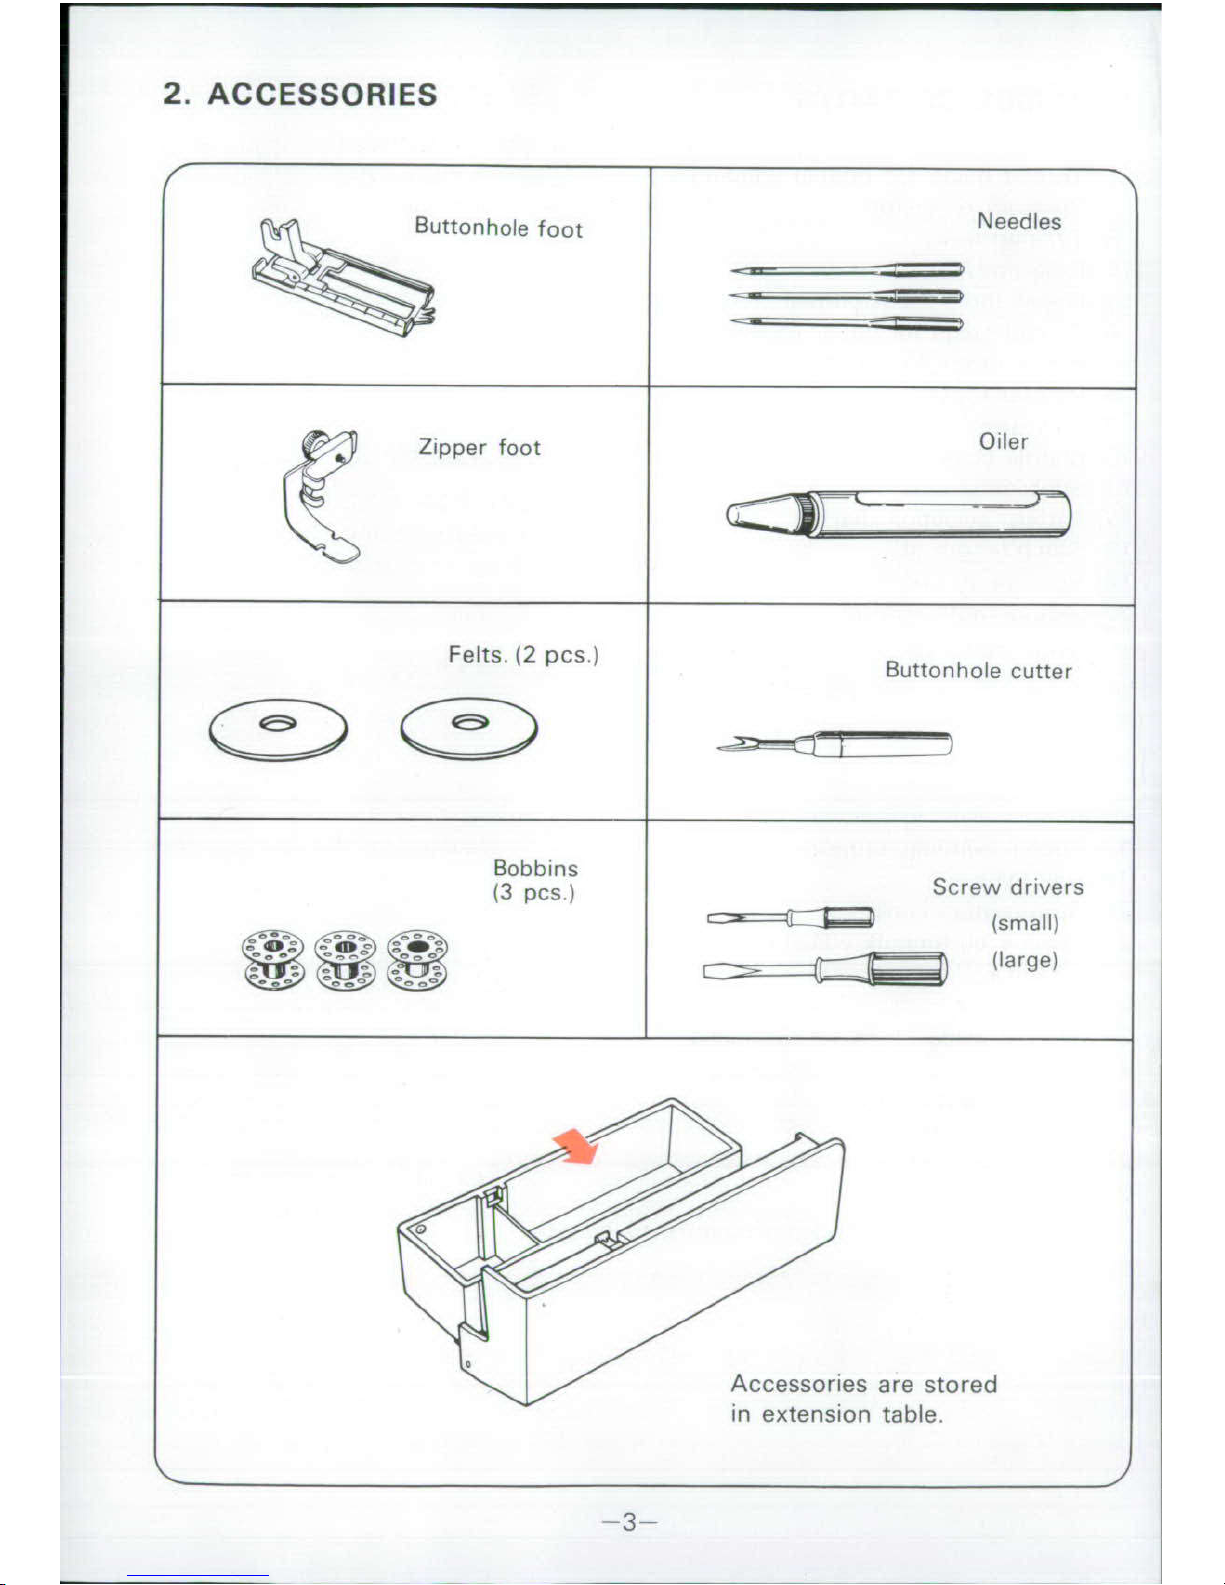
2.
ACCESSORIES
uttonhole
foot
Needles
Zipper
foot
Oiler
Felts.
J2
pcs.)
Buttonhole
cutter
Bobbins
(3
pcs.)
Screw
drivers
(small)
_
_
_
_
_
(large)
Accessories
are
stored
in
extension
table.
-3-3
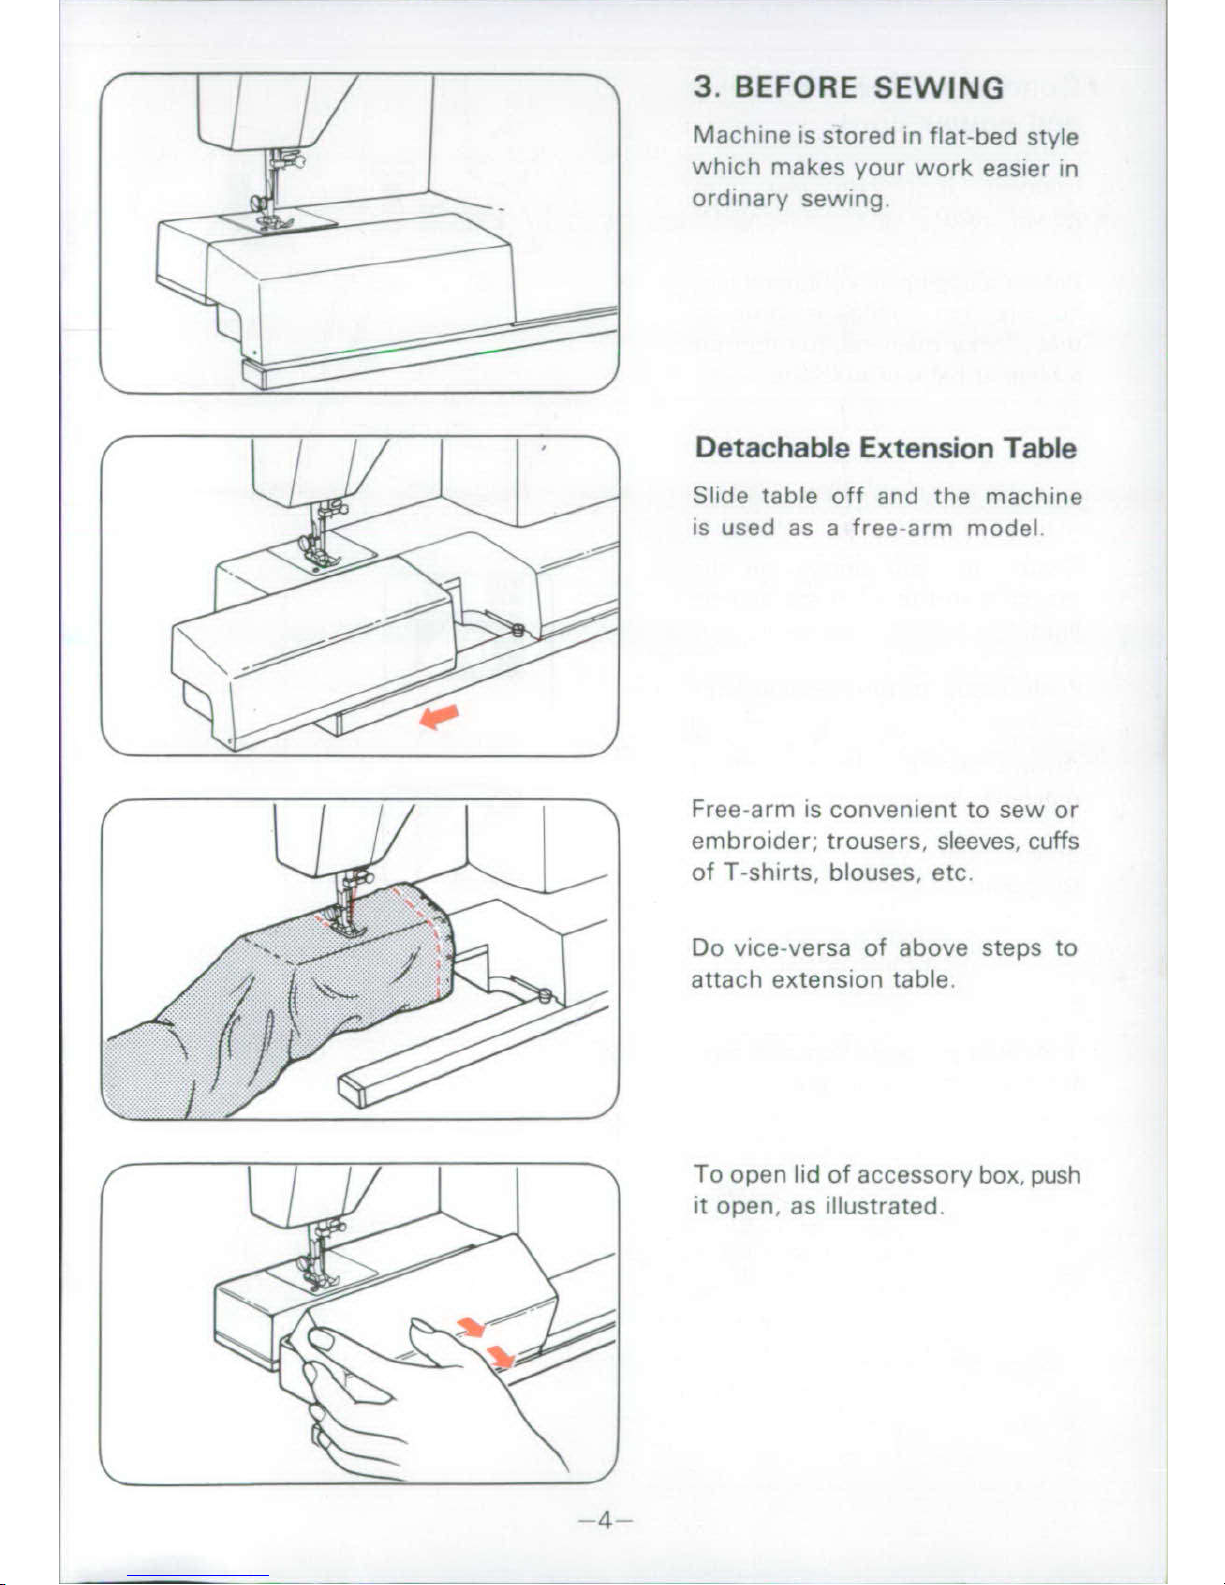
3.
BEFORE
SEWING
Machine
is
stored
in
flat-bed
style
which
makes
your
work
easier
in
ordinary
sewing.
Detachable
Extension
Table
Slide
table
off
and
the
machine
is
used
as
a
free-arm
model
Free-arm
is
convenient
to
sew
or
embroider;
trousers,
sleeves,
cuffs
of
T-shirts,
blouses,
etc.
Do
vice-versa
of
above
steps
to
attach
extension
table.
To
open
lid
of
accessory
box,
push
it
open,
as
illustrated.
-4
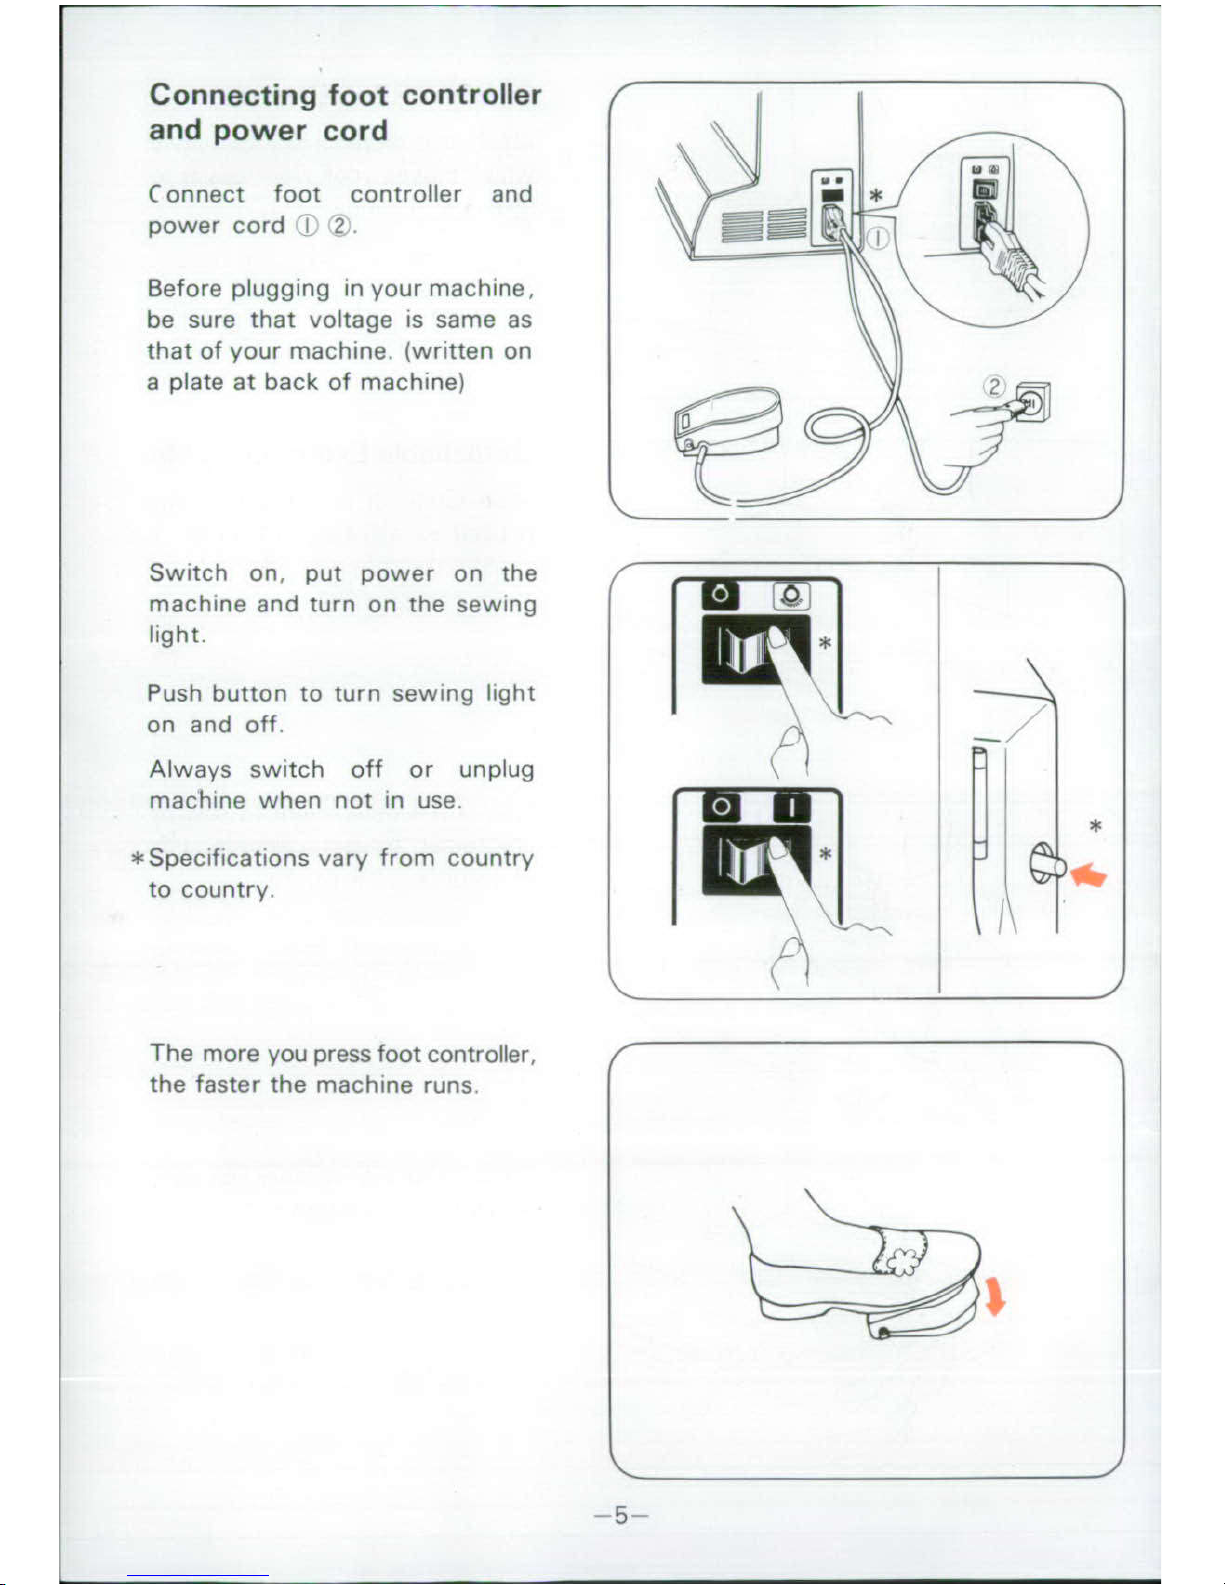
Connecting
foot
controller
and
power
cord
Connect
foot
controller
and
power
cord 1 2.
4
Before
plugging
in
your
machine,
be
sure
that
voltage
is
same
as
that
of
your
machine.
(written
on
a
plate
at
back
of
machine)2
Switch
on,
put
power
on
the
machine
and
turn
on
the
sewing
light.
Push
button
to
turn
sewing
lightF M
on
and
off.
Always
switch
off
or
unplug
machine
when
not
in
use.
*Specifications
vary
from
country
to
country.
The
more
you
press
foot
controller,
the
faster
the machine
runs.
-5--
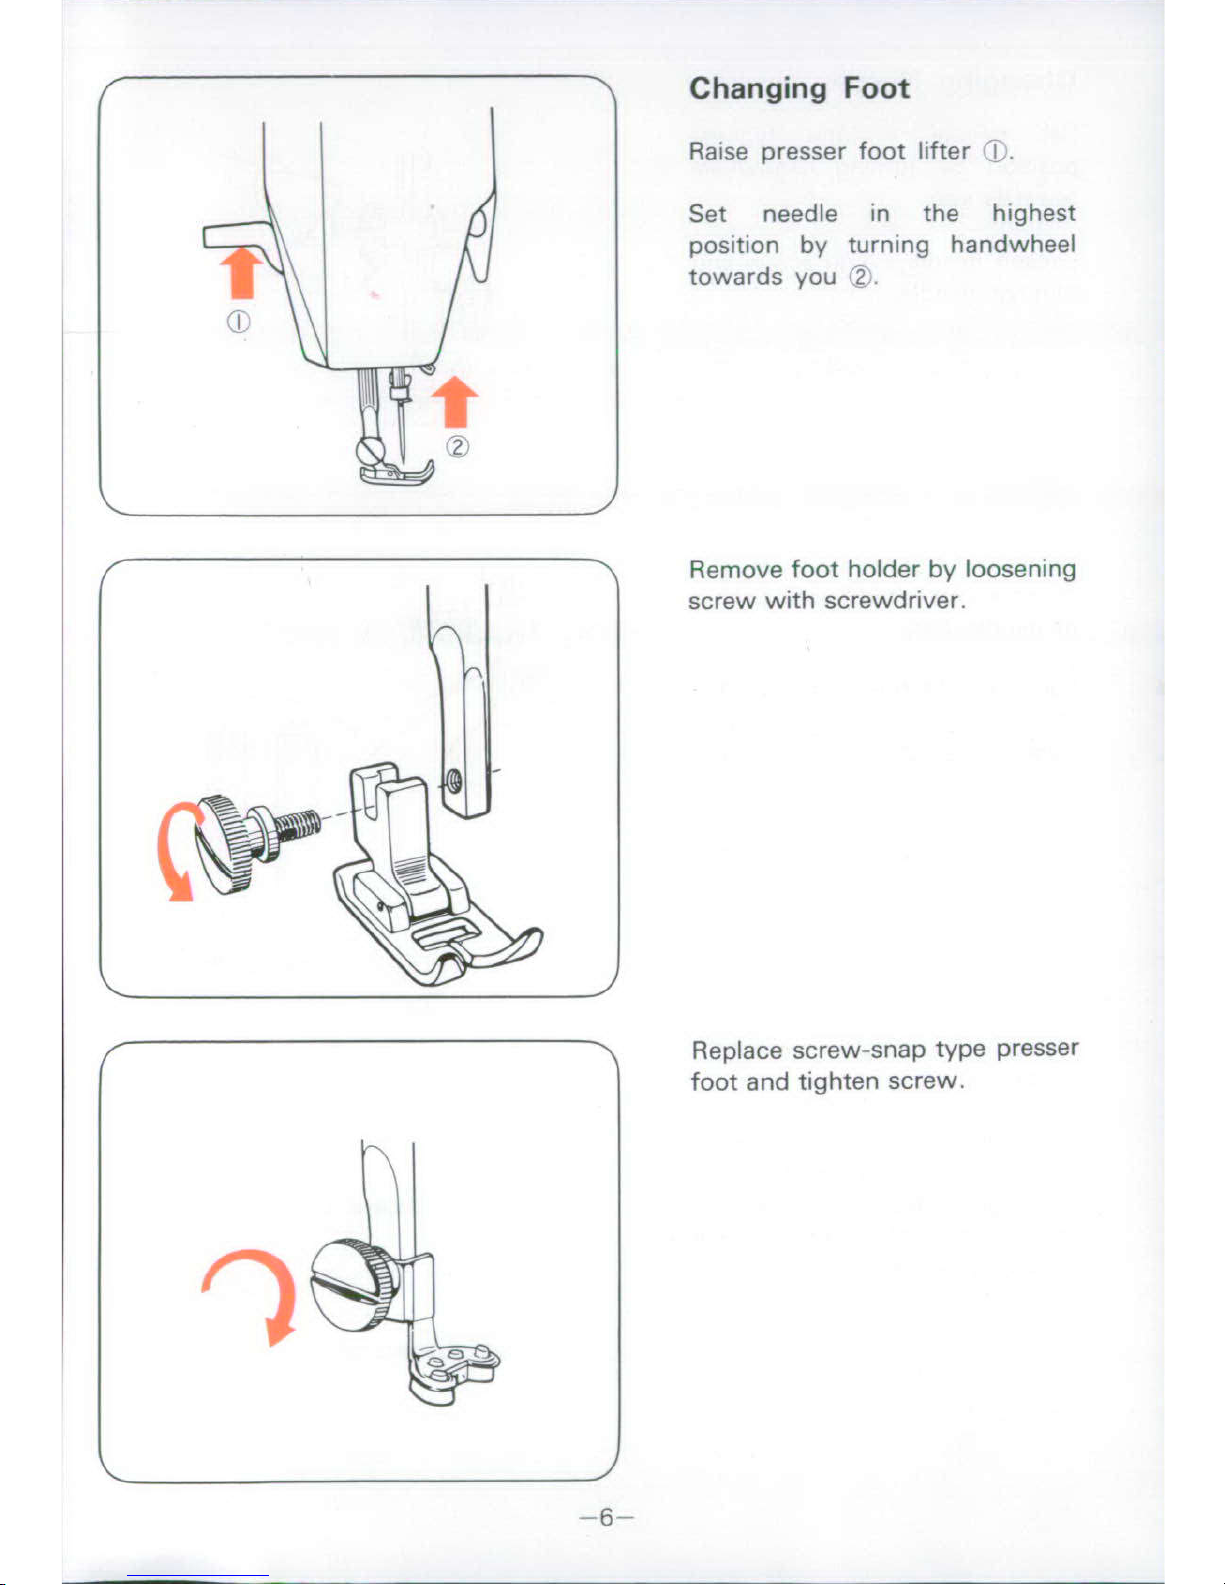
Changing
Foot
Raise
presser
foot
lifter
<>..
Set
needle
in
the
highest
position
by
turning
handwheel
towards
you
2.
At
itce
wt
cewrvr
_,
Remove
foot
holder
by
loosening
screw
with
screwdriver.
Replace
screw-snap
type
presser
foot
and
tighten
screw.
)6-
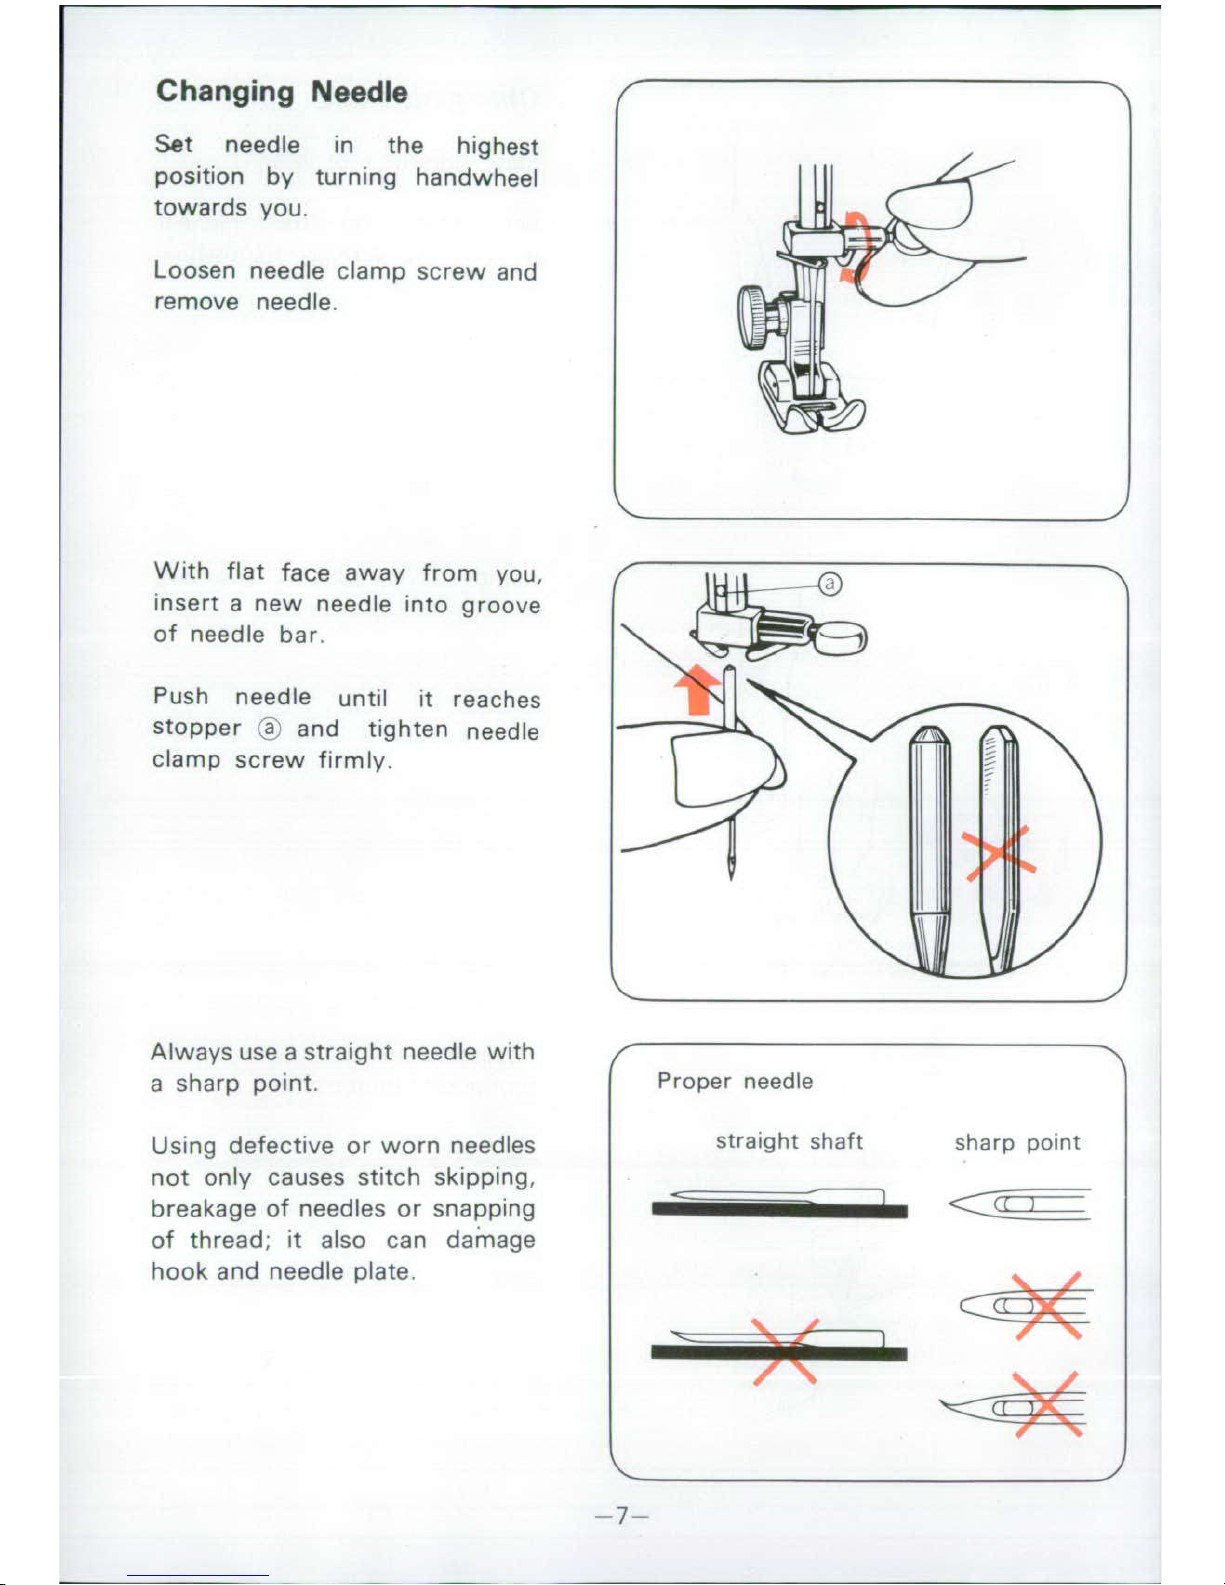
Changing
Needle
Set
needle
in
the
highest
position
by
turning
handwheel
towards
you.
Loosen
needle
clamp
screw
and
remove
needle.
With
flat
face
away
from
you,
insert
a
new
needle
into
groove
of
needle
bar.
Push
needle
until
it
reaches
stopper
O
and
tighten
needle
clamp
screw
firmly.
Always
use
a
straight
needle
with
a
sharp
point.
Proper
needle
Using
defective
or
worn
needles
straight
shaft
sharp
point
not
only
causes
stitch
skipping,
breakage
of
needles
or
snapping
of
thread;
it
also
can
dam-age
hook
and
needle
plate.
-7-
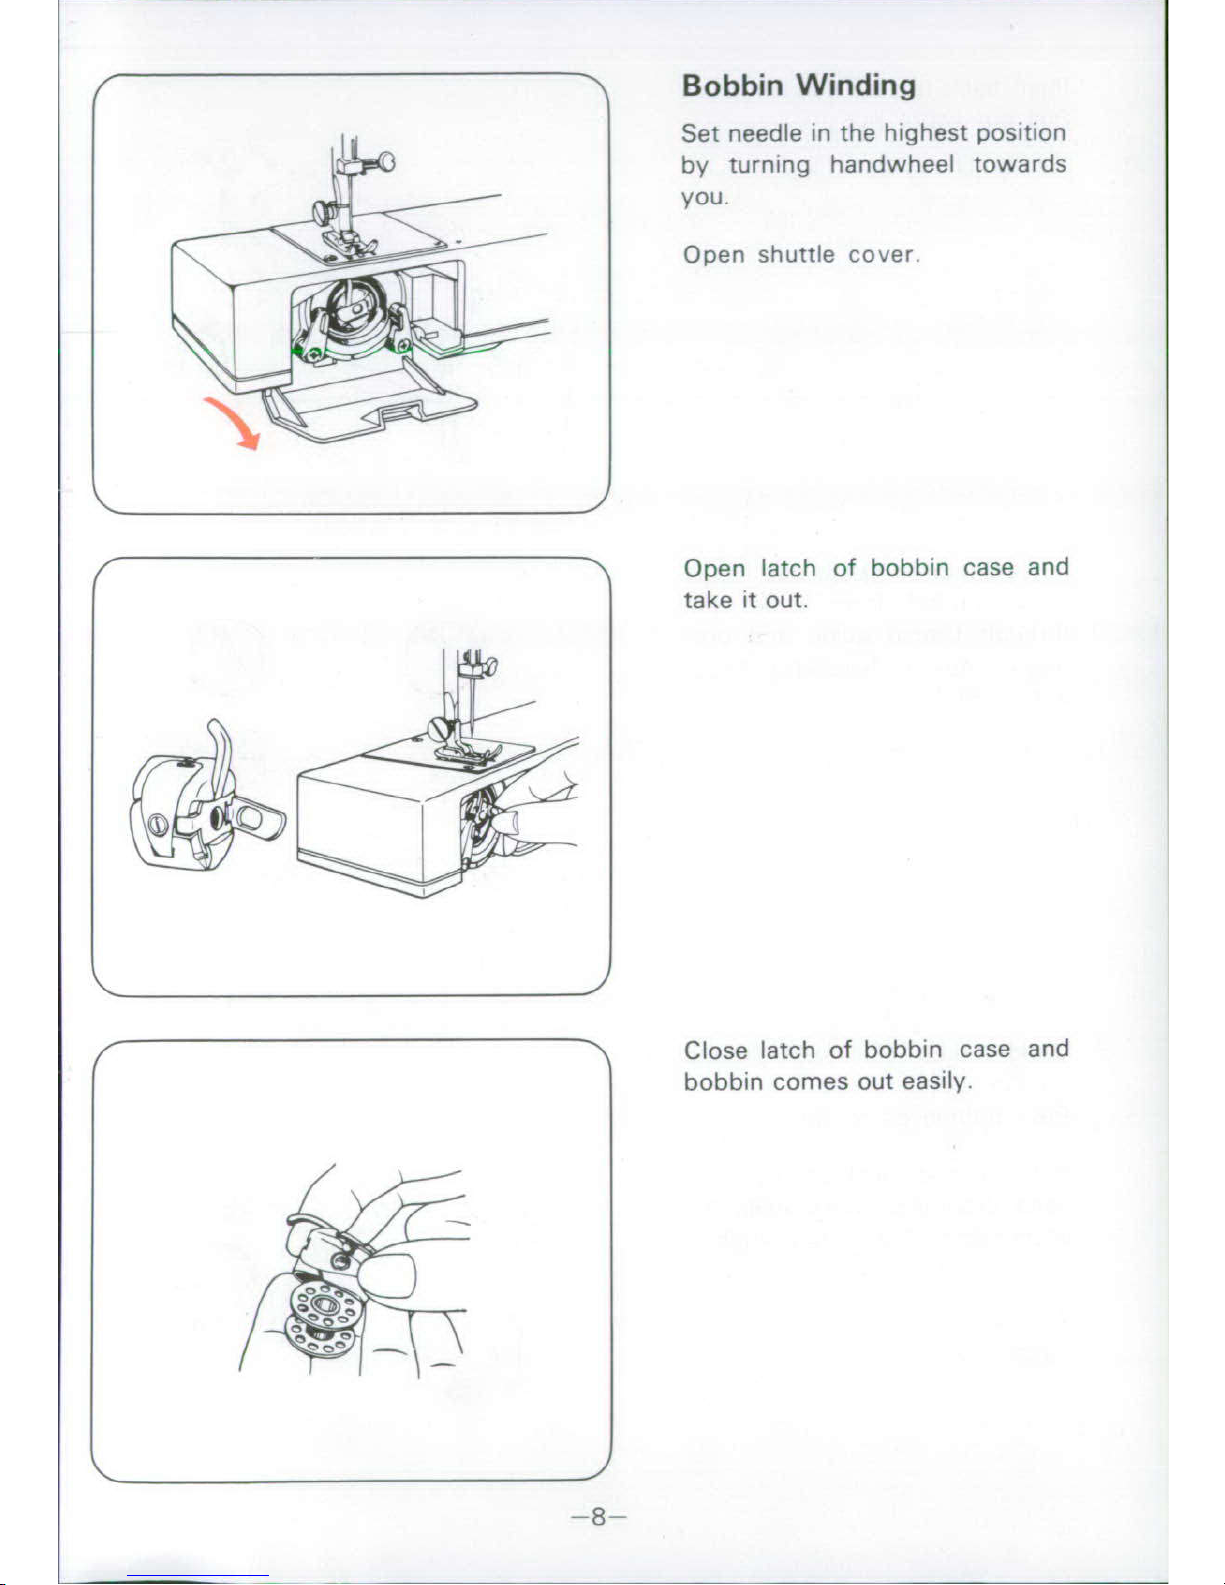
Bobbin
Winding
Set needle
in
the
highest
position
by
turning
handwheel
towards
you.
Open
shuttle
cover.
Open
latch
of
bobbin
case
and
take
it
out.
Close
latch
of
bobbin
case
and
bobbin
comes
out
easily.
--8--
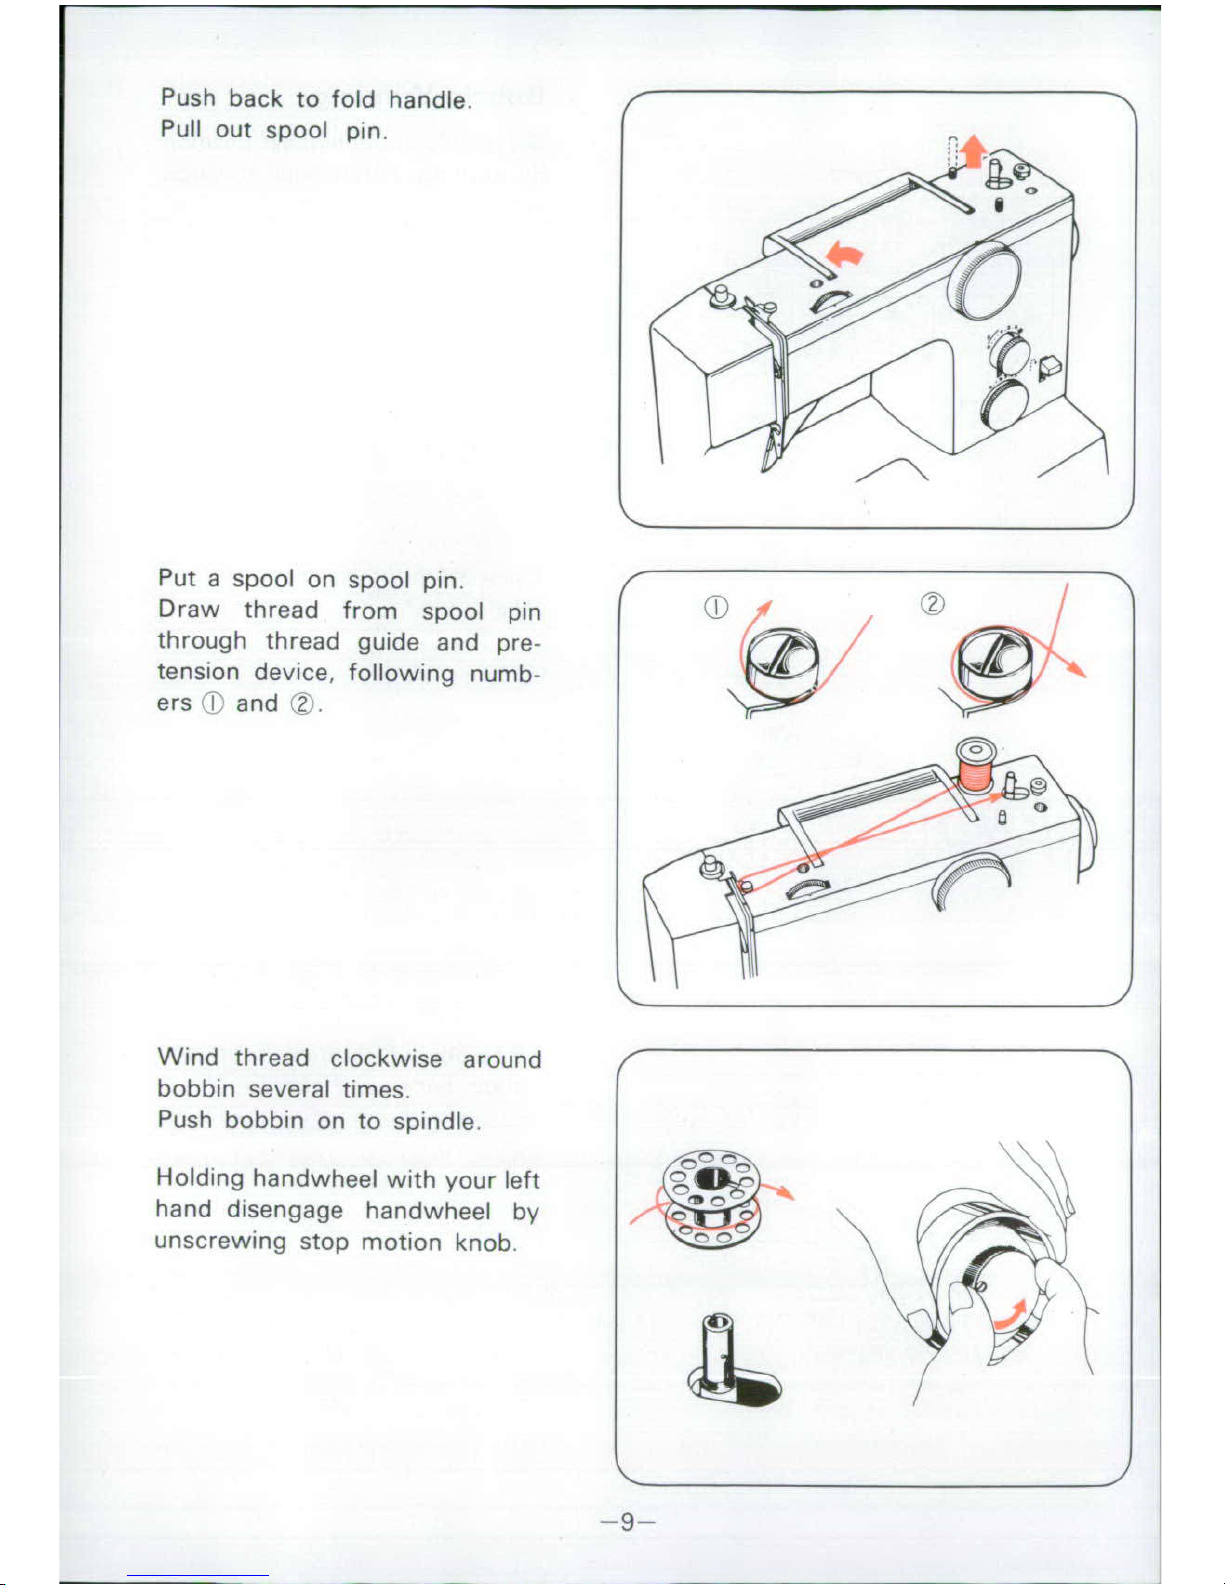
Push
back
to
fold
handle.
Pull
out
spool
pin.
Put
a
spool
on
spool
pin.
Draw
thread
from
spool
pin
through
thread
guide
and
pre-
tension
device,
following
numb-
ers
T1
and
,Z.
Wind
thread
clockwise
around
bobbin
several
times.
Push
bobbin
on
to
spindle.
Holding
handwheel
with
your
left
hand
disengage
handwheel
by
unscrewing
stop
motion
knob.
-9-
 Loading...