

Page 1

S
OFTWARE
M
ANUAL
DIGITAL STILL CAMERA
PDR-3310
Page 2

IMPORTANT
You should read this first before you use this software.
Notice and Request Regarding Software and Instruction Manual
(1) Copying or duplication of the software and Instruction Manual packaged with this Software
Application in part or in whole is not allowed without the prior permission of Toshiba Corporation.
(2) Use of the software and Instruction Manual packaged with this Software Application is allowed only
on one personal computer.
(3) Toshiba Corporation is not liable whatsoever for any damages to the user or a third party as a result
of use of a device by the software and Instruction Manual packaged with this Software Application.
(4) Every effort has been made in assuring the quality during production of the CD-ROM contained in
this package. If for any reason the CD-ROM has been damaged during production and within the
warranty , the disk will be replaced free of charge. For all other nonconformities or damages made
other than during the production of the CD-ROM, Toshiba Corporation will not be held liable
whatsoever.
(5) The contents of the software, Design, Specifications and Instruction Manual packaged with this
Software Application are subject to change without notice.
(6) The personal computer screens shown in this Instruction Manual are examples, and may differ from
actual screens.
(7) Toshiba Corporation is not liable whatsoever for any compensation arising from errors in descriptions
in this Instruction Manual.
(8) Do not play back the CD-ROM packaged with this Software Application on a regular CD player.
Doing so might damage the headphones or speakers, or injure your ears.
Page 3

Before Reading This Manual
This Instruction Manual describes how to install the software provided and a brief explanation of how to use the
Software Application.
To ensure that you use this Software Application correctly, read this Instruction Manual carefully before you start
using the Software Application.
This document has been written assuming that you basically understand how to use the Toshiba PDR-3310 Digital
Still Camera and your personal computer that the Software Application is running on.
For basic details on the PDR-3310 and your personal computer, refer to the Toshiba PDR-3310 Digital Still
Camera’s Instruction Manual or the Instruction Manual for your personal computer.
Trademark Information
• Windows and Windows NT are registered trademarks of the Microsoft Corporation of the U.S. registered in the
USA and other countries.
Windows is an abbreviated term referring to the Microsoft Windows Operating System.
• Macintosh
• Image Expert is a registered trademark of Sierra Imaging Inc.
• FlashPath is a registered trademark of SmartDisk Corporation of the USA.
• Other companies or product names are trademarks or registered trademarks of the respective companies.
and QuickTime are trademarks of Apple Computer, Inc.
Conventions Used In This Manual
IMPORTANT
• Indicates items or details that you should observe to prevent loss of data, malfunction and impaired performance.
Also indicates information relating to specifications and functions.
Memo
• Indicates extra useful information.
Indicates another page to refer to for extra information.
☞
Getting Ready
When Using
Windows
When Using
Macintosh
Operations in
Image Expert
- 1 -
Page 4

Before Reading This Manual (continued)
Abbreviations Used In This Manual
• Windows 98
• Windows 95
• Windows NT
Getting Ready
• Windows 2000
• Windows ME
• Images
Windows
When Using
Macintosh
When Using
Image Expert
Operations in
This refers to the Microsoft
This refers to the Microsoft® Windows® 95 operating system.
This refers to the Microsoft® Windows NT® or Windows NT® workstation 4.0 operating system.
This refers to the Microsoft® Windows® 2000 Professional operating system.
This refers to the Microsoft® Windows® ME operating system.
This refers to both still images and movies.
®
Windows® 98 operating system.
- 2 -
Page 5
Before Reading This Manual (continued)
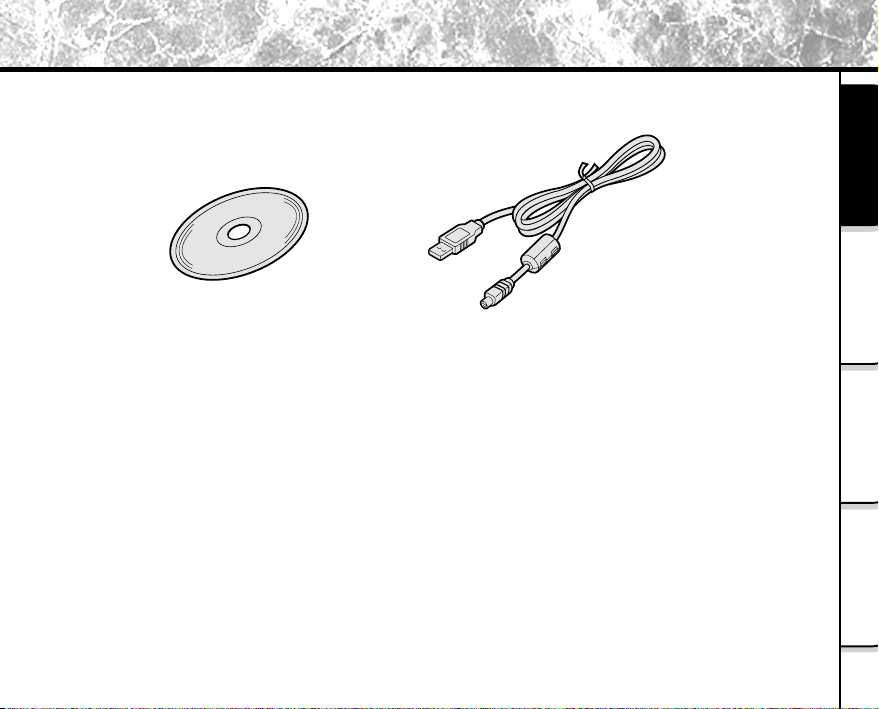
Make sure that you have all of the items below before you start using your software application.
CD-ROM (1 disk)
USB cable
Getting Ready
When Using
Windows
When Using
Macintosh
Operations in
Image Expert
- 3 -
Page 6

Contents
Getting Ready
■ Before Reading This Manual ....................... 1
■ Contents ...................................................... 4
Getting Ready
■ Features of This Software Application ......... 5
■ About Files .................................................. 6
■ About the Software ...................................... 8
■ Pre-installation Checks ............................... 9
Windows
When Using
■ Installation Procedure ............................... 10
■
When Using Windows
Using USB Cable ..........................................
When Using Macintosh
Macintosh
When Using
■ Installation Procedure ............................... 19
■ Using USB Cable ...................................... 22
Image Expert
Operations in
Operations in Image Expert
■ Button Functions ....................................... 25
■ Appending Still Images With Audio Files ... 27
■ Pasting Still Images to Other Applications
(Windows) ................................................. 29
■ Playing Movies .......................................... 30
13
- 4 -
Page 7

Features of This Software Application
If you install the software and drivers on your personal computer, you can perform the following:
• Importing Images
You can import images taken on the Toshiba PDR-3310 Digital Still Camera into your personal computer.
To import images, you need to use the USB cable (packaged with this camera), or the FlashPath floppy
disk adapter, or PC card adapter.
• Editing Still Images
You can edit imported still images using Image Expert, or print them out on a printer connected to the
personal computer you are using.
• Playing Movies
You can play imported movies.
• Saving Images
You can save imported images or edited images on the personal computer you are using.
When You Use Memory Card on Your Personal Computer
• When you use memory card on your personal computer, do not change or delete the folder or names of files
(image data) on the SmartMedia™. Otherwise, you may no longer be able to use the memory card on the
PDR-3310.
• Format the memory card on the PDR-3310.
• To edit image data, first copy the image data to the personal computer’s hard disk, and edit the copied image
data.
Getting Ready
When Using
Windows
When Using
Macintosh
Operations in
Image Expert
- 5 -
Page 8

About Files
File Structure of Memory Card
The images taken on the Toshiba PDR-3310 Digital Still Camera are stored to the memory card as shown below.
Windows Macintosh
Getting Ready
New removable disk Untitled
Windows
When Using
Macintosh
When Using
Image Expert
Operations in
DCIM
100TOSHI
PDR_0001.jpg
PDR_0002.jpg
PDR_0003.jpg
PDR_0004.jpg
PDR_0005.jpg
MISC
TRIMMING
T00_0001.jpg
T00_0002.jpg
T00_9999.jpg
DCIM
Still image/Movie Still image/Movie
Cannot be the
same file name.
If one image is
deleted, its file
name will be a
missing number.
100TOSHI
PDR_0001.jpg
PDR_0002.jpg
PDR_0003.jpg
PDR_0004.jpg
PDR_0005.jpg
MISC
TRIMMING
Resized images
are recorded
here.
T00_0001.jpg
T00_0002.jpg
T00_9999.jpg
- 6 -
Page 9

About Files (continued)
About Still Picture Data
On the PDR-3310, still image data is saved in Exif format. This format is JPEG data that includes a thumbnail
image and the photographic settings.
Still image data is saved as follows as shown on page 6:
Folder name : XXXTOSHI (XXX is any number within the range 100 to 999)
File name : PDR_XXXX (XXXX is any number within the range 0001 to 9999)
About Movie Data
Movie data is saved in the following format on the PDR-3310:
File format : AVI
Movie size : 320 x 240 or 160 x 120
Movie codec : Motion-JPEG
Audio codec : 8-bit Mono PCM (8 kHz)
Memo
• The quality or size of movie data cannot be changed.
Getting Ready
When Using
Windows
When Using
Macintosh
Operations in
Image Expert
- 7 -
Page 10

About the Software
You can install the following software from the CD-ROM:
• Image Expert
This software allows you to edit and print imported still images and to playback movies.
• USB driver
Getting Ready
Windows
When Using
Macintosh
When Using
Image Expert
Operations in
Install this driver when you use the USB connector on your personal computer to import images.
Install this driver when you are using the USB Software Application (CD-ROM).
• QuickTime
Install this software after installing Image Expert. You can play imported movies on personal computers that
have this software installed on them.
- 8 -
Page 11

Pre-installation Checks
To install the software supplied on the CD-ROM, your personal computer must conform to the system
requirements in the table below. Check the following items before you install the software.
Minimum system requirements
CPU
OS
Memory
Free space on
hard disk
Color monitor
CD-ROM drive
Windows
MMX Pentium 200MHz
or higher processor
Windows 98/95/NT 4.0/
2000/ME/XP
64 MB min.
20 MB min.
11*
256 or more colors (640 x 480 dot min.)
32,000 or more colors recommended
(Not applicable for 68K Macintosh)
For software operation : 60 MB
Required
Macintosh
PowerPC or higher
Mac OS 8.1 or higher
64 MB min.
For installation : 8 MB
*
When connecting by USB cable
Compatible
Personal
Computers
Windows
Windows 98/2000/ME/XP
pre-installed PC
Mac OS with built-in USB port
Macintosh
When using the floppy disk adapter or PC Card adapter
Windows
Compatible
Personal
Computers
*1
When you handle images, first make sure that you have enough free space on hard disk.
Windows 98/95/NT/2000/ME/XP
pre-installed PC
We do not guarantee the operation if the above OS is upgraded.
(Not applicable for 68K Macintosh)
Macintosh
PowerPC or higher
- 9 -
Getting Ready
When Using
Windows
When Using
Macintosh
Operations in
Image Expert
Page 12

Installation Procedure
Installing Image Expert
Insert the CD-ROM supplied with this software package into the CD-ROM drive.
The screen for selecting the display language appears.
Getting Ready
Windows
When Using
Macintosh
When Using
Image Expert
Operations in
Click “English”.
Click “Install Image Expert”.
Follow the on-screen instructions to continue the setup.
QuickTime is installed after Image Expert has been installed.
☞ About QuickTime
P. 8
➲
- 10 -
Page 13

Installation Procedure (continued)
Installing the USB Driver (for Windows 98 only)
Install this driver when the USB cable is used.
IMPORTANT
•
Install
the USB driver before
will not be installed properly.
Insert the CD-ROM supplied with this software package into the CD-ROM drive.
Click “English”.
Click “Install Driver”.
Follow the on-screen instructions to continue the setup.
connecting the USB cable. If you connect the USB cable first, the USB driver
Getting Ready
When Using
Windows
When Using
Macintosh
Operations in
Image Expert
- 11 -
Page 14

Installation Procedure (continued)
When the message “Install Shield Wizard Completed” is displayed, click “Restart
Now” to restart the personal computer.
Getting Ready
<Installing the USB driver (for Windows XP)>
After installing the USB driver and inserting the USB cable to the USB port for the first time, “Search New
Hardware Wizard” screen appears, click “Next”. The “Install Hardware” screen appears successively.
Be sure to click “Continue (C)”.
This screen appears when the USB device is inserted to the USB port for the first time, and the screen will not
appear from the second time.
Windows
When Using
Macintosh
When Using
Image Expert
Operations in
- 12 -
Page 15

Using USB Cable
To enable importing of images on the PDR-3310 to your personal computer, the PDR-3310 must be connected to
your personal computer by USB cable.
When you connect the PDR-3310 to your personal computer by USB cable, the connection can only be made
with both the PDR-3310 and your personal computer turned ON.
Connectable personal computer: Windows 98/2000/ME pre-installed machine
IMPORTANT
• If the camera’s power is turned OFF while image data is being transferred to the PC, the data may be damaged.
When the PDR-3310 is connected to the personal computer, use the AC adapter.
Connecting the USB Cable to the PC
Connect the camera and the PC with the exclusive USB cable.
Confirm the size of the USB jack. The smaller USB jack is for the main unit and the larger one is for the PC.
IMPORTANT
• Check the size of the USB jack. Connect the small end of the USB cable to the DIGITAL Terminal on the camera,
and connect the large end to the USB port on your personal computer.
For connecting, refer to the illustration on the next page.
Getting Ready
When Using
Windows
When Using
Macintosh
Operations in
Image Expert
- 13 -
Page 16

Using USB Cable (continued)
Getting Ready
To the DIGITAL terminal
Windows
When Using
Macintosh
When Using
Image Expert
Operations in
S3x
Insert until a
click is heard
DIGITAL
AUDIO
DC IN
To the USB terminal
Exclusive USB cable
To the USB
terminal
Personal computer
- 14 -
Page 17

Using USB Cable (continued)
“PC mode” is displayed on the LCD monitor when the USB cable is inserted to the camera, and operations can
be performed with the PC.
The self-timer LED blinks at this time.
PC mode
Connect one end of the USB cable to the DIGITAL terminal on the PDR-3310.
Connect the other end of the USB cable to the your personal computer or to the
USB port on the USB hub.
Download the images.
<To download all images>
In the Camio Viewer Startup Options screen, make sure that
“Copy all images from the Camera to the Computer” check
box is checked, and click OK.
All images stored on the PDR-3310 are downloaded to the
personal computer.
Getting Ready
When Using
Windows
When Using
Macintosh
Operations in
Image Expert
- 15 -
Page 18

Using USB Cable (continued)
The screen as below appears when the download is completed. Be sure to click “No”.
Getting Ready
After the images are downloaded to the album, they are displayed on the
right side of the monitor.
An album folder is created in the \MyDocuments\Image Expert Images folder
Windows
When Using
Macintosh
When Using
Image Expert
Operations in
using the current date as the folder name (standard setting).
☞ For details on playing movies
“Playing Movies” p.30
➲
- 16 -
Page 19

Using USB Cable (continued)
<To download selected images from the camera>
In the Camio Viewer Startup Options screen, make sure that
“View images in the Camera” check box is checked, and
click OK.
The images stored on the PDR-3310 are displayed on screen without being downloaded to the
personal computer’s hard disk. If you double-click an image, the Select Album screen appears.
Either select an album, or enter a new album name and click Open. When you do either of these, the
image you double-clicked is downloaded to the selected album and displayed.
☞ For details on playing movies
“Playing Movies” p.30
➲
Removing the USB cable
Follow the instructions below when removing the USB cable from the PC.
<For Windows Me>
Double click the “Remove Hardware” icon in the “Task Bar” at the bottom right of
the desktop screen.
Select “USB Disk” and click “Stop”.
Select “USB Disk” and click “OK”.
A message appears, click “OK”.
Remove the USB cable from the PC and camera.
- 17 -
Getting Ready
When Using
Windows
When Using
Macintosh
Operations in
Image Expert
Page 20

Using USB Cable (continued)
<For Windows 2000/XP>
Double click the “Remove Hardware” icon in the “Task Bar” at the bottom right of
the desktop screen.
Getting Ready
Windows
When Using
Macintosh
When Using
Image Expert
Operations in
Select “Digital Camera USB Device 1” and click “Stop”.
Select “Digital Camera USB Device 1” and click “OK”.
The message “You can remove the Hardware safely” appears, then click “OK”.
Remove the USB cable from the PC and camera.
<For Windows 98>
Turn the camera power Off and remove the USB cable.
- 18 -
Page 21

Installation Procedure
Installing Image Expert
Insert the CD-ROM into the CD-ROM drive.
The Install Image Expert icon appears on the desktop.
Double-click the Install Image Expert icon.
Double-click the “Install Image Expert” installer.
The screen for selecting the display language appears.
Select “English” and click OK.
Follow the on-screen instructions to continue the setup.
QuickTime is installed after Image Expert has been
installed.
☞ About QuickTime
Memo
• You can also install Image Expert from floppy disk.
Click the Make Floppies button in the screen displayed at step 3.
Follow the on-screen instructions to continue the setup.
➲
P. 8
Getting Ready
When Using
Windows
When Using
Macintosh
Operations in
Image Expert
- 19 -
Page 22

Installation Procedure (continued)
Installing the USB Driver
The PDR-3310 conforms with USB Mass Storage Class.
When a Mass Storage Class-compliant USB driver is already installed on the Macintosh, the USB driver
need not be installed again.
Getting Ready
Windows
When Using
Macintosh
When Using
Image Expert
Operations in
• To check if a Mass Storage Class-compliant USB driver is already installed
1. Connect the USB cable to the DIGITAL terminal on the camera.
2. Connect the USB cable to the USB port on the Macintosh or USB hub.
3. Set the mode dial on the camera to
If the drive “untitled” appears on the Desktop, this indicates that a Mass Storage Class-compliant
USB driver is already installed. The USB driver need not be installed from the CD-ROM provided. The
already installed USB can be used as it is.
• If the drive does not appear on the Desktop
Install the USB driver provided in the CD-ROM.
IMPORTANT
• Do not install the USB driver provided in the CD-ROM on a Macintosh on which a Mass Storage
Class-compliant USB driver is already installed.
.
- 20 -
Page 23

Installation Procedure (continued)
<Installing procedure (for Mac OS 8.6 only)>
Turn the power of computer on to start up Macintosh.
Insert the supplied CD-ROM into the CD-ROM drive on your computer.
Double-click the CD-ROM drive icon displayed on the screen to open the
window.
Double-click the [DRIVER] folder to open the window.
Double-click the [UDO (J)] folder displayed on the screen to open the window,
then copy the files below to the system folder.
After the copy is completed, restart your computer.
With the above procedures, the USB driver installing is completed.
Getting Ready
When Using
Windows
When Using
Macintosh
Operations in
Image Expert
- 21 -
Page 24

Using USB Cable
To enable importing of images on the PDR-3310 to your personal computer, the PDR-3310 must be connected to
your personal computer by cable.
When you connect the PDR-3310 to your personal computer by USB cable, the connection can be made with
both the PDR-3310 and your personal computer turned on.
IMPORTANT
Getting Ready
• If the camera’s power is turned off while image data is being transferred to the PC, the data may be damaged. When
the PDR-3310 is connected to the personal computer, use the AC adapter.
Connectable personal computer: Macintosh with built-in USB port
Connect one end of the USB cable to the DIGITAL terminal on the PDR-3310.
Windows
When Using
Macintosh
When Using
Image Expert
Operations in
Connect the other end of the USB cable to the your personal computer or to the
USB port on the USB hub.
Start up Image Expert.
Click “Connection” in the Camera menu.
Set Connect Via to “USB” and click OK.
- 22 -
Page 25

Using USB Cable (continued)
IMPORTANT
• When the USB driver is used simultaneously with other USB drivers, the memory card in the PDR3310 sometimes is not mounted on the desktop. If this happens, use the USB driver with only the
Macintosh and the PDR-3310 connected.
• Before you remove memory card from the PDR-3310, be sure to drag the memory card icon on the
Macintosh desktop to Trash, and wait for the confirmation dialog box to appear.
Click “View image” in the Camera menu.
The images in the camera are displayed.
Double-click the image that you want to load
to your personal computer.
The Select Album screen is displayed.
Getting Ready
When Using
Windows
When Using
Macintosh
Operations in
Image Expert
- 23 -
Page 26

Using USB Cable (continued)
Either select the album, or enter the album name and
click OK.
The image is downloaded to your personal computer, and is
displayed on the album window.
Getting Ready
Windows
When Using
Macintosh
When Using
Image Expert
Operations in
Double-click an image on the album to display it at full size.
<For users of Mac OS>
Drag the folder “Untitled” on the desktop screen into the trash can. Remove the USB cable after the
message “You Can Remove the Hardware Safely” appears.
- 24 -
Page 27

Button Functions
• New Album button ( )
This button displays the New Album screen.
When you create a new album name, a window opens so that you can add images.
• Open Album button ( )
This button displays the Open Album screen.
It allows you to open any specific album from the albums currently saved on your personal computer.
You can also easily browse albums on other drives or devices connected on a network.
• Open Image button (
This button allows you to open any specific image from the images currently saved on your personal
computer.
You can also easily browse images on other drives or devices connected on a network.
You can use these functions for editing still images only.
• Cut/Copy/Paste button (
This button is used to cut, copy or paste images.
Memo
• Drag-and-drop an image to copy it to another album.
• To move an image to another album, drag-and-drop the image with the Shift key held down.
• Slide Show button ( )
This button successively displays all images in an opened album using the slideshow feature.
You can start and stop the slideshow and set slideshow options using the buttons on the tool bar.
• Quick Fix button ( )
This button is used for automatically fixing images or creating even better-looking images.
This button is ideal for when you do not know which type of correction to make to improve an image or
when you are unfamiliar with how to correct images.
)
)
Getting Ready
When Using
Windows
When Using
Macintosh
Operations in
Image Expert
- 25 -
Page 28

Button Functions (continued)
• Corrections button ( )
Pressing this button displays a menu tab dialog box in which you can fine-adjust images.
This button allows you to correct Contrast/Brightness, Color and Hue/Saturation, and adjust Sharpness and
Equalization.
Before you apply the results of editing an image, you can check the differences between “before” and
Getting Ready
“after” images using the sliders in split windows.
To confirm a correction on an image at full size without quitting correction, click Apply.
To return an image to its original state, click the Undo button in the Edit menu.
• Crop button (
Windows
When Using
Macintosh
When Using
Image Expert
Operations in
This button allows you to trim unwanted parts of an image and leave only the required part. This is called
)
“cropping.”
First, open the image you want to edit using the Open Album or Open Image buttons.
To select the required part of the image, drag across the image using the drawing tool (Select Rectangle,
Select Ellipse, Select Freehand).
The area you selected will be indicated by a dotted frame.
To change the size of the dotted frame area, click the outside of the currently selected area to cancel the
selection, and repeat the above operation.
When you have decided on the selected area, click the Crop button.
The unwanted part of the image will be cropped and the required part of the image will remain on screen.
- 26 -
Page 29

Appending Still Images With Audio Files
You can append still images with audio files.
Click the still image you want to append the audio file to.
Click Record Audio in the Annotation menu.
The Record screen appears.
Click Record New.
This starts recording.
Click Stop.
This stops recording.
You can continue recording by clicking the Record Additional button.
Recorded audio files are saved to the same directory as the still image file
under the name “image file name.wav”.
Still images appended with an audio file are indicated by musical note mark
at the bottom right of the still image.
Getting Ready
When Using
Windows
When Using
Macintosh
Operations in
Image Expert
- 27 -
Page 30

Appending Still Images With Audio Files (continued)
Editing Audio Files
Click Edit Audio in the Annotation menu.
The waveform of the audio file is displayed.
Getting Ready
Windows
When Using
Macintosh
When Using
Image Expert
Operations in
Use Cut, Copy, Delete and other commands in the Edit menu to edit the audio
file.
☞ For details on Image Expert
Please refer to the Quick Tour under Image Experts’ Help menu.
➲
- 28 -
Page 31

Pasting Still Images to Other Applications (Windows)
If you have another application that is OLE-compatible, you can easily paste still images in the Image Expert and
Camio Viewer album’s into that application by dragging-and-dropping them.
If you double-click the still image pasted into the OLE-compatible application, the application will be replaced
with the Image Expert menu bar and tool bar, and you can correct the still image.
If the application is not OLE-compatible, you can paste the still images in the Image Expert and Camio Viewer
album’s by using the Copy/Paste command.
IMPORTANT
•“OLE” stands for Object Linking and Embedding.
Left-click the still image to copy from among the still images in the album.
Drag the still image to another application with the left mouse button held down.
Move the mouse cursor to the copy destination, and release the left mouse
button to drop the still image in the application.
Getting Ready
When Using
Windows
When Using
Macintosh
Operations in
Image Expert
- 29 -
Page 32

Playing Movies
You can play imported movies with Image Expert.
Double click on the movie in the album.
Start Movie Projector.
Getting Ready
Windows
When Using
Macintosh
When Using
Image Expert
Operations in
Click on Movie Projector’s play button .
Start playing the movie.
While the movie is playing, the play button become the pause button . Click on the pause button
to stop play, and the pause button becomes the play button .
Clicking on the step-one-frame button allows you to play one frame at a time. There are two types
of step-one-frame buttons, forward and backward. Clicking on these buttons advances or reverses the
movie one frame.
- 30 -
Page 33

Global Contacts
Country/Region
Canada
China Hong Kong
France
Germany
Italy
Singapore
Switzerland
United Kingdom
United States
Toshiba America Information
Systems, Inc.
Toshiba Hong Kong Ltd.
Toshiba Systems (France)
Toshiba Europe Gmbh
Toshiba Consumer Products (Italia)
Toshiba Singapore Pte.
Toshiba Europe Gmbh Swiss
Branch
Toshiba (UK) Ltd.
Toshiba America Information
Systems, Inc.
Company name
Phone number
(800) 829-8318
2956-0222
01 47 28 28 50
(02131) 158 01
(039) 6099342
270-7776
01-946 07 77
(01932) 828828
(800) 829-8318
dsc.support@tais.toshiba.com
e-mail
NA
consommateur@toshiba-tsf.com
consumer@toshiba-teg.com
toshiba.italia@toshiba-tuk.com
NA
info@toshiba.ch
enquiries@toshiba-tuk.com
dsc.support@tais.toshiba.com
www.toshiba.com/taisisd
Website
www.toshiba.com.hk
www.toshiba.fr/produits/video/index.htm
www.toshiba.de/consumer
www.toshiba.it/
www.cp.toshiba.com.sg
www.toshiba.ch/
www.toshiba.co.uk
www.toshiba.com/taisisd
Page 34

For customers in the U.K.
Website for digital cameras: www.toshiba.co.uk
Technical support is available on-line, or by calling (0115) 9766958.
9.00am to 5.00pm Monday to Friday except bank holidays,
or e-mail us at: enquiries@toshiba-tuk.com
Toshiba European Service Centre
Units 6&7 Admiralty Way, Camberley, Surret, GU15 3DT, U.K.
For customers in the U.S.A. and Canada
Register your product on-line at www.toshiba.com/taisisd
Technical support is available on-line, or by calling (800) 829-8318.
8:00 a.m. to 5:00 p.m. EST, Monday to Friday except holidays,
or e-mail us at: dsc.support@tais.toshiba.com
Toshiba America Information Systems, Inc.
Imaging Systems Division
9740 Irvine Boulevard, Irvine, California 92618-1697
* Address and telephone number are subject to change without notice.
* For customers outside of Canada, U.K. and the U.S.A., please refer to the "Global Contacts"
before this page and contact the nearest Toshiba company for assistance.
 Loading...