

Page 1
TOSHIBA DVD VIDEO RECORDER
DIGITAL VIDEO
H
Introduction
D-R4SU/D-R4SC/D-KR4SU
DVD VIDEO RECORDER
D-R4SU
D-R4SC
D-KR4SU
OWNER’S MANUAL
OPERATIONS
Recording
Playback
Editing
Function setup
Printed on 70% Recycled Paper
Printed in China
GUIDE
Read “INSTALLATION GUIDE” first.
P000416410
PM0020461012
© 2005 Toshiba Corporation
Others
Page 2

Introduction
Table of Contents
Introduction
Caution for safety................................................ 4
About this product .............................................. 5
Choosing a disc .................................................. 6
Index to parts and controls .............................. 12
Front panel ........................................................... 12
Rear panel ............................................................ 14
Remote control ..................................................... 16
Display ................................................................. 18
Before operating this recorder ........................ 20
Key operation - EASY NAVI & QUICK MENU .. 23
Recording
Before recording ............................................... 26
Initializing a DVD-RAM/RW disc (Logical format) .... 28
DVD-RAM physical format ..................................... 29
Entering characters ............................................... 30
Selecting a disc according to purposes of use
(DVD-RAM/DVD-R/RW) ...................................... 32
Setting for recording on a DVD-R/RW disc in
Video mode ........................................................ 33
Recording a TV program ................................... 34
Recording an external source.......................... 38
Programming a recording ................................ 41
Others ................................................................. 47
To delete recorded content .................................... 47
To protect recorded content ................................... 47
Technical information ............................................ 48
Playback
Information on playback ................................... 50
Playing recorded contents ............................... 51
Playing a DVD video disc ................................. 55
Locating a title using the top menu ........................ 56
Pausing a TV broadcast to resume later
(Pause TV) .......................................................... 57
Playing a TV program currently being
recorded (Chase Play) ...................................... 58
Playing at various speeds ................................ 59
Playing in fast reverse or fast forward ..................... 59
Skipping to the next/previous chapter or track ........ 60
Playing in slow-motion .......................................... 60
Playing frame by frame ......................................... 61
Viewing still pictures
(Playing a disc that contains still pictures)
Locating by entering the number .................... 62
Locating by entering the number of a desired
section
Locating a specific point by entering its elapsed time
(Time Search)
Selecting the camera angle .............................. 64
Selecting subtitles ............................................ 65
Zooming a picture ............................................. 66
Selecting the sound .......................................... 67
Viewing JPEG files ............................................ 70
JPEG files compatibility ........................................... 71
Playing MP3/WMA files ..................................... 72
Playable files ........................................................ 73
Pausing a TV broadcast
(Freeze function) ............................................... 74
Checking the current status and settings ...... 75
Operational status and setting details .................... 75
Using the time bar ................................................. 76
Functions in Quick Menu ................................. 77
................................................................. 62
....................................................... 63
.............. 61
Editing
Before editing .................................................... 82
Creating chapters.............................................. 84
Playlist editing
(Collecting desired scenes) ............................. 89
Creating thumbnails
(Changing the picture on CONTENT MENU) .. 93
High speed dubbing
(Dubbing only a specified part) ....................... 96
Deleting selected items
(Deleting multiple specified parts) .................. 98
DVD-Video finalizing process ........................ 100
2
Page 3

Function Setup
Customizing the function settings ................ 106
DVD player settings............................................. 110
Picture/Audio settings ......................................... 113
Display settings .................................................. 115
Operational settings ............................................ 116
DVD recorder operation....................................... 117
Management settings .......................................... 119
Others
Before calling service personnel ................... 122
Error codes on the display window ............... 124
Recording duration ......................................... 125
Language code list.......................................... 126
Specification .................................................... 127
Limited United States Warranty ..................... 128
CANADIAN WARRANTY INFORMATION ....... 130
Introduction
Recording
Playback
Editing
Function setup
Others
3
Page 4

Introduction
Introduction
Caution for safety
Read “SAFETY PRECAUTIONS”, “IMPORTANT SAFETY INSTRUCTIONS”,
and all other sections of the “INSTALLATION GUIDE” that came with this
product prior to reading this “OPERATIONS GUIDE”.
4
Page 5
Introduction
About this product
Introduction
Some differences
Because of its recording capacity, this DVD recorder
operates more like a computer and differently than a
standard DVD player. In addition to containing a
microprocessor, it contains an operating system,
random access memory (RAM), and a DVD-RAM/R/RW
drive. The operating system includes software that is
transferred to the RAM when the machine is turned on
and at other times during operation. This transfer can
take time. Therefore, when you turn the DVD recorder
on, it may take a little while before it is ready to use.
Likewise, other functions may not be performed as
quickly as they would on other AV equipment.
Additionally, accessing those programs (or deleting a
program from a DVD-RAM or DVD-RW disc) may take
more time. Please take these factors into consideration
as you use the DVD recorder.
Playback Restrictions
This owner’s manual explains the basic instructions for
this recorder. Some DVD video discs are produced in a
manner that allows specific or limited operation during
playback. As such, the recorder may not respond to all
operating commands. This is not a defect in the
recorder. Please refer to the notes on compatible discs
later in this Introduction and to the discussion of DVD
playback and features later in this manual.
Compatibility
In isolated cases, a disc bearing the DVD or CD logo
may not fully and properly play back all features or as
intended by the creator of the disc. This can be due,
among other reasons, to problems and errors that can
occur during the creation or recording of DVD and other
software and the manufacture of software discs
(including blank discs). Moreover, because of
variations in the quality of discs, this recorder may not
be able to record on all discs that bear a DVD-RAM,
DVD-R or DVD-RW logo, but you should not encounter
difficulty if you use only high quality recordable DVD
discs. Additionally, discs recorded in this device may not
operate properly in other DVD players, recorders and/or
personal computer drives. If you happen to encounter
difficulties playing or recording a DVD disc or playing a
CD disc, please feel free to call our Customer Service
Hotline at 1-800-319-6684.
Recording
Playback
Editing
Function setup
” may appear on the TV screen during operation.
“
” means that the operation is not permitted by the
“
recorder or the disc.
Recording Restrictions and Copyright
Copy-protected contents of DVD-Video discs, VIDEO
CDs or audio CDs on the market cannot be copied on
this recorder. Contents without copy protection should
be copied or edited only in accordance with applicable
copyright laws, which may restrict copying or editing.
Contents that permit single copying (copy once
contents) can be recorded onto DVD-RAM discs, with
some dubbing and editing restrictions. DVD-R/RW discs
cannot record these contents.
The unauthorized recording, use, distribution, or
revision of copyrighted materials including, without
limitation, television programs, videotapes, and DVDs, is
prohibited under the Copyright Laws of the United
States and other countries, and may subject you to civil
and criminal liability.
Others
5
Page 6
Introduction
Choosing a disc
There are many types and formats of discs. Please use the following information to select an
appropriate disc.
Notes
• Handle the disc according to the disc instruction manual.
• Toshiba cannot guarantee that all discs bearing the DVD or CD logos will operate as expected. Additionally, Toshiba cannot
guarantee that discs recorded in this device will operate properly in other DVD players, recorders and/or personal computer
drives.
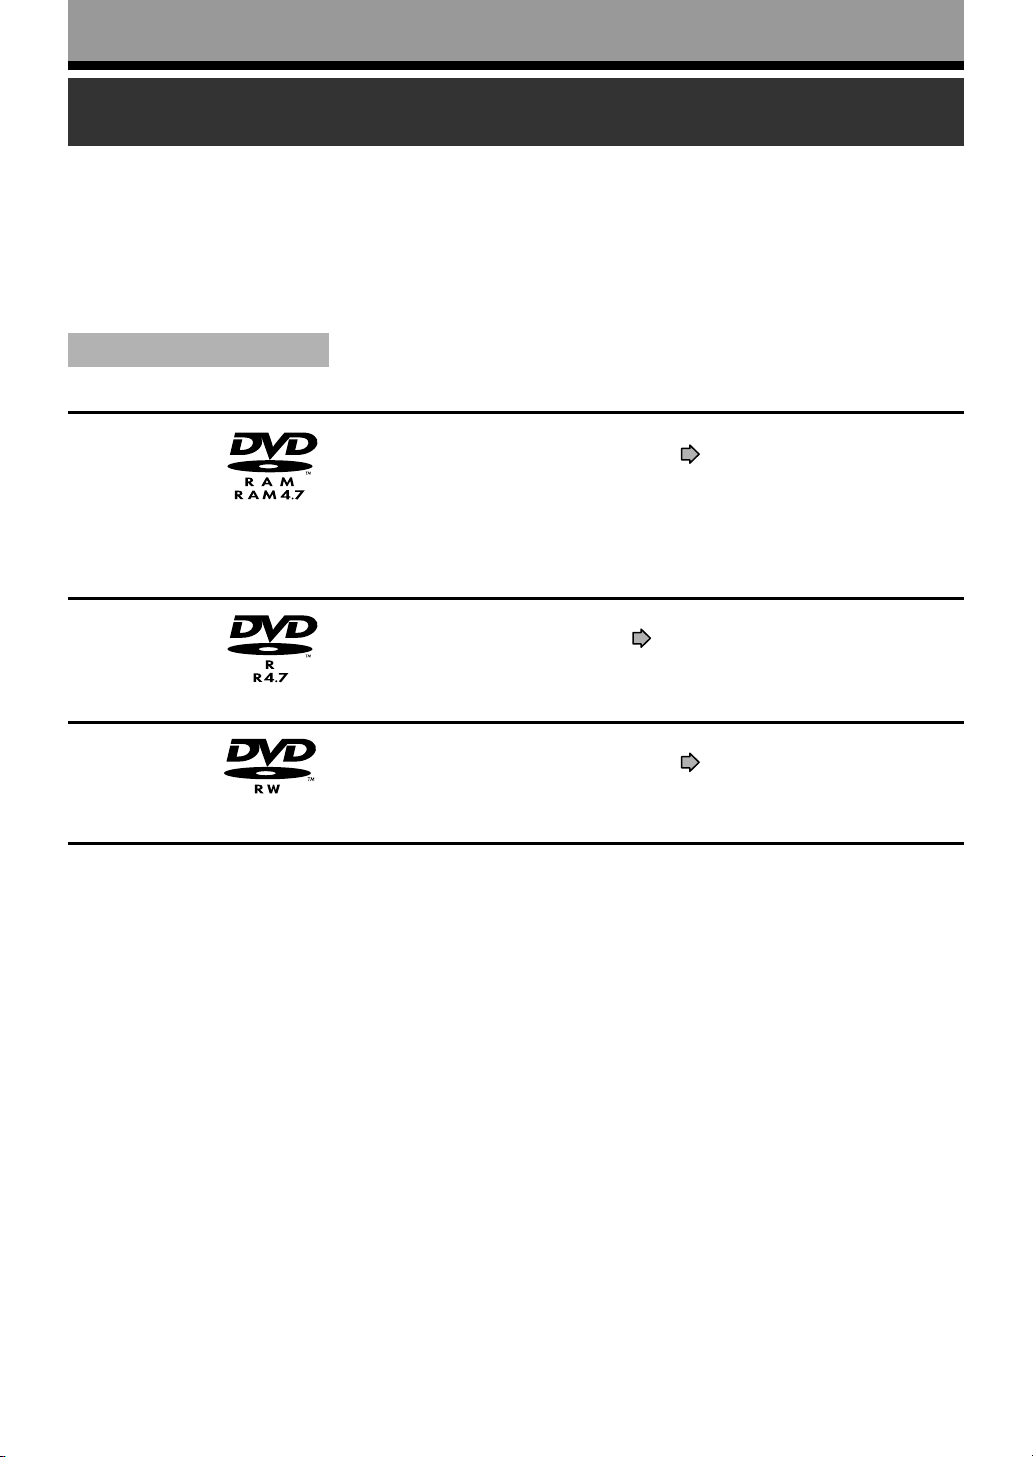
For recording / playback
Disc
DVD-RAM
DVD-R
DVD-RW
Mark Specification Remarks
• Single sided 4.7GB (12cm (43/4 in.))
• Double sided 9.4GB (12cm (4
• 4.7GB For General Ver.2.0
(12cm (4
• Ver. 1.1 or later (12cm
(4
3
/4 in.))
3
/4 in.))
3
/4 in.))
Read carefully the section “On DVD-RAM
discs” (
Select a DVD-RAM disc that shows a
statement on its package such as “this disc
can be used with video recorders and drives
compatible with 4.7GB DVD-RAM discs” or
“this disc can copy images that permit single
copying.”
Read carefully the section “On DVD-R discs”
page 9).
(
Depending on the disc status or the
recording equipment, playback of the disc
may not be possible on this recorder.
Read carefully the section “On DVD-RW
discs” (
Depending on the disc status or the
recording equipment, playback of the disc
may not be possible on this recorder.
page 8).
page 9).
Using different disc types for different purposes
DVD-RAM discs for your personal library
DVD-RAM discs comply with the global standard DVD-VR (Video Recording) format, and are optimized for recording of
TV programs. You can rewrite repeatedly without deterioration of an image quality, erase unnecessary parts, divide a
chapter, or specify playback area by frame. Its cartridge is suitable for a longer-term storage and family use, and its
large capacity of 9.4 GB allows more recording space.
DVD-R discs when creating your own original discs for distribution
DVD-R discs are designed to comply with the global standard DVD-Video format, and can be recorded only once.
DVD-R discs are convenient when you edit your original content (recorded personal events such as a wedding party)
with this recorder, transfer them to the recorder and make copies to send to your friends or relatives. The discs can be
played on other compatible DVD players. DVD-RW discs, which are rewriteable, can be used as well.
* DVD-R and DVD-RW may not be the best suited format for recording TV programs. Because of the way the discs are
formatted, it may not be possible to edit or divide the program as you may prefer, to record secondary languages, or
programs that are copy protected in a way that allows only one copy. (NOTE: “Copy once” protected programs
generally can be recorded to DVD-RAM discs.)
* This recorder records on a DVD-R/RW disc in DVD-Video format only. In DVD-VR format, recording is not possible.
We cannot guarantee that DVD-RAM/R/RW discs recorded on this recorder will be playable on all DVD recorders/
players. Similarly, there is no guarantee that all DVD-RAM/R/RW discs recorded on other recorders will be playable on
this recorder.
6
Page 7
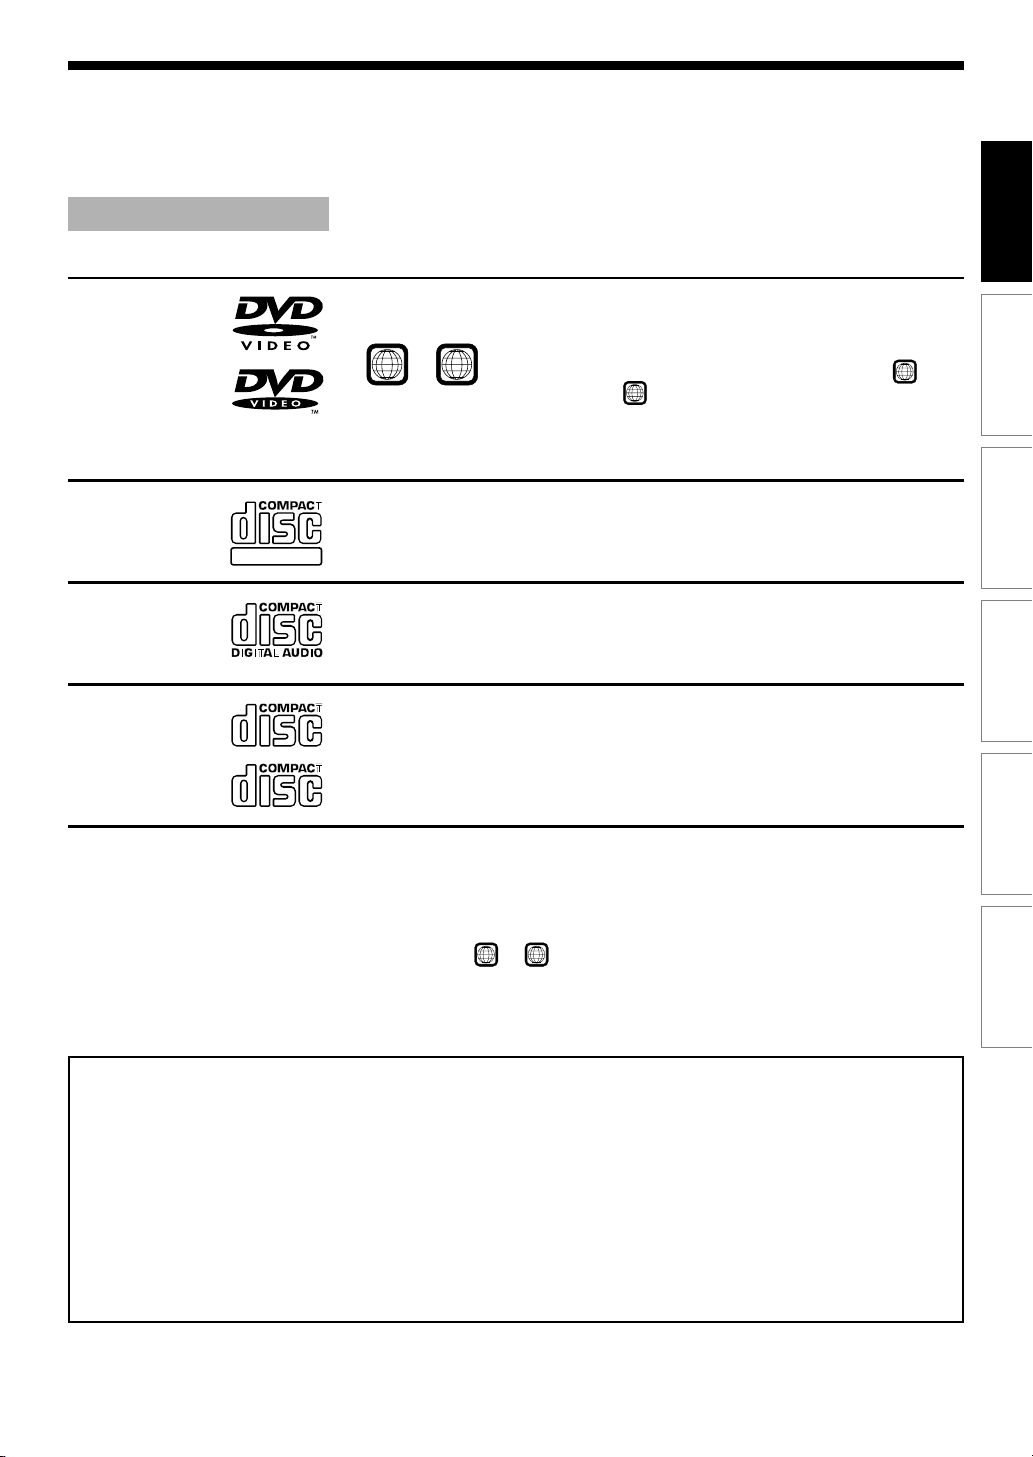
For playback only
Disc Mark Specification Remarks
Introduction
DVD video
disc
VIDEO CD
DIGITAL VIDEO
Audio CD
CD-R
• 12cm (43/4 in.)
• Region number
• Color system: NTSC
• 12cm (43/4 in.)
• Color system: NTSC
• Version 1.1 and 2.0
• 12cm (4
• 12cm (43/4 in.)
• CD-DA (audio CD) format
or
3
/4 in.)
ALL
1
The region number of this DVD recorder is 1.
If region numbers, corresponding to a
specific playable area, are printed on your
DVD video disc and you do not find
ALL
, or the disc is encoded to permit
playback only in regions other than Region 1,
disc playback will not be allowed by the
recorder.
Depending on the disc status, playback may
not be possible.
1
CD-RW
• You cannot play discs other than those listed above.
• You cannot play non-standardized discs even if they may be labeled as above.
• You cannot play discs with specialized encoding (such as SACD discs) or the DVD audio portions of DVD Audio
discs.
• This recorder uses the NTSC color system, and cannot play DVD video discs recorded in any other color system
(PAL, SECAM, etc.), even if they have region marks
• Toshiba cannot assure that all discs bearing the DVD or CD logos will operate as expected. Please see the
discussion of compatibility on page 5.
ALL
1
or
.
Recording
or
Playback
Editing
Function setup
Others
• Toshiba is not liable for any damage or loss caused directly or indirectly by the malfunction of this recorder,
including, without limitation, any one of the following:
• Failure to record contents intended to be recorded by the consumer.
• Failure to edit contents as intended by the consumer.
• When a DVD-RAM/R/RW disc created on this recorder is used (e.g., insertion, playback, recording or editing)
in another DVD player, recorder or personal computer drive.
• When a DVD-RAM/R/RW disc that is used in the manner described in the immediately preceding bullet point is
used again in this recorder.
• When a DVD-RAM/R/RW disc that was recorded in another DVD recorder, or in a personal computer drive is
used in this recorder.
• Discs recorded in this recorder may not operate as expected on other DVD players, recorders or personal
computer drives.
7
Page 8
Introduction
Choosing a disc (Continued)
On DVD-RAM discs
Use only DVD-RAM discs that comply with DVDRAM standard Version 2.0, 2.1 or 2.2.
The recorder cannot record on a disc formatted in any
other standard. When using such a disc, initialize it by
using the disc-format function of this recorder.
The recorder may not record, dub, or edit some DVDRAM discs, because they are edited/recorded with
another manufacturer’s equipment or PC, contain a
large number of titles, or have little remaining capacity.
Also, a DVD-RAM disc may not be edited or recorded
if its title contains still pictures.
DVD-RAM discs formatted in UDF2.0 on a PC are not
compatible with this recorder. Before using these
discs, initialize them on this recorder.
This recorder complies with current copyright
protection technology and can copy a disc only when
the disc permits copying once. When there is no
indication on the disc, copying will not be allowed.
DVD-RAM discs with cartridges are
recommended for recording.
Two types of DVD-RAM discs are
available: ones with cartridges and ones
without cartridges. You can use either of
them with this recorder, but the former
ones are recommended.
In order to record highly detailed data, make sure the
disc is clean. DVD-RAM discs with cartridges are
easier to handle in this regard.
Do not open the cartridge shutter. The disc may not
play, or may not be recorded or edited once it
becomes dirty.
There are two types of DVD-RAM cartridges;
removable (TYPE 2/4) and not removable (TYPE 1). It
is recommended you do not remove the disc even
when you can.
Refer to the instruction manual that comes with the
disc if it is absolutely necessary to remove the disc.
Some commercially available cartridge discs cannot
be recorded or edited once the inside discs are
removed.
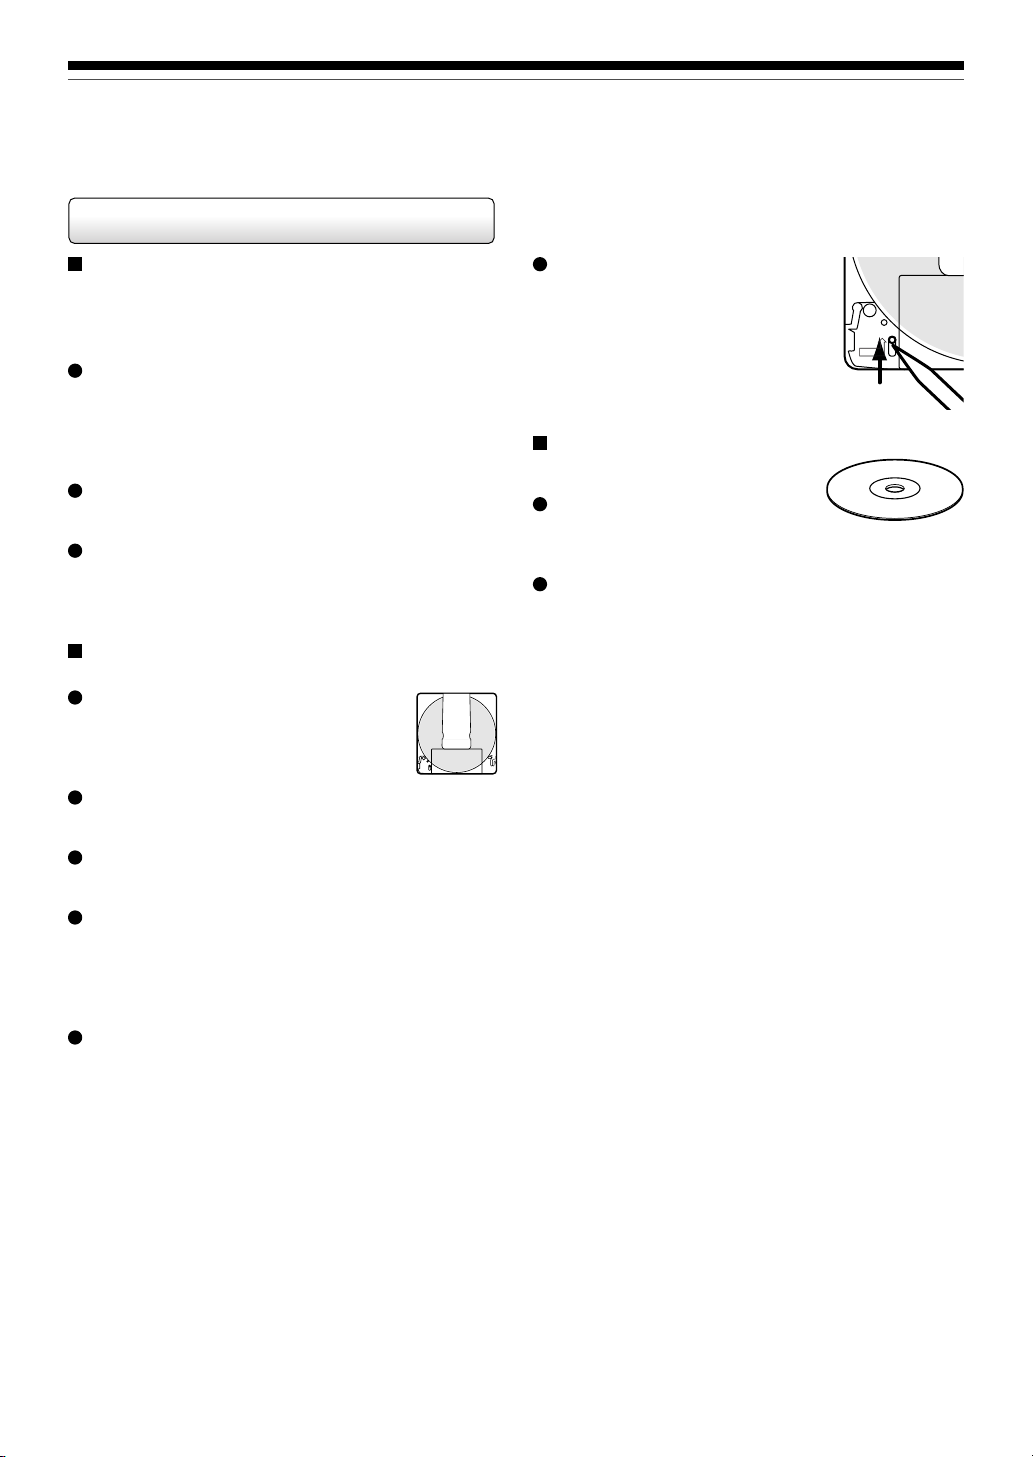
To protect recorded contents
Slide the write-protect tab to
“PROTECT” with something small
enough. The disc can play, but
cannot be edited or erased. Refer to
the instructions that come with the
disc.
When using a disc without a
cartridge (commercially
available discs)
Discs without cartridges can easily
attract fingerprints and dust, which
is the reason they are not recommended. If you cannot
avoid using them, handle with proper care.
When you write in a title column on a disc, use a pen
with a soft tip. Do not use a pen with a hard tip, such
as a ballpoint pen.
Recommended discs
The following discs have been tested with this recorder:
9.4 GB double-sided cartridge: Panasonic 2X, 3X
4.7 GB single-sided cartridge: Panasonic 2X, 3X
PROTECT
8
Page 9
Introduction
On DVD-R discs
Standards
DVD-R for General Ver.2.0 discs can be used for
recording and playback.
Discs compatible with 2X speed recording (labeled
Ver.2.1/2X etc.) and discs compatible with 4X speed
recording (labeled Ver.2.1/4X etc.) can also be used.
Select discs labeled “for video,” “for recording,” “120
min.” etc.
Recording conditions
Images for which copying is prohibited or restricted
(copy once or copy prohibited) cannot be recorded.
Even if the disc is labeled as CPRM compatible, this
recorder can only be used to record copy-free
material.
Recommended disc
That’s (Taiyo-Yuden) 4X
maxell 4X
TDK 4X
On DVD-RW discs
Standards
Discs labeled DVD-RW Ver.1.1 or 1.2 can be used.
Discs compatible with 2X speed recording (labeled
Ver.1.1/2X etc,) can also be used.
Select discs labeled “for video,” “for recording,” “120
min.” etc.
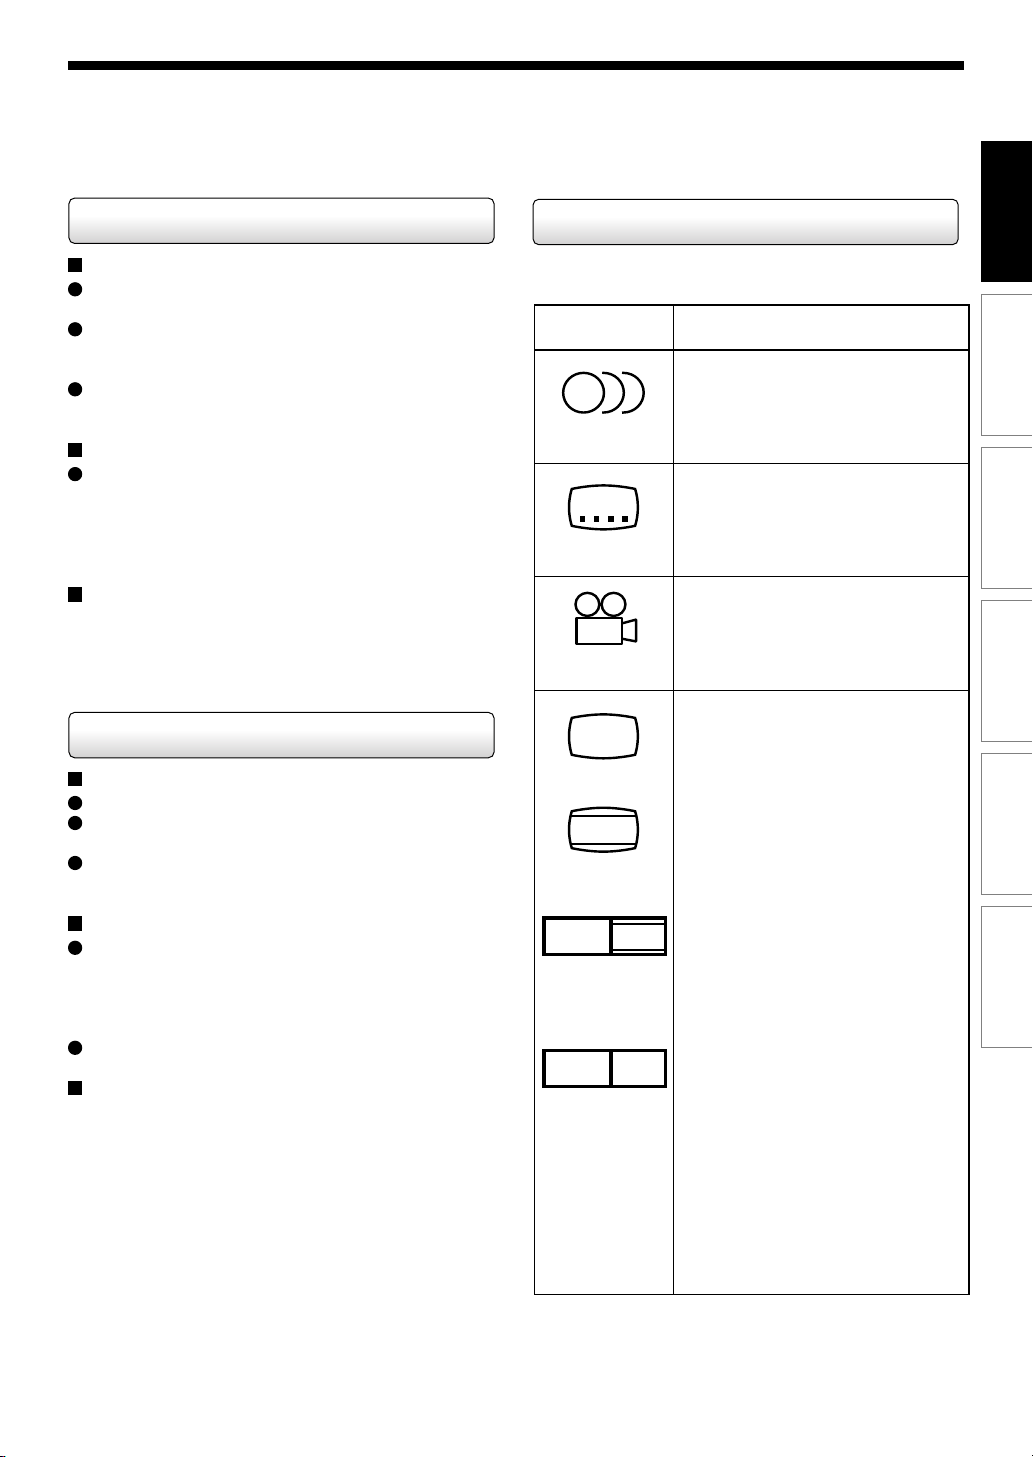
Marks on DVD video discs
The following are examples of marks and the meanings.
Mark Meanings
2
2
3
4:3
LB
Number of audio streams
recorded in the disc.
(2 streams such as English and
Japanese in this example.)
Number of subtitle languages
recorded in the disc.
(2 subtitle languages are
recorded in this example.)
Number of camera angles
recorded in the disc.
(3 camera angles are recorded in
this example.)
Pictures are recorded in the
standard picture shape
(4:3 aspect ratio).
Pictures are recorded in the letter
box picture shape (4:3 aspect
ratio with horizontal black bars in
the top and bottom of pictures).
Recording
Playback
Editing
Function setup
Recording conditions
Images for which copying is prohibited or restricted
(copy once or copy prohibited) cannot be recorded.
Even if the disc is labeled as CPRM compatible, this
recorder can only be used to record copy-free
material.
DVD-VR mode recording is not possible.
Recommended discs*
JVC 2X
*Operation has been confirmed with recommended discs
and tested disc, but some other discs may not be
usable.
16:9 LB
16:9 PS
Pictures are recorded in the 16:9
wide picture shape.
TVs with 4:3 aspect ratio will
display them in the letter box
style.
Pictures are recorded in the 16:9
wide picture shape.
TVs with 4:3 aspect ratio will
display them in the pan scan style
(one or both sides of pictures
are cut).
Actual picture shape may vary
depending on the aspect ratio or
mode selection of the TV.
Others
9
Page 10
Introduction
Yes
Choosing a disc (Continued)
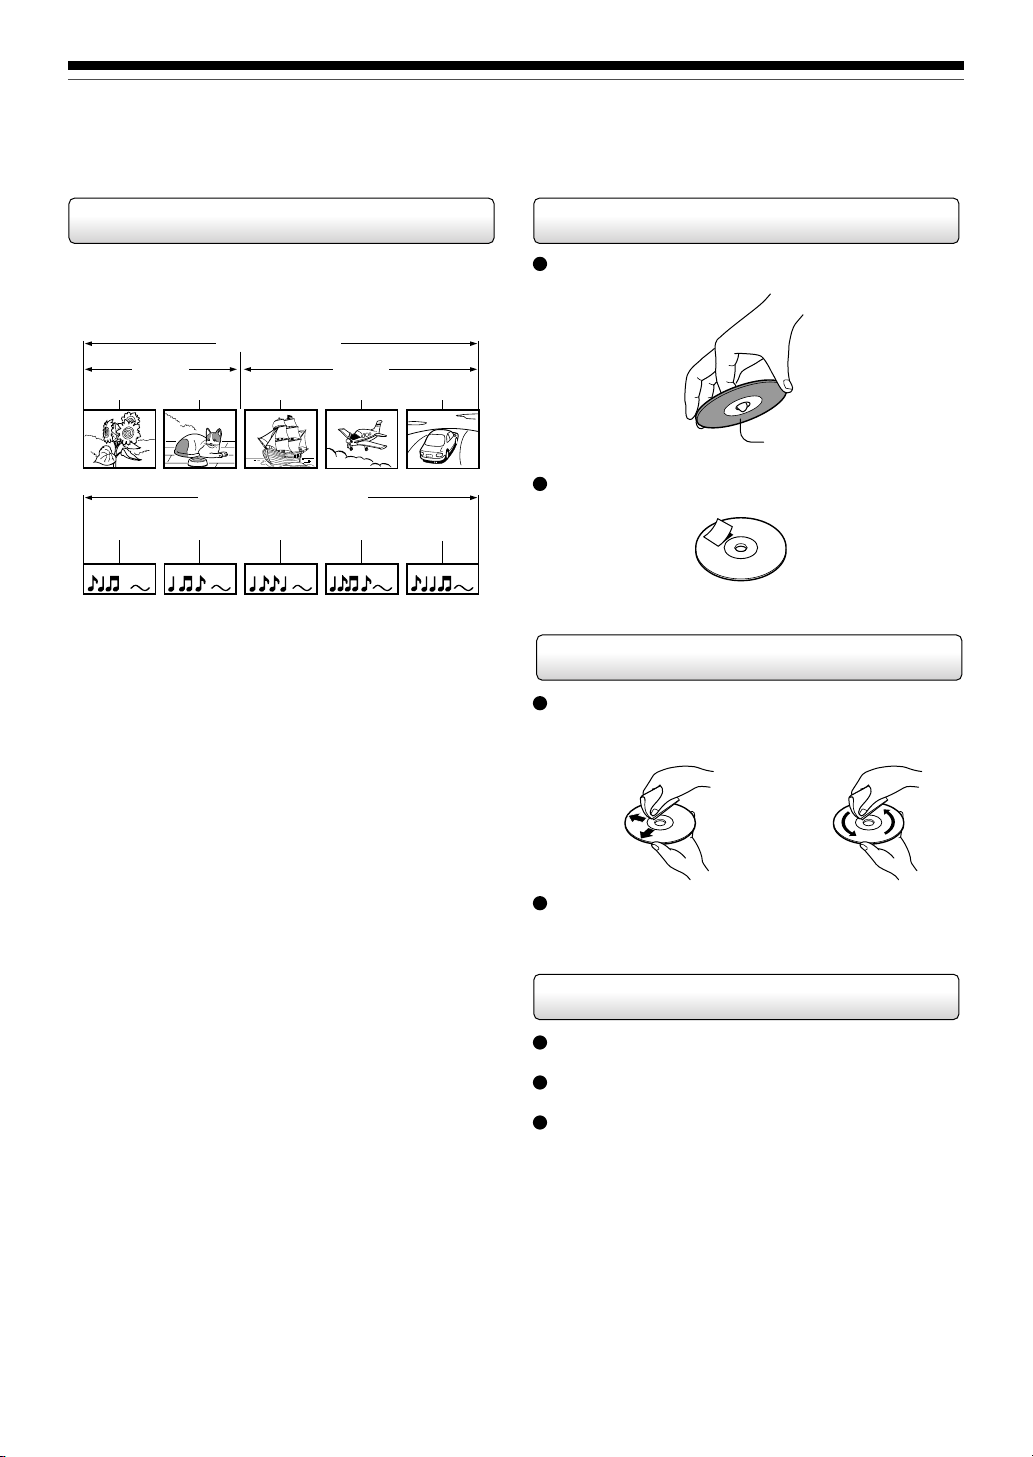
Structure of disc contents
Normally, DVD video discs are divided into titles, and the
titles are subdivided into chapters.
VIDEO CDs/audio CDs are divided into tracks.
DVD video disc
Title 1 Title
Chapter 2 Chapter 1 Chapter 2 Chapter 3Chapter 1
VIDEO CD / audio CD
Track 1 Track 2 Track 3 Track 4 Track 5
Title: Divided contents of a DVD video disc.
Roughly corresponds to a story title in short
stories.
Chapter: Divided contents of a title. This corresponds
to a chapter in a story.
Track: Divided contents of a VIDEO CD or an audio
CD.
Each title, chapter, or track is assigned a number, which
is called “title number”, “chapter number”, or “track
number” respectively.
Some discs may not have these numbers.
2
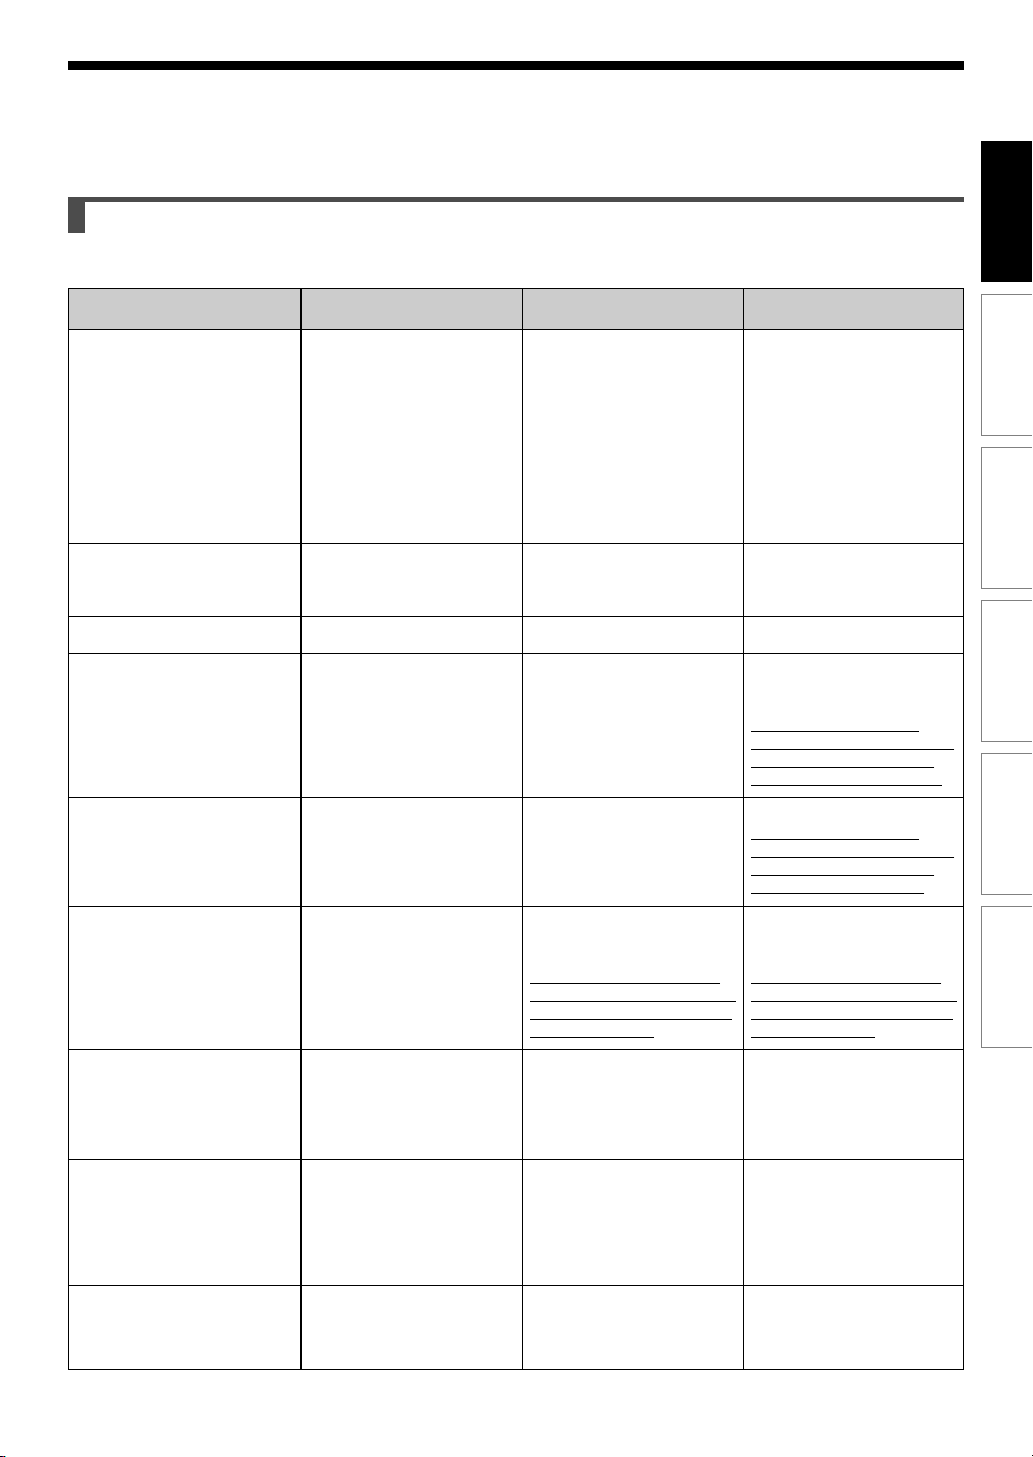
On handling discs
Do not touch the playback side of the disc.
Playback side
Do not stick paper or tape to discs.
No
On cleaning discs
Fingerprints and dust on the disc cause picture and
sound deterioration. Wipe the disc from the center
outwards with a soft cloth. Always keep the disc clean.
Yes No
When you record on a DVD-RAM/R/RW disc, one
recording will always equal one title. You can divide a title
into several chapters by marking borders in it to facilitate
scene search.
10
Do not use any type of solvent such as thinner,
benzine, commercially available cleaners or antistatic
spray for vinyl LPs. It may damage the disc.
On storing discs
Do not store discs in a place subject to direct sunlight
or near heat sources.
Do not store discs in places subject to moisture and
dust such as a bathroom or near a humidifier.
Store discs vertically in a case. Stacking or placing
objects on discs outside of their case may cause
warping.
Page 11
Discs and purposes
The table shows main functions which are available on this recorder per disc category.
This will help you choose discs.
Introduction
Characteristics on this
recorder
For the first use
Recording a TV program
Erasing recorded contents
Recording additional content
on a recorded disc
DVD-RAM disc
Suitable for repeat use of the
disc, and data storage for
video library. Copy once
contents can be recorded
using a compatible disc.
No preparatory steps
required, however initializing
is recommended.
Ye s
Ye s
Ye s
DVD-RW disc
Suitable for saving data in
DVD-Video format to play on
compatible devices.
You can erase recorded
contents to use the disc
repeatedly.
Initialize the disc.
Ye s
Ye s
If the disc has been executed
DVD-Video finalizing
process, first cancel the
process then delete contents
Ye s
If the disc has been executed
DVD-Video finalizing
process, first cancel the
process then delete contents
DVD-R disc
Suitable for saving data in
DVD-Video format to play on
compatible devices.
Once you execute DVDVideo finalizing process on a
recorded disc so that it can
be played on other players,
you cannot make addition,
correction and deletion of
contents on the disc.
No preparatory steps
required.
Ye s
Deleting contents cannot
restore the disc space.
After you execute DVD-
.
Video finalizing process on a
recorded disc, you cannot
delete contents of the disc.
After you execute DVDVideo finalizing process on a
recorded disc, you cannot
.
add contents to the disc.
Ye s
Ye s
Recording
Playback
Editing
Function setup
Indexing recorded contents
Naming a title
Creating a thumbnail
Collecting favorite scenes
(Playlist Editing)
Making a new title from a Playlist
containing favorite scenes
(Copy within the same disc)
Playing contents recorded on
this recorder, on other devices
When a message appears and
the loaded disc cannot be
used:
Ye s
Ye s
Ye s
Ye s
Contents can be played on
any devices compatible with
DVD-RAM discs. Follow the
instruction of the device to
play.
Initialize the disc.
If it is still unusable, try to
execute DVD-RAM physical
Format.
Ye s
Ye s
After you execute DVD-Video
finalizing process on a recorded
disc, you cannot name a title or
create a thumbnail.
No
No
Execute DVD-Video
finalizing process on this
recorder. This process
makes the disc playable on
other compatible devices.
(Some models excepted.)
Initialize the disc.
Ye s
Ye s
After you execute DVD-Video
finalizing process on a recorded
disc, you cannot name a title or
create a thumbnail.
No
No
Execute DVD-Video
finalizing process on this
recorder. This process
makes the disc playable on
other compatible devices.
(Some models excepted.)
–
11
Others
Page 12
Introduction
Index to parts and controls
See pages with arrows for details.
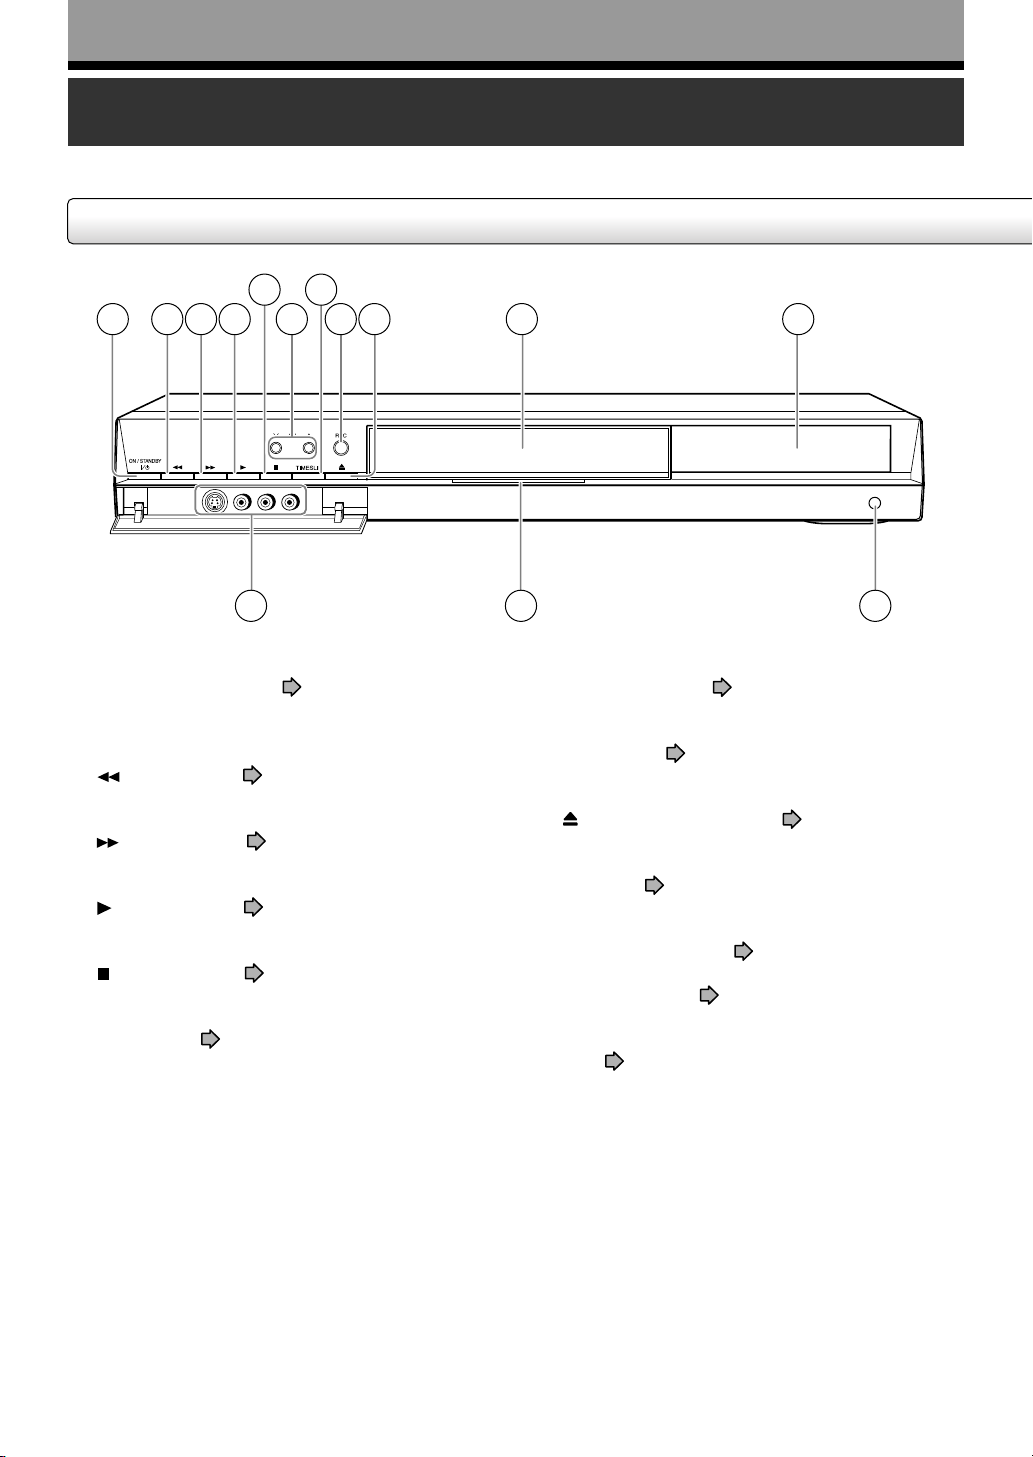
Front panel
Front panel
5
1 2 3 4
6 879
10 11
1214 13
* The above illustration displays the front panel with the cover open. See the following page on how to open or close the cover.
q ON/STANDBY button page 20, 21
Turns the power on/restores the unit in the
standby mode.
w (REV) button page 59
Scans the picture backwards.
e (FWD) button page 59
Scans the picture forward.
r (PLAY) button page 55
Starts playback.
t (STOP) button page 37, 55
Stops playback or recording.
y CH buttons page 20, 34
Selects the channel.
u TIMESLIP button page 57, 58
Selects the time slip mode.
i REC button
Starts recording.
(OPEN/CLOSE) button page 20, 21
o
Opens and closes the disc tray.
!0 Disc tray page 20
Loads a disc into the disc drive.
!1 Front panel display page 18
!2 Remote sensor page 18 in “INSTALLATION
GUIDE”
!3 LED page 20, 21
Illuminates when the recorder is on.
page 35
12
Page 13
Introduction
Recording
Playback
Editing
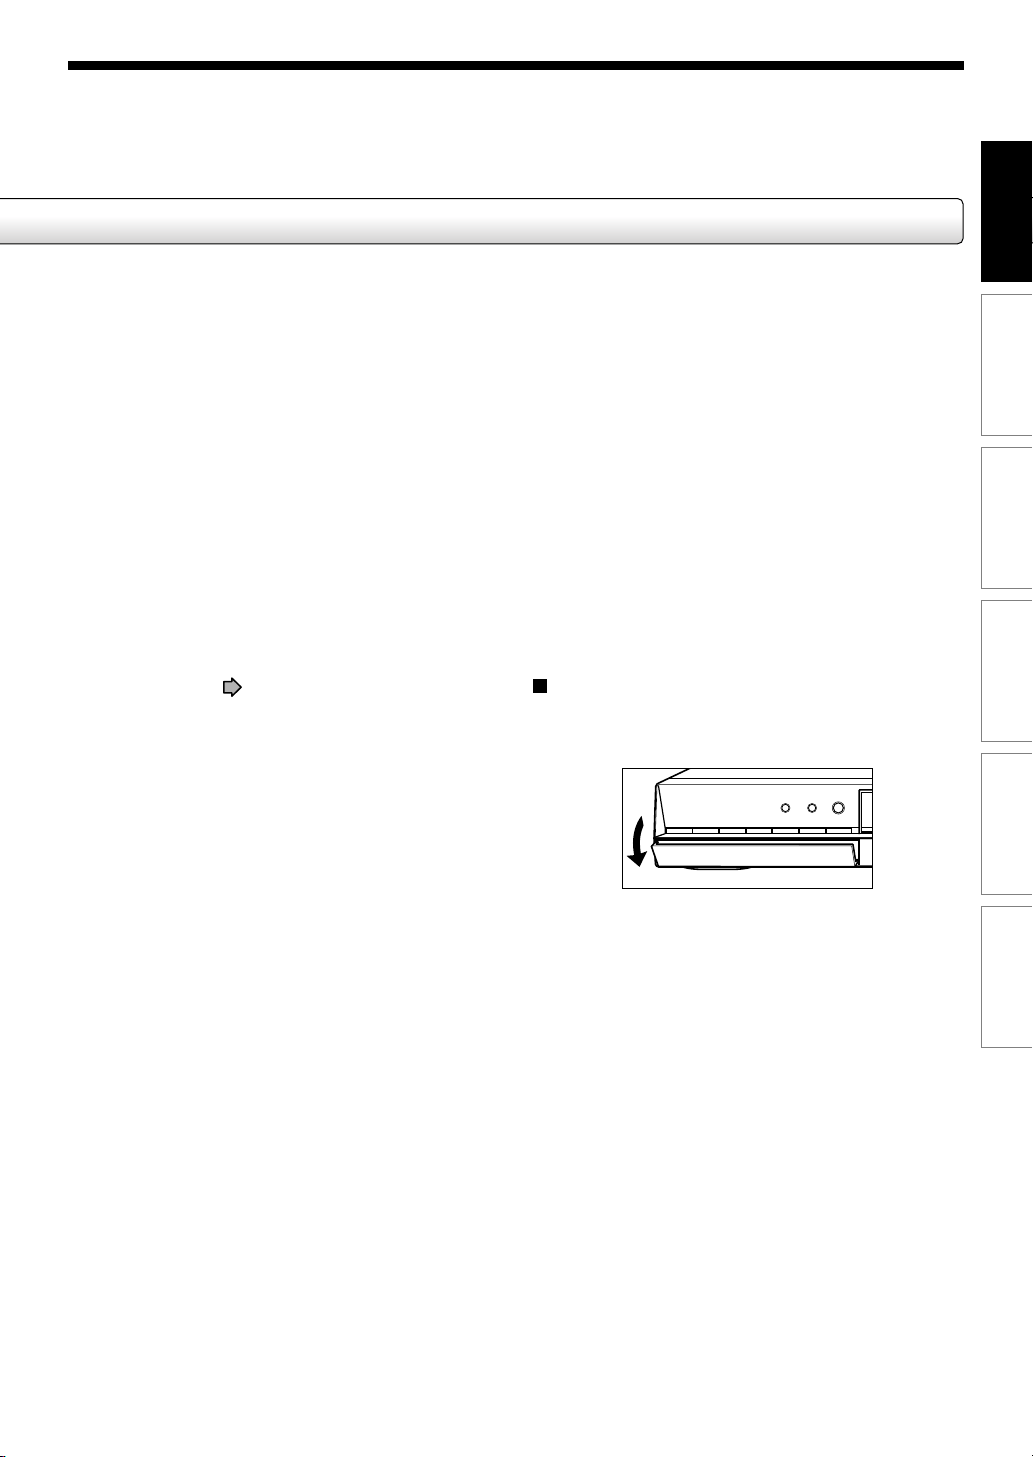
!4 INPUT 2 jacks page 38
Use this when recording from other input source
such as a VCR or a camcorder.
To open or close the cover on the front panel
Put your finger on the left edge of the cover and pull it
down to open.
Note
• Do not place a heavy object on the cover while it is
open. Doing so may damage the recorder.
Function setup
Others
13
Page 14
Introduction
Index to parts and controls (Continued)
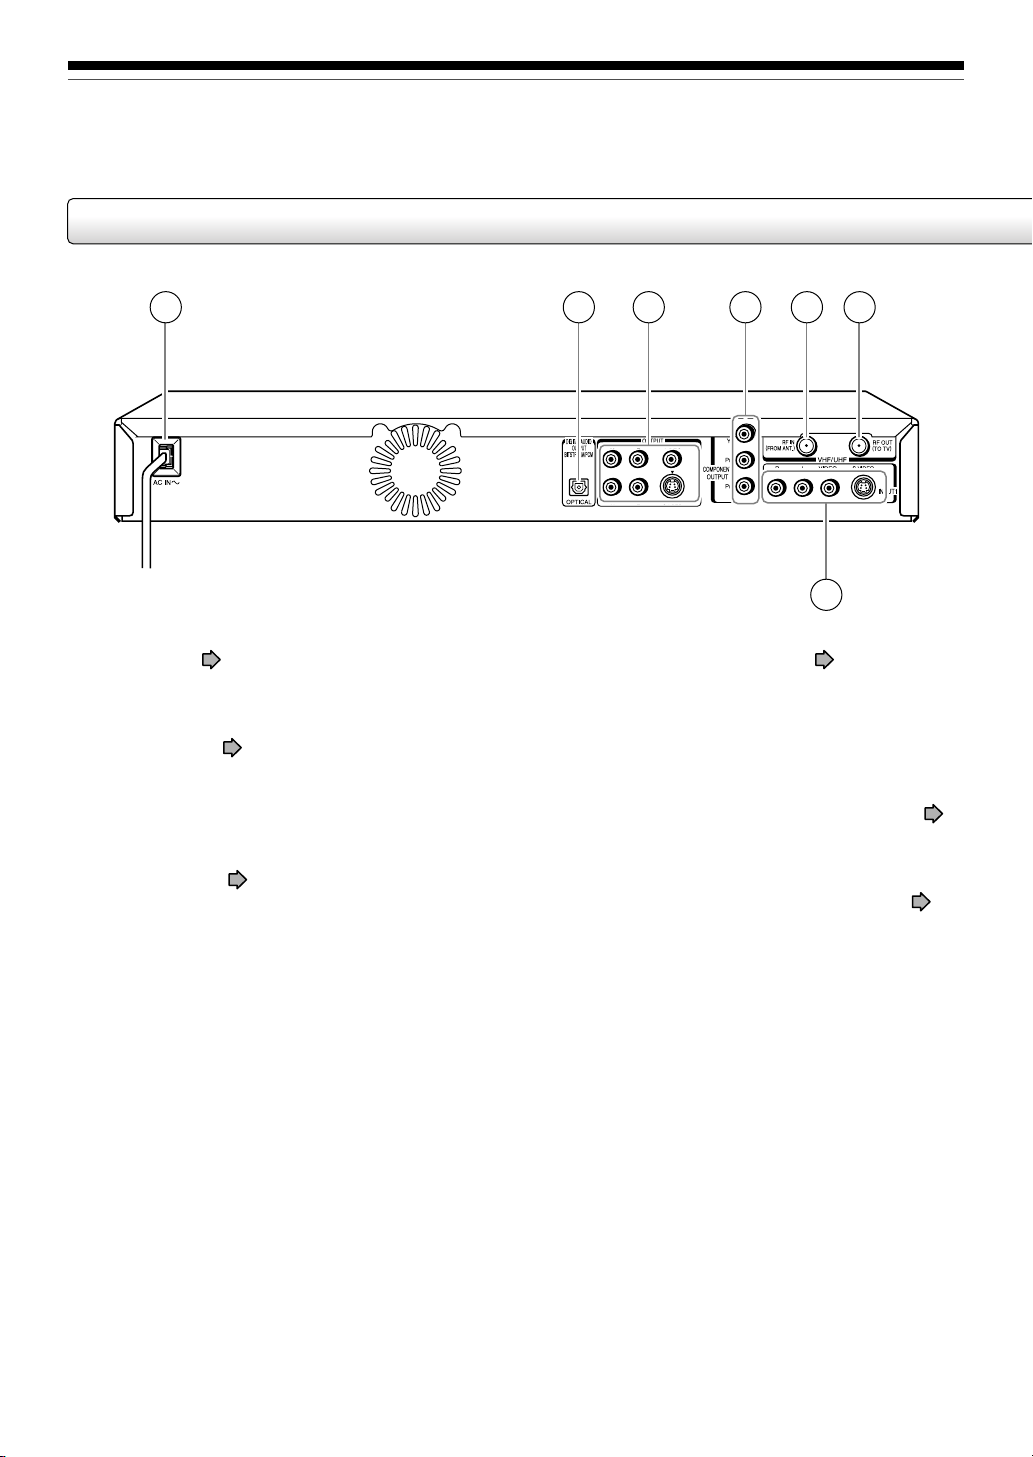
Rear panel
1 2 3 5 64
7
q Power cord page 21 in “INSTALLATION
GUIDE”
w DIGITAL AUDIO OUT BITSTREAM/PCM
OPTICAL jack
GUIDE”
Use this to connect the recorder to an audio
receiver equipped with an optical digital audio
input jack.
e OUTPUT jacks page 21, 23, 24, 25 in
“INSTALLATION GUIDE”
Outputs video and audio signals to a connected
TV or amplifier.
page 26 in “INSTALLATION
r COMPONENT OUTPUT jacks page 25 in
“INSTALLATION GUIDE”
Outputs video signals to a connected TV or
monitor.
Connects to a TV or monitor equipped with
component video jacks.
t VHF/UHF RF IN (FROM ANT.) input socket
page 20 in “INSTALLATION GUIDE”
Connects to an antenna or cable signal.
y VHF/UHF RF OUT (TO TV) output socket
page 20 in “INSTALLATION GUIDE”
Connects the supplied coaxial cable to a TV.
14
Page 15

u INPUT1 jacks page 38
Use this to connect the recorder to output jacks of
external devices such as another player or
camcorder.
Introduction
Recording
Playback
Editing
Function setup
Others
15
Page 16
Introduction
Index to parts and controls (Continued)
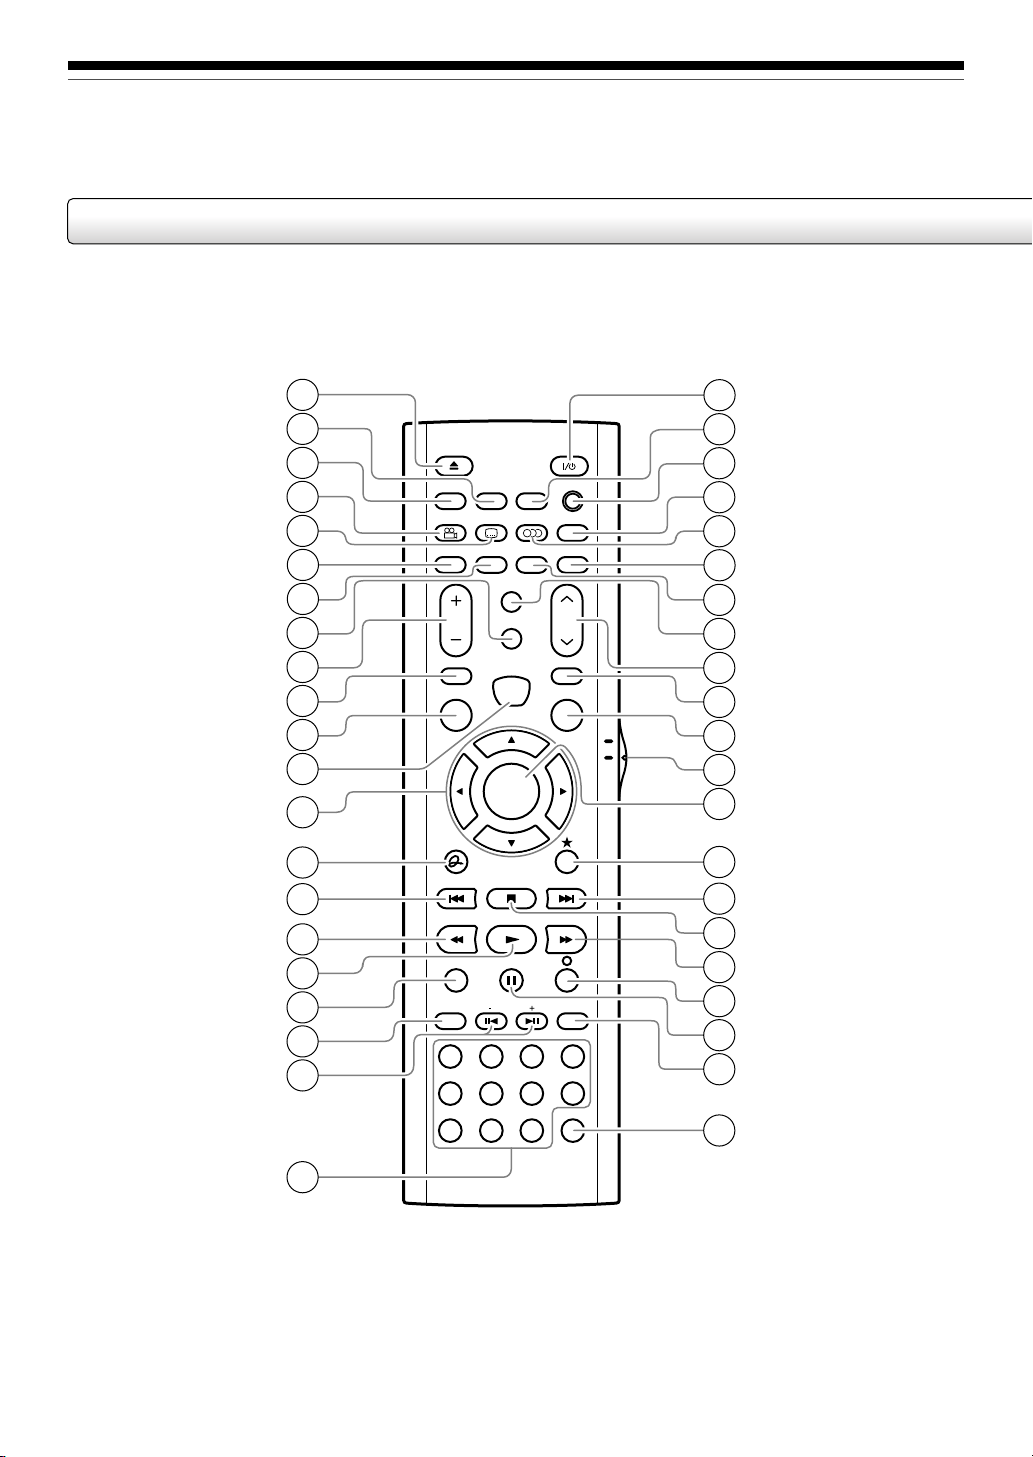
Remote control
1
2
3
4
5
6
7
8
9
10
11
12
13
14
15
16
17
18
19
20
OPEN/CLOSE
AUDIO/SAP
SETUP
TIMESLIP
EASY
NAVI
SELECT/
ENTER
DIMMER
EXTEND
3
6
PROGRESSIVE
FREEZE
INPUT SELECT
MENU
FWDPLAYREV
CHP DIVIDE
CLEAR
DISPLAY
FL SELECT
SUBTITLE
ANGLE
REC MODE
REMAIN
VOL CH
MUTE
TOP MENU
INSTANT
REPLAY
QUICK MENU
SKIP REV STOP SKIP FWD
REC
SEARCHTADJUST
1
2
4
5
89
7
ZOOM
INSTANT
+
10
0
DVD
SKIP
22
23
24
25
26
27
28
29
30
31
TV
32
33
34
35
36
37
38
39
40
41
42
16
21
Page 17

Introduction
1
OPEN/CLOSE button page 20, 21
2
FL SELECT button page 19
DISPLAY button page 75
3
4
ANGLE button page 64
5
SUBTITLE button page 65
6
REMAIN button page 27
7
REC MODE button page 36
8
TIMESLIP button page 57, 58
9
VOL button*
10
MUTE button*
TOP MENU button page 56
11
12
EASY NAVI button page 23
13
Direction buttons ( / / / ) page 51, 106
14
QUICK MENU button page 24, 77
15
SKIP REV button page 60
16
REV button page 59
2
2
31
INPUT SELECT button*
32
MENU button*
33
TV/DVD selector page 42 in
1
2
page 39
“INSTALLATION GUIDE”
34
SELECT/ENTER button page 51, 106
35
button page 51
SKIP FWD button page 60
36
37
STOP button page 39
38
FWD button page 59
39
button page 106
40
button page 37, 52
41
CHP DIVIDE button page 84
42
CLEAR button page 62
Recording
Playback
Editing
Function setup
PLAY button page 55
17
REC button page 35
18
19
SEARCH button page 62
20
ADJUST buttons page 41, 61
21
Number buttons page 34, 62
22
ON/STANDBY button*
23
DIMMER button page 19
24
PROGRESSIVE button page 25 in
2
page 20, 21
“INSTALLATION GUIDE”
FREEZE button page 74
25
AUDIO/SAP button page 67
26
ZOOM button page 66
27
EXTEND button page 44, 46
28
SETUP button page 106
29
2
CH button*
30
page 20, 34
*1MENU
Use this to display a menu screen that is recorded on
a DVD video disc.
Operate the menu screen as the same manner as
“Locating a title using the top menu (
A menu screen is not recorded on some discs.
2
*
Buttons for TV operation page 42 in
“INSTALLATION GUIDE”.
page 56)”.
Others
17
Page 18
Introduction
Index to parts and controls (Continued)
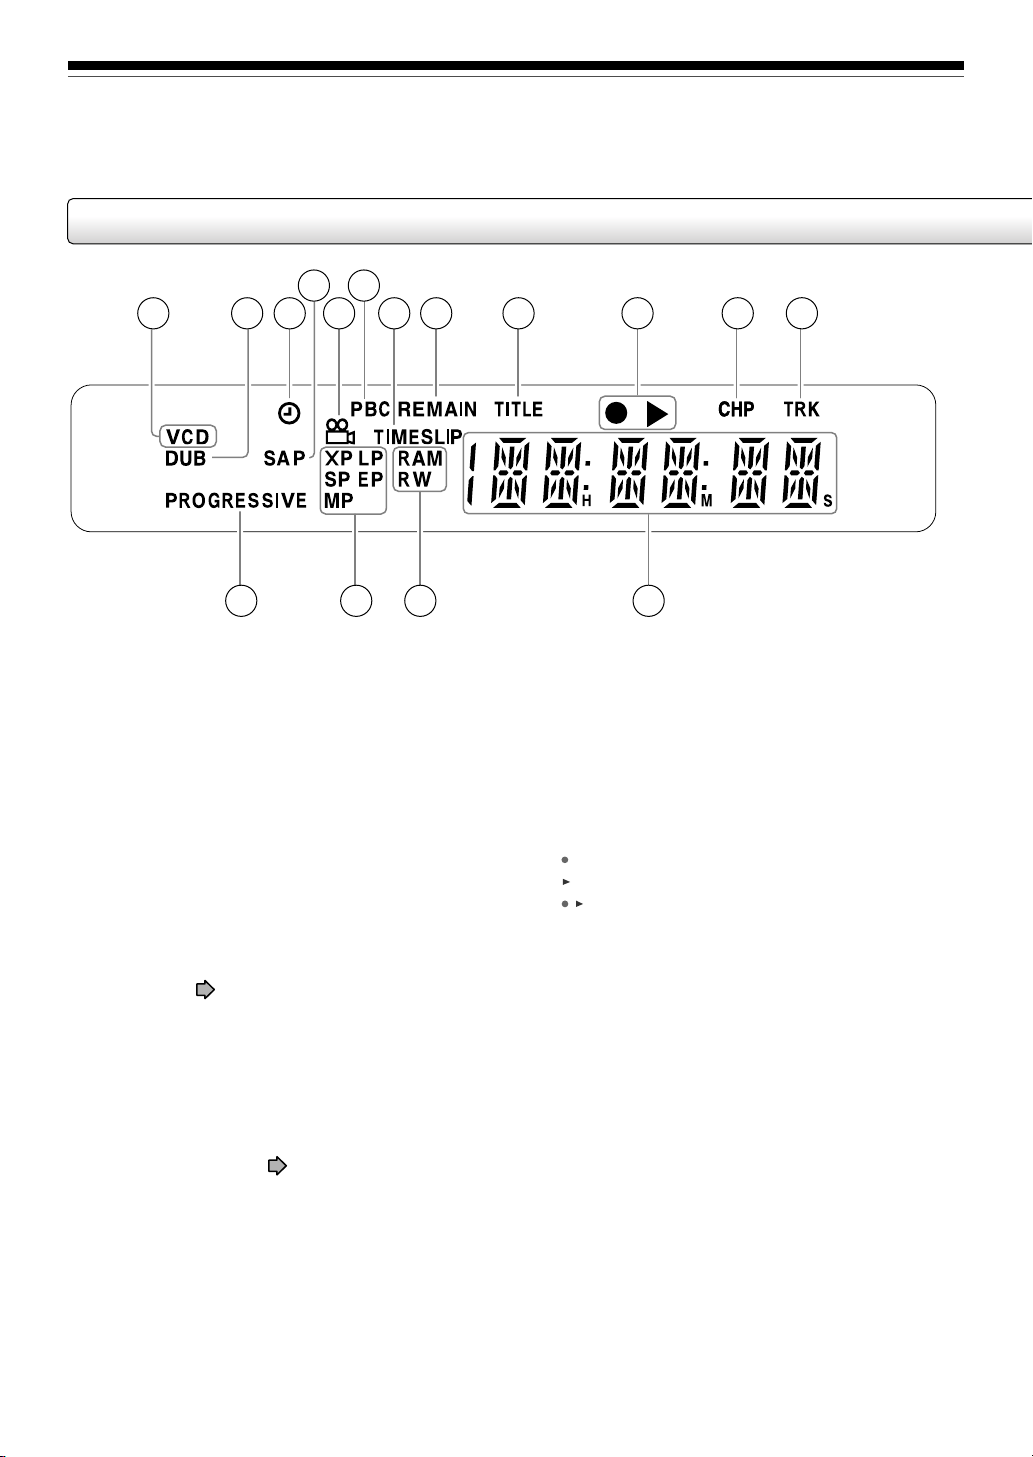
Display
4 6
1
2 3 5 7 8 9
10 11 12
16 15 13
q Disc indicator
Indicates the category of a loaded disc.
CD : audio CD
VCD : VIDEO CD
w DUB indicator
Illuminates when copying.
e Program recording indicator
Illuminates when the recorder holds a timer
program.
r SAP indicator
Illuminates when receiving a SAP broadcast.
t Angle icon page 64
Illuminates when playing a scene recorded with
multi angles.
y PBC indicator
Illuminates when a PBC-controllable VIDEO CD is
loaded.
u TIMESLIP indicator page 57, 58
Illuminates in the time slip mode.
14
i REMAIN (Remaining space) indicator
Illuminates when an available recording time is
displayed.
o Title indicator
Illuminates when a title number is displayed.
!0 Operational status indicator
Indicates the operational status of the recorder.
: Illuminates when recording.
: Illuminates when playing.
: Illuminates when recording and playback
are in progress at the same time.
!1 CHP (Chapter) indicator
Illuminates when a chapter number is displayed.
!2 TRK (Track) indicator
Illuminates when a track number is displayed.
!3 Multi display
Displays the current channel or other numbers
such as a title number, track number, input
selection, the current time, elapsed time,
remaining time, starting time of programmed
recording, chapter number or message, etc.
18
Page 19

Dimming the display
Pressing the DIMMER button on the remote control changes the brightness of the display (normal/dimmed).
When dimming the display, the LED will be turned off.
Switching the display
Every time you press the FL SELECT button, the display changes between the channel, title number, and time.
The display may not change, depending on the disc or recording conditions.
Disc indicator
!4
Indicates the category of a loaded disc.
RAM : DVD-RAM disc
RW : DVD-RW disc
R : DVD-R disc
!5 Picture quality mode indicator page 117
The current picture quality mode lights up.
Introduction
Recording
Playback
Editing
Function setup
!6 PROGRESSIVE indicator
Illuminates when video signals are output in the
progressive format.
Others
19
Page 20
Introduction
Before operating this recorder
Is your recorder ready?
• Refer to “INSTALLATION GUIDE” and finish the
necessary preparations.
• Turn on the connected equipment such as a TV or
audio system and select the input from the recorder.
Turning the power on
(This owner’s manual instructions are based on
the premise that all proper connections have been
completed and the TV is turned on.)
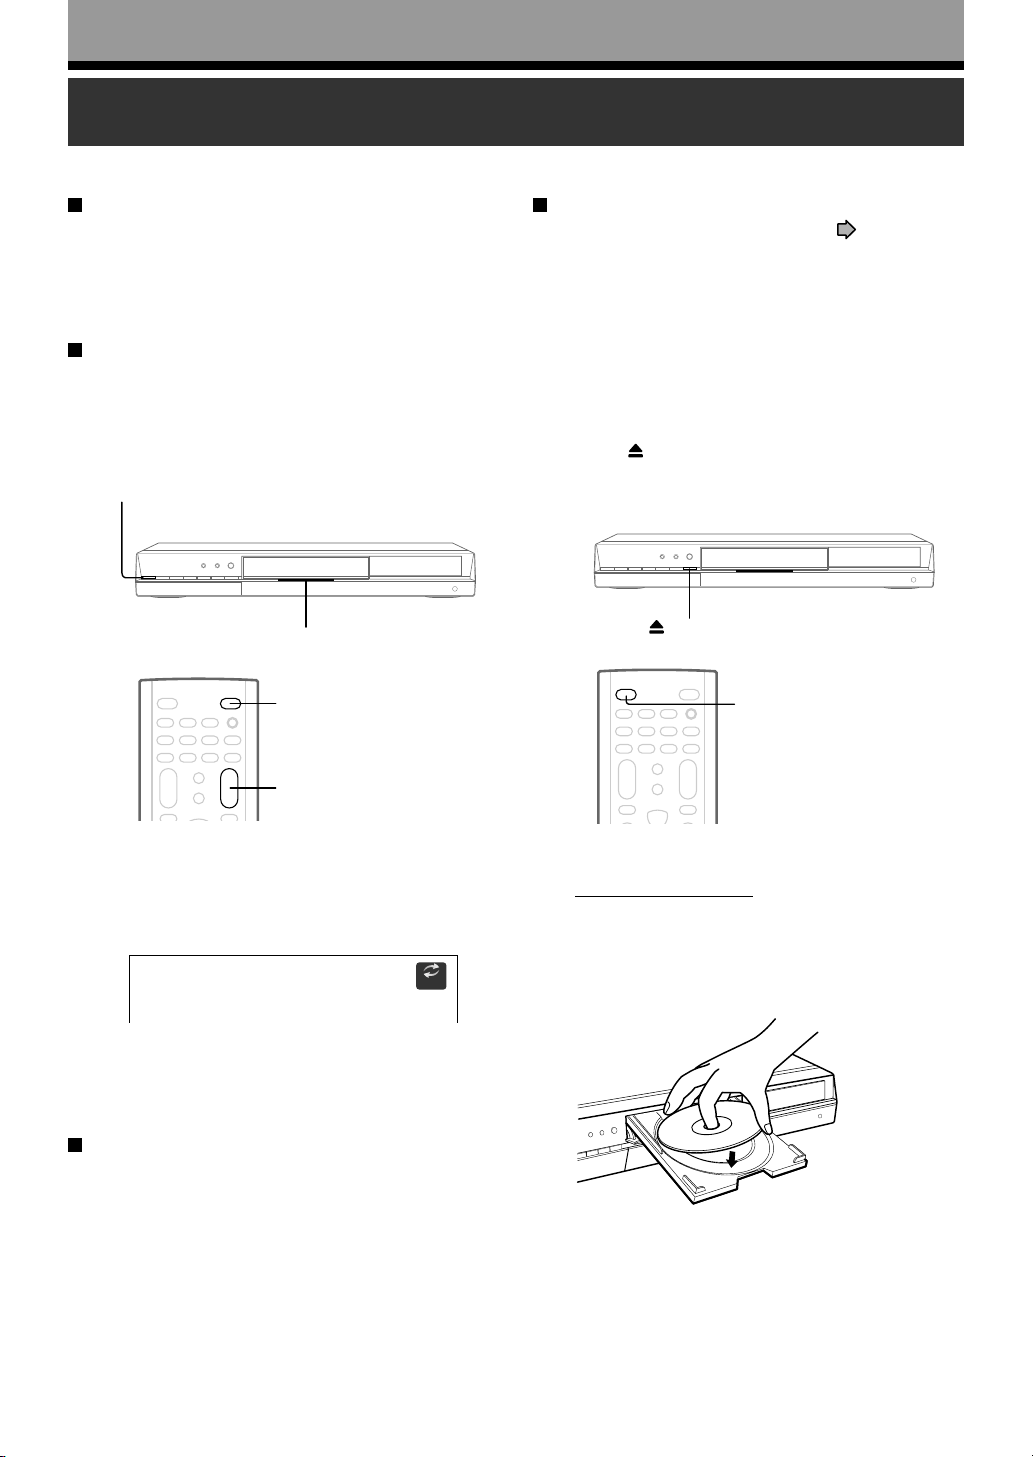
Press ON/STANDBY on the front panel of the
recorder or on the remote control.
ON/STANDBY button
LED
ON/STANDBY button
Loading a disc
Check disc compatibility beforehand ( page 6, 7)
and use a proper playable disc.
Caution
• Keep your fingers well clear of the disc tray. Neglecting this
may cause serious personal injury. Keep a close watch on
children.
• Do not use a cracked, deformed, or repaired disc.
1 Open the disc tray.
Press
the remote control.
on the front panel or OPEN/CLOSE on
button
OPEN/CLOSE button
CH button
When the power turns on, the LED on the front panel
illuminates.
After a few seconds, a start-up screen appears.
The following icon appears at the top right corner of
the screen.
e.g.
Loading
When this icon disappears, the recorder is ready to
operate. If the disc drive contains a disc, it takes a
little longer to start up.
Viewing TV channels through this recorder
After turning the power on, the recorder will output TV
channel signals to the connected TV (also in the stop
mode).
You can select a desired channel by pressing the CH
button, or the number buttons.
2 Insert a disc.
Disc without a cartridge
Insert with the playback side down.
There are two kinds of disc size. Place a disc to fit
the guide. If a disc is out of the guide, it may result
in damage to the disc or malfunction.
Place a disc in the
inside hollow.
20
Page 21
Introduction
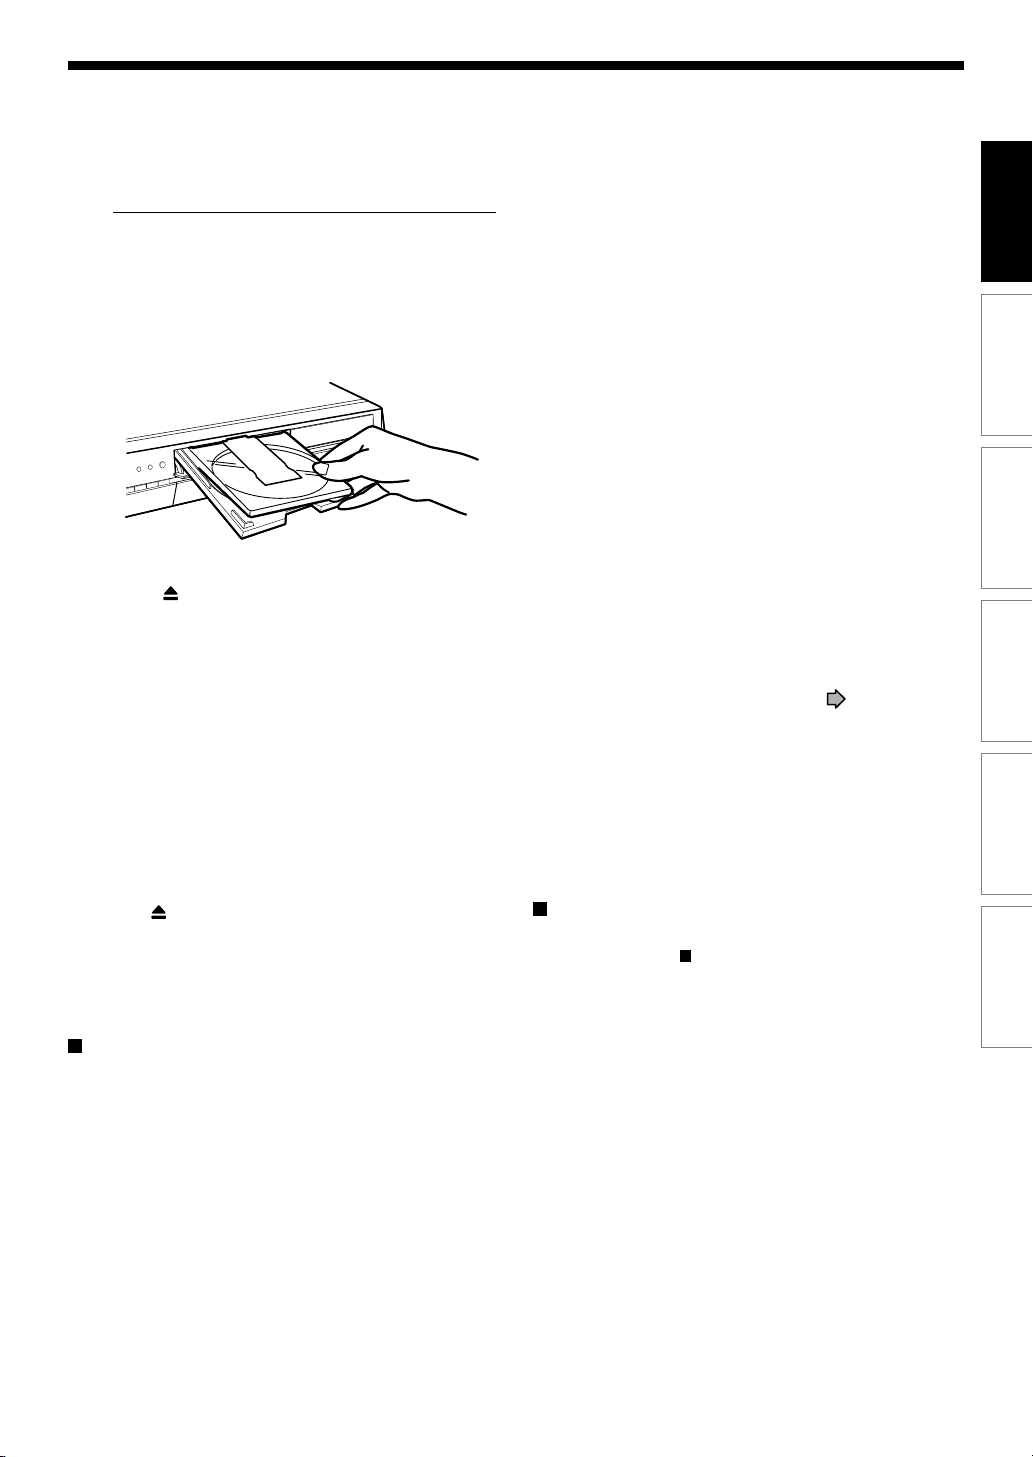
DVD-RAM disc with cartridge (TYPE1/TYPE2/TYPE4)
Single sided
Turn the printed side up, and insert the cartridge
into the tray frame following the direction of the
arrow on the cartridge.
Double sided
Turn the desired recording/playback side up, and
insert the cartridge into the tray frame following the
direction of the arrow on the cartridge.
3 Close the disc tray.
Press
on the front panel or OPEN/CLOSE on
the remote control.
Notes
• Use the button on the front panel or the remote control to
open and close the disc tray. Do not push or hold the disc
tray while it is moving. Doing so may cause the recorder to
malfunction.
• Do not insert a disc which is unplayable, or any object
other than a playable disc.
• Do not apply downforce to the disc tray. Doing so may
cause the recorder to malfunction.
• If the disc tray stops while closing, the mechanical
protection system of this recorder will open it. Do not force
it to close. Doing so may cause malfunction.
• If the disc tray will not open, turn the recorder off, and
press the button on the front panel or the OPEN/CLOSE
button on the remote control. This may turn the recorder on
and open the disc tray. If it still won’t open, contact your
nearest TOSHIBA dealer.
Turning the power off
Press ON/STANDBY on the front panel of the
recorder or on the remote control.
The “Unloading” icon appears at the top right corner of
the screen, and the LED turns off if it is lighted, then
the power turns off (Standby mode.)
Caution
• If the power fails or the power cord is disconnected from a
wall outlet while the recorder is in operation (LED lit when
the front panel display is not dimmed), the loaded disc may
become recording disabled. In such a case, executing an
initialization of the disc using the formatting function of the
recorder may refresh it. However, all contents stored on the
disc will be completely erased by this initialization process.
• This recorder may indicate alert messages with some
DVD-RAM discs right after insertion. If such a disc is used
for playback or recording on other equipment, all data in
the disc may be damaged and the disc will not be played.
By executing an initialization of the disc using the
formatting function of the recorder, the disc will become
operational.
• If the recorder freezes and does not respond at all, leave it
alone for about 15 minutes or longer. This may restore the
recorder. After the recorder has recovered, turn it off once
and turn it on again to use as usual. If the recorder is still
inoperable after more than 15 minutes have passed, press
and hold the ON/STANDBY button on the front panel for
about 10 seconds or longer. The recorder is forced to quit
and the power turns off. Turn the recorder on again and use
it as usual. (This is an emergency measure, which may
cause losses and/or damages of data. Avoid casual use of
this measure.) (This 15-minute measure is available only
when “Screen Protector” is set to “On.” ( page 115))
Note
• If there are any performance malfunctions of the disc drive,
immediately discontinue use of this recorder, and
disconnect the power cord from a wall outlet, then contact
your dealer. Continuous use of the recorder in such a
condition will aggravate the condition and result in
increased cost and repair time.
Disc tray lock (Child lock)
You can lock the disc tray.
Press and hold
on the front panel or STOP on
the remote control for longer than about 3
seconds.
To unlock, during stop press the button for longer than
about 3 seconds.
Note
• Turning the power off also unlocks the disc tray.
Recording
Playback
Editing
Function setup
Others
21
Page 22
Introduction
x1/2
Title
End
Chapter
Divide
x1
Before operating this recorder (Continued)
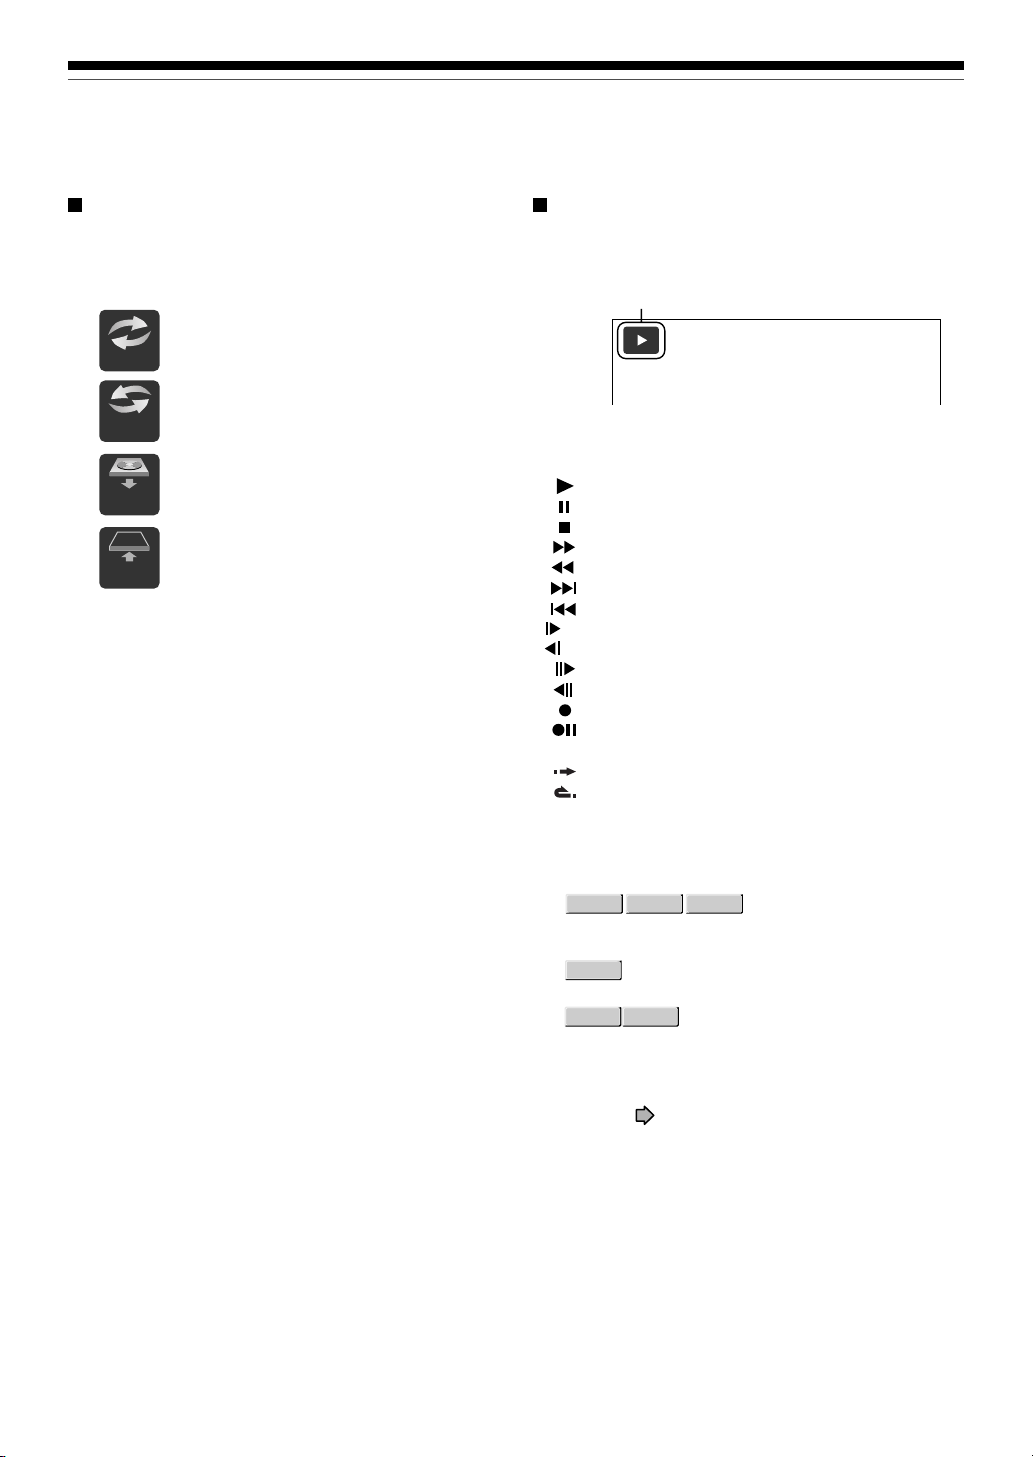
Start-up/Shutdown (closing) icons
These icons are displayed at the top right corner of the
screen when startup or finishing. While they are
flashing, the recorder is operating as follows:
Start-up, reading a disc, finishing the
Loading
recording
Unloading a disc, finishing the
Un
loading
Open
Close
operation
Opening a disc tray
Closing a disc tray
Status display
Each time you operate the recorder, the following
displays appear on the TV screen to indicate the
status of the recorder.
Status display
e.g.
Main on-screen displays
(Depending on the disc, some of these may not
appear.)
: Playback
: Pause
: Stop
: Fast-forward
: Fast-reverse
: Forward skip*
: Reverse skip*
: Forward slow-motion
: Reverse slow-motion
: Forward frame by frame playback
: Reverse frame by frame playback
: Recording
: Recording pause
: When title playback is completed
: Instant skip
: Instant replay
: Chapter division
22
* Accompanied with the followings:
DVD-RAM
DVD-R
DVD-RW
:
Title number/title name and chapter number/
chapter name
:
DVD-VIDEO
Title number and chapter number
VCD CD
:
Track number
Note
• You can add the current status of the settings to this
display. See page 75.
Page 23
Introduction
Key operation - EASY NAVI & QUICK MENU
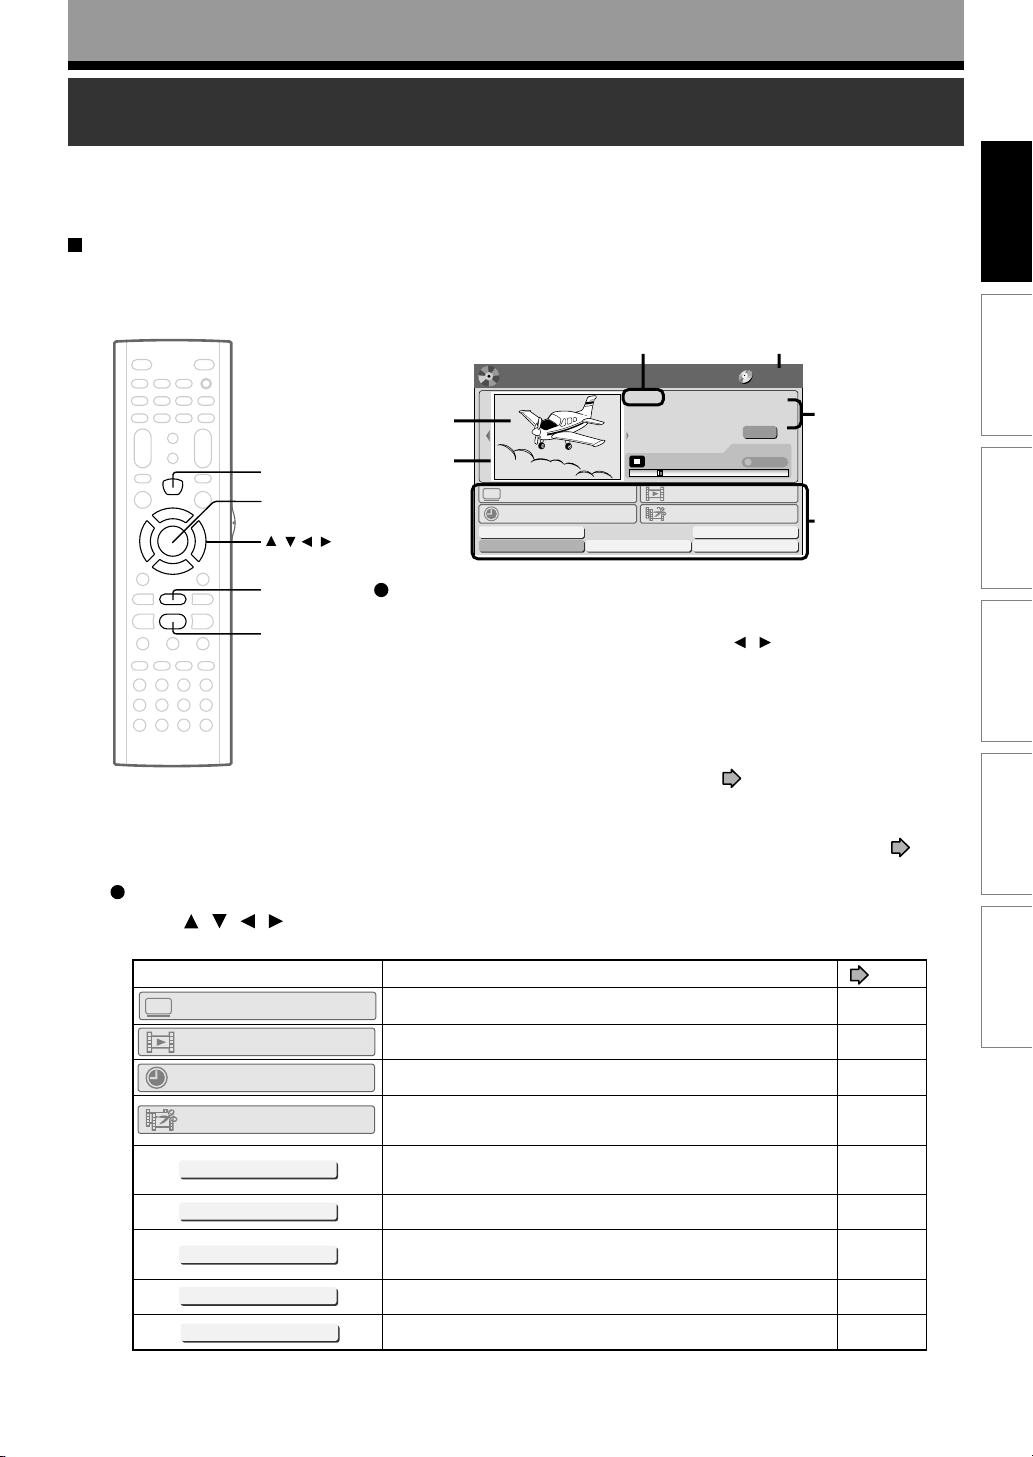
The EASY NAVI button opens the “EASY NAVI Main Menu”, a main gate to the functions of this recorder.
From this menu, you can access the desired functions while viewing a current picture.
Additionally, the QUICK MENU button provides you a sub menu of the current function.
EASY NAVI
Press EASY NAVI.
Sound is muted and the following GUI appears. (Actual displays vary depending on operational status.)
Appears when the finder shows
EASY NAVI
SELECT/ENTER
/ / /
Finder
Cursor
e.g.
the current broadcast.
EASY
Main Menu
NAVI
TV Viewing
Timer Recording
Delete Title
Finalize (R/RW)
TV:12ch
005 2005/04/03 07:00am TV:18
Play Time
Play Contents
Edit Menu
Format (RAM/RW)
00:10:15
Edit t
Disc
DVD-RAM
(00:54:30)
Original
DVD-RAM
TS
Time Slip
itle name
Setup
Recorded title
last selected
Functions
Introduction
Recording
Playback
STOP
Operating the finder (For DVD-RAM discs and DVD-R/RW discs
recorded on this recorder and not finalized yet)
PLAY
1) When the cursor is on the finder, press / .
You can view thumbnails of recorded contents.
2) When you find a desired content, press PLAY or SELECT/ENTER.
The content is played.
• Pressing the SELECT/ENTER button enlarges the finder’s playback
picture to the full of the screen.
• You can change playback speed. See
3) To stop, press STOP.
A current channel broadcast appears. (“TV:xxxch” accompanies.)
• Pressing the REC button starts recording. On recording, see
26.
Item selection
Press / / / to select an item, then press SELECT/ENTER.
(Unavailable features are grayed out.)
Item
TV Viewing
Play Contents
Timer Recording
Edit Menu
Delete Title
Edit title name
Return to current broadcast channel.
Recorded contents are listed in a thumbnail view.
A list of timer programs appears.
A menu of editing options appears.
You can delete the current content.
Operate according to the message.
An on-screen keyboard appears.
Function
page 59.
Editing
Function setup
page
Others
page
–
51
41
98
47
30
Finalize (R/RW)
Format (RAM/RW)
Setup
You can execute the DVD-Video finalizing process on the
loaded disc.
You can format the loaded disc.
A setup menu appears.
100
28
106
(Continued)
23
Page 24
Introduction
Key operation - EASY NAVI & QUICK MENU (Continued)
To exit the EASY NAVI
Press EASY NAVI again.
Note
• For a disc other than the specified one, the finder cannot
be operated. To play the disc, exit the EASY NAVI then
press the PLAY button, or select the “Play Contents”
function.
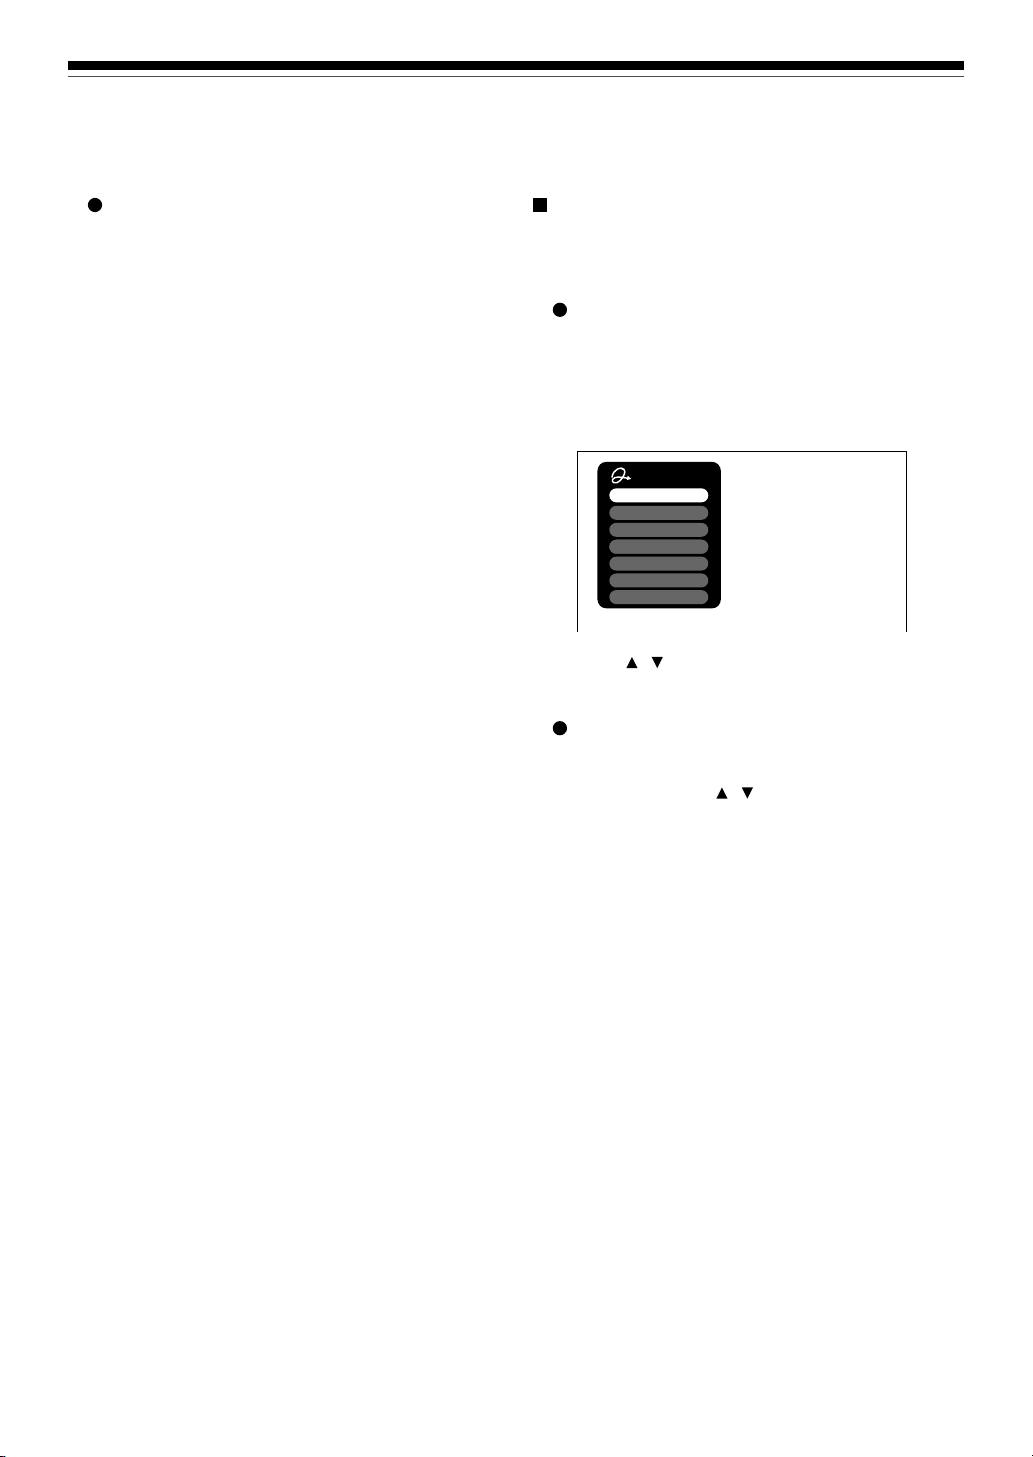
Quick Menu operation
To access various optional functions of this recorder,
open Quick Menu. Quick Menu displays a list of
selections relevant to your current mode.
Opening a Quick Menu
1) Press QUICK MENU.
The following menu (“Quick Menu”) appears.
(Actual selections vary depending on operational
status.)
e.g.
Quick Menu
Restart title
Title information
Bit rate
Auto Power Off
Special playback mode
Time bar
Remain
Exit
2) Press
/ to select an item, then press
SELECT/ENTER.
To exit Quick Menu
Press QUICK MENU again.
Alternatively
Select “Exit” with
/ , then press SELECT/
ENTER.
24
Page 25
Hint on reading this manual
The following icons show the playable discs for each
function described on this instruction manual.
DVD-RAM
: DVD-RAM disc
DVD-RW
: DVD-RW disc
DVD-R
: DVD-R disc
DVD-VIDEO
: DVD video disc
VCD
: VIDEO CD
CD
: Audio CD
(For CD containing JPEG or MP3/WMA files,
page 70, 72.)
see
Most instructions are based on remote control operation,
unless otherwise noted. You can use the buttons on the
remote control and those on the main unit as well when
they have the same function.
Recording
Recording variations for many types of programs or
situations.
Before recording
Selecting a disc according to
purposes of use (DVD-RAM/
DVD-R/RW)
Setting for recording on a DVDR/RW disc in Video mode
Recording a TV program
Recording an external source
Programing a recording
Others
If copy protection signal is detected during
recording on this recorder, the recording
automatically pauses and a message appears. In
this case, the
recording. (It is possible to end the recording by
pressing the STOP button.) If the copy protection
signal continues, the recording will terminate.
button cannot release the
Page 26

Recording
Before recording
Please be sure to read this critical background information prior to making a recording.
Conventional video cassette recorders have required tapes to record, while this recorder enables
recording on a DVD-RAM/R/RW disc whenever you want, without selecting an available tape and
confirming a point to start a recording from.
Further, if you use DVD-RAM discs, you can collect necessary scenes and store them in it to make
your own video library.
Is your DVD recorder ready?
Before recording a TV program on this recorder, insure
that channels you want to record are correctly tuned in
on this recorder.
If not tuned in, read the separate “INSTALLATION
GUIDE” volume again, and confirm all the necessary
connections and settings have been done.
Also, insure the clock is set precisely for program
recording. Set the clock using the “Initial settings”
menu (
Disc initializing
Whenever you use a new DVD-RAM/RW disc on this
recorder, be sure to initialize the disc.
DVD-R discs can be used on this recorder without
initializing.
For details of initialization of DVD-RAM/RW discs, see
If an initialized DVD-RAM disc is still unusable, it may
become usable by executing “DVD-RAM physical
format” in the “Management settings” menu.
For “DVD-RAM physical format”, see
Note on recording on a DVD-RAM disc
Confirm disc compatibility and prepare an available
DVD-RAM disc to record on (
Some discs may need to be formatted for use on this
recorder. A message will appear asking you to execute
disc formatting. Follow the procedure displayed onscreen to format the DVD-RAM disc compatible with
this recorder.
Some DVD-RAM discs formatted on a PC may not be
usable.
page 33, INSTALLATION GUIDE).
page 28.
page 29.
page 6, 8).
Notes
• This recorder records on a DVD-RAM disc if it complies
with DVD-RAM standard Version 2.0, 2.1 or 2.2. However,
you may not record on some DVD-RAM discs that have
complicated contents (often, to protect the recorded data).
When you select a DVD-RAM discs that has already been
recorded, check that the disc is suitable for recording or the
remaining time of the disc is displayed. It is recommended
to use a new DVD-RAM disc for an important recording.
• Depending on the source recording device used and how
that device is set up, the video and sound quality of the
recording may vary slightly from the video and sound
quality of the source device.
Note on recording on a DVD-RW disc
Confirm disc compatibility and prepare an available
DVD-RW disc to record on (
Some discs may need to be initialized for use on the
recorder. A message will appear asking you to execute
disc initializing. Follow the procedure displayed onscreen for initialize the DVD-RW disc compatible with
this recorder.
Some DVD-RW discs initialized on a PC may not be
usable.
To play a DVD-RW disc recorded on this recorder on
other devices, finalize the DVD-RW disc on this
recorder. (
The finalization disables the disc’s rewritability. To
rewrite a finalized DVD-RW disc, cancel the
finalization (
• On DVD-RW discs recorded on other devices, you
cannot execute DVD-Video finalize process or
cancel the finalize process, or add recordings on
this recorder.
• You cannot rewrite or edit a DVD-RW disc if
recorded in DVD-VR mode.
• DVD-RW discs which are recorded on other devices
and not finalized yet, cannot be read on this
recorder. Do not rush to initialization. Check that the
contents can be erased or not.
page 100)
page 103).
page 6, 9).
26
Page 27

Introduction
Note on recording on a DVD-R disc
Confirm disc compatibility and prepare an available
DVD-R disc to record on (
To play a DVD-R disc recorded on this recorder on
other devices, finalize the DVD-R disc on this recorder.
page 100)
(
The finalization permanently disables the disc’s
rewritability. (Canceling the finalization is not possible.)
• DVD-Video finalize process cannot be canceled if
once executed on a DVD-R disc.
• On DVD-R discs recorded on other devices, you
cannot execute DVD-Video finalize process or add
recordings on this recorder.
To check space remaining on a disc
1) Press REMAIN.
The current capacity is displayed at the bottom of
the screen and on the front panel display.
2) After checking the capacity, press REMAIN again
to turn off the display.
Note
• You can also check the capacity of the disc by selecting
“Disc budget calculation” from Quick Menu within the REC
MENU ( page 45).
Programmed recording and operational status
The recorder gives priority to programmed recordings
in every operating mode. Even if the recorder is
playing, recording or editing, or even in standby mode,
at a starting time of a programmed recording the
recorder will make itself ready or stop those
operations and start the recording.
However, “DVD-Video finalizing process” (
100) operations may have priority over programmed
recordings.
page 6, 9).
page
When the programmed settings overlap
Before the first recording is completed, the second
program is scheduled to begin recording. When using
a DVD-RAM disc, the recording of the previous
program stops 15 seconds before the next program
starts.
When using a DVD-R or DVD-RW disc, the recording
of the previous program stops about 2 minutes before
the next program starts, to complete data process. In
this 2 minutes, you cannot operate the loaded DVD-R
or DVD-RW disc.
On a programmed recording across the changeover of Daylight-saving time
• When the clock gains across Daylight-saving time
during a programmed recording, it means that the
recording completion time is consequently set onehour earlier. In this case, set the programmed
recording one-hour longer in advance. If not set
accordingly, the programmed recording stops onehour shorter.
• When the clock loses across Daylight-saving time
during a programmed recording, it means that the
recording completion time is consequently set onehour later. In this case, as the programmed
recording continues one-hour longer, delete
unnecessary chapters by chapter dividing after the
completion of recording.
Recording
Playback
Editing
Function setup
Others
Notes
• The “Loading” icon appears in the top right of the screen after recording. This indicates that the unit is executing
the final recording process (writing managing information). Operations other than changing channels cannot be
done until this icon disappears. The time for executing this process differs depending on the recording time or
capacity of the disc.
• Note that all recording content may be deleted if the unit is disconnected from a wall outlet, or a power failure
occurs, during recording.
• If a power failure occurs within five minutes prior to the programed recording start time, the programmed recording
may not be executed.
• A programmed recording may not be executed correctly if scheduled when Daylight-Saving time starts or ends.
27
Page 28
Recording
Before recording (Continued)
Initializing a DVD-RAM/RW disc (Logical format)
Be sure to read this section prior to using a DVD-RAM/RW disc on this recorder for the first time.
For DVD-R, initializing is not necessary.
A disc should be initialized in the following cases: (The
recorder may display a message to request you to do
so.)
e.g.
When you use a DVD-RAM/RW disc on this recorder
for the first time.
If data fragments produced by repeated recording or
erasing have accumulated.
If a disc error has occurred.
When you want to record on a DVD-RAM disc for PC.
page 8)
(
Initializing formats a disc logically and insures that it will
perform to its full capability. However, this erases all data
on the disc, so make sure that it does not matter if data
on the disc is erased whenever you initialize a disc.
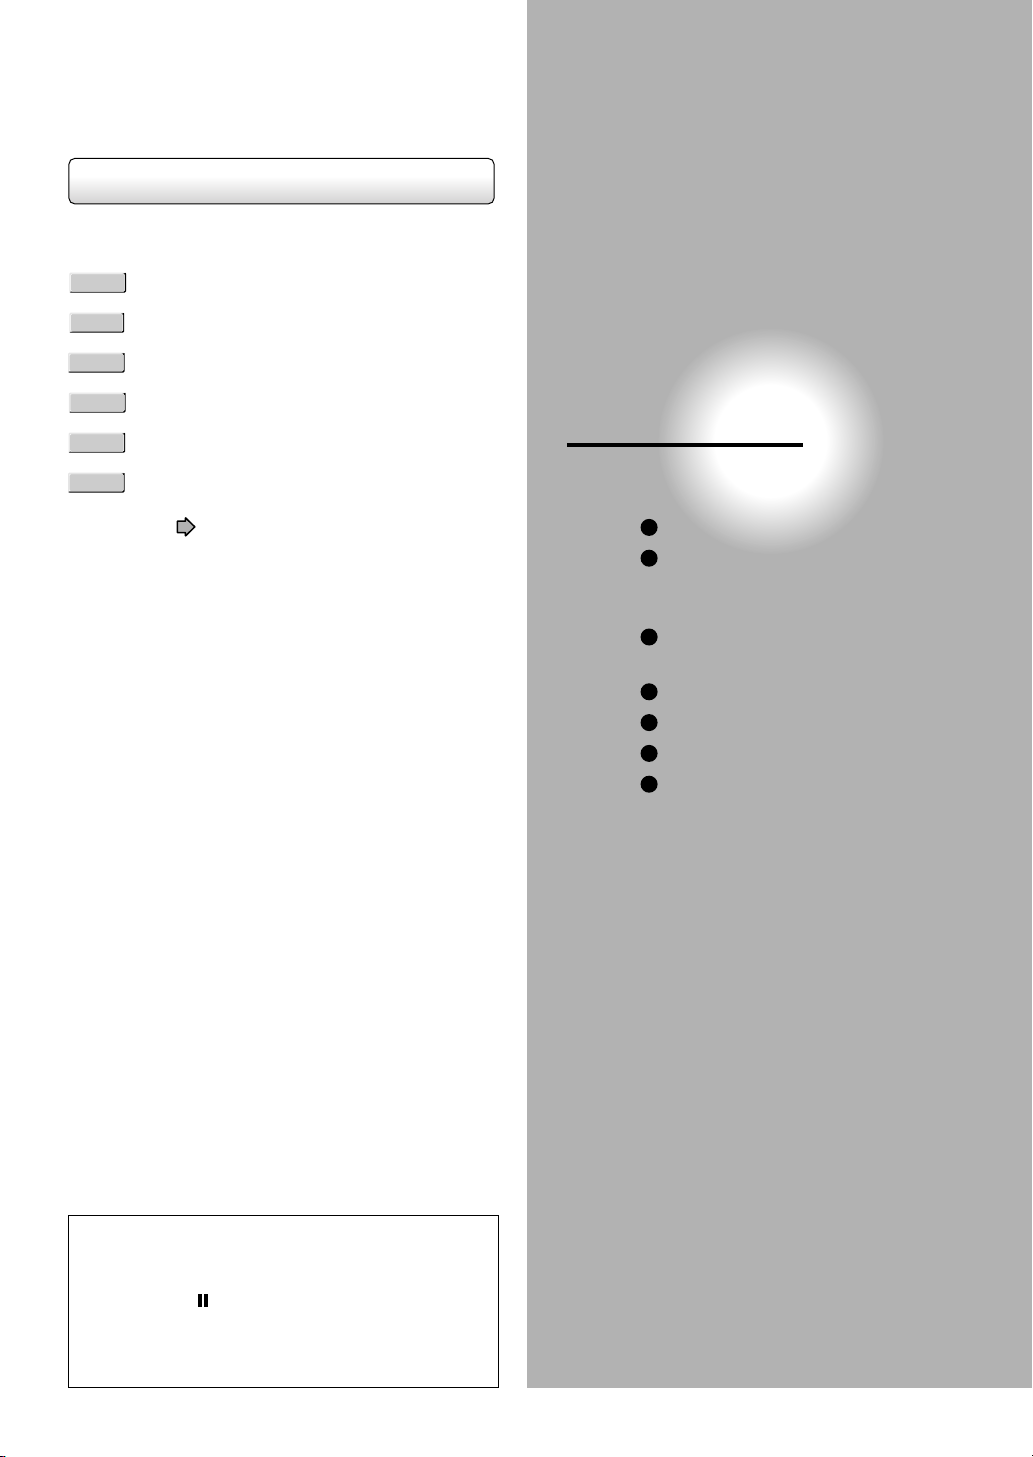
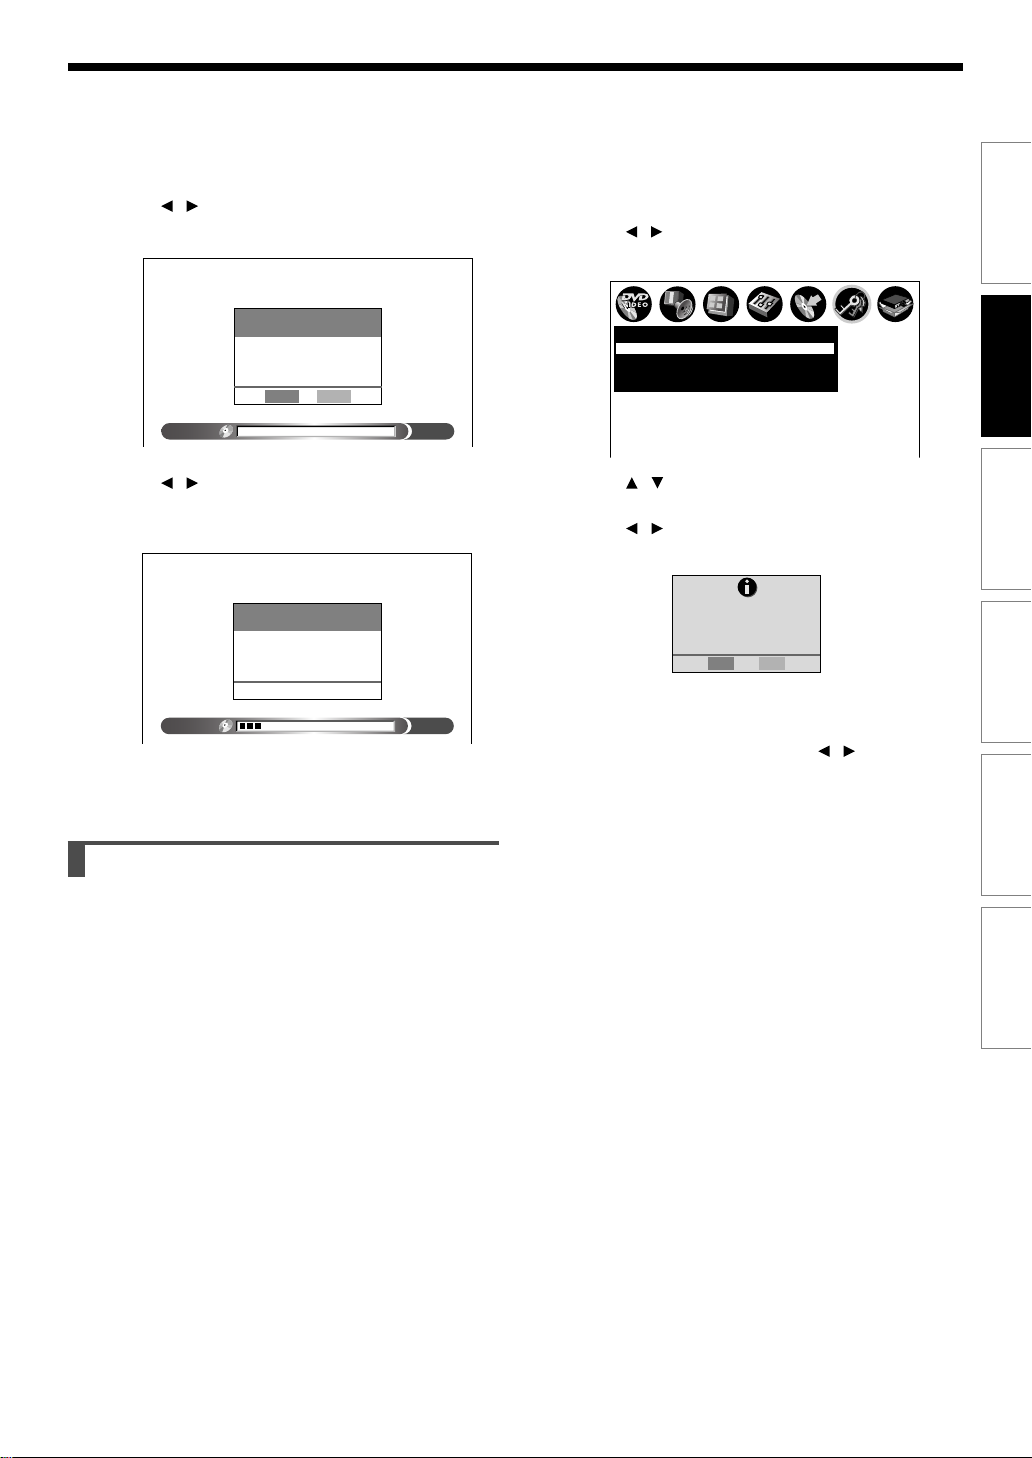
How to initialize a disc
To initialize a DVD-RAM disc, load it in the recorder.
page 20 for loading a disc.
See
1) During stop, press QUICK MENU.
The following menu appears. (The actual contents
depends on the operational status of the recorder.)
e.g.
Quick Menu
Bit rate
Disc management
DVD compatible mode
Aspect ratio(Video mode)
DVD-Video:CHP create
AV record quality
SAP
Time bar
Remain
Exit
e.g.
Quick Menu
3) Press
Bit rate
Disc management
DVD compatible mode
Aspect ratio(Video mode)
DVD-Video:CHP create
AV record quality
SAP
Time bar
Remain
Exit
/ to select “DVD format,” then press
Disc information
DVD format
SELECT/ENTER.
e.g.
DV D format
0 0 1 –
Cancel
Edit
Edit
%
0
Format
Disc Number
Disc Name
Start
Numbering a disc
The recorder automatically numbers discs when
initializing. However, you can assign a desired number
(using 3 digits) and designate sides A and B on a doublesided disc. (DVD-RW discs cannot be numbered.)
(1) Press
/ buttons to select “Edit” of “Disc Number”
then press SELECT/ENTER button.
(2) Press
(3) Press
/ buttons to select a digit.
/ buttons to shift.
(4) Repeat steps (2) and (3).
(5) Press SELECT/ENTER button.
2) Press
/ to select “Disc management,” then
press SELECT/ENTER.
A sub menu appears on the right side.
28
Naming a disc
You can name a disc.
(1) Press
/ buttons to select “Edit” of “Disc Name,”
then press SELECT/ENTER button.
The character input window appears.
(2) Enter a disc name following the procedure of
“Entering characters” (
(3) Press
button to eliminate the window.
page 30).
Page 29
Introduction
Management settings
DVD-RAM physical format
Software version
DVD drive software
Genre setting
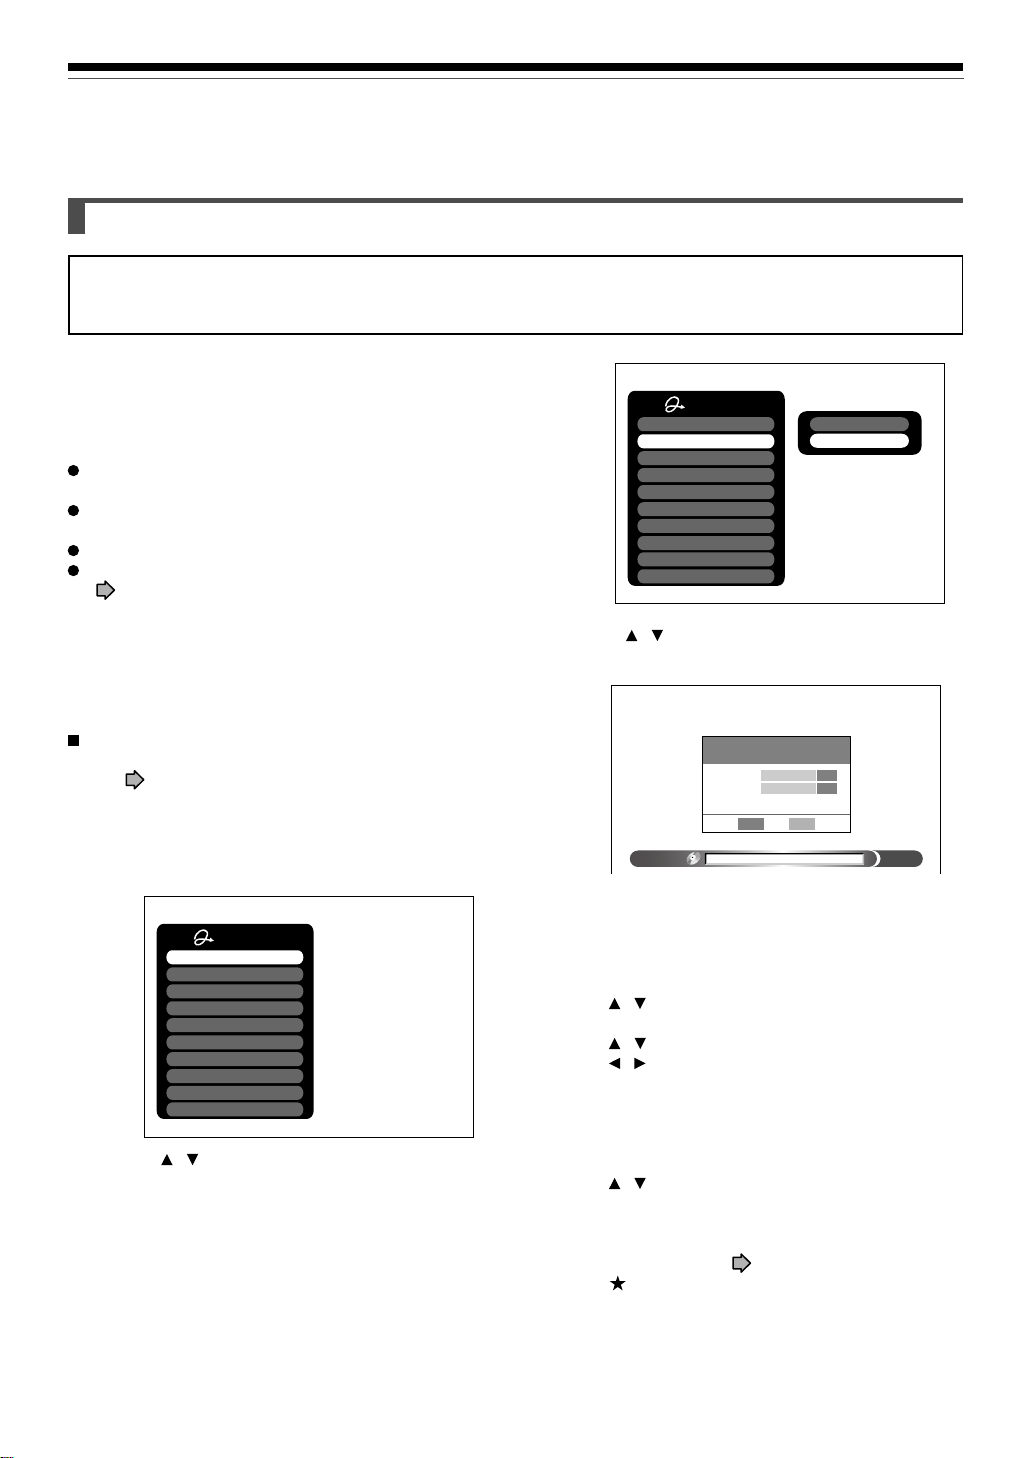
4) Press / to select “Start,” then press
SELECT/ENTER.
e.g.
DV D format
Entire disc contents will be
erased if disc is formatted.
Proceed?
Start
Cancel
%
0
5) Press
Format
/ to select “Start,” then press
SELECT/ENTER.
Initialization starts.
e.g.
DV D format
DVD
Formatting
Format
%
18
When initialization is completed, the setup window
disappears.
DVD-RAM physical format
Physical formatting is a simple execution for a disc which
cannot be used or read (or which is becoming hard to
read). It may refresh such a disc for recording and
playback. (There is no guarantee that all such discs will
be recovered.)
“DVD-RAM logical format” process only rewrites certain
data on file system and management information,
however, “DVD-RAM physical format” rewrites all data on
a disc, therefore it takes a much longer time to complete.
For a 4.7GB single sided DVD-RAM, about 70 minutes
will be necessary. While processing, all recorder
operations and functions including program recording will
not work until the process is finished. Also this process
erases all data stored on the DVD-RAM disc.
1) During stop, press SETUP.
2) Press
/ to select “Management settings”
then press SELECT/ENTER.
e.g.
3) Press
/ to select “DVD-RAM physical
format,” then press SELECT/ENTER.
4) Press
/ to select “Yes,” then press SELECT/
ENTER to execute.
e.g.
Warning: It will take approximately
70 minutes to format a 4.7GB
DVD and all data will be erased.
Confirm t
hat timer programming isn’t
scheduled.
Proceed?
Yes
No
To cancel, select “No”, then press SELECT/ENTER
button.
5) Read the message, and press
/ to select
“Yes ” or “No”, then press SELECT/ENTER.
Notes
• The physical format process may fail if executed to a dirty
DVD-RAM disc. Also, the disc may be difficult to record,
even if it finished. Before executing DVD-RAM physical
format process, be sure to confirm the disc is not dirty.
Clean it if necessary. If the disc has scratches or dust
beyond cleaner’s efficacy, do not execute DVD-RAM
physical format process on the disc.
• The following DVD-RAM discs require physical formatting:
– A disc which is not formatted correctly.
– The disc which has errors during writing because of dirt
on the disc, and cannot be further recorded, or cannot
initialize normally.
• You need to start physical formatting from the first step
again when you use a failed disc.
• Physical formatting does not work if the disc contains a lot
of voids beyond the limitation of this recorder.
• If an error occurs in physical formatting, “ERR-01” appears
in the front panel display. To turn off the message, press
DISPLAY button.
Recording
Playback
Editing
Function setup
Others
29
Page 30
Recording
Before recording (Continued)
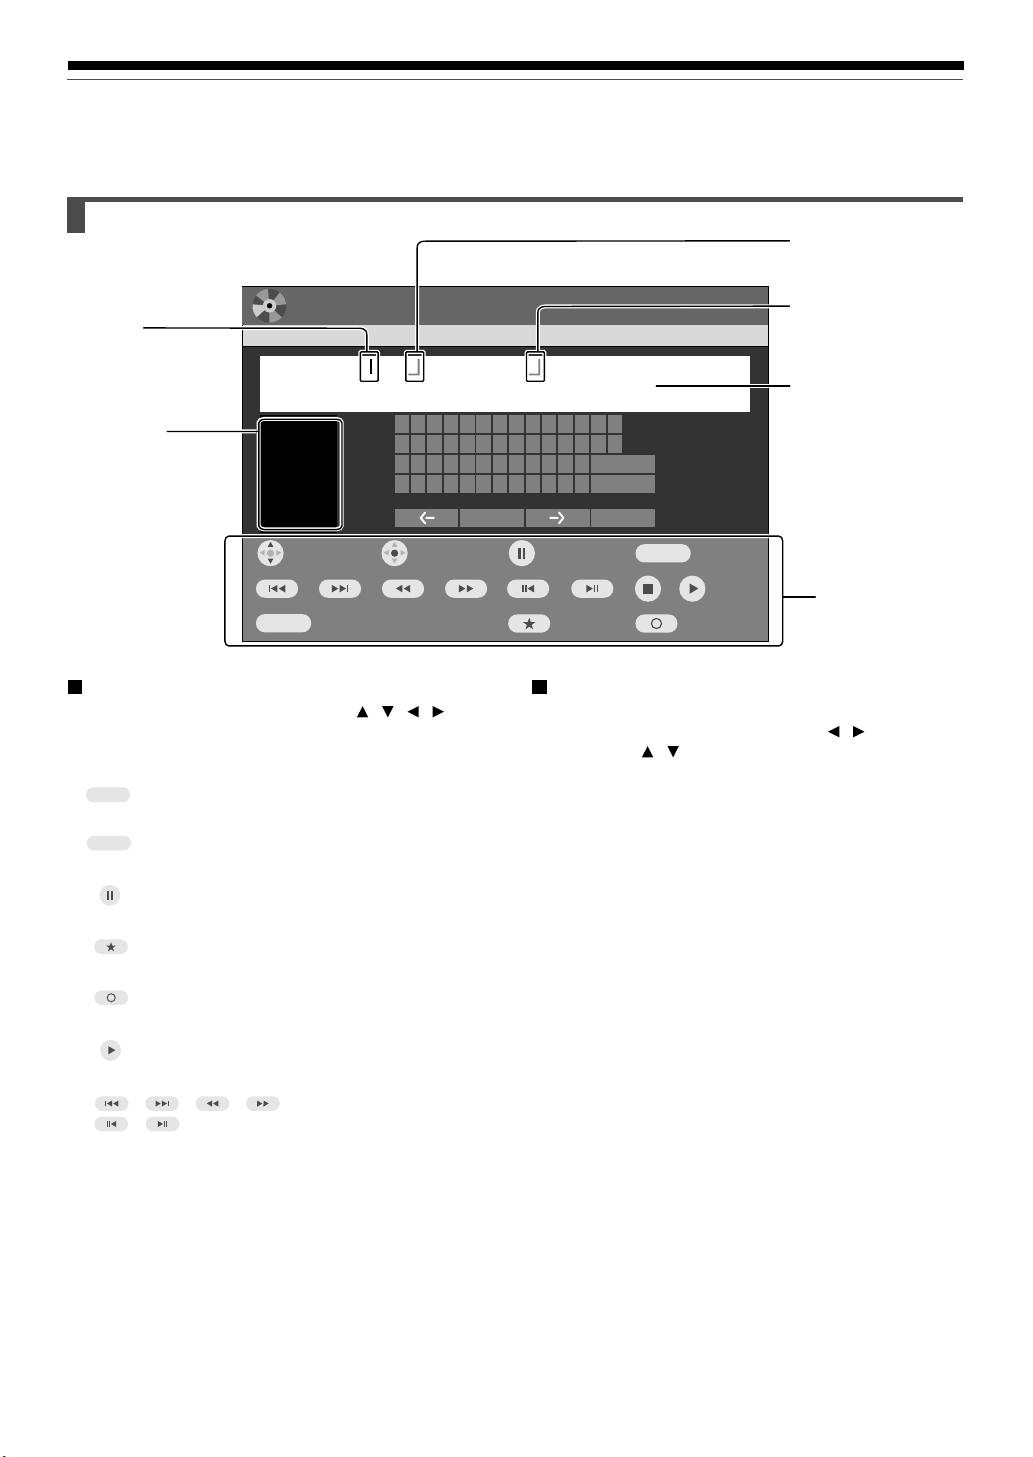
Entering characters
e.g.
Cursor
An entered character
will appear here.
Language
Operation guidance of the remote control
To enter the character, normally use / / /
buttons on the remote. About the other buttons to be
used are shown on the operation guide.
: Enters a number.
10KEY
CONTENT
MENU
Chapter
English
Spanish
French
German
Italian
etc...
10KEY
Title information
003
Select
/
Direct(0-9)
12345678 0-=/’9
qwe r t yu i p [ ]o
asdf ghjk :
zxcvbnm, /
Input
#;
l
.
Space
-,.:
BkSp
Delete
Clear All
CLEAR
Save Return
Switching a language
Before entering a character, move a cursor to the
language selection area by pressing
Then press
/ buttons to select a language, then
press SELECT/ENTER button.
All ClearCaps Lock
Space
Estimated end of the
first line on CONTENT
MENU.
Estimated limit of
characters displayable on
CONTENT MENU.
The character being
selected appears.
Operation guide
/ buttons.
30
: Erases all the characters.
CLEAR
: Caps Lock
: Saves the changes and returns to the
previous screen.
: Cancels the changes and returns to the
previous screen.
: Enters a space.
: Enters a symbol.
Page 31

Entering characters
The cursor may be followed by unwanted characters.
You can erase them if necessary by either of the
following measures:
Introduction
Erasing characters
• Erasing all the characters on the writing board
Select “Clear All” by pressing
press SELECT/ENTER button.
Alternatively, press CLEAR button.
• Erasing one character before the cursor
Select “BkSp” by pressing
press SELECT/ENTER button.
(1) Press
(2) Press
press SELECT/ENTER button.
The selected character is input on the cursor.
(3) Repeat steps (1) and (2) to enter characters.
(4) When finished, press
characters.
The characters you entered appears.
Notes
• You can enter up to 64 characters.
• When unnecessary information appears, or when you want
to alter the input character, press CLEAR button to erase
all, or select “BkSp” or “Delete” to erase an unnecessary
character.
button to select an input mode.
/ / / buttons to select a character, then
/ / / buttons, then
/ / / buttons, then
button to save the
Recording
Playback
Editing
Function setup
31
Others
Page 32

Recording
Selecting a disc according to purposes of use (DVD-RAM/DVD-R/RW)
There are various types of discs having different standards.
Select one for your purpose of use.
Purposes of use
• Editing after recording (e.g. deleting unnecessary
portions, dividing chapters).
• Recording so that the sound of bilingual broadcast
can be switched.
• Recording a recording-once-permitted program.
• Pause TV. Chase Play.
Available disc
DVD-RAM disc (Ver. 2.0/2.1/2.2)
• You can repetition-record/delete the contents.
• Playing discs recorded on this recorder with other
DVD players.
(Some DVD players may not play these discs.)
Available disc
DVD-R disc (Ver. 2.0)
DVD-RW disc (Ver. 1.1/1.2)
Once you record on a DVD-R disc. You cannot
delete or rewrite the contents in DVD-Video mode
(Video mode).
Finalizing a DVD-R/RW disc
32
You can see the contents recorded on a DVD-R/RW
disc with other DVD players by finalizing.
For details, see
When recording on a DVD-R/RW disc you need to set
up the recorder due to the restriction by DVD-Video
standard.
For details, see the next page.
page 100.
Page 33

Recording
Setting for recording on a DVD-R/RW disc in Video mode
This setting is necessary to play the contents on a DVD-R/RW disc with other DVD players.
Introduction
Items to set up
When recording in Video mode, there are some
restrictions by DVD-Video standard.
Therefore, it is necessary to set up these items below.
Set up the items in advance before recording onto a
DVD-R/RW disc.
DVD compatible mode
Only the main sound and SAP sound are available
for recording in Video mode under DVD-R standard.
Off: This is not for recording on a DVD-R disc.
Depending on Picture/Audio settings, making
DVD Video may not be possible. (When
recording directly on a DVD-R/RW disc of
DVD-Video mode, the recording proceeds
with “Main” on even though “Off” is set.)
Main: In multichannel broadcasting, only the main
sound is recorded.
SAP: In multichannel broadcasting, only SAP
sound is recorded.
Aspect ratio
“4:3” and “16:9” cannot be mixed in one title.
Therefore, set the aspect ratio before recording.
4:3: Set the aspect ratio to 4:3
16:9: Set the aspect ratio to 16:9
Chapter dividing (“DVD-Video: CHP create”)
This is the setting to divide a title into some
chapters. It is convenient to skip scenes.
Off: Chapter dividing is not available.
5 min, 10 min, 15 min, 20 min:
Select an interval for chapter dividing.
How to set up
Press SETUP.
1
SETUP menu appears.
SETUP
Select “DVD recorder operation”
and press SELECT/ENTER.
2
e.g.
SELECT/
ENTER
Select “Aspect ratio (Video
mode)” and press SELECT/
3
ENTER.
e.g.
SELECT/
ENTER
DVD recorder operation
AV record quality
Picture record mode
Input black level
Aspect ratio(Video mode)
DVD compatible mode
DVD-Video:CHP create
DVD recorder operation
AV record quality
Picture record mode
Input black level
Aspect ratio(Video mode)
DVD compatible mode
DVD-Video:CHP create
Standard
4:3
Main
Off
Standard
4:3
Main
Off
Recording
Playback
Editing
Function setup
Others
Note
• When the number of chapters reaches a limit, chapters are
not divided anymore. The limit number of chapters is
dependent on conditions of a DVD-R/RW disc.
Select an item and press
SELECT/ENTER.
4
e.g.
SELECT/
ENTER
Set “DVD compatible mode” and “DVD-Video:
CHP create” as step 3, 4.
DVD recorder operation
AV record quality
Picture record mode
Input black level
Aspect ratio(Video mode)
DVD compatible mode
DVD-Video:CHP create
Standard
4:3
Main
Off
4:3
16:9
33
Page 34

Recording
DVD-RAM
DVD-RW
DVD-R
Recording a TV program
To record a TV program currently being broadcast, follow the procedures of this chapter.
Preparation
• Load a DVD-RAM/R/RW disc into the recorder.
- Load a disc which has sufficient space available to record the program.
- Make sure the loaded disc is not write-protected.
• If you record on a DVD-R or a DVD-RW disc, set “DVD compatible mode” (
RW recording, “Off” setting is regarded as “Main.”
• If you record on a DVD-R or DVD-RW disc, set “Aspect ratio(Video mode)” (
sources.
page 33) to “Main” or “SAP.” In DVD-R/
page 33) according to recording
OPEN/CLOSE
DISPLAY
ANGLE
REMAIN
FL SELECT
SUBTITLE
REC MODE
SETUP
DIMMER
AUDIO/SAP
EXTEND
PROGRESSIVE
FREEZE
ZOOM
Start
VOL CH
TIMESLIP
EASY
NAVI
ENTER
INPUT SELECT
MENU
FWDPLAYREV
MUTE
TOP MENU
SELECT/
INSTANT
REPLAY
QUICK MENU
SKIP REV STOP SKIP FWD
TV
DVD
INSTANT
SKIP
Press INPUT SELECT repeatedly to select a
recording source.
1
Each time you press the button, the indicator alternates.
INPUT SELECT
Ch-: To record a TV program or cable program with
recorder tuner.
L-1: To record a source connected to the INPUT1
jacks on the rear panel (
L-2: To record a source connected to the INPUT2
jacks on the front panel (
Press the number buttons to select a channel
to record.
2
CH button ( / ) is also available.
1
3
2
4
7
6
5
89
To record a program from a connected tuner, select the
0
channel on the tuner.
Press QUICK MENU to display Quick Menu.
(If you want to use the default setting for “AV record
3
quality,” skip to step 7.)
page 38).
page 38).
34
REC
SEARCHTADJUST
1
2
4
5
89
7
3
6
CHP DIVIDE
+
10
0
CLEAR
QUICK MENU
e.g.
Quick Menu
Bit rate
Special playback mode
Disc management
DVD compatible mode
Aspect ratio(Video mode)
DVD-Video:CHP create
AV record quality
SAP
Time bar
Remain
Exit
Page 35

Introduction
OPEN/CLOSE
DISPLAY
FL SELECT
SUBTITLE
ANGLE
REC MODE
REMAIN
SETUP
VOL CH
TIMESLIP
MUTE
TOP MENU
INSTANT
REPLAY
QUICK MENU
SKIP REV STOP SKIP FWD
REC
SEARCHTADJUST
1
4
7
EASY
NAVI
SELECT/
ENTER
2
5
89
DIMMER
AUDIO/SAP
EXTEND
INPUT SELECT
3
6
PROGRESSIVE
FREEZE
ZOOM
MENU
FWDPLAYREV
CHP DIVIDE
CLEAR
DVD
INSTANT
SKIP
+
10
0
Press / to select “AV record quality,” then
press SELECT/ENTER.
4
Recording
e.g.
SELECT/
ENTER
TV
Press ADJUST (-/+) to select the setting
number.
5
e.g.
ADJUST
See
Quick Menu
Bit rate
Special playback mode
Disc management
DVD compatible mode
Aspect ratio(Video mode)
DVD-Video:CHP create
AV record quality
SAP
Time bar
Remain
Exit
AV record quality
Setting 2
DVD
Custom setting
ModeSetting Rate
X P
1
SP
2
MP
3
L P
4
E P
5
Total Recording Time: approx. 122min.
(
with 4.7 GB unused)
9. 2
4. 6
3. 0
2. 2
1. 4
SP
4.6
Audio quality
page 42 for details on “Mode”.
D/M1
D / M1
D / M1
D / M1
D / M1
D / M1
Playback
Editing
Function setup
Others
Press SELECT/ENTER.
6
The menu disappears.
SELECT/
ENTER
7
Press REC.
Recording starts.
REC
35
Page 36

Recording
Recording a TV program (Continued)
Selecting the recording mode
Before recording, you can select the recording mode. During stop mode, press REC MODE button. By pressing the
button repeatedly, you can select one from 5 settings of “AV record quality” appearing in the front panel display.
Notes
• During recording, you cannot change the recording parameters, such as modes, channels, etc.
• The number of titles cannot exceed 99 for any disc.
• During normal recording, you can set the programmed recording using the REC MENU.
• You cannot start recording immediately before a programmed recording starts.
• For recorded sound, see page 69.
• During monaural sound recording, the same sound is recorded on both the left and right channels.
•
When “DVD compatible mode” is set to “Main” or “SAP”, the unit records the same sounds on both the left and right channels
when receiving monaural sound. When receiving the multi-channel sound, the selected sound, Main or SAP, is recorded on
both the left and right channels
• Depending on the disc contents, pressing REC button may take a longer time to start recording.
•
When a starting time of a programmed recording comes, a recording in execution is stopped and the programmed recording
starts. If you do not want to stop the recording, cancel the timer program before it starts
•
Even if you set “Aspect ratio(Video mode)”
R or DVD-RW disc with “Rate” set to “EP” (1.4 Mbps)
• Be careful of a programmed recording across the change-over of Daylight-saving time ( page 27).
.
( page 33)
.
to “16:9”, images are recorded in 4:3 aspect ratio when using a DVD-
.
36
Page 37

Introduction
To stop recording
Press STOP.
To pause recording (to omit an unnecessary
portion)
During recording, press .
To resume recording, press it again.
To change a TV channel to be recorded
1) During recording, press .
Recording pauses.
2) Press CH or the number buttons to change the
channel.
3) Press
to resume recording.
To view a TV program while recording another
1) Start recording on this recorder.
2) On a connected TV, select the TV mode.
3) Using the channel selector of the TV, select a
desired channel on the TV.
To set an end time of a recording which is in
progress
1) During recording, press QUICK MENU.
Quick Menu appears.
2) Press
/ to select “End time” then press
SELECT/ENTER.
The display changes as follows:
e.g.
2:13
pm
3) Press
End time
/ to select an item then press
ADJUST to change the value.
4) Press SELECT/ENTER.
Notes
• By setting an end time, it is memorized as a programmed
one, and the indicator in the front panel display
illuminates to indicate that the recorder holds a timer
program of recording.
• The programmed end time must be set for 5 minutes later
than the current time.
To play a title recorded on a DVD-RAM disc
while recording another on the same disc
(Recorded Title Play)
DVD-RAM
During recording, you can play a title recorded on the
same disc.
1) While recording on a DVD-RAM disc, press
EASY NAVI.
2) Press
/ / / to select “Play Contents”,
then press SELECT/ENTER.
3) Press
/ / / to select a desired title, then
press SELECT/ENTER.
Playback of the selected title starts.
Pressing STOP button stops playback, and the
content currently recorded returns. If you press
PLAY button, playback resumes from the location
you last stopped.
Notes
• The playback picture may appear after a delay of several
seconds.
• While you are using this function, the following operations/
functions are not available.
- Programmed playback (repeat playback, etc.)
- Editing (Playlist programming, dubbing, title/chapter
naming, title thumbnail setting, etc.)
• Depending on the data condition, playback may pause.
• When the recording mode is set to “XP” or “AT ” (when a
high bit rate is automatically set. page 42), this function
is not available.
Creating chapters automatically at regular
intervals
Set “DVD-Video:CHP create” ( page 33).
Recording
Playback
Editing
Function setup
Others
37
Page 38

Recording
DVD-RAM
DVD-RW
DVD-R
Recording an external source
You can record programs from connected equipment on a DVD-RAM/R/RW disc.
Connect according to A or B.
• To record a clearer picture,
use the S video jack.
External equipment
To video
output jack
To audio
output jacks
Audio cable
Video cable
A: Using the input jacks on the rear of the recorder
Video cable
To video
output
jack
To audio
output jacks
Audio cable
Red
White
Rear of the recorder
B: Using the input jacks on the front of the recorder
Yellow
White Red
INPUT 2 (L-2)
INPUT1 (L-1)
Yellow
Preparation
• Load a DVD-RAM/R/RW into the recorder.
– Load a disc which has sufficient remaining space to record the program.
– Make sure the loaded disc is not write-protected.
Notes
• If a source of high quality sound track such as DVD audio is recorded with this recorder, the sound quality becomes regular
audio CD quality. Refer to the instructions of the connected equipment.
• When you record an external source onto a DVD-R/RW disc, set the connected equipment to output sound you want to
record (if selectable such as multiplex broadcasting), as the recorder records sounds of external source in the stereo type
onto a DVD-R/RW disc, neglecting the setting of “DVD compatible mode” ( page 33).
• DVD-R/RW discs cannot record contents with copy restriction signal embedded (copy-protected or copy once contents),
DVD-RAM discs can record copy once contents.
• Some satellite programs via a connected tuner may contain both 4:3 pictures and 16:9 pictures. DVD-R/RW discs cannot
record such contents, under restriction of the DVD-Video standard. To record these programs, use DVD-RAM discs.
38
Page 39

Introduction
OPEN/CLOSE
DISPLAY
ANGLE
REMAIN
FL SELECT
SUBTITLE
REC MODE
SETUP
DIMMER
AUDIO/SAP
EXTEND
PROGRESSIVE
FREEZE
ZOOM
Start
VOL CH
TIMESLIP
EASY
NAVI
ENTER
INPUT SELECT
MENU
FWDPLAYREV
MUTE
TOP MENU
SELECT/
INSTANT
REPLAY
QUICK MENU
SKIP REV STOP SKIP FWD
TV
DVD
INSTANT
SKIP
Press INPUT SELECT repeatedly so that “L-1”
or “L-2” appears on the front panel display,
1
corresponding to the input in which the device
is connected.
Each time you press the button, the indicator changes.
INPUT SELECT
L-1: To record pictures from equipment connected to
the INPUT 1 jacks on the rear panel.
L-2: To record pictures from equipment connected to
the INPUT 2 jacks on the front panel.
Start playback of the source content on the
connected equipment.
2
Press REC of this recorder to start recording.
3
REC
Recording
Playback
Editing
Function setup
REC
SEARCHTADJUST
1
2
4
5
89
7
3
6
CHP DIVIDE
+
10
0
CLEAR
When recording is completed, press STOP.
4
STOP
Others
39
Page 40

Recording
Recording an external source (Continued)
Notes on recording from a connected VCR or camcorder
Check the condition of the source equipment before playing.
Set the equipment in good condition, e.g. clean the head or adjust the tracking, etc. to obtain optimum playback.
Bad condition may produce noises in playback. These noises may be detected as copy protection signals,
resulting in stop of recording on this recorder.
Play a source in an usual mode. Avoid using any correcting or enhancing features, as they may add signals which
can be detected as copy protection signals.
Source quality or tape condition beyond adjustments on the source equipment may stop a recording on this
recorder.
Do not operate the source equipment during recording on this recorder.
Operations such as pausing, resuming, fast-forwarding (CUE) and fast-reversing (REVIEW), etc. may produce
noises, which may be detected as copy protection signals. Therefore, first start playback on the source equipment
to confirm that the desired source can be played properly, and then start recording on this recorder.
Do not operate the source equipment during recording. After completing the desired scene, stop the recording on
the recorder, and then stop the playback on the source equipment. Delete unnecessary scenes using editing
functions (
recording. After operating the source equipment, resume the recording as above.
page 98). If you want to operate the source equipment during recording, pause or stop the
When recording from a camcorder
Follow the above notes. Be sure to power the camcorder by its AC adapter, not batteries. If batteries are run
down, the recording may not be finished completely.
40
Page 41

Recording
REC
MENU
Timer Programming
1/ 1
9:00 pm
4/3 (Su)
Video
Media AudioEnd
4.6
D/M1
DVD
CH Date Star t
Exec
--- -- --
amam
SP
------- -----
REC
MENU
Timer Programming
1/ 1
9:00 pm
4/3 (Su)
Video
MediaEnd
4.6
DVD
AudioCH Date Start
Exec
-- --
amam
SP
------- -- --
2
D/M1
DVD-RAM
DVD-RW
DVD-R
Programing a recording
Use REC MENU to program a recording. It will take less time to prepare, as it provides all necessary
information for recording, including estimated disc space remaining.
For more information, see “Before recording” (
Be careful when you program a recording across the change-over of Daylight-saving time (
OPEN/CLOSE
DISPLAY
FL SELECT
DIMMER
SUBTITLE
ANGLE
REMAIN
VOL CH
Start
MUTE
TOP MENU
REC MODE
SETUP
TIMESLIP
EASY
NAVI
AUDIO/SAP
EXTEND
PROGRESSIVE
FREEZE
ZOOM
INPUT SELECT
MENU
TV
DVD
1
2
page 26).
page 27).
Press EASY NAVI.
EASY NAVI Main Menu appears.
EASY
NAVI
Press / / / to select “Timer Recording”,
then press SELECT/ENTER.
REC MENU appears.
SELECT/
ENTER
e.g.
Introduction
Recording
Playback
Editing
SELECT/
ENTER
INSTANT
REPLAY
QUICK MENU
SKIP REV STOP SKIP FWD
FWDPLAYREV
REC
SEARCHTADJUST
1
2
4
5
89
7
CHP DIVIDE
3
6
CLEAR
INSTANT
SKIP
+
10
0
Press SELECT/ENTER.
3
“CH” is ready for setting.
SELECT/
ENTER
Select an item by pressing / , then press
ADJUST (-/+) to set the item.
4
SELECT/
ENTER
ADJUST
e.g.
e.g.
REC
Timer Programming
MENU
Exec
23
4/10 (Su
)
7
00
pm8 00 pm
1/ 1
MediaEnd
DVD
• Refer to the setting items on the next page.
• You can also set the item by pressing
• “CH” can be input by the number buttons.
4/3 (Su)
Video
4.6
SP
Function setup
Others
9:00 pm
AudioCH Date Start
D/M1
/ button.
(Continued)
41
Page 42

Recording
Programing a recording (Continued)
When complete, press SELECT/ENTER.
5
To program another recording, press button to move
SELECT/
ENTER
to the next line, then repeat steps 3 to 5.
Press EASY NAVI to exit.
6
Your program is entered.
Setting items
Exec
CH
Date
Start*
End*
Media
Video
Audio
√
2-69 (TV), 1-125 (Cable),
L1, L2
Specific date (from today to 2
month later)
Every Sunday to Saturday, Monday
to Thursday, Monday to Friday,
Monday to Saturday, everyday.
12:00 am – 11:59 pm
12:00 am – 11:59 pm
DVD
XP 9.2
SP 4.6
MP 3.0
LP 2.2
EP 1.4
AT (Auto)
D /M1**
EASY
NAVI
A timer program with this mark will be executed. To disengage, remove
this indicator.
Select a channel you want to record.
Select a date of a TV program you want to record.
Enter a starting time of recording. (An initial setting is 10 minutes later.)
You can also use the number buttons.
Enter an end time. (Set the timer to begin recording no sooner than 2
minutes past the current time.)
You can also use the number buttons.
Fixed. (Not adjustable.)
To set a rate automatically according to the remaining volume of the
disc. (If the disc does not have room for the TV program, the program
cannot be recorded to the end.) Even if you use a blank DVD disc, the
maximum recording time is about 2 hours.
Fixed. (Not adjustable.)
• If you want to turn off the power, press ON/STANDBY
button.
* If you set summer time on the clock of the recorder, see the notes on page 34 in the “INSTALLATION GUIDE”.
** The digital recording technology for consumer products of Dolby Laboratories is used for D /M1. Dolby Digital 192 kbps
is set for D /M1.
Notes
• See page 48 for details on “Video” .
• If you record with setting the bit rate to MP (3.0 Mbps), LP (2.2 Mbps) or EP (1.4 Mbps), the recorded pictures may not be
played properly if change the playback speed. There will be noise, and the picture quality is lower than other rate settings.
42
Page 43

Suggestions for the picture quality setting
• For normal recording or when you cannot decide which mode to choose.
Select “SP”.
• When you need a longer recording time and video quality is not important
Select “EP”.
• To record a high quality picture
Select “XP”.
• To fill the disc
Select “AT (Auto).” A bit rate is calculated automatically according to the remaining volume of the disc. Some
contents may not be recorded on the disc even if you select this function. This is not the function to make full use of
the remaining space capacity.
Notes
• The disc tray does not close automatically, even when the recording start time arrives. Set the recorder loaded an available
DVD-RAM/R/RW disc beforehand.
• When there is little time before a programmed recording starts, you may not be able to start another recording.
• Playback pauses when a programmed recording starts.
• Do not change the “TV/Cable” selection of the Initial settings while a recording is programmed. If you want to change it,
cancel the program recording. After then, make the programing again if necessary.
• Confirm the “DVD compatible mode” ( page 33) setting. “Main” or “SAP” records main sound or sub-sound of multiplex
broadcasts respectively, and does not record the other. Therefore, select “Main” or “SAP” only when you record onto a DVD-
R/RW disc.
• When recording onto a DVD-R/RW disc, set “DVD compatible mode” ( page 33) to the desired recording sound for each
timer program.
Introduction
Recording
Playback
Editing
Function setup
Setting the details for every timer program
You can specify detail items for each of your timer
program.
1) Press QUICK MENU at step 4 on
page 41.
Quick Menu is displayed.
e.g.
REC
MENU
Exec
Aspect ratio(Video mode)
2) Press
Timer Programing
Quick Menu
CH Date Star t
AV record quality
)
7
4/10 (Sa
Exit
23
DVD compatible mode
DVD-R Broadcast Record
Genre setting
AV Record Quality
00
pm8 00 pm
1/ 1
MediaEnd Audio
DVD
/ to select an item and press SELECT/
4/3 (Su)
Video
4.6
SP
9:00 pm
D/M1
ENTER.
For details, see “Quick menu items.”
Quick menu items
AV record quality
Select a recording mode.
DVD compatible mode
When recording onto a DVD-R/RW disc, make this
selection (
page 33) for each timer program.
“Off” setting is neglected and regarded as “Main” in
DVD-R/RW recording.
Aspect ratio(Video mode)
Select the aspect ratio when recording onto a DVDR/RW disc. (
page 33)
Genre setting
You can set a genre before setting programmed
recording.
To see the registered list, refer to Genre setting
page 119).
(
Set the genre according to recording contents.
The selection you have made for the timer program
is shown at the bottom of the display.
Others
43
Page 44

Recording
Programing a recording (Continued)
Shifting the time period of a recording (Time
Shift)
If a prior TV program extends beyond its scheduled
time and into one that you programmed, you can shift
the programmed start and end time of the recording.
e.g.
1:00pm 1:54pm
Time Shift
20 minutes
extend
1:20pm
1) Press EASY NAVI.
EASY NAVI Main Menu appears.
2) Press
/ / / to select “Timer Recording”,
then press SELECT/ENTER.
REC MENU appears.
3) Press
/ to select a timer program you want
to shift the time period.
4) Press EXTEND.
“Start” and “End” are ready to be input.
5) Press EXTEND repeatedly.
Each time you press the button, “Start” and “End” is
shifted in 10 minutes intervals to, up to 60 minutes
later.
6) Press SELECT/ENTER.
7) Press EASY NAVI to exit.
Note
• After you shifted the time of a timer program which will be
repeated daily or weekly, you should restore the original
start/stop time for future recordings.
Adding a timer program
1) Press EASY NAVI.
EASY NAVI Main Menu appears.
2) Press
/ / / to select “Timer Recording”,
then press SELECT/ENTER.
REC MENU appears.
3) Press
to select a blank line, then press
SELECT/ENTER.
4) Press
/ to select the item, then press
ADJUST to set the item.
5) When complete, press SELECT/ENTER.
6) Press EASY NAVI to exit.
2:14pm
Deleting a timer program
1) Press EASY NAVI.
EASY NAVI Main Menu appears.
2) Press
/ / / to select “Timer Recording”,
then press SELECT/ENTER.
REC MENU appears.
3) Press
/ to select a timer program you want
to delete.
4) Press QUICK MENU.
Quick Menu appears.
5) Press
/ to select “Program cancel”, then
press SELECT/ENTER.
Check the message, then delete the entry.
6) Press EASY NAVI to exit.
Note
• You cannot delete a timer program while another is
executed.
Correcting a timer program
1) Press EASY NAVI.
EASY NAVI Main Menu appears.
2) Press
/ / / to select “Timer Recording”,
then press SELECT/ENTER.
REC MENU appears.
3) Press
/ to select a timer program you want
to change, then press SELECT/ENTER.
4) Press
/ to select an item, then press
ADJUST to set the item.
5) Press SELECT/ENTER.
The modification is registered.
6) Press EASY NAVI to exit.
Important
• You cannot correct a timer program within 5 minutes before
the recording start time. You can only delete the timer
program.
Note
• You can program a timer recording whose start time has
already passed, unless the another program recording will
start within 5 minutes. The portion of the program before
the recording starts cannot be saved.
Note
• While the recorder is preparing for or executing a
programmed recording, you cannot add a timer program
which will start within 5 minutes and 15 seconds from the
current time.
44
Page 45

Introduction
Remaining volume
1) Press EASY NAVI.
EASY NAVI Main Menu appears.
2) Press
/ / / to select “Timer Recording”,
then press SELECT/ENTER.
REC MENU appears.
3) Press QUICK MENU.
Quick Menu appears.
4) Press
/ to select “Disc budget calculation”
then press SELECT/ENTER.
Disc budget calculation menu appears.
5) Press
/ to select a timer program, then
press SELECT/ENTER or press ADJUST.
The recorder calculates on a bar graph how much
a specific program (identified by a check mark) will
occupy on the disc.
Pressing ADJUST button can display or remove the
check mark.
e.g.
REC
Disc budget calculation
MENU
CH
Date Start
3
4/10 (Sa
10
4/13
42
4/16 (Fr
4
4/16 (Fr
(Tu)
)
11
9
)
10
)
8
30 ::–
pm
11 50
:
30
pm
10 00
–
:
30
am11 30am
–
:
30
pm9 30pm
–
MediaEnd
pm
DVD
:
pm
DVD
:
DVD
:
DVD
4/3 (Su)
Video
1.4
EP
1.4
EP
2.2
LP
4.6
SP
Audio
D/M1
D/M1
D/M1
D/M1
9:00 pm
Result
Notes
• The nearest 8 programs are calculated at a time.
• While the recorder is preparing for or executing a
programmed recording, any program modification cannot
be registered. Only programs which will start after 5
minutes or later can be modified.
• Available disc volume is not displayed for a DVD-R/RW disc
on which DVD-Video finalize process was executed.
To stop a programmed recording
To finish,
Press
on the front panel twice.
When you press it once, a message appears. While
the message is displayed, press
button once again.
Turning the power off automatically after
completing a programmed recording
1) While executing a programmed recording, press
QUICK MENU.
Quick Menu appears.
2) Press
/ to select “Auto power off” then
press SELECT/ENTER.
Recording
Playback
Editing
Function setup
()
Elapsed AvailableSelected(current)
DVD
Selected entry
Available disc volume
DVDHDD
When the entry item is marked X, the
recording does not fit. Change the setting.
6) Correct the parameters of the timer program if
necessary.
(Skip to step 8), if you do not need this.)
You can change “Video”.
Select an item you want to modify and press
SELECT/ENTER button. The item will be ready to
be altered. Press ADJUST button to modify. When
complete, press SELECT/ENTER button.
You can adjust to a lower mode to reduce the
quality of the recording, and thus provide more disc
capacity (space).
7) Press
.
Program modification is registered.
8) Press EASY NAVI to exit the GUI.
Keeping the power on even after the
programmed recording finished
If the recorder turns itself on to execute a programmed
recording, it will turn itself off after finishing the
recording. You can restrict this and keep the recorder
powered on.
1) While executing a programmed recording, press
QUICK MENU.
2) Press
/ to select “Continuous power on”
then press SELECT/ENTER.
Others
45
Page 46

Recording
Programing a recording (Continued)
Delaying the end time of a programmed
recording while it is recording
While a programmed recording is in progress,
press EXTEND.
The first press displays the programmed end time (in
the front panel display).
Each time you press the button, it is delayed 10
minutes, up to 60 minutes.
Notes
• Pressing a button except EXTEND in the above procedure
will set the currently selected delay.
• You cannot delay the end time of a programmed recording
which will end within 1 minute from the current time.
• Even if you delay the end time of a programmed recording,
the recording will stop when the disc is exhausted.
46
Page 47

Recording
DVD-RAM
Others
Introduction
To delete recorded content
DVD-RAM
DVD-RW
Important note
Any deleted title/chapter (original) cannot be restored.
Before deleting, be sure to check contents on the disc.
1) Perform steps 1 and 3 in “Playing recorded
contents” (
(chapter).
2) Press QUICK MENU, then press
“Title delete” (“Chapter delete”) and press
SELECT/ENTER.
3) Read the message and press
“Yes,” then press SELECT/ENTER.
DVD-R
SELECT/ENTER
/ / /
page 51) to select a title
/ to select
/ to select
To protect recorded content
You can protect recorded content from unexpected
deletion.
Protection is provided for each title (original).
1) Perform steps 1 and 3 in “Playing recorded
contents” (
2) Press QUICK MENU, and press
“Title information”. Then press SELECT/ENTER.
3) Press QUICK MENU, and press the
select “Lock” and then press SELECT/ENTER.
The mark
Notes
• To cancel protection, repeat this procedure.
• Disc initialization erases all titles on a disc even if they are
protected.
page 51) to select a title.
/ to select
/ to
appears.
Recording
Playback
Editing
Function setup
Notes
• When you display a title to delete, on the finder of EASY
NAVI Main Menu, you can delete it by selecting “Delete
Title” then press SELECT/ENTER button. Operate
according to the message.
• Deleting a title (a chapter) decreases the numbers of the
succeeding titles (chapters).
• A chapter of about 5 seconds or shor ter may not be
deleted. Deleting a short chapter may not change the
display of the available disc volume.
• Deleting a playlist title/chapter does not affect the original
title/chapter.
• Deleting an original title/chapter affects all the
corresponding playlist title/chapters.
• Deleting all chapters in a title erases the title itself.
• Title and chapter which contains still pictures cannot be
deleted.
• On a DVD-R/RW disc, deleting is not possible if the disc is
finalized ( page 100).
• Chapters in a DVD-R/RW disc cannot be deleted.
•
On a DVD-RW disc, only
the disc capacity by being deleted.
•
On a DVD-R disc, deleting cannot restore the disc capacity
a title last recorded can restore
Others
.
47
Page 48

Recording
Others (Continued)
Technical information
About recording time
The recording time of a typical VCR (Video Cassette
Recorder) is determined by the length of a video tape
and recording speed (SP, LP, etc.). Video tapes with
various recording times are available in the market.
On the other hand, the recording time of a DVD-RAM/
R/RW depends on the bit rate (Mbps: amount of data
transmitted per second), which can be varied in
MPEG2 (Moving Picture Experts Group2)
compression technology.
As an example, when you pour water into a bucket
from a faucet, the faster the water flows, the sooner
the bucket is filled with water. On the other hand, the
slower the water flows, the more slowly the bucket is
filled. The DVD-RAM/R/RW is, so to speak, such a
bucket, and the degree you turn the faucet is bit rate,
the time required to fill the bucket with water is the
recording time available for a disc. The higher you set
the bit rate (making much more water flow), the sooner
a disc is filled. Consequently, the recording time
becomes shorter. The lower you set the bit rate, the
longer time it takes to fill a disc.
About picture quality (XP, SP, MP, LP, EP)
The higher you set the bite rate, the more the volume
of information for the picture. The lower the bit rate, the
less the volume of picture information.
However a high bit rate does not always mean that the
picture quality is high. The difference between the 1.4
Mbps and 9.2 Mbps is obvious, but when comparing
similar bit rates, the difference may be insignificant.
Generally when you set the bit rate low for longer
recording time, the data volume shortage will result in
a lack of detail information. As a result, the picture
quality is decreased (more noticeable with dynamically
moving images). For example, square noises (block
noise) may occur in a scene with fast action or a
scene with light and shadows, such as a water
surface.
This recorder has 6 settings. (e.g. “SP” records about 2
hours and “LP” about 4 hours onto a blank 4.7 GB
DVD-RAM disc.
consider the “SP” mode as a standard mode and use
the lower mode when you want to record for long time
regardless of the picture quality.
If you want to record for within 2 hours select the “AT ”
mode.
page 125) It is recommended to
On a blank 4.7 GB DVD-RAM disc, the “AT” mode
automatically sets the appropriate bit rate
corresponded to the recording time from about 1 hour
to up to 2 hours so that you can achieve the best
picture quality. If a part of a DVD-RAM disc has
already been recorded, the “AT ” mode sets the bit rate
suitable for the remaining space on the disc. (The
picture quality is determined referring the remaining
space just before recording. When the remaining
space is scarce in the disc, the picture quality may
decrease from what you set beforehand or the
recording may stop halfway.) “AT ” mode is available
also on DVD-R/RW recordings.
When you want to record a music program or
animation with high picture quality, it is recommended
that you select the “XP” mode. If you select more than
6 Mbps, you can usually record with considerably
higher picture quality. However the higher you set the
bit rate, the shorter the recording time.
D /M1
Sound recording format onto DVD-RAM discs. When
recording, sounds are converted into digital signals
and compressed. In playback, they are extracted to the
original sound.
recording technology for consumer products of Dolby
Laboratories. Dolby Digital 192 kbps is set for
D /M1.
D /M1 is applied the digital
48
Page 49

Playback
Play your favorite contents.
Information on playback
Playing recorded contents
Playing a DVD video disc
Pausing a TV broadcast to
resume later (Pause TV)
Playing a TV program currently
being recorded (Chase Play)
Playing at various speeds
Locating by entering the number
Selecting the camera angle
Selecting subtitles
Zooming a picture
Selecting the sound
Viewing JPEG files
Playing MP3/WMA files
Pausing a TV broadcast
(Freeze function)
Checking the current status and
settings
Functions in the Quick Menu
Page 50

Playback
Information on playback
The operation procedure depends on the kind of disc. See the respective pages for basic procedure to
play the disc.
To play contents recorded onto a DVD-RAM disc
Playing recorded contents (
To play a DVD video disc
Playing a DVD video disc (
To play a DVD-R/RW disc
DVD-R/RW discs recorded on this recorder
Playing recorded contents (
DVD-R/RW discs recorded on other devices
Playing a DVD video disc (
To switch the picture to view TV broadcasts
Press STOP button to stop playback.
To start recording
Press STOP button to stop playback.
Then press REC button to start recording.
Screen Protection
If you pause playback, display a menu or use the freeze function and leave it still for about 15 minutes, the recorder
switches the output picture source to a TV broadcast or connected equipment.
A still picture may be displayed after all titles are played. In this case, the screen protection activates after about 10
seconds.
page 51)
page 55)
page 51)
page 55)
Notes
• Do not move the recorder during playback. It may damage the disc.
• Occasionally the picture may stop at the last scene, or the main menu may appear after playing.
If you display a still picture such as the main menu on the TV screen for a prolonged period, the TV may be damaged (image
burn). To prevent this, press STOP button to stop playback.
• A still picture for about 15 minutes while TIMESLIP indicator illuminates, will return to normal playback. If the playback is
completed, a still picture of the title end will continue unless you press TIMESLIP button.
50
Page 51

Playback
DVD-RAM
DVD-RW
DVD-R
Playing recorded contents
Titles and chapters recorded on a DVD-RAM/R/RW disc are displayed in thumbnail view, so that you can
easily locate a desired one.
OPEN/CLOSE
DISPLAY
FL SELECT
DIMMER
SUBTITLE
ANGLE
REMAIN
VOL CH
Start
MUTE
TOP MENU
INSTANT
REPLAY
QUICK MENU
REC MODE
SETUP
TIMESLIP
EASY
NAVI
SELECT/
ENTER
AUDIO/SAP
EXTEND
PROGRESSIVE
FREEZE
ZOOM
INPUT SELECT
MENU
TV
DVD
INSTANT
SKIP
Press EASY NAVI.
1
EASY NAVI Main Menu appears.
EASY
NAVI
Press / / / to select “Play Contents”,
then press SELECT/ENTER.
2
CONTENT MENU Title List appears.
e.g.
SELECT/
ENTER
Attribution
(Original/Playlist)
CONTENT
Title List Page
MENU
001:
2005/03/08 07:00
am TV:4
2005/03/12 09:00
pm TV:3
2005/04/12 11:00
pm TV:4
(0:53:45)
Original
(0:52:40)
Original
(0:30:08)
Original
1/ 2
DVD-RAM
2005/03/08 11:00
pm TV:6
(0:29:50)
Original
2005/04/11 07:00
am TV:8
(0:54:30)
Original
2005/04/12 09:00
pm TV:10
(0:51:28)
Original
Introduction
Recording
Playback
Editing
Function setup
SKIP REV STOP SKIP FWD
FWDPLAYREV
REC
SEARCHTADJUST
1
2
4
5
89
7
3
6
CHP DIVIDE
+
CLEAR
0
10
Press / / / to select a title (chapter).
3
You can view succeeding or prior pages by pressing
REV or FWD button.
SELECT/
ENTER
To select a chapter, select a title and press
Chapter List appears.
By pressing
button again, you can return to Title List.
Press SELECT/ENTER.
4
Playback starts from a selected title (chapter).
SELECT/
ENTER
button.
Others
51
Page 52

Playback
DVD-RAM
Playing recorded contents (Continued)
Notes
• On CONTENT MENU, titles (Original) precede titles
(Playlist), in order from the oldest one respectively.
• To turn off CONTENT MENU, press EASY NAVI button.
Absence of operations for longer than about 15 minutes
also turns off CONTENT MENU.
• The mark is displayed in every thumbnail when “Title
playback” ( page 116) is set to “Title resume”. When set
to “Serial playback”, it is displayed in a thumbnail last
operated.
• You can change a thumbnail picture. See page 93.
• You cannot display CONTENT MENU for DVD-R/RW discs
recorded on other devices.
• For playing a recorded title while recording another, see
page 37.
• A black thumbnail with “Recording” means that the title is
being recorded or its recording will start within 15 seconds.
This thumbnail cannot start playback.
• When the recording mode is set to “XP” or “AT ” (when a
high bit rate is automatically set page 42),
playback will not be available several minutes before
recording starts.
To stop playback
Press STOP.
STOP
Resuming playback from the location last
stopped (Title resume)
DVD-RAM
The recorder memorizes the location you last stopped
playback to resume there.
To use this function, set “Title playback” (
page 116)
to “Title resume.” The recorder will memorize the
location you last stopped at in each title, so you can
resume playback there. For example, if there are 6
titles, you can start each of them as if you had stored
6 video tapes in the recorder.
• To return to the beginning of the title
During playback, press QUICK MENU button, then
/ buttons to select “Restart title,” then
press
press SELECT/ENTER button.
• To play another title
Perform steps 1 to 4 on
page 51.
You can make the recorder memorize only the very
last point, regardless of the number of titles. Set “Title
playback” (
page 116) to “Serial playback.”
• To return to the beginning of the title
Press SKIP REV button repeatedly until the
beginning of the title appears.
• To play the other title
Press SKIP REV or SKIP FWD button repeatedly.
To pause playback (still playback)
Press .
To resume normal playback, press PLAY button or
button.
Note
• Sound is muted during still mode.
Notes
• Depending on conditions or contents, playback may not
start from the location last stopped, but instead of another
location. For example, from the beginning of the disc or
title.
• Depending on a disc, there may be a slight difference
between the location the recorder memorizes and the
actual location where playback starts.
• This function is not available on DVD-R/RW discs.
• The resuming function will not work if the write-protect tab
is set to “PROTECT” ( page 8).
Playing all titles (Original/Playlist) in a disc
Set “Title playback” ( page 116) to “Serial
playback”. You can play all titles in a DVD-RAM disc in
the order of the thumbnails on CONTENT MENU, as if
they were recorded in one video tape.
52
Page 53

Introduction
Checking the background information on a
selected title
1) At step 3 on page 51, select a title (chapter)
then press QUICK MENU.
Quick Menu appears.
2) Press
/ to select “Title information”, then
press SELECT/ENTER.
Detailed information of a selected title (chapter)
appears.
e.g.
CONTENT
Title informatin
MENU
Title : 006
2005/04/10 10:00pm TV:3
DVD Mode :
Media :
Mode :
Rate :
Audio :
LP
2. 2
Off
3
CH
4/10(Su) 10:00 pm
2005
Documentary/Culture(General)
DVD
Original
D/ M1
Chapter :
0001
(2:06:32)
(0:04:15)
Changing the title information:
1) While “CONTENT MENU Title Information” is
displayed, press QUICK MENU.
Quick Menu appears.
e.g.
CONTENT
Title informatin
MENU
Quick Menu
Title : 006
2004/07/11 10:00pm TV:3
Edit chapter name
Record date & time
DVD Mode :
3
CH
Edit title name
Del chapter name
Lock
Genre
Media :
Exit
Mode :
LP
2. 2
Rate :
Audio :
Off
DVD
D/ M1
4/10(Su) 10:00 pm
2005
Documentary/Culture(General)
Original
Chapter :
0001
(2:06:32)
(0:04:15)
Del chapter name:
(First press FWD or REV button to display the chapter
you want, then select this item.)
Record date & time:
The recording date is highlighted so that you can
correct the digits.
Lock:
Set the protection for the currently selected title.
The protection icon “
” appears. ( page 47)
Genre:
The submenu appears.
Press
/ buttons to select a genre, then press the
SELECT/ENTER button.
A name of the selected genre and the icon appear.
Notes
• To change the title information, be sure to load a DVDRAM/R/RW disc which contains the desired title.
• You may not be able to change the title name, etc. of a
DVD-R disc, if the disc is in a certain condition such as a
minimal remaining space.
• You cannot set the protection of titles in DVD-R/RW discs.
• By pressing the O button, you can return to the previous
display.
• To exit these steps, press EASY NAVI button.
Recording
Playback
Editing
Function setup
Others
2) Press
/ to select an title, then press
SELECT/ENTER.
Edit title name:
The on-screen keyboard appears.
Following the procedure on
page 30, enter a new
name for the title.
Edit chapter name:
(First press FWD or REV button to display the chapter
you want, to put a name for, and select the chapter.)
The on-screen keyboard appears.
Following the procedure on
page 30, enter a new
name for the chapter.
53
Page 54

Playback
Playing recorded contents (Continued)
Viewing information of a loaded disc
1) Press EASY NAVI.
EASY NAVI Main Menu appears.
2) Press
/ / / to select “Play Contents”,
then press SELECT/ENTER.
3) Press QUICK MENU.
Quick Menu appears.
4) Press
/ to select “Disc information”, then
press SELECT/ENTER.
You can view information on a loaded disc.
e.g.
CONTENT
Disc information
MENU
–
001
Disc Type Record Time (h:m)
Disc Lock
Finalize
DVD-RAM
VR mode
4
(
0
Normal
Lock Off
–
–
)
SP
Current
)
XP
1
)
SP
2
)
MP
3
)
LP
4
)
EP
5
Edit Disc Number
Remain Time (h:m)
4.6Mbps /
9.2Mbps /
4.6Mbps /
3.0Mbps /
2.2Mbps /
1.4Mbps /
Writing Mode
Original Titles
Playlist Titles
Disc Status
Increment Rec
1:21
D/M1:
0:46
D/M1:
0:22
D/M1:
0:46
D/M1:
1:09
D/M1:
1:32
D/M1:
2:21
Edit Disc Name
Changing the disc information:
You can change the number or name of a DVD-RAM
disc. You can also change the name of a DVD-RW
disc.
1) Press
/ to select “Edit Disc Number” or
“Edit Disc Name”, then press SELECT/ENTER.
2) Following the procedure on
page 30, enter a
new name for the disc.
To change the disc number, press ADJUST button.
Notes
• You cannot change the disc name of a blank DVD-R disc.
After recording, change the disc name.
• You may not be able to change the disc name of a DVD-R
disc, if the disc is in a certain condition such as a minimal
remaining space.
54
Page 55

Playback
DVD-RW
DVD-R
DVD-VIDEO
VCD CD
Playing a DVD video disc
You can also play VIDEO CDs, audio CDs or finalization processed DVD-R/RW discs in the same manner.
To play recorded contents, follow the instructions on
Preparation
• Turn on a TV or audio system and select the corresponding input source that the recorder is connected to.
• Load a disc you want to play. (
SETUP
VOL CH
TIMESLIP
EASY
NAVI
ENTER
INPUT SELECT
MENU
INSTANT
SKIP
MUTE
TOP MENU
INSTANT
REPLAY
QUICK MENU
SELECT/
page 20)
Press PLAY.
1
PLAY
TV
DVD
Start
SKIP REV STOP SKIP FWD
FWDPLAYREV
page 51.
Playback starts.
• Depending on the disc, playback starts automatically
by loading the disc.
• The recorder may take a short time to start playback.
This occurs because the recorder is reading the data
of a disc.
Introduction
Recording
Playback
Editing
Function setup
REC
To stop playback
Press STOP.
STOP
Note
• DVD video disc provides high resolution pictures and a lot of information. Because of this, you may notice some fine picture
noises on TV screen, which you have never seen with regular broadcast TV program. While the amount of noise depends on
the TV you use with the recorder, you should generally reduce the sharpness adjustment on your TV when viewing DVD
video discs.
To pause playback (still playback)
Press .
To resume normal playback, press PLAY button or
button.
Note
• Sound is muted during still mode.
Others
55
Page 56

Playback
Playing a DVD video disc (Continued)
Resuming playback from the location last
stopped (Resume Play)
DVD-RW
DVD-R
DVD-VIDEO
VCD CD
You can resume playback from the location where you
stopped at.
If you press PLAY button after stopping playback,
playback resumes from the location you have stopped.
If you stop playback by pressing STOP button twice,
the resume playback feature will be canceled.
Notes
• Resume feature cannot function when:
– you select a disc menu language ( page 110) or change
the parental lock setting ( page 111).
– you open the disc tray.
– you cancel the DVD-Video finalizing process of a DVD-RW
disc.
• There may be a difference in the location where playback
resumes depending on the disc.
• While the recorder retains a location in memory, initial
setting changes with GUI may function only after the
memory is cleared.
Locating a title using the top menu
DVD-RW
Some DVD video discs may include a top menu, on
which you can view the structure of contents or select
a scene. Most of the top menus automatically appear
in certain scenes, and also are displayed on demand.
Actual operation of the top menu depends on the disc.
This section explains a general example of how to
operate a top menu. Also refer to the instructions of
the disc itself.
1) Press TOP MENU.
2) Press
If the titles in the top menu are assigned a number,
you can directly locate a specific title by pressing its
designated number with the number buttons.
3) Press SELECT/ENTER.
DVD-VIDEO
DVD-R
TOP MENU
SELECT/ENTER
/ / /
/ / / to select the title you want.
56
Notes
• The instructions above describe basic procedures which
may vary depending on the contents of a DVD video disc. If
different instructions appear on the TV screen, follow those
instructions.
• If you display the top menu during playback and press TOP
MENU button again without selecting any title, the recorder
may resume playback from the point where you first
pressed TOP MENU button. (depending on the actual DVD
video disc.)
• This method of locating a title is available only on a disc
that contains a top menu.
• Instruction notes of discs may refer to the button that
displays the top menu as TITLE button.
Page 57

Playback
DVD-RAM
Pausing a TV broadcast to resume later (Pause TV)
This function enables you to pause a TV broadcast and resume viewing at a later, more convenient time,
by storing the TV broadcast temporarily on a DVD-RAM disc.
When this function is used, a DVD-RAM disc which can be recorded needs to be loaded into the recorder
beforehand.
OPEN/CLOSE
DISPLAY
ANGLE
REMAIN
FL SELECT
SUBTITLE
REC MODE
DIMMER
AUDIO/SAP
EXTEND
PROGRESSIVE
FREEZE
Start
SETUP
VOL CH
TIMESLIP
EASY
NAVI
ENTER
INPUT SELECT
MENU
FWDPLAYREV
CHP DIVIDE
3
MUTE
TOP MENU
SELECT/
INSTANT
REPLAY
QUICK MENU
SKIP REV STOP SKIP FWD
REC
SEARCHTADJUST
1
2
ZOOM
INSTANT
SKIP
+
10
TV
DVD
While viewing a TV broadcast via this recorder
or immediately before it starts, press TIMESLIP
1
When Pause TV mode is ready, playback stops
TIMESLIP
automatically.
The recorder begins to store the broadcast on a DVDRAM disc the moment you press TIMESLIP button.
Locate a scene you want by the following
methods.
2
Fast-forward/fast-reverse:
Press FWD or REV button.
Forward/reverse Slow-motion:
First press
Forward/reverse frame by frame play:
First press
• To resume normal playback, press PLAY button.
• You can play in fast-forward to within 10 seconds prior to the
current broadcast.
button then press FWD or REV button.
button then press ADJUST button.
Press TIMESLIP to exit this mode.
3
The recorder stops storing the broadcast on a DVD-
TIMESLIP
• When the recording mode is set to “XP”, the recorder
RAM disc.
A message appears and asks you whether you will save
the stored data or erase it.
/ buttons to select, then press SELECT/
Press
ENTER button.
automatically changes “XP” to “SP” to record the broadcast.
.
Introduction
Recording
Playback
Editing
Function setup
Others
4
7
Notes
• This function is not available during recording.
• Pause TV recording stops when the DVD-RAM disc is filled up. It will not begin if a DVD-RAM disc is full.
• While using this pause TV recording, you cannot program a recording.
• Playback may jump a few seconds back or pause depending on a disc or data condition.
6
5
89
0
CLEAR
57
Page 58

IntroductionPlayback
DVD-RAM
Playing a TV program currently being recorded (Chase Play)
You can begin playback from the beginning of a program currently being recorded.
You will find this function of great advantage on long programs, as you do not have to wait for the end of
recording to begin playback.
SUBTITLE
ANGLE
REMAIN
Start
VOL CH
MUTE
TOP MENU
INSTANT
REPLAY
QUICK MENU
SKIP REV STOP SKIP FWD
REC
SEARCHTADJUST
1
4
7
AUDIO/SAP
REC MODE
EXTEND
SETUP
TIMESLIP
EASY
NAVI
SELECT/
ENTER
2
5
89
FREEZE
INPUT SELECT
MENU
FWDPLAYREV
CHP DIVIDE
3
6
CLEAR
ZOOM
INSTANT
+
10
0
TV
DVD
SKIP
While recording a TV program on a DVD-RAM
disc, press TIMESLIP.
1
TIMESLIP
The recorder displays a TV program as it is being
recorded.
Go back to the beginning of the TV program
using SKIP REV.
2
SKIP REV
When you go back to the beginning, playback starts
automatically.
You can confirm how far you are from the current
broadcast by selecting “Time bar” from Quick Menu.
Locate a scene you want through the
following operations if necessary.
3
Fast-forward/fast-reverse:
Press FWD or REV button.
Forward/reverse Slow-motion:
First press
Forward/reverse frame by frame play:
First press
• To resume normal playback, press the PLAY button.
• You can play in fast-forward to within 10 seconds prior to the
current broadcast.
button then press FWD or REV button.
button then press ADJUST button.
Press TIMESLIP to exit.
4
TIMESLIP
The current broadcast returns.
Notes
• Time slip recording/playback stops when the DVD-RAM disc is filled up. You can play up to a location where the recorder
stopped the recording. The time slip recording/playback cannot begin if a DVD-RAM disc is full.
• The playback picture may appear after a delay of several seconds.
• The playback location will never be identical to the record location in the program. It will always trail the record location by a
few seconds.
• While using time slip recording/playback, you cannot program a recording.
• While the TIMESLIP indicator is on, you cannot change the setting of the feature that turns off the recorder after a
programmed operation has finished.
• Even while “Auto power off” is selected, the recorder does not turn off if the recording end time comes during playback of a
program being recorded.
• Playback may jump a few seconds back or pause depending on the disc or data condition.
• When a timer recording or normal recording is executing with the recording mode “XP” or “AT ” (when a high bit rate is
automatically set. page 42), this function is not available.
58
Page 59

Playback
DVD-RAM
DVD-RW
DVD-R
DVD-VIDEO
VCD CD
Playing at various speeds
Playing in fast reverse or fast forward
EASY
NAVI
INPUT SELECT
MENU
MUTE
TOP MENU
DVD-RAM
During normal playback, press FWD or REV.
DVD-RW
DVD-R
DVD-VIDEO
VCD CD
1
FWD : Fast forward playback
REV : Fast reverse playback
Each time you press the button, the playback speed
changes.
During fast forward playback at “
” speed, sound is
reproduced. (Not available on VIDEO CD.)
• This function is not available when you play a title
recorded on a DVD-RAM disc while recording
another.
SELECT/
ENTER
INSTANT
REPLAY
QUICK MENU
Start
SKIP REV STOP SKIP FWD
FWDPLAYREV
REC
TV
DVD
INSTANT
SKIP
FWD
REV
Introduction
Recording
Playback
Editing
SEARCHTADJUST
Notes
• The playback speed may vary depending on a disc.
• Depending on the disc or data condition, picture and sound
in fast forward playback at “ ” speed may be disturbed.
CHP DIVIDE
To resume normal playback
Press PLAY.
To skip the contents in pre-determined
increments
During playback, press INSTANT SKIP.
Each time you press the button, you can skip by the
specified time.
You can select the interval per press of the button. See
“Instant skip interval” (
page 116).
Time bar display
Fast-forward or fast-reverse playback automatically
displays a time bar.
e.g.
00:00:00 Location 00:00:24:05F
For details, see
page 76.
00:00:40
To skip back in pre-determined increments
During playback, press INSTANT REPLAY.
Each time you press the button, you can go back by
the specified time to resume playback.
You can select the interval per press of the button. See
“Instant replay interval” (
Notes
• Some discs may not permit this operation.
• Depending on the structure of a disc, some operations may
be limited.
• Depending on playback status, some operations may not
work.
page 116).
Function setup
Others
59
Page 60

Playback
MENU
TOP MENU
S
Playing at various speeds (Continued)
Skipping to the next/previous chapter or track
DVD-RAM
DVD-RW
DVD-R
DVD-VIDEO
VCD CD
TV
DVD
Press SKIP FWD or SKIP REV repeatedly until
the chapter or track number you want
1
appears.
SELECT/
ENTER
FWDPLAYREV
INSTANT
SKIP
DVD-RAM
INSTANT
REPLAY
QUICK MENU
Notes
• Some titles may not display chapter numbers.
• When playing a DVD-RAM disc, you can access chapters only in the current title if “Title playback” ( page 116) is set to
“Title resume”. To access chapters in other titles, set to “Serial playback”.
• When playing a DVD video disc or a DVD-R/RW disc, you can locate chapters only in the current title if “DVD title stop” (
page 112) is set to “On”. To access chapters in other titles, set to “Off”. However, in this instance even though you press the
SKIP REV button to go back to the previous title, playback starts not from the last chapter of the title but from the first
chapter.
Start
SKIP REV STOP SKIP FWD
Playing in slow-motion
NAVI
SKIP FWD
SKIP REV
DVD-RW
DVD-R
Playback starts from the selected chapter or track.
SKIP FWD :Playback starts from the beginning of the
SKIP REV : Playback starts from the beginning of the
DVD-VIDEO
next chapter or track.
current chapter or track.
When you press twice, playback starts from
the beginning of the previous chapter or
track.
VCD
Press during playback.
TV
DVD
1
SELECT/
ENTER
INSTANT
SKIP
INSTANT
REPLAY
QUICK MENU
SKIP REV STOP SKIP FWD
Start
FWDPLAYREV
REC
SEARCHTADJUST
Notes
• Slow-motion does not provide smooth playback.
• When playing a VIDEO CD, reverse slow-motion playback
is not available.
• The speed level displayed is approximate.
CHP DIVIDE
60
2
Press FWD or REV.
FWD
REV
FWD : Forward slow-motion
REV : Reverse slow-motion
Each time you press the button, the slow-motion speed
changes.
To resume normal playback
Press PLAY.
Page 61

Playing frame by frame
DVD-RAM
DVD-RW
DVD-R
DVD-VIDEO
VCD
Introduction
SELECT/
ENTER
INSTANT
REPLAY
QUICK MENU
SKIP REV STOP SKIP FWD
REC
SEARCHTADJUST
1
2
To resume normal playback
Press the PLAY or button.
INSTANT
Start
FWDPLAYREV
CHP DIVIDE
+
3
SKIP
10
During playback, press .
1
A still picture is displayed.
Press ADJUST (-/+).
2
+ : Playback direction
ADJUST
- : Opposite direction
Notes
• Sound is muted during frame by frame playback.
• Frame by frame playback cannot provide smooth playback.
• Picture may advance more than 1 frame at a time.
• Depending on the scene, some frames may not be played.
• When playing a VIDEO CD, reverse frame by frame
playback is not available.
Recording
Playback
Editing
Function setup
DVD-RAM
Viewing still pictures (Playing a disc that contains still pictures)
DVD
SELECT/
ENTER
INSTANT
REPLAY
QUICK MENU
Start
SKIP REV STOP SKIP FWD
FWDPLAYREV
REC
INSTANT
SKIP
Press PLAY.
1
The first still picture on a disc is displayed.
PLAY
Some DVD video discs may allow you to change the
pictures using PLAY, SELECT/ENTER or SKIP FWD or
SKIP REV button.
Press ADJUST (-/+).
DVD-VIDEO
2
3
CHP DIVIDE
+
10
ADJUST
+ : Displays the next still picture.
- : Displays the previous still picture.
SEARCHTADJUST
1
2
Others
61
Page 62

Playback
DVD-RAM
DVD-RW
DVD-R
DVD-VIDEO
VCD CD
Locating by entering the number
Locating by entering the number of a desired section
Normally titles, chapters, and tracks are numbered. By entering these numbers, you can access a desired section.
SUBTITLE
ANGLE
REMAIN
VOL CH
REC MODE
SETUP
TIMESLIP
AUDIO/SAP
EXTEND
FREEZE
ZOOM
Press SEARCH.
1
SEARCH
T
If you are using a VIDEO CD/audio CD, skip step 2.
e.g.
Search
Title
001
0001Chapter
EASY
NAVI
ENTER
INPUT SELECT
MENU
FWDPLAYREV
MUTE
TOP MENU
SELECT/
INSTANT
REPLAY
QUICK MENU
SKIP REV STOP SKIP FWD
Start
REC
SEARCH ADJUST
T
1
2
4
5
89
7
CHP DIVIDE
3
6
CLEAR
DVD
INSTANT
SKIP
+
10
0
Press / to select a section (title or chapter)
you want to locate.
TV
2
e.g. When you want to locate a chapter.
001
SELECT/
ENTER
Search
Title
Chapter
0001
Press the number buttons to enter a number
of the section.
3
e.g. To enter 25, press “2”, then press “5”.
1
3
2
4
6
5
0
89
7
Press SELECT/ENTER.
4
Playback starts from the selected location.
SELECT/
ENTER
Notes
• Pressing CLEAR button resets the numbers. To clear the display, press SEARCH button several times (depending on a disc).
• This method of locating a title is available only on a disc that contains title numbers.
• If a title is erased, the numbers of the following titles decrease respectively.
• When you record a new title (Original) on a DVD-RAM disc, it is added prior to current titles (Playlist), and each following title
(Playlist) reference number will advance by a factor of 1.
62
Page 63

Locating a specific point by entering its elapsed time (Time Search)
SUBTITLE
ANGLE
AUDIO/SAP
FREEZE
Press SEARCH.
Introduction
Recording
REC MODE
REMAIN
VOL CH
MUTE
TOP MENU
INSTANT
REPLAY
QUICK MENU
SKIP REV STOP SKIP FWD
Start
REC
SEARCH ADJUST
T
EXTEND
SETUP
TIMESLIP
EASY
NAVI
SELECT/
ENTER
INPUT SELECT
MENU
FWDPLAYREV
CHP DIVIDE
ZOOM
INSTANT
SKIP
TV
DVD
1
You may have to press repeatedly, depending on a disc.
SEARCH
T
Press the button until the following display appears.
e.g.
Search
Title
Time
001
:
00:0000
Press the number buttons and / to enter
the desired time location on the disc.
2
e.g. To enter 1 hour, 25 minutes, and 30 seconds
1
3
4
7
2
5
89
SELECT/
ENTER
“0” → “1” → “ ” → “2” → “5” → “ ” → “3” → “0”
6
0
hour minute second
Press SELECT/ENTER.
3
Playback starts from the selected location.
Playback
Editing
Function setup
Others
+
1
2
4
5
89
7
Notes
• Some discs may not respond to this process.
• Some scenes may not be accessed precisely as you specified.
• This method for accessing specific locations is available only within the current title of a DVD-RAM/R/RW/DVD video disc or
within a current track of a VIDEO CD/audio CD.
• Pressing CLEAR button resets the numbers.
10
3
6
0
CLEAR
SELECT/
ENTER
63
Page 64

Playback
DVD-VIDEO
Selecting the camera angle
If the scene was recorded with multiple angles, you can easily change the camera angle of the scene you
are watching.
OPEN/CLOSE
Start
DISPLAY
FL SELECT
SUBTITLE
ANGLE
REC MODE
REMAIN
SETUP
VOL CH
TIMESLIP
MUTE
TOP MENU
INSTANT
REPLAY
QUICK MENU
SKIP REV STOP SKIP FWD
REC
EASY
NAVI
SELECT/
ENTER
DIMMER
AUDIO/SAP
EXTEND
INPUT SELECT
PROGRESSIVE
FREEZE
MENU
FWDPLAYREV
ZOOM
INSTANT
TV
DVD
SKIP
Press ANGLE while playing a scene recorded
with multiple angles.
1
While playing a scene recorded with multiple angles, the
ANGLE
angle icon appears on the TV screen and on the front
panel. Press ANGLE button while the angle icon is
displayed.
e.g.
Angle
1 / 6
Total number of angles
Current selection
Press ADJUST while the angle number is
displayed on the TV screen.
2
You can also select the camera angle by pressing
ADJUST
ANGLE button several times.
Angle
1 / 6
2 / 6
3 / 6
6 / 6
• The angle icon disappears after about 3 seconds if no
further selections are made.
Angle icon
SEARCHTADJUST
Notes
• You can also change the camera angle during still playback. The camera angle changes to the new setting when you resume
normal playback.
• If you pause a picture immediately after changing a camera angle, the resumed playback picture may not display the new
camera angle.
• Depending on a disc, the camera angle may not change even though the angle number changes.
CHP DIVIDE
64
Page 65

Good evening!
Bonsoir!
Playback
DVD-RAM
DVD-RW
DVD-R
DVD-VIDEO
VCD
Selecting subtitles
You can display subtitles on the TV screen and select a subtitle language from those included on the
disc.
OPEN/CLOSE
DISPLAY
ANGLE
REMAIN
VOL CH
MUTE
TOP MENU
INSTANT
REPLAY
QUICK MENU
SKIP REV STOP SKIP FWD
Start
FL SELECT
SUBTITLE
REC MODE
SETUP
TIMESLIP
EASY
NAVI
SELECT/
ENTER
DIMMER
AUDIO/SAP
EXTEND
INPUT SELECT
PROGRESSIVE
FREEZE
ZOOM
MENU
TV
DVD
INSTANT
SKIP
Press SUBTITLE during playback.
1
The current subtitle setting appears.
SUBTITLE
Press to select “Status,” then press ADJUST
to select “On.”
2
SELECT/
ENTER
ADJUST
e.g.
Subtitle
Status
1 – –
Off
Setting number and
language
The language code appears instead of the language
name. Refer to the list of languages and their
abbreviations. ( page 126)
Skip to step 3 if “On” is already displayed.
Introduction
Recording
Playback
Editing
Function setup
FWDPLAYREV
REC
SEARCHTADJUST
1
2
4
5
89
7
Notes
• Some DVD video discs are set to display subtitles
automatically.
• Depending on the scene, subtitles may not appear
immediately after you set the subtitle function to on.
• Some DVD video discs will allow you to change subtitle
languages and turn subtitles on or off only via the disc
menu.
3
6
CHP DIVIDE
+
10
0
CLEAR
Press to select “Subtitle,” then press
ADJUST to select a language.
3
The subtitles of recorded languages appear.
SELECT/
ENTER
ADJUST
The display turns off after about 3 seconds if you do not
make a selection.
To turn the subtitles on or off
At step 2, select “Off” by pressing ADJUST button.
Others
65
Page 66

Playback
DVD-RAM
DVD-RW
DVD-R
DVD-VIDEO
VCD
Zooming a picture
You can magnify areas within a picture.
OPEN/CLOSE
DISPLAY
FL SELECT
Start
SUBTITLE
ANGLE
REC MODE
REMAIN
SETUP
VOL CH
TIMESLIP
MUTE
TOP MENU
INSTANT
REPLAY
QUICK MENU
SKIP REV STOP SKIP FWD
REC
EASY
NAVI
SELECT/
ENTER
DIMMER
AUDIO/SAP
EXTEND
INPUT SELECT
PROGRESSIVE
FREEZE
MENU
FWDPLAYREV
ZOOM
INSTANT
TV
DVD
SKIP
Press ZOOM.
1
A zoom scope appears.
ZOOM
e.g.
Select a zoom point and magnification level.
2
:
Raises the magnification level.
:
Lowers the magnification level.
/ / / :
SELECT/
ENTER
CLEAR
Moves the zoom point. (only after the image has been
magnified)
CLEAR:
Returns the zoom point to the center of the picture.
66
SEARCHTADJUST
1
2
4
5
89
7
3
6
CHP DIVIDE
+
10
0
CLEAR
Notes
• Some discs may not respond to zoom feature.
• During some scenes, the buttons may not work as described.
• The zoom feature is canceled when the disc menu is operated.
• The magnification level varies depending on the picture size you select
( page 40, “INSTALLATION GUIDE”).
• The zoom feature is not available while displaying a GUI.
• The zoom feature is canceled when you stop playback or start playback.
To cancel the zoom
Press ZOOM.
Page 67

Playback
DVD-RAM
DVD-RAM
DVD-RW
DVD-R
DVD-VIDEO
VCD
Selecting the sound
You can select a preferred language and a sound format.
OPEN/CLOSE
Start
DISPLAY
FL SELECT
DIMMER
SUBTITLE
ANGLE
REMAIN
VOL CH
MUTE
TOP MENU
INSTANT
REPLAY
QUICK MENU
REC MODE
SETUP
TIMESLIP
EASY
NAVI
SELECT/
ENTER
AUDIO/SAP
EXTEND
PROGRESSIVE
FREEZE
ZOOM
INPUT SELECT
MENU
TV
DVD
INSTANT
SKIP
Press AUDIO/SAP during playback or while
receiving a broadcast.
1
The current audio setting appears.
AUDIO/SAP
The language code appears instead of the language
name. Refer to the list of languages and their
abbreviations. (
Press ADJUST while the audio setting is
displayed on the TV screen.
2
Variation of channels depends on the disc or the type of
ADJUST
TV broadcast.
•
, TV channel signals
Stereo sound
→ “Stereo” (left channel and right channel)
→ “Stereo L” (left channel)
→ “Stereo R” (right channel)
(→ Back to “Stereo”)
SAP sound
“Main” → “SAP” → “Main + SAP” (→ Back to “Main”)
Introduction
Recording
page 126)
Playback
Editing
Function setup
SKIP REV STOP SKIP FWD
FWDPLAYREV
REC
SEARCHTADJUST
CHP DIVIDE
DVD-RW
Language name / sound recording system / No. of
channels
e.g.
Sound
Output
VCD
•
“Stereo” → “Stereo L” → “Stereo R” (→ Back to “Stereo”)
DVD-R
English
1
DVD-VIDEO
2ch
PCM
The display turns off if you do not operate for more than
1
4
7
3
2
6
5
89
+
10
0
CLEAR
3 seconds.
If you press the
/ buttons to select “Output,” you can
select the audio output setting (
ADJUST buttons.
page 114) by using
MTS Broadcast Compatibility
This recorder can receive or record MTS (Multichannel TV sound) broadcast.
By connecting the recorder to your stereo system or stereo TV, you will try the SAP or stereo sound.
SAP (Second Audio Program broadcast)
A separate audio program, usually broadcast in a second language with the main language.
Sounds in playback
You can play SAP and/or stereo broadcasts with this recorder. Refer to steps 1 and 2 to select a desired audio.
While a SAP program is received, the SAP indicator on the front panel illuminates.
Others
67
Page 68

Playback
Selecting the sound (Continued)
Recorded sounds
According to your setting of “SAP” on the setup menu screen, ( page 114), the sound is recorded onto different
channels of the disc below. Set “SAP” to “On” or “Off” appropriately.
Setting on the setup screen Type of receiving broadcast Contents of recorded sound Type of record
DVD Compatible Mode SAP Lch Rch
Off Off Stereo + SAP L R Stereo
Main Off Stereo + SAP L R Stereo
SAP Off Stereo + SAP L R Stereo
Mono + SAP Mono Mono Stereo
Stereo L R Stereo
Mono Mono Mono Stereo
On Stereo + SAP L + R SAP Dual Mono
Mono + SAP Mono SAP Dual Mono
Stereo L R Stereo
Mono Mono Mono Stereo
Mono + SAP Mono Mono Stereo
Stereo L R Stereo
Mono Mono Mono Stereo
On Stereo + SAP L + R L + R Stereo
Mono + SAP Mono Mono Stereo
Stereo L R Stereo
Mono Mono Mono Stereo
Mono + SAP Mono Mono Stereo
Stereo L R Stereo
Mono Mono Mono Stereo
On Stereo + SAP SAP SAP Stereo
Mono + SAP SAP SAP Stereo
Stereo L R Stereo
Mono Mono Mono Stereo
68
Page 69

Notes
• Some discs allow you to change audio selections only via the disc menu. If this is the case, press MENU button and
choose the appropriate language from the selections on the disc menu.
• When you turn on the recorder or replace a disc, the recorder returns to the initial default setting. ( page 110)
Depending on a disc, a specific type of audio the disc has is output.
• Immediately after you have switched sounds, there may be a temporary discrepancy between the display and actual
sound.
• The BITSTREAM/PCM jack may not output SAP sound you select. In this instance, set “Audio out select” to “PCM”.
( page 114)
• You cannot change SAP sound if recorded with “DVD compatible mode” ( page 33) set to “Main”. Even when “DVD
compatible mode” ( page 33) is set to “Off,” the recorder regards it as “Main” when recording to a DVD-R/RW disc.
Output sound conversion table
Audio setting ( page 114) and output in the default setting display
Disc
DVDvideo
disc*
VIDEO CD
Audio
CD
DVD-
RAM/RW/
R
CD-R/RW
Sound format
Dolby Digital
48 kHz/16 bit
48 kHz/20 bit
48 kHz/24 bit
Linear
PCM
96 kHz/16 bit
96 kHz/20 bit
96 kHz/24 bit
DTS
MPEG2
MPEG1
Linear PCM 44.1 kHz/16 bit
DTS
Dolby Digital
Linear PCM 48 kHz/16 bit
MPEG2
MP3/WMA
BITSTREAM/
48 kHz/16 bit
48 kHz/16 bit
48 kHz/16 bit
48 kHz/16 bit
48 kHz/16 bit
48 kHz/16 bit
44.1 kHz/16 bit
44.1 kHz/16 bit
48 kHz/16 bit
* “DVD video disc” above does not include DVD-R/RW discs recorded on this recorder.
• Do not select a connection or setting indicated as “Noise” in the above list.
Bitstream Analog 2ch PCM
PCM jack
Bitstream
Bitstream
Bitstream
Bitstream
Bitstream
Bitstream
Analog (L/R)
jacks
48 kHz/20 bit
48 kHz/16 bit
48 kHz/20 bit
48 kHz/24 bit
48 kHz/16 bit
48 kHz/20 bit
48 kHz/24 bit
—
48 kHz/16 bit
44.1 kHz/16 bit
44.1 kHz/16 bit
(Noise)
48 kHz/20 bit
48 kHz/16 bit
48 kHz/16 bit
BITSTREAM/
PCM jack
Bitstream
48 kHz/16 bit
48 kHz/16 bit
48 kHz/16 bit
—
—
—
Bitstream
Bitstream
44.1 kHz/16 bit
44.1 kHz/16 bit
Bitstream
Bitstream
48 kHz/16 bit
Bitstream
44.1 kHz or 32 kHz or 48 kHz/16 bit
Analog (L/R)
jacks
48 kHz/20 bit
48 kHz/16 bit
48 kHz/20 bit
48 kHz/24 bit
96 kHz/16 bit
96 kHz/20 bit
96 kHz/24 bit
—
48 kHz/16 bit
44.1 kHz/16 bit
44.1 kHz/16 bit
(Noise)
48 kHz/20 bit
48 kHz/16 bit
48 kHz/16 bit
BITSTREAM/
PCM jack
48 kHz/16 bit
48 kHz/16 bit
48 kHz/16 bit
48 kHz/16 bit
48 kHz/16 bit
48 kHz/16 bit
48 kHz/16 bit
—
48 kHz/16 bit
44.1 kHz/16 bit
44.1 kHz/16 bit
Bitstream
48 kHz/16 bit
48 kHz/16 bit
48 kHz/16 bit
Analog (L/R)
48 kHz/20 bit
48 kHz/16 bit
48 kHz/20 bit
48 kHz/24 bit
48 kHz/16 bit
48 kHz/20 bit
48 kHz/24 bit
48 kHz/16 bit
44.1 kHz/16 bit
44.1 kHz/16 bit
48 kHz/20 bit
48 kHz/16 bit
48 kHz/16 bit
jacks
—
(Noise)
Introduction
Recording
Playback
Editing
Function setup
Others
Manufactured under license from Dolby Laboratories. “Dolby” and the double-D symbol are trademarks of Dolby Laboratories.
69
Page 70

Playback
Viewing JPEG files
You can play JPEG files that have been recorded on a CD-R or CD-ROM on the recorder.
Preparations
• Prepare a compatible disc ( page 71) that contains JPEG files you want to view.
• Set “Priority contents” (
• Make your TV shape conform to the 4:3 picture size. Only 4:3 pictures can be played regardless of the function
settings via the on-screen displays of the recorder (
to other sizes, e.g. “WIDE,” images will appear to be horizontally expanded. For details, refer to the owner’s
manual of your TV.
page 116) to “Photo”.
page 40, “INSTALLATION GUIDE”). If the TV is adjusted
OPEN/CLOSE
DISPLAY
FL SELECT
SUBTITLE
ANGLE
Start
REC MODE
REMAIN
DIMMER
AUDIO/SAP
EXTEND
PROGRESSIVE
FREEZE
ZOOM
Load a CD that contains JPEG files.
1
Each photo appears for about 3 seconds (slide show).
OPEN/CLOSE
If a slide show does not start, press the PLAY button.
Depending on the disc, “CONTENT MENU Picture List”
SETUP
VOL CH
TIMESLIP
EASY
NAVI
INPUT SELECT
MENU
TV
DVD
MUTE
TOP MENU
SELECT/
Notes
• Some files may not display their own entire images depending on the size.
• Operation to JPEG file will be disabled at about 5 minutes before a programmed recording starts.
To stop playback (slide show)
Press STOP.
If you press PLAY button after pressing STOP button,
playback will start from the photo you stopped.
appears. See “On “CONTENT MENU Picture List””
(
page 71) to operate.
To rotate a picture
Press ANGLE repeatedly.
Each time you press the button, the picture rotates by
90° degree.
To pause playback (slide show)
Press .
To resume, press
button again or press PLAY
button.
To skip photos
During playback, press SKIP FWD or SKIP REV
button repeatedly.
SKIP FWD : To skip forward.
SKIP REV : To skip backward.
70
Notes
• The rotated image is displayed after its original posture
appears momentarily.
To magnify a picture
Follow the procedure on page 66.
Notes
• The magnified image is displayed after its original posture
appears momentarily.
• For small pictures, the reduction level may be limited.
Page 71

Viewing a specified photo (single view)
Full screen still view.
2 ways are available:
On “CONTENT MENU Picture List”
1) Press EASY NAVI.
2) Press
/ / / to select “Play Contents”,
then press SELECT/ENTER.
CONTENT MENU Picture List appears.
Depending on the disc, the recorder creates either
temporary folder, “Auto” or “All”.
“Auto”: For CD of which compatibility confirmed by
TOSHIBA. Only playable files are listed.
e.g.
CONTENT
Picture List
MENU
Auto
001
DH100001
004
DH100004
007
DH100003
010
DH100006
013
DH100009
File number
016
DH100012
If you select this icon and press SELECT/ENTER
019
DH100015
button, upper folders appear.
022
DH100018
002
005
008
011
014
017
020
023
1/ 3
DH100002
DH100001
DH100004
DH100007
DH100010
DH100013
DH100016
DH100019
Page
003
006
009
012
015
018
021
024
DH100001
DH100002
DH100005
DH100008
DH100011
DH100014
DH100017
DH100020
CD
“All”: For CD other than above. All files are listed.
e.g.
CONTENT
Picture List
MENU
All
001
DH100001
004
DH100004
002
005
1/ 3
DH100002
DH100001
Page
003
006
DH100001
DH100002
CD
• Some CDs may not comply with the above.
3) Press
/ / / to select a folder or photo.
Pressing FWD or REV button turns the pages.
If you press
button, the list changes to thumbnail
view (CONTENT MENU Pictures).
e.g.
CONTENT
Pictures
MENU
/ / JPEG
1/ 8
Page
CD
Pressing ANGLE button rotates the picture. The
rotation of pictures is kept until the CD is ejected.
To return to the previous list, press
button again.
4) Press SELECT/ENTER.
If you select a folder at step 3), repeat steps 3) and
4) until your favorite file appears.
The selected photo appears in full screen.
Notes
• CONTENT MENU Picture List cannot show all the files in a
disc, but only ones regarded as objects of regular play of
the disc.
• The larger the file size is, the longer the thumbnail takes
time to appear.
• Letters of a file/folder name overflowing the given space
are not displayed.
Direct input of a photo number
1) During playback or stop, press SEARCH.
An input window appears.
e.g.
Search
Photo
001
2) Input a photo number using the number buttons
or ADJUST.
3) Press SELECT/ENTER.
The selected photo appears in full screen.
To change the playback order
1) During playback (slide show) or stop, press
QUICK MENU.
2) Press
/ to select an item, then press
SELECT/ENTER.
To shift the cursor, press
Reverse
Repeat
: To reverse the order.
: To repeat the current folder.
/ buttons.
3) Press SELECT/ENTER.
Playback in the selected mode starts.
JPEG files compatibility
Discs whose compatibility with this recorder has been
confirmed by TOSHIBA are as follows.
CANON QuickCD
FUJICOLOR CD
Kodak Picture CD
NORITSU QSS CD
JPEG disc compatibility with this recorder is limited as
follows:
• Playable discs:
CD-ROM, CD-R
CD-RW is not recommendable.
• CD physical format:
Mode 1, Mode 2 XA Form 1
• File system:
ISO9660 Level 1, 2 or Joliet
• File name:
A file name should be in alphabet and
numerals only, and must incorporate “JPG”
extension.
e.g.“********.JPG”
• Total number of folders:
Less than 256
• Total number of files:
Less than 1000
Some files may not display their own entire image
depending on the size.
Some discs may not permit this operation. Especially,
the following conditions of included files will increase
the disc’s disability.
1. Pixels over 5000 x 5000 in height and/or width
2. File format except Exif
Introduction
Recording
Playback
Editing
Function setup
Others
71
Page 72

Playback
Page
CD
MP3
1/ 1
001
MP3_0001
004
MP3_0004
007
MP3_0007
010
MP3_0010
002
MP3_0002
005
MP3_0005
008
MP3_0008
011
MP3_0011
003
MP3_0003
006
MP3_0006
009
MP3_0009
012
MP3_0012
Audio List
CONTENT
MENU
File number
Current folder
If you select this icon and press SELECT/ENTER
button, upper folders appear.
e.g.
Playing MP3/WMA files
You can play MP3/WMA files that have been recorded on a CD-R or CD-ROM on this recorder.
Preparations
• Make sure that a disc you want to play is compatible with this recorder. See page 73.
• Set “Priority contents” (
page 116) to “Audio”.
OPEN/CLOSE
DISPLAY
FL SELECT
DIMMER
PROGRESSIVE
Load a CD that contains MP3/WMA files.
1
Playback starts from the first track of a current folder.
SUBTITLE
ANGLE
REMAIN
VOL CH
MUTE
TOP MENU
AUDIO/SAP
Start
REC MODE
EXTEND
SETUP
TIMESLIP
EASY
NAVI
SELECT/
FREEZE
ZOOM
INPUT SELECT
MENU
TV
DVD
OPEN/CLOSE
Notes
• WMA tracks copy-protected cannot be played.
• The DIGITAL AUDIO OUT BITSTREAM/PCM jack outputs MP3/WMA sounds in the linear PCM format regardless of the
current “Audio out select” ( page 114) selection.
• You cannot change the playback speed of MP3/WMA playback.
To stop playback
Press STOP.
If you press PLAY button after pressing STOP button,
playback will start from the the beginning of the track.
To pause playback
Press .
To resume, press
button again or press PLAY
button.
To skip tracks
During playback, press SKIP FWD or SKIP REV
repeatedly.
SKIP FWD : To skip forward.
SKIP REV : To skip backward.
72
Selecting a track in the disc
2 ways are available:
On “CONTENT MENU Audio List”
1) Press EASY NAVI.
2) Press
/ / / to select “Play Contents”,
then press SELECT/ENTER.
CONTENT MENU Audio List appears.
e.g.
CONTENT
Audio List
MENU
JPG_MP3
003
Disc name
MP3
MP3c
MP3_0003
1/ 1
Page
MP3a MP3b
001
MP3_0001
004
MP3_0004
The recorder creates temporary
folder “All”, which contains all
playable files.
002
CD
All
MP3_0002
Page 73

Introduction
3) Press / / / to select a track or folder.
Pressing FWD or REV button turns the pages.
4) Press SELECT/ENTER.
If you select a folder at step 3), repeat steps 3) and
4) until your favorite file appears.
Notes
• CONTENT MENU Autio List cannot show all the tracks in a
disc, but only ones regarded as objects of proper play of
the disc.
• Letters of a file/folder name overflowing the given space
are not displayed.
Direct input of a track number
1) During playback or stop, press SEARCH.
An input window appears.
e.g.
Search
Track
001
2) Input a track number using the number buttons
or ADJUST button.
3) Press SELECT/ENTER.
To change the playback order
1) During playback or stop, press QUICK MENU.
2) Press
/ to select “Special playback mode”,
then press SELECT/ENTER.
e.g.
Quick Menu
Special playback mode
Exit
Memory
Memory list
Folder repeat
Track repeat
Track random
3) Press / to select an item, then press
SELECT/ENTER.
Memory list
: To play favorite tracks only in
a favorite order.
Input a track number by using the number buttons
or ADJUST button.
To shift the cursor, press
Folder repeat
Track repeat
Track random
: To repeat the current folder.
: To repeat the current file.
: To play files in the current
/ buttons.
folder in a random order.
Note
• To cancel these modes, stop the playback or select the
cancel command from Quick Menu.
Playable files
MP3/WMA disc compatibility with this recorder is
limited as follows:
• Playable discs:
CD-ROM, CD-R
CD-RW is not recommendable.
• Sampling Frequency / Bitrate:
WMA: 32 kHz / 48 Mbps (CBR), VBR
44.1 kHz / 48-192 Mbps (CBR), VBR
48 kHz / 128-192 Mbps (CBR), VBR
MP3: 8 kHz, 11.025 kHz, 12kHz, 16 kHz,
22.05 kHz, 24 kHz / 8-160 kbps (CBR),
VBR
32 kHz, 44.1 kHz, 48 kHz / 32-320 kbps
(CBR), VBR
• CD physical format:
Mode 1, Mode 2 XA Form 1
• File system:
ISO9660 Level 1, 2 or Joliet
• File name:
A file name should be in alphabet and
numerals only, and must incorporate “MP3” or
“WMA” extension.
e.g.“********.MP3”, “********.WMA”
• Total number of folders:
Less than 256
• Total number of files:
Less than 1000
• WMA codec version:
V7, V8, V9
* This recorder supports ID3v2 (ID3 Tag Version 2) of MP3,
to display text data such as names of title and artist.
Some characters may be displayed properly.
This recorder requires discs/recordings to meet certain
technical standards in order to achieve optimal playback
quality. Pre-recorded DVDs are automatically set to these
standards. There are many different types
of recordable disc formats (including CD-R containing
MP3/WMA files). Because this area of technology is still
evolving, Toshiba cannot guarantee that all recordable
discs will produce optimal playback quality. The technical
criteria set forth in this owner’s manual are meant only as
a guide.
Please be advised that you must obtain permission from
the applicable copyright owners to download copyrighted
content, including music files, in any format, including the
MP3 and WMA formats, prior to the downloading thereof.
Toshiba has no right to grant and does not grant
permission to download any copyrighted content.
Microsoft, Windows Media, and the Windows
Logo are trademarks or registered trademarks
of Microsoft Corporation in both the United
States and other countries.
Recording
Playback
Editing
Function setup
Others
73
Page 74

Playback
Pausing a TV broadcast (Freeze function)
While watching a TV broadcast through this recorder, you can pause it. However, even if an image is still
on the screen, the picture is running on the broadcast and you can still hear the sound on-going.
OPEN/CLOSE
DISPLAY
ANGLE
REMAIN
TOP MENU
Start
FL SELECT
DIMMER
SUBTITLE
AUDIO/SAP
REC MODE
EXTEND
SETUP
VOL CH
TIMESLIP
MUTE
EASY
NAVI
PROGRESSIVE
FREEZE
ZOOM
INPUT SELECT
MENU
TV
DVD
While watching a TV broadcast through this
recorder, press FREEZE.
1
The TV broadcast pauses just as a still picture.
FREEZE
e.g.
• When “Screen protector” is set to “On”, the freeze
function will be cancelled about 15 minutes later.
To cancel the freeze function
Press FREEZE.
• The picture being broadcast displays on the
screen.
74
Page 75

Playback
DVD-RAM
DVD-RW
DVD-R
DVD-VIDEO
VCD
CD
Checking the current status and settings
Introduction
You can confirm operational status and setting details.
Operational status and setting details
Recording
OPEN/CLOSE
Press DISPLAY.
1
DISPLAY
FL SELECT
SUBTITLE
ANGLE
REC MODE
REMAIN
Start
SETUP
VOL CH
TIMESLIP
MUTE
TOP MENU
EASY
NAVI
DIMMER
AUDIO/SAP
EXTEND
INPUT SELECT
PROGRESSIVE
FREEZE
ZOOM
MENU
TV
DVD
DISPLAY
The following on-screen display appears. (The actual
display varies depending on the disc.)
e.g. while playing a DVD-RAM disc
Elapsed time of a title/
Elapsed time of a chapter
Title No./
Chapter No.
Mode indicator
Playback
mode
Operating disc
Receiving
DVD
RAM
channel
3
Stereo
Status display
e.g.
Title
Chapter
002
0005
:
00:10:29
:
00:05:15
Title
repeat
Playback
Editing
SELECT/
ENTER
INSTANT
REPLAY
QUICK MENU
SKIP REV STOP SKIP FWD
FWDPLAYREV
REC
SEARCHTADJUST
1
2
4
5
89
7
CHP DIVIDE
3
6
CLEAR
INSTANT
SKIP
+
10
0
Press DISPLAY again.
2
An expanded display appears.
DISPLAY
(Actual display varies depending on the disc.)
e.g.
Remaining time
Title
Chapter
Virtual surround
Picture Quality
Audio Quality
Audio
Audio Output
Subtitle
:
-00:22:01
002
:
-00:00:07
0005
:
Off
:
SP
:
D/M1
:
1 Stereo R Original
:
Bitstream
:
– – – Off
Title
repeat
Press DISPLAY again to turn the display off.
3
DISPLAY
DVD
RAM
3
Stereo
Function setup
Others
75
Page 76

Playback
Checking the current status and settings (Continued)
Using the time bar
The time bar shows the current progress in playback or recording.
REC MODE
REMAIN
VOL CH
MUTE
TOP MENU
EXTEND
SETUP
TIMESLIP
EASY
NAVI
ZOOM
INPUT SELECT
MENU
During playback or recording, press
QUICK MENU.
1
QUICK MENU
SELECT/
ENTER
INSTANT
REPLAY
QUICK MENU
SKIP REV STOP SKIP FWD
FWDPLAYREV
Start
REC
SEARCHTADJUST
1
2
4
5
89
7
CHP DIVIDE
3
6
CLEAR
DVD
INSTANT
SKIP
+
10
0
TV
Press / to select “Time bar”, then press
SELECT/ENTER.
2
The time bar appears. (The actual display varies
depending on the disc.)
SELECT/
ENTER
e.g. Playback
Chapter division
Elapsed time
Locator (Shows the current location.)
00:55:00:00FLocation
Total playing time of a current title
(In the case of a VIDEO CD or
audio CD, it shows the total
playing time of the disc.)
01:30:0000:00:00
e.g. Recording
Locator (Shows the current location.)
Elapsed time
00:18:00Location
Elapsed recording time (per 30 minutes)
(Recording end time if it comes within 30
minutes.)
00:30:0000:00:00
Note
• Time display is an approximation.
76
Changing the location of the time bar
While the time bar is displayed, press / .
The time bar shifts up and down.
Turning off the time bar
Repeat steps 1 and 2.
Page 77

Playback
Functions in Quick Menu
Besides these examples, various other ones are introduced on respective pages for your convenience.
page 24 on how to operate Quick Menu.
See
Introduction
To play repeatedly (Repeat playback)
DVD-RAM
You can repeat a desired section.
1) During playback, press QUICK MENU.
2) Press
DVD-RW
/ to select “Special playback mode”,
then press SELECT/ENTER.
DVD-R
DVD-VIDEO
VCD CD
Special playback mode
The sub menu appears. Select the next item by
pressing / buttons and SELECT/ENTER button.
A-B repeat
You can designate a portion in a title or track to repeat
continuously.
If you select “A-B repeat” and press SELECT/ENTER
button, the following display appears. Perform steps 1
and 2 below.
e.g.
To cancel the procedure, press
1) Press SELECT/ENTER at the beginning of the
2) Press SELECT/ENTER at the end of the segment
A
B
Set A
repeat
segment (point A) you want to repeat.
The location of point A is memorized.
The display changes to “Set B”.
(point B).
The location of point B is memorized, and repeat
playback begins between point A and B.
:
button.
Cancel repeat
To resume normal playback.
Playback of a DVD-RAM disc stops.
Notes
• Some discs may not permit repeat operation.
• You cannot use the repeat playback function in conjunction
with the random playback function.
• If you press STOP button during repeat playback, this
operation is canceled.
• While you are performing repeat playback on a DVD-RAM
disc, other operations ( pages 59 to 61) except pause
play are not available.
: (in Repeat playback mode)
To play in random order (Random play)
DVD-RW
You can play sections in random order.
1) During playback or stop, press QUICK MENU.
2) Press
then press SELECT/ENTER.
DVD-VIDEO
DVD-R
/ to select “Special playback mode”,
VCD CD
Special playback mode
The sub menu appears. Select the next item by
pressing / buttons and SELECT/ENTER button.
Title random
Plays all titles in a loaded disc in random order.
Each title is played beginning from chapter 1.
Chapter random
Plays all chapters in a current title in random order.
Track random
Plays all tracks on a loaded disc in random order.
:
:
:
Recording
Playback
Editing
Function setup
Others
Title repeat
To repeat the same title.
Chapter repeat
To repeat the same chapter.
Track repeat
To repeat the same track.
Disc repeat
To repeat the entire disc.
:
:
DVD-RW
VCD CD
DVD-R
:
:
77
Page 78

Playback
Functions in Quick Menu (Continued)
Cancel random
: (in Random play mode)
Resumes normal playback.
Notes
• Some discs may not permit random playback operation.
• You cannot use the random playback function in
conjunction with the memory playback function.
• You cannot use the random playback function in
conjunction with the repeat playback function.
• Pressing STOP button during operation cancels random
playback.
To play in favorite order (Memory playback)
DVD-RW
DVD-R
DVD-VIDEO
VCD CD
You can select 30 titles, chapters, or tracks and play
them in favorite order.
(To play contents in a DVD-RAM disc in favorite order,
make a playlist. For details, see “Editing” on
page
81.)
1) During playback or stop, press QUICK MENU.
2) Press
/ to select “Special playback mode”,
then press SELECT/ENTER.
Special playback mode
The sub menu appears. Select the next item by
pressing / buttons and SELECT/ENTER button.
Memory list
:
If you select this and press SELECT/ENTER button,
the following display appears. Perform the steps below.
2) Press / to select the next box, then perform
step 1).
To select another chapter in the same title, you do
not need to select the title number.
Repeat these steps if necessary.
You can program up to 30 selections into memory.
3) Press SELECT/ENTER.
Memory playback starts.
Memory
: (in normal playback mode)
To display an entry box for one program selection.
Memory release
: (in memory playback mode)
To resume normal playback.
Memory repeat
: (in memory playback mode)
To repeat a current memory playback.
Notes
• Some discs may not permit memory playback operation.
• Inputting numbers of titles, chapters or tracks that a disc
does not contain will result in error.
• You cannot program/change selections during memory
playback. To change selections, cancel memory playback
by pressing STOP button.
• When you turn off the power, the selected memory is
erased.
• You can exit the memory playback display by pressing O
button.
e.g.
01 T CT 11 T CT 21 T CT
02 T CT 12 T CT 22 T CT
03 T CT 13 T CT 23 T CT
04 T CT 14 T CT 24 T CT
05 T CT 15 T CT 25 T CT
06 T CT 16 T CT 26 T CT
07 T CT 17 T CT 27 T CT
08 T CT 18 T CT 28 T CT
09 T CT 19 T CT 29 T CT
10 T CT 20 T CT 30 T CT
1) Input numbers of a titles, chapters, or tracks by
using the number buttons, in favorite order.
Input each 3-digit number.
To input a 1- or 2-digit number, first input 0.
(e.g. “0”, “0”, “3”.)
To cancel the numbers, press CLEAR button.
To input a chapter number, press
/ buttons to
shift the cursor.
78
Page 79

To display the current bit rate
DVD-RAM
1) During playback, press QUICK MENU.
2) Press
DVD-RW
SELECT/ENTER.
DVD-R
/ to select “Bit rate”, then press
DVD-VIDEO
Bit rate
Note
• To turn off the bit rate display, select this item again.
Introduction
Recording
To check information on a title
DVD-RAM
1) During playback, press QUICK MENU.
2) Press
DVD-RW
press SELECT/ENTER.
DVD-R
/ to select “Title information”, then
Title information
To exit the Quick Menu
DVD-RAM
Press QUICK MENU again.
or
Press
ENTER.
DVD-RW
/ to select “Exit”, then press SELECT/
DVD-R
DVD-VIDEO
VCD CD
Exit
Playback
Editing
Function setup
Others
79
Page 80

80
Page 81

Editing
You can create your own movie from your assembled
scenes.
Before editing
Creating chapters
Playlist editing
Creating thumbnails
High speed dubbing
Deleting selected Items
DVD-Video finalizing process
Page 82

Editing
Before editing
Process of editing
You can edit recorded contents and create your own
library.
Basic editing procedure
(An original title is created automatically)
Create chapters by dividing an original title.
• A playlist has a fictitious title that is different from an
original title.
• Copy the playlist and it becomes an original title.
Record a TV program
(Chapter Editing)
(Playlist Editing)
Collect necessary chapters
(Dubbing)
Copy the playlist
82
Page 83

Outline of basic editing
Recording a TV program
Record a TV program and it becomes a original title.
Introduction
e.g.
Title: The world of cats and
dogs.
Chapter editing
Divide the original title into chapters.
Title 1: “The world of cats and dogs”
(Original)
Chapter 1 Chapter 2 Chapter 3 Chapter 4 Chapter 5 Chapter 6
Divide chapters and create divisions of chapter
Playlist editing
Collect your favorite chapters to make them as one
title. (Playlist)
If an original title is deleted, a playlist will be also
deleted because playlists are fictitious titles.
e.g. Making a playlist by collecting scenes of cats from
title 1 “The world of cats and dogs”.
Title 1: “The world of cats and dogs”
Title 1 Title 2 Title 3 Title 4 Title 5 Title 6
(Original)
Title 1: “Cat’s world”
(Playlist)
Playlist
Editing
A fictitious
playlist title
that is
different from
the original
title is
created.
Recording
Playback
Editing
Function setup
• You can play desired scenes from the top by “Chapter
Divide”.
• Divide chapters to edit a playlist.
Dubbing
Copy the playlist and it becomes an original title.
Once the dubbing is complete, you can delete
unnecessary chapters to regain space for another
recording.
Using these editing functions to modify copyrighted content for any purpose other than your private viewing may be
prohibited under the Copyright Laws of the United States and other countries, and may subject you to civil and
criminal liability.
Others
83
Page 84

Editing
DVD-RAM
Creating chapters
1 title is created by recording at a time, which includes 1 chapter. By dividing it into several chapters, it
will be easier to access a desired scene, and your editing or playback will be much easier.
To create chapters in a title, insert a chapter mark. Playback the content, locate a point where you want to divide, then
press CHP DIVIDE button.
The point divides the chapter (into two). You can create multiple chapters by repeating the above operation.
Notes
• Chapters cannot be created in the following modes:
Dubbing / Fast-reverse, Fast-forward / Slow-motion
• You cannot divide a title of a DVD-R/RW disc into chapters. It is possible to create chapters in a DVD-R/RW disc by selecting
an option that inserts chapter marks automatically during recording at regular intervals. ( page 118)
If you want to modify the chapter division, or want to place a chapter mark more precisely monitoring the
frame counter, follow the procedures below.
OPEN/CLOSE
DISPLAY
FL SELECT
SUBTITLE
ANGLE
REC MODE
REMAIN
SETUP
VOL CH
TIMESLIP
MUTE
TOP MENU
INSTANT
REPLAY
QUICK MENU
SKIP REV STOP SKIP FWD
REC
EASY
NAVI
SELECT/
ENTER
PROGRESSIVE
DIMMER
AUDIO/SAP
FREEZE
EXTEND
Start
INPUT SELECT
MENU
FWDPLAYREV
ZOOM
INSTANT
TV
DVD
SKIP
Press EASY NAVI.
1
EASY NAVI Main Menu appears.
EASY
NAVI
Press / / / to select “Play Contents”,
then press SELECT/ENTER.
2
CONTENT MENU Title List appears.
SELECT/
ENTER
Press / / / to select a title.
3
• To go to the next or previous page, press REV or
SELECT/
ENTER
FWD button.
• To select a chapter, first highlight the title that contains
the chapter you want, then press
The display changes to CONTENT MENU Chapter
List.
To go back to the title display, press
button.
button again.
84
SEARCHTADJUST
1
2
4
5
3
6
CHP DIVIDE
+
10
0
CLEAR
Page 85

Introduction
OPEN/CLOSE
DISPLAY
FL SELECT
SUBTITLE
ANGLE
REC MODE
REMAIN
SETUP
VOL CH
TIMESLIP
MUTE
TOP MENU
INSTANT
REPLAY
QUICK MENU
SKIP REV STOP SKIP FWD
REC
EASY
NAVI
SELECT/
ENTER
DIMMER
AUDIO/SAP
EXTEND
INPUT SELECT
PROGRESSIVE
FREEZE
ZOOM
MENU
FWDPLAYREV
TV
DVD
INSTANT
SKIP
Press QUICK MENU.
4
Quick Menu appears.
QUICK MENU
Press / to select “Chapter function”, then
press SELECT/ENTER.
5
SELECT/
ENTER
e.g.
CONTENT
Title List Page
MENU
Quick Menu
HDD :
Title information
2004/06/08 07:00
Create thumbnail
am TV:4
High speed dubbing
Chapter function
Edit function
Disc information
Title delete
Exit
Original
2004/06/12 09:00
pm TV:3
Original
2005/04/12 11:00
pm TV:4
Original
The submenu appears.
e.g.
CONTENT
Title List Page
MENU
Quick Menu
001 :
Title information
2004/06/08 07:00
Create thumbnail
am TV:4
High speed dubbing
Chapter function
Edit function
Disc information
Title delete
Exit
Original
2004/06/12 09:00
pm TV:3
Original
2005/04/12 11:00
pm TV:4
Original
1/ 2
(0:53:45)
(0:52:40)
(0:30:08)
Auto chapter create
(0:53:45)
(0:52:40)
(0:30:08)
1/ 2
Chapter editing
DVD-RAM (VR)
2005/03/08 11:00
pm TV:6
(0:29:50)
Original
2005/04/11 07:00
am TV:8
(0:54:30)
Original
2005/04/12 09:00
pm TV:10
(0:51:28)
Original
DVD-RAM (VR)
2005/03/08 11:00
pm TV:6
(0:29:50)
Original
2005/04/11 07:00
am TV:8
(0:54:30)
Original
2005/04/12 09:00
pm TV:10
(0:51:28)
Original
Recording
Playback
Editing
Function setup
SEARCHTADJUST
1
2
4
5
89
7
3
6
CHP DIVIDE
+
10
0
CLEAR
Press / to select “Chapter editing”, then
press SELECT/ENTER.
6
EDIT MENU Chapter Editing appears.
e.g.
SELECT/
ENTER
EDIT
MENU
00:00:00
Chapter Editing
Title:004 Chapter:0001
Fishing Guide
Original
00:00:00:03F
Location
To create new chapter, select
desired start point via remote.
To set, press enter.
DVD-RAM (VR)
Aspect Ratio
Divide
00:54:30
4:3
(Continued)
Others
85
Page 86

Editing
Creating chapters (Continued)
OPEN/CLOSE
DISPLAY
FL SELECT
SUBTITLE
ANGLE
REC MODE
REMAIN
SETUP
VOL CH
TIMESLIP
MUTE
TOP MENU
INSTANT
REPLAY
QUICK MENU
SKIP REV STOP SKIP FWD
REC
EASY
NAVI
SELECT/
ENTER
DIMMER
AUDIO/SAP
EXTEND
INPUT SELECT
PROGRESSIVE
FREEZE
MENU
FWDPLAYREV
ZOOM
INSTANT
TV
DVD
SKIP
Press PLAY to start playback.
7
Locate a scene where you want to insert a chapter mark.
PLAY
At a point where you want to make a chapter
division, press
8
You can use the following buttons.
FWD, REV, SKIP FWD, SKIP REV,
The locator shows the current position on the time bar.
And the live video plays in the upper left.
• To access other chapters:
/ buttons to move to the thumbnail display,
Press
then press
/ buttons to select a desired thumbnail.
To go to the next page, press FWD button.
• You can confirm the first and last scenes of a chapter.
Select a thumbnail and press SELECT/ENTER button.
3 seconds of the first and last scenes are played.
.
The picture pauses.
e.g.
EDIT
Chapter Editing
MENU
Fishing Guide
Original
Location Divide
00:00:21:24F
To create new chapter, select
desired start point via remote.
To set, press enter.
Title:004 Chapter:0001
Aspect Ratio
, ADJUST, etc.
DVD-RAM (VR)
4:3
00:54:3000:00:00
86
SEARCHTADJUST
1
2
4
5
89
7
3
6
CHP DIVIDE
+
10
0
CLEAR
Press / / / to select “Divide,” then press
SELECT/ENTER.
9
A chapter division is created at the selected location,
and the first scene of the new chapter is registered as a
SELECT/
ENTER
chapter thumbnail.
e.g.
EDIT
Chapter Editing
MENU
00:00:00
Fishing Guide
Original
00:00:21:24F
Location
To create new chapter, select
desired start point via remote.
To set, press enter.
Title:004 Chapter:0001
Aspect Ratio
DVD-RAM (VR)
4:3
Divide
00:54:30
00:54:3000:00:00
Page 87

Repeat steps 7 to 9.
Introduction
10
Locations of chapter division are indicated by the markers on the
time bar.
To erase a chapter division, see “Merging chapters” ( page 88).
When all chapter divisions have been made,
press
11
Notes
• This recorder suppor ts a limited number of chapters on a
disc. If exceeded, a message appears. In this event, reduce
the number of chapters by merging chapters. ( page 88)
• EDIT MENU Chapter Editing can also be viewed by
selecting “Edit Menu” from EASY NAVI Main Menu, then
“Chapter Editing”.
e.g.
EDIT
Main Menu
MENU
Chapter Editing
Chapter Editing
Chapters can be divided on frame
basis. Chapters can be merged and
assigned names.
Title
1
Divide
1
Merge
5432
DVD-RAM (VR)
Source
DV Recording
Chapter Editing
Edit Functions
Playlist Editing
DVD-Video Finalizing
Del Selected Items
.
The recorder displays a message, and starts saving the
chapter divisions on the time bar.
When complete, CONTENT MENU returns.
Creating chapters automatically when
recording
You can create chapter marks from the beginning of a
title at regular intervals automatically. (Chapter marks
are added to those already existing.)
This is convenient for long programs, such as live
sports games.
1) Perform steps 1 to 5 on
2) Press
press SELECT/ENTER.
3) Press
then press SELECT/ENTER.
Chapter divisions are automatically marked at the
selected intervals.
/ to select “Auto chapter create”, then
/ to select a chapter division interval,
pages 84 to 85.
Recording
Playback
Editing
Function setup
Others
• To exit the EDIT MENU Main Menu, press EASY NAVI
button.
• Making chapters in a title (Original) does not affect the
related titles (Playlist).
• There may be a small difference between a location you
marked and a chapter division actually played.
• Pausing a recording automatically creates a chapter
division.
87
Page 88

Editing
Creating chapters (Continued)
Merging chapters
1) Perform steps 1 to 6 on pages 84 to 85, to
view EDIT MENU Chapter Editing.
2) Press
/ / / to highlight a chapter.
Pressing REV or FWD button can access
preceding or following pages.
3) Press QUICK MENU.
e.g.
4) Press
EDIT
Chapter Create
MENU
Quick Menu
Merge with previous cptr
Merge with following cptr
Merge all chapters
Auto chapter create
Edit chapter name
Exit
Fishing Guide
Location
To create new chapter, select
desired start point via remote.
To set, press enter.
Title:004 Chapter:0003
/ to select an item.
Original
Aspect Ratio
00:00:21:24F
DVD-RAM (VR)
4:3
Divide
00:54:3000:00:00
00:54:3000:00:00 00:54:3000:00:00
Merge with previous cptr:
To delete the chapter division between the selected
chapter and the previous one.
Merge with following cptr:
To delete the chapter division between the selected
chapter and the succeeding one.
Merge all chapters:
To merge all chapters in the title.
5) Press SELECT/ENTER.
e.g. When “Merge with previous cptr” is selected:
The selected chapter is merged into the previous
chapter and its thumbnail is erased.
EDIT
MENU
Chapter Editing
Title:004 Chapter:0003
Fishing Guide
Original
Location
To create new chapter, select
desired start point via remote.
To set, press enter.
Aspect Ratio
00:00:00:03F
DVD-RAM (VR)
4:3
Divide
00:54:3000:00:00
Notes
• To turn off EDIT MENU Main Menu, press EASY NAVI
button.
• When chapters are merged, the numerical value of
following chapters will decrease correspondingly.
• Merging chapters does not affect the related titles (Playlist).
You can also merge chapters in the title (Playlist). In this
case, the title (Original) is not affected.
• You can access the feature of merging chapters also from
the Quick Menu on CONTENT MENU Chapter List.
Naming a chapter
1) From EDIT MENU Chapter Editing, select a
chapter which you want to name.
2) Press QUICK MENU.
3) Press
/ / / to select “Edit chapter name”,
then press SELECT/ENTER.
A keyboard appears.
Enter a name following the on-screen icon guides.
Notes
• There is a limit to the number of chapters which can be
named. If exceeded, a message appears.
• You can also access the keyboard to enter a chapter name
by selecting a chapter with REV or FWD button on
CONTENT MENU Title Information, and by selecting “Edit
chapter name” from Quick Menu on CONTENT MENU
Chapter List.
• You can change chapter names also on a DVD-R/RW disc,
if the disc is not finalized yet.
88
Page 89

Editing
DVD-RAM
Playlist editing (Collecting desired scenes)
Create a “Playlist” to omit unnecessary scenes for dubbing, or compile desired scenes.
OPEN/CLOSE
DISPLAY
FL SELECT
SUBTITLE
ANGLE
REC MODE
REMAIN
SETUP
VOL CH
TIMESLIP
MUTE
TOP MENU
INSTANT
REPLAY
QUICK MENU
SKIP REV STOP SKIP FWD
REC
SEARCHTADJUST
EASY
NAVI
SELECT/
ENTER
PROGRESSIVE
DIMMER
AUDIO/SAP
FREEZE
EXTEND
Start
INPUT SELECT
MENU
FWDPLAYREV
CHP DIVIDE
ZOOM
INSTANT
SKIP
TV
DVD
Press EASY NAVI.
1
EASY NAVI Main Menu appears.
EASY
NAVI
Press / / / to select “Play Contents”,
then press SELECT/ENTER.
2
CONTENT MENU Main Menu appears.
SELECT/
ENTER
Press QUICK MENU.
3
Quick Menu appears.
QUICK MENU
e.g.
CONTENT
Title List Page
MENU
Quick Menu
001 :
Title information
2004/06/08 07:00
Create thumbnail
am TV:4
High speed dubbing
Chapter function
Edit function
Disc information
2004/06/12 09:00
Title delete
pm TV:3
Exit
2005/04/12 11:00
pm TV:4
(0:53:45)
Original
(0:52:40)
Original
(0:30:08)
1/ 2
2005/03/08 11:00
pm TV:6
2005/04/11 07:00
am TV:8
2005/04/12 09:00
pm TV:10
DVD-RAM (VR)
(0:29:50)
Original
(0:54:30)
Original
(0:51:28)
Introduction
Recording
Playback
Editing
Function setup
Others
1
4
7
3
2
6
5
89
+
10
0
CLEAR
Press / to select “Edit function”, then
press SELECT/ENTER.
4
Submenu appears.
SELECT/
ENTER
e.g.
CONTENT
Title List Page
MENU
Quick Menu
HDD :
Title information
2004/06/08 07:00
Create thumbnail
am TV:4
High speed dubbing
High speed dubbing
Chapter function
Edit function
Disc information
2004/06/12 09:00
Title delete
pm TV:3
Exit
2005/04/12 11:00
pm TV:4
(0:53:45)
Original
(0:52:40)
Original
(0:30:08)
Original
1/ 2
Playlist editing
DVD-RAM (VR)
2005/03/08 11:00
pm TV:6
(0:29:50)
Original
2005/04/11 07:00
am TV:8
(0:54:30)
Original
2005/04/12 09:00
pm TV:10
(0:51:28)
Original
(Continued)
89
Page 90

Editing
Playlist editing (Continued)
OPEN/CLOSE
DISPLAY
FL SELECT
SUBTITLE
ANGLE
REC MODE
REMAIN
SETUP
VOL CH
TIMESLIP
MUTE
TOP MENU
INSTANT
REPLAY
QUICK MENU
SKIP REV STOP SKIP FWD
EASY
NAVI
SELECT/
ENTER
DIMMER
AUDIO/SAP
EXTEND
INPUT SELECT
PROGRESSIVE
FREEZE
MENU
FWDPLAYREV
ZOOM
INSTANT
TV
DVD
SKIP
Press / to select “Playlist editing”, then
press SELECT/ENTER.
5
EDIT MENU Playlist editing appears.
SELECT/
ENTER
e.g.
EDIT
MENU
Playlist
Editing
DVD-RAM (VR)
Entire time:
Source:Title
Object :Title
Press / / / to select a title or chapter
6
To select between titles and chapters, press button
SELECT/
ENTER
e.g.
EDIT
MENU
Playlist
Editing
DVD-RAM (VR)
Source:Title
Object :Title
Original
PlayList
StartTitle:
.
.
Original
PlayList
90
REC
SEARCHTADJUST
1
2
4
5
89
7
3
6
CHP DIVIDE
+
10
0
CLEAR
Press SELECT/ENTER.
7
A cursor appears, indicating the point where the
selected item will be inserted.
SELECT/
ENTER
e.g.
Cursor
EDIT
MENU
Playlist
Editing
Entire time:
DVD-RAM (VR)
AAA
B
B
Source:Title
Object :Title
Entire time:
StartTitle:
Original
PlayList
StartTitle:
Page 91

Introduction
OPEN/CLOSE
DISPLAY
FL SELECT
SUBTITLE
ANGLE
REC MODE
REMAIN
SETUP
VOL CH
TIMESLIP
MUTE
TOP MENU
INSTANT
REPLAY
QUICK MENU
SKIP REV STOP SKIP FWD
EASY
NAVI
SELECT/
ENTER
DIMMER
AUDIO/SAP
EXTEND
INPUT SELECT
PROGRESSIVE
FREEZE
MENU
FWDPLAYREV
ZOOM
INSTANT
SKIP
TV
DVD
Press / to select a point where you want to
insert the item, then press SELECT/ENTER.
8
If there are no parts in the lower area, leave the cursor
to the left and press SELECT/ENTER button.
SELECT/
ENTER
The selected part is inserted at the location of the
cursor.
e.g.
Playlist
EDIT
Editing
MENU
2005/05/07 10:30am 00:13:45
DVD-RAM (VR)
Entire time:
Source:Title
Object :Title
Repeat steps 6 to 8 to insert items.
9
To cancel the selection, see “Canceling selection of a part”
page 92).
(
When all items have been inserted, press .
Original
PlayList
StartTitle:
Recording
Playback
Editing
Function setup
REC
10
The recorder displays a message, and starts saving the
SEARCHTADJUST
CHP DIVIDE
Playlist.
When complete, CONTENT MENU is displayed.
+
1
2
4
5
Notes
• You can access EDIT MENU Playlist editing also by selecting “Edit Menu” on EASY NAVI Main Menu, then “Playlist editing”.
• If you delete titles and chapters (Original), the corresponding titles and chapters (Playlist) are also deleted. Contrarily, if you
delete titles and chapters (Playlist), the corresponding titles and chapters (Original) are not deleted.
• Playback may pause if a gap between the content is played.
• There may be a small difference between the chapter boundary and the actual playback picture.
• A title or chapter which is being edited cannot be selected as an item.
• You cannot add a title of still pictures, or a title or a chapter which contains both still and moving pictures, to a playlist.
• By copying (dubbing) a Playlist, a title (Original) of the same contents is created.
• You cannot program a Playlist of contents recorded on a DVD-R/RW disc.
• Down arrow on the thumbnails means: Orange: This title already selected. Green trimmed: Some chapters in this title already
selected. Green: This chapter already selected.
• A black thumbnail with “Recording” means that the title is being recorded or its recording will start within 15 seconds. This
thumbnail cannot start playback.
10
3
6
0
CLEAR
Others
91
Page 92

Editing
Playlist editing (Continued)
Canceling selection of a part
1) From EDIT MENU Playlist editing, press
/ / / to select a part to cancel.
2) Press QUICK MENU.
Quick Menu appears.
3) Press
then press SELECT/ENTER.
The part you have selected is canceled.
/ to select “Cancel selected title”,
Confirming the first and last scenes of a part or
a Playlist
You can play the first and last 3 seconds of a scene
(Preview). (If a title contains several chapters, the first
and last scenes of the chapters are also played.)
Preview of a part:
1) At step 6 on
chapter, then press QUICK MENU.
2) Press
SELECT/ENTER.
Preview of all parts:
1) Move the cursor to an any part (in the lower
area), then press QUICK MENU.
2) Press
press SELECT/ENTER.
/ to select “Preview”, then press
/ to select “Preview all playlists”, then
page 90, select a title or a
Confirming the title information
1) At step 6 on page 90, select a title or a
chapter, then press QUICK MENU.
2) Press
press SELECT/ENTER.
/ to select “Title information” then
Correcting a Playlist
You can add or delete parts to correct a Playlist.
1) From CONTENT MENU, select a Playlist to
correct.
2) Press QUICK MENU.
3) Press
then press SELECT/ENTER.
EDIT MENU Playlist editing appears.
Follow the procedure from steps 6 on
add or delete parts as necessary.
Note
• You cannot edit a title (Playlist) of still pictures, or a title
(Playlist) which contains both still and moving pictures.
/ to select “Playlist re-editing” and
page 90,
Using a part in a Playlist also in another Playlist
1) In play or stop mode of a Playlist title, press
EASY NAVI.
EDIT MENU Main Menu appears.
2) Press
press SELECT/ENTER.
3) Press
press SELECT/ENTER.
EDIT MENU Playlist editing appears.
4) Press
SELECT/ENTER.
The areas of title name and part selection become
blank.
5) Following the procedures outlined on
90, make a Playlist.
/ / / to select “Edit Menu”, then
/ to select “Playlist editing,” then
/ / / to select “Start” then press
page
Naming a title (Playlist)
1) From EDIT MENU Playlist editing, move a
cursor to the lower side (selected parts) then
press QUICK MENU.
2) Press
press SELECT/ENTER.
A keyboard appears.
3) Following the procedures outlined on
30, enter a title name.
/ to select “Edit title name,” then
page
92
Note
• You can name a title also while viewing its information.
From CONTENT MENU Title List, select a title and press
QUICK MENU button then select “Title information” by
/ buttons and SELECT/ENTER button. Further press
QUICK MENU button, and select “Edit title name” by /
buttons and SELECT/ENTER button.
Page 93

Editing
DVD-RAM
DVD-RW
DVD-R
Creating thumbnails (Changing the picture on CONTENT MENU)
Introduction
You can register your favorite scene as a thumbnail displayed on CONTENT MENU.
On a finalized DVD-R/RW disc, this feature is not available.
OPEN/CLOSE
DISPLAY
FL SELECT
DIMMER
SUBTITLE
ANGLE
REMAIN
VOL CH
MUTE
TOP MENU
INSTANT
REPLAY
QUICK MENU
REC MODE
SETUP
TIMESLIP
EASY
NAVI
SELECT/
ENTER
AUDIO/SAP
EXTEND
Start
PROGRESSIVE
FREEZE
ZOOM
INPUT SELECT
MENU
TV
DVD
INSTANT
SKIP
Press EASY NAVI.
1
EASY NAVI Main Menu appears.
EASY
NAVI
Press / / / to select “Play Contents”,
then press SELECT/ENTER.
2
CONTENT MENU Title List appears.
SELECT/
ENTER
e.g.
CONTENT
Title List
MENU
001 :
2005/03/08 07:00
am TV:4
(0:53:45)
Original
2005/03/12 09:00
pm TV:3
(0:52:40)
Original
2005/04/12 11:00
pm TV:4
(0:30:08)
Original
1/ 2
Page
DVD-RAM (VR)
2005/03/08 11:00
pm TV:6
(0:29:50)
Original
2005/04/11 07:00
am TV:8
(0:54:30)
Original
2005/04/12 09:00
pm TV:10
(0:51:28)
Original
Recording
Playback
Editing
Function setup
SKIP REV STOP SKIP FWD
FWDPLAYREV
REC
SEARCHTADJUST
1
2
4
5
89
7
3
6
CHP DIVIDE
+
0
CLEAR
10
Press / / / to select a title whose
thumbnail you want to change.
3
• To go to the next or previous page, press FWD or
REV button.
SELECT/
ENTER
• To select a chapter, select a title and press
Chapter List appears.
By pressing
button again, you can return to Title
List.
Press QUICK MENU.
4
Quick Menu appears.
QUICK MENU
e.g.
CONTENT
Title List
MENU
Quick Menu
001 :
Title information
Create thumbnail
High speed dubbing
Chapter function
Edit function
Disc information
Title delete
Exit
2004/06/08 07:00
am TV:4
(0:53:45)
Original
2004/06/12 09:00
pm TV:3
(0:52:40)
Original
2005/04/12 11:00
pm TV:4
(0:30:08)
Original
1/ 2
Page
DVD-RAM (VR)
2005/03/08 11:00
pm TV:6
(0:29:50)
Original
2005/04/11 07:00
am TV:8
(0:54:30)
Original
2005/04/12 09:00
pm TV:10
(0:51:28)
Original
button.
(Continued)
Others
93
Page 94

Editing
Creating thumbnails (Continued)
OPEN/CLOSE
DISPLAY
FL SELECT
SUBTITLE
ANGLE
REC MODE
REMAIN
SETUP
VOL CH
TIMESLIP
MUTE
TOP MENU
INSTANT
REPLAY
QUICK MENU
SKIP REV STOP SKIP FWD
REC
SEARCHTADJUST
1
4
7
EASY
NAVI
SELECT/
ENTER
2
5
89
DIMMER
AUDIO/SAP
EXTEND
INPUT SELECT
3
6
PROGRESSIVE
FREEZE
ZOOM
MENU
TV
DVD
INSTANT
SKIP
FWDPLAYREV
CHP DIVIDE
+
10
0
CLEAR
Note
• There may be a small difference
between a thumbnail made on
Create Thumbnail and that displayed
in CONTENT MENU. Operation with
FWD or REV button may extend the
difference.
Press / to select “Create thumbnail”
(or “Create CHP thumbnail” if selected a
5
chapter at step 2), then press SELECT/ENTER.
CONTENT MENU Create Thumbnail appears.
e.g.
CONTENT
Create Thumbnail
SELECT/
ENTER
MENU
00:00:00
2005/03/08 11:00pm Ch:6
Original
00:00:00:03F
Location
Select desired thumbnail image via
remote. To set, press enter.
Title:002 Chapter:0001
Press PLAY to start playback.
6
Locate a scene you want to capture as a thumbnail.
PLAY
You can use the following buttons.
FWD, REV,
, SKIP FWD, SKIP REV, ADJUST, etc.
At the point where you want to capture a
thumbnail image, press
7
e.g.
CONTENT
Create Thumbnail
MENU
00:00:00
.
2005/03/08 11:00pm Ch:6
Original
00:06:25:23F
Location
Select desired thumbnail image via
remote. To set, press enter.
Title:002 Chapter:0001
Press SELECT/ENTER.
8
CONTENT MENU returns. The selected scene is
displayed as a thumbnail.
e.g.
SELECT/
ENTER
CONTENT
Title List
MENU
001 :
2005/03/08 07:00
am TV:4
2005/03/12 09:00
pm TV:3
2005/04/12 11:00
pm TV:4
(0:53:45)
Original
(0:52:40)
Original
(0:30:08)
Original
1/ 2
Page
2005/03/08 11:00
pm TV:6
2005/04/11 07:00
am TV:8
2005/04/12 09:00
pm TV:10
DVD-RAM (VR)
(0:29:50)
00:29:50
DVD-RAM (VR)
(0:29:50)
00:29:50
DVD-RAM (VR)
(0:29:50)
Original
(0:54:30)
Original
(0:51:28)
Original
94
Page 95

Notes
• You cannot create thumbnails of chapters in a title that
contains a still picture.
• If you create a chapter thumbnail, and then record or edit
the disc on other devices, the chapter thumbnail may
return to the top of the chapter.
Introduction
Recording
Playback
Editing
Function setup
Others
95
Page 96

Editing
DVD-RAM
High speed dubbing (Dubbing only a specified part)
This section explains how to copy a title or chapter recorded on a DVD-RAM disc within the same disc at
high speed (high speed: in a shorter time than actual playing time of the title or chapter). Follow this
procedure when you convert a playlist into an original title.
OPEN/CLOSE
DISPLAY
FL SELECT
SUBTITLE
ANGLE
REC MODE
REMAIN
SETUP
VOL CH
TIMESLIP
MUTE
TOP MENU
INSTANT
REPLAY
QUICK MENU
SKIP REV STOP SKIP FWD
EASY
NAVI
SELECT/
ENTER
PROGRESSIVE
DIMMER
AUDIO/SAP
FREEZE
EXTEND
Start
INPUT SELECT
MENU
FWDPLAYREV
ZOOM
INSTANT
SKIP
TV
DVD
Press EASY NAVI.
1
EASY NAVI Main Menu appears.
EASY
NAVI
Press / / / to select “Play Contents”,
then press SELECT/ENTER.
2
CONTENT MENU Title List appears.
e.g.
SELECT/
ENTER
Press / / / to select a part (a title or
chapter) to copy.
3
CONTENT
Title List
MENU
001 :
2005/03/08 07:00
am TV:4
(0:53:45)
Original
2005/03/12 09:00
pm TV:3
(0:52:40)
Original
2005/04/12 11:00
pm TV:4
(0:30:08)
Original
1/ 2
Page
DVD-RAM (VR)
2005/03/08 11:00
pm TV:6
(0:29:50)
Original
2005/04/11 07:00
am TV:8
(0:54:30)
Original
2005/04/12 09:00
pm TV:10
(0:51:28)
Original
96
REC
SEARCHTADJUST
1
2
4
5
89
7
3
6
CHP DIVIDE
+
10
0
CLEAR
• You can go forward/back to pages by pressing FWD
SELECT/
ENTER
or REV button.
• To select a chapter, highlight a title and press
button. If you press the button again, the title list reappears.
Press QUICK MENU then select “High speed
dubbing” pressing
4
then press SELECT/ENTER.
CONTENT MENU High Speed Library Dubbing
QUICK MENU
SELECT/
ENTER
appears.
e.g.
CONTENT
MENU
2005/04/11 07:00am TV:8
/ from Quick Menu,
High Speed Library Dubbing
(0:54:30)
(Saves Original)
Original
Same Disc
Page 97

Press SELECT/ENTER.
Introduction
5
Copying starts.
A new title with the same contents is created on the
SELECT/
ENTER
Notes
• Copying a Playlist makes an Original, leaving the Playlist as it is.
• A title or a chapter becomes a title by being copied.
• Copying is interrupted when a program recording is about to start.
• This function is available only for copying contents on a DVD-RAM disc to the same disc.
• If copying is not allowed due to some conditions, such as lack of disc space, etc., a message will appear. Follow the
procedure indicated there.
• Depending on the contents, some reference information or appendix data may not be copied.
• A title that contains a still picture cannot be copied.
To cancel copying halfway through the
operation
1) During copying, press QUICK MENU.
Quick Menu appears.
2) Press
press SELECT/ENTER.
Note
• Cancellation of a copying operation will result in deletion of
a portion of the title or chapter already copied.
/ to select “Cancel dubbing”, then
same disc.
The job progress is displayed on the screen and the
front panel display.
When the job finishes, the graph disappears.
You can set the recorder to turn off automatically when
the job finishes.
(1) During the operation, press QUICK MENU button.
(2) Press
(3) Press SELECT/ENTER button.
/ buttons to select “Auto power off”.
Recording
Playback
Editing
Function setup
Others
97
Page 98

Editing
DVD-RAM
DVD-RW
DVD-R
Deleting selected items (Deleting multiple specified parts)
This section explains how to simultaneously delete unnecessary titles and chapters.
On a finalized DVD-R/RW disc, this feature is not possible.
OPEN/CLOSE
DISPLAY
FL SELECT
SUBTITLE
ANGLE
REC MODE
REMAIN
SETUP
VOL CH
TIMESLIP
MUTE
TOP MENU
INSTANT
REPLAY
QUICK MENU
SKIP REV STOP SKIP FWD
REC
SEARCHTADJUST
EASY
NAVI
SELECT/
ENTER
PROGRESSIVE
DIMMER
AUDIO/SAP
FREEZE
EXTEND
Start
INPUT SELECT
MENU
FWDPLAYREV
CHP DIVIDE
ZOOM
INSTANT
TV
DVD
SKIP
Press EASY NAVI.
1
EASY NAVI Main Menu appears.
EASY
NAVI
Press / / / to select “Edit Menu”, then
press SELECT/ENTER.
2
EDIT MENU Main Menu appears.
SELECT/
ENTER
Press / to select “Del Selected Items”.
3
e.g.
EDIT
Main Menu
MENU
Del Selected Items
SELECT/
ENTER
Del Selected Items
Several titles or unnecessary chapters
in several titles can be deleted at one
time.
Title Title Title
321
1 2
321
321
321
Chapter Editing
Edit Functions
Playlist Editing
DVD-Video Finalizing
Del Selected Items
DVD-RAM (VR)
Source
98
1
4
7
3
2
6
5
89
+
10
0
CLEAR
Press SELECT/ENTER.
4
EDIT MENU Del Selected Items appears.
SELECT/
ENTER
e.g.
Thumbnails of the parts in the disc are displayed in the
upper area.
EDIT
MENU
Del Selected Items
DVD-RAM (VR)
Title
Object
Original
Start
Page 99

Following steps 6 to 8 on page 90, 91,
assemble the items to delete.
5
Press repeatedly to select “Start”, then
press SELECT/ENTER.
6
The recorder begins the deletion process.
SELECT/
ENTER
Notes
• To confirm the first and last scenes of an item, first select an item then press QUICK MENU button. Press / buttons to
select “Preview” (or “Title information”) then press SELECT/ENTER button. This is available only on contents recorded in
DVD-RAM discs.
• Titles and chapters show their names for about 2 seconds at the bottom of the screen when they are selected.
• On a DVD-RW disc, deleting can restore the disc space only by deleting the last recorded title.
• Deleting cannot be canceled once star ted. Be careful when executing the deletion process.
• If you select a title for the part to be removed, you cannot select chapters in that title.
• Chapters in DVD-R/RW discs cannot be selected to delete.
To cancel deleting, press
then press SELECT/ENTER button.
When the process is finished, EDIT MENU Main Menu
returns.
/ buttons to select “No”,
Introduction
Recording
Playback
Editing
Function setup
99
Others
Page 100

Editing
DVD-RW
DVD-R
DVD-Video finalizing process
The recorder processes recorded data in a DVD-R/RW disc so that it can be played on other compatible
devices.
Important
• You cannot rewrite data onto a disc after you execute the DVD-Video finalizing process. However, the disabled rewritability of
a DVD-RW disc can be restored by canceling the process of the disc. ( page 103) On DVD-R discs, canceling of the DVDVideo finalizing process is not available.
Preparation
• Load a DVD-R/RW disc you want to execute the finalizing process.
OPEN/CLOSE
DISPLAY
FL SELECT
SUBTITLE
ANGLE
REC MODE
REMAIN
SETUP
VOL CH
TIMESLIP
MUTE
TOP MENU
INSTANT
REPLAY
QUICK MENU
SKIP REV STOP SKIP FWD
REC
EASY
NAVI
SELECT/
ENTER
PROGRESSIVE
DIMMER
AUDIO/SAP
FREEZE
EXTEND
Start
INPUT SELECT
MENU
FWDPLAYREV
ZOOM
INSTANT
TV
DVD
SKIP
Press EASY NAVI.
1
EASY NAVI Main Menu appears.
EASY
NAVI
Press / / / to select “Edit Menu”, then
press SELECT/ENTER.
2
EDIT MENU Main Menu appears.
SELECT/
ENTER
Press / to select “DVD-Video Finalizing”.
3
e.g.
EDIT
Main Menu
MENU
DVD-Video Finalizing
SELECT/
ENTER
DVD-Video Finalizing
Used to crete compatibility between
the recorded DVD-R/-RW and
DVD Players. Also used for setting up
“menu picture”, etc.
Title
Title Title
321
1 2
Menu
Finalize
321
1 2
321
321
Playlist Editing
DVD-Video Finalizing
Del Selected Items
DVD-R
Source
Chapter Editing
Edit Functions
100
SEARCHTADJUST
1
2
4
5
89
7
3
6
CHP DIVIDE
+
10
0
CLEAR
Press SELECT/ENTER.
4
A display of option settings appears.
SELECT/
ENTER
e.g.
EDIT
DVD–Video Finalize(Option Settings)
MENU
Menu Create
Start Play
After play one title
After play final title
Title+Chapter Title Chapter None
Menu
Menu
Menu
Title 1
Next Title
Title 1
Stop
NextReturn
 Loading...