

Page 1
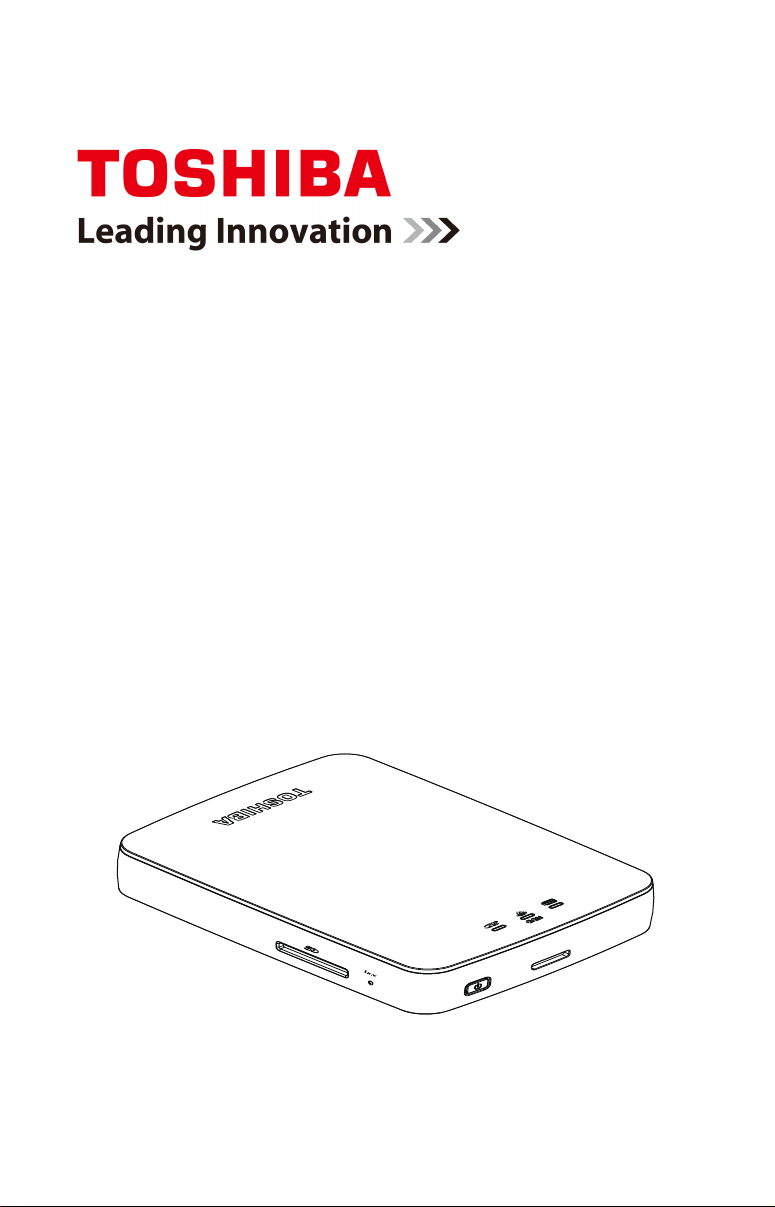
TOSHIBA
Canvio Aero
Cast
User’s Manual
English
™
Page 2

2
For the state of California only.
Safety information and Rules and Regulations for wireless LAN
Wireless LAN devices may cause interference with
medical equipment such as cardiac pacemakers. If
you use personal medical equipment, consult with
your physician and medical equipment instructions
before using the Product. The Product should not be
used in environments with medical equipment such as
hospitals and medical offices, or near users of
personal medical equipment, as use of this Product
may cause injury in such environments.
Always turn off wireless functionality if the computer is
near automatic control equipment or appliances such
as automatic doors or fire detectors. Radio waves can
cause malfunction of such equipment, possibly
resulting in injury.
Do not use the Wireless LAN functionality near a
microwave oven or in areas subject to radio
interference or magnetic fields.
Interference from a microwave oven or other source
can disrupt Wireless LAN operation.
The transmission speed over the wireless LAN, and the
distance over which the wireless LAN can reach, may
vary depending on surrounding electromagnetic
environment, obstacles, access point design and
configuration, client design and software/hardware
configurations. The transmission rate described is the
theoretical maximum speed as specified under the
appropriate standard – the actual transmission speed
will be lower than the theoretical maximum speed.
Page 3

3
Federal Communications Commission (FCC) Notice (USA)
Complies with FCC RF Exposure requirements.
This equipment has been tested and found to comply with the limits for a
Class B digital device, pursuant to Part 15 of the FCC Rules. These limits are
designed to provide reasonable protection against harmful interference in a
residential installation. This equipment generates, uses, and can radiate radio
frequency energy and, if not installed and used in accordance with the
instructions, may cause harmful interference to radio communications.
However, there is no guarantee that interference will not occur in a particular
installation. If this equipment does cause harmful interference to radio or
television reception, which can be determined by turning the equipment off
and on, the user is encouraged to try to correct the interference by one or
more of the following measures:
❖ Reorient or relocate the receiving antenna.
❖ Increase the separation between the equipment and the receiver.
❖ Connect the equipment into an outlet on a circuit different from that
to which the receiver is connected.
❖ Consult the dealer or an experienced radio or television
technician for help.
Changes or modifications not expressly approved by the party responsible for
compliance could void the user’s authority to operate the equipment.
Radiation Exposure Statement:
This device meets the government’s requirements for exposure to radio
waves. This device is designed and manufactured not to exceed the emission
limits for exposure to radio frequency (RF) energy set by the Federal
Communications Commission of the U.S. Government.
The exposure standard for wireless device employs a unit of measurement
known as the Specific Absorption Rate, or SAR. The SAR limit set by the FCC
is 1.6W/kg. *Tests for SAR are conducted using standard operating positions
accepted by the FCC with the device transmitting at its highest certified
power level in all tested frequency bands.
Note: The country code selection is for non-US model only and is not
available to all US model. Per FCC regulation, all WiFi product marketed in US
must fixed to US operation channels only.
Page 4

4
Declaration of Conformity for Products Marked with the FCC Logo (USA)
This device complies with Part 15 of the FCC Rules. Operation is subject to
the following two conditions:
1) This device may not cause harmful interference, and
2) This device must accept any interference received, including
interference that may cause undesired operation.
Canadian Notice
This device complies with the Canadian ICES-003 Class B specifications and
RSS-210 of Industry Canada.
Cet appareil numérique de la classe B est conformé à la norme NMB-003 du
Canada.
This Class B digital apparatus meets all requirements of the Canadian
Interference-Causing Equipment Regulations. Wireless operation is subject to
2 conditions. The first is that the wireless device may not cause interference.
The second is that the wireless device must accept any interference, including
interference that may cause undesired operation of the device.
Cet appareil numérique de classe B satisfait à toutes les exigences des
Normes sur le matériel brouilleur au Canada. Le fonctionnement sans fil est
assujetti à 2 conditions. La première est que l'appareil sans fil ne doit pas
causer d'interférence. La seconde est que l'appareil sans fil doit accepter
toute interférence, y compris celle susceptible de causecauser un
fonctionnement indésirable de l'appareil.
To comply with the Canadian RF exposure compliance requirements, this
device and its antenna must not be co-located or operating in conjunction
with any other antenna or transmitter.
Pour être conforme aux exigences canadiennes en matière d'exposition aux
fréquences radio, l'appareil et son antenne ne doivent pas être situés au
même endroit qu'une autre antenne ou un autre émetteur ni fonctionner en
même temps.
This device complies with Industry Canada license-exempt RSS standard(s).
Operation is subject to the following two conditions:
(1) this device may not cause interference, and
(2) this device must accept any interference, including interference that
may cause undesired operation of the device.
Le présent appareil est conforme aux CNR d'Industrie Canada applicables
aux appareils radio exempts de licence. L'exploitation est autorisée aux deux
conditions suivantes:
(1) l'appareil ne doit pas produire de brouillage, et
(2) l'utilisateur de l'appareil doit accepter tout brouillage radioélectrique
subi, même si le brouillage est susceptible d'en compromettre le
fonctionnement."
Page 5

5
Radiation Exposure Statement:
The product comply with the Canada portable RF exposure limit set forth for
an uncontrolled environment and are safe for intended operation as described
in this manual. The further RF exposure reduction can be achieved if the
product can be kept as far as possible from the user body or set the device to
lower output power if such function is available.
Déclaration d'exposition aux radiations:
Le produit est conforme aux limites d'exposition pour les appareils portables
RF pour les Etats-Unis et le Canada établies pour un environnement non
contrôlé.
Le produit est sûr pour un fonctionnement tel que décrit dans ce manuel. La
réduction aux expositions RF peut être augmentée si l'appareil peut être
conservé aussi loin que possible du corps de l'utilisateur ou que le dispositif
est réglé sur la puissance de sortie la plus faible si une telle fonction est
disponible.
This device and its antenna(s) must not be co-located or operating in
conjunction with any other antenna or transmitter, except tested built-in
radios. The County Code Selection feature is disabled for products marketed
in the US/ Canada.
Cet appareil et son antenne ne doivent pas être situés ou fonctionner en
conjonction avec une autre antenne ou un autre émetteur, exception faites
des radios intégrées qui ont été testées. La fonction de sélection de l'indicatif
du pays est désactivée pour les produits commercialisés aux États-Unis et au
Canada.
Page 6

6
Copyright
This manual may not be reproduced in any form without the prior written
permission of Toshiba. No liability is assumed with respect to the use of the
information contained herein.
©2014 by Toshiba America Information Systems, Inc. All rights reserved.
Notice
The information contained in this manual, including but not limited to any
product specifications, is subject to change without notice.
TOSHIBA CORPORATION AND TOSHIBA AMERICA INFORMATION
SYSTEMS, INC. (TOSHIBA) PROVIDES NO WARRANTY WITH REGARD
TO THIS MANUAL OR ANY OTHER INFORMATION CONTAINED
HEREIN AND HEREBY EXPRESSLY DISCLAIMS ANY IMPLIED
WARRANTIES OF MERCHANTABILITY OR FITNESS FOR ANY
PARTICULAR PURPOSE WITH REGARD TO ANY OF THE FOREGOING.
TOSHIBA ASSUMES NO LIABILITY FOR ANY DAMAGES INCURRED
DIRECTLY OR INDIRECTLY FROM ANY TECHNICAL OR
TYPOGRAPHICAL ERRORS OR OMISSIONS CONTAINED HEREIN OR
FOR DISCREPANCIES BETWEEN THE PRODUCT AND THE MANUAL.
IN NO EVENT SHALL TOSHIBA BE LIABLE FOR ANY INCIDENTAL,
CONSEQUENTIAL, SPECIAL, OR EXEMPLARY DAMAGES, WHETHER
BASED ON TORT, CONTRACT OR OTHERWISE, ARISING OUT OF OR
IN CONNECTION WITH THIS MANUAL OR ANY OTHER INFORMATION
CONTAINED HEREIN OR THE USE THEREOF.
GNU General Public License (“GPL”)
Firmware incorporated into this product may include third party
copyrighted software licensed under the GPL or Lesser General
Public License (“LGPL”) (collectively, “GPL Software”) and not
Toshiba's End User License Agreement. A copy of that license may be
obtained at http://www.gnu.org, and http://support.toshiba.com. You
may obtain the complete Corresponding Source code from us by
downloading at no charge from http://support.toshiba.com or by
calling Toshiba Customer Support for a period of three years after the
date of purchase. With respect solely to the GPL Software, no
warranty is provided, to the extent permitted by applicable law.
Modification of or tampering with the Software is solely at your own
risk and will void the product warranty. Toshiba is not responsible for
any such modification or tampering. Toshiba will not support any
product in which you have or have attempted to modify the Software
supplied by Toshiba.
Page 7

7
Trademarks
Canvio and Canvio AeroCast are either trademarks or registered trademarks
of Toshiba America Information Systems, Inc.
Android, Google Play and Google Chrome are trademarks of Google, Inc.
Apple, Mac, Mac OS, iPad, iPhone, Safari and Time Machine are trademarks
of Apple Inc., registered in the U.S. and other countries.
IOS is a trademark or registered trademark of Cisco in the U.S. and other
countries and is used under license.
AppStore is a service mark of Apple Inc.
Firefox is a registered trademark of the Mozilla Foundation.
SD and SDHC logos are trademarks of SD 3C, LLC.
®
is a registered trademark of the Wi-Fi Alliance®.
Wi-Fi
®
Windows
companies.
All other brand and product names are trademarks or registered trademarks
of their respective companies.
Safety icons
This section lists important precautions which users of our porduct(s) (and
anyone else) should observe in order to avoid injury and damage to property,
and to ensure safe and correct use of our products. Please be sure that you
understand the meanings of the labels and graphic symbols described below
before you move on to the detailed descriptions of the precautions, and
comply with the precautions stated.
and Internet Explorer are trademarks of Microsoft group of
Indicate an imminently hazardous situation which, if
not avoided, will result in death or serious injury.
Indicate a potentially hazardous situation which, if
not avoided, could result in death or serious injury.
Indicate a potentially hazardous situation which, if
not avoided, could result in minor or moderate
injury.
Indicates practices that may cause property
damage and other problems, but not personal
injury.
Page 8

8
Provides important information.
* Serious injury including blindness, wounds, burns (low and high
temperature), electric shock, fractures, and poisoning, etc. with long-lasting
effects or that require hospitalization and/or long-term hospital visits for
treatment.
* Minor or moderate injury includes wounds, burns, electric shock, etc. not
requiring hospitalization and/or long-term hospital visits for treatment.
* Property damage means damage to device.
Page 9
Other icons used
Additional icons highlight other helpful or educational
information:
TECHNICAL NOTE: This icon indicates technical
information about the device.
HINT: This icon indicates helpful hints and tips.
9
DEFINITION: This icon indicates the definition of a
term used in the text.
Battery safety precautions
Do not immerse the drive (with the internal battery
in it) in liquid such as water, beverages, or other
fluids.
The battery (including protection circuit) may catch
on fire, smoke, explode, or cause heat generation
by unexpected electrical load.
Keep the drive (with the internal battery in it) away
from heat and fire.
Heat will damage the battery and may cause it to
generate heat, smoke, catch fire, or explode.
Do not disassemble the drive and the internal
battery.
Disassembly or modification of the battery may
damage the protection circuit. This may cause the
battery to generate heat, smoke, catch fire, or
explode.
Page 10
10
Keep the product away from small children. If the product
is broken or has cracks, keep the battery and any or its
components parts away from small children. If the battery
liquid or any of its component parts are swallowed, seek
medical attention immediately.
Stop charging if the charging process cannot be finished.
If the battery can not finish the charging process within
the specified time, halt the charging process. The battery
may generate heat, smoke, catch fire, or explode.
This drive has a rechargeable battery inside. Do not throw
away used batteries as home rubbish.
Please bring them to a recycle agency or put in a recycle
box for portable rechargeable batteries. If used batteries
are thrown away as home rubbish, there is a possibility
that they may cause the rubbish collection to catch fire or
smoke.
Always immediately turn the power off and disconnect
the power cable/cord plug from the plug socket and stop
using the battery if you observe any of the folllowing
conditions: Offensive or unsual odor / Excessive heat /
Discoloration / Deformation, crack, or leaks / Smoke /
Other unusual event during use, such as abnormal sound.
Only charge the battery in temperatures between 5º C
and 35º C. Charging outside of this temperature range
may cause the battery to leak, generate heat, or result in
serious damage. It may also cause the battery's
performance and life to deteriorate.
Actual battery life may vary depending on settings,
application usage, features or tasks selected, network
configuration, operating temperature and many other
factors. Recharge time varies depending on usage. The
battery may not charge while the drive is consuming full
power. After a period of time, the battery will lose its
ability to perform at maximum capacity. This is normal for
all batteries.
Page 11
Safety Precautions for the Battery
Do not immerse the drive (with the internal battery in it) in liquid
such as water, beverages, or other fluids. The battery (including
protection circuit) may catch on fire, smoke, explode, or cause
heat generation by unexpected electrical load.
Keep the drive (with the internal battery in it) away from heat and
fire. Heat will damage the battery and may cause it to generate
heat, smoke, catch fire, or explode.
Do not disassemble the drive and the internal battery.
Disassembly or modification of the battery may damage the
protection circuit. This may cause the battery to generate heat,
smoke, catch fire, or explode.
Keep the product away from small children. If the product is
broken or has cracks, keep the battery and any of its component
parts away from small children. If the battery liquid or any of its
component parts are swallowed, seek medical attention
immediately.
Stop charging if the charging process cannot be finished. If the
battery can not finish the charging process within the specified
time, halt the charging process. The battery may generate heat,
smoke, catch fire, or explode.
This drive has a rechargeable battery inside. Do not throw away
used batteries as home rubbish. Please bring them to a recycle
agency or put in a recycle box for portable rechargeable
batteries. If used batteries are thrown away as home rubbish,
there is a possibility that they may cause the rubbish collection
to catch fire or smoke.
Always immediately turn the power off and disconnect the power
cable /cord plug from the plug socket and stop using the battery
if you observe any of the following conditions: Offensive or
unusual odor / Excessive heat / Discoloration / Deformation,
crack, or leaks / Smoke / Other unusual event during use, such
as abnormal sound
Do not turn on the drive’s power again. Continued use could
cause a fire or rupture possibly resulting in serious injury or drive
failure including but not limited to the loss of data.
If the drive is leaking or its case is cracked, put on protective
gloves to handle it.
Only charge the battery in temperatures between 5°C and 35°C.
Charging outside of this temperature range may cause the
battery to leak, generate heat, or result in serious damage. It may
also cause the battery's performance and life to deteriorate.
11
Page 12
12
Actual battery life may vary depending on settings, application
usage, features or tasks selected, network configuration,
operating temperature and many other factors. Recharge time
varies depending on usage.
The battery may not charge while the drive is consuming full
power. After a period of time, the battery will lose its ability to
perform at maximum capacity. This is normal for all batteries.
Safety Precautions for Wireless LAN
Wireless LAN devices may cause interference with medical
equipment such as cardiac pacemakers. If you use personal
medical equipment, consult with your physician and medical
equipment instructions before using the Product. The Product
should not be used in environments with medical equipment
such as hospitals and medical offices, or near users of personal
medical equipment, as use of this Product may cause injury in
such environments.
Always turn off wireless functionality if the computer is near
automatic control equipment or appliance such as automatic
doors or fire detectors. Radio waves can cause malfunction of
such equipment, possibly resulting in injury.
Do not use the Wireless LAN functionality near a microwave
oven or in areas subject to radio interference or magnetic fields.
Interference from a microwave oven or other source can disrupt
Wireless LAN operation.
The transmission speed over the wireless LAN, and the distance
over which the wireless LAN can reach, may vary depending on
surrounding electromagnetic environment, obstacles, access
point design and configuration, client design and
software/hardware configurations. The transmission rate
described is the theoretical maximum speed as specified under
the appropriate standard – the actual transmission speed will be
lower than the theoretical maximum speed.
Safety Precautions for Power and More
Do not leave parts such as plastic covers and electrical plug
within the reach of children and pets. Misuse of the part
including, without limitation, accidental swallowing the part may
cause choking and suffocation resulting in death or serious
injury. If you suspect a part has been swallowed, immediately
take appropriate emergency action and consult a doctor.
Do not place the drive on a shaky table, uneven, tilted surface or
other unstable location. The drive may fall, causing damage to
the drive or possibly injury.
Do not do the improper maintenance or disassemble, as it may
cause personal injury or may result in electric shock or fire.
Do not expose the drive to wet or damp conditions, as it may
result in electric shock or fire.
Page 13

13
Do not allow any liquids or metal objects such as screws, staples
or paper clips to enter the drive. Foreign objects may create a
short circuit, which may cause product damage and fire,
possibly resulting in serious injury.
Do not use the drive when there is an abnormality in metal parts
and plastic parts, as it may result in electric shock.
Do not use the drive if the drive have been dropped or damaged,
as it may result in electric shock.
If the Product produces an odor, overheats or smokes,
immediately turn off the drive and disconnect the power cord
from the outlet and disconnect the USB cable from the device.
Failure to do so may result in fire, damage to the drive and/or
personal injury including burns and electric shock. Do not use
the drive again. Please contact the store from which you
purchased it.
Do not plug the AC adaptor into a power source that does not
correspond to the voltage, current and the frequency specified
on the regulatory label of the unit. An overload on the socket
and/or AC adaptor may cause a fire or electric shock, possibly
resulting in serious injury.
Do not pull on the power cable/cord to remove a plug from a
socket. Always grasp the plug directly. Pulling a power
cable/cord may cause fracture resulting in a fire or electric shock
and serious injury.
Always confirm that the power plug has been fully inserted into
the socket, to ensure a secure electrical connection. An overload
on the socket may cause a fire or electric shock, possibly
resulting in serious injury.
Always make sure the drive and AC adaptor have adequate
ventilation and are protected from overheating when the AC
adaptor is connected to a power outlet. Inadequate ventilation
may cause the drive and AC adaptor to overheat resulting in a
fire or electric shock and serious injury.
If dust gets on the power plug connectors or connector base,
turn the power off and disconnect the power plug. Then clean
the connector and/or connector base with a dry soft cloth.
Failure to do so may cause a fire or electric shock, possibly
resulting in serious injury.
Avoid extended contact between the drive and your skin. The
drive may become hot! Avoid prolonged contact to prevent
skin irritation and/or heat injury.
Avoid extended contact between the AC adaptor and your skin.
The AC adaptor may become hot! Avoid prolonged contact to
prevent skin irritation and/or heat injury.
Page 14

14
Do not disconnect the USB cable and AC adaptor while
operating, as it may result in loss of data or damage to the drive.
Do not touch the USB cable while and AC adaptor operating, as
it may result in loss of data or damage to the drive.
Do not bump, drop or jar the drive, as it may result in loss of data
or damage to the drive.
Do not use the drive at high or low temperatures or sudden
temperature changes. This may result in loss of data or damage
to the drive. (Operating: 5°C-35°C)
Make sure that you backup all your data as much as you can on
the drive to the other storage drive.
Do not use the drive in the dew condensation, as it may result in
loss of data or damage to the drive.
Do not cover the drive during operating, as it may become
overheated.
Do not use the drive during a thunderstorm. If you see lightning
or hear thunder, immediately turn off the devices to which this
drive is connected, computer and peripherals, and disconnect
the power cord from the outlet, and disconnect the USB cable
from the computer. An electric surge caused by the lightning
may result in loss of data or damage to the drive.
Do not clean the drive or any accessories with any chemicals. To
clean the outside of the drive or the accessories, use a dry soft
cloth. Use of chemicals may result in deterioration, deformation
or discoloration of those items and the loss of data.
Compatibility may vary depending on user's hardware
configuration and operating system.
USB3.0 is backward compatible with USB2.0
If the drive is not provided enough power, the drive does not
operate.
You may need USB3.0 Express Card Host Controller for your
computer if the computer doesn't have USB3.0 port. You also
can connect the drive to USB2.0 port of your computer.
However the transfer rate will be downgraded to that of USB2.0.
One Gigabyte (1GB) means 109 = 1,000,000,000 bytes and one
Terabyte (1TB) means 1012 = 1,000,000,000,000 bytes using
power of 10. A computer operating system, however, reports
storage capacity using powers of 2 for the definition of 1GB =
230 = 1,073,741,824 bytes and 1TB = 240 = 1,099,511,627,776
bytes, and therefore shows less storage capacity. Available
storage capacity (including examples of various media files) will
vary based on file size, formatting, setting, software and
operating system and other factors.
Use only the accessories supplied by the manufacturer.
This drive needs the power supply from AC adaptor supplied by
the manufacturer.
Product specifications are subject to change without notice.
Page 15

15
Immunity from Responsibility
Toshiba is not responsible for data corruption or data loss.
(Toshiba will not cover any data recovery )
Toshiba is not responsible for any damage due to the fail or negligence of
users, fire, earthquake, or other accident beyond the control of Toshiba.
Toshiba is not responsible all if you do not follow the mention content listed in
the user's manual.
Toshiba is not responsible all, as for the abuse of the connection apparatus
and software.
This product support is available only in the country where the Product was
originally purchased.
Usage Restrictions
This drive is used in standard applications such as office work, personal
drive and household appliances. Toshiba Corporation shall not be liable
except for this type of use. Do not use in special uses (atomic controls,
aeronautic or space systems, mass transport vehicle operating controls,
medical devices for life support, or weapons firing controls) where
particularly high reliability requirements exist, where the pertinent levels
of safety are not guaranteed, or where a failure or operational error could
threaten a life or cause a physical injury.
Page 16

Contents
Introduction ....................................................... 18
Overview............................................................................18
Components ................................................................18
Hardware specifications ..............................................19
Software specifications ...............................................19
Chapter 1: Getting Started ................................ 21
Charging the Canvio AeroCast™........................................21
Function modes.................................................................22
DAS mode (Direct-Attached Storage)..........................22
Wireless LAN mode (Wireless LAN storage)................ 23
Features.............................................................................23
Chapter 2: Canvio AeroCast™ Software Utility ..26
Canvio AeroCast™ System login........................................26
Connect wirelessly to a PC/Mac .................................26
Web browser login....................................................... 26
Client login for iPhone or iPad.....................................27
Android™ client login....................................................27
Canvio AeroCast™ main interface......................................28
Web main interface......................................................29
Application main interface ...........................................30
Pictures Management interface.........................................31
Picture Viewer interface...............................................33
Videos Management interface...........................................34
Video Playback interface (iPhone, iPad, and Android™
device only)..................................................................36
Music Management interface ............................................38
16
Page 17

Contents
Music Player interface (iPhone, iPad, and Android™
device only)..................................................................40
Documents Management interface ................................... 42
Document Viewer interface (iPhone, iPad, and Android™
device only)..................................................................44
File/Folder Management interface.....................................45
SDTM Memory Card Management......................................48
SDTM Memory Card Backup Interface..........................49
Backup Management Interface .........................................50
Settings Management Interface ........................................51
Wireless Interface ........................................................52
Operation Interface...................................................... 53
Information Interface....................................................54
User symbol and name Interface................................. 55
Internet Interface .........................................................56
SSID attribute Interface ...............................................57
Language Interface...................................................... 58
Cache Interface ...........................................................59
Contacting Toshiba............................................................60
Call Toshiba Customer Support Center....................... 60
17
Page 18

Introduction
Introduction
Overview
The Toshiba Canvio AeroCast™ allows you to wirelessly access your
music, videos, pictures, and data, streaming it to your iPad, iPhone,
tablets, smartphones, and notebooks, no longer requiring you to
tangle with cords or cables. With the internal Hard Disk Drive (HDD)
storage, there is no need to worry about running out of space on your
mobile devices and the built-in USB 3.0 port makes file transfer easier
and much faster.
Components
The Canvio AeroCast™ includes the following components:
❖ AC adapter
❖ USB 3.0 cable
❖ Quick Start guide
❖ Warranty
18
Page 19

Introduction
Overview
19
Hardware specifications
Product dimension: 121.4 mm (L) x 86.0 mm (W) x 24.4 mm (H)
[4.8 in (L) x 3.3 in (W) x 0.9 in (H)]
Weight: 280.0 g
Battery: 3100mAh Li-ion type
Environmental requirements:
Wireless LAN
Standard: 802.11 b/g/n
Frequency: 2.4 GHZ
Speed: 1T1R up to 150 Mbps
Temperature
Operating: 5 to 35º C (41 to 95º F)
Storage: 20 to 60º C (68 to
140º F)
Humidity
Operating: 20-80%
Storage: 8-90%
Software specifications
Compatible file types:
Videos: mp4, 3gp, m4v, mov, avi, 3GP, MTS, M2TS
Music: mp3, m4a, aac, wav
Pictures: jpg, bmp, png
Documents: pdf, doc, docx, ppt, pptx, xls, xlsx, txt
Others: Opens in external software
System requirements:
Operating System
Windows®: Windows® 7, Windows
8, Windows 8.1
Mac OS: X 10.7, 10.8
Web browser
Windows®: Internet Explorer® 8.0
to 11.0
Mac: Safari® 5.0 to 7.0
Others: Firefox® 3.0 to 30.0,
Google Chrome
to 30.0
™
13
Page 20

Introduction
20
iPhone or iPad
operating system:
Android™: 2.3 to 4.4
Overview
6.0 to 7.0
Page 21

Chapter 1: Getting Started
A
Getting Started
Charging the Canvio AeroCast™
The Canvio AeroCast™ can be charged via the AC adaptor and USB
cable.
™
Charge the Canvio AeroCast
is Yellow (indicates low battery charge).
when you see that the battery indicator
USB 3.0 Port
C adaptor
USB cable
(Sample Image) Canvio AeroCast
To charge the Canvio AeroCast
1 Attach the USB cable to the AC adaptor.
™
:
™
charging
21
Page 22

Getting Started
22
Function modes
2 Plug the USB cable into the USB 3.0 Host port on the Canvio
™
AeroCast
.
3 Plug the AC adapter into a live electrical wall outlet.
While charging, the battery indicator light will blink slowly
(interval time is 2 seconds).
Function modes
There are two available function modes on the Canvio AeroCast™. You
can either connect to it directly with the included USB cable (DAS
mode) or connect wirelessly (Wireless LAN mode).
DAS mode (Direct-Attached Storage)
To operate via DAS mode, connect the Canvio AeroCast™ to the
computer’s USB port using the included USB cable.
For Mac users:
To write files in DAS mode, you will need to install the “NTFS driver for
Mac” to your Mac. Refer the pre-loaded manual stored on the Canvio
AeroCast’s HDD.
USB 3.0 Port
USB cable
USB port
(Sample Image) Canvio AeroCast™ DAS mode
To connect the Canvio AeroCast™ to your computer:
1 Make sure the Canvio AeroCast
™
is powered OFF.
2 Connect the included USB 3.0 cable to the Canvio
™
AeroCast
.
3 Connect the other end of the USB 3.0 cable to your
computer’s USB port.
You can now begin transferring data to and from the product.
Page 23

Getting Started
Features
Wireless LAN mode (Wireless LAN storage)
23
You can access the Canvio AeroCast™ wirelessly from Windows®,
™
Mac, iPhone, iPad, and Android
mobile devices using the AeroCast
Client.
(Sample Image) Canvio AeroCast™ Wireless LAN mode
Press the ON/OFF button to power on the system.
If not connected to your computer via the USB cable, the Canvio
™
AeroCast
automatically functions in Wireless LAN mode once the
AeroCast Client has been set up, see “Connect wirelessly to a
PC/Mac” on page 17.
Features
❖ Two available modes:
❖ DAS (Direct-Attached Storage) mode
❖ Wireless LAN mode (Wireless LAN Storage mode)
❖ Access and stream your music, videos, pictures and data
using the free Application supporting iPhone, iPad, and
Android
❖ Up to 8 Hours of continuous battery life in video streaming
condition.
❖ Search function to locate and access your files much faster.
❖ Internet access capability via wireless, supporting 802.11 b/g/n.
❖ Built-in HDD with up to 1 TB of storage with NTFS format.
❖ Supports SD
™
operating systems.
™
memory, SDHC, Class 10 compatible.
Page 24

Getting Started
24
Features
-
Battery Indicator
USB 3.0 Port
On/Off Button
Reset Button
SD Memory Card Slot
(Sample Image) Canvio AeroCast™ features
USB 3.0 Host:
❖ Compatible with USB 3.0 and USB 2.0.
❖ Allows for data transfer between a computer and the Canvio
™
AeroCast
, when connected.
❖ Allows you to charge the product battery when connected to
the AC adapter.
On/Off button:
❖ Press and hold for 2 seconds, (Wireless LAN mode turns ON).
❖ Press and hold for 2 seconds again, (Wireless LAN mode
turns OFF).
NOTE
If the battery is too low, you cannot turn the Canvio
AeroCast
™
ON. The battery indicator will blink
Orange for 6 seconds, and then off.
Reset button:
❖ In Wireless LAN mode, press and hold for 5 seconds. The
system will restore to its factory settings.
SD Memory Card Slot:
❖ Class 10 compatible, supports SD Memory Card and SDHC.
❖ In Wireless LAN mode, you can access the SD Memory Card.
Page 25

Getting Started
Battery Indicator light:
Features
❖ Green: The battery power is ≥ 30%.
❖ Yellow: The battery power is < 30% and > 10%.
❖ Orange (blinking fast): the product is out of battery power or
the operating temperature is too high. the product will shut
down after 30 seconds.
❖ Green or Yellow (blinking slowly): The battery is charging.
❖ Green or Yellow (blinking fast): The product is shutting down
or turning ON.
❖ LED Off: The device is powered OFF.
Wireless LAN/HDD indicator:
❖
Wireless LAN Mode
❖ Blue: Wireless LAN is ON (no data access).
❖ Blue (blinking): Wireless LAN is ON (storage access
available).
❖ Blue (turned off): Wireless LAN is OFF.
DAS Mode
❖
❖ White: No data access.
❖ White (blinking): Data access available.
❖ White (turned off): “Safely Remove”, system “Sleep”
or “Standby.”
SD Memory Card indicator:
❖ Only glows in Wireless LAN Mode
❖ Violet: No SD Memory Card access.
❖ Violet (blinking): SD Memory Card access available.
❖ Violet (turned off): SD Memory Card enters into standby.
25
Page 26

Chapter 2: Canvio AeroCast
Software Utility
Canvio AeroCast™
Software Utility
Canvio AeroCast™ System login
Connect wirelessly to a PC/Mac
1 Press the ON/OFF button to power on the system.
2 Once the Wi-Fi
Wireless LAN feature on your PC/Mac and open the Wireless
Network connection.
3 Select the
wireless SSID: Toshiba whdd xxxx), and then enter the default
password
®
indicator light stops blinking, enable the
Toshiba whdd xxxx wireless connection (default
12345678.
™
Web browser login
1 Once you have successfully connected to your Canvio
AeroCast
“http://10.10.10.254” URL.
(Sample Image) Web browser address field
If an Internet connection is not available, input any URL and
the Web browser will take you to the above page.
™
, open a Web browser and enter the
26
Page 27

Canvio AeroCast™ Software Utility
Canvio AeroCast™ System login
Client login for iPhone or iPad
Install the application for iPhone and iPad
1 Search and locate the free TOSHIBA app called “Toshiba
Canvio AeroCast” in the Apple Store.
2 Install the
Toshiba Canvio AeroCast app and follow the
on-screen installation instructions.
3 The
Toshiba Canvio AeroCast icon appears on the
Desktop once the installation process is complete.
Connecting wirelessly to an iPhone or iPad
1 Press the ON/OFF button to power on the system.
®
2 Once the Wi-Fi
indicator light stops blinking, go to Setting,
and then the Wireless LAN option in your iPad/iPhone.
3 Click or touch
4 Enter the default password
Toshiba whdd xxxx.
12345678.
Application login
1 Run the “Toshiba Canvio AeroCast” app.
Android™ client login
Install the Android™ application
1 Search and locate the free TOSHIBA app called “Toshiba
Canvio AeroCast” in the Google Play
2 Install the
Toshiba Canvio AeroCast app and follow the
on-screen installation instructions.
3 The
Toshiba Canvio AeroCast icon appears on the
Desktop once the installation process is complete.
Connecting wirelessly to an Android
1 Press the ON/OFF button to power on the system.
2 Once the Wi-Fi
®
indicator light stops blinking, go to Setting,
and then the Wireless LAN option in your tablet or smart
phone.
3 Click or touch
4 Enter the default password
Toshiba whDD xxxx.
12345678.
Application login
Run the “Toshiba Canvio AeroCast” app.
™
Store.
™
device
27
Page 28

Canvio AeroCast™ Software Utility
28
Canvio AeroCast™ main interface
Canvio AeroCast™ main interface
When entering the main interface, Canvio AeroCast™ may inform you
if a new Firmware is available. The following 3 options are available:
OK to update
❖
Cancel
❖
Do not prompt
❖
(Sample Image) Firmware update screen
If you select OK to update, the system will inform you to wait 5
minutes.
(Sample Image) Firmware update - wait 5 minutes screen
If you select Cancel, you may be informed of any available upgrades
™
the next time you login and enter the Canvio AeroCast
main
interface.
If you select
Do not prompt, Canvio AeroCast
™
will never again
automatically inform you of a firmware upgrade, however, you can
manually upgrade the firmware on the
Setting page, see.
Page 29

Canvio AeroCast™ Software Utility
Canvio AeroCast™ main interface
29
Web main interface
Below is an example of the Canvio AeroCast™ main interface viewed
in a computer’s Web browser.
(Sample Image) Canvio AeroCast™ main interface - Web browser
Page 30

Canvio AeroCast™ Software Utility
30
Canvio AeroCast™ main interface
Application main interface
Below is an example of the Canvio AeroCast™ main interface viewed
in the iPhone, iPad, or Android
™
app.
Tablet/iPad
Smart phone/iPhone
(Sample Image) Canvio AeroCast™ main interface – application
Canvio AeroCast™ main interface functionality
Below is a description of each button/icon and its function within the
™
Canvio AeroCast
main interface:
Button/Icon Function
Displays the picture preview.
Click or touch the Picture button to enter Pictures
Management.
Displays the video files preview. If no videos are available,
the default image is used.
Click or touch the Videos button to enter Videos
Management.
Displays the music files preview. If no music are available,
the default file is used.
Click or touch the
Management.
Displays the document files preview. If no documents are
available, the default image is used.
Click or touch the Documents button to enter
Documents Management.
Click or touch the File/Folder button to enter the
File/Folder Management Interface. This is where you can
create folder(s), copy file(s)/folder(s), delete file(s)/folder(s),
share file(s), upload/download file(s) etc.
Click or touch the SD Card button to incrementally back
up all videos and pictures on the SD
one of the four user directories: Default, Owner1, Owner2,
or Owner3.
Music button to enter Music
TM
Memory Card to
Page 31

Canvio AeroCast™ Software Utility
Pictures Management interface
Button/Icon Function
Click or touch the Backup button to incrementally back
up local camera videos and pictures to one of the four user
directories: Default, Owner1, Owner2, or Owner3.
(iPhone, iPad, and Android
Click or touch the HDD button to access the local files.
(iPhone, iPad, and Android
No SD™ Memory Card is available.
An SD™ Memory Card is available.
Displays the current battery level of the Canvio AeroCast™.
Internet connection is available.
No Internet connection is available.
Click or touch the Settings button to enter the Canvio
AeroCast
™
system settings.
™
devices only.)
™
devices only.)
31
Pictures Management interface
NOTE
When you click or touch the Picture button the Pictures Management
window appears.
Below is an example of the Pictures Management interface window.
(Sample Image) Canvio AeroCast™ Pictures Management
interface window
Before using this feature, content should be
transferred to the Canvio AeroCast
connection to your computer, see “DAS mode
(Direct-Attached Storage)” on page 22.
™
device via direct
Page 32

Canvio AeroCast™ Software Utility
32
Pictures Management interface
Below is a description of each button/icon and its function within the
™
Canvio AeroCast
Pictures Management interface window:
Button/Icon Function
Click or touch the Back button to return to the
main window.
When the Sort by name icon is displayed, the list
is in “sort by name” mode.
When the Sort by date icon is displayed, the list
is in “sort by date” mode.
Click or touch the icon to toggle between modes.
When the Thumbnail icon is displayed, the list is
in “Thumbnail” mode.
When the List icon is displayed, the list is in “List”
mode.
Click or touch the icon to toggle between modes.
Click or touch the Shortcut button to show the
shortcut menu and choose which menu to switch to.
Enter key letters or numbers in the search box to
perform a search of a specific file or folder.
Click or touch the HDD Storage icon to switch to
the Canvio AeroCast’s internal HDD storage.
Click or touch the SD Card button to switch to the
Canvio AeroCast’s inserted SD
Click or touch the Local button to switch to the
local iPhone, iPad, or Android
(iPhone, iPad, or Android
When switching to the Canvio AeroCast's internal
HDD storage, you can choose pictures from one of
4 users.
The 4 user default names are: Default, Owner1,
Owner2, and Owner3.
™
Memory Card.
™
device.
™
devices only.)
Page 33

Canvio AeroCast™ Software Utility
Pictures Management interface
Picture Viewer interface
Click or touch a picture file to enter the Picture Viewer interface.
Below is an example of the Picture Viewer interface window.
(Sample Image) Canvio AeroCast™ Picture Viewer interface
window
33
Below is a description of each button/icon and its function within the
™
Canvio AeroCast
Pictures Management interface window:
Button/Icon Function
Click or touch the Back button to return to the
Pictures Management interface window.
Click or touch the Download button to download the
current picture to the local album.
Click or touch the Play/Pause button to start/stop
the photo slide show.
Click or touch the Delete button to delete the
current picture.
Click or touch the Share button to share the current
picture to social media or email.
Page 34

Canvio AeroCast™ Software Utility
34
Videos Management interface
Videos Management interface
NOTE
Before using this feature, content should be
transferred to the Canvio AeroCast
™
device via direct
connection to your computer, see “DAS mode
ect-Attached Storage)” on page 22.
(Dir
When you click or touch the Videos button the Videos Management
window appears.
Below is an example of the Videos Management interface window.
(Sample Image) Canvio AeroCast™ Videos Management interface
window
Below is a description of each button/icon and its function within the
™
Canvio AeroCast
Videos Management interface window:
Button/Icon Function
Click or touch the Back button to return to the
main window.
When the Sort by name icon is displayed, the list
is in “sort by name” mode.
When the Sort by date icon is displayed, the list
is in “sort by date” mode.
Click or touch the icon to toggle between modes.
When the Thumbnail icon is displayed, the list is
in “Thumbnail” mode.
When the List icon is displayed, the list is in “List”
mode.
Click or touch the icon to toggle between modes.
Enter key letters or numbers in the search box to
perform a search of a specific file or folder.
Page 35

Canvio AeroCast™ Software Utility
Videos Management interface
Button/Icon Function
Click or touch the Shortcut button to show the
shortcut menu and choose which menu to
switch to.
Enter key letters or numbers in the search box to
perform a search of a specific file or folder.
Click or touch the HDD Storage icon to switch to
the Canvio AeroCast’s internal HDD storage.
Click or touch the SD Card button to switch to the
Canvio AeroCast’s inserted SD
Click or touch the Local button to switch to the
local iPhone, iPad, or Android
(iPhone, iPad, or Android™ devices only.)
When switching to the Canvio AeroCast's internal
HDD storage, you can choose pictures from one of
4 users. The 4 user default names are: Default,
Owner1, Owner2, and Owner3.
™
Memory Card.
™
device.
35
Page 36

Canvio AeroCast™ Software Utility
36
Video Playback interface
(iPhone, iPad, and Android
Videos Management interface
™
device only)
Click or touch a video file to enter the Video Playback interface. Below
is an example of the Video Playback interface window.
(Sample Image) Canvio AeroCast™ Video Playback interface
window
Below is a description of each button/icon and its function within
the Canvio AeroCast
Video Playback interface window:
™
Button/Icon Function
Click or touch the Back button to return to the main
window.
Click or touch the Zoom button to adjust the playback
screen size.
Click or touch the Previous button to switch to the
previous video playback.
Click or touch the Next button to switch to the next
video playback.
Click or touch the Rewind button to rewind the video 20
seconds.
Click or touch the Forward button to forward the video
20 seconds.
Click or touch the Play/Pause button to play/pause the
currently playing video.
Drag the Playback progress bar, to navigate to different
positions in the video playback.
Page 37

Canvio AeroCast™ Software Utility
Button/Icon Function
Drag the Volume control bar to adjust the volume of the
video. The volume is divided into four states: Quiet, Small,
Medium, and Maximum volume.
Videos Management interface
37
Page 38

Canvio AeroCast™ Software Utility
38
Music Management interface
Music Management interface
NOTE
Before using this feature, content should be transferred
to the Canvio AeroCast
your computer, see “
Storage)
” on page 22.
™
device via direct connection to
DAS mode (Direct-Attached
(Sample Image) Canvio AeroCast™ Music Management interface
Window
Below is a description of each button/icon and its function within the
™
Canvio AeroCast
Music Management interface window:
Button/Icon Function
Click or touch the Back button to return to the
main window.
When the Sort by name icon is displayed, the
list is in “sort by name” mode.
When the Sort by date icon is displayed, the
list is in “sort by date” mode.
Click or touch the icon to toggle between modes.
When the Thumbnail icon is displayed, the list
is in “Thumbnail” mode.
When the List icon is displayed, the list is in
“List” mode.
Click or touch the icon to toggle between modes.
Click or touch the Shortcut button to show
the shortcut menu and choose which menu to
switch to.
Enter key letters or numbers in the search box to
perform a search of a specific file or folder.
Page 39

Canvio AeroCast™ Software Utility
Music Management interface
Button/Icon Function
Click or touch the HDD Storage icon to switch
to the Canvio AeroCast’s internal HDD storage.
Click or touch the SD Card button to switch to
the Canvio AeroCast’s inserted SD
Card.
Click or touch the Local button to switch to the
local iPhone, iPad, or Android
(iPhone, iPad, or Android™ devices only.)
Click or touch the All Songs button to view all
of the song files available on the Canvio
AeroCast
™
(default mode).
Click or touch the Albums button to view all of
the song files by albums.
Click or touch the Artist button to view all of the
song files by Artist.
Click or touch the Favorites button to view all
of your favorite songs. You can add songs to the
favorites screen by clicking or touching the ( )
button on the All music screen, Album screen,
and the Artist screen. Remove songs from the
Favorites screen by clicking or touching the (
button on the Favorites screen.
™
device.
™
Memory
39
)
Page 40

40
Canvio AeroCast™ Software Utility
Music Management interface
Music Player interface
(iPhone, iPad, and Android
™
device only)
Click or touch a music file to enter the Music Player interface. Below is
an example of the Music Player interface window.
(Sample Image) Canvio AeroCast™ Music Player interface window
Below is a description of each button/icon and its function within the
™
Canvio AeroCast
Music Player interface window:
Button/Icon Function
Click or touch the Back button to return to the Music
Management interface window.
Click or touch the Shortcut button to show the
shortcut menu and choose which menu to switch to.
The Song icon displays the title of current playing song.
The Album icon displays the album of current
playing song.
The Artist icon displays the artist of current playing song.
Click or touch the Music Playlist button to change the
songs in a playlist.
Click or touch the Previous button to switch to the
previous music playback.
Click or touch the Next button to switch to the next
video playback.
Click or touch the Rewind button to rewind the video
20 seconds.
Page 41

Canvio AeroCast™ Software Utility
Music Management interface
Button/Icon Function
Click or touch the Forward button to forward the
video 20 seconds.
Click or touch the Play/Pause button to play/pause
the currently playing video.
Drag the Playback progress bar, to navigate to
different positions in the video playback.
Drag the Volume control bar to adjust the volume of
the video. The volume is divided into four states:
Quiet, Small, Medium, and Maximum volume.
Click or touch the Music mode button to switch
between the following four musical modes:
Order Play (
( ),Single Cycle ( ),and Shuffle ( )
41
) (default mode), Loop Playback
Click or touch the Favorites button to add the
currently playing music to your Favorites.
If the Web browser supports music playback, you can play the music
within a Web browser, otherwise, you will be asked to download the
music file to a local device.
Page 42

Canvio AeroCast™ Software Utility
42
Documents Management interface
Documents Management interface
(Sample Image) Canvio AeroCast™ Documents Management
interface window
Below is a description of each button/icon and its function within the
Canvio AeroCast
Button/Icon Function
™
Documents Management interface window:
Click or touch the Back button to return to the
main window.
When the Sort by name icon is displayed, the list
is in “sort by name” mode.
When the Sort by date icon is displayed, the list
is in “sort by date” mode.
Click or touch the icon to toggle between modes.
When the Thumbnail icon is displayed, the list is
in “Thumbnail” mode.
When the List icon is displayed, the list is in “List”
mode.
Click or touch the icon to toggle between modes.
Click or touch the Shortcut button to show the
shortcut menu and choose which menu to
switch to.
Enter key letters or numbers in the search box to
perform a search of a specific file or folder.
Click or touch the HDD Storage icon to switch to
the Canvio AeroCast’s internal HDD storage.
Page 43

Canvio AeroCast™ Software Utility
Documents Management interface
Button/Icon Function
43
Click or touch the SD Card button to switch to the
Canvio AeroCast’s inserted SD
Click or touch the Local button to switch to the
local iPhone, iPad, or Android
(iPhone, iPad, or Android
™
Memory Card.
™
device.
™
devices only.)
When switching to the Canvio AeroCast's internal
HDD storage, you can choose pictures from one of
4 users.
The 4 user default names are: Default, Owner1,
Owner2, and Owner3.
Page 44

Canvio AeroCast™ Software Utility
44
Document Viewer interface
(iPhone, iPad, and Android
Click or touch a document file to enter the Document Viewer interface. Below
is an example of the Document Viewer interface window.
Documents Management interface
™
device only)
(Sample Image) Canvio AeroCast Document Viewer interface
window
Below is a description of each button/icon and its function within the
™
Canvio AeroCast
Document Viewer interface window:
Button/Icon Function
Click or touch the Back button to return to the main
window.
Page 45

Canvio AeroCast™ Software Utility
File/Folder Management interface
45
File/Folder Management interface
(Sample Image) Canvio AeroCast™ File/Folder Management
interface - Application window
Below is a description of each button/icon and its function within the
Canvio AeroCast
Button/Icon Function
™
Documents Management interface window:
Click or touch the Back button to return to the main
window.
Click or touch the Shortcut button to show the
shortcut menu and choose which menu to switch
to.
Click or touch the Home button to return to the main
interface.
When the Thumbnail icon is displayed, the list is in
“Thumbnail” mode.
When the List icon is displayed, the list is in “List” mode.
Click or touch the icon to toggle between modes.
Enter key letters or numbers in the search box to
perform a search of a specific file or folder.
Click or touch the HDD Storage icon to switch to
the Canvio AeroCast’s internal HDD storage.
Click or touch the SD Card button to switch to the
Canvio AeroCast’s inserted SD
Click or touch the Local button to switch to the local
iPhone, iPad, or Android
(iPhone, iPad, or Android
™
Memory Card.
™
device.
™
devices only.)
Page 46

Canvio AeroCast™ Software Utility
46
File/Folder Management interface
Button/Icon Function
Click or touch the Refresh button to refresh the
screen.
Click or touch the Share button to share the current
document by email.
(Within an Application only.)
Click or touch the Edit button to display the edit
menu.
A Checkmark icon indicates that the file or folder is
selected.
Page 47

Canvio AeroCast™ Software Utility
File/Folder Management interface
Button/Icon Function
Click or touch the Transmission button to switch to
the File transmission dialog box.
When an action is taken with a file or folder (copy, cut,
upload, or download), the File transmission dialog box
opens. A progress bar of each transmission is
displayed as well as successful and failed
transmissions.
(Application only.)
The Upload ( ) icon indicates an uploading
file/folder in progress.
The Download (
file/folder in progress.
Touch the Upload/Download icon to pause the
upload/download process. The Pause (
displayed.
The (
upload/download. This application allows for
individual file/folder upload/download.
Touch the Delete ( ) button to delete the task.
Touch the Cancel ( ) icon to cancel all queued
files.
The buttons above the Queued Files list indicate
“Transfer Complete” or “Transfer Failed.”
) icon indicates that a file/folder is waiting for
47
) icon indicates a downloading
) icon is
Page 48

Canvio AeroCast™ Software Utility
48
SDTM Memory Card Management
SDTM Memory Card Management
When you click or touch the SD Card button the SDTM Memory Card
Management window appears. Below is an example of the SD
Card Management interface window.
TM
Memory
(Sample Image) Canvio AeroCast™’s SDTM Memory Card
Management interface window
Below is a description of each button/icon and its function within the Canvio
AeroCast™ SD
TM
Memory Card Management window:
Button/Icon Function
Click or touch the Back button to return to the
main window.
Click or touch the Backup SD Card button to
enter the SD™ Memory Card Backup interface.
Click or touch the Unmount SD Card button to
unmount the SD™ Memory Card.
Page 49

Canvio AeroCast™ Software Utility
SDTM Memory Card Management
SDTM Memory Card Backup Interface
49
When you click or touch the Backup SD Card button the SDTM Memory
Card Backup window appears. Below is an example of the SD
Card Backup interface window.
TM
Memory
(Sample Image) Canvio AeroCast™’s SDTM Memory Card Backup
interface window
Below is a description of each button/icon and its function within the Canvio
AeroCast™ SD™ Memory Card Backup interface window:
Button/Icon Function
Click or touch the Back button to return to the
SD™ Memory Card Management interface window.
Click or touch the Start Copy button to start
copying the SD™ Memory Card contents to the
Canvio AeroCast™.
The user directory that the SD™ Memory Card will
copy to.
Click or touch the Auto Copy button to
enable/disable auto copy functions.
The progress bar for the copy process.
Page 50

Canvio AeroCast™ Software Utility
50
Backup Management Interface
Backup Management Interface
When you click or touch the Backup button the Backup Management
window appears. Below is an example of the Backup Management interface
window.
(Sample Image) Canvio AeroCast™’s Backup Management
interface window
Below is a description of each button/icon and its function within the Canvio
AeroCast™’s Backup Management interface window:
Button/Icon Function
Click or touch the Back button to return to the
previous interface.
Click or touch the Start Backup button to start
backing up your local pictures and videos to the
Canvio AeroCast™.
The user directory that the local files will backup
to.
The progress bar of the backup process.
Page 51

Canvio AeroCast™ Software Utility
Settings Management Interface
51
Settings Management Interface
When you click or touch the Settings button the Settings Management
window appears. Below is an example of the Settings Management interface
window.
(Sample Image) Canvio AeroCast™’s Settings Management
interface window
Below is a description of each tab/button/icon and its function within the
Canvio AeroCast™’s Settings Management interface window:
Button/Icon Function
Click or touch the Home button to return to the
main interface.
Click or touch the Shortcut button to show
the shortcut menu and choose which menu to
switch to.
Click or touch the Wireless tab to enter Wireless
interface.
Click or touch the Operation tab to enter
Operation interface.
Page 52

Canvio AeroCast™ Software Utility
52
Settings Management Interface
Click or touch the Information tab to enter
Information interface.
Click or touch the User symbol and name
tab to enter User symbol and name interface.
Click or touch the Internet tab to enter Internet
interface.
Click or touch the SSID attribute tab to enter
SSID attribute interface.
Click or touch the Language tab to enter
Language interface.
Click or touch the Cache tab to enter Cache
interface.
Click or touch the OSS info tab to display OSS
information.
Wireless Interface
When you click or touch the Wireless tab the Wireless window appears.
Below is an example of the Wireless interface window.
(Sample Image) Canvio AeroCast™’s Wireless interface window
Page 53

Canvio AeroCast™ Software Utility
Below is a description of each field/button/icon and its function within the
Canvio AeroCast™’s Wireless interface window:
Settings Management Interface
53
Button/Icon Function
Displays the Canvio AeroCast™ SSID. Click or
touch the SSID button to modify the SSID.
Enable/Disables the use a password to access
the Canvio AeroCast™.
Modify the password for the Canvio AeroCast™.
Operation Interface
When you click or touch the Operation tab the Operation window appears.
Below is an example of the Operation interface window.
(Sample Image) Canvio AeroCast™’s Operation interface window
Below is a description of each field/button/icon and its function within the
Canvio AeroCast™’s Operation interface window:
Button/Icon Function
Click or touch to restart the Canvio AeroCast™.
Click or touch to power off the Canvio
AeroCast™.
Click or touch to reset the Canvio AeroCast™.
Page 54

Canvio AeroCast™ Software Utility
54
Settings Management Interface
Information Interface
When you click or touch the Information tab the Information window
appears. Below is an example of the Information interface window.
(Sample Image) Canvio AeroCast™’s Information interface
window
Below is a description of each field/button/icon and its function within the
Canvio AeroCast™’s Information interface window:
Button/Icon Function
Display the capacity of the Canvio AeroCast™’s
hard disk drive.
Display the capacity of the SD™ Memory Card
that is inserted into the Canvio AeroCast™.
Display the Mac address for the Canvio
AeroCast™.
Display the Firmware version for the Canvio
AeroCast™.
Display the Application version for the Canvio
AeroCast™.
Page 55

Canvio AeroCast™ Software Utility
Settings Management Interface
55
User symbol and name Interface
When you click or touch the User symbol and name tab the User
symbol and name window appears. Below is an example of the User symbol
and name interface window.
(Sample Image) Canvio AeroCast™’s User symbol and name
interface window
Below is a description of each button/icon and its function within the Canvio
AeroCast™’s User symbol and name interface window:
Button/Icon Function
Click or touch the Icon button to select the
icon for a user.
Click or touch the Name field to change the
name for a user.
Click or touch the Save button to save user
symbol and name settings.
Page 56

Canvio AeroCast™ Software Utility
56
Settings Management Interface
Internet Interface
When you click or touch the Internet tab the Internet window appears. Below
is an example of the Internet interface window.
(Sample Image) Canvio AeroCast™’s Internet interface window
Below is a description of each button/icon and its function within the Canvio
AeroCast™’s Internet interface window:
Button/Icon Function
This icon and SSID represents the router that the
Canvio AeroCast™ is connected to.
This icon indicates whether or not there is a
Chromecast connection.
This icon and SSID represents the Canvio AeroCast™
that is currently connected.
The icon represents the tablet/phone that is currently
connected.
The Station/Bridge Mode field displays the
current working mode of the Canvio AeroCast™.
Touch or click the Set button to set the external
network for the Canvio AeroCast™ via the SSID
attribute interface menu.
Page 57

Canvio AeroCast™ Software Utility
Settings Management Interface
SSID attribute Interface
57
When you click or touch the Set button a list of wireless networks will appear
in the left-hand column, select the router that the Canvio AeroCast
connected to and the SSID attribute window appears. Below is an example of
the SSID attribute interface window.
TM
is
(Sample Image) Canvio AeroCast™’s SSID attribute interface
window
Below is a description of each button/icon and its function within the Canvio
AeroCast™’s SSID attribute interface window:
Button/Icon Function
Click or touch the Home Network option to switch
the network to a home (private) network.
Click or touch the Public Network option to
switch the network to a public network.
Click or touch the Station Mode or Bridge
Mode button to switch between Station Mode or
Bridge Mode.
Click or touch the Cancel button to cancel work
mode setting.
Click or touch the OK button to enable work mode
setting.
Page 58

Canvio AeroCast™ Software Utility
58
Settings Management Interface
Language Interface
When you click or touch the Language tab the Language window appears.
Below is an example of the Language interface window:
(Sample Image) Canvio AeroCast™’s Language interface window
The Canvio AeroCast™ supports eight language: English, Simplified Chinese,
Traditional Chinese, Spanish, French, German, Italian and Portuguese.
Page 59

Canvio AeroCast™ Software Utility
Settings Management Interface
59
Cache Interface
When you click or touch the Cache tab the Cache window appears. Below
is an example of the Cache interface window.
(Sample Image) Canvio AeroCast™’s Cache interface window
Below is a description of each button/icon and its function within the Canvio
AeroCast™’s Cache interface window:
Button/Icon Function
Enables/Disables the copy and play function.
Cleans the cache of this application.
Page 60

Canvio AeroCast™ Software Utility
60
Contacting Toshiba
Contacting Toshiba
For technical support, or to stay current on the most recent software
and hardware options for your computer, and for other product
information, be sure to regularly check the Toshiba Web site at
support.toshiba.com.
Call Toshiba Customer Support Center
Toshiba Customer Support Center is ready to help with personal
service 24 hours a day, 7 days a week.
888-592-0944 From inside the United States
949-583-3305 From outside the United States
 Loading...