

Toro 133-1437 Installation Instructions
LightKit
GrandStand
ModelNo.133-1437
ThisproductcontainsachemicalorchemicalsknowntotheStateofCaliforniato
causecancer,birthdefects,orreproductiveharm.
Note:Determinetheleftandrightsidesofthemachinefromthenormaloperatingposition.
®
Mower
Proposition65Warning
WARNING
CALIFORNIA
Installation
FormNo.3402-997RevC
InstallationInstructions
LooseParts
Usethechartbelowtoverifythatallpartshavebeenshipped.
Description
Lightassembly1
Rearlight1
Spacer
Bolt2
Nut2
Lightswitch1
Cableties
InstallingtheLights
1.Shutofftheengine,waitforallmovingpartstostop,
engagetheparkingbrake,andremovethekey.
2.Removethenegative(-)batterycablefromthebattery.
3.Removethefueltank;refertotheOperator’ sManualfor
themachine.
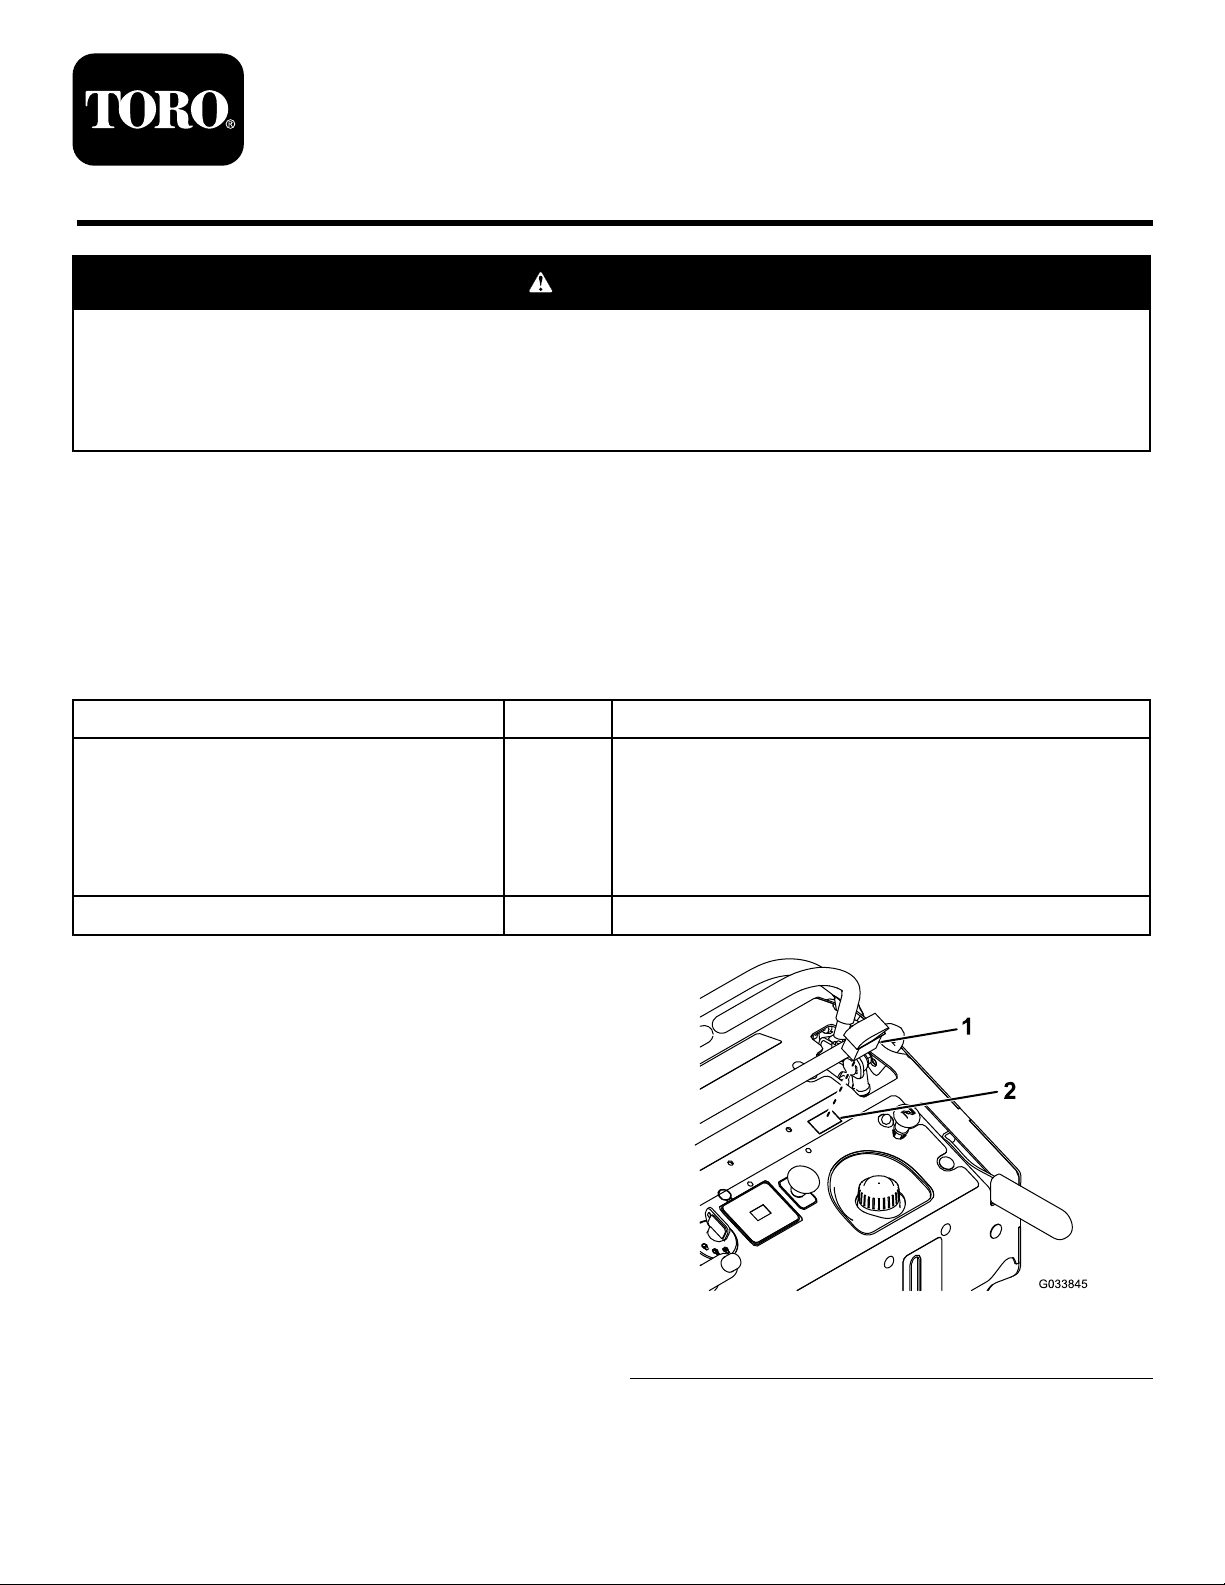
4.Removeanddiscardtheknock-outfromthetower
panel(Figure1).
Qty.
1
6Routethewireharness.
Installthelights.
Use
©2016—TheToro®Company
8111LyndaleAvenueSouth
Bloomington,MN55420
Registeratwww.T oro.com.
Figure1
1.Lightswitch2.Knock-outlocation
OriginalInstructions(EN)
PrintedintheUSA
AllRightsReserved
*3402-997*C
5.Installthelightswitch(Figure1).
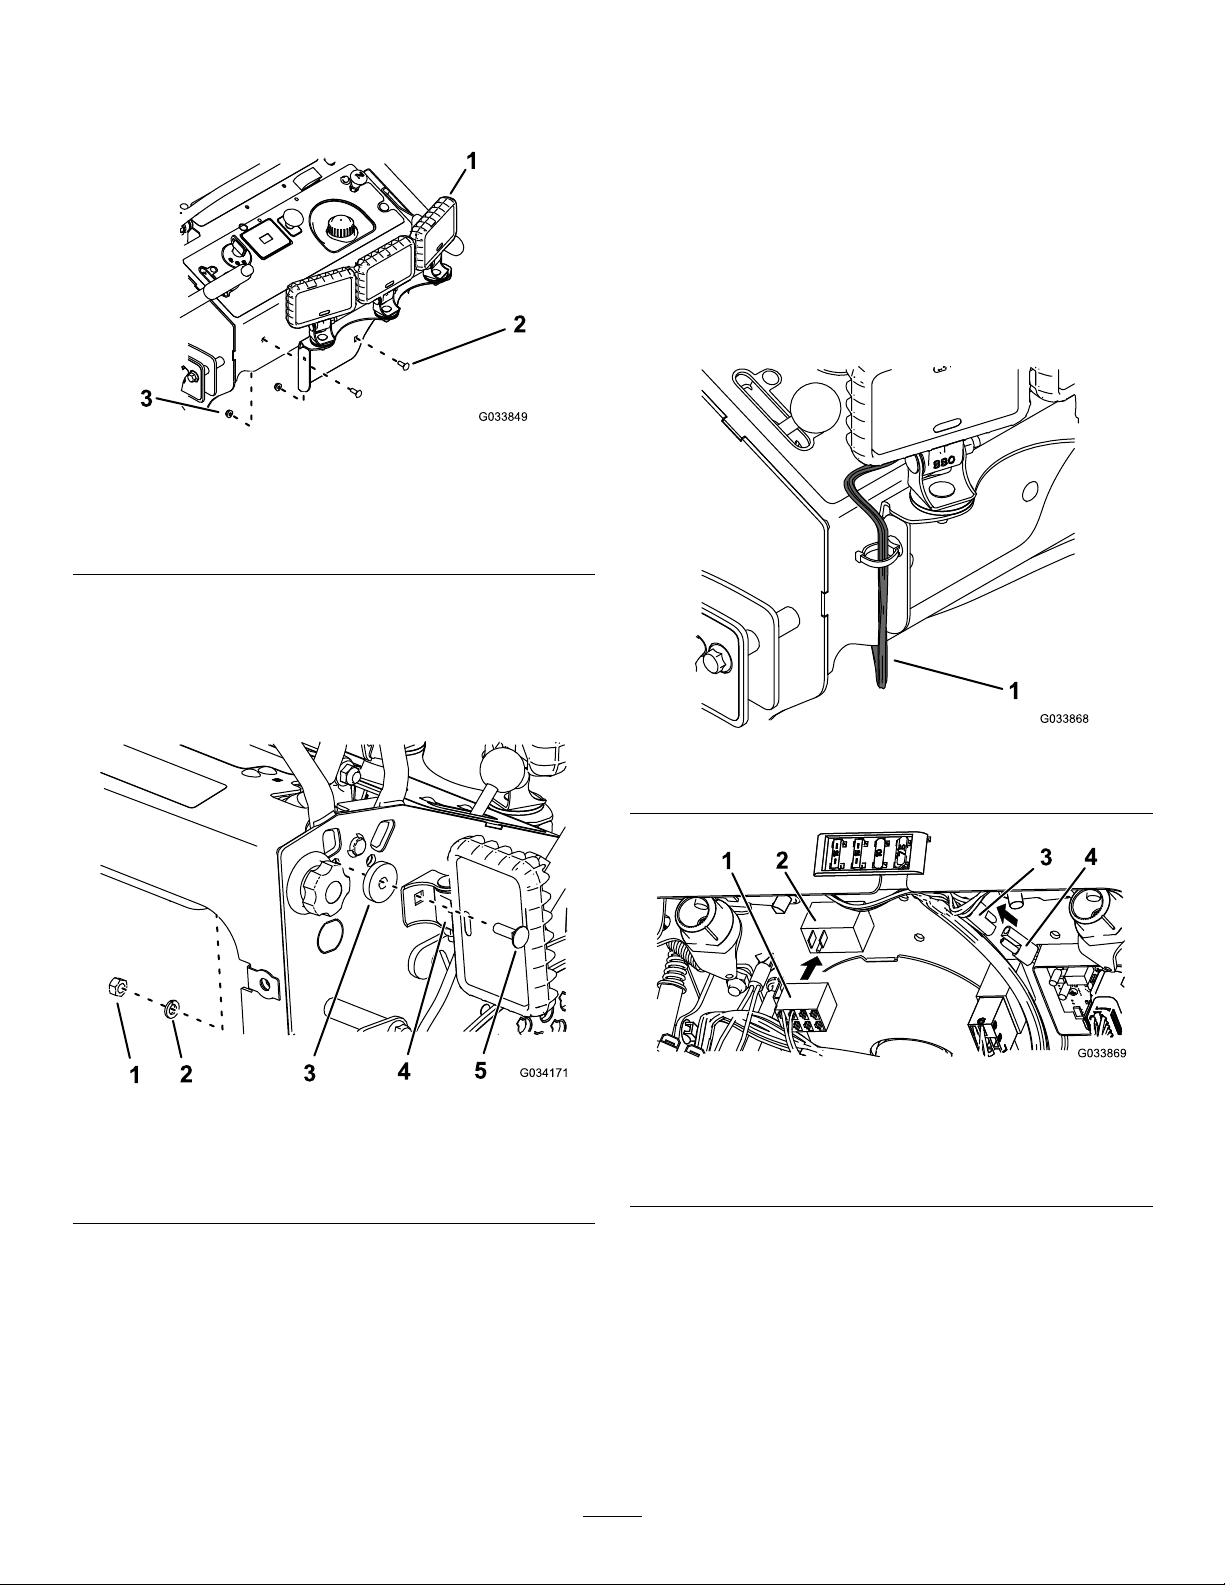
6.Mountthelightassemblytothefrontofthecontrol
panelusing2boltsand2nuts(Figure2).
Figure2
WireHarnessNotShown
1.Lightassembly3.Nut
2.Bolt
7.Removethebolt,washer,andnutfromtherearlight
andusethemtoinstalltherearlightandspaceronthe
rightsideofthecontrolpanel(Figure3).
RoutingtheWireHarness
1.Routethewireharnessunderthefrontofthecontrol
panelandplugtheconnectorsintothelightswitchand
themainwireharnessforthemachine(Figure4and
Figure5).
Note:Theother3connectorsonthewireharnessare
usedwithotheraccessories(soldseparately)forthe
machine.Ifanaccessoryisinstalledonthemachine,
plugitintotheaccessoryconnectorofthewireharness.
Donotplugthelightkitintothewireharnessforan
accessory,otherwisethelightsmaynotfunction.
Note:Ifthereisnohole,drillaholeusinga3/8-inch
drillbit.
Figure3
1.Nut4.Rearlight
2.Lockwasher5.Bolt
3.Spacer
Figure4
1.Wireharness
Figure5
1.Plugintothelightswitch.3.Main-wire-harness
connector
2.Lightswitch4.Plugintothewire-harness
connector.
2
 Loading...