

Page 1

CONTENTS
1 Handset and Basestation 50
2 Display 50
3 Operating Instructions 51
3.1 Installation 51
3.2 Basic Functions 52
3.2.1 Incoming Calls 52
3.2.2 Outgoing Calls 52
3.2.3 Paging from Base to Handset (up to 6 handsets) 53
3.2.4 Internal Call to another Handset 53
3.2.5 Internal Call from another Handset 54
3.2.6 Internal Call during an external Call 54
3.2.7 Incoming external Call during internal Call 55
3.2.8 Making a Phone Call 56
3.2.8.1 Normal Dialling 56
3.2.8.2 Last Number Redial 56
3.2.8.3 Memory Numbers 56
3.2.9 Prenumeration 57
3.2.9.1 Normal numeration 57
3.2.9.2 Redialling (4 last numbers) 57
3.2.9.3 Memory numbers 57
3.2.10 Microphone Mute 58
3.2.11 Dialling Mode 58
3.2.12 Flash (R) 58
3.2.13 Call Duration Time 59
3.2.14 Caller-ID Information 59
3.2.15 Temporary Keypad Lock 59
3.3 Programming the System Parameters 60
3.3.1 Ring Volume and Ring Melody of the Base Station 60
3.3.2 Pause Time Programming 60
3.3.3 PSIC/EIC Code Programming 61
3.3.4 Emergency Numbers 61
3.3.5 Call Barring 62
3.4 Programming the Handset Parameters 63
3.4.1 Base Number Display on/off 63
3.4.2 Handset Number Display on/off 63
3.4.3 Key Tone on/off 63
3.4.4 Ring Volume and Melody of the Handset 64
3.4.5 Speaker Volume Programming 64
3.4.6 Notebook Function 64
3.4.7 Programming Memory Numbers 65
3.4.8 Transfer Redial Memory Numbers to Memory Locations 65
3.4.9 Clear the Dial Memory 66
3.4.10 Babycall 66
3.5 Programming the PIN code (Personal Identification Number) 67
3.5.1 Programming the Handset PIN code 67
3.5.2 Programming the Base PIN code 67
3.6 Registration and Deregistration 68
3.6.1 Registration 68
3.6.2 Deregistration 68
3.7 Select the Base Station 69
3.8 Default Settings 69
3.8.1 Default Settings of the Handset 69
4 Technical Data 70
5 Troubleshooting 71
6 Warranty 72
3.8.2 Default Setting of the Base Station 70
49
Page 2

1 Handset and Basestation
1 Display
2 Set button
3 Intercom button
4 Memory button
5 Mute button
6 On/Off button
7 Line button
8 Flash button
9 Redial button
10 Battery indicator
11 Line indicator
12 Paging button
2 Display
LOCK indicator
The handset is locked
PROGRAM indicator
You are in the menu
PHONE indicator
You are in communication
SCAN indicator
The handset is active
1
5
7
6
8
9
2
3
4
11
10
12
INT
INTERCOM indicator
An intercom call or a base
programming mode with
PROGRAM indicator
DTMF indicator
The dialling mode is DTMF
MUTE indicator
The microphone is temporarily
deactivated
50
Page 3

BATTERY indicator
Indicator rechargeable battery. The indicator blinks when the battery is low.
Battery capacity 25%
Battery capacity 50%
Battery capacity 75%
Battery capacity 100%
3 Operating Instructions
3.1 Installation
• Connect the phone lines to the base unit
and put the batteries into the battery
compartment.
• When the handset is placed on the charger unit, the handset batteries are
being charged. If the battery has been completely discharged, it re q u i res 7 hours
to fully re c h a rg e .
Power off
• Press and hold the ‘ ’ button for about 1 second when the handset is in
standby mode.
Activate handset
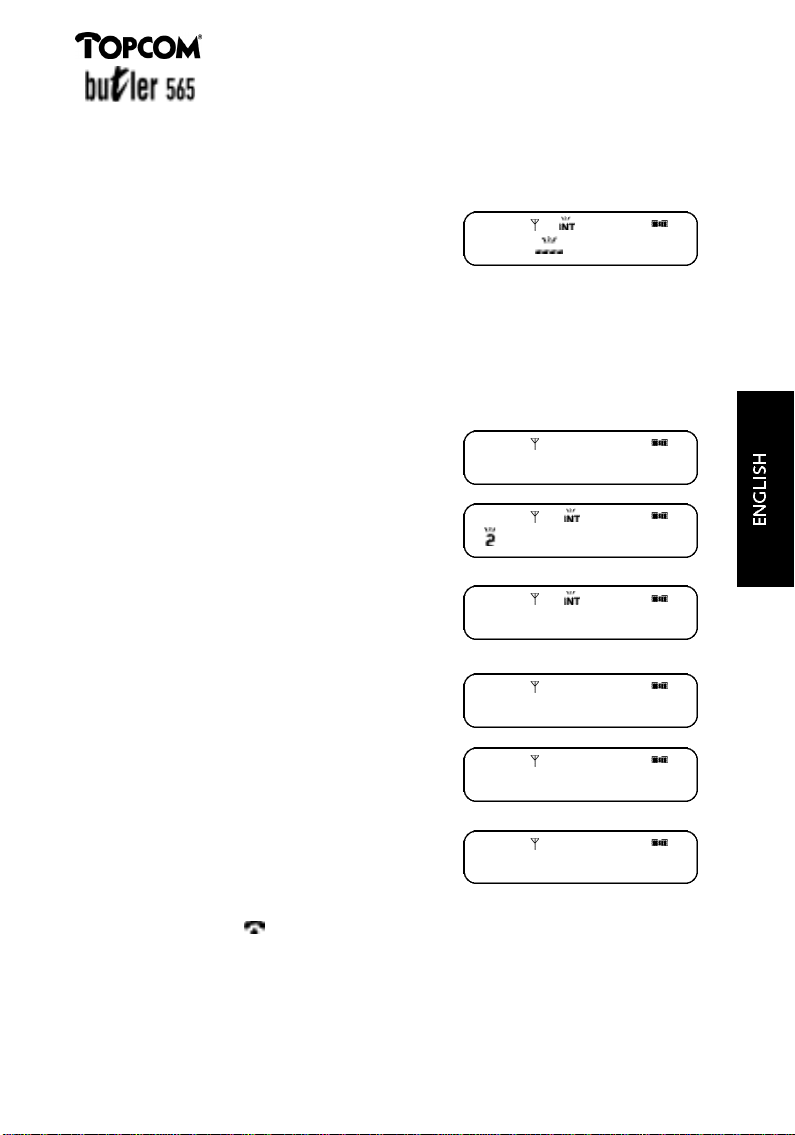
• Press the ‘ ’ button briefly when the handset is deactivated.
-1- H1
The handset is searching the base
BASE NO HANDSET NO
During base searching, the base number appears on the display. It indicates the
base that the handset is currently searching for.
• ‘-0-’ means that all bases, to which this handset is registered, are being
searched. (Automatic Searching)
• ‘-1-’, ‘-2-’, ‘-3-’, ‘-4-’ displays the number of the base station to which the
handset is registered.
REMARKS
You can program the base number you want to make a connection with. If you do not want the
base and handset number to be shown on the display, you can deactivate this function.
51
Page 4

The handset has found the base
-1- H1
BASE NO HANDSET NO
3.2 Basic Functions
REMARKS
When you receive an external call during an internal communication, you will hear the
call-waiting tone.
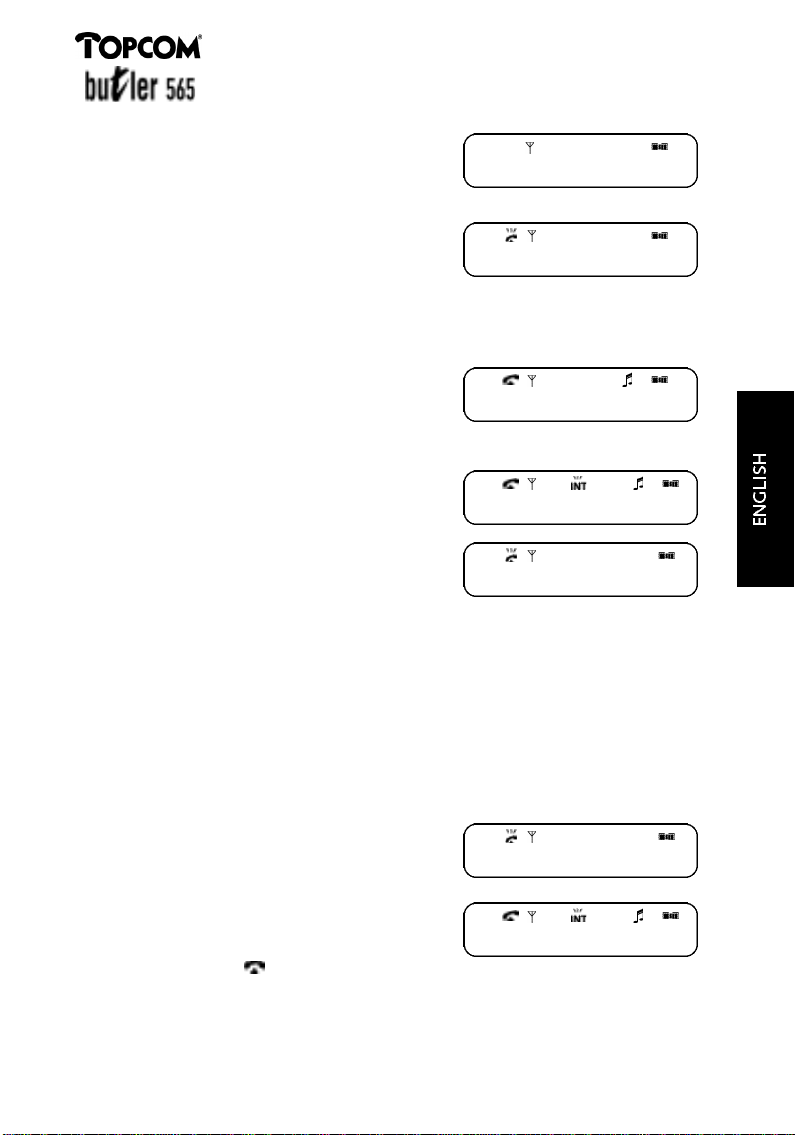
3.2.1 Incoming Calls
When the base unit receives an incoming
call, it starts to ring and the Line indicator on
the base blinks. The handsets that are not
busy, are ringing and the PHONE indicator blinks on their displays.
• Press any button, except the ‘ ’ button.
or
• Pick up the handset from the base unit to accept the call.
All other handsets stop ringing.
The DTMF indicator appears on the
display.
If other users now press the ‘ ’ button, they will hear a busy tone.
An internal call between two other handsets is possible.
3.2.2 Outgoing Calls
• Press the ‘ ’ button.
The PHONE indicator blinks on the display.
Then you hear the dial tone and the
PHONE indicator stabilizes (stops blink-
ing). The DTMF indicator is displayed.
• Enter the telephone number.
• If you want to enter a dialling pause, press
the ‘ ’ button after dialling the number.
The dialling pause ‘P’ is displayed.
You can now have your conversation.
If another handset is already in
communication with an external caller,
you will hear the busy tone and the
handset number is shown on the display.
52
868P1230
Page 5
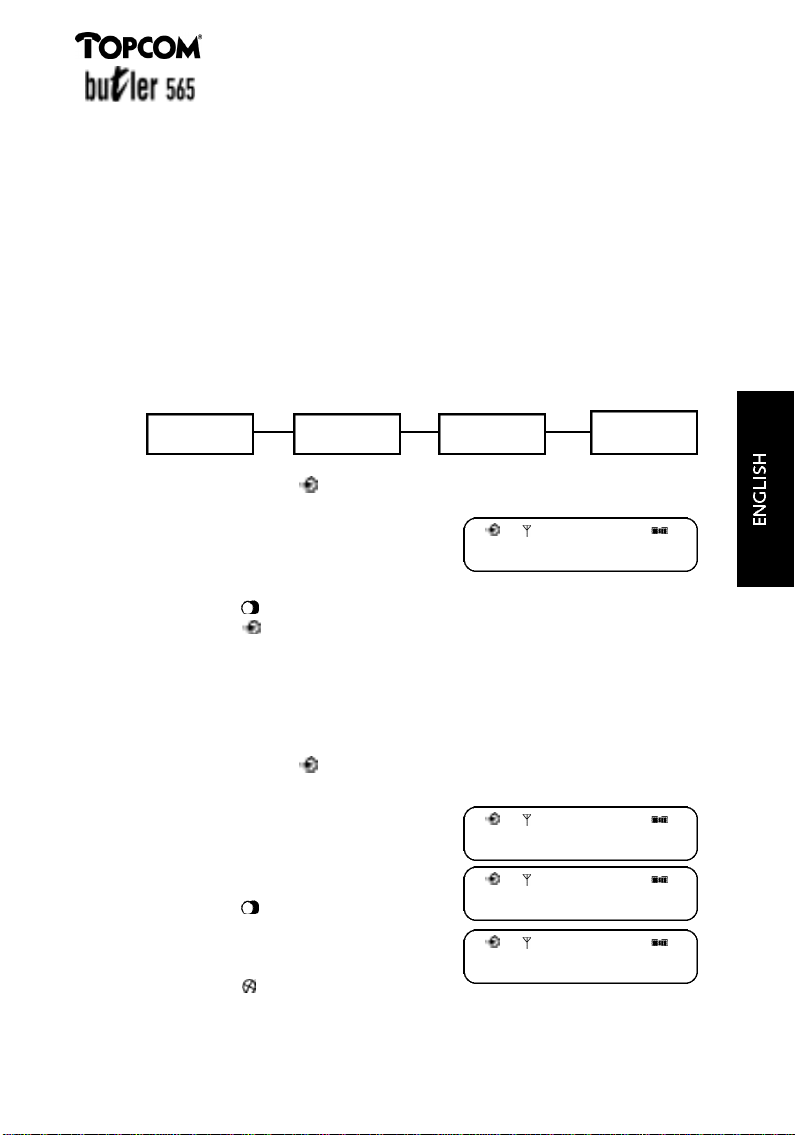
3.2.3 Paging from Base to Handset (up to 6 Handsets)
The handset starts ringing when the Paging button is being pressed, but an
internal call between base and handset is not possible.
• Press the Paging button on the base
station. All handsets start ringing for
20 sec. If there’s no answer within these
20 sec., the paging will be automatically
stopped.
• To cancel this mode, press the Paging button once more. All handsets stop
ringing.
REMARKS
Paging is only possible when the base station is in idle mode.
3.2.4 Internal Call to another Handset
• Press the ’INT‘ button.
You will hear the dialling tone and the
I N T
1
handset number is displayed.
When you are making an internal call,
the handset number of the handset that
you want to contact, appears on the
display. If the other handset is already in
internal communication with a third
handset, both of these numbers are
3 -4
shown on the display.
• Enter the desired handset number
(1-6), ex. enter ‘2’.
2 1
I N T
or
• Press ‘*’ if you want to call all subscribed
handsets. All the handset numbers of the
subscribed handsets are displayed.
When the call is answered, you will hear
the ringing tone. If the called party is
busy or unavailable, you hear a busy
2 3 4 5 6 1
I N T
I N T
1
tone.
Press the ‘ ’ button or the ‘INT’ button to disconnect the internal call.
REMARKS
If the called party does not answer this call within 30 seconds, this call will be disconnected
automatically. Only one internal call is possible.
53
Page 6

3.2.5 Internal call from another Handset
When the handset receives an internal call
from another handset, it will ring and the
handset number of the calling hanset is
shown on the display.
• Press any key to connect this internal
call.
• Press the ‘ ’ button or the ‘INT’
button to disconnect the internal call.
3.2.6 Internal call during an external call
This function offers you the possibility to transfer an external call to another
handset.
During an external connection
2 1
I N T
8681230
• Press the ‘INT’ button.
You will hear the dialling tone and the
external communication is put on hold.
The current handset number is displayed.
• Enter the desired handset number (1-6),
ex. handset number ‘2’.
or
• Press ‘*’ if you want to call all subscribed
handsets. All the handset numbers of the
subscribed handsets are displayed.
2 1
2 3 4 5 6 1
I N T
I N T
I N T
1
1
You will hear a ringing tone when the called party answers the internal call.
The following steps can be taken
a) To connect the external call that has been put on hold, to the other handset you
are currently connected with.
• Press the ‘ ’ button.
The external call is transferred
to the other handset. The call
duration is displayed.
54
04-00
Page 7
After 5 seconds the handset returns to
standby mode.
If the called party does not answer the
transferred call within 30 seconds, the call
goes back to the first handset.
If the first handset doesn’t answer this call
within 30 seconds, the call will be
disconnected automatically.
b) To retrieve the external call, the internal
call is disconnected
• Press the ‘R’ button to end the
internal call.
c) To retrieve the external call, the internal
call is put on hold.
• Press the ‘INT’ button.
-1- H1
8681230
8681230
I N T
2 1
• Press the ‘INT’ button once more to
retrieve the internal call. The external
call is put on hold.
REMARKS
You can switch from the call you are connected with to the call on hold by pressing the
‘INT’ button.
3.2.7 Incoming external call during internal call
When you receive an external call, you will hear a call waiting tone and the PHONE
indicator blinks on the display.
• Press the ‘INT’ button to answer the
incoming external call.
• Press the ‘INT’ button again to go back
to the internal call.
• Press the ‘ ’ button to end the
connection.
55
2 1
I N T
Page 8

3.2.8 MAKING A PHONE CALL
3.2.8.1 Normal Dialling
• Press the ‘ ’ button.
The PHONE indicator blinks on the
display. Then you hear the dialling tone
and the PHONE indicator stops blinking.
• Enter the telephone number.
• If you want to enter a dialling pause,
press the ‘ ’ button after dialling the
number. The dialling pause ‘P’ is
displayed.
3.2.8.2 Last number redial
The last dialled number can be redialled
automatically.
• Press the ‘ ’ button.
• Press the ‘ ’ button
The last number called will be displayed
and dialled automatically.
3.2.8.3 Memory numbers
You can easily call numbers that have been stored in the memory (see 3.4.7.
Programming memory numbers).
• Press the ‘ ’ button.
8 6 8 P 1 2 3 0
6 8 P 1 2 3 0
• Press the ‘ ’ button.
The cursor on the display is blinking
which means that the memory location
of the memory number needs to be
entered.
• Enter the location number (0 - 9).
The number is displayed and dialled.
REMARKS
The speed dial numbers will not be stored in the redial memory.
56
6 8 1 2 3 0
Page 9

3.2.9 Prenumeration
3.2.9.1 Normal numeration
• Enter the desired telephone number.
• If you want to enter a dialling pause,
press the ‘ ’ button after dialling the
number. The dialling pause ‘P’ is
displayed.
• If you have made a mistake while entering the number, press the
’ ’ button to correct it. You can delete
the entire dialled number by pressing
this key for more than 1 second. Then
you can enter the new number.
• Press the ‘ ’ button.
The entered numbers will now be dialled.
3.2.9.2 Redialling (4 last numbers)
• Press the ‘ ’ button
The number that has been called last, is
displayed.
• Press the ‘ ’ button again, if you want to select another number from the
redial memory. The 4 last entered telephone numbers are stored in the redial
memory.
• If you have made a mistake while entering the number, press the ’ ’ button
to correct it. You can delete the entire dialled number by pressing this key for
m o re than 1 second. Then you can enter
the new number.
• Press the ‘ ’ button.
The last dialled number will be redialled.
8 6 8 P 1 2 3 0
6 8 P 1 2 3 0
8 6 8 1 2 3 0
6 8 1 2 3 0
3.2.9.3 Memory numbers
• Press the ‘ ’ button.
The cursor on the display blinks which
means that the memory location of the
memory number needs to be entered.
• Enter the location number (0 - 9).
or
• Press the ‘ ’ button again to go to
the next location. The location number
(for ex: ‘0’) is displayed, followed by the
telephone number.
• Press the ‘ ’ button.
The number on the display is being
dialled.
57
0 8 6 8 1 2 3 0
6 8 1 2 3 0
Page 10

REMARK
The memory numbers will not be stored in the redial memory.
3.2.10 Microphone Mute
It is possible to deactivate the microphone during a conversation. Now you can talk
freely without being heard by your correspondent.
• Press the ’ ’ button.
The microphone is deactivated and the
MUTE indicator is displayed.
• Press the ’ ’ button once more.
The microphone is activated again and
the MUTE indicator is no longer
displayed. You can continue the
conversation.
3.2.11 Dialling Mode
When you press the buttons, you will hear that each button has a key tone (DTMF).
During a conversation, you can program these key tones so that they sound longer,
for example for telecom services. First you have to enter the telephone number,
than you switch to longer key tones, otherwise the base station will not accept his
t e m p o r a ry change. The tone will be generated as long as you keep the button
pushed. Default = short key tones.
Long key tones (temporary)
8 6 8 1 2 3 0
• Press the ‘ ’ button.
• Press the ‘* *’ button.
• Press the ‘ ’ button.
3.2.12 Flash (R)
The R button, also called flash or recall, generates a line interruption. This interru ption allows you to use comfort services. You can program the flash time as follows :
• Press the ‘R’ button short for a 85ms flash signal.
or
• Press the ‘R’ button for more than 1 second for a 250ms flash signal.
58
0 0
8 6 8 1 2 3 0
Page 11

3.2.13 Call Duration Time
During or after an external call the call time
appears on the display.
• After picking up the handset, the call
duration time is displayed after 20 sec.
• After finishing the conversation the call
duration time will still be visible on the
display for another 5 sec.
REMARKS
1) Even when the external call takes less than 20 seconds, the call duration time will appear
on the display.
2) The call duration time of an external incoming call will also be displayed.
3) When the external call is transferred to another handset, the call duration time will restar t
on the other handset.
3.2.14 Caller-ID Information
This device has the Caller-ID function through the FSK system. Caller identification is
only available if your telephone operator provides this service in FSK if you have a
subscription. When you receive an external call, the caller’s phone number will
appear on the display after the second ring. The number stays visible on the display
during the call or for 20 seconds after having pressed the ‘ ’ button.
• The phone number of the incoming call
is displayed.
0 0 - 2 0
0 4 - 0 0
6682508
• Press the ‘ ’ button to receive the
incoming call. After 20 seconds, the
Caller-ID information disappears and the
call duraton time is displayed.
0 0 - 2 0
3.2.15 Temporary Keypad Lock
To prevent that a number is being pressed accidentally, you can temporarily lock
the keypad.
The phone is in standby mode :
• Give the ‘ ’ button a short press to
lock the keypad.
• Press and hold the ‘ ’ button for
1 second to unlock the keypad.
REMARK
If you receive an incoming call when the keypad is locked, the keypad will be unlocked
automatically by pressing any key or by picking up the handset.
59
-1- H1
P
Page 12

3.3 Programming the System Parameters
When you are programming the parameters of the base station, the pro g r a m m i n g
will be aborted automatically if there is no key action within 30 sec.
R E M A R K S
Do the programming when the base and handset are in standby mode.
During the programming you can receive an external or internal call by pressing
the ‘ ’ button or the ‘ ’ button.
You can always end the programming by pressing the ‘ ’ button.
3.3.1 Ring Volume and Ring Melody of the Base station
Ring Volume Base station
You can select the desired ring volume from 0 (no ringing tone) to level 3 (high).
• P ress the buttons ‘ ’ and ‘#‘.
You will hear a confirmation tone
coming from the handset.
• P ress ‘5‘ .
• Enter the desired volume (0-3).
• P ress the ‘ ’ button to confirm .
Ring Melody Base station
The base station has 6 diff e rent melodies.
• P ress the buttons ‘ ’ and ‘#‘.
You will hear a confirmation tone
coming from the handset.
• P ress ‘6‘ .
• Enter the desired ringing melody (1-6).
• P ress the ‘ ’ button to confirm.
5 2
6 2
I N T
I N T
R E M A R K S
When you receive an external call during this programming, the pro c e d u re will be abort e d .
3.3.2 Pause Time Pro g r a m m i n g
• P ress the buttons ’ ‘ en ‘#‘ .
You will hear a confirmation tone
coming from the base station.
• P ress ‘0’ ‘2’ .
• P ress ‘0’ for 1 second pause time.
o r
• P ress ‘1’ for 3 seconds pause time.
o r
• P ress ‘2’ for 5 seconds pause time.
• P ress ‘ ’ button to confirm.
0 2 1
60
I N T
Page 13
3.3.3 PSIC/EIC Code Programming
When you use this phone on a PABX home telephone exchange, you can insert the
pause time automatically by programming the following. You can program a code for
PSIC (3 kinds : H0, H1, H2) and for EIC (3 kinds : A0, A1, A2).
R E M A R K
PSIC (Primary Station Identification Code)
EIC (Exchange Identification Code)
The pause time can automatically be inserted twice when your telephone is connected
to two serial PABX systems. For this purpose, you should program the following : PSIC
( P r i m a ry Station Identification Code) and EIC (Exchange Identification Code).
TELEPHONE
PSIC
H0, H1,H2
EIC
A0, A1,A2
PSTN
• P ress the buttons ‘ ’ a n d ‘#’.
You will hear a confirmation tone
coming from the handset.
• P ress ‘0’ ‘0’ .
• Enter the PSIC/EIC code. (max. 4 digits)
H 0 - - - -
I N T
or
• P ress the ‘ ’ button to select the next memory location for the PSIC/EIC code.
• P ress the ‘ ’ button to confirm .
If the telephone is connected to only one PABX, the pause time can be inserted
by programming either the PSIC or the EIC code.
3.3.4 Emergency Numbers
You can program emergency numbers (max. 12 digits) in 3 locations. These numbers
can always be called even when the handset is locked for outgoing calls.
• P ress the buttons ‘ ’ and ‘#‘ .
You will hear a confirmation tone
coming from the base station.
• P ress ‘2’ ‘5’ .
• Enter the PIN code (default ‘0 0 0 0’ ) .
The content of the first memory location
is displayed.
• P ress the ‘ ’ button to go to the
next location.
• Enter the desired emergency number
(max.12 digits).
2 5 - - - -
0 112
0 110
I N T
I N T
I N T
• P ress the ’ ’ button to delete the last
number if you have made a mistake
while entering the number.
61
Page 14

• P ress the ‘ ’ button to save the content of the current location and to go
to the next location.
o r
• P ress the ‘ ’ button.
3.3.5 Call Barr i n g
You can program a handset in such a way that certain telephone numbers can not be
called. The base station has 3 call barring memories for each handset (max. 8 digits).
When this function is activated, the LOCK indicator is displayed. Only the emerg e n c y
numbers (see 3.3.4) can always be called.
Call Barring Pogramming
• P ress the buttons ‘ ’ and ‘#’ .
I N T
You will hear a confirmation tone coming
f rom the handset.
• P ress ‘7’ ‘4’ .
• Enter the PIN code (default ‘0 0 0 0’ ) .
The handset numbers appear on the display
(for ex.: 1, 2, 3).
• Enter the hanset number that needs to be
p ro g r a m m e d .
7 4 - - - -
1 2 3
1 0
I N T
I N T
I N T
The handset number appears in the left
c o rner of the display and the current status of the barring appears in the right
c o rner of the display.
R E M A R K
• “0” means that the the call barring is deactivated.
• “1” means that the call barring is activated.
• “2” means that outgoing calls are not possible, only internal calls
• P ress ‘0’, ‘1’ or ‘2’ .
• P ress the ‘ ’ button.
P rogramming Call Barring Numbers
• P ress the buttons ‘ ’ and ‘#’ .
• P ress ‘7’ ‘5’ .
• Enter the PIN code.
• Enter the number of the handset that needs
to be programmed. The content of the first
location is displayed.
• P ress the ‘ ’ button to go to the next
location.
• Enter the number (max.8 digits).
0
0 00
I N T
I N T
62
Page 15

• P ress the ’ ’ button to delete the last number if you have made a mistake
while entering the number.
• P ress the ‘ ’ button to store the content of the current location and to go to
the next location.
o r
• P ress the ‘ ’ button.
3 . 4 P rogramming the Handset Parameters
When you are programming the handset parameters, the programming will be
a b o rted automatically if there is no key action within 30 sec.
R E M A R K
Do the programming when the base and handset are in standby mode, except for the pro g r a mming of the speaker volume and the notebook function.
The programming can be aborted by pressing the ‘ ’ button. This is not applicable for the
p rogramming of the speaker volume and the notebook function.
3.4.1 Base Number Display on/off
• P ress the buttons ‘ ’ and ‘2’ .
• P ress the buttons ‘0’ and ‘ ’ to
deactivate the number display.
• P ress the buttons ‘1’ and‘ ’ to
activate the number display.
3.4.2 Handset Number Display on/off
• P ress the buttons ‘ ’ and ‘3’ .
• P ress the buttons ‘0’ and ‘ ’ to
deactivate the number display.
• P ress the buttons ‘1’ and ‘ ’ to
activate the number display.
2 1
3 1
3.4.3 Keytone on/off
• P ress the buttons ‘ ’ and ‘5’ .
• P ress the buttons ‘0’ and ‘ ’ to
deactivate the key tones.
• P ress the buttons ‘1’ and ‘ ’ to
activate the key tones.
5 1
63
Page 16

3.4.4 Ring Volume and Melody of the Handset
Ring Volume Handset
You can select the desired ring volume : 0 (no ringing tone) to level 3 (high).
• P ress the buttons ‘ ’ and ‘4’ .
• Enter the desired ring volume (0, 1, 2 or 3).
• P ress the ‘ ’ button.
Ring Melody Handset
The handset has 6 melodies.
• P ress the buttons ‘ ’ and ‘6’ .
• Enter de desired ring melody (1-6).
• P ress the ‘ ’ button.
3.4.5 Speaker Volume Pro g r a m m i n g
During a conversation you can adjust the speaker volume. There are 3 levels.
• P ress, during a conversation, the buttons
‘ ’ and ‘#’ .
• Enter the desired speaker volume (1-3).
• P ress the ‘ ’ button to confirm.
3.4.6 Notebook Function
During a telephone conversation, telephone numbers can be saved in the re d i a l
m e m o ry for later use (external calls only). While entering the number, the number
will not be dialled.
• P ress the ‘ ’ button during a
conversation.
• Enter the telephone number (max.20 digits)
4 2
6 2
- 2
• If you want to enter a dialling pause, press
the ‘ ’ after dialling the number. The
dialling pause ‘P is displayed.
• P ress the ‘ ’ button.
R E M A R K
Notebook numbers should not begin with ‘#’, ‘*’ or ‘* *’ because these numbers are used for
other pro g r a m m i n g .
3.4.7 Programming Memory Numbers
64
8 5 4 P 1 6 6 1
Page 17

You can store 10 memory numbers in the memory (0-9).
• P ress the buttons ‘ ’ a n d ‘ ’.
• Enter the memory location where you
want to store the memory number (0-9 ).
o r
• P ress the ‘ ’ button to go to the next
memory location. The memory location
(for ex.: 0) is displayed.
• Enter the telephone number (max.20 digits).
• If you want to enter a dialling pause, press
the ‘ ’ button after dialling the
number. The dialling pause ‘P’ is
displayed.
• P ress the ’ ’ button to delete the last
number if you have made a mistake while entering the number.
• P ress the ‘ ’ b u t t o n .
3.4.8 Transfer redial memory numbers to memory locations
A number that is stored in the redial memory, can be transferred to the memory
n u m b e r s .
• P ress the buttons ‘ ’ a n d ‘ ’.
• Enter the memory location number using
the numeric keys 0-9
o r
• P ress the ‘ ’ button to go to the next
m e m o ry location. The memory location
(for ex.: 0) is displayed.
0
0 851P2385
0
• P ress the ‘ ’ button to select the redial
memory. The numbers in the redial
memory appear in the display as memory
numbers.
• P ress the ‘ ’ b u t t o n .
3.4.9 Clear the dial memory
0 851P2385
65
Page 18

This pro c e d u re clears all the memory numbers, the redial numbers and the babycall
n u m b e r s .
• P ress the buttons ‘ ’, ‘9’ and ‘9’ .
• P ress the ‘ ’ b u t t o n .
3.4.10 Babycall
To prevent unauthorized use you can program a babycall number. This function
allows you to program one specific number that will be dialled automatically no
matter what key has been pressed. When the babycall function is activated, you can
call the babycall number in case of an emergency by pressing any button, except the
‘ ’ b u t t o n .
Babycall Pro g r a m m i n g
• P ress the buttons ‘ ’, ‘8’ and ‘0’ .
• Enter the handset PIN code (default ‘0 0 0 0’ ) .
• Enter the babycall number (max. 20 digits).
• P ress the ’ ’ button to delete the last
number if you have made a mistake while
entering the number.
• P ress the ‘ ’ b u t t o n .
The babycall function is activated.
The LOCK indicator and the babycall number
a re displayed.
8 0 0 0 0 0
8 1 1 1 2 4
8 1 1 1 2 4
Deactivate the Babycall number
• P ress the buttons ‘ ’, ‘8’ and ‘1’ .
8 1 0 0 0 0
• Enter the handset PIN code
(default ‘0 0 0 0’ ) .
• P ress the ‘ ’ b u t t o n .
Activate the Babycall number
You can only use this function when the babycall number is programmed. When this
function is activated all other programming is disabled.
• P ress the ‘ ’, ‘8’ and ‘2’ .
8 1
8 2 0 0 0 0
66
Page 19

• Enter the handset PIN code
(default ‘0 0 0 0’ ) .
• P ress the ‘ ’ b u t t o n .
The babycall function is activated. The
LOCK indicator and the babycall number
a re displayed.
R E M A R K S
1 ) When the babycall number is activated, you can answer internal calls but you can’t make t h e m .
2 ) When the babycall number is being dialled, you can end the call by pressing the ‘ ’
button or by putting the handset on the base station.
3 ) The babycall number will not be stored in the redial memory.
8 2
8 1 1 1 2 4
3.5 Programming the PIN code (Personal Identification Number)
To prevent unauthorized use, you can use this function. Handset and base function
can not be changed by unauthorized users. The PIN code is needed to change the
functions. (The default PIN code of the handset and the base station is ‘0 0 0 0' ) .
R E M A R K
Should you forget the PIN code, you have to go to the service center for repair of the handset.
T h a t ’s why it is very important to always remember the PIN code.
3.5.1 Programming the handset PIN code
• P ress the buttons ‘ ’, ‘9’ and ‘0’ .
• Enter the current PIN code of the
handset.
• Enter the new PIN code of the handset.
• Enter the new PIN code of the handset for
a second time.
• P ress the ‘ ’ b u t t o n .
3.5.2 Programming the base PIN code
• P ress the buttons ‘ ’ and ‘#’.
You will hear a confirmation tone
coming from the handset.
• P ress the buttons ‘8’ and ‘9’ .
• Enter the current PIN code of the base
( 4 d i g i t s ) .
• Enter the new PIN code of the base
(4digits).
• Enter the new PIN code of the base
(4digits) for a second time.
• P ress the ‘ ’ b u t t o n .
9 0 0 0 0 0
9 0
8 9 - - - -
8 9
INT
INT
INT
INT
INT
67
Page 20

3.6 REGISTRATION and DEREGISTRATION
3.6.1 Registration
A new handset can be re g i s t e red to the base-station.
B a s e - s t a t i o n
• P ress the Paging Button until you hear the registration tone
• You hear the registration tone for about 30 seconds. During this period you
can register the handset.
H a n d s e t
• Switch off the handset (Press and hold the ‘ ’ button for more than 1 sec.).
• P ress the ‘ ’ button with the desired base Number (1-4).
• The handset supports a base PIN code of max. 8 digits, depending on the base
s t a t i o n .
• P ress the ‘ ’ button and ‘1’ at the
same time.
- 1 - 0 0 0 0 0 0 0 0
• Enter the base PIN code (default ‘0 0 0 0’) and
then press the ‘#’ button.
• Wait until the allowed handset numbers are
d i s p l a y e d .
• Select the desired handset number.
When the registration pro c e d u re is finished,
the base and handset number appear on the
display if this is pro g r a m m e d .
- 1 -
1 2 3 4 5 6
- 1 - H1
3.6.2 Dere g i s t r a t i o n
A handset can be deleted from the base unit to which it is re g i s t e red. This function is
used when you have for ex. a damaged handset. The damaged handset will then be
deleted so that it can be replaced by a new one.
• P ress the buttons ‘ ’ and ‘#’ .
You will hear a confirmation tone coming
f rom the handset.
• P ress the buttons ‘9’, ‘0’ and ‘0’ .
• Enter the base PIN code (default ‘0 0 0 0’ ) .
On the display appear the handset numbers
of the handsets that are currently re g i s t e red
to the base station.
• Select the handset number that you
want to dere g i s t e r.
68
900 ----
1 2 3 4 5 6
INT
INT
INT
Page 21

• P ress the ‘ ’ b u t t o n .
1
INT
3.7 SELECT THE BASE STATION
This pro c e d u re will select the base station and will make a connection.
• P ress the buttons ‘ ’ and ‘I N T’ .
On the display appear the base
numbers of the base stations to which
the handset is re g i s t e red. The base
1 2 3 4
number of the currently selected base
b l i n k s .
• Select the base number of the base
station you want (for ex.) Press ‘2’.
The selected base number blinks.
R E M A R K S
• Selecting ‘0’: the handset will search all base stations to which it is re g i s t e red and
s y n c h ronizes them to the base station that was found first.
• Selecting others: The Handset will search only the defined base station.
0 1 3 4
• P ress the ‘ ’ b u t t o n .
The handset will now search only base
number 2.
3.8 DEFAULT SETTINGS
3.8.1 Default Settings of the Handset
This procedure will reset all the parameters to default values and will erase all
registered base stations.
• Switch off the handset (press and hold the ‘ ’ button for about 1 sec. at
standby mode).
• Press the buttons ‘*’ and ‘#’ simultaneously and switch on the handset (press
the ‘ ’ button). The default values of the handset have now been reset.
Default Parameter Values
Ringer Pattern 4
Ringer Volume 2 (middle)
Speaker Volume 2 (middle)
Key Tone ON
Lock Mode OFF
Memory numbers ERASED
Redial memory ERASED
Babycall memory ERASED
Base Number Display ON
69
Page 22

Handset Number Display ON
Default Base station Automatic Searching mode (‘-0-‘)
Handset PIN code 0000
All Registered Base stations ERASED
3.8.2 Default Setting of the Base station
This procedure will reset all the parameters to default values and erase all
registered handsets.
• Switch off the power (disconnect the adapter plug).
• Press the Paging button and switch the power on again (connect the adapter
plug).
• Wait until you hear a beep tone.
The default values of the base station are reset now. You have 30 seconds time
to register a handset.
Default Parameter Values
Ringer Pattern 4
Ringer Volume 2 (middle)
Pause Time 1 (3 sec)
PSIC/EIC code ERASED
Emergency Call Memories ERASED
Call Lock Number Memories ERASED
Call Lock OFF
System PIN code 0000
All Registered Base stations ERASED
4 Technical Data
Frequency range 1.88-1.9Ghz (BW = 20 MHz)
RF Channels 10 Channel
Channel Band width 1.728 MHz
Modulation GFSK
Output power about 250mW
Antenna Diversity supported at base station
Data Transmission Rate 1.152 Mbps
Speech Encoding ADPCM (32 Kbps)
Communication Range about 100 meters in open space
Voltage stream supply Base unit: adaptor
Operating time Standby: 60 hours
Operating temperature 0°C to 40°C
Storage temperature -20°C to 60°C
Input: AC 230V ± 10%, 50Hz
Output: DC 9 V 350 mA / AC 9 V 260 mA
Handset: Ni-Cd Battery (AA, 2.4V, 650mAh)
Talk: 6 hours
70
Page 23

5 Troubleshooting
SYMPTOM SOLUTION
The SCAN indicator is not • Check the battery of the handset.
visible on the display. • Place the handset on the base to charge
Battery is not charged. • Check the battery of the handset.
BATTERY indicator is blinking • Charge the handset battery.
and you hear a warning tone.
Out-of-range warning tone is • The handset is out of radio coverage, you
generated. must enter within radio coverage.
Handset can not find the base • When the handset is out of radio coverage,
station (the SCAN indicator blinks) you must enter within radio coverage.
the handset battery.
• Remove the handset battery, put it back in
and switch on the handset.
• Clean the charge terminal of the handset and
the base station.
• Check the adapter of the base.
• P rogram the default values of the base station.
• Register the handset correctly to the base
station.
• Remove the handset battery, put it back in
and switch on the handset.
• Disconnect the adapter from the base and
connect it again.
No dial tone • Check if the telephone line is connected
correctly to the base.
It is not possible to dial a number. • Select the correct dialling system
(DTMF or PULSE).
The handset doesn't ring. • Program the ringer volume again.
When dialling an external • Check if the lock mode is activated, if so
telephone number, the deactivate it.
connection is broken.
There is no key tone. • Activate the key tone function.
71
Page 24

6 Warranty
Warranty
• 1 year
• Ask your dealer for your free swop warranty.
Attention
• Do not forget to include your purchase invoice when you return the damaged
device.
The equipment has been approved to 98/482/EG (TBR 21) for pan-European single terminal
connection to the Public Switched Telephone Network (PSTN). However, due to differences
between the individual PSTNs provided in different countries the approval does not, of itself,
give an unconditional assurance of successful operation on every PSTN network termination
point. Should you have problems, contact your dealer.
This list will indicate the networks with which the equipment is designed to work and any notified networks with which the equipment may have interworking difficulties.
Network Compatibility Network Compatibility
Austria A Luxembourg A
Belgium A The Netherlands A
Denmark A Portugal A
Finland A Spain A
France A Sweden A
Germany A United Kingdom A
Greece A Norway A
Ireland C Switzerland A
Italy A
A – equipment designed to work with country’s network
B – equipment may have interworking difficulties with country’s network
C – equipment not tested against compliance to country’s network
72
Page 25

Inhalt
1 Mobilteil und Basisstation 74
2 Display 74
3 Betrieb 75
3.1 Installation 75
3.2 Grundfunktionen 76
3.2.1 Eingehender Anruf 76
3.2.2 Abgehender Anruf 76
3.2.3 Paging von der Basisstation zum Mobilteil (max. 6 Mobilteile) 77
3.2.4 Interner Anruf zu einem anderen Mobilteil 77
3.2.5 Interner Anruf von einem anderen Mobilteil 78
3.2.6 Interner Anruf zu einem anderen Mobilteil während eines externen Anrufs 78
3.2.7 Externer Anruf während einer internen Verbindung 79
3.2.8 Abgehende Anrufe 80
3.2.8.1 Normaler Verbindungsaufbau 80
3.2.8.2 Zuletzt gewählte Rufnummer wiederholen 80
3.2.8.3 Rufnummernspeicher 80
3.2.9 Blockwahl 81
3.2.9.1 Normaler Verbindungsaufbau 81
3.2.9.2 Eine der letzten 4 Rufnummern wiederholen (Wahlwiederholung) 81
3.2.9.3 Gespeicherte Rufnummern 81
3.2.10 Vorübergehendes Ausschalten des Mikrofons (Stumm) 82
3.2.11 Das Wahlverfahren 82
3.2.12 Signaltaste (R) 82
3.2.13 Gesprächsdaueranzeige 83
3.2.14 Rufnummernanzeige 83
3.2.15 Vorübergehende Tastensperre 83
3.3 Programmieren der Systemparameter 84
3.3.1 Ruftonlautstärke und –melodie der Basisstation einstellen 84
3.3.2 Programmieren der Wahlpause 84
3.3.3 Programmieren des PSIC/EIC - Codes 85
3.3.4 Notrufnummern 85
3.3.5 Sperre für abgehende Gespräche einrichten 86
3.4 Programmieren der Mobilteilparameter 87
3.4.1 Anzeige der Basisstationnummer aktivieren/deaktivieren 87
3.4.2 Anzeige der Mobilteilnummer aktivieren/deaktivieren 87
3.4.3 Tastentöne aktivieren/deaktivieren 87
3.4.4 Ruftonlautstärke und –melodie des Mobilteils 87
3.4.5 Lautsprecherlautstärke ändern 88
3.4.6 Terminplaner 88
3.4.7 Rufnummern speichern 88
3.4.8 Rufnummern aus der Wahlwiederholungsliste in den Rufnummernspeicker übernehmen 89
3.4.9 Speicher löschen 89
3.4.10 Babyruf 89
3.5 PIN (Personal Identification Number) programmieren 91
3.5.1 PIN des Mobilteils programmieren 91
3.5.2 PIN der Basisstation programmieren 91
3.6 Anmeldung und abmeldung 91
3.6.1 Anmeldung 91
3.6.2 Abmelden 92
3.7 Basisstation wählen 93
3.8 Grundeinstellungen 93
3.8.1 Grundeinstellungen des Mobilteils 93
4 Technische Daten 94
5 Problembehebung 95
6 Garantie 96
3.8.2 Grundeinstellungen der Basisstation 94
73
Page 26

1 Mobilteil und Basisstation
1 Display
2 Programmiertaste
3 Interntaste
4 Speichertaste
5 Stummschalttaste
6 Ein/Aus-Taste
7 Verbindungstaste
8 Signaltaste
9 Wahlwiederholungstaste
10 Akku-Anzeige
11 Verbindungsanzeige
12 Paging-Taste
2 Display
WAHLSPERRE-Symbol
Das Mobilteil ist gesperrt.
PROGRAMMIER-Symbol
Sie befinden sich im Menü.
TELEFON-Symbol
Sie führen ein Gespräch.
SCAN-Symbol
Das Mobilteil ist aktiv.
INT
INTERN-Symbol
Ein interner Anruf oder ein
Basisprogramm mit
Programmiersymbol.
MFV-Symbol
Das Wahlverfahren ist auf
Tonwahl (MFV) eingestellt.
STUMMSCHALTUNG
Das Mikrofon ist vorübergehend
ausgeschaltet.
74
Page 27

AKKU-Anzeige
Anzeige für den wiederaufladbaren Akku.
Die Anzeige blinkt, wenn der Akku fast leer ist.
Akkuladung 25%
Akkuladung 50%
Akkuladung 75%
Akkuladung 100%
3 BETRIEB
3.1 Installation
• Verbinden Sie die Telefonschnur mit der
Basisstation und legen Sie die Akkuzellen
in das Akkufach des Mobilteils.
• Sobald das Mobilteil auf die Basisstation gelegt wird, werden die Akkuzellen
des Mobilteils geladen. Die Ladezeit für einen vollständig entladenen Akku
beträgt 7 Stunden.
Mobilteil ausschalten
• Halten Sie die ‘ ’-Taste im Standby-Modus 1 Sekunde gedrückt.
Mobilteil einschalten
• Betätigen Sie kurz die ‘ ’-Taste, wenn das Mobilteil ausgeschaltet ist.
-1- H1
Das Mobilteil sucht die Basisstation.
BASIS-NR. MOBILTEIL-NR.
Im Display erscheint die Nummer der vom Mobilteil gesuchten Basisstation.
• Wenn die Nummer ‘-0-’ erscheint, werden alle Basisstationen, an denen das
Mobilteil angemeldet ist, gesucht (automatische Suche).
• ‘-1-’, ‘-2-’, ‘-3-’, ‘-4-’ zeigen die Nummer der Basisstation an, an der das
Mobilteil angemeldet ist.
HINWEISE
Die Nummer der Basisstation, zu der man eine Verbindung aufbauen will, kann fest einpro g r a mm i e rt werden. Die Anzeige der Basis- und Mobilteilnummer kan ein- und ausgeschaltet werd e n .
75
Page 28

Das Mobilteil hat die Basisstation gefunden
-1- H1
BASIS-NR. MOBILTEIL-NR.
3.2 Grundfunktionen
HINWEISE
Wenn Sie während eines internen Gesprächs einen externen Anruf erhalten, hören Sie einen
Anklopfton.
3.2.1 Eingehender Anruf
Wenn die Basisstation einen eingehenden
Anruf erhält, hören Sie den Rufton und
blinkt das Verbindungssymbol auf der
Basisstation. Alle Mobilteile, die nicht besetzt
sind, klingeln, und in ihren Displays blinkt das
TELEFON-Symbol.
• Betätigen Sie eine beliebige Taste, außer
der ‘ ’-Taste.
oder
• Nehmen Sie das Mobilteil von der Basisstation, um den Anruf entgegenzunehmen. Die anderen Mobilteile hören auf zu klingeln.
Das MFV-Symbol erscheint im Display. Wenn ein anderer Teilnehmer jetzt die
‘ ’-Taste betätigt, hört er einen Besetztton. Eine interne Verbindung
zwischen zwei Mobilteilen bleibt weiterhin möglich.
3.2.2 Abgehender Anruf
• Betätigen Sie die ‘ ’-Taste.
Im Display blinkt das TELEFON-Symbol.
Danach hören Sie das Freizeichen, das
TELEFON-Symbol hört auf zu blinken.
Das MFV-Symbol erscheint im Display.
• Geben Sie die Telefonnummer ein.
• Wenn Sie eine Wahlpause eingeben
wollen, betätigen Sie nach Eingabe der
Nummer die ‘ ’-Taste. Im Display
erscheint ein ‘P’.
Sie können jetzt ein Gespräch führen.
Wenn bereits eine externe Verbindung zu
einem anderen Mobilteil besteht, hören
Sie den Besetztton und erscheint die
Nummer des betreffenden Mobilteils im
Display.
868P1230
76
Page 29

3.2.3 Paging von der Basisstation zum Mobilteil (max. 6 Mobilteile)
Wenn Sie die Paging-Taste der Basisstation betätigen, klingelt das Mobilteil. Ein
interner Anruf zwischen Basisstation und Mobilteil ist jedoch nicht möglich.
• Betätigen Sie die Paging-Taste der
Basisstation. Alle Mobilteile klingeln.
Wenn der Anruf nicht entgegen-
genommen wird, hört das Klingeln nach
20 Sekunden auf.
• Um den Paging-Ruf zu unterbrechen, betätigen Sie erneut die Paging-Taste.
Alle Mobilteile hören auf zu klingeln.
HINWEISE
Ein Paging-Ruf ist nur möglich, wenn sich die Basisstation im Ruhezustand befindet.
3.2.4 Interner Anruf zu einem anderen
Mobilteil
• Betätigen Sie die ’INT‘-Taste.
I N T
1
Sie hören das Freizeichen und im Display
erscheint die Mobilteilnummer.
Bei einem internen Anruf erscheint die
Nummer des Mobilteils, das man anrufen
möchte.
Wenn bereits eine Verbindung zwischen
3 - 4
dem angerufenen und einem dritten
Mobilteil besteht, erscheinen die
Nummern beider Mobilteile im Display.
I N T
2 1
• Geben Sie die Nummer des Mobilteils ein
(1-6), z.B. ‘2’.
oder
• Drücken Sie ‘*’ wenn Sie alle
2 3 4 5 6 1
angemeldeten Mobilteile anrufen wollen.
Die Nummern aller angemeldeten
Mobilteile erscheinen im Display.
Bei Erhalt des Anrufes, klingeln die
Mobilteile.Wenn das Mobilteil besetzt
oder nicht verfügbar ist, hören Sie einen Besetztton.
Betätigen Sie die ‘ ’-Taste oder die ‘INT’-Taste, um die interne Verbindung
zu trennen.
HINWEISE
Wenn der angerufene Teilnehmer den Anruf nicht innerhalb von 30 Sekunden entgegennimmt,
wird der Anruf automatisch beendet. Es ist jeweils nur ein interner Anruf möglich.
I N T
I N T
1
77
Page 30

3.2.5 Interner Anruf von einem anderen Mobilteil
Wenn das Mobilteil einen internen Anruf von
einem anderen Mobilteil erhält, hören Sie
den Rufton und erscheint die Nummer des
anrufenden Mobilteils im Display.
• Betätigen Sie eine beliebige Taste, um
diesen internen Anruf entgege-
zunehmen.
• Betätigen Sie die ‘ ’-Taste oder die ‘INT’-Taste, um die interne Verbindung
zu trennen
3.2.6 Interner Anruf zu einem anderen Mobilteil während eines externen
Anrufs
Mit dieser Funktion kann eine externe Verbindung an ein anderes Mobilteil
weitergeleitet werden.
Während einer externen Verbindung
• Betätigen Sie die ‘INT’-Taste.
Sie hören das Freizeichen und die externe
Verbindung wird gehalten. Im Display
wird die aktuelle Mobilteilnummer
angezeigt.
2 1
8681230
I N T
I N T
1
1
• Geben Sie die Nummer des Mobilteils
ein (1 - 6), z.B. ’2‘.
oder
• Drücken Sie ‘*’, wenn Sie alle
angemeldeten Mobilteile anrufen wollen.
Die Nummern aller angemeldeten
Mobilteile erscheinen im Display.
Wenn die Verbindung aufgebaut wurde, hören Sie einen Rufton.
Sie haben jetzt folgende Möglichkeiten
a) Den gehaltenen, externen Anruf an das andere Mobilteil übergeben.
• Betätigen Sie die ‘ ’-Taste.
Der externe Anruf wurde an das
andere Mobilteil übergeben. Im
Display erscheint die Gesprächsdauer.
78
2 1
2 3 4 5 6 1
I N T
I N T
04-00
Page 31

Nach 5 Sekunden wechselt das Mobilteil
wieder in den Standby-Modus.
Wenn das andere Mobilteil den weitergeleiteten Anruf nicht innerhalb von 30 Sekunden
entgegennimmt, wird dieser wieder auf dem
ersten Mobilteil signalisiert. Wenn das erste
Mobilteil den Anruf nicht innerhalb von 30
Sekunden entgegennimmt, wird die Verbindung automatisch getrennt.
b) Den externen Anruf wieder übernehmen und die interne Verbindung trennen.
-1- H1
• Betätigen Sie die ‘R’-Taste, um die
interne Verbindung zu trennen.
c) Den externen Anruf wieder übernehmen und die interne Verbindung halten.
• Betätigen Sie die ‘INT’-Taste.
8681230
8681230
• Betätigen Sie nochmals die
‘INT’-Taste, um den internen Anruf zu
übernehmen. Das externe Gespräch
wird gehalten.
HINWEISE
Mit der ‘INT’-Taste können Sie zwischen dem aktuellen und dem gehaltenen Gespräch
wechseln.
3.2.7 Externer Anruf während einer internen Verbindung
Wenn ein externer Anruf eingeht, hören Sie
einen Anklopfton und blinkt das TELEFONSymbol im Display.
• Betätigen Sie die ‘INT’-Taste, um den
externen Anruf entgegenzunehmen.
• Betätigen Sie nochmals die ‘INT’-Taste,
um zum internen Gespräch zurück-
zukehren.
• Betätigen Sie die ‘ ’-Taste, um die Verbindung zu trennen.
2 1
2 1
I N T
I N T
79
Page 32

3.2.8 Abgehende Anrufe
3.2.8.1 Normaler Verbindungsaufbau
• Betätigen Sie die ‘ ’-Taste.
Im Display blinkt das TELEFON-Symbol.
Anschließend hören Sie das Freizeichen,
das TELEFON-Symbol hört auf zu blinken.
• Geben Sie die gewünschte Rufnummer
ein.
• Wenn Sie eine Wahlpause eingeben
wollen, betätigen Sie nach Eingabe der
Nummer die ‘ ’-Taste. Im Display
erscheint ein ‘P’.
3.2.8.2 Zuletzt gewählte Rufnummer wiederholen
Die zuletzt gewählte Nummer kann automatisch gerufen werden.
• Betätigen Sie die ‘ ’-Taste.
• Betätigen Sie die ‘ ’-Taste.
Die zuletzt gewählte Rufnummer
erscheint im Display und wird
automatisch gewählt.
3.2.8.3 Rufnummernspeicher
Gespeicherte Rufnummern (siehe 3.4.7. Rufnummern speichern) können sehr einfach gewählt werden.
• Betätigen Sie die ‘ ’-Taste.
8 6 8 P 1 2 3 0
6 8 P 1 2 3 0
• Betätigen Sie die ‘ ’-Taste.
Im Display blinkt der Cursor. Sie müssen
jetzt die Speicherstelle der zu wählenden
Rufnummer eingeben.
• Geben Sie die Speicherstelle ein (1-9).
Die Nummer erscheint im Display und
wird gewählt.
HINWEIS
Aus dem Rufnummernspeicher gewählte Rufnummern werden nicht in die
Wahlwiederholungsliste aufgenommen.
80
6 8 1 2 3 0
Page 33

3.2.9 Blockwahl
3.2.9.1 Normaler Verbindungsaufbau
• Geben Sie die gewünschte Rufnummer
ein.
• Wenn Sie eine Wahlpause eingeben
wollen, betätigen Sie nach Eingabe der
Nummer die ‘ ’-Taste. Im Display erscheint ein ‘P’.
• Wenn Sie bei der Eingabe der Rufnummer einen Fehler gemacht haben,
betätigen Sie die ’ ’-Taste, um die Nummer zu korrigieren. Sie können auch
die komplette Nummer löschen, indem Sie diese Taste 1 Sekunde gedrückt
halten. Geben Sie danach die neue Nummer ein.
8 6 8 P 1 2 3 0
• Betätigen Sie die ‘ ’-Taste.
Die eingegebene Nummer wird gewählt.
3.2.9.2 Eine der letzten 4 Rufnummern wiederholen (Wahlwiederholung)
• Betätigen Sie die ‘ ’-Taste.
Die zuletzt gewählte Nummer erscheint
im Display.
• Betätigen Sie nochmals die ‘ ’-Taste,
wenn Sie eine andere Nummer aus der
Wahlwiederholungsliste wählen wollen. In der Wahlwiederholungsliste werden
die letzten 4 Rufnummern gespeichert.
• Wenn Sie bei der Eingabe der Rufnummer einen Fehler gemacht haben, betätigen
Sie die ’ ’-Taste, um die Nummer zu korrigieren. Sie können auch die
komplette Nummer löschen, indem Sie diese Taste 1 Sekunde gedrückt halten.
Geben Sie danach die neue Nummer ein.
• Betätigen Sie die ‘ ’-Taste.
Die zuletzt eingegebene Nummer wird
gewählt.
3.2.9.3 Gespeicherte Rufnummern
• Betätigen Sie die ‘ ’-Taste.
Im Display blinkt der Cursor. Sie müssen
jetzt die Speicherstelle der zu wählenden
Rufnummer eingeben.
• Geben Sie die Speicherstelle ein (0-9).
oder
• Betätigen Sie nochmals die ‘ ’-Taste,
um zur nächsten Speicherstelle zu
wechseln. Die Speicherstelle, z.B. ‘0’, und die Rufnummer erscheinen im Display.
• Betätigen Sie die ’ ’-Taste.
Die Nummer im Display wird gewählt.
6 8 P 1 2 3 0
8 6 8 1 2 3 0
6 8 1 2 3 0
0 8 6 8 1 2 3 0
6 8 1 2 3 0
81
Page 34

HINWEISE
Aus dem Rufnummernspeicher gewählte Rufnummern werden nicht in die
Wahlwiederholungsliste aufgenommen.
3.2.10 Vorübergehendes Ausschalten des Mikrofons (Stumm)
Sie können das Mikrofon während eines Gesprächs vorübergehend ausschalten.
Der andere Teilnehmer kann Sie dann nicht hören.
• Betätigen Sie die ’ ’-Taste. Das
Mikrofon wird ausgeschaltet. Auf dem
Display erscheint das STUMM-Symbol.
• Betätigen Sie nochmals die ’ ’-Taste.
Das Mikrofon wird wieder eingeschaltet
und das STUMM-Symbol verschwindet
vom Display. Sie können das Gespräch
fortsetzen.
3.2.11 Das Wahlverfahren
Wenn Sie die Tasten des Mobilteils betätigen, hören Sie Tastentöne (MFV). Sie können
das Wa h l v e rf a h ren während eines Gesprächs so einstellen, daß die Tastentöne länger
anhalten, z.B. um bestimmte Funktionen im Telefonnetz zu nutzen. Geben Sie erst die
Rufnummer ein und schalten Sie danach das Wa h l v e rf a h ren um, sonst wird diese
v o r ü b e rgehende Änderung von der Basisstation nicht übernommen. Solange Sie die
Taste gedrückt halten, wird der Ton erzeugt. In der Grundeinstellung sind die kurz e n
Tastentöne eingestellt.
Lange Tastentöne (vorübergehend)
8 6 8 1 2 3 0
• Betätigen Sie die ‘ ’-Taste.
• Betätigen Sie die ‘* *’.
0 0
• Betätigen Sie die ‘ ’-Taste.
8 6 8 1 2 3 0
3.2.12 Signaltaste (R)
Die Signaltaste, auch Flash-Taste genannt, sendet einen Signalton an das
öffentliche Fernsprechnetz oder an Telefonanlagen. Die Signaltaste ermöglicht die
Nutzung von Komfortmerkmalen. Sie können die Flash-Zeit wie folgt einstellen:
• Betätigen Sie die ’R‘-Taste kurz, um ein Flash-Signal von 100 ms einzustellen.
oder
• Halten Sie die ’R‘-Taste länger als 1 Sekunde gedrückt, um ein Flash-Signal von
250 ms einzustellen.
82
Page 35

3.2.13 Gesprächsdaueranzeige
Während und nach einem externen Anruf wird die Gesprächsdauer auf dem
Display angezeigt.
• Während einer Verbindung erscheint
nach 20 Sekunden die Gesprächsdauer
im Display.
• Die Gesprächsdauer bleibt nach dem
Gespräch noch 5 Sekunden sichtbar.
HINWEISE
1) Auch wenn das externe Gespräch weniger als 20 Sekunden dauert, erscheint die
Gesprächsdauer im Display.
2) Die Gesprächsdauer eines eingehenden externen Anrufs erscheint ebenfalls im Display.
3) Wenn der externe Anruf einem anderen Mobilteil übergeben wird, so fängt die
Gesprächsdaueranzeige auf dem anderen Mobilteil wieder bei null an.
3.2.14 Rufnummernanzeige
Das Gerät verfügt über die Funktion Rufnummernanzeige. Diese Funktion ist jedoch
nur verf ü g b a r, wenn sie vom Netzbetreiber angeboten wird und Sie diese Funktion
beauftragt haben. Die Rufnummer des Anrufers erscheint nach dem zweiten
Klingelzeichen im Display Ihres Mobilteils. Nach 20 Sekunden wird die Rufnummer
d u rch die Gesprächsdaueranzeige ersetzt.
• Die Telefonnummer des Anrufers wird
angezeigt.
• Betätigen Sie die ‘ ’-Taste, um den
externen Anruf entgegenzunehmen.
Nach 20 Sekunden wird die Rufnummer
d u rch die Gesprächsdaueranzeige ersetzt.
6682508
0 0 - 2 0
0 4 - 0 0
0 0 - 2 0
3.2.15 Vorübergehende Tastensperre
Um die unbeabsichtigte Wahl einer Rufnummer zu vermeiden, können Sie die
Wähltastatur vorübergehend sperren.
Das Gerät befindet sich im StandbyModus :
• Betätigen Sie die ‘ ’-Taste kurz, um
die Wähltastatur zu sperren.
• Halten Sie die ‘ ’-Taste 1 Sekunde
gedrückt, um die Sperrung aufzuheben.
HINWEISE
Die Ta s t e n s p e rre wird automatisch deaktiviert, wenn Sie bei einem eingehenden Anruf eine
beliebige Taste betätigen oder das Mobilteil von der Basisstation nehmen.
83
-1- H1
P
Page 36

3.3 Programmieren der Systemparameter
Die Pro g r a m m i e rung der Grundparameter wird automatisch beendet, wenn 30
Sekunden keine Eingabe erf o l g t .
H I N W E I S E
Die Programmierung muß erfolgen, wenn sich das Mobilteil und die Basisstation im StandbyModus befinden.
Sie können während des Programmiervorgangs externe oder interne Anrufe
entgegennehmen, indem Sie die ‘ ’-Taste oder die ‘ ’-Taste betätigen. Sie
können den Programmiervorgang jederzeit mit der ‘ ’-Taste abbrechen.
3.3.1 Ruftonlautstärke und -melodie der Basisstation einstellen
Ruftonlautstärke Basisstation
Sie können die Ruftonlautstärke von 0 (kein Rufton) bis 3 (laut) einstellen.
• Betätigen Sie die Tasten ‘ ’ und ‘#‘. Sie hören einen Quittungston des
M o b i l t e i l s .
• Drücken Sie ‘5‘ .
• Stellen Sie die gewünschte Lautstärke
5 2
ein (0-3).
• Betätigen Sie die ‘ ’-Taste, um die Einstellung zu bestätigen.
Ruftonmelodie Basisstation
Die Basisstation verfügt über 6 verschiedene Ruftonmelodien.
• Betätigen Sie die Tasten ‘ ’ und ‘#‘. Sie hören einen Quittungston des
M o b i l t e i l s .
• Drücken Sie ‘6‘ .
• Stellen Sie die gewünschte Ruftonmelodie
6 2
ein (1-6).
• Betätigen Sie die ‘ ’-Taste, um die Einstellung zu bestätigen.
I N T
I N T
HINWEISE
Wenn Sie während der Pro g r a m m i e rung einen externen Anruf erhalten, wird der Vo rgang
a b g e b ro c h e n .
3.3.2 Pro g r a m m i e ren der Wa h l p a u s e
• Betätigen Sie die Tasten ’ ’ und ‘#‘. Sie hören einen Quittungston der
B a s i s s t a t i o n .
• Drücken Sie ‘0’ ‘2’ .
• Drücken Sie ‘0’, um eine Wahlpause von
1 Sekunde einzustellen.
0 2 1
I N T
o d e r
• Drücken Sie ‘1’, um eine Wahlpause von 3 Sekunden einzustellen.
o d e r
• Drücken Sie ‘2’, um eine Wahlpause von 5 Sekunden einzustellen.
• Betätigen Sie die ‘ ’-Taste, um die Einstellung zu bestätigen.
84
Page 37

3.3.3 Pro g r a m m i e ren des PSIC/EIC-Codes
Wenn Ihr Telefon an einer TK-Anlage angeschlossen ist, können Sie die Wahlpause
automatisch einfügen lassen, indem Sie folgende Programmierung vornehmen. Sie
können einen Code für PSIC (3 Arten: H0, H1, H2) und für EIC (3 Arten : A0, A1,
A2) festlegen.
H I N W E I S E
PSIC (Primary Station Identification Code)
EIC (Exchange Identification Code)
Die Wahlpause kann zweimal automatisch eingefügt werden, wenn das Telefon mit
zwei seriellen TK-Anlagen verbunden ist. Dazu nehmen Sie folgende Pro g r a m m i e ru n g
vor: PSIC (Primary Station Identification Code) und EIC (Exchange Identification Code).
TELEFON
PSIC
H0, H1,H2
EIC
A0, A1,A2
PSTN
• Betätigen Sie die Tasten ‘ ’ und ‘#’. Sie hören einen Quittungston des
M o b i l t e i l s .
• Drücken Sie ‘0’ ‘0’ .
• Geben Sie den PSIC/EIC-Code ein
(max. 4 Zeichen).
H 0 - - - -
I N T
oder
• Betätigen Sie die ‘ ’-Taste, um die nächsten Speicherstelle für den
PSIC/EIC-Code zu wählen.
• Betätigen Sie die ‘ ’-Taste, um die Einstellung zu bestätigen. Wenn das
Telefon nur an einer TK-Anlage angeschlossen ist, kann die Wahlpause eingefügt
w e rden, indem Sie entweder den PSIC oder den EIC-Code pro g r a m m i e re n .
3.3.4 Notru f n u m m e rn
Sie können drei Notru f n u m m e rn (max. 12 Zeichen) pro g r a m m i e ren. Diese Nummern
können immer gewählt werden, auch wenn eine Wählsperre eingestellt ist.
• Betätigen Sie die Ta s t e n ‘ ’ und ‘#‘. Sie hören einen Quittungston der
B a s i s s t a t i o n .
• Drücken Sie ‘2’ ‘5’ .
• Geben Sie die PIN ein (Grundeinstellung
2 5 - - - -
I N T
‘0 0 0 0’). Der Inhalt der ersten
Speicherstelle wird im Display angezeigt.
• Betätigen Sie die ‘ ’-Taste, um zur
0 112
I N T
nächsten Speicherstelle zu wechseln.
• Geben Sie die gewünschte Notrufnummer
ein (max.12 Zeichen).
• Wenn Sie bei der Eingabe einen Fehler
0 110
I N T
gemacht haben sollten, betätigen Sie die
’ ’-TasteTaste, um die letzte Ziffer zu löschen.
85
Page 38

• Betätigen Sie die ‘ ’-Taste, um die eingegebene Nummer zu übernehmen und
zur nächsten Speicherstelle zu wechseln.
o d e r
• Betätigen Sie die ‘ ’-Taste.
3.3.5 Sperre für abgehende Gespräche einrichten
Sie können das Mobilteil so pro g r a m m i e ren, daß bestimmte Rufnummern nicht
a n g e rufen werden können. Die Basisstation verfügt über 3 Sperren je Mobilteil (max.
8 Zeichen). Wenn diese Funktion aktiviert ist, wird das WAHLSPERRE-Symbol im Display
angezeigt. Nur die Notru f n u m m e rn (siehe 3.3.4) können immer gewählt werd e n .
Wa h l s p e rre einrichten
• Betätigen Sie die Tasten ‘ ’ und ‘#’.
I N T
Sie hören einen Quittungston des
M o b i l t e i l s .
• Drücken Sie ‘7’ ‘4’ .
• Geben Sie die PIN ein (Grundeinstellung
‘0 0 0 0’). Die Nummern der Mobilteile
erscheinen im Display (z.B.: 1, 2, 3).
• Geben Sie die Nummer des zu pro g r a m -
7 4 - - - -
1 2 3
I N T
I N T
m i e renden Mobilteils ein. Die Mobilteilnummer erscheint unten links, der aktuelle
Status der Sperre unten rechts im Display.
H I N W E I S
• “0” bedeutet, daß die Sperre nicht aktiviert ist.
• “1” bedeutet, daß die Sperre aktiviert ist.
• “2” bedeutet, daß keine abgehenden Gespräche möglich sind, nur Intern g e s p r ä c h e .
1 0
I N T
• Drücken ‘0’, ‘1’ oder ‘2’ .
• Betätigen Sie die ‘ ’-Taste.
R u f n u m m e rn sperre n
• Betätigen Sie die Tasten ‘ ’ und ‘#’ .
• Drücken Sie ‘7’ ‘5’ .
• Geben Sie die PIN ein.
• Geben Sie die Nummer des zu pro g r a m m i e renden Mobilteils ein. Der Inhalt der
ersten Speicherstelle erscheint im Display.
• Betätigen Sie die ‘ ’ - Taste, um zur nächsten
Speicherstelle zu wechseln.
• Geben Sie die Rufnummer ein
(max.8 Zeichen).
• Wenn Sie bei der Eingabe einen Fehler
gemacht haben sollten, betätigen Sie die
’ ’-Taste um die letzte Ziffer zu löschen.
0
0 00
I N T
I N T
86
Page 39

• Betätigen Sie die ‘ ’-Taste, um die eingegebene Nummer zu übernehmen und
zur nächsten Speicherstelle zu wechseln.
o d e r
• Betätigen Sie die ‘ ’-Taste.
3 . 4 P ro g r a m m i e ren der Mobilteilparameter
Die Pro g r a m m i e rung der Mobilteilparameter wird automatisch beendet, wenn
30 Sekunden keine Eingaben getätigt wurd e n .
H I N W E I S E
Die Programmierung muß erfolgen, wenn sich das Mobilteil im Standby-Modus befindet, außer
beim Einstellen der Lautsprecherlautstärke und der Terminplanerfunktion. Sie können den
Programmiervorgang mit der ‘ ’-Taste abbrechen. Dies gilt jedoch nicht für die Einstellung
der Lautsprecherlautstärke und der Terminplanerfunktion.
3.4.1 Anzeige der Basisstationnummer aktiviere n / d e a k t i v i e re n
• Betätigen Sie die Tasten ‘ ’ und ‘2’ .
• Betätigen Sie die Tasten ‘0’ und ‘ ’ um
die Anzeige zu deaktiviere n .
• Betätigen Sie die Tasten ‘1’ und ‘ ’ um
die Anzeige zu aktiviere n .
3.4.2 Anzeige der Mobilteilnummer aktiviere n / d e a k t i v i e re n
• Betätigen Sie die Tasten ‘ ’ und ‘3’ .
• Betätigen Sie die Tasten ‘ ’ um die
Anzeige zu deaktiviere n .
• Betätigen Sie die Tasten ‘1’ und ‘ ’ um
die Anzeige zu aktiviere n .
2 1
3 1
3.4.3 Tastentöne aktiverien/deaktiviere n
• Betätigen Sie die Tasten ‘ ’ und ‘5’ .
• Betätigen Sie die Tasten 0’ und ‘ ’ um
die Tastentöne zu aktiviere n .
• ABetätigen Sie die Tasten ‘1’ und ‘ ’ um
die Tastentöne zu aktiviere n .
3.4.4 Ruftonlautstärke und -melodie des Mobilteils
Ruftonlautstärke Mobilteil
Sie können die Ruftonlautstärke von 0 (kein Rufton) bis 3 (laut) einstellen.
• Betätigen Sie die Tasten ‘ ’ und ‘4’ .
• Stellen Sie die gewünschte Lautstärke ein
( 0 - 3 ) .
• Betätigen Sie die Tasten ‘ ’-Taste
87
5 1
4 2
Page 40

Ruftonmelodie Mobilteil
Das Mobilteil verfügt über 6 verschiedene Ruftonmelodien.
• Betätigen Sie die Tasten ‘ ’ und ‘6’ .
• Stellen Sie die gewünschte Ruftonmelodie
ein (1-6).
• Betätigen Sie die Tasten ‘ ’-Taste.
3.4.5 Lautsprecherlautstärke ändern
Sie können die Lautstärke des Lautsprechers während eines Gesprächs einstellen.
Es gibt 3 Einstellungsmöglichkeiten.
• Betätigen Sie während eines Gesprächs die
Tasten ‘ ’ und ‘#’ .
• Stellen Sie die gewünschte Lautstärke ein
( 1 - 3 ) .
• Betätigen Sie die ‘ ’-Taste, um die
Einstellung zu bestätigen.
3.4.6 Te rm i n p l a n e r
Sie können während eines Gesprächs Rufnummern von Te i l n e h m e rn speichern, die
Sie später anrufen wollen (nur externe Rufnummern). Die Nummer wird bei der
Eingabe nicht gewählt.
• Betätigen Sie während eines Gesprächs die
‘ ’-Taste.
• Geben Sie die Rufnummer ein
(max. 20 Zeichen).
• Wenn Sie eine Wahlpause eingeben wollen,
betätigen Sie nach Eingabe der Nummer die
‘ ’-Taste. Im Display erscheint ein ‘P’ .
• Betätigen Sie die ‘ ’-Taste.
6 2
- 2
8 5 4 P 1 6 6 1
H I N W E I S E
Die gespeicherten Rufnummern dürfen nicht mit #’, ‘*’ oder ‘* *’ anfangen, da diese Zeichen für
a n d e re Pro g r a m m i e rv o rgänge benutzt werd e n .
3.4.7 Rufnummern speichern
Im Rufnummernspeicher können Sie bis zu 10 Rufnummern speichern (0-9).
• Betätigen Sie die Tasten ‘ ’ und ‘ ’.
• Geben Sie die gewünschte Speicherstelle für
die Rufnummer ein (0-9).
o d e r
• Betätigen Sie die ‘ ’-Taste, um zur näch
sten Speicherstelle zu wechseln.
Die Speicherstelle (z.B.: 0) erscheint im
Display.
88
0
Page 41

• Geben Sie die Rufnummer ein (max.20 Zeichen).
• Wenn Sie eine Wahlpause eingeben
wollen, betätigen Sie nach Eingabe der
Nummer die ‘ ’-Taste. Im Display
erscheint ein ‘P’ .
• Wenn Sie bei der Eingabe einen Fehler gemacht haben sollten, betätigen Sie die
’ ’-Taste, um die letzte Ziffer zu löschen.
• Betätigen Sie die ‘ ’-Taste.
3.4.8 Rufnummern aus der Wa h l w i e d e rholungsliste in den
R u f n u m m e rnspeicher übernehmen
Eine Nummer aus der Wa h l w i e d e rholungsliste kann in den Rufnummern s p e i c h e r
ü b e rnommen werd e n .
• Betätigen Sie die Tasten ‘ ’ und
‘ ’-Taste.
• Geben Sie mit den Wähltasten 0-9
die Speicherstelle ein.
o d e r
• Betätigen Sie die ‘ ’-Taste, um zur
nächsten Speicherstelle zu wechseln.
Die Speicherstelle (z.B.: 0) erscheint im Display.
• Betätigen Sie die ‘ ’-Taste, um die
Wahlwiederholungsliste zu öffnen.
Die Nummern in der Wahlwiederholungsliste werden wie Nummern aus
dem Rufnummernspeicher im Display angezeigt.
• Betätigen Sie die ‘ ’-Taste.
0 851P2385
0
0 851P2385
3.4.9 Speicher löschen
Auf diese Art und Weise löschen Sie alle Rufnummern im Rufnummern s p e i c h e r, die
Wa h l w i e d e rholungsliste sowie die Zielwahlnummern .
• Betätigen Sie die Tasten ‘ ’, ‘9’ und ‘9’ .
• Betätigen Sie die ‘ ’-Taste.
3.4.10 Babyru f
Um unbefugte Benutzung des Geräts zu verh i n d e rn, können Sie eine
B a b y rufnummer pro g r a m m i e ren. Sie können eine Nummer pro g r a m m i e ren, die bei
Betätigung einer beliebigen Taste gewählt wird .
Wenn die Funktion Babyruf aktiviert ist, kann man die Nummer im Notfall durc h
Betätigung einer beliebigen Taste, außer der ‘ ’-Taste, wählen.
89
Page 42

B a b y ruf pro g r a m m i e re n
• Betätigen Sie die Tasten ‘ ’, ‘8’ und ‘0’ .
• Geben Sie die PIN des Mobilteils ein
( G rundeinstellung ‘0 0 0 0’ ) .
• Geben Sie die Babyrufnummer ein
(max. 20 Zeichen).
• Wenn Sie bei der Eingabe einen Fehler
gemacht haben sollten, betätigen Sie die
’ ’-Taste, um die letzte Ziffer zu löschen.
• Der Babyruf ist aktiviert. Im Display werden
das WAHLSPERRE-Symbol und die
B a b y rufnummer angezeigt.
B a b y ruf deaktiviere n
• Betätigen Sie die Tasten ‘ ’, ‘8’ und ‘1’ .
• Geben Sie die PIN des Mobilteils ein
( G rundeinstellung ‘0 0 0 0’ ) .
• Betätigen Sie die Tasten ‘ ’-Taste.
B a b y ruf aktiviere n
Wenn die Babyrufnummer pro g r a m m i e rt ist, können Sie die Funktion benutzen.
Sobald Sie den Babyruf aktivieren, werden alle anderen Pro g r a m m i e rungen
w i r k u n g s l o s .
8 0 0 0 0 0
8 1 1 1 2 4
8 1 1 1 2 4
8 1 0 0 0 0
8 1
• Betätigen Sie die Tasten ‘ ’, ‘8’ und ‘2’ .
• Geben Sie die PIN des Mobilteils ein
( G rundeinstellung ‘0 0 0 0’ ) .
• Betätigen Sie die ‘ ’-Taste.
Der Babyruf ist aktiviert. Im Display werden
das WAHLSPERRE-Symbol und die
B a b y rufnummer angezeigt.
H I N W E I S E
1) Wenn der Babyruf aktiviert ist, können Sie interne Anrufe entgegennehmen, jedoch keine
Verbindungen aufbauen.
2) Wenn die Babyrufnummer gewählt wird, können Sie das Gespräch nur beenden, indem Sie
die ‘ ’-Tastebetätigen oder das Mobilteil auf die Basisstation legen.
3) Die Babyrufnummer wird nicht in die Wa h l w i e d e rholungsliste aufgenommen.
90
8 2 0 0 0 0
8 2
8 1 1 1 2 4
Page 43

3.5 PIN (Personal Identification Number) programmieren
Um die Einstellungen der Basisstation und des Mobilteils zu schützen, können Sie
zwei PIN-Codes eingeben. Um die Einstellungen zu ändern, braucht man die PIN.
Die Grundeinstellung der PIN ist (‘0 0 0 0' ) .
H I N W E I S E
Sollten Sie Ihre PIN vergessen haben, müssen Sie das Gerät zur Reparatur zum Händler bringen.
Es ist also sehr wichtig, daß Sie Ihre PIN behalten.
3.5.1 PIN des Mobilteils pro g r a m m i e re n
• Betätigen Sie die Tasten ‘ ’, ‘9’ und ‘0’ .
• Geben Sie die aktuelle PIN des Mobilteils
ein.
• Geben Sie die neue PIN des Mobilteils ein.
• Geben Sie die neue PIN des Mobilteils
nochmals ein.
• Betätigen Sie die ‘ ’-Taste.
3.5.2 PIN der Basisstation pro g r a m m i e re n
• Betätigen Sie die Tasten ‘ ’ und ‘#’ .
Sie hören einen Quittungston des
M o b i l t e i l s .
• Betätigen Sie die Tasten ‘8’ und ‘9’ .
• Geben Sie die aktuelle PIN der Basisstation
ein (4 Zeichen).
• Geben Sie die neue PIN der Basisstation
ein (4 Zeichen).
• Geben Sie die neue PIN der Basisstation
nochmals ein (4 Zeichen).
• Betätigen Sie die ’ ’-Taste.
9 0 0 0 0 0
9 0
8 9 - - - -
8 9
INT
INT
INT
INT
INT
3.6 ANMELDUNG UND ABMELDUNG
3.6.1 Anmeldung
Ein neues Mobilteil kann an der Basisstation angemeldet werd e n .
B a s i s s t a t i o n
• Betätigen Sie die Paging-Taste, bis Sie den Signalton höre n .
• Der Signalton hält 30 Sekunden an. In dieser Zeit können Sie das Mobilteil
a n m e l d e n .
91
Page 44

M o b i l t e i l
• Schalten Sie das Mobilteil aus (Halten Sie die ‘ ’-Tastelänger als 1 Sekunde
g e d r ü c k t . )
• Betätigen Sie die ‘ ’ - Taste und die Nummer der gewünschten Basisstation (1-4).
• Je nach Basisstation kann die PIN aus bis zu 8 Zeichen bestehen. Wenn Sie z.B.
ein Mobilteil an einer Basisstation mit der Nummer 1 anmelden wollen und die
Basisstation eine PIN mit 4 Zeichen hat, gehen Sie wie folgt vor:
• Betätigen Sie die ‘ ’-Taste und drücken Sie
gleichzeitig die ‘1’ .
• Geben Sie die PIN der Basisstation ein
( G rundeinstellung ‘0 0 0 0’) und betätigen Sie
anschließend die ‘#’-Taste. Warten Sie, bis
die möglichen Mobilteilnummern im Display
angezeigt werden.
- 1 - 0 0 0 0 0 0 0 0
- 1 -
• Wählen Sie die gewünschte Mobilteilnummer.
Sobald der Anmeldevorgang beendet ist,
erscheinen die Nummern der Basisstation und
des Mobilteils im Display (wenn diese
Funktion aktiviert ist).
3.6.2 Abmelden
Man kann ein Mobilteil an der Basisstation, an der es angemeldet ist, abmelden. Mit
dieser Funktion kann man z.B. ein beschädigtes Mobilteil abmelden. Anschließend
kann dann ein neues Mobilteil angemeldet werd e n .
• Betätigen Sie die Tasten ‘ ’ und ‘#’ .
Sie hören einen Quittungston des Mobilteils.
• Drücken Sie ‘9’, ‘0’ und ‘0’ .
• Geben Sie die PIN der Basisstation ein
( G rundeinstellung ‘0 0 0 0’).
Im Display werden die Nummern der
angemeldeten Mobilteile angezeigt.
• Wählen Sie die Nummer des Mobilteils, das
Sie abmelden wollen.
• Betätigen Sie die ’ ’-Taste.
1 2 3 4 5 6
- 1 - H1
INT
INT
900 ----
INT
1 2 3 4 5 6
INT
1
92
Page 45

3.7 BASISSTATION WÄHLEN
Mit dieser Funktion sucht das Mobilteil eine Basisstation und nimmt die Ve r b i n d u n g
a u f .
• Betätigen Sie die Tasten ’ ‘ und
’I N T‘ - Ta s t e .
Im Display werden die Nummern der
Basisstationen, an denen das Mobilteil
1 2 3 4
angemeldet ist, angezeigt. Die Nummer
der gewählten Basisstation blinkt.
• Wählen Sie die Nummer der
gewünschten Basisstation.
Drücken Sie z.B. ‘2’. Die Nummer der
0 1 3 4
gewählten Basisstation blinkt.
H I N W E I S E
• ‘0’ wählen : Das Mobilteil sucht alle Basisstationen an denen es angemeldet ist und setzt
sie der zuerst gefundenen Basisstation gleich.
• A n d e re Nummer: Das Mobilteil sucht nur die eingegebene Basisstation.
• Betätigen Sie die ‘ ’-Taste.
Das Mobilteil sucht jetzt nur die
Basisstation mit der Nummer 2.
3.8 GRUNDEINSTELLUNGEN
3.8.1 Grundeinstellungen des Mobilteils
Mit dieser Funktion Stellen Sie die Grundeinstellungen des Mobilteils wieder her
und löschen Sie die angemeldeten Basisstationen.
• Schalten Sie das Mobilteil aus (halten Sie die ‘ ’-Taste im Standby-Modus ca.
1 Sekunde gedrückt).
• Betätigen Sie gleichzeitig die Tasten ‘*’und ‘#’ und schalten Sie das Mobilteil
ein (‘ ’-Taste betätigen).
Die Grundeinstellungen des Mobilteils sind wiederhergestellt.
Grundeinstellungen
Ruftonmelodie 4
Ruftonlautstärke 2 (mittel)
Lautsprecherlautstärke 2 (mittel)
Tastentöne EIN
Wahlsperre AUS
Rufnummernspeicher GELÖSCHT
Wahlwiederholungsliste GELÖSCHT
Babyruf GELÖSCHT
Anzeige Basisstationnummer EIN
93
Page 46

Anzeige Mobilteilnummer EIN
Grundeinstellung Basisstation Automatische Suche (‘-0-‘)
PIN Mobilteil 0000
Alle angemeldeten Basisstationen GELÖSCHT
3.8.2 Grundeinstellungen der Basisstation
Mit dieser Funktion Stellen Sie die Grundeinstellungen wieder her und löschen Sie
die angemeldeten Mobilteile.
• Schalten Sie die Stromversorgung aus (Netzteil abziehen).
• Betätigen Sie die Paging-Taste und schalten Sie die Stromversorgung wieder ein
(Netzteil anschließen).
• Warten Sie, bis Sie den Signalton hören.
Die Grundeinstellungen wurden wiederhergestellt und Sie haben 30 Sekunden
Zeit, ein Mobilteil anzumelden.
Paramètres standard
Ruftonmelodie 4
Ruftonlautstärke 2 (mittel)
Wahlpause 1 (3 Sek.)
PSIC/EIC-Code GELÖSCHT
Notrufnummern im Speicher GELÖSCHT
Beschränkte Nummern im Speicher GELÖSCHT
Rufnummernsperre AUS
System-PIN 0000
Alle angemeldeten Mobilteile GELÖSCHT
4 Technische Daten
Funkfrequenzbereich 1.88-1.9Ghz (BW = 20 MHz)
RF-Kanäle 10 Kanäle
Kanalraster 1.728 MHz
Modulation GFSK
Sendeleistung ca. 250mW
Diversität Antenne Unterstützung durch Basisstation
Datenübertragungsgeschwindigkeit 1.152 Mbps
Sprachcodierung ADPCM (32 Kbps)
Reichweite ca. 100 m im Freien
Stromversorgung Basisstation: Netzteil
Betriebszeiten Standby: 60 Std.
Betriebsbedingungen 0°C bis 40°C
Lagertemperatur -20°C bis 60°C
ein: AC 230V ± 10%, 50Hz
aus: DC 9 V 350 mA / AC 9 V 260 mA
Mobilteil: Ni-Cd-Akku (AA, 2.4V, 650mAh)
Gesprächsdauer: 6 Std.
94
Page 47

5 Problembehebung
PROBLEM LÖSUNG
Das SCAN-Symbol erscheint • Überprüfen Sie den Akku des Mobilteils.
nicht im Display. • Legen Sie das Mobilteil auf die Basisstation,
Der Akku ist nicht geladen. • Überprüfen Sie den Akku des Mobilteils.
Die AKKU-Anzeige blinkt und • Laden Sie den Akku des Mobilteils.
Sie hören einen durchgehenden Warnton.
Sie hören den Reichweitenton. • Das Mobilteil befindet sich außerhalb des Funk-
Das Mobilteil findet die Basisstation • Wenn sich das Mobilteil außerhalb des F u n k nicht (das SCAN-Symbol blinkt). bereichs der Basisstation befindet, müssen
um den Akku zu laden.
• Entfernen Sie den Akku, bringen Sie ihn
wieder an und schalten Sie das Mobilteil ein.
• Reinigen Sie die Ladekontakte des Mobilteils
und der Basisstation
b e reichs der Basisstation. Bringen Sie das Mobilteil wieder in den Funkbereich der Basisstation.
Sie es wieder in den Funkbereich bringen.
• Überprüfen Sie das Netzteil der Basisstation.
• Führen Sie einen Reset der Basisstation durch
(Grundeinstellungen wiederherstellen).
• Melden Sie das Mobilteil ordnungsgemäß an
der Basisstation an.
• Entfernen Sie den Akku, bringen Sie ihn
wieder an und schalten Sie das Mobilteil ein.
• Trennen Sie das Netzteil der Basisstation und
schließen Sie es wieder an.
Kein Freizeichen. • Überprüfen Sie, ob die Basisstation ordnungs-
gemäß mit dem Telefonnetz verbunden ist.
Es kann keine Nummer • Stellen Sie das richtige Wahlverfahren ein
gewählt werden. (Ton- oder Impulswahl).
Das Mobilteil klingelt nicht. • Stellen Sie die Lautstärke des Ruftons neu ein.
Bei der Eingabe einer externen Telefon- • Überprüfen Sie, ob eine Wa h l s p e rre eingerichtet
nummer wird die Verbindung getrennt. ist und deaktivieren Sie diese gegebenenfalls.
Keine Tastentöne. • Aktivieren Sie die Tastentonfunktion.
95
Page 48

6 Garantie
Garantie
• 1 Jahr
• Erkundigen Sie sich bei Ihrem Händler nach der kostenlosen Umtauschgarantie.
Achtung
• Vergessen Sie nicht, den Kaufbeleg beizulegen.
Dieses Gerät wurde gemäb der Entscheidung 98/482/EG (TBR 21) des Rates europaweit zur
Anschaltung als einzelne Endeinrichtung an das öffentliche Fernsprechnetz zugelassen.
Aufgrund der zwischen den öffentlichen Fernsprechnetzen verschiedener Staaten bestehenden
Unterschiede stellt diese Zulassung an sich jedoch keine unbedingte Gewähr für einen erfolgreichen Betrieb des Geräts an jedem Netzabschlubpunkt dar.
Falls beim Betrieb Probleme auftreten, sollten Sie sich zunächst an ihren Fachhändler wenden.
Diese Liste gibt eine Übersicht über die Netze, für die dieses Gerät entwickelt worden ist und
bei welchen Probleme auftreten können.
Netz Kompatibilität Netz Kompatibilität
Österreich A Luxemburg A
Belgien A Die Niederlande A
Dänemark A Portugal A
Finnland A Spanien A
Frankreich A Schweden A
Deutschland A Grobbritannien A
Griechenland A Norwegen A
Irland C Die Schweiz A
Italien A
A – Das Gerät ist für den Betrieb mit dem Netz dieses Landes entwickelt worden.
B – Es können sich beim Betrieb des Gerätes mit dem Netz dieses Landes Probleme ergeben.
C – Das Gerät ist im Netz dieses Landes nicht geprüft worden.
96
Page 49

 Loading...