

Page 1

Blue&Me TomTom 2
Reference Guide
Page 2

2
Contents
What's in the box 6
What's in the box ................................................................................................................................. 6
Read me first 7
Installing the Dock ............................................................................................................................... 7
Switching on and off ............................................................................................................................ 7
Setting up ............................................................................................................................................ 7
GPS reception ..................................................................................................................................... 7
About MyTomTom ............................................................................................................................... 8
Setting up MyTomTom ........................................................................................................................ 8
Device not starting ............................................................................................................................... 8
Charging your device .......................................................................................................................... 9
Take care of your navigation device.................................................................................................... 9
Safety settings ..................................................................................................................................... 9
Blue&Me controls 11
Steering wheel controls .....................................................................................................................11
Cluster display ...................................................................................................................................11
Pairing and connection 12
Synchronizing your settings 14
Car Menu 15
Car Menu ...........................................................................................................................................15
Telephone ..........................................................................................................................................16
Answering a phone call .....................................................................................................................17
Telephone menu................................................................................................................................17
Trip Computer....................................................................................................................................17
Driving style information ....................................................................................................................18
Voice command and control 20
Voice control ......................................................................................................................................20
Blue&Me voice command and control ...............................................................................................20
Media Player 21
Media Player ......................................................................................................................................21
Using the Media Player .....................................................................................................................21
Page 3

3
Low Fuel Warning 23
MyTomTom for Blue&Me TomTom 2 24
MyTomTom .......................................................................................................................................24
Planning a route 26
Planning a route ................................................................................................................................26
Route summary .................................................................................................................................28
Selecting a route type ........................................................................................................................29
Frequent destinations ........................................................................................................................29
Show my frequent destinations .........................................................................................................29
Using arrival times .............................................................................................................................30
Navigation menu options ...................................................................................................................31
Planning a route in advance ..............................................................................................................32
Viewing route information ..................................................................................................................33
Voice control 34
Voice control ......................................................................................................................................34
About navigation device voice control ...............................................................................................34
Using voice control ............................................................................................................................34
Planning a trip using your voice ........................................................................................................35
Entering addresses using your voice ................................................................................................37
The Driving view 39
About the Driving View ......................................................................................................................39
The Driving View ...............................................................................................................................39
Driving View Symbols ........................................................................................................................40
Advanced lane guidance 41
About lane guidance ..........................................................................................................................41
Using lane guidance ..........................................................................................................................41
Changing your route 42
Making changes to your route ...........................................................................................................42
Change route menu ...........................................................................................................................42
View map 44
About viewing the map ......................................................................................................................44
View map ...........................................................................................................................................44
Options ..............................................................................................................................................45
Cursor menu ......................................................................................................................................45
Map corrections 48
About TomTom Map Share™ ...........................................................................................................48
Correcting a map error ......................................................................................................................48
Types of map correction ....................................................................................................................48
Page 4

4
Sounds and voices 52
About sounds and voices ..................................................................................................................52
About computer voices ......................................................................................................................52
Selecting a voice ...............................................................................................................................52
Changing the volume level ................................................................................................................52
Settings 54
About Settings ...................................................................................................................................54
2D/3D settings ...................................................................................................................................54
Advanced settings .............................................................................................................................55
Battery saving settings ......................................................................................................................55
Brightness settings ............................................................................................................................55
Change car symbol ...........................................................................................................................56
Change Home location ......................................................................................................................56
Change language ..............................................................................................................................56
Change map colors ...........................................................................................................................56
Keyboard settings ..............................................................................................................................56
Make your own menu ........................................................................................................................57
Manage Favorites ..............................................................................................................................57
Manage POIs.....................................................................................................................................58
Phone settings ...................................................................................................................................58
Planning settings ...............................................................................................................................58
Reset factory settings ........................................................................................................................60
Safety settings ...................................................................................................................................60
Set clock ............................................................................................................................................60
Set units .............................................................................................................................................60
Show POI on map .............................................................................................................................61
Speaker settings ................................................................................................................................61
Start-up settings ................................................................................................................................61
Status & Information ..........................................................................................................................61
Status bar settings .............................................................................................................................62
Switch map ........................................................................................................................................62
Turn off voice guidance / Turn on voice guidance ............................................................................62
Use night colors / Use day colors ......................................................................................................63
Voices ................................................................................................................................................63
Volume settings .................................................................................................................................63
Points of Interest 64
About Points of Interest .....................................................................................................................64
Creating POIs ....................................................................................................................................64
Using POIs to plan a route ................................................................................................................66
Showing POIs on the map .................................................................................................................66
Calling a POI .....................................................................................................................................67
Setting warnings for POIs ..................................................................................................................67
Manage POIs.....................................................................................................................................68
Help 69
About getting help .............................................................................................................................69
Using Help to phone a local service ..................................................................................................69
Help menu options ............................................................................................................................69
Hands-free calling 71
Important ...........................................................................................................................................71
Page 5

5
About hands-free calls .......................................................................................................................71
Connecting to Your Phone ................................................................................................................71
Making a call ......................................................................................................................................71
Receiving a call .................................................................................................................................72
Auto-answer ......................................................................................................................................72
Connecting more phones to your device ...........................................................................................72
Mobile phone menu ...........................................................................................................................72
Favorites 74
About Favorites .................................................................................................................................74
Creating a Favorite ............................................................................................................................74
Using a Favorite ................................................................................................................................75
Changing the name of a Favorite ......................................................................................................76
Deleting a Favorite ............................................................................................................................76
Traffic 77
About RDS-TMC................................................................................................................................77
Using traffic information .....................................................................................................................77
Taking the fastest route .....................................................................................................................78
Setting the radio frequency for RDS-TMC information......................................................................78
Minimizing delays ..............................................................................................................................78
Making commuting to work easier .....................................................................................................79
Getting more information about an incident ......................................................................................80
Checking traffic incidents in your area ..............................................................................................81
Changing traffic settings ....................................................................................................................81
Traffic incidents .................................................................................................................................81
Traffic menu .......................................................................................................................................83
Speed Cameras 84
About Speed Cameras ......................................................................................................................84
Speed Camera warnings ...................................................................................................................84
Changing the way you are warned ....................................................................................................85
Safety camera symbols .....................................................................................................................85
Report button .....................................................................................................................................86
Reporting a new speed camera while on the move ..........................................................................87
Reporting a new speed camera while at home .................................................................................87
Reporting incorrect camera alerts .....................................................................................................87
Types of fixed speed camera you can report ....................................................................................87
Speed Enforcement Zone warnings ..................................................................................................88
Speed Cameras menu ......................................................................................................................89
MyTomTom 91
About MyTomTom .............................................................................................................................91
Setting up MyTomTom ......................................................................................................................91
MyTomTom account ..........................................................................................................................92
Customer support 93
Getting help to use your navigation device .......................................................................................93
Status & information ..........................................................................................................................93
Addendum 94
Page 6

6
What's in the box
Blue&Me TomTom 2
Dock
USB cable
Documentation
What's in the box
Page 7

7
Installing the Dock
Use the Dock to install your Blue&Me TomTom 2 navigation device inside the car.
To attach the Dock, insert the base of the dock into the dash plug on the car dashboard or A-pillar.
To insert your navigation device into the dock, push the button on the front of the dock to open the top
bracket. Place the bottom of the device into the dock and then push the top bracket of the dock down
until it clicks into place.
To adjust the position of the device, unscrew the knob on the back of the device to adjust the position
using the ball joint and fix it by tightening the knob. Alternatively, press the left and right buttons on the
shaft of the dock to rotate the device in the vertical direction.
To remove the navigation device, press the button on the front of the dock and lift the navigation
device out.
To release the dock from the dashboard, push the lower button on each side of the shaft and pull out
the dock.
Switching on and off
To switch on your navigation device manually, press and hold the On/Off button until you see the
start-up screen. The first time you switch on your navigation device, it may take a short time to start.
Your Blue&Me TomTom 2 navigation device starts automatically as soon as it is powered by the dock.
To set up your navigation device you need to answer a few questions by tapping the screen. You then
need to connect your navigation device to Blue&Me in your car.
Note: Your dealer may have connected your navigation device to Blue&Me for you. If this is the
case, you can start using your device right away.
Setting up
Important: Take care to select the correct language as the language you choose will be used for all
text on the screen.
When you first switch on your device, you have to answer a few questions to set up the device.
Answer the questions by tapping the screen.
GPS reception
When you first start your Blue&Me TomTom 2 navigation device, the device may need a few minutes
to determine your GPS position and show your current position on the map. In the future, your position
will be found much faster, usually within a few seconds.
To ensure good GPS reception, you should use your device outdoors. Large objects such as tall
buildings can sometimes interfere with reception.
Read me first
Page 8

8
About MyTomTom
MyTomTom helps you manage the contents and services of your Blue&Me TomTom 2 navigation
device, as well as giving you access to the TomTom community. You log in to MyTomTom on the
TomTom website. It is a good idea to frequently connect your navigation device to MyTomTom to
ensure you always have the latest updates.
Tip: We recommend using a broadband internet connection whenever you connect your navigation
device to MyTomTom.
Setting up MyTomTom
To set up MyTomTom, do the following:
1. Connect your computer to the internet.
2. Start a browser and go to tomtom.com/getstarted.
3. Click Download now.
Your browser downloads the MyTomTom support application, which you need to install on your
computer in order to connect your device to MyTomTom. Follow the instructions on the screen if
you are asked questions while downloading.
4. When prompted, connect your device to your computer using the USB cable. Then switch your
device on.
Important: You should plug the USB cable directly into a USB port on your computer and not into a
USB hub or USB port on a keyboard or monitor.
Once the MyTomTom support application is installed, you can access MyTomTom from the notification
area on your desktop.
Tip: When you connect your navigation device to your computer, MyTomTom tells you if there are
any updates for your device.
Device not starting
In rare cases, your Blue&Me TomTom 2 navigation device may not start correctly or may stop
responding to your taps.
First, check that the battery is charged. To charge the battery, connect your device to the car charger.
It can take up to 2 hours to fully charge the battery.
If this does not solve the problem, you can reset the device. To do this, press and hold the On/Off
button for 15 seconds and release the button when your device begins to restart.
Page 9

9
Charging your device
The battery in your Blue&Me TomTom 2 navigation device charges when you connect it to the dock or
to your computer.
The light on the On/Off button is orange while the battery is charging and is green when the battery is
fully charged.
Important: You should plug the USB connector directly into a USB port on your computer and not into
a USB hub or USB port on a keyboard or monitor.
Take care of your navigation device
Never leave your Blue&Me TomTom 2 or accessories on view when you leave the car as they may
become an easy target for thieves.
It is important to take care of your device:
Your device is not designed for use in extreme temperatures and any such exposure may cause
permanent damage. Extended exposure to sunlight may lead to premature degradation of battery
performance.
Do not open the casing of your device under any circumstances. Doing so may be dangerous and
will void the warranty.
Wipe or dry the screen of your device using a soft cloth. Do not use any liquid cleaners.
Safety settings
We recommend using the safety settings to make your driving as safe as possible.
These are some of the options included in the safety settings:
Show essential menu buttons while driving
Show safety reminders
Warn when driving faster than allowed
You can also drive more safely by using voice commands to control your navigation device.
Page 10

10
Blue&Me-specific
functions
Page 11
11
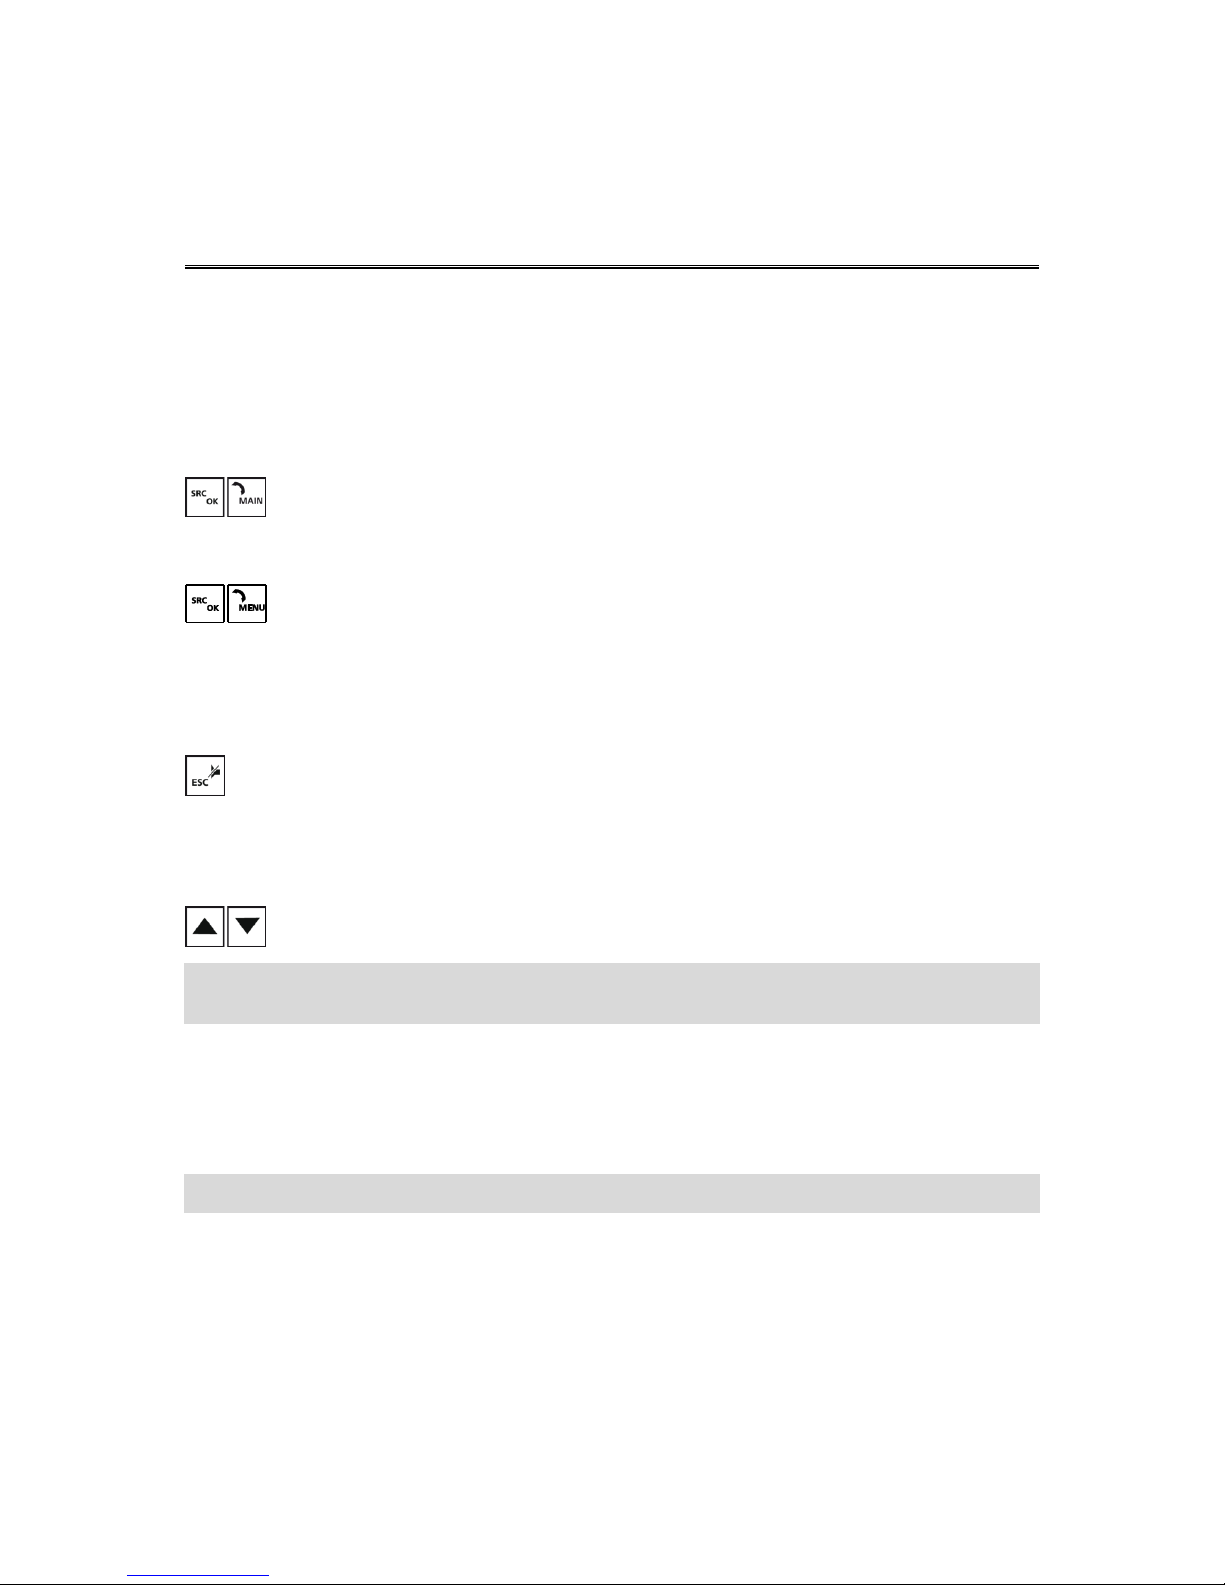
Steering wheel controls
You can control most of the functions on your Blue&Me TomTom 2 navigation device using the
buttons on the car steering wheel. To do this, press MAIN/MENU, then use the arrow keys to highlight
SAT NAV, then press SRC/OK.
Press one of these buttons to open selected items in the menu or to select or clear checkboxes:
or
Press this button to return to the Driving View and to stop using the steering wheel buttons to control
the navigation device:
Press one of these buttons to move up or down a list or menu:
Note: The remaining buttons are used for specific Blue&Me functions, for controlling the volume of
the radio and incoming calls, and to activate Blue&Me voice commands.
A message is displayed on your navigation device if you try to do something which is not supported by
the steering wheel buttons. To control these functions on your device, tap the screen or use voice
command and control. For more information, see the chapter on Voice command and control.
Cluster display
Note: Not all cars support showing navigation instructions in the cluster display.
Navigation instructions from your Blue&Me TomTom 2 navigation device are shown in your car’s
cluster display.
The display shows the next navigation instruction, the distance to next navigation instruction and the
name of the next street.
You can switch the navigation instructions in the cluster display on or off in the Blue&Me-TomTom
Preferences menu, on page 2/2, with the option Show guidance on car display.
Blue&Me controls
Page 12

12
Your Blue&Me TomTom 2 navigation device and Blue&Me in your car communicate with each other
using a Bluetooth connection.
To pair your navigation device with Blue&Me, do the following:
1. Turn your car key to the MAR position.
2. Press the MAIN button on your steering wheel to open the main menu of Blue&Me in the cluster
display of your car.
3. Use the arrow buttons on the steering wheel to navigate to the settings menu.
4. Select Settings and then Pairing/User Pairing.
A 4-digit PIN code appears on the cluster display. You use this PIN in a later step.
5. Tap the screen on your navigation device to show the Main Menu.
6. Tap Find Blue&Me.
7. Tap Yes when asked if you want to start searching for Blue&Me now.
8. Enter the Blue&Me PIN on your navigation device. This is the PIN shown earlier in the cluster
display of your car.
A message confirming that the connection is successful appears both on the navigation device
and in the cluster display. Each time the Blue&Me TomTom 2 device is connected or disconnected
from Blue&Me, you see a confirmation message.
Pairing and connection
Page 13

13
When your navigation device and your car have been paired, the Car Menu button appears in the
Main Menu of the navigation device.
From the Car Menu, you can access the functions specific to your Blue&Me TomTom 2. The Car
Menu button changes depending on the model of your car and is updated whenever you connect your
device with a new car.
In future, the connection is activated automatically each time the navigation device is switched on and
either the car key is switched to the "ignition on" position or the car engine is running.
In some cases, you may need to repeat the pairing procedure. Note that the PIN code will change
every time. To connect your Blue&Me TomTom 2 device to a different car, you need to carry out the
complete pairing and connection procedure.
Note: If a connection problem occurs, tap Settings on the device. Then tap Reset factory settings
and repeat the pairing procedure.
Page 14

14
You can synchronize some settings on your Blue&Me TomTom 2 navigation device with your car
settings.
Settings that can be synchronized include language, time and units. You can also choose to use a
branded car symbol and start-up screen that matches your car.
When you first connect your navigation device to Blue&Me, automatic synchronization of settings is
switched on.
If synchronization is switched on, this happens every time you connect your navigation device to
Blue&Me and every time you change the car settings.
You can control the synchronization of individual properties in the Blue&Me Preferences menu.
Synchronizing your settings
Page 15

15
Car Menu
Tap Car Menu in the Main Menu to access Telephone, Trip Computer, eco:Drive info (or Fuel
efficiency info, or EcoTrend info depending on your car) and Media player.
Tip: The car image displayed in the Car Menu button and in the buttons within the Car Menu is
branded. It resembles the car that the navigation device is connected to.
Car Menu
Page 16

16
The Car Menu looks as follows for different brands of car:
Telephone
You can use your Blue&Me TomTom 2 navigation device to manage your hands-free calls. You should
establish a Bluetooth connection between your phone and Blue&Me in your car, and not between your
phone and the navigation device.
You can also use Blue&Me to handle hands-free phone calls without the navigation device. However,
if the navigation device is in the dock and switched on, you can access all the functions through the
navigation device, for example, answering incoming calls and calling POIs.
Note: For information about hands-free calling and Blue&Me in your car, see the Blue&Me user
guide.
Page 17

17
Answering a phone call
When someone calls you, the caller's name and phone number are shown.
Tap the buttons on the screen of your Blue&Me TomTom 2 navigation device to accept or reject
incoming calls.
During a call, tap this button in the Driving View to access the Call... menu.
Using this menu you can end the call, switch between calls or access the Telephone menu.
Telephone menu
To access the Telephone menu, do the following:
1. Tap Car menu in the Main Menu on your navigation device.
2. Tap Telephone.
3. Tap Dial number to enter a phone number using the keyboard on the screen.
You can also access the list of recently dialed numbers and the phone book.
Trip Computer
Your Blue&Me TomTom 2 navigation device shows constantly updated information about your current
fuel consumption and remaining driving range. The range is the distance you can travel with the
amount of fuel currently in your car.
To see this information on your device, tap Car Menu in the Main Menu on your navigation device,
then tap Trip Computer.
Note: Part of this functionality is not available when driving using CNG and is less reliable when
driving using LPG.
The information about trip A and B is the same as shown in the dashboard display but is shown in one
screen. The type of information shown depends on your car.
Note: For further information about using trip information, see the guide that was supplied with your
car.
Page 18

18
Driving style information
Driving style information helps you drive in a way that limits the environmental impact.
It can improve the efficiency of your driving by analyzing your driving style. It helps you to use less
fuel, reduce CO2 emissions and save money.
On the left of the screen for cars where a gear shift indicator is available, the indicator suggests when
you should change gear by repeating the information shown in the gear shift indicator on the cluster
display. On the right, the ecological impact of your driving is shown.
To view this information, do the following:
1. Tap Car Menu in the Main Menu on your navigation device.
2. Tap eco:Drive info, Fuel efficiency info or EcoTrend info depending on your car.
The screen is shown until you tap Done.
Page 19

19
Information about your driving style is not available for all types of car engine. If you are using LPG
fuel, the fuel efficiency information is only shown to provide an estimation of your driving style. If you
are using CNG fuel, this function is not available.
Page 20

20
Voice control
There are two types of voice control.
The first type is provided by Blue&Me and you can use it to control Blue&Me features. You do this
using a button on your steering wheel.
The second type is provided by your navigation device and you can use it to plan routes and control
other features of your navigation device. You do this by initially tapping the screen on the navigation
device.
Blue&Me voice command and control
Press this button on your steering wheel to start using command and control provided by Blue&Me:
Give one of the following voice commands:
Say "SatNav" to start using buttons on the steering wheel to control your navigation device.
Say "Car Menu" to open the Car menu, then say one of these voice commands:
"Telephone"
"Trip Computer"
"eco:Drive info" or "Fuel Efficiency info" or "EcoTrend info" depending on your car
"Media player."
The menu opens for your chosen command. Blue&Me lists the commands available for that menu.
To return to the Driving View at any time, press Done on your navigation device.
Note: For a list of all Blue&Me voice commands see the FAQ on tomtom.com/support. For
additional information about Blue&Me voice command and control, please see the Blue&Me manual
that was delivered with your car.
Voice command and control
Page 21

21
Media Player
You can use your Blue&Me TomTom 2 navigation device to operate the Blue&Me Media Player.
You can also use Blue&Me in your car to operate the Media Player without using the navigation
device. However, if the navigation device is in the Dock and switched on, you can control the Media
Player through the navigation device.
Using the Media Player
To start using the Media Player, do the following:
1. Insert the USB device that contains your music collection into the USB slot in your car.
2. Tap Car menu in the main menu of your navigation device.
3. Tap Media Player.
The Media Player opens.
On the right, you can see the current song title and the artist, as well as the album name, if available,
or the library name.
Tap the left and right arrows to select the previous or next song.
Tap the up and down arrows to select the previous or next item in the library. For example, if you
selected the song from a folder, tap the arrows to go to the next or previous folder.
Music is played using the car loudspeakers, just like when the media player is operated via Blue&Me.
Media Player
Page 22

22
Tap USB library to open the library menu.
Tap Play anything to select a song at random. The Media Player starts playing this song. When the
Media Player starts playing a new song, a message is displayed showing the title of the song.
Tap the other buttons to select a song using that category.
Tap USB settings to open the USB settings menu.
In the USB settings menu, you can choose to start playing a song as soon as Blue&Me is switched on,
shuffle songs during playback, and repeat the song that is currently playing.
Note: For more information about the Media player, see the guide that was supplied with your car.
Your car may have both USB and AUX IN. The above functionality is not available if you plug your
media player into the AUX IN jack. The AUX IN jack is a headset socket and cannot be controlled
via Blue&Me TomTom 2.
Page 23

23
When the amount of fuel in your car drops into the reserve, your Blue&Me TomTom 2 navigation
device gives you a warning.
Tap Yes to be routed to the gas station closest to your route. If you do not have a route planned, tap
Yes to be taken to the gas station closest to your current location.
Your Blue&Me TomTom 2 navigation device knows which type of fuel your car uses and guides you to
a gas station that offers the correct type of fuel.
Note: The Low Fuel Warning is not available in all cars.
Low Fuel Warning
Page 24

24
MyTomTom
The MyTomTom pages of tomtom.com on your computer have an appearance that matches the brand
of your car.
Your Blue&Me TomTom 2 navigation device remembers the brand of your car and the MyTomTom
pages of tomtom.com are updated to match your car.
For more information about MyTomTom, see the chapter About MyTomTom.
MyTomTom for Blue&Me TomTom 2
Page 25

25
TomTom functions
Page 26

26
Planning a route
Important: In the interest of safety and to reduce distractions while you are driving, you should always
plan a route before you start driving.
To plan a route on your Blue&Me TomTom 2, do the following:
1. Tap the screen to open the Main menu.
2. Tap Navigate to...
3. Tap Address.
You can change the country or state setting by tapping the flag before you select a city.
4. Enter the town or city name.
Tip: Instead of typing the address, tap the microphone button to enter the address by speaking to
your Blue&Me TomTom 2.
Towns with similar names are shown in the list while you type.
When the correct city or town appears in the list, tap the name to select the destination.
5. Enter the street name.
Streets with similar names are shown in the list while you type.
Planning a route
Page 27

27
When the correct street name appears in the list, tap the name to select the destination.
6. Enter the house number, then tap Done.
7. The location is shown on the map. Tap Select to continue or tap Back to enter another address.
Tip: If you want your final destination to be a parking lot, tap Park nearby and select a location
from the list of parking lots close to your general destination.
8. When the new route is shown, tap Done.
For more information about the route, tap Details.
Page 28

28
To plan a different route, tap Change route.
Your Blue&Me TomTom 2 starts to guide you to your destination, using spoken instructions and
on-screen directions.
Route summary
The route summary shows an overview of your route, the remaining distance to your destination and
the remaining estimated trip time.
To view the route summary, tap the right-hand panel on the status bar in the Driving view or tap View
route in the Main menu and then tap Show route summary.
If you have a TomTom Traffic service or an RDS-TMC receiver, the route summary also shows traffic
information about delays on your route.
Page 29

29
Selecting a route type
Every time you plan a route, you can choose to be asked about the type of route you want to plan. To
do this, tap Settings followed by Planning settings and then tap Ask me every time I plan.
The types of route you can choose from are as follows:
Fastest route - the route which takes the least time.
Eco route - the most fuel-efficient route for your trip.
Shortest route - the shortest distance between the locations you set. This may not be the
quickest route, especially if the shortest route is through a town or city.
Avoid highways - a route which avoids highways.
Walking route - a route designed for making the trip on foot.
Bicycle route - a route designed for making the trip on a bicycle.
Frequent destinations
If you often make trips to the same destinations, you can set your Blue&Me TomTom 2 to ask if you
want to plan a route to one of these locations every time the device starts. This is faster than planning
a route in the normal way.
To select a new destination, tap Start-up settings in the Settings menu and select Ask for a
destination. Select a button to use for this destination and answer the questions about the
destination.
Show my frequent destinations
You can set your Blue&Me TomTom 2 to ask if you want to plan a route to one of your frequently
visited destinations every time the device starts.
Page 30

30
To change this setting, do the following:
1. Tap Start-up settings in the Settings menu and then select Ask for a destination.
2. Tap Yes, then tap Yes again to begin entering information about the destination.
3. Select a symbol for the destination and tap Done to set the symbol, then tap Yes.
Tip: To add new destinations, select one of the numbered symbols and enter a name for the new
destination button.
4. Tap Yes and if required enter a new name, then tap Done.
5. Enter the address details in the same way you enter an address when planning a route, then tap
Done.
6. If you want to set more destinations, repeat the steps above. Otherwise, tap Done.
7. You are asked if you want to change the start-up image.
8. If you want to change the image, tap Yes then follow the instructions shown on the screen.
Otherwise, tap No.
Every time your Blue&Me TomTom 2 starts, you are asked if you want to plan a route. If you tap
Cancel, you are shown the Main Menu.
Using arrival times
When you plan a route, your Blue&Me TomTom 2 asks you if you need to arrive at a particular time.
Tap YES to enter a preferred arrival time.
Your Blue&Me TomTom 2 calculates your arrival time and shows you whether you will arrive on time.
You can also use this information to work out when you need to leave. If your Blue&Me TomTom 2
shows that you will arrive 30 minutes early, you can wait and leave in 30 minutes time, rather than
arrive early.
Your arrival time is constantly recalculated during your trip. The status bar shows whether you will
arrive on time or if you are going to be late, as shown below:
You will arrive 55 minutes before the arrival time you entered.
If the estimated arrival time is more than five minutes before the time you
entered, it is shown in green.
You will arrive 3 minutes before the arrival time you entered.
If the estimated arrival time is less than 5 minutes before the time you entered,
it is shown in yellow.
You will arrive 19 minutes late.
If the estimated arrival time is later than the time you entered, it is shown in
red.
Status bar settings
Tap Status bar settings in the Settings menu, to enable or disable arrival
time notifications.
To enable arrival time notifications, select Leeway.
Page 31

31
Navigation menu options
When you tap Navigate to or Drive to, you can set your destination in many ways, not just by entering
the address. The other options are listed below:
Home
Tap this button to navigate to your Home location.
You will probably use this button more than any other.
Favorite
Tap this button to select a Favorite as your destination.
Address
Tap this button to enter an address as your destination.
Recent destination
Tap this button to select your destination from a list of places you have
recently used as destinations.
Point of Interest
Tap this button to navigate to a Point of Interest (POI).
ZIP code
Tap this button to enter a ZIP code as a destination.
In some countries, the zip code can be used to identify the place and street. In
other countries, the zip code only identifies the place, so you need to enter the
street name separately.
Point on map
Tap this button to select a point on the map as your destination using the map
browser.
Latitude Longitude
Tap this button to enter a destination using latitude and longitude values.
Page 32

32
Position of last
stop
Tap this button to select your last recorded position as your destination.
Planning a route in advance
You can use your Blue&Me TomTom 2 to plan a route in advance, selecting your starting point and
your destination.
Here are some more reasons to plan a route in advance:
Find out how long a trip is going to take before you start.
You can also compare trip times for the same route at different times of the day or on different
days of the week. Your Blue&Me TomTom 2 uses IQ Routes when planning a route. IQ Routes
calculates routes based on the real average speeds measured on roads.
Study the route of a trip you are planning.
Check a route for someone who is coming to visit you and then explain the route to them in detail.
To plan a route in advance, follow these steps:
1. Tap the screen to bring up the Main menu.
2. Tap the arrow button to move to the next menu screen and tap Plan route.
This button is shown while there is no planned route on your Blue&Me TomTom 2.
3. Select the starting point for your trip in the same way that you would select your destination.
4. Set the destination for your trip.
5. If Planning settings are set to Ask me every time I plan, select the type of route you want to plan:
Fastest route - the route which takes the least time.
Eco route - the most fuel-efficient route for your trip.
Shortest route - the shortest distance between the locations you set. This may not be the
quickest route, especially if the shortest route is through a town or city.
Avoid highways - a route which avoids highways.
Walking route - a route designed for making the trip on foot.
Bicycle route - a route designed for making the trip on a bicycle.
6. Choose the date and time that you will make the trip you are planning.
Your Blue&Me TomTom 2 uses IQ Routes to work out the best possible route at that time. This is
useful to see how long a trip takes at different times of the day or on different days of the week.
Your Blue&Me TomTom 2 plans the route between the two locations you selected.
Page 33

33
Viewing route information
You can access these options for the route you last planned by tapping View route in the Main Menu
or the Details button on the route summary screen.
You can then select from the following options:
Show instructions
Tap this button for a list of all the turn instructions on the route.
This is very useful if you need to explain a route to someone else.
Show map of route
Tap this button to see an overview of the route using the map browser.
Show route demo
Tap this button to watch a demo of the trip. You can interrupt the demo at any
time by tapping the screen.
Show route
summary
Tap this button to open the route summary screen.
Show destination
Tap this button to see a preview of your destination.
You can navigate to a parking lot near your destination, and view any
available information about your destination, for example, the phone number.
Show traffic on
route
Tap this button to see all the traffic incidents on your route.
Note: This button is only shown if your device has a traffic subscription or is
connected to an RDS-TMC Receiver. Traffic information is not available in
all countries or regions. For more information about TomTom traffic
information services, go to tomtom.com/services.
Page 34

34
Voice control
There are two types of voice control.
The first type is provided by Blue&Me and you can use it to control Blue&Me features. You do this
using a button on your steering wheel.
The second type is provided by your navigation device and you can use it to plan routes and control
other features of your navigation device. You do this by initially tapping the screen on the navigation
device.
About navigation device voice control
Note: Voice control is not supported on all devices or in all languages.
Instead of tapping the screen to control your Blue&Me TomTom 2, you can use your voice to control
your Blue&Me TomTom 2.
For example, to increase the volume on your Blue&Me TomTom 2, you can say, "Increase volume."
To view the list of available commands, tap Help in the Main menu then tap Product manuals and
then tap What to say.
Important: Voice control requires a computer voice. When there are no computer voices installed on
your Blue&Me TomTom 2, this feature is not available.
To select a computer voice, tap Voices in the Settings menu, then tap Change voice and select a
computer voice.
Using voice control
Voice control is switched on by default if it is supported for your chosen language.
To switch off voice control and remove the button from the Driving view, tap Voice control in the
Settings menu and select Disable voice control.
The following example shows how to use voice control to plan a trip to your Home address:
1. Tap the microphone button in the Driving view to turn on the microphone.
You see a screen with examples of commands you can say.
Tap What to say to see a full list of commands you can say. Alternatively, tap Settings in the
Main menu, tap Voice control and then tap What to say.
2. When you hear "Say a command" followed by a tone, say a command of your choice. For
example, you can say "Drive home." Your Blue&Me TomTom 2 is only ready to listen after your
hear the tone.
Voice control
Page 35

35
While you are speaking the microphone monitor shows how well the device can hear your voice:
A green bar means the device can hear your voice.
A red bar means your voice is too loud for the device to recognize individual
words.
A gray bar means your voice is too quiet for the device to recognize individual
words.
For some phrases, your Blue&Me TomTom 2 repeats what you say and asks for confirmation.
Tip: For the best recognition of what you say, speak normally without trying to articulate words in
an unnatural way.
3. If the command is correct, say "Yes."
If the command is incorrect, say "No" and repeat the command after you hear the prompt and tone
again.
Your Blue&Me TomTom 2 plans a route from your current location to your destination.
Tip: To stop your Blue&Me TomTom 2 from listening for further commands, say "Cancel." To go
back one step, say "Back."
Planning a trip using your voice
Important: In the interest of safety and to reduce distractions while you are driving, you should always
plan a route before you start driving.
Note: It's not possible to plan a route using your voice for all maps in all countries, or in all
languages.
To plan a route to an address using speech, do the following:
1. Tap the voice control button in the Driving view.
2. When you hear the tone, say, "Navigate to address" or "Drive to address."
Tip: Your device has either Navigate to or Drive to on the button in the Main Menu. When
planning a route to an address using speech, say "Navigate to address" if the button shows
Navigate to or "Drive to address" if the button shows Drive to.
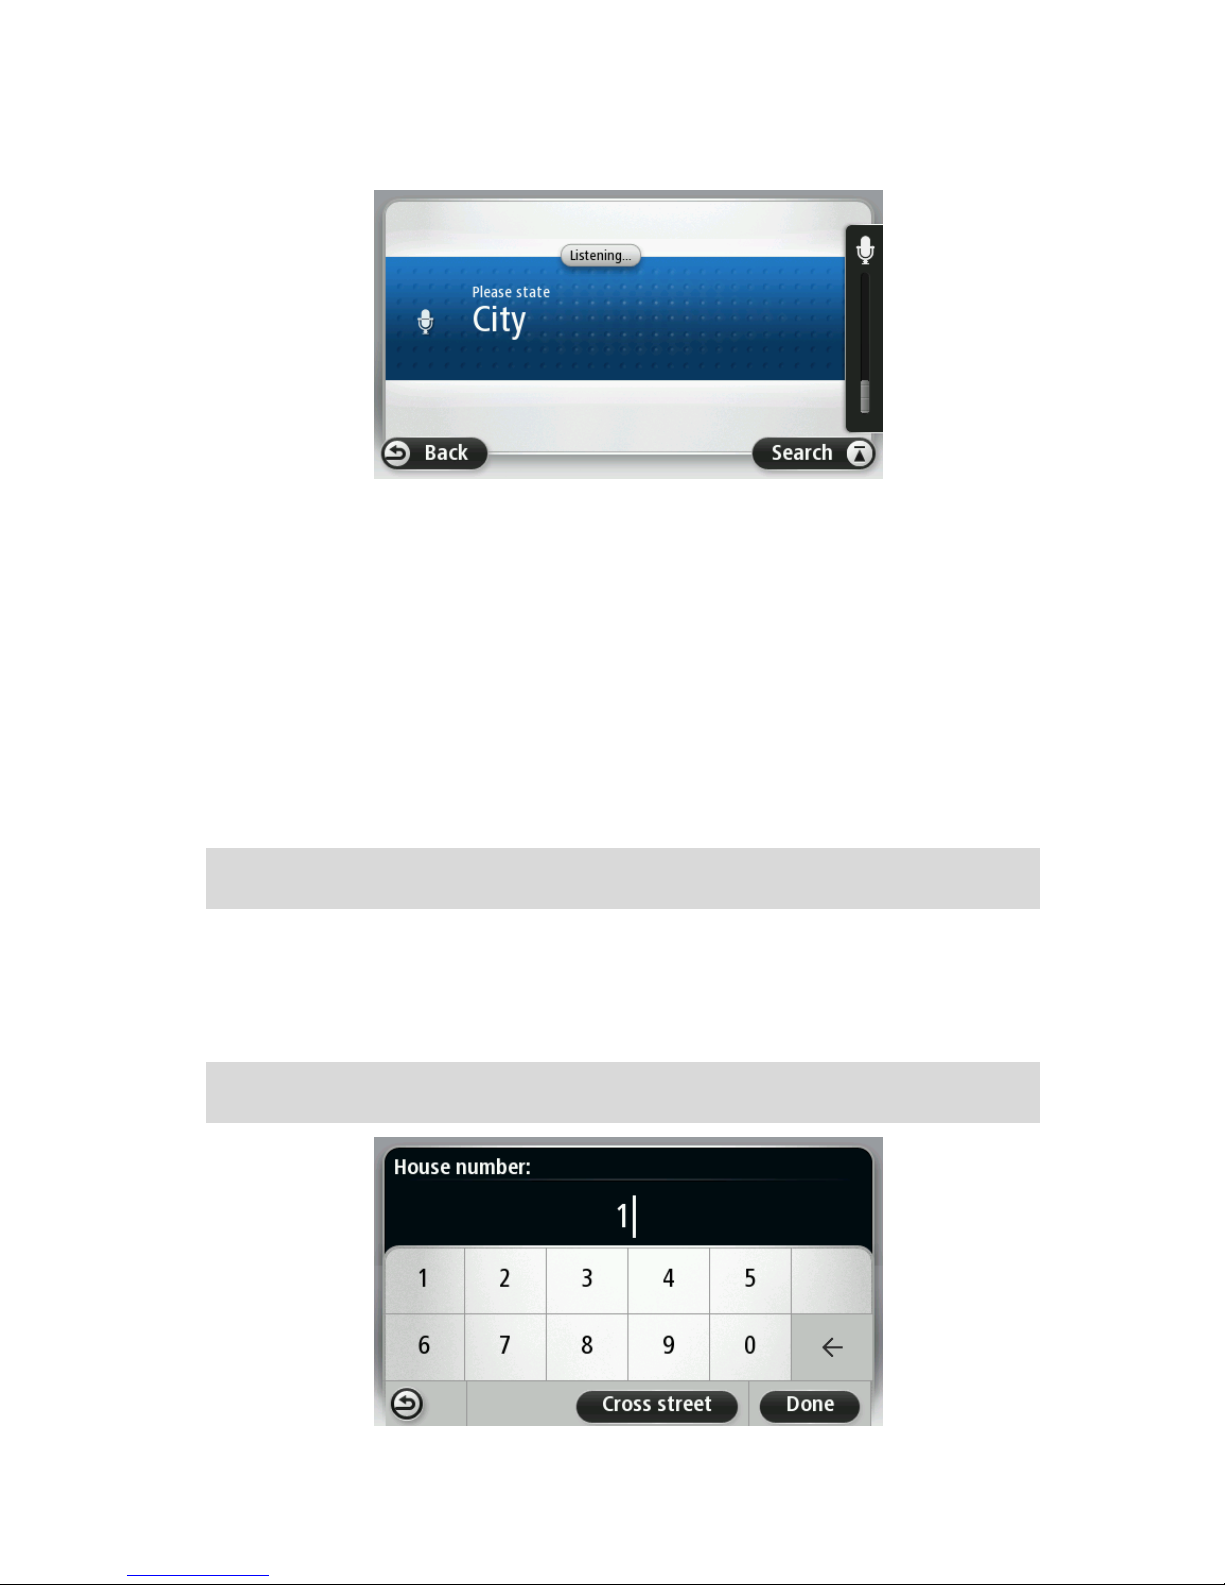
3. Say the name of the town.
Page 36
36
Your Blue&Me TomTom 2 shows a list of towns which sound similar to what you said and tells you
which town is at the top of the list.
If the town you hear is the same as the town you requested then say, "Done" or "OK" or "Yes" or
"One" or tap the town at the top of the list.
If the town you hear is incorrect, but the correct town is in the list, say the number next to the
correct town or tap the name of the town.
For example, if the correct city is Rotterdam and this is shown as the third item in the list, you can
say, "Three" or tap the name, Rotterdam.
If the name is not in the list, then say "Back" or "No" or tap Back to return to the previous screen
and say the town again when you hear the tone.
4. Say the street name.
Your Blue&Me TomTom 2 shows a list of street names which sound similar to what you said and
tells you which street name is at the top of the list.
If the street name you hear is the same as the street name you requested then say, "Done" or
"OK" or "Yes" or "One" or tap the street name at the top of the list.
Tip: Different locations may have the same name, such as a road that spans multiple zip codes.
When this happens you need to look at the screen and tap the correct location.
If the street name you hear is incorrect, but the correct street name is in the list, say the number
next to the correct street name or tap the street name in the list.
If the street name is not shown in the list, say "Back" or "No" or tap Back to return to the previous
screen and then say the street name again when you hear the tone.
5. Say the house number.
Important: Numbers need to been spoken in the same language as the button names and
menus on your Blue&Me TomTom 2.
Page 37
37
Numbers should be pronounced in the same way you normally say a number, in one continuous
sentence. So 357 is pronounced, "Three hundred and fifty seven."
If the number is shown correctly then say, "Done" or "OK" or tap the keyboard to enter the number.
If the number is shown incorrectly then say, "Back" or "No" or tap the Backspace key and repeat
the number.
Tip: If you say "Back" when there are no numbers on the screen, your Blue&Me TomTom 2 will
return you to the previous screen.
When the number is shown correctly say, "Done" or "OK." Alternatively, enter the number by
tapping the screen.
6. When the route has been calculated and the route summary is shown, tap Done.
Your Blue&Me TomTom 2 starts to guide you to your destination, using spoken instructions and
on-screen directions.
Entering addresses using your voice
Important: In the interest of safety and to reduce distractions while you are driving, you should always
plan a route before you start driving.
Even if you don't use voice control to start planning a trip, you can still use your voice to enter the
address.
To start planning a trip, tap Navigate to in the Main menu, then tap Spoken Address or Address.
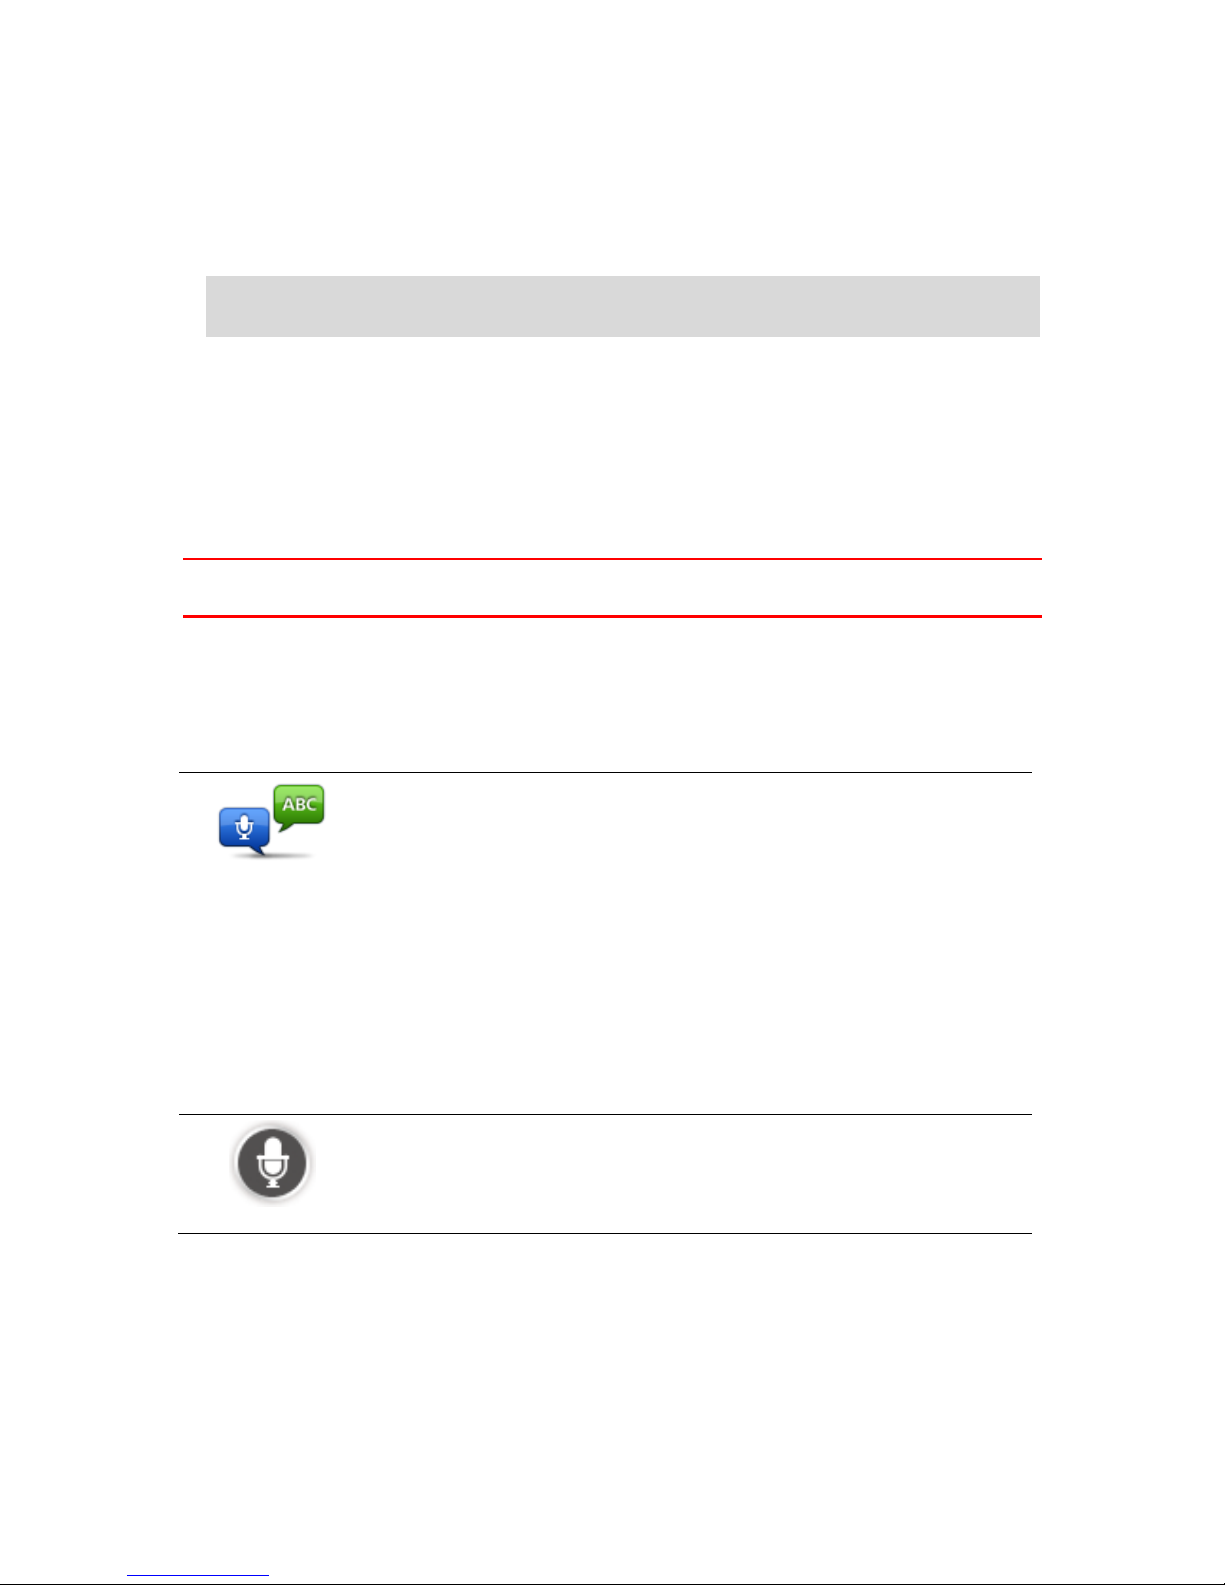
To enter the destination using your voice, tap one of the following buttons:
Spoken address
Tap this button to enter an address entirely using speech.
Spoken address helps you to enter information without tapping the screen.
This option recognizes the following spoken terms:
Commands: Yes, No, Back, Done, OK, Crossing.
Street names.
Cities and towns and their centers.
Favorites, zip codes and POIs.
Plan alternative route, Recalculate original, Avoid roadblock, Minimize
delays, Cancel route, Travel via... and Recent destination.
Tap this button at the base of the keyboard to use speech to enter an address.
When the button is gray, you cannot use speech to enter an address.
Page 38

38
Tips
Within the USA, first select a state. You can then use spoken address entry to enter the remainder
of the address.
Your Blue&Me TomTom 2 recognizes places and street names when they are spoken in the local
language using local pronunciation.
Spoken address entry is not possible for zip codes which must be entered using the keyboard.
Spoken address entry is not available for all maps in all countries.
Page 39

39
About the Driving View
When your Blue&Me TomTom 2 device starts for the first time, you are shown the Driving View along
with detailed information about your current position.
Tap the center of the screen at any time to open the Main Menu.
You can choose the screen shown when you switch on your device by tapping Settings in the Main
Menu, then tapping Start-up settings.
The Driving View
1. Zoom button - tap the magnifying glass to show buttons for zooming in and out.
2. Quick menu - to enable the quick menu, tap Make your own menu in the Settings menu.
3. Your current position.
4. Road sign information or the next street name.
5. Traffic sidebar. Tap the sidebar to open the Traffic menu.
The traffic sidebar is only shown if your device has either an HD Traffic subscription or an
RDS-TMC Receiver connected. Traffic information is not available in all countries or regions.
6. Battery level indicator.
7. Microphone button for voice command and control.
8. The time, your current speed and the speed limit, if known. To see the difference between your
preferred arrival time and your estimated arrival time, check the Leeway checkbox in the Status
bar settings.
Tap this part of the status bar to switch between a 3D map and a 2D map.
9. The name of the street you are on.
The Driving view
Page 40

40
10. Navigation instruction for the road ahead and the distance to next instruction. If the second
instruction is less than 500ft after the first instruction, you see it shown immediately instead of the
distance.
Tap this part of the status bar to repeat the last voice instruction and to change the volume. You
can also tap here to mute the sound.
11. The remaining trip time, the remaining distance and your estimated arrival time.
Tap this part of the status bar to open the Route Summary screen.
To change the information shown in the status bar, tap Status bar in the Settings menu.
Driving View Symbols
Mobile phone not connected - this symbol is shown only when navigation
device is not connected to Blue&Me and the selected mobile phone is not
connected to your device. You must have already established a connection to
this phone.
Sound muted - this symbol is shown when the sound has been muted.
To turn the sound back on, tap the middle panel in the status bar.
Battery - this symbol is shown when the battery level is low.
When your see this symbol, you should charge your navigation device as soon
as possible.
Connected to computer - this symbol is shown when your navigation device is
connected to your computer.
Page 41

41
About lane guidance
Note: Lane guidance is not available for all junctions or in all countries.
Your Blue&Me TomTom 2 helps you prepare for highway exits and junctions by showing the correct
driving lane for your planned route.
As you approach an exit or junction, the lane you need is shown on the screen.
Using lane guidance
There are two types of lane guidance:
Lane images
To turn lane images off, tap Settings in the Main Menu, then tap Advanced settings. Clear the
checkbox for Show lane images.
Tip: Tap anywhere on the screen to return to the Driving View.
Instructions in the status bar
Tip: If no lane guidance is shown in the status bar and all lanes are highlighted, you can use any
lane.
Advanced lane guidance
Page 42
42
Making changes to your route
After you plan a route, you may want to change the route or even the destination. There are various
ways to change your route without the need to completely replan the entire trip.
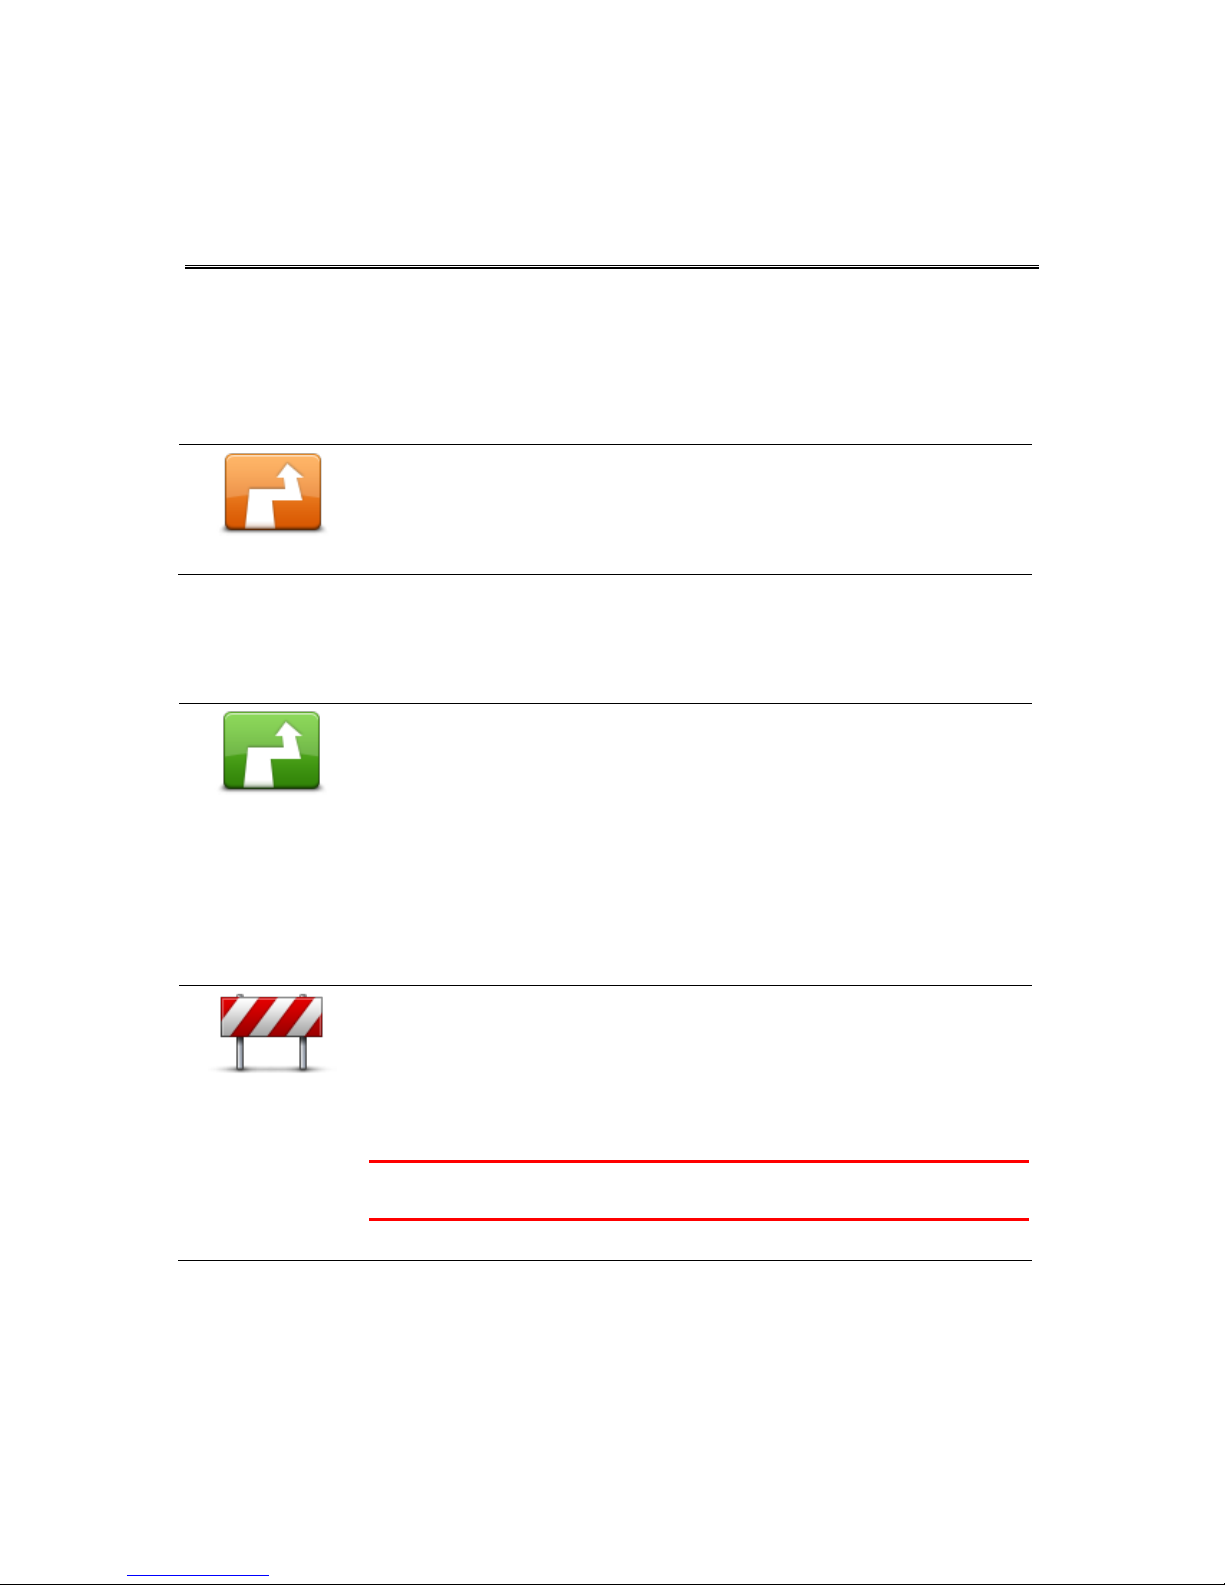
To change the current route, tap Change route in the Main menu:
Change route
Tap this button to change the current route.
This button is only shown while there is a planned route on your Blue&Me
TomTom 2.
Change route menu
To change the current route or your destination, tap one of the following buttons:
Calculate
alternative
Tap this button to find an alternative to the current route.
This button is only shown while there is a planned route on your Blue&Me
TomTom 2.
This is a simple way to search for a different route to your current destination.
Your Blue&Me TomTom 2 calculates a new route from your current location to
reach your destination using completely different roads.
The new route is shown next to the original route so that you can select the
route you want to use.
Avoid roadblock
Tap this button while driving on a planned route to avoid a roadblock or traffic
congestion on the road ahead.
Your Blue&Me TomTom 2 will suggest a new route which avoids the roads on
your current route for the selected distance.
If the roadblock or traffic congestion suddenly clears, tap Recalculate route to
replan your original route.
Important: Be aware that when a new route is calculated, you might
immediately be asked to turn off the current road.
Changing your route
Page 43

43
Minimize delays
Tap this button to avoid traffic delays on a planned route.
It is not always possible to avoid all traffic delays. Your Blue&Me TomTom 2
will check for traffic delays on your route and calculate the best route to avoid
all or most of the delays.
Note: This button is only shown if your device has a traffic subscription or is
connected to an RDS-TMC Receiver. Traffic information is not available in
all countries or regions. For more information about TomTom traffic
information services, go to tomtom.com/services.
Change destination
Tap this button to change the current destination.
When you change the destination, you are shown the same options and asked
to enter the new address in the same way as when you plan a new route.
Avoid part of route
Tap this button to avoid part of the current route.
You are shown a list of the street names on your route. When you tap one of
the street names, your Blue&Me TomTom 2 calculates a detour to avoid the
selected street. The route summary shows both the new route and your
original route. Tap the panel at the right to select one of the routes and then
tap Done.
If you do not want to use either of the routes shown in the route summary, tap
Change route to find another way to change your route.
Travel via...
Tap this button to change your route by selecting a location you want to travel
past, perhaps to meet someone along the way.
When you select a location to travel past, you are shown the same options
and asked to enter the new address in the same way as when you plan a new
route.
Your Blue&Me TomTom 2 calculates the route to your destination via the
selected location.
The selected location is shown on the map using a marker.
Unlike when you reach your destination, no warning is given when you travel
past a marked location.
Page 44
44
About viewing the map
You can view the map in the same way as you might look at a traditional paper map. The map shows
your current location and many other locations such as Favorites and POIs.
To view the map in this way, tap View map or View route in the Main menu.
You view different locations on the map by moving the map across the screen. To move the map,
touch the screen and drag your finger across the screen. If your device supports gestures, you can
also zoom in and out by touching the screen with your thumb and forefinger and sliding your fingers in
and out.
To select a location on the map, tap the location on the map. The cursor highlights the location and
displays useful information about the location in an information panel. Tap the information panel to
create a Favorite or plan a route to that location.
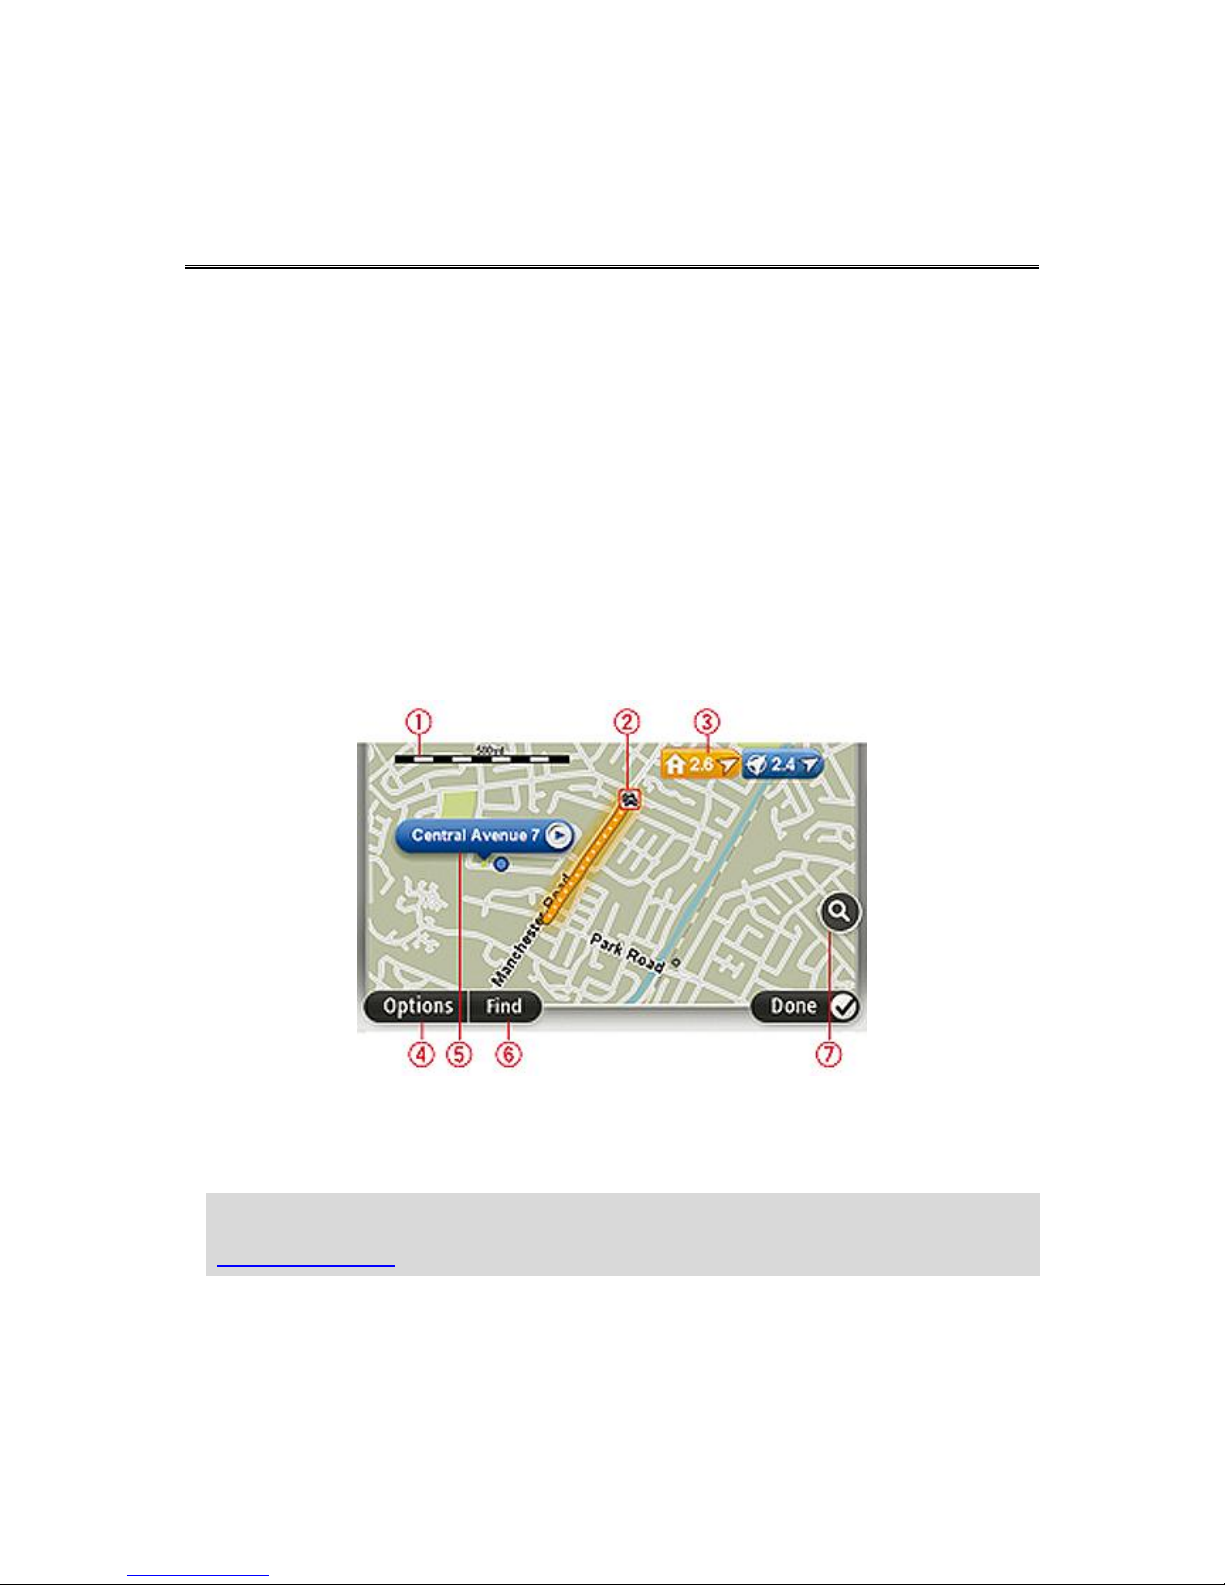
View map
1. The scale bar
2. Traffic - current traffic incidents. Use the Options button to select whether traffic information is
shown on the map. When traffic information is shown on the map, POIs and Favorites are not
shown.
Note: To use a TomTom traffic information service, you may need a subscription or a receiver.
Traffic services are not supported in all countries. For more information and to subscribe, visit
tomtom.com/services.
3. Marker
Markers point to your current location (blue), your home location (yellow) and your destination
(red). The marker shows the distance to the location.
Tap a marker to center the map on the location pointed to by the marker.
View map
Page 45

45
You can also set your own marker. Tap the cursor button, then tap Set marker position to place a
green marker at the cursor position.
To turn markers off, tap Options, then Advanced and clear the Markers checkbox.
4. Options button
5. The cursor with street name balloon
Tap the button in the street name balloon to open the cursor menu. You can navigate to the cursor
position, make a Favorite of the cursor position, or find a Point of Interest near the cursor position.
6. The Find button
Tap this button to find specific addresses, favorites or Points of Interest.
7. The zoom bar
Zoom in and out by moving the slider.
Options
Tap the Options button to set the information shown on the map and show the following information:
Traffic - select this option to show traffic information on the map. When traffic information is
shown, POIs and Favorites are not shown.
Note: To use a TomTom traffic information service, you may need a subscription or a receiver.
Traffic services are not supported in all countries or regions. For more information and to
subscribe, visit tomtom.com/services.
Names - select this option to show street and city names on the map.
Points of interest - select this option to show POIs on the map. Tap Choose POI to choose
which POI categories are shown on the map.
Images - select this option to show satellite images of the area being viewed. Satellite images are
not available in every map or for every location on the map.
Favorites - select this option to show your Favorites on the map.
Tap Advanced to show or hide the following information:
Markers - select this option to enable markers. Markers point to your current location (blue), your
home location (yellow) and your destination (red). The marker shows the distance to the location.
Tap a marker to center the map on the location the marker is pointing to.
To create your own marker, tap the cursor button. Then tap Set marker position to place a green
marker at the cursor position.
To disable markers, tap Options, then tap Advanced and deselect Markers.
Coordinates - select this option to show GPS coordinates in the lower left corner of the map.
Cursor menu
The cursor can be used to do more than highlight a location on the map. Position the cursor on a
location on the map, then tap Cursor and then tap one of the following buttons:
Navigate there
Tap this button to plan a route to the cursor position on the map.
Page 46
46
View location
Tap this button to view information about the location on the map such as the
address.
Set marker
position
Tap this button to create your own green marker and place it at the cursor
position.
If a green marker exists, this button changes to Delete marker.
Find POI nearby
Tap this button to find a POI near the cursor position on the map.
For example, if the cursor currently highlights a restaurant location on the
map, you can search for a nearby parking garage.
Correct location
Tap this button to make a map correction for the cursor position on the map.
You can make the correction only on your own map or you can share the
correction with the TomTom Map Share community.
Call...
Tap this button to call the location at the cursor position.
This button is only available if your Blue&Me TomTom 2 has the phone
number for the location.
The phone numbers for many POIs are available on your Blue&Me TomTom
2.
You can also call phone numbers of your own POIs.
Add as Favorite
Tap this button to create a Favorite at the cursor position on the map.
Add as POI
Tap this button to create a POI at the cursor position on the map.
Travel via...
Tap this button to travel via the cursor position on the map as part of your
current route. Your destination remains the same as before but your route now
includes this location.
This button is only available while there is a planned route.
Page 47

47
Center on map
Tap this button to center the map on the cursor position.
Page 48

48
About TomTom Map Share™
TomTom Map Share helps you correct map errors. You can correct several types of map error.
To make corrections to your own map, tap Map corrections in the Services menu.
Note: TomTom Map Share is not available in all regions. For more information, go to
tomtom.com/mapshare.
Correcting a map error
Important: For safety reasons, do not enter the full details of a map correction while you are driving.
Mark the location of the map error instead and enter the full details later.
To correct a map error, do the following:
1. Tap Map corrections in the Services menu.
2. Tap Correct a map error.
3. Select the type of map correction you want to report.
4. Select how you want to select the location.
5. Select the location. Then tap Done.
6. Enter the details of the correction. Then tap Done.
7. Tap Send.
The correction is saved.
Types of map correction
To make a correction to your map, tap Map corrections in the Services menu, then tap Correct a
map error. There are several types of map correction available.
Map corrections
Page 49
49
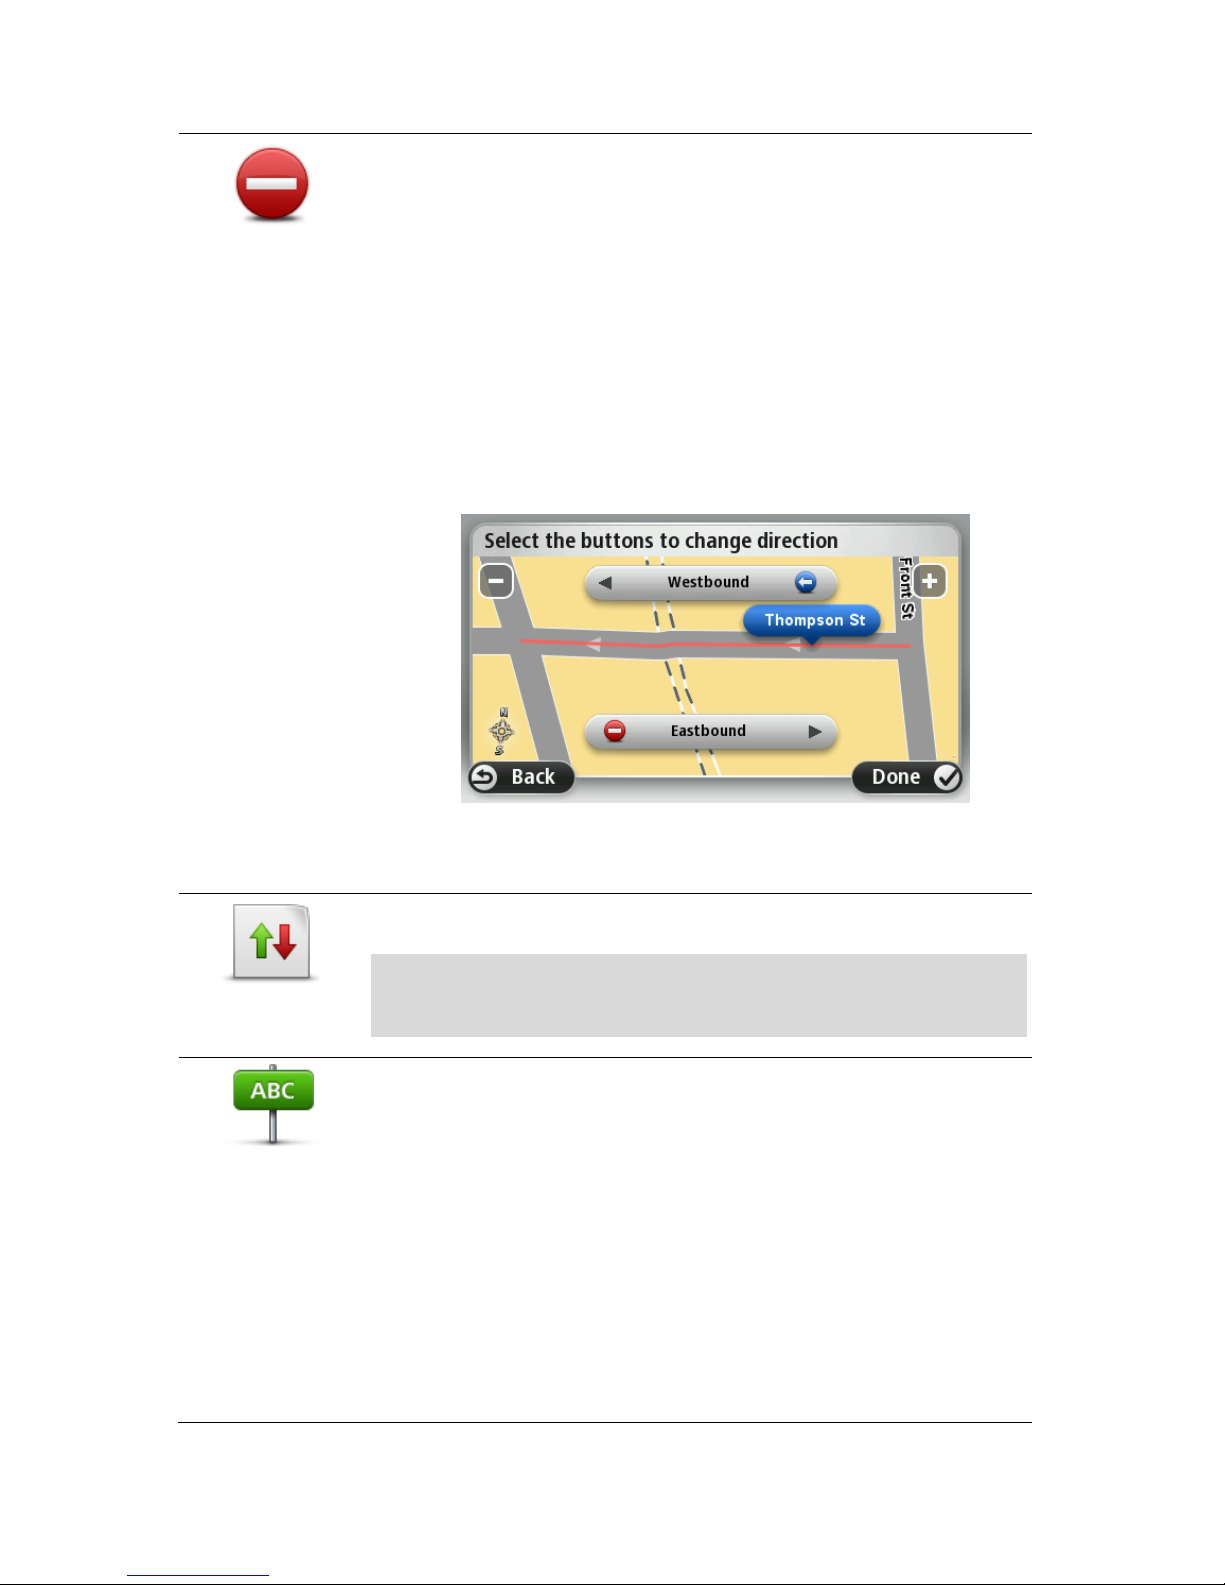
(Un)block street
Tap this button to block or unblock a street. You can block or unblock the
street in one or both directions.
For example, to correct a street near to your current location, do the following:
1. Tap (Un)block street.
2. Tap Near you to select a street near your current location. You can select
a street by name, a street near your Home location or a street on the map.
3. Select the street or section of a street you want to correct by tapping it on
the map.
The street you select is highlighted and the cursor shows the name of the
street.
4. Tap Done.
Your device shows the street and whether the traffic is blocked or allowed
in each direction.
5. Tap one of the direction buttons to block or unblock the flow of traffic in
that direction.
6. Tap Done.
Reverse traffic
direction
Tap this button to correct the traffic direction of a one-way street, where the
direction of traffic is different to the direction shown on your map.
Note: Reverse traffic direction only works for one-way streets. If you select
a two-way street you will be given the chance to block/unblock the street
rather than changing the direction.
Edit street name
Tap this button to change the name of a street on your map.
For example, to rename a street near to your current location:
1. Tap Edit street name.
2. Tap Near you.
3. Select the street or section of a street you want to correct by tapping it on
the map.
The street you select is highlighted and the cursor shows the name of the
street.
4. Tap Done.
5. Type the correct street name.
6. Tap Done.
Page 50

50
Change turn
restrictions
Tap this button to change and report incorrect road turn restrictions.
Change road speed
Tap this button to change and report the road speed limit.
Add or remove
rotary
Tap this button to add or remove a rotary.
Add missing POI
Tap this button to add a new Point of Interest (POI).
For example to add a new restaurant near to your current location:
1. Tap Add missing POI.
2. Tap Restaurant in the list of POI categories.
3. Tap Near you.
4. Select the location of the missing restaurant.
You can select the location by entering the address or by selecting the
location on the map. Select Near you or Near home to open the map at
your current location or at your Home location.
5. Tap Done.
6. Type the name of the restaurant then tap OK.
7. If you know the telephone number of the restaurant you can type it, then
tap OK.
If you don't know the number, just tap OK without typing a number.
Edit POI
Tap this button to edit an existing POI.
You can use this button to make the following changes to a POI:
Delete the POI.
Rename the POI.
Change the telephone number of the POI.
Change the category that a POI belongs to.
Move the POI on the map.
Page 51

51
Comment on POI
Tap this button to enter a comment about a POI. Use this button if you cannot
edit the error with the POI using the Edit POI button.
Correct house
number
Tap this button to correct the location of a house number. Enter the address
that you wish to correct and then indicate on the map the correct location of
that house number.
Existing street
Tap this button to edit an existing street. Once you have selected the street,
you can select an error to report. You can select more than one type of error
for a street.
Missing street
Tap this button to report a missing street. You have to select the start and end
points of the missing street.
City
Tap this button to report an error about a city, town or village. You can report
the following types of error:
City is missing
Wrong city name
Alternative city name
Other
Highway
entrance/exit
Tap this button to report an error about a highway entrance or exit.
ZIP code
Tap this button to report an error about a ZIP code.
Other
Tap this button to report other types of corrections.
These corrections are not immediately applied to your map but are saved in a
special report.
You can report missing streets, errors in highway entrances and exits and
missing rotaries. If the correction you want to report is not covered by any of
these report types, enter a general description then tap Other.
Page 52

52
About sounds and voices
Your Blue&Me TomTom 2 uses sound for some or all of the following:
Driving directions and other route instructions
Traffic information
Note: To use a TomTom traffic information service, you may need a subscription or a receiver.
Traffic services are not supported in all countries. For more information and to subscribe, visit
tomtom.com/services.
Warnings that you set
Hands-free phone calls
There are two types of voice available for your Blue&Me TomTom 2:
Computer voices
Computer voices are generated by your Blue&Me TomTom 2. They provide route instructions and
read aloud city and street names, traffic and other useful information.
Human voices
These are recorded by an actor and only provide route instructions.
About computer voices
Your Blue&Me TomTom 2 uses text-to-speech technology and computer voices to read the street
names on your map as it guides you on your route.
The computer voice analyses the whole phrase or sentence before speaking to ensure that the
sentence sounds as close as possible to natural speech.
Computer voices can recognize and pronounce foreign towns and street names. For example, the
English computer voice can read and pronounce French street names.
Selecting a voice
To select a different voice on your Blue&Me TomTom 2, tap Voices in the Settings menu. Then tap
Change voice and select the required voice.
Changing the volume level
You can change the volume on your Blue&Me TomTom 2 in several ways.
In the Driving view.
Tap the central panel on the status bar and move the slider to adjust the volume. The last route
instruction is played so you can hear the new volume level.
Sounds and voices
Page 53

53
In the Settings menu.
Tap Settings in the Main menu, then tap Volume settings and move the slider to adjust the
volume. Tap Test to listen to the new volume level.
Page 54

54
About Settings
You can change the way your Blue&Me TomTom 2 looks and behaves. Most of the settings on your
device can be accessed by tapping Settings in the Main Menu.
2D/3D settings
2D/3D settings
Tap this button to set the default view of the map. To switch between 2D and
3D views while driving, tap the center part of the status bar in Driving View.
It is sometimes easier to view the map from above, such as when navigating a
complex road network.
The 2D view shows a two dimensional view of the map as though viewed from
above.
The 3D view shows a three dimensional view of the map as though you are
driving through the landscape.
The following buttons are available:
In 2D view: rotate map in direction of travel - tap this button so the map
is rotated automatically with the direction you are traveling always at the
top.
Switch to 3D view when following a route - tap this button to show the
map automatically in 3D view when you are following a route.
Settings
Page 55

55
Advanced settings
Advanced settings
Tap this button to select the following advanced settings:
Show house number before street name - when this setting is selected,
addresses are shown with the house number followed by the street name,
such as 1600 Pennsylvania Avenue.
Show street names - when this setting is selected, street names are
shown on the map in the Driving View. You do not need to select this
option when your Blue&Me TomTom 2 is set to read aloud street names
using a computer voice.
Show next street name - when this setting is selected, the name of the
next street on your route is shown at the top of the Driving view.
Show current street name on map - when this setting is selected, the
name of the street you are on is shown at the bottom of the Driving view.
Show location preview - when this setting is selected, a graphical
preview of your destination is shown during route planning.
Enable automatic zooming in 2D view
Enable automatic zooming in 3D view
Show lane images - when this setting is selected, a graphical view of the
road ahead shows which lane you need when you approach a junction or
highway exit. This feature is not available for all roads.
Show tips
Automatically adjust clock for time zone
Battery saving settings
Battery saving
settings
To change the power saving settings, tap this button on your Blue&Me
TomTom 2.
Brightness settings
Brightness
settings
Tap this button to set the brightness of the screen. Move the sliders to adjust
the brightness level.
To view the map and menus in day or night colors, tap Use day colors or Use
night colors in the Settings menu.
Page 56

56
Change car symbol
Change car symbol
Tap this button to select the car symbol that shows your current location in the
Driving view.
Change Home location
Change Home
location
Tap this button to set or change your Home location. You enter the address in
the same way as you do when you plan a route.
Your Home location provides an easy way to plan a route to an important
location.
For most people, your Home location will be your home address. However,
you might prefer to set the location to another regular destination, such as
your place of work.
Change language
Change language
Tap this button to change the language used for all the buttons and messages
you see on your Blue&Me TomTom 2.
You can choose from a wide range of languages. When you change the
language, you are also given the opportunity to change the voice.
Change map colors
Change map colors
Tap this button to select the color schemes for day and night map colors.
Tap Search to search for a color scheme by typing the name.
Keyboard settings
Keyboard settings
Tap this button to select the keyboards that will be available for your use and
the layout of the Latin keyboard.
You use the keyboard to enter names and addresses, such as when you plan
a route or search for the name of a town or a local restaurant.
Page 57
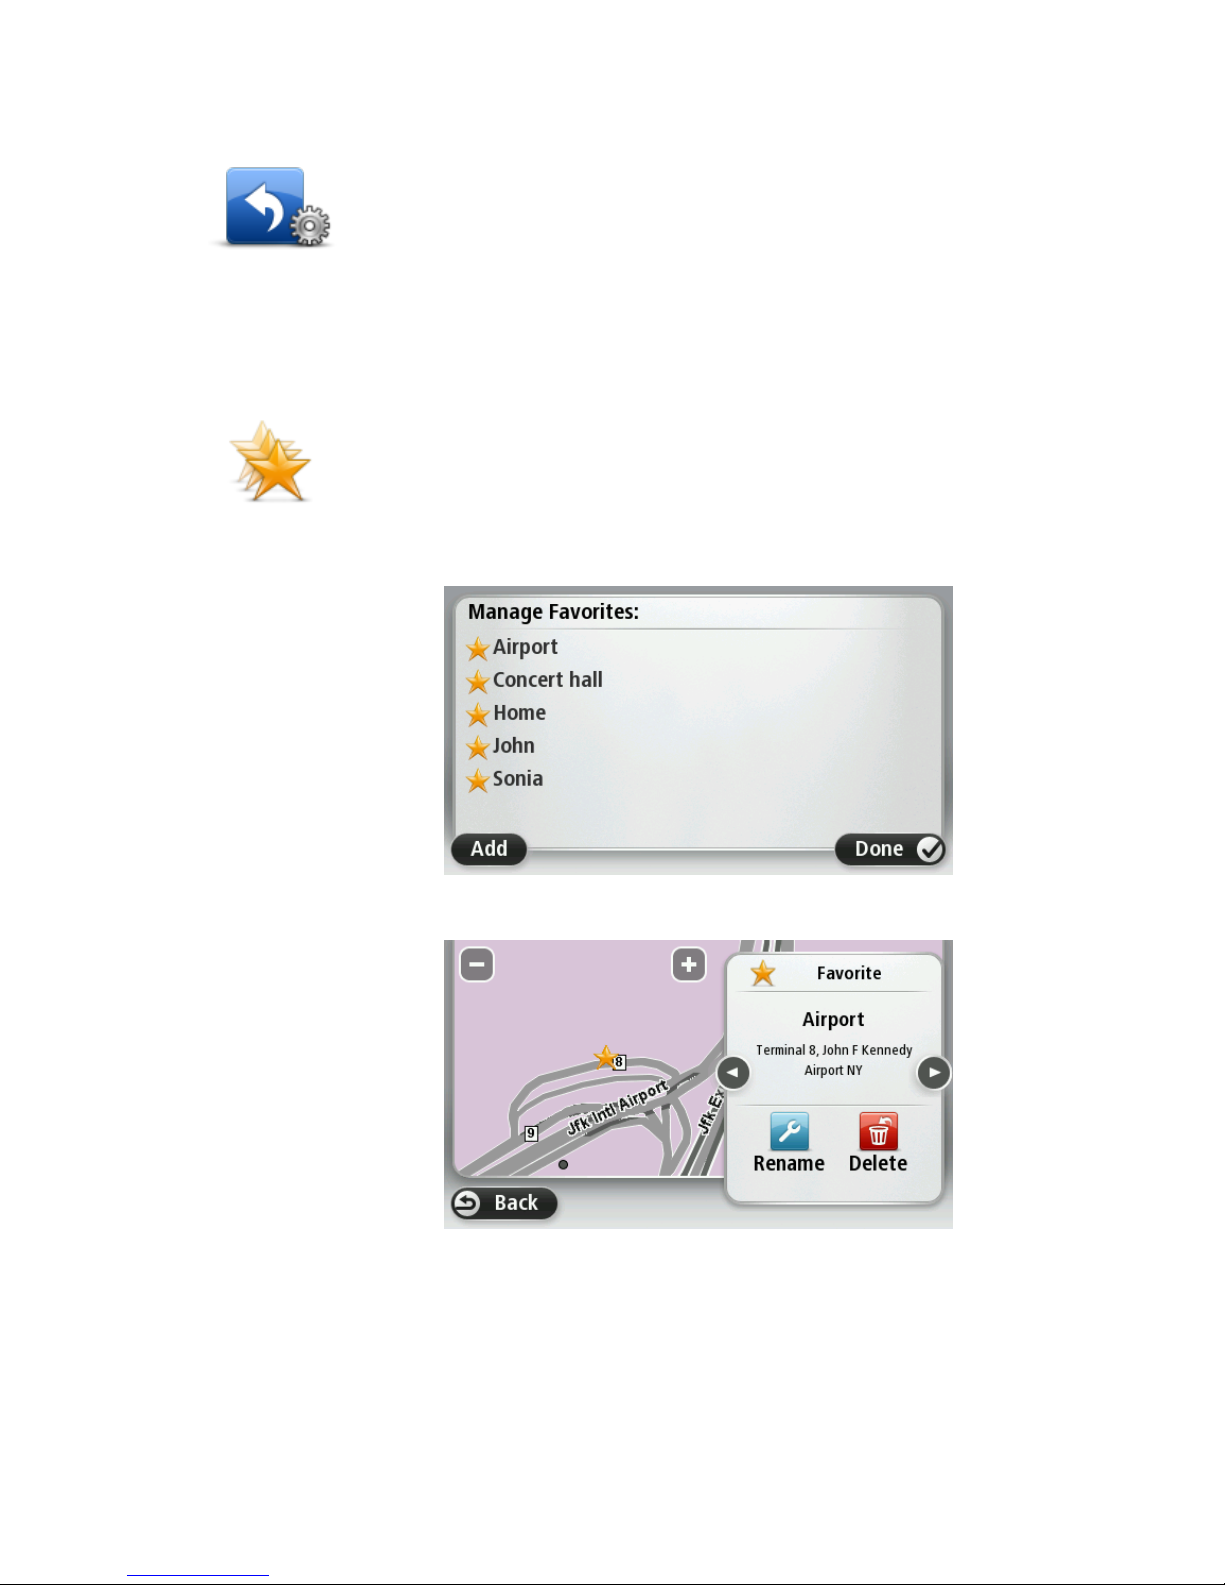
57
Make your own menu
Make your own
menu
Tap this button to add up to six buttons to your own personalized menu.
If there are only one or two buttons in your menu, both buttons are shown in
the Driving view.
If you have three or more buttons in your menu, then a single button is shown
in the Driving view which opens your menu when tapped.
Manage Favorites
Manage Favorites
Tap this button to add, rename or delete Favorites.
Favorites provide an easy way to select a location without the need to enter
the address. They do not need to be favorite places, they can simply be seen
as a collection of useful addresses.
To create a new Favorite, tap Add. Then enter the location address in the
same way that you enter an address when you plan a route.
To view or change an existing Favorite, tap one of the items in the list. To see
more Favorites on the map, tap the left or right buttons.
Page 58

58
Manage POIs
Manage POIs
Tap this button to manage your own Point of Interest (POI) categories and
locations.
You can set your Blue&Me TomTom 2 to let you know when you are near to
selected POI locations. For example, you could set the device to let you know
when you are approaching a gas station.
You can create your own POI categories and add your own POI locations to
these categories.
You can, for example, create a new POI category called Friends. You could
then add all your friends' addresses as POIs in this new category.
Tap the following buttons to create and maintain your own POIs:
Add POI - tap this button to add a location to one of your own POI
categories.
Warn when near POI - tap this button to set your Blue&Me TomTom 2 to
warn you when you are near selected POIs.
Delete POI - tap this button to delete one of your own POI categories.
Edit POI - tap this button to edit one of your own POIs.
Add POI category - tap this button to create a new POI category.
Delete POI category - tap this button to delete one of your own POI
categories.
Phone settings
Phone settings
Tap this button to open the phone settings menu.
One of the phone settings allows you to enable or disable Bluetooth for your
Blue&Me TomTom 2. If you disable Bluetooth, any connection you have
established between your Blue&Me TomTom 2 device and Blue&Me is
canceled.
For more information on connecting your phone and making hands-free calls,
see Hands-Free calling.
Planning settings
Planning settings
Tap the Planning settings button to set the way your Blue&Me TomTom 2
calculates the routes that you plan. The settings for planning consist of several
options that are spread over several screens. Each setting is described below.
Page 59

59
Planning settings
Set the type of route you want your Blue&Me TomTom 2 to calculate.
Tap IQ Routes to set if you want the device to use IQ Routes information to help find the best route.
Fastest route
Choose whether you want to avoid highways.
Replanning settings
Note: This setting is only available if your device has either a traffic subscription or an RDS-TMC
Receiver connected. Traffic information is not available in all countries or regions. For more
information about TomTom traffic information services, go to tomtom.com/services.
Set whether you want your Blue&Me TomTom 2 to replan the current route if a faster route is found
while you are driving. This is useful if traffic builds up or clears further ahead on your route. Choose
from the following settings:
Always switch to that route - select this option to receive no messages when a faster route is
found. The current route is automatically re-calculated to be the fastest one.
Ask me if I want that route - select this option to be asked if you want to take the new route.
When asked if you want to take the alternative route, tap Yes to have the current route
re-calculated as the fastest one. Tap No if you don't want to take alternative route.
Tap Info to see a summary of both the original and the alternative routes. You can then tap Done
to take the fastest route or Current route to remain on your original route.
Never change my route - select this option to receive no messages and simply be shown the
new route on the screen.
Map information settings
Set whether you want to be warned if your route passes through an area where your map contains
only limited information.
Toll road, ferry, carpool lanes and unpaved road settings
Set how your Blue&Me TomTom 2 should manage each of these four road features when the device
calculates a route.
Carpool lanes are sometimes known as High Occupancy Vehicle Lanes and are not present in every
country. To travel on these lanes, you may need to have more than one person in the car, for
example, or the car may need to use environmentally-friendly fuel.
Route summary
Set whether you want the route summary screen to close automatically after you plan a route. If you
select No, then you will need to tap Done to close the route summary screen every time you plan a
route.
Page 60
60
Reset factory settings
Reset factory
settings
Tap this button to delete all your personal settings and restore the standard
factory settings to your Blue&Me TomTom 2.
This is not a software update and will not affect the version of the software
application installed on your Blue&Me TomTom 2.
Important: This feature deletes all your personal settings!
If you want to keep your personal information and settings, you should perform
a full backup of your Blue&Me TomTom 2 before you reset the device. You
can then restore all your personal information and settings after you reset the
device.
This includes items such as your Home and Favorite locations, your personal
menu and your POI categories and POI locations.
Safety settings
Safety settings
Tap this button to select the safety features you want to use on your Blue&Me
TomTom 2.
Set clock
Set clock
Tap this button to select the time format. As soon as you have a GPS fix, the
time will be set automatically. If you don't have a GPS fix, you can choose to
set the time manually.
Set units
Set units
Tap this button to set the units used on your Blue&Me TomTom 2 for features
such as route planning.
Page 61

61
Show POI on map
Show POI on map
Tap this button to select the types of Point of Interest (POI) you want to see on
the map.
1. Tap Show POI on map in the Settings menu.
2. Select the POI categories you want to be shown on the map.
Tap Search and use the keyboard to search for a category name.
3. Select whether you want POIs to be shown in 2D or 3D views of the map.
4. Tap Done.
Point of Interest locations are shown on the map as symbols.
Speaker settings
Speaker settings
Tap this button to select the loudspeaker or loudspeaker connections that are
used on your Blue&Me TomTom 2.
Start-up settings
Start-up settings
Tap this button to set what happens when your Blue&Me TomTom 2 starts.
Status & Information
Status &
Information
Tap this button to find technical information on your Blue&Me TomTom 2,
such as the device serial number, application version and the map version.
You can also view the current status for GPS reception.
Page 62

62
Status bar settings
Status bar settings
Tap this button to select the information you want to see on the status bar:
Horizontal - show the status bar at the bottom of the Driving view.
Vertical - show the status bar on the right-hand side of the Driving view.
Maximum speed
Important: The speed limit is shown next to your current speed, and your
speed is shown in red if you drive faster than the speed limit.
Information about speed limits is not available for all roads.
Current time
Remaining distance - the distance to your destination.
Leeway - your Blue&Me TomTom 2 shows how late or early you will
arrive, compared with your preferred arrival time that was set when you
planned the route.
Switch map
Switch map
Tap this button to select the map you want to use for route planning and
navigation.
Although you can store more than one map on the device, you can only use
one map at a time for planning and navigation.
To switch from the current map to plan a route in another country or region,
simply tap this button.
Note: The first time you switch to a map, you may need to connect to your
MyTomTom account and activate the map.
Turn off voice guidance / Turn on voice guidance
Turn off Voice
guidance
Tap this button to switch off voice guidance. You will no longer hear spoken
route instructions but you will still hear information such as traffic information
and warnings.
Voice guidance is also switched off if you tap Turn off sound in the Settings
menu.
Note: If you change the voice on your Blue&Me TomTom 2, then voice
guidance is automatically switched on for the new voice.
Turn on Voice
guidance
Tap this button to switch on voice guidance and hear spoken route
instructions.
Page 63

63
Use night colors / Use day colors
Use night colors
Tap this button to reduce the brightness of the screen and display the map in
darker colors.
When driving at night or when driving through a dark tunnel, it is easier to view
the screen and less distracting for the driver if the brightness of the screen is
dimmed.
Tip: Your Blue&Me TomTom 2 can switch between day and night colors
depending on the time of day. To automatically switch between night and day
colors, tap Brightness settings in the Settings menu and select Switch to
night colors when dark.
Use day colors
Tap this button to increase the brightness of the screen and display the map in
brighter colors.
Voices
Change voice
Tap this button to change the voice that gives spoken directions and other
route instructions.
A wide range of voices are available. There are computer voices which can
read street names and other information directly from the map and there are
human voices which have been recorded by actors.
Voice settings
Tap this button to set the type of spoken directions and other route instructions
your Blue&Me TomTom 2 will read aloud.
Volume settings
Volume settings
Tap this button to set the volume level for your Blue&Me TomTom 2. Move the
slider to change the volume.
Page 64

64
About Points of Interest
Points of Interest or POIs are useful places on the map.
Here are some examples:
Restaurants
Hotels
Museums
Parking garages
Gas stations
Creating POIs
Tip: For help on managing third party POIs, see: tomtom.com/13814
1. Tap the screen to open the Main Menu.
2. Tap Settings.
3. Tap Manage POIs.
4. If there are no POI categories or the one you want to use does not exist, tap Add POI category
and create a new category.
Every POI must be assigned to a POI category. This means you need to have created at least one
POI category before you can create your first POI.
You can only add POIs to POI categories you have created.
For more information on creating POI categories, read Managing POIs.
5. Tap Add POI.
6. Select the POI category you want to use for the new POI.
7. Tap a button to enter the POI address in the same way that you plan a route.
The POI is created and saved in the selected category.
Home
Tap this button to set your Home location as a POI.
This is useful if you decide to change your Home location but first want to
create a POI using the current Home address.
Points of Interest
Page 65
65
Favorite
Tap this button to create a POI from a Favorite.
You might want to create a POI from a Favorite because you can only create a
limited number of Favorites. If you want to create more Favorites you need to
delete some Favorites. To avoid losing a Favorite, save the location as a POI
before you delete the Favorite.
Address
Tap this button to enter an address as a new POI.
When you enter an address, you can choose from four options.
City center
Street and house number
ZIP code
Cross street or intersection
Recent destination
Tap this button to select a POI location from a list of places you have recently
used as destinations.
Point of Interest
Tap this button to add a Point of Interest (POI) as a POI.
For example, if you are creating a category of POIs for your favorite
restaurants, use this option instead of entering the addresses of the
restaurants.
My location
Tap this button to add your current location as a POI.
For example, if you stop somewhere interesting, you can tap this button to
create a new POI at the current location.
Point on map
Tap this button to create a POI using the map browser.
Use the cursor to select the location of the POI, then tap Done.
Latitude Longitude
Tap this button to create a POI by entering latitude and longitude values.
Position of last
stop
Tap this button to select the location where your Blue&Me TomTom 2 was last
docked.
Page 66

66
Spoken address
Tap this button to create a POI by saying the address.
Using POIs to plan a route
When you plan a route, you can use a POI for the destination.
The following example shows how to plan a route to a parking lot in a city:
1. Tap Navigate to or Drive to in the Main menu.
2. Tap Point of Interest.
3. Tap POI in city.
Tip: The last POI you viewed on your Blue&Me TomTom 2 is also shown in the menu.
4. Enter the name of the town or city and select it when it is shown in the list.
5. Tap the arrow button to expand the list of POI categories.
Tip: If you already know the name of the POI you want to use, you can tap Search POI to enter
the name and select this location.
6. Scroll down the list and tap Parking lot.
7. The parking lot closest to your destination is shown at the top of the list.
8. The following list explains the distances shown next to each POI. How the distance is measured
varies depending on how you initially searched for the POI:
POI near you - distance from your current location
POI in city - distance from the city center
POI near Home - distance from your Home location
POI along route - distance from your current location
POI near destination - distance from your destination
9. Tap the name of the parking lot you want to use and tap Done when the route has been
calculated.
Your Blue&Me TomTom 2 starts to guide you to the parking lot.
Showing POIs on the map
You can select the types of POI locations you want to see on your maps.
1. Tap Show POI on map in the Settings menu.
2. Select the categories you want to be shown on the map.
3. Tap Done.
4. Select whether you want to see POI locations in 2D and 3D views of the map.
5. Tap Done.
The types of POI you have selected are shown as symbols on the map.
Page 67

67
Calling a POI
Note: Hands-free calling is not supported on all devices.
Many of the POIs on your Blue&Me TomTom 2 include phone numbers. This means that if your device
supports hands-free calling, you can use your Blue&Me TomTom 2 to call the POI and plan a route to
the location of the POI. If your device doesn't support hands-free calling, you can still get the phone
number of POI from your TomTom navigation device and then call the POI using another phone or
device.
For example, you can search for a movie theater, call to reserve a ticket and plan a route to the movie
theater, and all using your Blue&Me TomTom 2.
1. Tap the phone button in the Driving view.
If the button is not visible in the Driving view, tap Make your own menu in the Settings menu and
select Call... to display the button in the Driving view.
2. Tap Point of Interest.
3. Select how you want to search for the POI.
For example, if you want to search for a POI on your route, tap POI along route.
4. Tap the type of POI you want to call.
For example, if you want to call a cinema to reserve a ticket, tap Cinema and then select the name
of the cinema you want to call. Then tap Call or Dial to make the phone call.
Your Blue&Me TomTom 2 uses your mobile phone to call the POI.
Setting warnings for POIs
You can set a warning sound or message to be played or displayed when you approach a selected
type of POI, such as a gas station.
The following example will show how to set a warning sound to be played when you are 250 yards
from a gas station.
1. Tap Manage POIs or Warn when near POI in the settings menu.
2. Scroll down the list and tap Gas station.
Tip: To remove a warning, tap on the category name and then tap Yes. POI categories which
have been set with a warning have a sound symbol next to the category name.
3. Set the distance as 500 feet and tap OK.
4. Select Sound effect and then tap Next.
5. Select the warning sound for the POI and then tap Next.
6. If you only want to hear the warning when the POI is directly on a planned route, select Warn only
if POI is on route. Then tap Done.
The warning is set for the selected POI category. You will hear a warning sound when you are 500
feet from a petrol station on your route.
Page 68

68
Manage POIs
Tap Manage POIs to manage your POI categories and locations.
You can set your Blue&Me TomTom 2 to let you know when you are near to selected POI locations. In
this way you could, for example, set the device to let you know you when you are approaching a gas
station.
You can create your own POI categories and add your own POI locations to these categories.
This means you can, for example, create a new POI category called Friends. You could then add all
your friends' addresses as POIs in this new category.
Tap the following buttons to create and maintain your own POIs:
Add POI - tap this button to add a location to one of your own POI categories.
Warn when near POI - tap this button to set your Blue&Me TomTom 2 to warn you when you are
near selected POIs.
Delete POI - tap this button to delete one of your own POI categories.
Edit POI - tap this button to edit one of your own POIs.
Add POI category - tap this button to create a new POI category.
Delete POI category - tap this button to delete one of your own POI categories.
Page 69

69
About getting help
Tap Help in the Main Menu to navigate to emergency services centers and other specialist services.
For example, if you are involved in a car accident, you could use the Help menu to find the contact
details for the nearest hospital, call them using a phone and tell them your exact location.
Tip: If you do not see the Help button in the Main Menu, tap Settings and then Safety settings. Clear
the checkbox for Show only essential menu options while driving.
Using Help to phone a local service
To use Help to locate a service centre, contact the centre by phone and navigate from your current
location to the centre, do the following:
1. Tap the screen to show the Main Menu.
2. Tap Help.
3. Tap Call for help.
4. Select the type of service you require, for example, Nearest hospital.
5. Select a center from the list; the nearest is shown at the top of the list.
Your Blue&Me TomTom 2 shows your position on the map along with a description of the location.
This helps you explain where you are while making a call. The phone number is displayed for you
to call using a phone.
6. To navigate your way to the garage by car, tap Navigate there. If you are on foot, tap Walk there.
Your Blue&Me TomTom 2 starts guiding you to your destination.
Help menu options
Note: In some countries, information may not be available for all services.
Call for help
Tap this button to find the contact details and location of a service center.
Note: Hands-free calling is not supported on all devices.
Drive to help
Tap this button to navigate your way by car to a service center.
Help
Page 70

70
Walk to help
Tap this button to navigate your way on foot to a service center.
Where am I?
Tap this button to see your current location on the map.
If hands-free calling is supported on your device, and your phone is connected
to your device, you can tap Where am I?. Select the type of service you want
to contact and tell them your exact location as shown on your device.
Safety and other
guides
Tap this button to read a selection of guides, including a First Aid guide.
Product manuals
Tap this button to read a selection of guides relating to your navigation device.
You can also access on-device help using this button.
Page 71

71
Important
Important: This chapter covers the hands-free functionality of the navigation device when the
navigation device is not connected to Blue&Me. When the navigation device is connected to Blue&Me,
the phone functionality described in the first part of "Blue&Me-specific functions" applies.
About hands-free calls
Note: Hands-free calling is not supported on all devices.
If you have a mobile phone with Bluetooth®, you can use your Blue&Me TomTom 2 to make phone
calls and send and receive messages.
Important: Not all phones are supported or compatible with all features. For more information, go to
tomtom.com/phones/compatibility.
Connecting to Your Phone
First you must establish a connection between your mobile phone and your Blue&Me TomTom 2.
Tap Phone settings in the settings menu, then tap Manage phones and select your phone when it is
shown in the list.
You only need to do this once and your Blue&Me TomTom 2 will remember your phone.
Tips
Make sure that you switch on Bluetooth® on your phone.
Make sure that your phone is set to "discoverable" or "visible to all."
You may have to enter the password "0000" on your phone in order to connect to your Blue&Me
TomTom 2.
To avoid having to enter "0000" every time you use the phone, save your Blue&Me TomTom 2 as
a trusted device on your phone.
For additional information about Bluetooth® settings, refer to your mobile phone user guide.
Making a call
When you have established a connection between your Blue&Me TomTom 2 and your mobile phone,
you can use your navigation device to make hands-free calls on your mobile phone.
To make a phone call, tap the phone button in the Driving View. Then tap one of the following buttons:
Tap Home to call your Home location.
If you have not entered a number for your Home location this button is unavailable.
Tap Number to enter a phone number to call.
Tap Point of Interest to choose a Point of Interest (POI) to call.
If your Blue&Me TomTom 2 knows the phone number of a POI, this is shown next to the POI.
Hands-free calling
Page 72

72
Tap Phonebook entry to select a contact from your phonebook.
Note: Your phonebook is automatically copied to your Blue&Me TomTom 2 when you first establish
a connection with your mobile phone.
Not all phones can transfer the phonebook to your Blue&Me TomTom 2. For more information, go
to tomtom.com/phones/compatibility.
Tap Recently dialed to select from a list of people or numbers you have called recently using
your Blue&Me TomTom 2.
Tap Recent caller to select from a list of people or numbers that called you recently.
Only calls you have received on your Blue&Me TomTom 2 are saved in this list.
Receiving a call
When someone calls you, the caller's name and phone number are shown. Tap the screen to accept
or reject the call.
Auto-answer
You can set your Blue&Me TomTom 2 to automatically answer incoming phone calls.
To set automatic answering, tap Phone settings in the settings menu, then tap Auto-answer
settings.
Select how long your Blue&Me TomTom 2 will wait before automatically answering your calls, then tap
Done.
Connecting more phones to your device
You can establish connections for up to 5 mobile phones.
To add more phones, do the following.
1. Tap Phone settings in the Main Menu.
2. Tap Manage phones.
3. Tap Find other phone... and follow the instructions.
To switch between phones, tap Manage phones. Then tap the button for the phone you want to
connect to.
Mobile phone menu
Note: Hands-free calling is not supported on all devices.
When you open the Mobile Phone menu, the following buttons are available:
Manage phones
Tap this button to manage the mobile phones that will be connected to your
Blue&Me TomTom 2.
You can add a profile for up to five different mobile phones.
Page 73
73
Flight mode
Tap this button to put your Blue&Me TomTom 2 into flight mode.
Auto-answer
settings
Tap this button to change the auto-answer settings.
Change Home
number
Tap this button to change your Home phone number.
Disable Bluetooth
Tap this button to disable Bluetooth on your Blue&Me TomTom 2.
Delete
Tap this button to select information you want to delete. You can delete the list
of recent callers and the list of recently dialed numbers.
Important: Not all phones are supported or compatible with all features. For more information, go to
tomtom.com/phones/compatibility.
Page 74

74
About Favorites
Favorites provide an easy way to select a location without the need to enter the address. They do not
need to be favorite places, they can simply be seen as a collection of useful addresses.
Creating a Favorite
To create a Favorite, do the following:
1. Tap the screen to bring up the Main Menu.
2. Tap Settings to open the Settings menu.
3. Tap Manage Favorites.
4. Tap Add.
Select the type of the Favorite by tapping one of the buttons described below:
Home
You can set your Home location as a Favorite.
Favorite
You cannot create a Favorite from another Favorite. This option will always be
unavailable in this menu.
To rename a Favorite, tap Manage Favorites in the Settings menu.
Address
You can enter an address as a Favorite.
Recent destination
Create a new Favorite by selecting a location from a list of your recent
destinations.
Point of Interest
If you visit a POI you particularly like, for example a restaurant, you can add it
as a Favorite.
Favorites
Page 75

75
My location
Tap this button to add your current location as a Favorite.
For example, if you stop somewhere interesting, while you are there you can
tap this button to create the Favorite.
Point on map
Tap this button to create a Favorite using the Map Browser.
Select the location of the Favorite using the cursor, then tap Done.
Latitude Longitude
Tap this button to create a Favorite by entering latitude and longitude values.
Spoken address
Tap this button to create a Favorite by saying the address.
Position of last
stop
Tap this button to select your last recorded position as your destination.
Your Blue&Me TomTom 2 suggests a name for your new Favorite. To enter a new name, there is
no need to delete the suggested name, you just start typing.
Tip: It is a good idea to give your Favorite a name that is easy to remember.
5. Tap OK.
Your new favorite appears in the list.
After you have added two or more Favorites, you are asked whether you make regular trips to the
same locations. If you tap YES, you can enter these destinations as your favorite destinations. Every
time you switch on your device, you can immediately select one of these locations as your destination.
To change these destinations or select a new destination, tap Start-up settings in the Settings menu,
then select Ask for a destination.
Using a Favorite
You can use a Favorite as a way of navigating to a place without having to enter the address. To
navigate to a Favorite, do the following:
1. Tap the screen to bring up the main menu.
2. Tap Navigate to or Drive to.
3. Tap Favorite.
4. Select a Favorite from the list.
You see your Favorite on the map. You can tap Park nearby to see a list of parking POIs near to
your Favorite. You can also call the Favorite or see more information about it.
Page 76

76
5. Tap Select to choose to navigate to this Favorite.
Tip: Use the left and right arrows to choose another Favorite from your list.
Your Blue&Me TomTom 2 calculates the route for you.
6. When the route is calculated, tap Done.
Your Blue&Me TomTom 2 will immediately start guiding you to your destination with spoken
instructions and visual instructions on the screen.
Changing the name of a Favorite
To change the name of a Favorite, do the following:
1. Tap the screen to bring up the Main Menu.
2. Tap Settings to open the Settings menu.
3. Tap Manage Favorites.
4. Tap the Favorite you want to rename.
Tip: Use the left and right arrows to choose another Favorite from your list.
5. Type in the new name and then tap OK.
6. Tap Done.
Deleting a Favorite
To delete a Favorite, do the following:
1. Tap the screen to bring up the Main Menu.
2. Tap Settings to open the Settings menu.
3. Tap Manage Favorites.
4. Tap the Favorite you want to delete.
Tip: Use the left and right arrows to choose another Favorite from your list.
5. Tap Yes to confirm the deletion.
6. Tap Done.
Page 77

77
About RDS-TMC
The Traffic Message Channel (TMC), also known as RDS-TMC, transmits traffic information as a radio
signal and is available free of charge in many countries.
TMC is not a TomTom Service, but is available when using the TomTom RDS-TMC Traffic Receiver.
Note: TomTom is not responsible for the availability or quality of traffic information provided by the
Traffic Message Channel.
The Traffic Message Channel (TMC) is not available in all countries. To check the availability of
TMC services in your country, go to tomtom.com/5826.
Using traffic information
If you are using an RDS-TMC receiver to view TMC traffic information on your Blue&Me TomTom 2,
connect the TomTom RDS-TMC Traffic Receiver to the USB connector on your Blue&Me TomTom 2.
The traffic sidebar is shown on the right side of the Driving view. The sidebar informs you about traffic
delays while you drive, using glowing dots to show you where each traffic incident is located on your
route.
The top of the traffic sidebar represents your destination and shows the total
time delay due to traffic jams and other incidents on your route.
The central section of the traffic sidebar shows individual traffic incidents in the
order they occur on your route.
The bottom of the traffic sidebar represents your current location and shows
the distance to the next incident on your route.
To make the traffic sidebar more readable some incidents may not be shown. These incidents will
always be of minor importance and only cause short delays.
The color of the pointers, as shown below, gives you an instant indication of the type of incident:
Unknown or undetermined situation.
Slow traffic.
Developing traffic jam.
Traffic
Page 78

78
Stationary traffic or road closure.
Taking the fastest route
Your Blue&Me TomTom 2 regularly looks for a faster route to your destination. If the traffic situation
changes and a faster route is found, your Blue&Me TomTom 2 will offer to replan your trip so you can
use the faster route.
You can also set your Blue&Me TomTom 2 to automatically replan your trip whenever a faster route is
found. To apply this setting, tap Traffic settings in the Traffic menu.
To manually find and replan the fastest route to your destination, do the following:
1. Tap the traffic sidebar.
Tip: If you find that tapping the sidebar opens the Main menu instead of the traffic menu, try
tapping the sidebar with your finger resting on the edge of the screen.
2. Tap Minimize delays.
Your Blue&Me TomTom 2 searches for the fastest route to your destination.
The new route may include traffic delays. You can replan the route to avoid all traffic delays, but a
route which avoids all delays will usually take longer than the fastest route.
3. Tap Done.
Setting the radio frequency for RDS-TMC information
Note: Not all devices support setting the radio frequency.
If you know the frequency of a particular radio station you want to use for RDS-TMC traffic information,
you can set the frequency manually. To activate this feature, you must first enable manual tuning as
follows:
1. Tap the Traffic bar in the Driving View, then tap Traffic settings.
2. Select Tune manually by entering a frequency and then tap Done.
Now you can enter the frequency of the radio station.
3. Tap the Traffic sidebar in the Driving View.
4. Tap Tune Manually.
5. Enter the frequency of the radio station.
6. Tap Done.
Your TomTom navigation device looks for your radio station. If it doesn't find a radio station at the
frequency you set, it automatically continues to search for the next available station.
Minimizing delays
You can use TomTom Traffic to minimize the impact of traffic delays on your route. To minimize
delays automatically, do the following:
Page 79

79
1. Tap Services in the Main Menu.
2. Tap Traffic.
3. Tap Traffic settings.
4. Choose between always taking the faster route automatically, being asked or never changing your
route.
5. Tap Next and then Done.
6. Tap Minimize traffic delay.
Your device plans the quickest route to your destination. The new route may include traffic delays
and may remain the same as the original route.
You can re-plan the route to avoid all delays, but this route is unlikely to be the quickest possible
route.
7. Tap Done.
Making commuting to work easier
The Home to work or Work to home buttons in the Traffic menu let you check your route to and from
work with one tap of a button.
When you use either of these buttons, your device plans a route between your home and work
locations and checks the route for possible delays.
The first time you use Home to work, you must set your traffic home and work locations by doing the
following:
1. Tap the traffic sidebar to open the Traffic menu.
2. Tap Show home-work traffic.
3. Set your home location and your work location.
If you have already set the locations and want to change them, tap Change home-work.
You can now use the Home to work and Work to home buttons.
Note: The home location you set here is not the same as the home location you can set in the
Settings Menu. In addition, the locations you use here do not have to be your actual home and
work locations. If there is another route that you often travel, you can set Work/Home to use these
locations instead.
Page 80

80
For example, to check for delays on your route home before you leave the office, do the following:
1. Tap the traffic sidebar to open the Traffic menu.
2. Tap Show home-work traffic.
3. Tap Work to home.
The Driving View is shown and a message is displayed telling you about traffic incidents on this route.
The Traffic sidebar also shows any delays.
Getting more information about an incident
To check for delays on your route, tap Show traffic on route in the Traffic menu. Your navigation
device shows a summary of the traffic delays on your route.
The total includes any delays due to traffic incidents and those due to busy roads, with information
provided by IQ Routes.
Tap Minimize delays to check if you can reduce the delay.
Tap the left and right arrow buttons to move through each incident in turn, viewing the details of each
one. This includes the type of incident, for example road works, and the length of delay caused by this
incident.
You can also access the details about individual incidents by tapping View map in the Main Menu and
then tapping on the traffic incident symbol.
When shown on the map, a traffic incident starts with an icon. In the case of a traffic jam, the direction
of the incident is from the icon towards the other end.
Page 81

81
Checking traffic incidents in your area
Get an overview of the traffic situation in your area, using the map. To find local incidents and their
details, do the following:
1. Tap the traffic sidebar to open the Traffic menu.
2. Tap View map.
The map overview screen is shown.
3. If the map does not show your location, tap the marker to center the map on your current location.
The map shows traffic incidents in the area.
4. Tap on any traffic incident to get more information.
A screen is shown that gives you detailed information about the incident you chose. To display
information about surrounding incidents use the left and right arrows at the bottom of this screen.
Changing traffic settings
Use the Traffic settings button to choose how traffic information works on your navigation device.
1. Tap the traffic sidebar to open the Traffic menu.
2. Tap Traffic settings.
3. To hear a beep sound when a new traffic incident occurs on your route, select Report if traffic on
route changes and then tap Done.
4. If you are using an RDS-TMC Traffic Receiver, you will be able to select the setting Tune
manually by entering a frequency. If you select this option, the button Tune manually is shown
in the Traffic menu. Tap Tune manually to enter the frequency of a particular radio station you
want to use for RDS-TMC traffic information
5. If a faster route is found while you are driving, Traffic can replan your journey to use the faster
route. Select one of the following options and then tap Done.
Always switch to that route
Ask me if I want to change
Never change my route
Traffic incidents
Traffic incidents and warnings are shown on the map, in the Driving View and on the Traffic sidebar.
Page 82

82
To find out more about an incident, tap Browse Map in the Main Menu. Tap on a traffic incident
symbol on the map to see information about that incident. To display information about surrounding
incidents, use the left and right arrows at the bottom of the screen.
There are two types of incident and warning signs:
Symbols shown in a red square are traffic incidents. Your navigation device can replan to avoid
them.
Symbols shown in a red triangle are weather related. Your device does not replan to avoid these
warnings.
Traffic incident symbols:
Accident
Road works
One or more lanes closed
Road closed
Traffic incident
Traffic jam
Weather related symbols:
Fog Rain
Wind
Ice
Snow
Note: The incident avoided symbol is shown for any traffic incident that you
avoid using a traffic service.
Page 83

83
Traffic menu
To open the Traffic menu, tap the Traffic sidebar in the Driving View or tap Traffic in the Services
menu.
The following buttons are available:
Minimize traffic
delays
Tap this button to re-plan your route based on the latest traffic information.
Show home-work
traffic
Tap this button to calculate the quickest route from your home location to your
place of work and back.
Show traffic on
route
Tap this button for an overview of traffic incidents along your route.
Tap the left and right buttons for more detailed information about each
incident.
Tap Replan to replan your route and avoid the traffic incidents that are shown
on the map.
View map
Tap this button to browse the map and see the traffic incidents shown on the
map.
Change Traffic
settings
Tap this button to change your settings for how the Traffic service works on
your device.
Read aloud traffic
info
Tap this button to hear spoken information about traffic incidents on your
route.
Note: Your TomTom device must have a computer voice installed to read
information aloud.
Page 84

84
About Speed Cameras
Note: Only available on LIVE devices.
The Speed Cameras service warns you about roadside camera locations.
Speed Camera warnings
By default, warnings are given 15 seconds before you reach a speed camera location. To change the
number of seconds or warning sound, tap Alert settings in the Speed Cameras menu.
You are warned in three ways:
Your device plays a warning sound.
The type of speed camera and your distance from the camera location is shown in the Driving
View. If a speed restriction has been reported for the camera, the speed is also shown in the
Driving View.
The location of the speed camera is shown on the map.
Note: For speed enforcement zone cameras, you are warned by a combination of icons and sounds
at the start, middle and end of the Speed Enforcement Zone.
Speed Cameras
Page 85
85
Changing the way you are warned
Alert settings
To change the way your Blue&Me TomTom 2 warns you about speed
cameras, tap the Alert settings button.
You can then set how close you want to be to a speed camera before you are
warned and what type of sound will be played.
For example, to change the sound that is played when you approach a fixed
speed camera, do the following:
1. Tap Services in the Main Menu.
2. Tap Speed Cameras.
3. Tap Alert settings.
A list of speed camera types is displayed. A speaker is shown next to the
speed camera types that have been set for an alert.
4. Tap Fixed cameras.
5. Tap NO to avoid removing the fixed speed camera alerts.
6. Enter the time in seconds for when a warning is given before you reach a
camera. Then tap OK.
7. Tap the sound you want to be used for the warning.
Tips: To switch off warning sounds for a camera type, tap Silence in
step 7 above. You still see a warning in the Driving View if you switch off
the warning sound.
8. Tap YES to save your changes.
Safety camera symbols
Speed Cameras are shown as symbols on the Driving View.
When you approach an area where an alert is located, you see a symbol and a warning sound is
played.
You can change both the warning sound and the number of seconds that the warning is issued before
reaching the alert.
Fixed speed camera
Red light camera
Page 86

86
Toll booth camera
Restricted road camera - located on a minor road that reduces traffic on a
larger road
Other cameras
Speed trap hotspot
Speed Enforcement Zone
Accident black spot
Bi-directional speed camera
Ungated railroad crossing
Report button
To show the report button in the Driving View, do the following:
1. Tap Services in the Main Menu.
2. Tap Speed Cameras.
3. Tap Enable report button.
4. Tap Done.
Page 87

87
The report button is shown on left-hand side of the Driving View or, if you are already using the
quick menu, it's added to the buttons available in the quick menu.
Tip: To hide the report button, tap Disable report button in the Speed Cameras menu.
Reporting a new speed camera while on the move
To report a speed camera on the move, do the following:
1. Tap the report button shown in the Driving View or in the quick menu to record the location of the
camera.
If you tap the report button within 20 seconds of receiving a speed camera warning, you get the
option to add a camera or remove a camera. Tap Add camera.
2. Tap Fixed camera or Speed trap, depending on the type of camera you are reporting.
3. Select the camera location on the map and confirm that it is correct.
4. Tap the type of fixed camera you want to report, for example, a red light camera.
Note: If the type of camera you choose has a safety restriction, you can also enter the speed.
You see a message confirming that a report has been created.
Reporting a new speed camera while at home
You do not need to be at the location of a speed camera to report the new location. To report a new
speed camera location while you are at home, do the following:
1. Tap Services in the Main Menu on your navigation device.
2. Tap Speed Cameras.
3. Tap Report speed camera.
4. Tap Fixed camera or Speed trap depending upon the type of speed camera.
5. Use the cursor to mark the exact location of the camera on the map, then tap Done.
6. Tap Yes to confirm the location of the camera.
7. Tap on the type of camera you want to report and if necessary, choose the speed restriction for
the camera.
You see a message confirming that a report has been created.
Reporting incorrect camera alerts
You may receive an alert for a camera that is no longer there. To report an incorrect camera alert, do
the following:
Note: You can only report an incorrect camera alert while you are at the location.
1. While you are at the location of the missing camera, tap Report in the Driving View.
Note: This must be done within 20 seconds of receiving the camera alert.
2. Tap Remove.
Types of fixed speed camera you can report
When you report a fixed speed camera, you can select the type of fixed camera you are reporting.
Page 88
88
These are the different types of fixed speed camera:
Speed Camera
This type of speed camera checks the speed of passing vehicles.
Red light camera
This type of camera checks for vehicles breaking traffic rules at traffic lights.
Toll booth speed
camera
This type of camera monitors traffic at toll road barriers.
Speed
Enforcement Zone
This type of speed camera checks the average speed of vehicles between two
fixed points.
Vehicle restriction
This type of camera checks traffic on roads where access is restricted.
Other cameras
All other types of cameras that do not fall into any of the above categories.
Speed Enforcement Zone warnings
There are several types of visual and audible warnings that you may see and hear when you meet a
speed enforcement zone camera.
You always receive a start and end zone warning regardless of the speed you are traveling at.
Intermediate warnings, if given, occur every 200 meters.
All the warnings are described below:
Page 89

89
Start of zone warning
As you approach the start of a Speed Enforcement Zone, you see a visual
warning in the top left hand corner of the Driving View with a distance to the
camera underneath it. You hear an audible warning.
You also see a small icon on the road showing the position of the speed
enforcement zone camera at the start of the zone.
Intermediate warning - type 1
Once in the speed check zone, if you are not speeding and have already
received a start of zone warning, you see a visual warning in the Driving View.
This reminds you that you are still in the speed check zone.
Intermediate warning - type 2
Once in the speed check zone, if you are driving faster than the permitted
speed and have already received a start of zone warning, you see a visual
warning in the Driving View indicating the maximum permitted speed. You also
hear a quiet audible warning. These warnings are there to remind you to slow
down...
Intermediate warning - type 3
Once in the speed check zone, if you are driving faster than the permitted
speed and have not received a start of zone warning, you see a visual warning
in the Driving View indicating the maximum permitted speed. You also hear a
loud audible warning.
These warnings occur at the FIRST intermediate point only and are there to
remind you to slow down...
End of zone warning
As you approach the end of a Speed Enforcement Zone, you see a visual
warning in the Driving View with a distance to the camera shown underneath
it. You hear an audible warning.
You also see a small icon on the road showing the position of the speed
enforcement zone camera at the end of the zone.
Speed Cameras menu
To open the Speed Cameras menu, tap Services in the Main Menu and then tap Speed Cameras.
Report speed
camera
Tap this button to report a new speed camera location.
Page 90

90
Alert settings
Tap this button to set the alerts you will receive and the sounds used for each
alert.
Disable alerts
Tap this button to disable alerts.
Enable report
button
Tap this button to enable the report button. The report button is shown in the
Driving View or in the quick menu.
When the report button is shown in the Driving View, this button changes to
Disable report button.
Page 91

91
About MyTomTom
MyTomTom helps you manage the contents and services of your Blue&Me TomTom 2 navigation
device, as well as giving you access to the TomTom community. You log in to MyTomTom on the
TomTom website. It is a good idea to frequently connect your navigation device to MyTomTom to
ensure you always have the latest updates.
Tip: We recommend using a broadband internet connection whenever you connect your navigation
device to MyTomTom.
Setting up MyTomTom
To set up MyTomTom, do the following:
1. Connect your computer to the internet.
2. Start a browser and go to tomtom.com/getstarted.
3. Click Download now.
Your browser downloads the MyTomTom support application, which you need to install on your
computer in order to connect your device to MyTomTom. Follow the instructions on the screen if
you are asked questions while downloading.
4. When prompted, connect your device to your computer using the USB cable. Then switch your
device on.
Important: You should plug the USB cable directly into a USB port on your computer and not into a
USB hub or USB port on a keyboard or monitor.
Once the MyTomTom support application is installed, you can access MyTomTom from the notification
area on your desktop.
Tip: When you connect your navigation device to your computer, MyTomTom tells you if there are
any updates for your device.
MyTomTom
Page 92

92
MyTomTom account
To download content and services from TomTom, you need a MyTomTom account. You can create an
account when you start using MyTomTom.
Note: If you have more than one TomTom device, you need a separate account for each device.
Page 93
93
Getting help to use your navigation device
You can get further help by going to tomtom.com and clicking Support.
For warranty information, go to tomtom.com/legal.
Status & information
Status &
information
Tap this button to open the Status & information menu.
Version
information
Tap this button to view technical information about your device, such as your
serial number for your device and the TomTom App version.
GPS Status
Tap this button to see the current status for GPS reception.
My Services
Tap this button to check the status of your subscriptions to TomTom Services.
Customer support
Page 94

94
Important Safety Notices and Warnings
Global Positioning System
The Global Positioning System (GPS) is a satellite-based system that provides location and timing
information around the globe. GPS is operated and controlled under the sole responsibility of the
Government of the United States of America, which is responsible for its availability and accuracy. Any
changes in GPS availability and accuracy, or in environmental conditions, may impact the operation of
your TomTom device. TomTom does not accept any liability for the availability and accuracy of GPS.
Use with Care
Use of a TomTom device for navigation still means that you need to drive with due care and attention.
Aircraft and Hospitals
Use of devices with an antenna is prohibited on most aircraft, in many hospitals and in many other
locations. A TomTom device must not be used in these environments.
Battery
This product uses a Lithium-Ion battery.
Do not use it in a humid, wet and/or corrosive environment. Do not put, store or leave your product in
or near a heat source, in a high temperature location, in strong direct sunlight, in a microwave oven or
in a pressurized container, and do not expose it to temperatures over 60°C (140°F). Failure to follow
these guidelines may cause the battery to leak acid, become hot, explode or ignite and cause injury
and/or damage. Do not pierce, open or disassemble the battery. If the battery leaks and you come into
contact with the leaked fluids, rinse thoroughly with water and seek medical attention immediately. For
safety reasons, and to prolong the service life of the battery, charging will not occur at low (below
0°C/32°F) or high (over 45°C/113°F) temperatures.
Temperatures: Standard operation: 0°C (32°F) to +45°C (113°F); short-term storage: -20°C (-4°F) to
+60°C (140°F); long-term storage: -20°C (-4°F) to +25°C (77°F).
Caution: risk of explosion if battery is replaced with an incorrect type.
Do not remove or attempt to remove the non-user-replaceable battery. If you have a problem with the
battery, please contact TomTom customer support.
Addendum
Page 95

95
THE BATTERY CONTAINED IN THE PRODUCT MUST BE RECYCLED OR DISPOSED OF
PROPERLY ACCORDING TO THE LOCAL LAWS AND REGULATIONS AND ALWAYS SEPARATE
FROM HOUSEHOLD WASTE. BY DOING THIS YOU WILL HELP CONSERVE THE
ENVIRONMENT. USE YOUR TOMTOM ONLY WITH THE SUPPLIED DC POWER LEAD (CAR
CHARGER/BATTERY CABLE), AC ADAPTER (HOME CHARGER), IN AN APPROVED CRADLE OR
USING THE SUPPLIED USB CABLE TO CONNECT TO A COMPUTER FOR BATTERY CHARGING.
If you device requires a charger, please use this device with the charger provided. For replacement
chargers, go to tomtom.com for information about approved chargers for your device.
The stated battery life is a maximum possible battery life. The maximum battery life will only be
achieved under specific atmospheric conditions. The estimated maximum battery life is based on an
average usage profile.
For tips on extending the battery life, see this FAQ: tomtom.com/batterytips
SPECIAL NOTE REGARDING DRIVING IN CALIFORNIA AND MINNESOTA
California Vehicle Code Section 26708 (a) (1) provides that "No persons shall drive any motor vehicle
with an object or material placed, displayed, installed, affixed or applied upon the windshield or side or
rear windows." Drivers in California should not use a suction mount on their windshield, side or rear
windows.
Note: This section of the California Vehicle Code applies to anyone driving in California, not just
California residents.
Minnesota State Legislature Statutes Section 169.71, subdivision 1, section 2 provides that "A person
shall not drive or operate with any objects suspended between the driver and the windshield other
than sun visors and rearview mirrors and electronic toll collection devices."
Note: this Minnesota Stature applies to anyone driving in Minnesota, not just Minnesota residents.
TomTom Inc. bears no responsibility for any fines, penalties or damage that may be incurred by
disregarding this notice. While driving in any state with windshield mounting restrictions, TomTom
recommends the use of the supplied Adhesive Mounting Disk or its Alternative Mounting Kit, which
includes multiple options for mounting TomTom devices on the dashboard and the air vents. See
tomtom.com for more information about these mounting options.
FCC information for the user
Federal Communications Commission (FCC) Statement
You are cautioned that changes or modifications not expressly approved by the part responsible for
compliance could void the user's authority to operate the equipment.
This product contains a transmitter which must not be co-located or simultaneously operated in
conjunction with any other transmitter.
Page 96

96
This equipment has been tested and found to comply with the limits for a Class B digital device,
pursuant to part 15 of the FCC rules. These limits are designed to provide reasonable protection
against harmful interference in a residential installation. This equipment generates, uses and can
radiate radio frequency energy and, if not installed and used in accordance with the instructions, may
cause harmful interference to radio communications. However, there is no guarantee that interference
will not occur in a particular installation. If this equipment does cause harmful interference to radio or
television reception, which can be determined by turning the equipment off and on, the user is
encouraged to try to correct the interference by one or more of the following measures:
Reorient or relocate the receiving antenna.
Increase the separation between the equipment and receiver.
Connect the equipment into an outlet on a circuit different from that to which the receiver is connected.
Consult the dealer or an experienced radio/TV technician for help.
Operation is subject to the following two conditions:
This device may not cause harmful interference.
This device must accept any interference received, including interference that may cause undesired
operation.
Radio and Television Interference
This equipment radiates radio frequency energy and if not used properly - that is, in strict accordance
with the instructions in this manual - may cause interference to radio communications and television
reception.
Important
This equipment was tested for FCC compliance under conditions that included the use of shielded
cables and connectors between it and the peripherals. It is important that you use shielded cables and
connectors to reduce the possibility of causing radio and television interference. Shielded cables
suitable for the product range can be obtained from an authorised dealer. If the user modifies the
equipment or its peripherals in any way, and these modifications are not approved by TomTom, the
FCC may withdraw the user's right to operate the equipment. For customers in the USA, the following
booklet prepared by the Federal Communications Commission may be of help: "How to Identify and
Resolve Radio-TV Interference Problems." This booklet is available from the US Government Printing
Office, Washington, DC 20402. Stock No 004-000-00345-4.
FCC radio frequency radiation exposure statement
The Transmitters within this device must not be co-located or operating in conjunction with any other
antenna or transmitter.
FCC Declaration of Conformity
Tested to Comply with FCC Standards for Home or Office Use.
FCC ID: S4L4CS03
IC ID: 5767A-4CS03
Responsible party in North America
TomTom, Inc., 150 Baker Avenue Extension, Concord, MA 01742
Tel: 866 486-6866 option 1 (1-866-4-TomTom)
Page 97

97
Emissions information for Canada
Operation is subject to the following two conditions:
This device may not cause interference.
This device must accept any interference, including interference that may cause undesired operation
of the device.
This device complies with RSS-310 of Industry Canada. Operation is subject to the condition that this
device does not cause harmful interference.
This Class B digital apparatus complies with Canadian ICES-003.
Pacemakers
Pacemaker manufacturers recommend that a minimum of 15cm (6 inches) be maintained between a
handheld wireless device and a pacemaker to avoid potential interference with the pacemaker. These
recommendations are consistent with independent research and recommendations by Wireless
Technology Research.
Guidelines for people with Pacemakers
You should ALWAYS keep the device more than 15cm (6 inches) from your pacemaker when turned
ON.
You should not carry the device in a breast pocket.
If you have any reason to suspect that interference is taking place, turn OFF your device.
Other Medical Devices
Please consult your physician or the manufacturer of the medical device, to determine if the operation
of your wireless product may interfere with the medical device.
Exposure limits
This device complies with radiation exposure limits set forth for an uncontrolled environment. In order
to avoid the possibility of exceeding the radio frequency exposure limits, human proximity to the
antenna shall not be less than 8 inches (20 cm) during normal operation.
Model names
4CS03
This Document
Great care was taken in preparing this manual. Constant product development may mean that some
information is not entirely up to date. The information in this document is subject to change without
notice.
TomTom shall not be liable for technical or editorial errors or omissions contained herein; nor for
incidental or consequential damages resulting from the performance or use of this material. This
document contains information protected by copyright. No part of this document may be photocopied
or reproduced in any form without prior written consent from TomTom N.V.
Copyright notices
© 2011 TomTom N.V., The Netherlands. TomTom®, and the "two hands" logo, among others, are
Trademarks owned by TomTom N.V. or one of its subsidiaries. Please see tomtom.com/legal for
warranties and end user license agreements applying to this product.
Page 98

98
Ordnance Survey © Crown Copyright License number 100026920.
Data Source © 2011 TomTom
All rights reserved.
SoundClear™ acoustic echo cancellation software © Acoustic Technologies Inc.
Nuance® is a registered trademark of Nuance Communications, Inc. and is used here under license.
Some images are taken from NASA’s Earth Observatory.
The purpose of NASA’s Earth Observatory is to provide a freely-accessible publication on the Internet
where the public can obtain new satellite imagery and scientific information about our home planet.
The focus is on Earth’s climate and environmental change: earthobservatory.nasa.gov
The software included in this product contains copyrighted software that is licensed under the GPL. A
copy of that license can be viewed in the License section. You can obtain the complete corresponding
source code from us for a period of three years after our last shipment of this product. For more
information, visit tomtom.com/gpl or contact your local TomTom customer support team via
tomtom.com/support. Upon request, we will send you a CD with the corresponding source code.
Linotype, Frutiger and Univers are trademarks of Linotype GmbH registered in the U.S. Patent and
Trademark Office and may be registered in certain other jurisdictions.
MHei is a trademark of The Monotype Corporation and may be registered in certain jurisdictions.
 Loading...