


User manual
ROC850
ROC850
2
1
3
8
7
9
5
4
11
10
6

Contents
General
Precautions of use ....................................................................................................................................................................2
About your remote control
Your ROC 850 includes many features........................................................................................................................................3
Installing the batteries..............................................................................................................................................................4
About the batteries ..........................................................................................................................................................................4
Description of keys and LED....................................................................................................................................................5
Description of the touch screen keys......................................................................................................................................6
Other very useful touch screen keys ..........................................................................................................................................7
Programming the ROC 850
Programming by entering a 3-digit code................................................................................................................................8
Programming using the Brand scan method ........................................................................................................................9
Programming using the auto scan method..........................................................................................................................10
Identifying codes found during scanning ..............................................................................................................................11
Programming a Macro
Programming without timeout ............................................................................................................................................12
Programming with timeout between 2 keys........................................................................................................................13
Using a Macro-command ......................................................................................................................................................13
Removing a Macro ..................................................................................................................................................................13
Zapping between 2 channels
Programming ..........................................................................................................................................................................14
Use (zap between 2 channels) ..............................................................................................................................................14
EN
EN
Customizing the touch screen
Returning to the default screen ............................................................................................................................................15
Learning a code
Before starting, read the following tips ................................................................................................................................16
Instructions for downloading keys ........................................................................................................................................17
To clear all the keys downloaded in a given mode..............................................................................................................17
Other functions
Beep....................................................................................................................................................................................................18
Backlighting ......................................................................................................................................................................................18
Zero reset ........................................................................................................................................................................................18
Scanning the channels ....................................................................................................................................................................18
Showview/VideoPlus+....................................................................................................................................................................19
General Off ......................................................................................................................................................................................19
Sound volume of a TV set ............................................................................................................................................................19
Sound volume of a satellite or cable receiver..........................................................................................................................19
Sleep Timer ......................................................................................................................................................................................19
Troubleshooting
If the remote control does not operate ..............................................................................................................................20
1

General
Precautions of use
• Your remote control is fitted with an LCD touch screen requiring specific precautions of use.
• Do not apply heavy pressure on it.A slight pressure with the finger is sufficient.
• Do not use sharp and/or metallic objects.
• Avoid shock and mechanical constraints, high temperatures (35° C maximum), vibration,
humidity.
• Read and follow the indications in this manual to install the batteries and set the various
functions.
• Do not let children use the remote control alone.
• Your ROC 850 remote control is designed for domestic use, and not industrial use. It must be
used within a family and private environment.
• Any dismounting or modification of this remote control cancel your rights to the guarantee.
• Also apply the instructions and guidelines detailed in this user manual.
• In case of any particular problem or question, refer to page 20 before calling your retailer or
our technical support at the following number:
You can contact THOMSON by dialling: 0871 712 1312
(For Great-Britain, all calls will be charged 0,10£ / mn)
THOMSON shall not be responsible if the ROC 850 is not used according to this manual.
www.thomson-europe.com
2

About your remote control
Your ROC 850 remote control is a universal remote control designed to be used with most
Audio/Video equipment.Thanks to its 8 mode keys, your ROC 850 replaces up to 8 for the
following devices:
- TV set :
- VCR :
- CD player :
- DVD player :
- Satellite receiver :
- Cable receiver :
- Amplifier/tuner :
- Other audio video device :
Your remote control is fitted with an LCD (Liquid Crystal Display) touch screen.This screen
displays a keypad, with virtual keys you can use when programming or controlling a device. In this
manual, the touch screen keys are designated LCD keys, whereas the other keys (actual keys) are
designated keypad keys.
Your ROC 850 includes many features:
• MACRO function, to memorize 9 keystrokes (up to 20 keys each of the 9 macro keys
available).
• LEARN function, used to download the codes from another remote control (up to 40 keys
per mode).
• Scan/Search function.
• ShowView/VideoPlus+ (
• All off function: to switch off all devices.
• TV Volume/Mute control regardless of the last mode selected.
• Key to shift between 2 channels prefered (
• Customization the LCD touch screen according to your requirements.
SV/V+) key.
TV mode key
VCR mode key
CD mode key
DVD mode key
SAT mode key
CBL mode key
AUDIO mode key
AUX mode key
P<P).
EN
EN
Your ROC 850 includes an extended library of infrared codes you can use to control most
current devices (2003). However, some more recent or older devices may not be compatible with
this remote control.
3

About your remote control
Installing the batteries
Insert the 4 batteries supplied (LR03 / AAA) according to the direction indicated (polarity).
Note: programmed keys maintain programming when replacing the batteries.
About the batteries
• Your ROC 850 uses 4 LR03 (AAA) batteries.When changing the batteries, choose preferably
alkaline batteries, and ensure they are inserted in the right direction (polarity).
• Do not leave the batteries in the remote control if you intend no to use it for a long period
of time. Used batteries can leak an acid liquid.This liquid can damage the remote control and
is toxic: it burns the skin and the mucous. Use gloves when handling such batteries.
• Remove the batteries if you intend not to use your remote control for a long period of time.
• Do not throw the batteries into a fire; store them away from sources of intense heat; do not
short them: they may explode.
• Never let a child play with batteries as he/she may bite them, swallow them, or choke on
them.
• Please respect the environment and prevailing regulations. Before you dispose of
batteries ask your dealer whether they are subject to special recycling and if he accepts
to take them back.
4
About your remote control
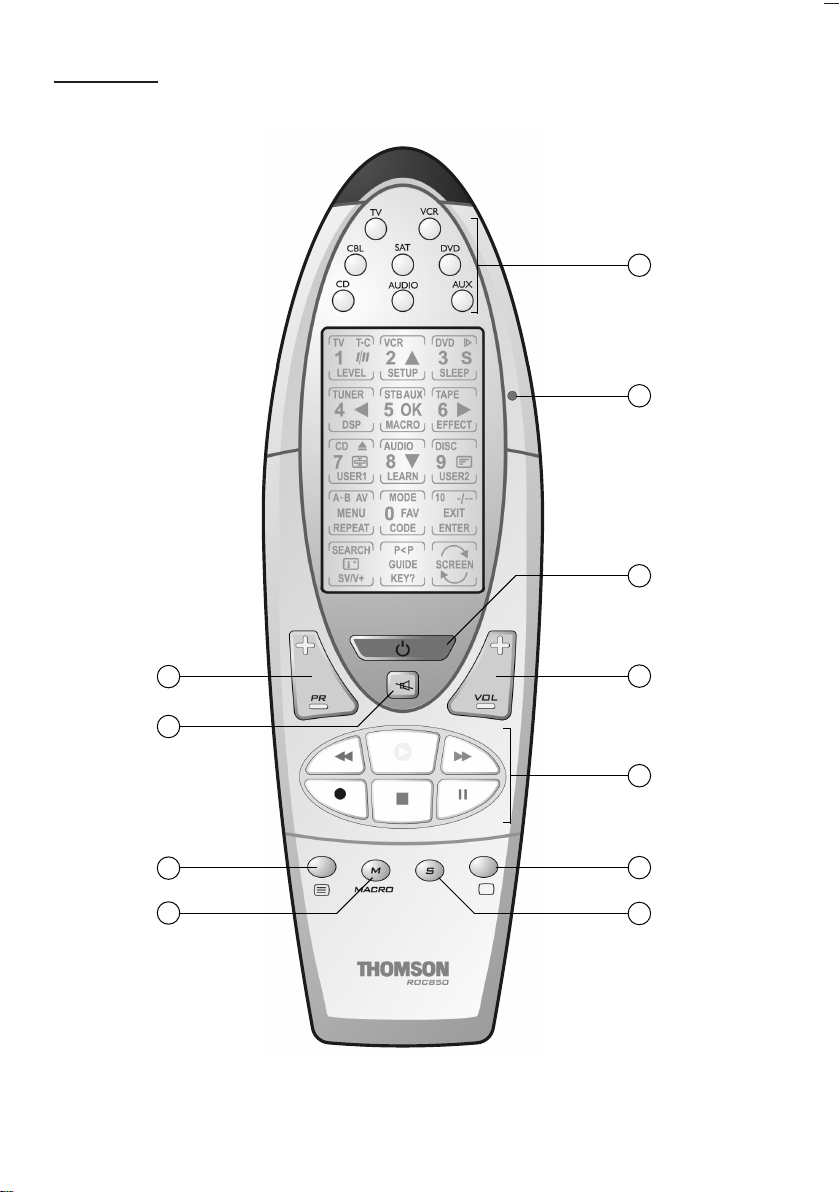
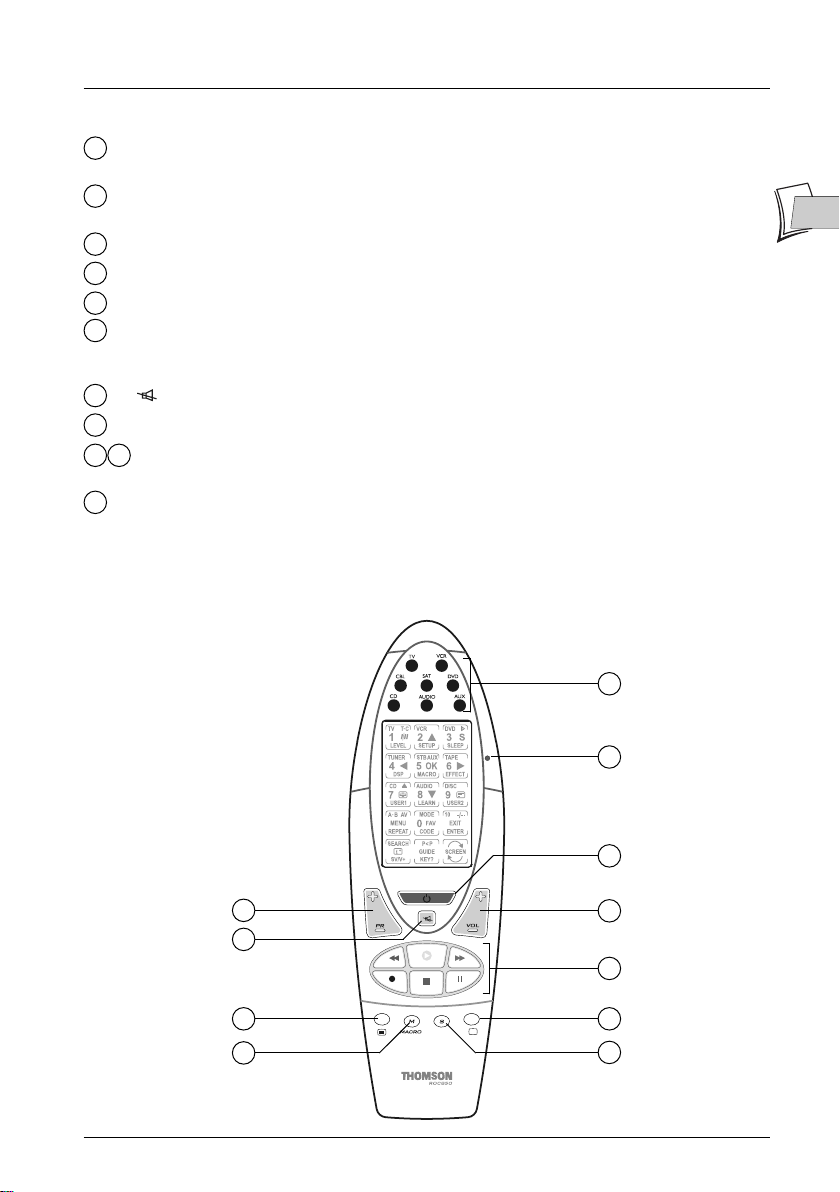
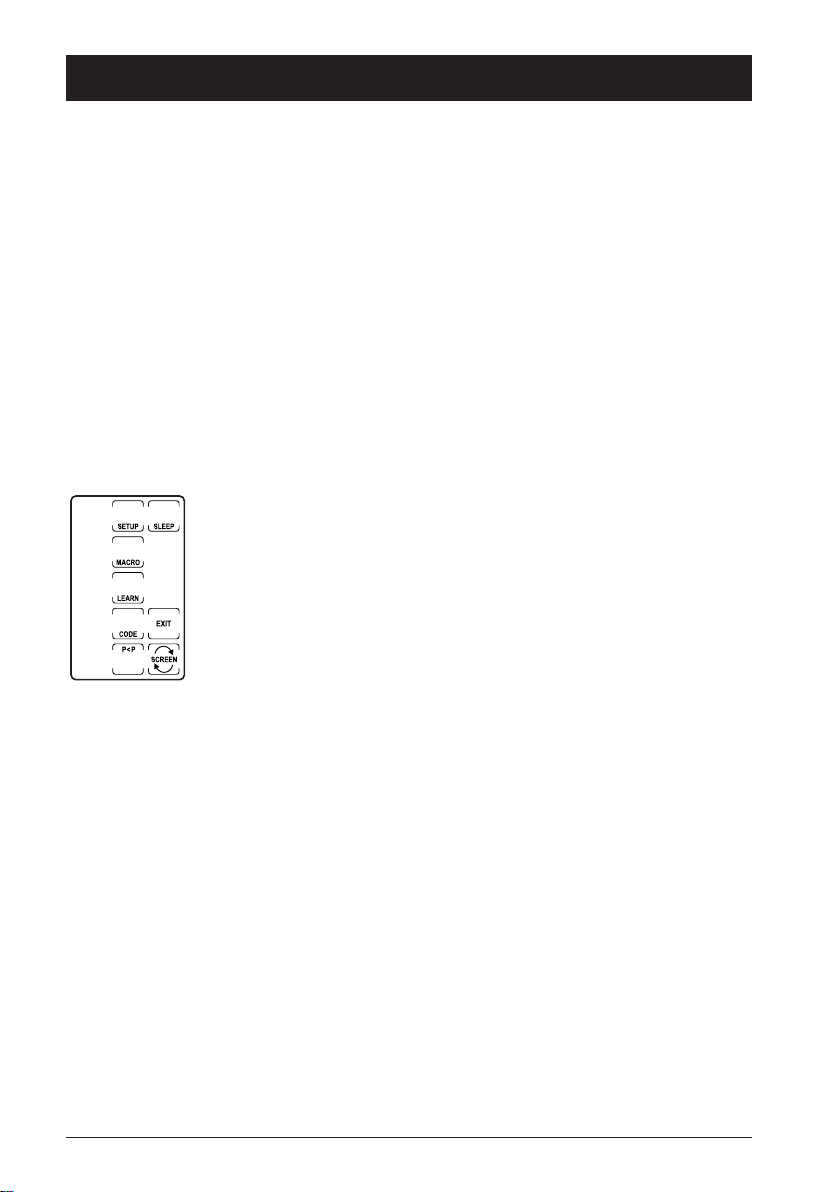
Description of keys and LED
LED: lights up briefly whenever used (pressing a key or the touch screen). Indicates the
1
transmission of a command. Blinks 3 times in case of mistake.
TV, VCR, CD, SAT, CBL, DVD, AUDIO, AUX: operating mode keys, used to select the
2
device to control.
B: switch off the device for the mode selected.
3
VOL +/-: set the volume on certain devices.
4
M (MACRO): Use a macro command (see page 13).
5
S (SETUP): Use to program the remote control according to the device to control. It is
6
also used to access secondary functions (one press on the
displays or hides the letter S in the top right corner of the touch screen).
7
8
9
11
: mute on/off on certain devices.
PR +/- : selecting the next or previous channel.
a/I: Display or remove Videotext.With some devices, quit the Videotext with the
10
EXIT key of the touch screen (see page 6).
PLAY, REW, FF, REC, STOP, PAUSE: to control a disc player or VCR.These keys also
match the color
FAST TEXT keys for the TV, CBL, and SAT modes.
SETUP key, in the VCR mode,
EN
EN
2
1
3
8
7
9
5
5
4
11
10
6
About your remote control
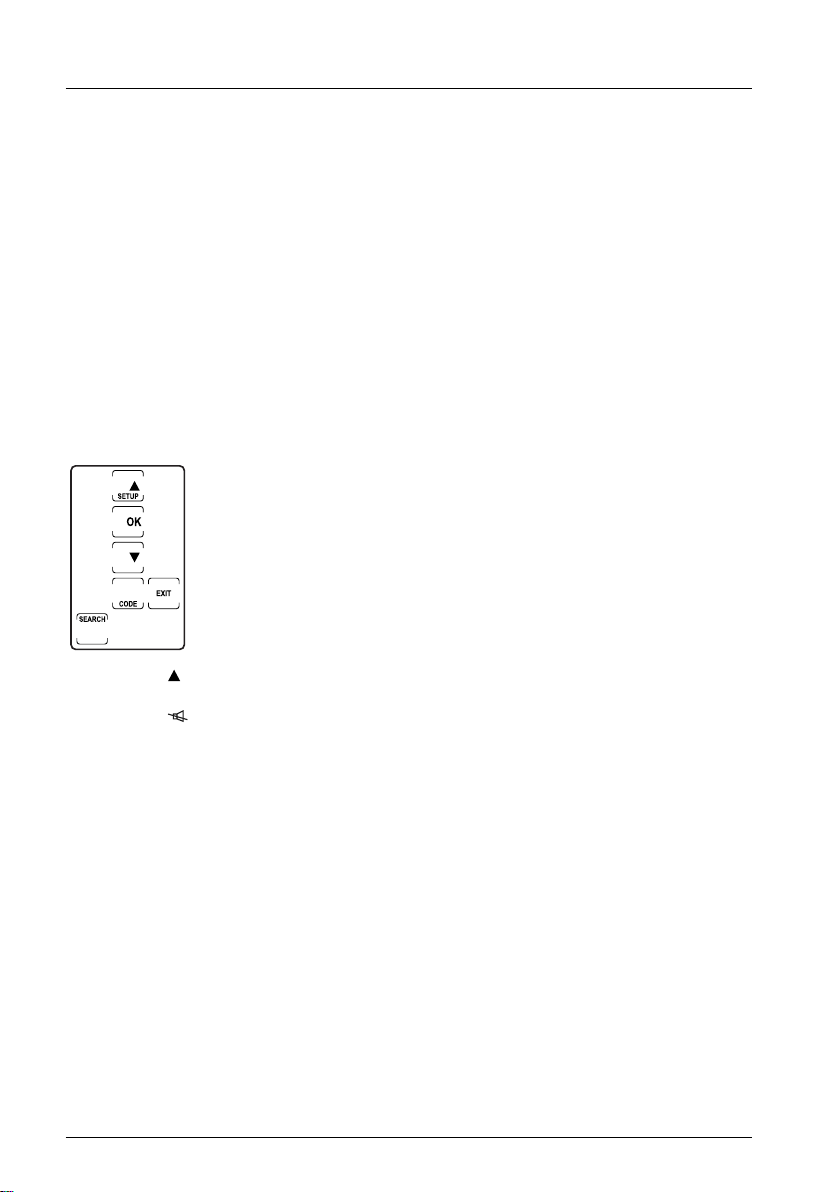
Description of the touch screen keys
The LCD touch screen is used as a virtual keypad, activated when pressed. It
includes 15 areas representing 15 keys.These keys are contextual, i.e. their
number and function depend on the device to control.Therefore, they
depend on the mode chosen (keypad key on which you have pressed
VCR, …).
Your remote control can display 2 virtual keypads on the LCD touch screen for current use.The
SCREEN key on the touch screen is used to shift between screens.The display disappears after a
few seconds inactivity. To activate the display, press the
keys (
2) on the keypad, or any area of the LCD screen.The other keys on the keypad do not
SETUP key (6) or one of the MODE
activate the LCD screen.The keys common to all the modes are described below.
TV,
Main Screen
Secondary Screen
Keys 0 to 9 Select a channel number or enter the number of the device to
control.
-/-- Direct selection of channels beyond 9 with most devices.For other
AV Select an Audio/Video socket (view the images of a device connected
SEARCH Scan channels or sequences (see page 19)
P<P Memorize 2 of your favorite channels, and shift from one to the other
SCREEN Shift from one touch screen to the second screen for the mode
devices, first press the
required (e.g. for the chain 53, enter
0
key and enter the name of the channel
053
).
to the device controlled (DVD player, SAT receiver,VCR,…).
using this key (see page 14).
selected.
Browsing keys for menu selections.
MENU
OK
EXIT
Display the menu of the device controller.
Confirm a choice in a menu.
Remove menu on TV screen.
Displays the channel number, program title...
6
About your remote control
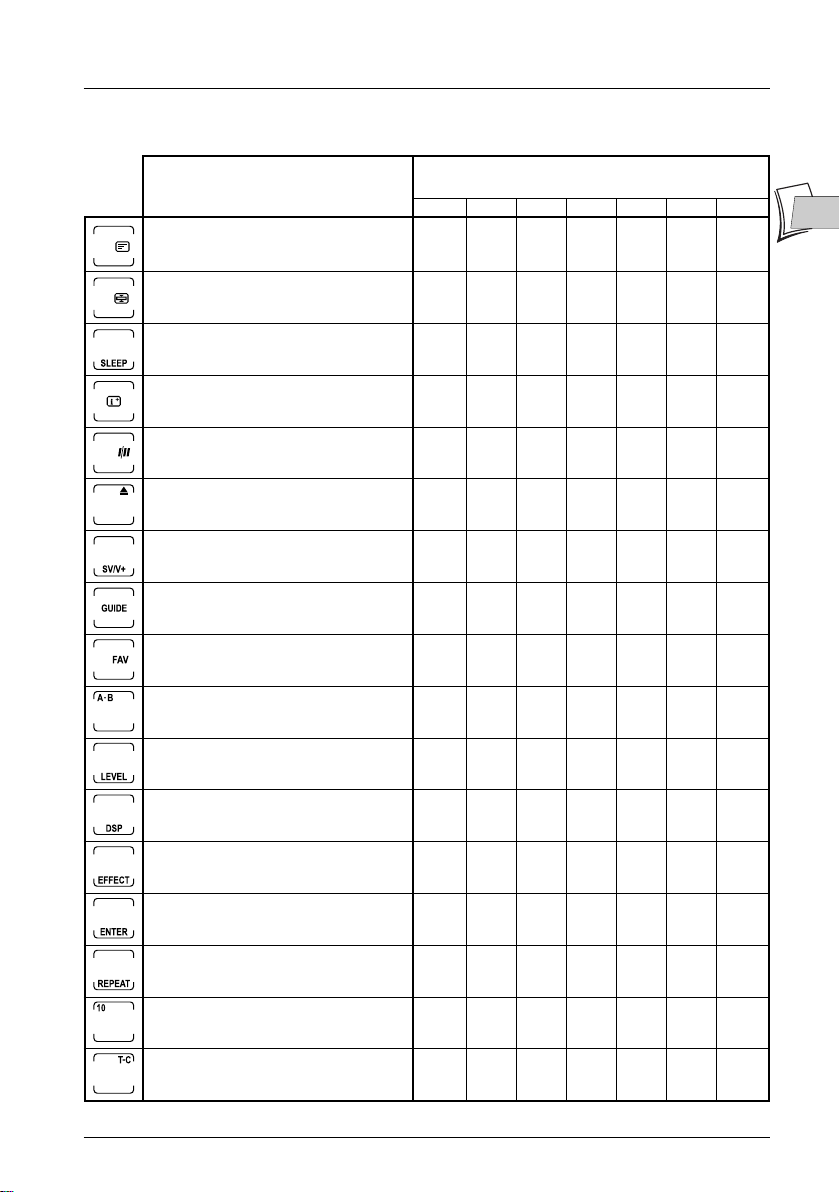
Other very useful touch screen keys
Functions
Displays a videotext page over a
transparent TV image.
Videotext page change stop.
Programs TV sleep (timeout between 1
and 99 minutes, see page 19).
Displays the channel number, program
title...
Select the SP or LP modes on certain
VCRs (simple play or long play function).
To open the disc tray or to eject a
cassette.
Access to the ShowView or VideoPlus+
function on certain VCRs (see page 19).
Display program guide on screen.
Access to favorite channels.
Select loudspeaker A pr B.
(Main screen = 1, Secondary screen = 2)
TV VCR SAT CAB CD AUDIO DVD
2
2
2
2 2
Devices and screens
2
2
2
2
2
1
222
2
2
2 2
2
1
1
2
EN
EN
Set the volume level.
Select digital signal processing (DSP).
Select sound effects.
Confirm an action.
Repeat a disc or a sequence between 2
points,A and B, with certain players.
Go to chapters beyond 09 on a DVD
disc in certain players.
Read a track or a chapter of a disc.
2
2
2
2
2
2
2
2
1
1
2
7
Programming the ROC 850
Any device (TV,VCR, satellite receiver, …) can be controlled using the VCR, DVD, SAT, CD,
AUDIO, CBL and AUX mode keys, provided the remote control is programmed, by allocating
the 3-digit code matching the make of the device to control, or using 2 other code scanning
methods.Therefore, the remote control can be programmed in several ways: by entering a code,
scanning by make, auto scanning.
Note: when pressing, the red indicator lights briefly, and you hear a beep.An error is indicated by 3 blinkings
and 3 beeps.
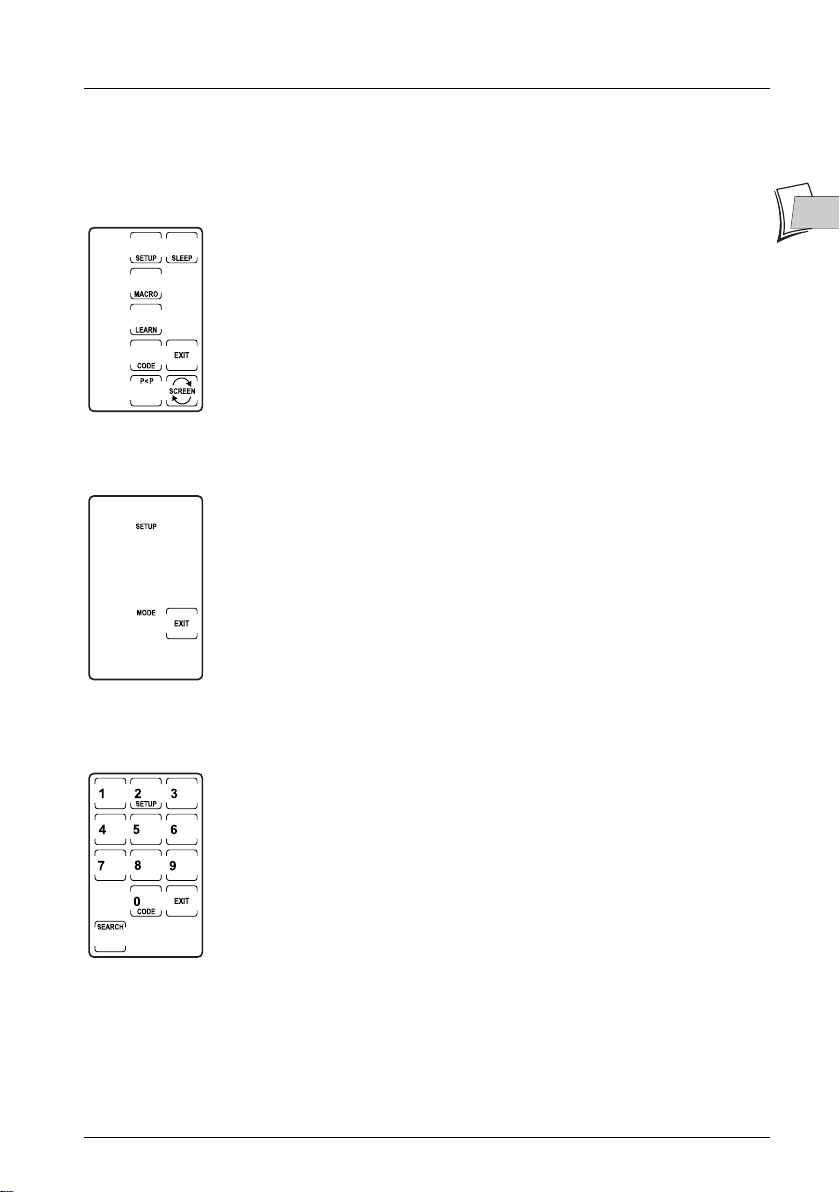
Programming by entering a 3-digit code
Note: before starting, take the document appended in your hands. It lists the codes for most devices. Search
for the type (TV,VCR, …) and make of the device you wish to control. For certain makes, several codes are
proposed.These different codes apply to various generations of devices. Program the remote control by
testing each code, until you find the code covering the most functions possible. Certain codes do not enable
controlling the device required, whereas other codes provide access to more or less functions.
1. Switch on the device to control (TV,VCR, …).
2. Activate the touch screen by pressing it.
3. Press and hold the SETUP (6) key until the red indicator remains lit (2-3
seconds) and the following screen displays (Setting screen). Release the
SETUP key.
4. Press the CODE key on the touch screen.The following screen displays (Mode screen).
5. Press a mode key (TV, VCR, SAT...) on the keypad (2) according to the device to control.
The following screen displays (Code screen).
6. Using the list of codes appended, enter the first 3-digit code for the make of the device you
wish to control (the
indicator switches off after the last digit entered. It confirms the integration of the code (code
correct). In case of error, the indicator blinks fast during a few seconds.The main screen
displays.
SEARCH key disappears after entering the second digit).The red
7. Press the EXIT key on the touch screen.The virtual screen for controlling the device chosen
in step 4 displays. Programming is complete.
Note: point the remote control towards the device and press the B key on the keypad (3). If the device
switches off, this means the code entered is correct. All you need to do is check the various keys on the touch
screen, in order to determine whether the keys proposed on the screen can be used to control the device
concerned. If keys are inoperative, reprogram the remote control using another code proposed in the list.
8. Repeat this procedure for the other devices to control (TV, VCR, DVD, SAT, CD, AUDIO
and AUX).
8

Programming the ROC 850
Programming using the Brand scan method
To avoid searching by entering a code or too long automatic scan,you can scan according to the
brand of the device to control. Make scanning is available only for the CD and AUDIO (HiFi)
modes.
Note: this method presumes you wish to memorize a VCR code under the VCR mode, a satellite receiver
code under the CBL mode, etc …To memorize, for example, a VCR code under the CBL or other code, the
CBL mode key must be dedicated to the list of VCR codes.You can assign any VCR code under the CBL
mode, by applying the method described in page 8, before scanning.
1. Switch on the device to control (TV,VCR, …).
2. Activate the touch screen by pressing it.
3. Press and hold the SETUP (6) key until the red indicator remains lit (2-3 seconds) and the
following screen displays (Setting screen). Release the
4. Press the CODE key on the touch screen.The following screen displays (MODE screen).
5. Press the mode key (TV, VCR, SAT...) of the device to control on the
keypad (
2).The following screen displays (CODE screen).
6. Press one of the numeric keys (0 to 6) matching the make of the device to control (refer to
the separate codes list).
Note: when pressing 0 you launch a complete scan identical to the code scanning method (see page 10).
7. Press the SEARCH key on the touch screen once.The SEARCH screen displays.
8. Press the key on the touch screen (or the B or PLAY keys on the keypad).The remote
control sends a series of codes and beeps.When the device switches off or the channel
changes (according to the key pressed in step 8) press the key (
memorize the corresponding code.The main screen displays. Code scanning is completed.
Note: if you have accidentally overshot the code, you can browse back by pressing the key on the touch
screen or the PR- key on the keypad.To move forward, press the key on the touch screen or the PR+
key on the keypad.
9. Repeat this procedure for the other devices to control (TV, VCR, DVD, SAT, AUX).
Note:
• point the remote control towards the device, and press the
switches off, this means the code found by the remote control is correct.You only need to check that the
various keys on the touch screen proposed enable controlling the device concerned. If touch keys are
inoperative, reprogram using make scanning, by restarting the procedure.
• When all the codes for a make have been tested, the red indicator blinks 3 times to indicate scanning is
complete, and the main screen displays.
SETUP key.
7) immediately to
B key on the keypad (3). If the device
EN
EN
9
Programming the ROC 850
Programming using the auto scan method
If you were unable to find the satisfactory code using the manual entry or make scanning
methods, try the auto scan method below.
Note: this method presumes you wish to memorize a VCR code under the VCR mode, a satellite receiver
code under the CBL mode, etc …To memorize, for example, a VCR code under the CBL or other code, the
CBL mode key must be dedicated to the list of VCR codes.You can assign any VCR code under the CBL
mode, by applying the method described in page 8, before scanning.
1. Switch on the device to control (TV,VCR, …).
2. Activate the touch screen by pressing it.
3. Press and hold the SETUP (6) key until the red indicator remains lit (2-3 seconds) and the
following screen displays (Setting screen). Release the
4. Press the CODE key on the touch screen.The following screen displays (MODE screen).
5. Press a mode key (TV, VCR, SAT...) on the keypad (2) according to the device to control.
The next screen appears (CODE screen).
6. Press the SEARCH key on the touch screen once.The SEARCH screen
displays.
SETUP key.
7. Press the key on the touch screen (or the B or PLAY keys in the keypad).The remote
control returns a series of codes and beeps.When the device turns off or changes channel
press the (
redisplays. Code scanning is complete.
Note: point the remote control towards the device and press the B key (3) on the keypad. If the device
switches on, this means the code found by the remote control is correct.You only need to check that the
various keys on the touch screen proposed on the screen enable controlling the device concerned. If touch
keys are inoperative, reprogram by make scanning, by restarting the procedure.
7) key immediately to memorize the corresponding code.The main screen
8. Repeat this procedure for the other devices to control (TV, VCR, DVD, SAT, AUX).
Note:
• once all the codes matching a make have been tested, the red indicator blinks 3 times to indicate that
scanning is complete, and the main screen displays.
• Code scanning starts from the last code memorized under the mode concerned. Therefore, if auto scan
tests the 100 mode codes concerned, and if the code in memory in the remote control is code 050, code
search will start from code 051 up to code 100, then returns to 000 to 050.
10
Programming the ROC 850
Identifying codes found during scanning
1. Activate the touch screen by pressing it.
2. Press and hold the SETUP (6) key until the red indicator remains lit (2-3
seconds) and the following screen displays (Setting screen). Release the
SETUP key.
3. Press the CODE key on the touch screen.The following screen displays (MODE screen).
EN
EN
4. Press the MODE key (TV, VCR, SAT...) on the keypad (2) according to the device to
control.The next screen appears (CODE screen).
5. Press the SETUP (6) key.The 3 digits of the code memorized appear
one after the other.The main screen displays. Identification of the code is
completed. Press the
EXIT key on the touch screen.
11

Programming a Macro
You can memorize up to 9 control sequences (Macros) in your remote control. Each sequence
can run a series of 20 instructions. Once memorized, press the
screen key for the sequence to run.Before programming, take a few minutes to write down the
sequence to compose.This will be particularly useful to achieve your programming and use it
later.
Programming without timeout
1. Activate the touch screen by pressing it.
2. Press and hold the SETUP (6) key until the red indicator remains lit (2-3
seconds) and the Setting screen displays.Release the
3. Press the MACRO (5) key on the touch screen.The MACRO screen
displays.
4. Press 1 to 9 to number the sequence.
5. A new screen displays, using the keypad (2), press the key of the mode
desired (
mode selected, as well as the
6. Compose your sequence:
a) Press the sequence of keys to memorize in the exact order required.
b) Use the
c) Use a key for the keypad mode (
7. Press the MACRO (5) key on the keypad to save the sequence. Saving is
automatic when reaching the 20 keys possible.
8. Press the EXIT key on the touch screen to return to the previous menu.
TV, VCR, SAT, …).The touch screen displays the keys of the
SETUP and MACRO keys.
SCREEN key on the touch screen to go to the 2nd screen.
devices (start a TV ser, select a channel, switch on a satellite
receiver, ...).
MACRO (5) key and the touch
SETUP key.
TV, VCR, …) to control different
Note:
• In certain cases, you may have to include a timeout between 2 keys. Refer to next
paragraph.
• Secondary keys accessible via the
• You cannot include a Macro inside a Macro.
S key cannot be included in a Macro.
12

Programming a Macro
Programming with timeout between 2 keys
Inside a sequence, the time between 2 infrared transmissions is 0.5 seconds.
You may have to increase this time in order to leave, for example, the time for the TV to light on
and display the images of a channel.
1. When composing your sequence (step 6 page 12), press the SETUP (6)
key on the keypad (or screen) in order to display the timeout screen.
2. Using the touch screen numeric keys, enter the time required (maximum
9 seconds). Indicating a time is considered as being a key (20 keys max
per sequence).
To apply the default timeout (0.5 second), press the
screen without entering a value.
Note: the commands accessible via the S key cannot be included to a sequence.To quit the Macro mode
while entering a sequence, press the SETUP key twice.
Using a Macro-command
To use a Macro, press the MACRO (5) key on the keypad, then press the appropriate key on the
touch screen (keys 1 to 9 according to the sequences memorized).
EXIT key on the touch
EN
EN
Removing a Macro
1. Activate the touch screen by pressing it.
2. Press and hold the SETUP (6) key until the red indicator is list (2-3
seconds) and that the Setting screen displays.Release the
3. Press and hold the MACRO (5) key on the keypad or touch screen.The
red indicator switches off, and the Delete Macro screen displays.
4. Press the key matching the sequence to remove.The red indicator blinks
to indicate that deletion is effective.
To quit the screen without deleting a sequence, press the
13
SETUP key.
EXIT key.

Zapping between 2 channels
Use the P<P key on the touch screen to toggle between 2 favorite channels stored previously.
Programming
Activate the touch screen by pressing it.
1.
2. Press and hold the SETUP (6) key until the red indicator is list (2-3 seconds) and that the
Setting screen displays. Release the
3. Press the P<P key on the touch screen.The P<P screen displays.
4. Press the mode key required (TV, VCR, SAT, …) on the keypad.The
touch screen displays the mode keys selected, as well as the
P<P keys.
5. Enter the first number of one of your 2 favorite channels (1 to 3 digits).
6. If your channel has less than 3 digits, press the mode key (TV, VCR, …)
after entering the number.
7. Enter the second number of your other favorite channel (between 1 and
3 figures).
8. If your channel has less than 3 digits, press the SETUP (6) key after
entering the digit.
9. If you have entered 3 digits, press the EXIT key on the touch screen.
Note: the key for the mode desired must be pressed before entering the channel
number.The commands accessible via key S cannot be used.
The
SCREEN key on the touch screen provides access to the 2nd screen.
A pressure on the
entry.
SETUP key.
SETUP and
SCREEN key of the touch screen is considered as being an
Use (zap between 2 channels)
Activate the touch screen by pressing it.
1.
2. Press the P<P key on the touch screen to zap from one channel to another.
14

Customizing the touch screen
You can select the keys which will be displayed or hidden when displaying each mode.You can
change any touch key, except the
1. Activate the touch screen by pressing it.
2. Press and hold the SETUP (6) key until the red indicator remains lit (2-3 seconds) and the
display of the next screen (Setting screen). Release the
3. Press the SCREEN key on the touch screen.The next screen displays (MODE screen).
4. Press the key of the mode required (TV, VCR, SAT, …) on the keypad.
5. The touch screen displays the keys for the mode selected, as well as the
SETUP and SCREEN keys.
6. You can now allocate other functions to each of the touch screen keys,
or clear them by pressing as many times as required on the key
concerned.
7. After customizing the touch screen for a mode, you can customize it for
another mode, by pressing the key of the mode required (
SAT, …).Your settings in the previous mode are saved.
8. To save your customized setting and return to the main screen, press the SETUP key.
9. Press the EXIT key on the touch screen to return to the previous menu.
Note: the SCREEN key on the touch screen provides access to the 2nd screen.
The
SLEEP, SETUP, MACRO, LEARN, P<P, KEY? and SEARCH keys cannot be changed.
Returning to the default screen
You can cancel your customized settings and return to the default screen.
1. Activate the touch screen by pressing it.
2. Press and hold the SETUP (6) key until the red indicator remains lit (2-3
seconds) and the display of the next screen (Setting screen). Release the
SETUP key.
3. Press the SCREEN key on the touch screen.The next screen displays
(MODE screen).
4. Press the key of the mode required (TV, VCR, SAT, …) on the keypad.
5. The touch screen displays the keys for the mode selected, as well as the
SETUP and SCREEN keys.
6. Maintain the key of the mode to restore depressed.
7. The main screen displays, press EXIT to quit.
Note: to cancel your screen customization and return to the default screen, press the Mode key and hold it
during about 3 seconds (until the main screen appears). The SLEEP, SETUP, MACRO, LEARN, P<P,
KEY? and SEARCH keys cannot be customized.
SCREEN, SLEEP, SEARCH and P<P keys.
SETUP key.
TV, VCR,
EN
EN
15

Learning a code
3 to 5 cm
ROC 440
To recover all the features of one of your original remote controls (e.g. the one supplied with
your TV set), you can download the infrared codes from the original remote control into your
ROC 850.Your ROC 850 can “copy” up to 40 keys per mode.
Before starting, read the following tips:
• Check that the batteries in both remote controls are not used.
• Perform a zero reset of programming before starting this operation (see page 18).This means
that all the parameters in the ROC 850 remote control will be restored to their default value
(factory settings).
• Lay both remote controls as shown in the figure below, and at same horizontal level as the
ROC 850.
• Leave a distance of about 5 cm between both remote controls, while ensuring you are away
from an incandescent or energy saving lamp.
• Perform a test, by downloading 2 or 3 keys and trying them out.Then perform a zero reset
before a full download of all the functions in the original remote control.
• When downloading a key, do not release the key transmitted as long as the screen does not
redisplay and the red indicator remains lit.This can require 2 to 3 seconds.
• No function can be memorized under the
touch screen or the
keys on the keypad.
SETUP, MACRO, TV, VCR, DVD, CBL, SAT, CD, AUX or AUDIO
SCREEN, SLEEP, P<P,SEARCH keys of the
3 to 5 cm
16
Learning a code
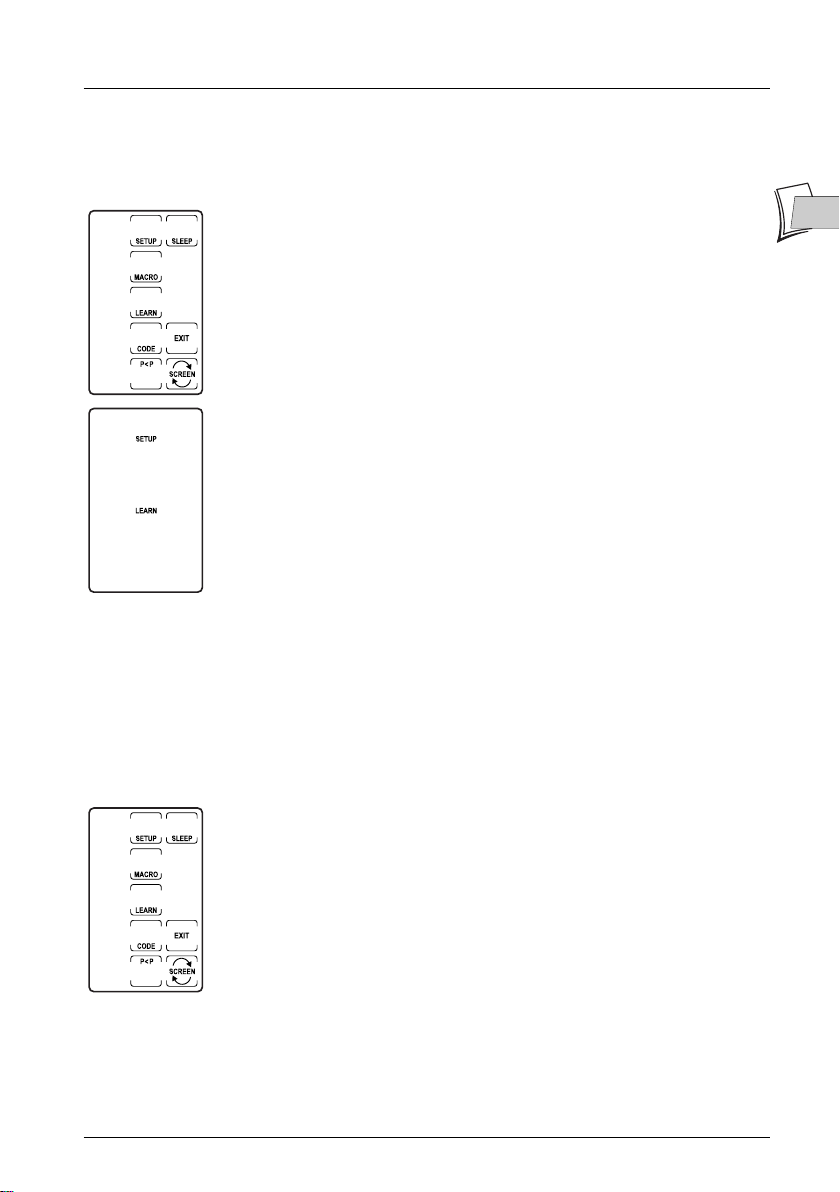
Instructions for downloading keys
Activate the touch screen by pressing it.
1.
2. Press and hold the SETUP (6) key until the red indicator remains lit (2-3 seconds) and the
display of the next screen (Setting screen). Release the
3. Press the LEARN key on the touch screen.The MODE screen appears.
4. Press the mode key desired (TV, VCR, SAT,etc.) on the keypad.The
LEARN screen displays.This screen includes the touch keys in the mode
selected, as well as the
5. Press the touch key or keypad key for which you wish to download the
first key of the original remote control. Use the
touch screen to open the 2nd screen.
6. Press and hold the key on the original remote control until the red
indicator on the ROC 850 blinks once and the LEARN NEXT screen
appears (this can take 2 to 3 seconds). In case of error, the red indicator
blinks during 3 seconds, but the ROC 850 remains in the learning mode
with the LEARN NEXT screen displayed.To download a new key, press
the
LEARN key on the touch screen and return to step 5 in the above
procedure.To memorize and quit the learning mode, press the
on the touch screen.The Setting screen displays. Learning is complete.
7. Quit by pressing the EXIT key on the touch screen.
SETUP and LEARN keys.
SETUP key.
SCREEN key on the
OK key
EN
EN
To clear all the keys downloaded in a given mode
Activate the touch screen by pressing it.
1.
2. Press and hold the SETUP (6) key until the red indicator remains lit (2-3 seconds) and the
display of the next screen (Setting screen). Release the
3. Press and hold the LEARN key on the touch screen.The MODE screen
displays.
4. Press the mode key required (TV, VCR, SAT, etc.) on the keypad.The
LEARN screen displays.
5. Press and hold the SETUP (6) key until the Setting screen displays.All
the keys downloaded under the mode concerned are then cleared.
17
SETUP key.

Other functions
Beep
A beep can be generated when pressing the keys.If you wish to remove this feature, you can
disable it and reactivate it later.
1. Activate the touch screen by pressing it.
2. Press the SETUP (6) key until the red indicator remains lit (2-3
seconds) and the display of the next screen (Setting screen). Release the
SETUP key.
3. Press and hold the STOP key on the keypad for a few seconds until the
red indicator blinks.
Note: to activate the beep, perform the same procedure, but press the PLAY key
instead of the STOP key.
Backlighting
Your ROC 850 is fitted with a photo-sensitive cell which triggers automatic key backlighting when
ambient light is insufficient.You can also trigger lighting by hiding the cell located at the front of
the remote control.You can change the backlighting time, set to 30 seconds by default.
1. Activate the touch screen by pressing it.
2. Press and hold the SETUP (6) key until the red indicator remains lit (2-3
seconds) and the display of the next screen (Setting screen). Release the
SETUP key.
3. Press the SETUP (6) key.A numeric keypad with 9 keys displays.
4. Select a duration by pressing one of the 9 keys (1 for 10 seconds, 2 for
20 seconds, 3 for 30, etc.).
5. Press the ENTER key on the touch screen. Setting is completed.
Zero reset
To reset your ROC 850 and restore factory settings (default settings).
1. Activate the touch screen by pressing it.
2. Press and hold the SETUP (6) key until the red indicator remains lit (2-3
seconds) and the display of the next screen (Setting screen). Release the
SETUP key.
3. Press and hold the SETUP (6) key during about 5 seconds, until the red
indicator switches on and off and the screen disappears. Zero reset is
completed.The remote control is back to the original setting when
purchased.
Scanning the channels
This function is used to view automatically, one after the other, the channels of a TV set or
satellite or cable receiver. Press the
channels. Channel change is performed every 3 seconds, to stop, press any key.
Note: after 2 minutes, browsing stops.
SEARCH key once on the touch screen to browse the
18

Other functions
Showview/VideoPlus+ (VCR)
This function provides access to the ShowView (or VideoPlus+) programming functions for a
VCR featuring them. If the function does not exist in your VCR, you open the recording
programming function .
General Off
This function is used to switch off all the devices by pressing on a single key. Press promptly (in
less than a second) twice on the B key and hold the key the second time.
Sound volume of a TV set
The sound volume adjustment and mute keys of a TV set remain active regardless of the mode
selected.
Sound volume of a satellite or cable receiver (SAT/CBL)
Certain satellite or cable receivers have a sound volume adjustment.The adjustment keys
allocated to the TV set sound volume adjustment can be allocated to controlling the sound
volume of a satellite or cable receiver.
1. Press the TV mode key on the keyboard.
2. Press and hold the SETUP (6) key until the red indicator remains lit (2-3 seconds) and the
display of the next screen (Setting screen). Release the
3. Press and hold the (7) key on the keypad during 5 seconds, until the red indicator blinks,
switches off during 5 seconds, and switches on.The main screen displays again. Setting is
completed.Volume control can no longer be used for the TV set, but for a satellite or cable
receiver.
Note: to return to the previous setting (volume control of a TV set), apply this procedure.
SETUP key.
EN
EN
Sleep Timer
To shift your TV into standby, follow the procedure below:
1. Activate the touch screen by pressing it.
2. Press the TV key (2) on the keypad.
3. Displays the second screen, by pressing the SCREEN button on screen.
4. Hold the SLEEP key on the touch screen until the red indicator remains
On and the SLEEP screen displays.
5. Release the SLEEP key.
6. Using the numeric keys on the touch screen, enter the time before your
TV switches off (01 to 99. For times below 10 minutes, enter 2 figures,
e.g. 05 for 5 minutes).The indicator switches off, the screen changes.
7. The sleep timer function is set. Lay your remote control opposite your TV while checking no
obstacle (object, perso, animal) is present between the TV set and the remote control.
Note: to cancel the sleep timer, hold the SLEEP key until you hear 2 beeps.
19

Troubleshooting
If the remote control does not operate or malfunctions, check that the
solution is not in the following advice:
• Check that you have pressed one of the 8 mode keys of your ROC 850 (TV, VCR,
DVD, ...).
• Check that the original remote control of the device you wish to control is operating
properly.
• If the list of codes you chose in programming (page 8) is inoperative, try the next code or
use automatic scan programming (page 10).
• If the red indicator remains lit, usually after a long period of time, this means that the
batteries are ageing. Replace them as soon as possible.
• If you have just replaced the batteries, check they are inserted properly. Do not mix new
batteries and used batteries, or batteries of different types (alkaline, saline, ...). Use new
alkaline batteries, preferably from the same manufacturer.
20
ROC 850 EN / RST - BEI / 09-2003

ROC 850
Model and serial number
THOMSON
46, quai A. Le Gallo
92648 Boulogne Cedex
France
RCS NANTERRE B 322 019 464
30 Tower View - Kings Hill
West Malling - Kent ME19 4NQ
England
http://www.thomson-europe.com
35744210 © Copyright THOMSON 2003
Dealer's address

ROC 850

ROC850
ACME ................... 003 030
ADA ...................... 013
ADC ...................... 006 002
ACURA .................. 009 074
ADMIRAL ................ 000 001 002 019 021 053 108
ADYSON ................ 003
AGAZI ................... 002
AGB ...................... 123
AIKO ..................... 003 004 009
AIWA .................... 087 184
AKAI ...................... 004 006 008 009 011 051 061 068 069 070 086 133 141 169
AKIBA .................... 011
AKITO .................... 025
AKURA ................... 002 011 071
ALBA ..................... 003 009 011 027 028 053 062 068 083 162 169
ALBIRAL ................. 037
ALKOS ................... 164
ALLORGAN ............. 026 157
ALLSTAR ................. 051
AMPLIVISION .......... 003
AMSTRAD ............... 002 009 011 013 030 068 069 071 074 108 123
ANAM ................... 009 065 109
ANGLO ................. 009
ANITECH ............... 002 009 043 109
ANSONIC .............. 009 014
ARCAM DELTA ........ 003
ARC EN CIEL ......... 045 126 139
ARISTONA .............. 051 169
ARTHUR MARTIN ..... 158
ASA ...................... 000 016 017 018 021 110
ASBERG ................ 043 051
ASTRA ................... 009
ASUKA ................... 002 003 011
ATLANTIC ............... 003 051 157 169
ATORI .................... 009
AUDIOSONIC .......... 003 009 011 051 139 157 169
AUDIOTON ............. 003
AUSIND ................. 043
AUTOVOX .............. 000 002 003 043 101 125 157
BAIRD .................... 111 139
BANG & OLUFSON .. 000 199
BASIC LINE ............ 009 011 051
BASTIDE ................. 003
BAUR .................... 076 118 132 141 169
BEKO .................... 007 034 083
BEON ................... 051 169
BEST ..................... 113
BESTAR ................. 051 115
BINATONE ............. 003
BLACK STAR ........... 129
BLAUPUNKT ............ 008 022 100 112 117 135 202
BLUE SKY .............. 011
BLUE STAR ............. 120
BONDSTEC ............ 129
BOOTS .................. 003 025
BPL ....................... 120
BRANDT ................. 022 036 045 046 126 127 139
BRION VEGA .......... 000 051 169
BRITANNIA ............. 003
BRUNS .................. 000 007
BSR ...................... 026 131
BTC ...................... 011
BUSH .................... 009 011 019 024 025 027 028 051 062 068 115 120 131 132 139
CAPSONIC ............ 002
CARREFOUR ........... 027
CASCADE .............. 009
CATHAY ................ 051 169
CENTURION ........... 051 169
CENTURY .............. 000
CGE ..................... 043 053 129 131
CIMLINE ................ 009 028
CITY ...................... 009
CLARIVOX .............. 037 169
CLATRONIC ........... 002 003 009 011 030 043 051 083 129
CONCORDE .......... 009
CONDOR .............. 003 051 083 198
CONTEC ............... 003 009 027 029 030
CONTINENTAL EDISON 022 036 045 046 111 126 139
COSMEL ................ 009
CROSLEY .............. 000 043 129 131
CROWN ................ 009 043 051 053 083 121 169
CS ELECTRONICS .. 003 011 129
CTC ...................... 129
CTC CLATRONIC .... 014
CYBERTRON .......... 011
DAEWOO .............. 003 003 009 051 058 094 115 191
DAINICHI ............... 011
DANSAI ................. 002 051 169
DANTAX ................. 034 088 148 161 169 171
DATSURA ................ 121
DAYTON ................ 009
DE GRAAF .............. 006 019 033
DECCA ................. 003 004 025 030 051 123 169
DESMET ................. 051 169
DIXI ....................... 009 051 169
DTS ....................... 009
DUAL ..................... 003 089 125 126 131 139 160
DUAL-TEC ............... 003 009 131
DUMONT ................ 000 003 014 017 018
DUX ...................... 169
DYNATRON ............ 051 169
ELBE ..................... 037 108 157
ELCIT .................... 000
ELECTRO TECH ...... 009
ELECTA ................. 120
ELIN...................... 003 016 018 051 169
ELITE ..................... 011 051
ELMAN .................. 014 131
ELTA ...................... 009
EMERSON ............. 000 127 141
ERRES ................... 051 169
ETRON .................. 009
EURO-FEEL ............. 002
EUROLINE .............. 088 149 169
EUROMANN ........... 002 003 003 051
EUROPHON ........... 003 014 025 051 123 131
EXPERT ................. 157
FENNER ................ 009 115
FERGUSON ............ 035 036 037 050 052 081 095 111 127 163 169
FIDELITY ................. 003 019 068 074 095 096
FINLANDIA .............. 006 019 110 128
FINLUX ................... 000 003 004 014 016 017 018 043 051 061 063 110 123 131 157
167 169 171
167 169
FIRST LINE .............. 003 009 026 051 062 129
FISHER .................. 000 003 006 018 027 029 040 083 131
FLINT ..................... 051 148
FORGESTONE ........ 095
FORMENTI .............. 000 001 003 043 125 131 133 169
FORTRESS .............. 000 001
FRONTECH ............ 002 009 019 021 068 118 129 129
FUJITSU .................. 004 157
FUNAI .................... 002 026
GALAXI .................. 053 083
GBC ..................... 009 027 131
GEC ..................... 003 004 021 041 051 123 132 141 169
GELOSO ................ 009 019 131
GENERAL TECHNIC 009
GENEXXA .............. 011 021 051
GOLDSTAR ............. 003 009 012 019 051 084 093 129 131 169 171
GOODMANS .......... 002 004 009 027 028 051 068 093 111 115 127 153 169
GORENJE .............. 083
GPM ..................... 011
GRAETZ ................. 021 141 142
GRANADA .............. 003 004 006 019 027 031 040 043 051 054 064 123 127 128 133
GRANDIN .............. 009 011 120 169
GRUNDIG .............. 008 017 043 091 101 117 135 136 114
HALIFAX ................. 002 003
HAMPTON ............. 003
HANSEATIC ........... 003 007 009 026 027 051 073 118 131 141 169
HANTAREX ............. 009 123
HAUPPAUGE .......... 193
HCM .................... 002 003 009 074 120
HIFIVOX ................. 139
HINARI .................. 006 009 011 027 043 051 137 169
HISAWA ................ 011 120 148
HITACHI ................ 003 004 016 019 021 023 027 033 041 045 046 047 085 118 123
HOSHAI ................ 011
HORNYPHON ........ 051
HUANYU ................ 003 115
HYGASHI .............. 003
HYPER .................. 003 009 129 131
HYPSON ............... 002 003 051 120 169
ICE ....................... 002 003 009 011 051 068
IMPERIAL ................ 021 043 051 053 083 129 131
INDESIT ................. 024 101
INDIANA ................ 051 169
INGELEN ............... 021
INGERSOL ............. 009
INNO HIT .............. 003 004 009 011 051 093 123 169
INNOVATION .......... 002 009 061 067 068 087 103 107 111 115 154 156 168 171 175
INTERBUY .............. 009 109 129
INTERFUNK ............. 000 021 051 129 139 141 169
INTERVISION .......... 002 003 014 109
IRRADIO ................. 009 011 051 068 169
ISUKAI ................... 011
ITC ....................... 003 131
ITS ........................ 011 051 068 120
ITT ......................... 009 021 031 061 132 133 141 142 143
ITV ........................ 009 088 169 171
JEC ...................... 164
JVC ...................... 027 051 068 081
KAISUI ................... 003 009 011 120
KAMOSONIC .......... 003
KAMP .................... 003
KAPSCH ................ 021 157
KARCHER .............. 003 009 016 037 169
KENDO ................. 014 019 028 108
KENNEDY .............. 131 157
KINGSLEY .............. 003
KNEISSEL .............. 174
KOLSTER ................ 051
KONKA ................. 011 229
KORPEL ................. 051 169
KORTING ............... 000
KOYODA ................ 009
KTV ....................... 003
KURO .................... 121
KYOTO .................. 037
LENCO ................. 009
LENOIR ................. 003 009
LESA ..................... 129
LEYCO .................. 002 004 026 051 169
LG ........................ 003 009 012 019 051 084 088 093 129 131 149 169 171
LIESENK ................ 169
LIFE ....................... 002 009 061 067 068 087 103 107 111 115 154 156 168 171 175
LIFETEC ................. 002 009 061 067 068 087 103 107 111 115 154 156 168 171 175
LOEWE ................. 097 098
LOEWE OPTA ......... 000 051 169
LOGIK ................... 030
LUMA .................... 019 141 157 169
LUMATRON ............. 019 051 074 141 157 169
LUX MAY ................ 051
LUXOR ................... 003 019 047 077 093 101 132 138 141 196
M-ELECTRONIC ....... 003 009 016 018 021 036 051 068 109 110 115 139 169
MAGNADYNE ......... 000 014 123 129 131 169
MAGNAFON ........... 003 014 043 123
MAGNUM .............. 002 009 061 067 068 087 103 107 111 115 154 156 168 171 175
MANDOR ............... 002
MANESTH .............. 002 003 028 051 169
MARANTZ .............. 051 169
MARELLI ................. 000
MARK .................... 051 169
MATSUI .................. 003 004 009 013 019 025 026 027 028 030 051 062 068 091 123
MATSUSHITA ........... 065
MCMICHAEL .......... 041
MEDIATOR .............. 051 169
MEDION ................ 002 009 061 067 068 087 103 107 115 154 156 168 171 175 176
MEMOREX ............. 009
MEMPHIS .............. 004 009 113
METZ .................... 000 075 135 151 152 201
MICROMAXX .......... 002 009 061 067 068 087 103 107 111 115 154 156 168 171 175
MICROSTAR ........... 002 009 061 067 068 087 103 107 111 115 154 156 168 171 175
MINERVA ............... 017 101 135
MINOKA ................ 051
MITSUBISHI ............. 000 027 030 051 054 055 060 098 101 135 170
MIVAR ................... 003 043 073 093 123
MOTION ................ 043
MTC ...................... 132
MULTI SYSTEM ........ 169
MULTITECH ............. 003 009 014 019 027 043 045 129 131 169
MURPHY ................ 003 018 133
NAD ...................... 141
NAIKO ................... 099
138 169
131 133 138 138 139 140 141 142 144
176 177
176 177
176 177
176 177
147 148 164 169 173 180
177 181
176 177
176 177
II

ROC 850
NAONIS ................ 019 108
NATIONAL .............. 064 101
NEC ..................... 027 056 185
NECKERMANN ....... 000 003 008 019 022 051 083 118 132 169
NEI ....................... 051 068 113 169
NESCO ................. 129
NEWTECH ............. 009 051
NEW WORLD ......... 011
NICAMAGIC ........... 003
NIKKAI ................... 002 003 004 011 051 113 164 169
NOBLIKO ............... 003 014 017 043
NOGAMATIC .......... 139
NOKIA ................... 021 031 061 063 077 132 133 141 142 143
NORDMENDE ......... 000 021 024 036 045 046 051 111 126 127 139
NORDVISION .......... 169
OCEANIC .............. 021 141 142
OKANO ................. 083
ONCEAS ............... 003
ONWA .................. 069
ORBIT .................... 051
ORION .................. 009 013 026 028 030 051 062 075 095 099 123 142 147 159 169
ORMOND .............. 171
OSAKI ................... 002 003 004 011 074 165
OSO ..................... 011
OSUME ................. 004 029
OTTO VERSAND ...... 001 003 008 027 051 076 111 118 120 121 131 132 139 141 169
PAEL ..................... 003
PALLADIUM ............. 003 012 083
PANAMA ................ 002 003 009 165
PANASONIC .......... 021 064 065 067 101 124 141 142 151 152 186 197
PATHE CINEMA ...... 003 037 073 131
PATHE MARCONI .... 022 037 045 046 126 139
PAUSA ................... 009
PERDIO ................. 004
PHILCO ................. 000 043 053 129 131
PHILHARMONIC ..... 003 165
PHILIPS ................. 000 003 041 043 051 088 089 095 111 115 131 141 155 169 200
PHOENIX .............. 000 051 169
PHONOLA ............. 000 051 169
PIONEER ............... 021 036 051 139 145 169
PLANTRON ............. 002 051
POPPY .................. 009
PRANDONI-PRINCE . 019 123 141
PRECISION ............ 003 165
PRIMA ................... 009 021
PRINZ ................... 047
PROFEX ................. 009 043 141
PROFILO ................ 171
PROFI-TRONIC ........ 051
PROLINE ................ 004 051 062
PROSONIC ............ 003 042 088 107 161 169 171
PROTECH .............. 002 003 009 014 051 113 129 131 132 165 169
PROVISION ............ 169 171
PYE ...................... 051 068 169
PYMI ..................... 009
QUASAR ................ 129
QUELLE ................. 002 003 016 017 018 022 026 030 051 076 129 131 135 141 169
QUESTA ................. 027
RADIOLA ................ 051 169
RADIOTONE ........... 007 051
RADIOMARELLI ........ 000 123 129
RADIONETTE ........... 016 018
RANK .................... 017 027
RBM ...................... 017
RCA ...................... 031
REDIFFUSION .......... 141
REVOX .................. 051 169
REX ...................... 002 019 021 108 157
RFT ....................... 000 007
R-LINE ................... 051 169
ROADSTAR ............. 002 009 011
ROBOTRON ........... 000
RTF ....................... 000
SABA .................... 000 021 036 045 046 058 111 123 126 127 139 141 142
SACCS ................. 037
SAISHO ................. 002 003 009 013 028 030 095 123
SALORA ................. 019 021 031 047 093 107 108 118 121 128 131 132 138 141
SAMBERS .............. 014 043 123
SAMSUNG ............. 002 003 004 009 030 051 083 090 093 104 105 160 165 169 172
SANDRA ................ 003
SANSUI ................. 051
SANYO ................. 003 004 006 016 018 027 029 030 031 040 043 073 127 131 160
SBR ...................... 041 095 169
SCHAUB LORENZ . .. 021 141 142
SCHNEIDER ........... 003 011 051 068 071 125 131 139 160 169 177
SEG ...................... 002 003 014 027 043 088 129 131 169
SEI-SYNUDYNE ....... 000 013 014 021 026 075 123
SELECO ................ 019 021 027 108 131 157
SENCORA ............. 009
SENTRA ................. 164
SHARP .................. 001 005 027 029 059 187 188
SHORAI ................. 026
SIAREM ................. 000 014 123 131
SICATEL ................. 037
SIEMENS ............... 008 022 029 135
SIERRA .................. 051
SIESTA ................... 160
SILVER ................... 027
SINGER ................. 000 014 129 131
SINUDYNE ............. 000 013 014 026 028 075 131 169
SKANTIC ................ 021 138 196
SKYWORTH ........... 228
SOLAVOX .............. 021 092
SONITRON ............. 006 031
SONOKO .............. 002 003 009 051 169
SONOLOR ............. 006 021
SONTEC ................ 051 160 169
SONY ................... 004 009 027 029 030 076 106 127 130 165 182 183
SOUND & VISION .... 011 014
SOUNDWAVE ......... 051 169
STANDARD ............. 003 009 011 051 165
STARLIGHT ............. 169
STENWAY .............. 120
STERN ................... 019 021 157
SUNKAI ................. 009 026 062
SUNWOOD ............ 009 051
SUPERLA ................ 003
SUPERTECH ........... 118
SUPRA ................... 009
SUSUMU ................ 011
SUTRON ................ 009
SYDNEY ................ 003 165
SYSLINE ................ 169
TANDBERG ............. 026 157
TANDY ................... 001 003 004 011 021 133 165
TASHIKO ................ 003 019 027 041 056 128 165
171
204
171
192
TATUNG ................. 003 004 025 051 123 165 169
TCM ...................... 002 009 061 067 068 087 103 107 111 115 154 156 168 171 175
TEC ...................... 003 009 129 131 133 165
TECHNICS............. 065
TELEAVIA ................ 022 036 045 111 126 139
TELEFUNKEN .......... 022 035 036 050 051 052 078 079 101 108 111 126 127 139 163
TELETECH .............. 009 088 113 129 169
TELETON ................ 003 118 132 157 165
TEVION ................. 002 009 061 067 068 087 103 107 111 115 154 156 168 171 175
TENSAI .................. 009 011 018 026 051
TESMET ................. 051
TEXET .................... 003 165
THOMSON ............. 003 022 036 045 046 050 051 052 058 101 102 111 126 127 139
THORN ................. 004 018 035 037 054 081 095 111 127 141 164 169
TOKAI .................... 004 051
TOKYO .................. 003
TOMASHI ............... 120
TOSHIBA ................ 017 027 082 114 164 189
TOWADA ................ 021 131
TRIDENT ................. 165
TRIUMPH ................ 013 082 123
UHER .................... 021 043 051 157
ULTRAVOX .............. 000 003 014 129 131 133
UNITED .................. 088 169 171
UNIVERSUM ........... 002 016 018 051 083 102 110 122 129 131 169
UNIVOX ................. 037
VESTEL .................. 019 021 051 083 092 103 129 131 138 169 171 194 195 196
VEXA .................... 009 169
VICTOR ................. 027 051 065
VIDEOLOGIQUE ....... 003 011
VIDEOSAT .............. 129
VIDEO SYSTEM ....... 051
VISIOLA ................. 003
VISION .................. 051
VISOREX ................ 096
VISTAR ................... 133
VORTEC ................ 051 169
VOXSON ............... 000 019 021 043 051 108
WALTHAM .............. 003 037 133 138 165
WATSON ............... 051 169
WATT RADIO ........... 003 014 037 131
WEGA................... 000 027
WELTBLICK............. 051 169
WESTON ............... 131
WHARFEDALE ......... 099
WHITE WESTINGHOUSE 0 03 014 043 169
YOKO ................... 002 003 009 011 051 165 169
YORX .................... 011
ZANUSSI ................ 019 108 157
AIWA .................... 230 231 232 233 248
AKAI ...................... 232 236 237 238 239 300 329
AKIBA .................... 275
AKURA ................... 232 244 275
ALBA ..................... 233 245 246 247 248 250 275
ALLORGAN ............. 311
AMBASSADOR ........ 250
AMSTRAD ............... 231 253 254
ANITECH ............... 275
ASA ...................... 256 257
ASUKA ................... 231 256 257 275
BAIRD .................... 231 232 237 245 258 259
BASIC LINE ............ 233 245 250 275
BAUR .................... 257 263
BESTAR ................. 245 250
BLACK PANTHER LINE 245
BLAUPUNKT ............ 257 260 261 262 263 271 309
BONDSTEC ............ 250
BRANDT ................. 303 305
BRION VEGA .......... 264
BROKSONIC .......... 277
BUSH .................... 233 245 246 247 248 275 288
CATRON ................ 250
CGE ..................... 231 232
CIMLINE ................ 233 275
CLATRONIC ........... 250
COMBITECH .......... 248
CONDOR .............. 245 250
CROWN ................ 245 250 275
CYBERMAXX .......... 319
DAEWOO .............. 245 250 265 274 319
DANSAI ................. 275
DANTAX ................. 233
DAYTRON .............. 245
DE GRAAF .............. 257 266
DECCA ................. 231 232 257
DUAL ..................... 232 257
DUMONT ................ 231 257 258 266
ELIN ...................... 252
ELTA ...................... 275 337
EMERSON ............. 301
ESC ...................... 245
ETZUKO ................. 275
FERGUSON ............ 232 259 271 278 281 294 305
FIDELITY ................. 231
FINLANDIA .............. 257 258 266
FINLUX ................... 231 232 237 257 258 266 298
FIRST LINE .............. 233 256 265 266 275 298
FISHER .................. 258 279
FLINT ..................... 233
FORMENTI-PHEONIX 257
FRONTECH ............ 250
FUJITSU .................. 231
FUNAI .................... 231
GALAXY ................. 231
GBC ..................... 250 275
GEC ..................... 257
GELOSO ................ 275
GENERAL .............. 250
GENERAL TECHNIC 233 248 262 311
GOLDHAND ........... 275
GOLDSTAR ............. 231 256
GOODMANS .......... 231 245 250 252 256 259 275 282 283
GRAETZ ................. 232 258 264
176 177
166 190
176 177
163 166 185
III

GRANADA .............. 240 257 258 266 271 285
GRANDIN .............. 231 245 250 256 275
GRUNDIG .............. 243 257 260 263 270 271 272 273 275 276 287 288 290 330
HANSEATIC ........... 256 257
HCM .................... 275 288
HINARI .................. 233 248 275 288 301
HISAWA ................ 233
HITACHI ................ 231 232 257 266 268
HYPSON ............... 233 275
IMPEGO ................ 250
IMPERIAL ................ 231
INNOVATION .......... 233 248 262 311
INNO HIT .............. 245 250 252 257 275
INTERBUY .............. 256
INTERFUNK ............. 257 258
INTERVISION .......... 231
IRRADIO ................. 256 275
ITT ......................... 232 237 258 264 292 293
ITV ........................ 245 256
JVC ...................... 232 293 294 295 296 297
KAISUI ................... 275
KARCHER .............. 257
KENDO ................. 233 237 236 245 250 265 300
KENWOOD ............ 232
KORPEL ................. 275
LENCO ................. 245
LEYCO .................. 275
LIFETEC ................. 233 248 262 311 319
LG ........................ 231 256
LOEWE ................. 262 267
LOEWE OPTA ......... 256 257 271
LOGIK ................... 252 275
LUMATRON ............. 245 274
LUXOR ................... 237 258 282 298
MAGNASONIC ....... 258
MANESTH .............. 265 275
MARANTZ .............. 257 271 282 299
MATSUI .................. 233 248 256 301
M ELECTRONIC ...... 231
MEDIATOR .............. 257
MEDION ................ 233 248 262 311 319
MEMOREX ............. 231 240 256 258 279
MEMPHIS .............. 275
METZ .................... 261 262 263 267 271 273 325
MICROMAXX .......... 233 248 262 311 319
MICROSTAR ........... 233 248 262 311 319
MIGROS ................ 231
MINERVA ............... 263 271 050
MITSUBISHI ............. 231 257 294 298 331
MULTITECH ............. 231 250 257 275
MURPHY ................ 231
NATIONAL .............. 260 262
NEC ..................... 232 294 299
NECKERMANN ....... 232 257 264 301
NEI ....................... 257
NESCO ................. 275
NIKKAI ................... 250 302
NOKIA ................... 232 237 240 252 258 264 292 300
NORDMENDE ......... 232 293 294 303 305
OCEANIC .............. 231 232 240
OKANO ................. 233 300
ORION .................. 233 246 248 283 301 332
ORSON ................. 231
OSAKI ................... 231 256 275
OTTO VERSAND ...... 257
PALLADIUM ............. 232 256 271 275 300
PANASONIC .......... 260 261 262 267 314 325 335
PATHE CINEMA ...... 301
PATHE MARCONI .... 232
PENTAX ................. 266
PERDIO ................. 231
PHILCO ................. 299
PHILIPS ................. 235 242 257 271 290 293 315 333 336
PHONOLA ............. 257
PIONEER ............... 257 294
PORTLAND ............. 245 250
PRINZ ................... 231
PROFEX ................. 275
PROLINE ................ 231 288
PROSONIC ............ 233 245
PYE ...................... 257
QUARTZ ................. 258
QUELLE ................. 231 257 258 263 264 271 301
RADIOLA ................ 257
REX ...................... 232 293
RFT ....................... 250 257
ROADSTAR ............. 245 252 256 275
SABA .................... 232 281 293 303 305 324
SAISHO ................. 233 248 275 301
SALORA ................. 237 258 292 298
SAMSUNG ............. 252 311 312
SAMURAI ................ 250
SANSUI ................. 232 244 294
SANYO ................. 258 279
SAVILLE ................. 248
SBR ...................... 257
SCHAUB LORENZ ... 231 232 237 258 264
SCHNEIDER ........... 231 233 245 250 256 257 265 275
SEG ...................... 252 275
SEI SINUDYNE ........ 257
SELECO ................ 232
SENTRA ................. 250
SENTRON .............. 275
SHARP .................. 240 241 282 328
SHINTOM .............. 258 275
SHIVAKI ................. 256
SIEMENS ............... 256 258 263 271
SILVA .................... 256
SINUDYNE ............. 257
SOLAVOX .............. 250
SONOKO .............. 245
SONOLOR ............. 240
SONTEC ................ 256
SONY ................... 249 251 255 308 309 310 313 316
STANDARD ............. 245
STRONG ................ 244
SUNKAI ................. 233
SUNSTAR ............... 231
SUNTRONIC ........... 231
SUNWOOD ............ 275
TAISHO ................. 233
TANDBERG ............. 263 301
TASHIKO ................ 231 240
TATUNG ................. 231 232 257
TCM ...................... 233 248 262 311 319
TEC ...................... 250
TECHNICS ............. 260 262
TELEAVIA ................ 232
TELEFUNKEN .......... 232 280 293 294 295 303 305 306 307 323 324
TENOSAL ............... 275
ROC850
TENSAI .................. 231 256 275
TEVION ................. 233 248 262 311 319
THOMSON ............. 232 242 293 294 295 305 323 324
THORN ................. 232 258 301
TiVo HDD ............... 242 316
TOKAI .................... 256 275
TONSAI ................. 275
TOSHIBA ................ 232 257 265 293 298 334
TOWADA ................ 275
TOWIKA ................. 275
TRIUMPH................ 301
TVA ....................... 250
UHER .................... 256 264
ULTRAVOX .............. 264
UNITECH ............... 252
UNITED QUICK STAR 245
UNIVERSUM ........... 231 237 239 253 256 257 263 271 290
VICTOR ................. 294 295
VIDEON ................. 233 248 262 311
WELTBLICK............. 256
WHITE WESTINGHOUSE 2 64
YAMISHI ................ 275
YOKAN ................. 275
YOKO ................... 250 252 256 275
DENON ................. 252
DISCO VISION ........ 291
ELTA ...................... 337
GRUNDIG .............. 318
HITACHI ................ 291
MITSUBISHI ............. 318
NAD ...................... 318
PHILIPS ................. 319
PIONEER ............... 291 318
RADIOLA ................ 319
SONY ................... 278 320 321
TELEFUNKEN .......... 318
THORN ................. 322
Daewoo ................ 058 (TV) + 245 (VCR)
SABA .................. 058 (TV) + 245(VCR) , 166 (TV) + 323 (VCR)
THOMSON ........... 058 (TV) + 245(VCR) , 166 (TV) + 323 (VCR)
AIWA .................... 377
AKAI ...................... 369
APEX .................... 357 390
CLASSIC................ 383
CYBERCOM ........... 356
DAEWOO .............. 353 354 355
DENON ................. 364 389
DENVER ................ 381
DMTECH ................ 351
DUAL ..................... 356
ELTA ...................... 337 365 382
EMERSON ............. 375
FISHER .................. 378
GO-VIDEO .............. 367
GRUNDIG .............. 370 380
HARMON/KARDON . 395
HITACHI ................ 367 387
INNOVATION .......... 356 371 372 373
JVC ...................... 361
KENDO ................. 356
KENWOOD ............ 364 393
LIFE ....................... 371 372 373
LIFETEC ................. 356 371 372 373
LG ........................ 375
LOEWE ................. 370
MARANTZ .............. 379
MBO ..................... 396
MEDION ................ 352 356 371 372 373
METZ .................... 368
MICROMAXX .......... 356 371 372 373
MICROSTAR ........... 356 371 372 373
MITSUBISHI ............. 366
MUSTEK ................. 383
NAD ...................... 394
NAKAMICHI ........... 398
ONKYO ................. 374
ORITRON ............... 373
PANASONIC .......... 364
PHILIPS ................. 362 370 379
PHILIPS MAGNAVOX 362
PIONEER ............... 368
RCA ...................... 384
SAMPO ................. 386
SAMSUNG ............. 367
SCHNEIDER ........... 350 351 352 373
SEG ...................... 350 392
SHARP .................. 371 394
SHERWOOD .......... 391
SHINCO ................ 384
SKYMASTER ........... 382 383
SONY ................... 363
TCM ...................... 356 371 372 373
TEAC .................... 368
TEVION ................. 356 371 372 373
THOMSON ............. 359 360
TOSHIBA ................ 362
WHARFEDALE ......... 376
YAMAHA ................ 364 388
YAMAKAWA ........... 397
ZENITH ................. 375
IV

CABLETIME ............. 448 449 450
CABLE AND WIRELESS 606
CLYDE CABLEVISION 452
CRYPTOVISION ....... 458
FILMNET CABLECRYPT 474
FILMNET COMCRYPT 474
GEC ..................... 452
GRUNDIG .............. 415 483
JERROLD ................ 494 554
MOVIE TIME ........... 551
PACE .................... 606
PIONEER ............... 415 518 521
SCIENTIFIC ATLANTA 524 525
STS .......................
TELE+1 .................. 474
TELEWEST .............. 606
VISIOPASS ............. 487
AKAI ...................... 552
ALBA ..................... 401 402 404 405 407 482 562
ALDES ................... 405 408 409
ALLSAT ................... 410 462 552
ALLSONIC .............. 408 428
AMPERE ................ 422
AMSTRAD ............... 415 416 417 419 421 541 555 584
ANKARO ................ 408 428
ANTTRON .............. 401 407
APOLLO ................. 401
ARCON ................. 415 422 424 426 463
ARMSTRONG .......... 419
ASAT ..................... 552
AST ....................... 435
ASTON .................. 406 594
ASTRA ................... 419 429 431 432 502
ASTRO ................... 407 409 428 439 441
AUDIOTON ............. 407 462
AXIS ...................... 415 428 432 456
BARCOM ............... 424
BEST ..................... 424 428
BLAUPUNKT ............ 439
BOCA ................... 419 502
BRANDT ................. 565 566 567 574
BRAIN WAVE .......... 444
BROADCAST ........... 443
BT SATELLITE ........... 420 574
BUSH .................... 402 404 410 446 482 562
CANAL+ ................ 569
CHANNEL MASTER . 405
CHAPARRAL ........... 507
CHESS ................. 547 586
CITYCOM .............. 402 459
CLATRONIC ........... 444
CLEMENS KAMPHUS 491
CNT ...................... 409
COLUMBUS ............ 477
COMMLINK ............ 408
COMTECH ............. 456
CONDOR .............. 428
CONNEXIONS ....... 438 454
CONTEC ............... 456 459
COSAT .................. 462
CROWN ................ 419
CYBERMAXX .......... 618
DAERYUNG ............ 438
DANSAT ................. 410
DDC ...................... 405
DECCA ................. 460
DELEGA ................. 405
DEW ..................... 456
DIAMOND .............. 461
DISKXPRESS ........... 424 454
DITRISTRAD ............. 462
DNT ...................... 438 552
DONG WOO .......... 501
DRAKE ................... 463 557
ECHOSTAR ............ 425 438 464 465 467 481 578 579 580 581 586
EINHELL ................ 401 408 417 419
ELEKTA .................. 409
ELTA ...................... 401 428 462 552
EMANON .............. 401
EMME ESSE ........... 428 446 491
EP SAT .................. 402
EURODEC .............. 603
EUROSAT ............... 419
EUROSKY .............. 419 428
EUROSPACE .......... 468
EUROSTAR ............. 419
EXATOR ................. 401 407
FERGUSON ............ 402 410 446 471 472 473 603
FIDELITY ................. 415 417
FINLANDIA .............. 402
FINLUX ................... 402 429 475 480 487 608
FINNSAT ................ 456 603
FORCE .................. 535 577
FRACARRO ............. 562
FRANCE SATELLITE/TV 477
FREECOM .............. 401 489
FTE ....................... 420 422 496
FUBA ..................... 401 424 428 431 438 439 477 480 548 552
GALAXI .................. 424
GALAXIS ................ 408 428 432 456 462 478 484 535 582 583
GMI ...................... 419
GOLDSTAR ............. 489
ROC 850
GOODING ............. 483
GOODMANS .......... 402 482
GRANADA .............. 429
GROTHUSEN .......... 401 489
GRUNDIG .............. 402 407 436 439 446 483 495 550 555 584 602
HANSEATIC ........... 504
HANTOR ................ 401 444 501
HANURI ................. 409
HELIOCOM ............ 422
HINARI .................. 405
HIRSCHMANN ....... 439 487 488 491 547 548 558
HISAWA ................ 444
HITACHI ................ 402 446 537
HOUSTON ............. 462
HUTH .................... 408 411 419 443 444 456 462 491
HUMAX ................. 485 582
IMPERIAL ................ 482 562
INNOVATION .......... 428 493 504 511 583 586 587 618 619
INTERTRONIC ......... 419
INTERVISION .......... 462
ITT/NOKIA .............. 402 429 446 454 487 537 548
JOHANSSON ......... 444
JSR ....................... 462
JVC ...................... 483
KATHREIN .............. 439 441 459 496 498 499 507 549 552 607 617
KOSMOS ............... 489 491 496
KR ........................ 407
KREISELMEYER ....... 439
KYOSTAR ............... 401
LASAT .................... 409 428 500 501 502 565 566 567
LENCO ................. 401 420 489 503
LENG .................... 444
LENNOX ................ 462
LENSON ................ 479
LIFE ....................... 583
LIFESAT .................. 428 493 504 511 583 586 587 618 619
LIFETEC ................. 428 493 504 511 583 586 587 618 619
LION ..................... 468
LG ........................ 489
LORRAINE .............. 489
LUPUS ................... 428
LUXOR ................... 417 429 537 548
LYONNAISE ........... 603
MACAB ................. 603
MANHATTAN .......... 402 403 409 446 462 633
MARANTZ .............. 552
MASCOM .............. 409
MASPRO ................ 402 446 471 483 507 558
MATSUI .................. 483 574
MB ....................... 504
MEDIAMARKT .......... 419
MEDIASAT .............. 432
MEDION ................ 428 493 504 511 566 583 586 587 618 619
MEGA ................... 552
METRONIC ............. 401 407 408 409 424 601 612 613 614 615 632
METZ .................... 439
MICROMAXX .......... 428 493 504 511 583 586 587 618 619
MICROSTAR ........... 428 493 504 511 583 586 587 618 619
MICRO TECHNOLOGY 468
MINERVA ............... 439 483
MITSUBISHI ............. 402 439 574
MITSUMI ................. 502
MORGANS ............. 419 502 552
MORGAN SYDNEY .. 611
MULTICHOICE ........ 602
MULTISTAR .............. 496 501
MULTITEC ............... 586 587
MURATTO ............... 437 489
NAVEX .................. 444
NEC ..................... 509 510
NEUHAUS .............. 432 462 479
NEXTWAVE ............ 414 585
NIKKO................... 419
NOKIA ................... 402 429 446 454 487 530 531 544 548 563 564
NOMEX ................. 622
NORDEMENDE ....... 401 402 405 409 472 549 603
NOVIS ................... 444
OCEANIC .............. 461 468
OCTAGON ............. 401 407 456
OKANO ................. 419 491 496
OPTEX ................... 459 462
ORBIT .................... 435
ORBITECH ............. 401
ORIGO .................. 468
OSAT .................... 407
OTTO VERSAND ...... 439
PACE .................... 402 410 439 446 471 482 508 527 555 559 584
PACIFIC ................. 461
PALCOM ................ 405 431 477 479
PALLADIUM ............. 419 483
PALTEC ................. 431
PANASONIC .......... 402 446 542 555 584
PANDA .................. 402 410
PHILIPS ................. 402 427 434 436 446 455 483 493 495 508 515 550 552 561 599
PHOENIX .............. 456 482
PHONOTREND ....... 408 462 491
PIONEER ............... 620
POLSAT ................. 603
POLYTRON ............. 459
PREDKI .................. 444
PREMIERE .............. 462 569
PRIESNER .............. 419
PROFI .................... 503
PROMAX ................ 402
PROSAT ................. 404 405 408 482 562
PROTEK ................. 461
PROVISION ............ 409
QUADRAL ............... 405 408 428
QUELLE ................. 417 439
QUIERO ................. 603
RADIOLA ................ 552
RADIX .................... 438 630
RAINBOW .............. 407
REDIFFUSION .......... 510
REDPOINT .............. 432
REDSTAR ................ 428
RFT ....................... 408 552
RUEFACH .............. 503
SABA .................... 404 409 446 468 471 472 543 556 562 565 571 572 573 575
SABRE ................... 402
SAGEM ................. 603 604
SAKURA ................. 456 482
SALORA ................. 429 509 510 527
SAMSUNG ............. 401 426
SAT ....................... 405 415 435 437
SATCOM ................ 443 504 523
SATEC ................... 446
SATFORD ................ 443
SATMASTER ............ 443
V
600 605

ROC850
SATPARTNER .......... 401 407 409 444 489 491
SCHNEIDER ........... 428 455 511 583 586 587 618 635
SCHWAIGER .......... 411 459 461 498 504 516 566 573 575 576 582 585 587 598 616
SEEMANN ............. 419 432 438
SEG ...................... 401 428 444 504 541 634
SELECO ................ 462
SIEMENS ............... 439
SILVA .................... 489
SKARDIN ................ 432
SKY DIGITAL ........... 555 584
SKYMASTER ........... 408 504 546 547 586 587 588 589 590 591 592 621
SKYMAX ................ 552
SKYVISION ............. 462
SONY ................... 418 555 584
SR ........................ 419 472 502
STARLAND .............. 586
STARRING .............. 444
STAR TRAK ............. 401
STRONG ................ 401 407 428 454 489 562
SUMIDA ................. 419
SUNSTAR ............... 419 502 527
TANDBERG ............. 603
TANDY ................... 407
TANTEC ................. 402 446 471 477 479
TATUNG ................. 460
TCM ...................... 428 493 504 511 583 586 587 618 619
TECO .................... 419 502
TECHNILAND .......... 443
TECHNISAT ............ 438 479 528 529 623
TELANOR ............... 405
TELASAT ................. 504
TELEFUNKEN .......... 401 446 560 565 566 567 574
TELEKA .................. 407 419 426 438
TELEMASTER ........... 409
TELEMAX ................ 500
TELESAT ................. 504
TELESTAR ............... 479
TELEVES ................ 402 610 611
TELEWIRE .............. 462
TEVION ................. 428 493 504 511 583 586 587 618 619
THOMSON ............. 402 472 560 568 574 603
THORENS .............. 461
THORN ................. 402 410 446 471 473
TIOKO ................... 459
TONNA ................. 402 443 462
TPS ....................... 570
TRIAD .................... 435 437 489 533
TRIASAT ................. 480
TRIAX .................... 439 479 565 609
TWINNER .............. 610 611
UNIDEN ................. 534
UNISAT .................. 419 456
UNITOR ................. 424 444
UNIVERSUM ........... 439 475 483 487
VARIOSTAT ............. 439
VECTOR ................ 468
VENTANA .............. 552
VIA DIGITAL ............. 568
VISIOSAT ................ 444 462 586 593 594 595 596 597
VIVANCO .............. 624
VORTEC ................ 401 426
V-TECH ................. 435 437 515 537
WEWA .................. 402
WEVASAT .............. 402
WINERSAT ............. 444
WISI ...................... 402 435 437 438 439 533 538 539 540 597 625 626 627 628 629
WITTENBERG .......... 415
WOORISAT ............. 409
ZEHNDER .............. 409 424 428 437 496 498 541 631 632
ZODIAC ................. 407
CD Player
ADCOM ................. 648
AIWA .................... 649 650 651 751
AKAI ...................... 653 654 655
ALBA ..................... 656
ARCAM ................. 732
BESTAR ................. 659
BSR ...................... 660
BUSH .................... 661
CARRERA .............. 663
CONDOR .............. 660
DENON ................. 665 666
DUAL ..................... 648 798
EMERSON ............. 648 659
ELTA ...................... 667 668 694 745
FISHER .................. 669
GENEXXA .............. 659 671 672 673 675 676 677
GOLDSTAR ............. 663
GOODMANS .......... 678 679
GRUNDIG .............. 680 697 698 732
HARMON KARDON . 683
HITACHI ................ 648 685 686
INNOVATION .......... 730 742 743 744 745 746 747
JVC ...................... 687
KENWOOD ............ 669 688 689 690 762
LIFETEC ................. 730 742 743 744 745 746 747
LINN ..................... 732
LG ........................ 663
LUXMAN ................ 691
MAGNUM .............. 730 742 743 744 745 746 747
MARANTZ .............. 695 732
MATSUI .................. 696 732
MEDION ................ 730 742 743 744 745 746 747
MEMOREX ............. 648 659 677
MERIDIAN .............. 732
MICROMEGA .......... 732
MICROMAXX .......... 730 742 743 744 745 746 747
MICROSTAR ........... 730 742 743 744 745 746 747
MISSION ................ 732
NAD ...................... 671 733 735 736 737 800
NAIM .................... 732
NAKAMICHI ........... 699 700
ONKYO ................. 640 701 702 703 785 792
PANASONIC .......... 661 705
PHILIPS ................. 647 706 732
633 635
PHILIPS CD-V .......... 640
PIONEER ............... 673 677 753
PROTON ................ 732
QUAD .................... 732
REALISTIC .............. 648 659 675
ROADSTAR ............. 706 708
ROTEL ................... 732
SABA .................... 648
SAE ...................... 732
SAMSUNG ............. 768
SANSUI ................. 647 709 710 711 732
SCHNEIDER ........... 627 660 732
SCOTT ................... 659
SHARP .................. 672 712 713 714
SHERWOOD .......... 782
SKYMASTER ........... 778
SONY ................... 671 716 717 718 741 748 749 750
TANDBERG ............. 732
TCM ...................... 730 742 743 744 745 746 747
TEAC .................... 795
TECHNICS............. 705 721 763 787
TELEFUNKEN .......... 648
TEVION ................. 730 742 743 744 745 746 747
THOMSON ............. 642 648
TOSHIBA ................ 722 723
UNIVERSUM ........... 732
VECTOR RESEARCH . 663
VICTOR ................. 687
YAMAHA ................ 712 720 725 771
YORX .................... 708
Audio Amplifiers/Tuners/Receivers
DENON ................. 779 781
DUAL ..................... 797
ELTA ...................... 667 668
GRUNDIG .............. 697 698 727
HARMON KARDON . 682
KENWOOD ............ 761
MARANTZ .............. 727
NAD ...................... 735 736 737 738 799 800
ONKYO ................. 785 792 793
PHILIPS ................. 646 727
SANSUI ................. 727
SCHNEIDER ........... 791
SHERWOOD .......... 782
SONY ................... 739 740 755 757 758 759 760
TEAC .................... 794 796
TECHNICS............. 764 777 788
THOMSON ............. 642 766
YAMAHA ................ 724 752 770 771 772
Audio Tape Players
AIWA .................... 790
DENON ................. 780
GRUNDIG .............. 729 698
HARMON KARDON . 681
KENWOOD ............ 761
MAGNAVOX ........... 729
MARANTZ .............. 729
MARANTZ .............. 799
ONKYO ................. 784
PHILIPS ................. 729
SANSUI ................. 729
SHERWOOD .......... 783
SONY ................... 754 755 756
TEAC .................... 794
TECHNICS............. 764 777 786
THOMSON ............. 642
YAMAHA ................ 724 772
Misc.
Video CD .............. 640
Audio Combi .......... 644
DBS ...................... 645
CDR ...................... 647
MINI Systems
AIWA .................... 773 774
DUAL ..................... 797
ELTA ...................... 693 745
MEDION ................ 745
PIONEER ............... 753
SAMSUNG ............. 768
SHARP .................. 789
SONY ................... 741
VI
clr8e11ma_h13027_141003
 Loading...