

Page 1
Before you begin
Useful advice
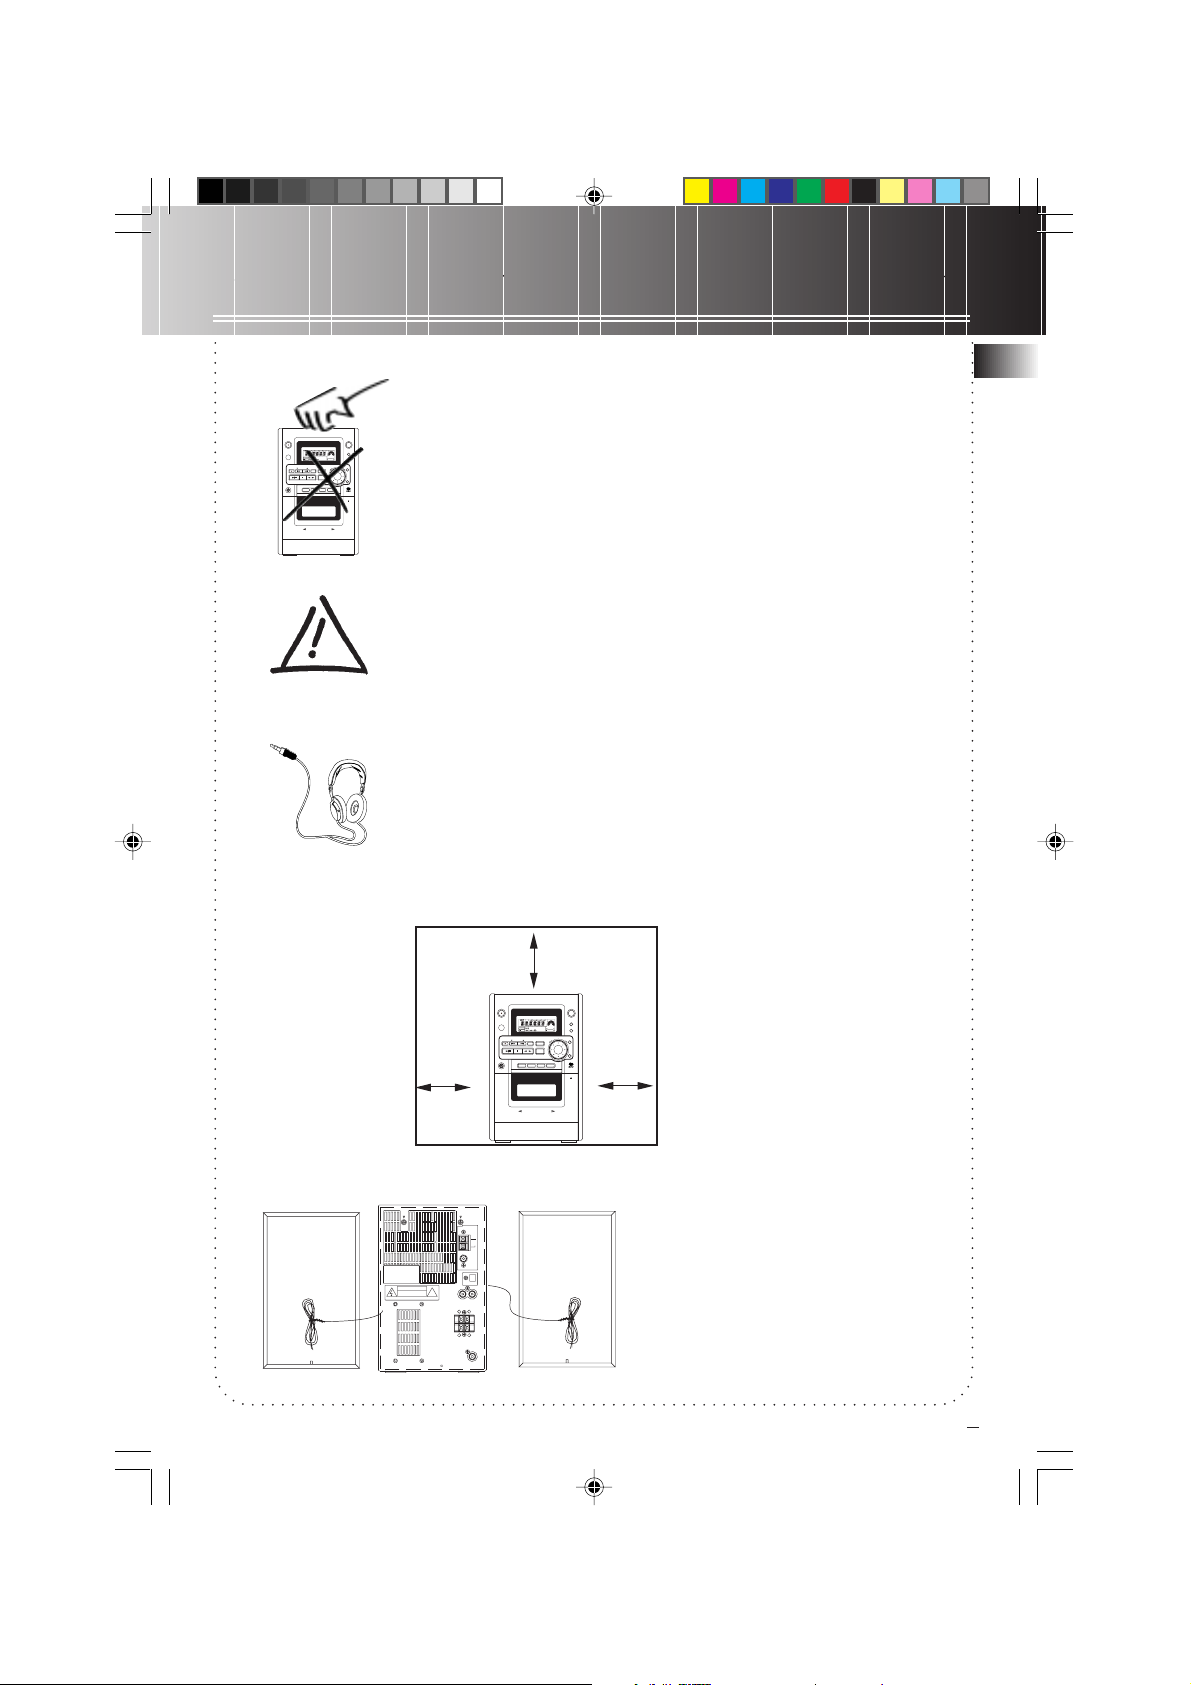
Do not use your CD Micro System immediately after transporting it from a
cold place to a warm place, as condensation may cause the system to
malfunction. If moisture forms inside this system, it may not operate
DISPLAY
POWER
(STANDBY)
REMOTE
SENSOR
REC
PLAY/PAUSE
PHONES
ST
CD TUNER TAPE AUX
FM
AM
MW
LW
PROGRAM SHUFFLE MIXREPEAT 1 ALL
REC
RDS TIME/
REV. MODE
TUNING
ATS
DIRECTION
STOP
FUNCTION SELECTOR
AUTO REVERSE
FULL FUNCTION CONTROL
LOGIC CASSETTE PLAYER
MICRO COMPONENT SYSTEM
/DEMO
SURROUND
MHz
KHz
VOLUME
BASS BOOST
BASS BOOST
ATSINTRO
SURROUND
MULTI JOG
DOWN UP
MODE
FM STEREO
INTRO
PRESET/TUNE
REPEAT
SET/
PROG.
TAPE AUXCDTUNER
PUSH/OPEN
properly. To correct the problem, turn off the power and wait about 30
minutes for moisture to evaporate
This system is fitted with a laser. To avoid accidents, it is to be opened by
qualified technicians only.
Never leave the tray open as dust could cover the laser lens and/or the tray
could be bumped into accidentally
Do not place the system near wet areas such as bathrooms and pool side.
Avoid storing the system at humid places or near abnormally heated areas.
Power is continuously supplied to the system. To disconnect power
completely, unplug the power cord from the power outlet.
LOUD NOISE CAN DAMAGE YOUR HEARING! Make sure you turn down
the volume on the unit before putting on headphones. Increase the volume
to your desired level only after headphones are in place.
Installation
To ensure sufficient ventilation, keep the spacings, as shown below, free from other surfaces:
EN
10 cm
Speakers connection
RL
CAUTION
RISK OF ELECTRIC SHOCK
!
DO NOT OPEN.
AVIS:RISQUE DE CHOC ELECTRIQUE-NE PAS OUVRIR.
AM1450 Eng Version 3/27/00, 4:34 PM1
10 cm
ST
CD TUNER TAPE AUX
FM
AM
MW
LW
PROGRAM SHUFFLE MIXREPEAT 1 ALL
REC
RDS TIME/
REV. MODE
FM STEREO
TUNING
ATS
PRESET/TUNE
DIRECTION
STOP
FUNCTION SELECTOR
AUTO REVERSE
FULL FUNCTION CONTROL
LOGIC CASSETTE PLAYER
MICRO COMPONENT SYSTEM
DISPLAY
/DEMO
SURROUND
MHz
KHz
VOLUME
BASS BOOST
BASS BOOST
ATSINTRO
SURROUND
MULTI JOG
DOWN UP
MODE
INTRO
REPEAT
SET/
PROG.
TAPE AUXCDTUNER
10 cm
PUSH/OPEN
The black and red ends of a
speaker wire should be
connected, respectively, to a
set of black and red terminals.
POWER
(STANDBY)
REMOTE
SENSOR
REC
PLAY/PAUSE
PHONES
EXT.ANT
AM
LOOP
FM
75ߟ
OPTICAL OUT
RL
AUX IN
-
R
L
SPEAKERS
-
+ +
SUB WOOFER
1
Page 2
Contents
A
60
A
EN
Before you begin............................................................... 1
More information .......................................................... 2
General controls .............................................................. 3
Front view .............................................................................. 3
Top view .................................................................................. 4
Back view ................................................................................ 4
Remote control .................................................................... 4
Sound features .................................................................. 5
Showing demonstration ........................................ 5
Setting sleep ........................................................................ 5
Tape player ............................................................................ 8
Auxiliary input .................................................................. 8
Using MODE .......................................................................... 9
Setting time .......................................................................... 9
Setting timer ........................................................................ 9
Setting timer on/off ......................................................... 9
Adjusting display brightness .................................... 9
Troubleshooting tips ................................................ 10
Care and maintenance ............................................ 10
Technical specifications ................ 11
CD player ................................................................................. 6
Tuner ............................................................................................. 7
More information
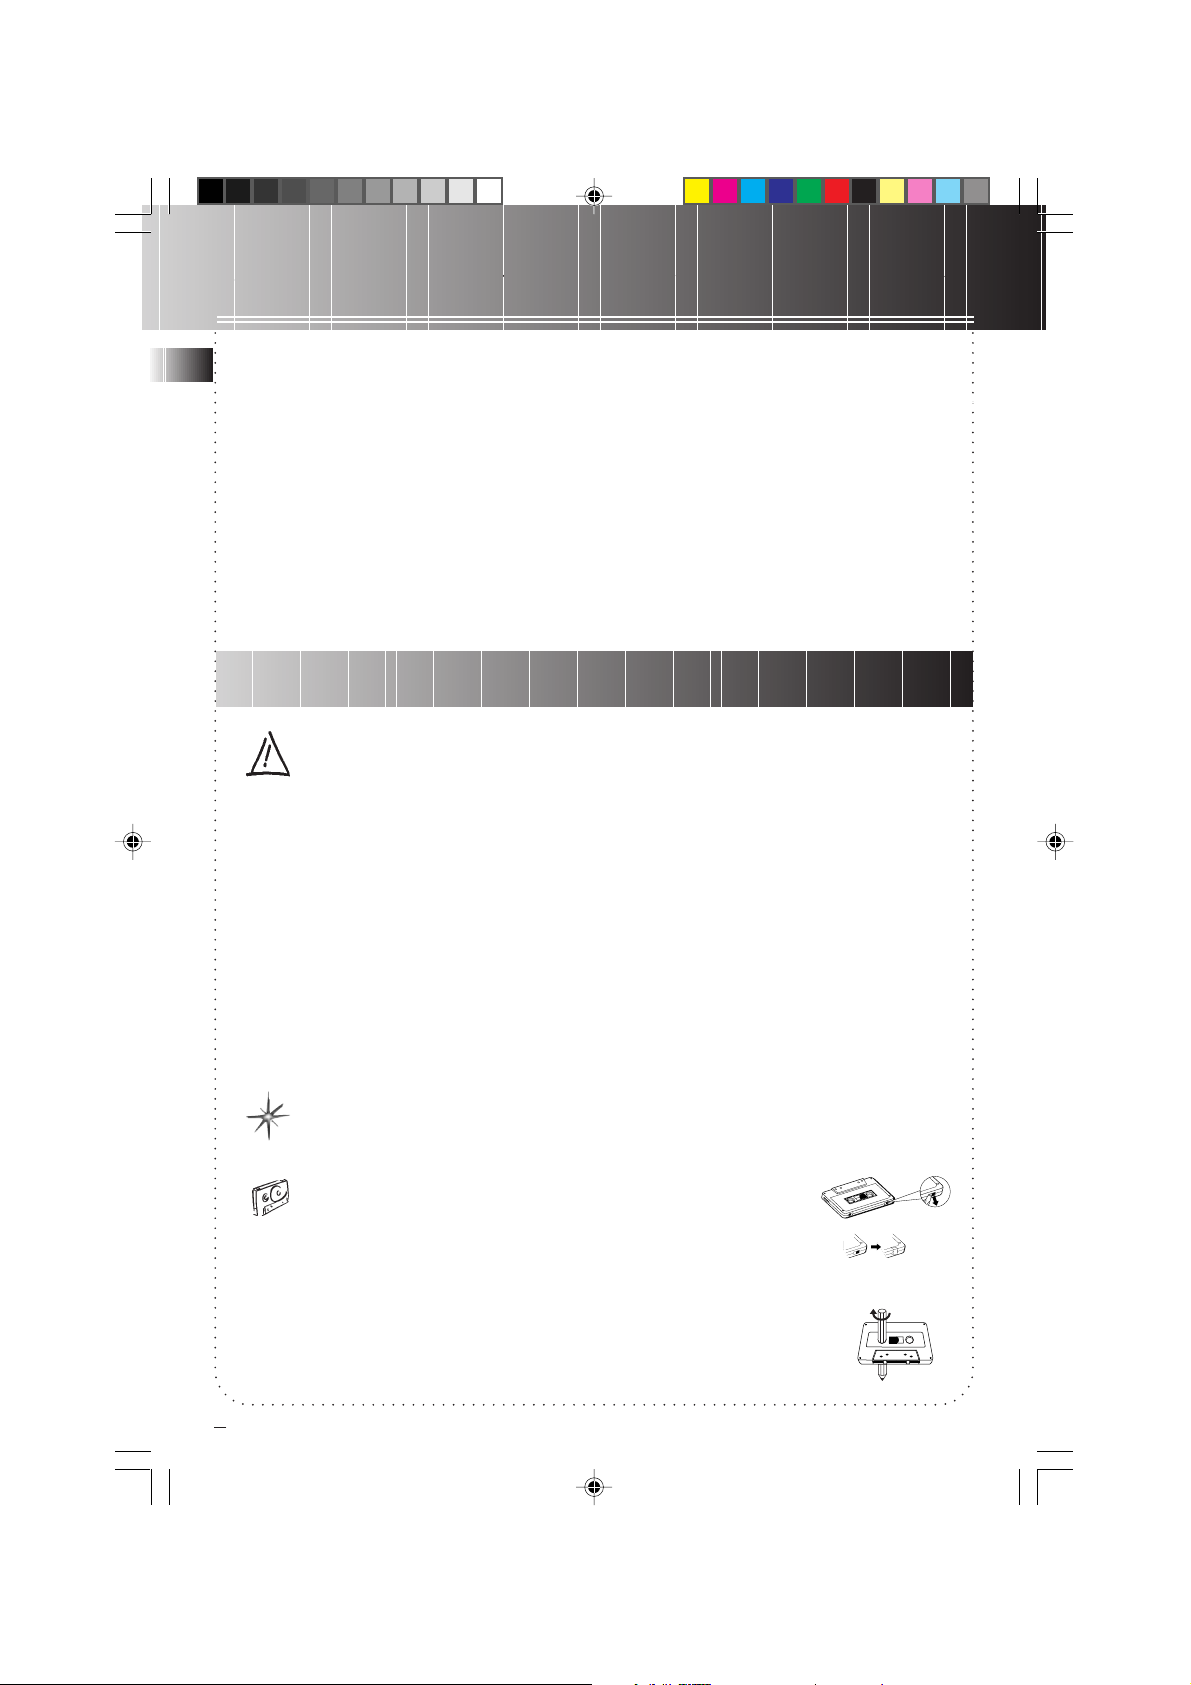
Useful advice
• This unit uses a laser beam. To prevent any accident due to this type of beam, the set
should only be opened by properly-trained personnel.
• Make sure you keep your set away from water and high temperatures.
• If you do not use the remote control for more than one month, we advise you to take out
all the batteries to prevent leakage.
• To prevent any personal injury, do not mix battery types and never reverse their polarities.
• Important battery information
If you’re not going to use your unit for a month or more, be sure to remove batteries
because they can leak and cause damage. Discard leaky batteries immediately as leaking
batteries can cause skin burns or other personal injuries. Dispose of batteries in the proper
manner, according to provincial and local regulations. Any battery may leak electrolyte if
mixed with a different battery type, if inserted incorrectly, if all batteries are not replaced at
the same time, if disposed of in fire, or if an attempt is made to charge a battery not
intended to be recharged.
Maintenance
• Clean the set with a soft cloth or a dampen chamois leather. Never use solvents, as it may
damage the unit.
Cassettes
• To protect your recordings from accidental erasure on one or both sides
of your cassette, snap out the tab at the top of the cassette. If you decide
later to record on the tape, seal the hole with a piece of adhesive tape. (Refer to
diagram on the right)
Quit Slacking
• A little bit of slack in your tapes can cause scratches on the tape, or worse
yet, the tape could break. If you notice some slack in the tape, use a pencil to
tighten it up before you insert it.
A
A
A
2
AM1450 Eng Version 3/27/00, 4:34 PM2
Page 3
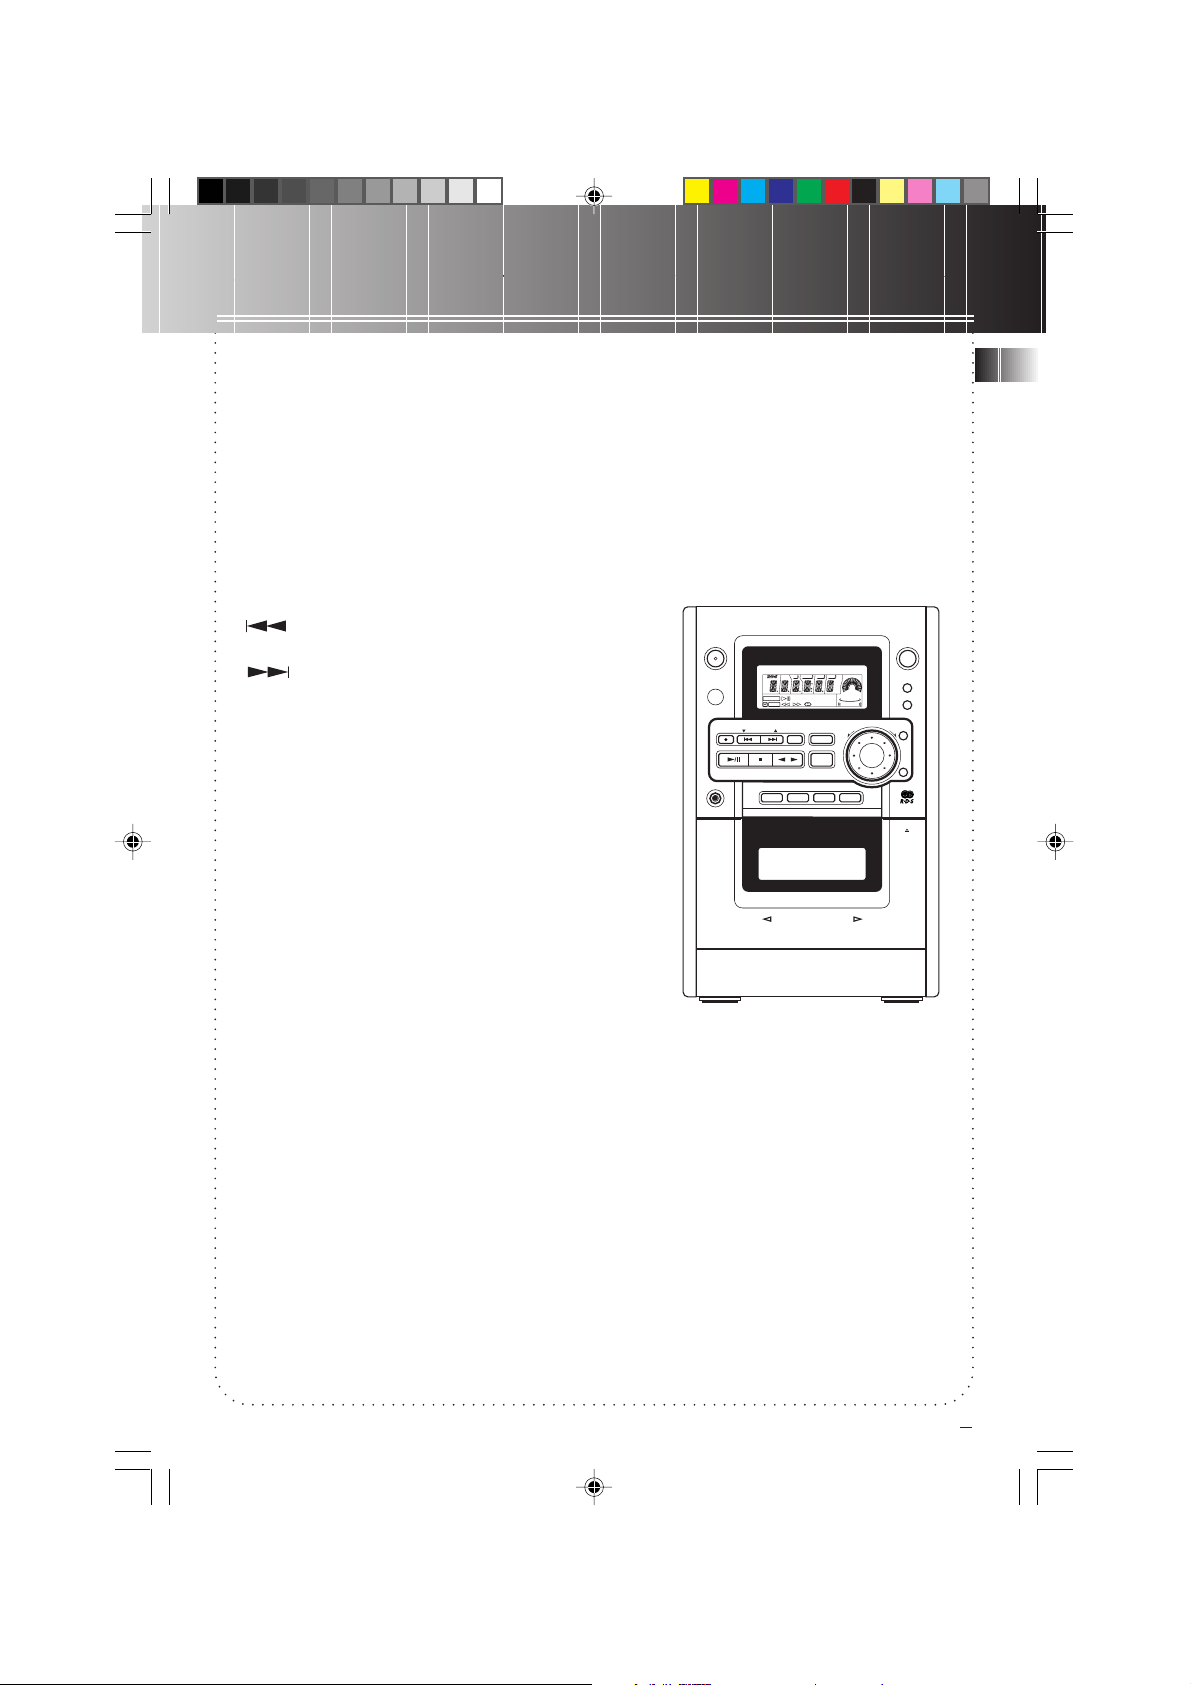
General controls
Front view
POWER (STANDBY) – turns unit on/off
REMOTE SENSOR – receives signal from remote control
DISPLAY / DEMO – toggles between demonstration and normal
modes
SURROUND – turns surround (3D) sound on/off
BASS BOOST – turns bass boost on/off
RECORD – records to tape from CD, tuner or aux mode
-- tunes radio down, searches/skips CD track
backward, rewinds tape
-- tunes radio up, searches/skips CD track forward,
fast-forwards tape
ATS (RDS TIME/ REV. MODE) – enters “Automatic Track
Skipping” mode, (stores RDS time, selects tape play mode)
INTRO(FM STEREO) – plays each CD track for 10 seconds
(toggles between stereo/mono FM receptions)
PLAY/PAUSE – starts or pauses CD/tape play
STOP – stops CD/tape play
DIRECTION – selects tape play direction
REPEAT(PRESET/TUNE) – repeats 1 track or entire disc play
(toggles between preset/tune mode for tuner)
MULTI JOG – adjusts audio output volume, selects preset
equalizer modes, sets time, toggles timer on/off, sets display
brightness
MODE – toggles among PRESET EQ MODE SEL, CLOCK
ADJUSTMENT, TIMER MODE SET, DIMMER MODE SET
SET / PROG. – confirms settings or enters CD/tuner program mode
PHONES – connects headphones
CD – turns on CD mode
TUNER – turns on tuner mode
TAPE – turns on tape mode
AUX – turns on aux mode
PUSH / OPEN – opens tape deck door when pushed and released
POWER
(STANDBY)
REMOTE
SENSOR
TUNING
REC
PLAY/PAUSE
STOP
PHONES
MICRO COMPONENT SYSTEM
CD TUNER TAPE AUX
ST
FM
AM
MW
LW
PROGRAM SHUFFLE MIXREPEAT 1 ALL
REC
CD
FULL FUNCTION CONTROL
LOGIC CASSETTE PLAYER
RDS TIME/
REV. MODE
FM STEREO
ATS
PRESET/TUNE
DIRECTION
FUNCTION SELECTOR
TUNER
AUTO REVERSE
ATS INTRO
INTRO
REPEAT
TAPE AUX
MHz
KHz
VOLUME
BASS BOOST
SURROUND
DOWN UP
MULTI JOG
DISPLAY
/DEMO
SURROUND
BASS BOOST
MODE
SET/
PROG.
PUSH/OPEN
EN
AM1450 Eng Version 3/27/00, 4:34 PM3
3
Page 4
General controls
EN
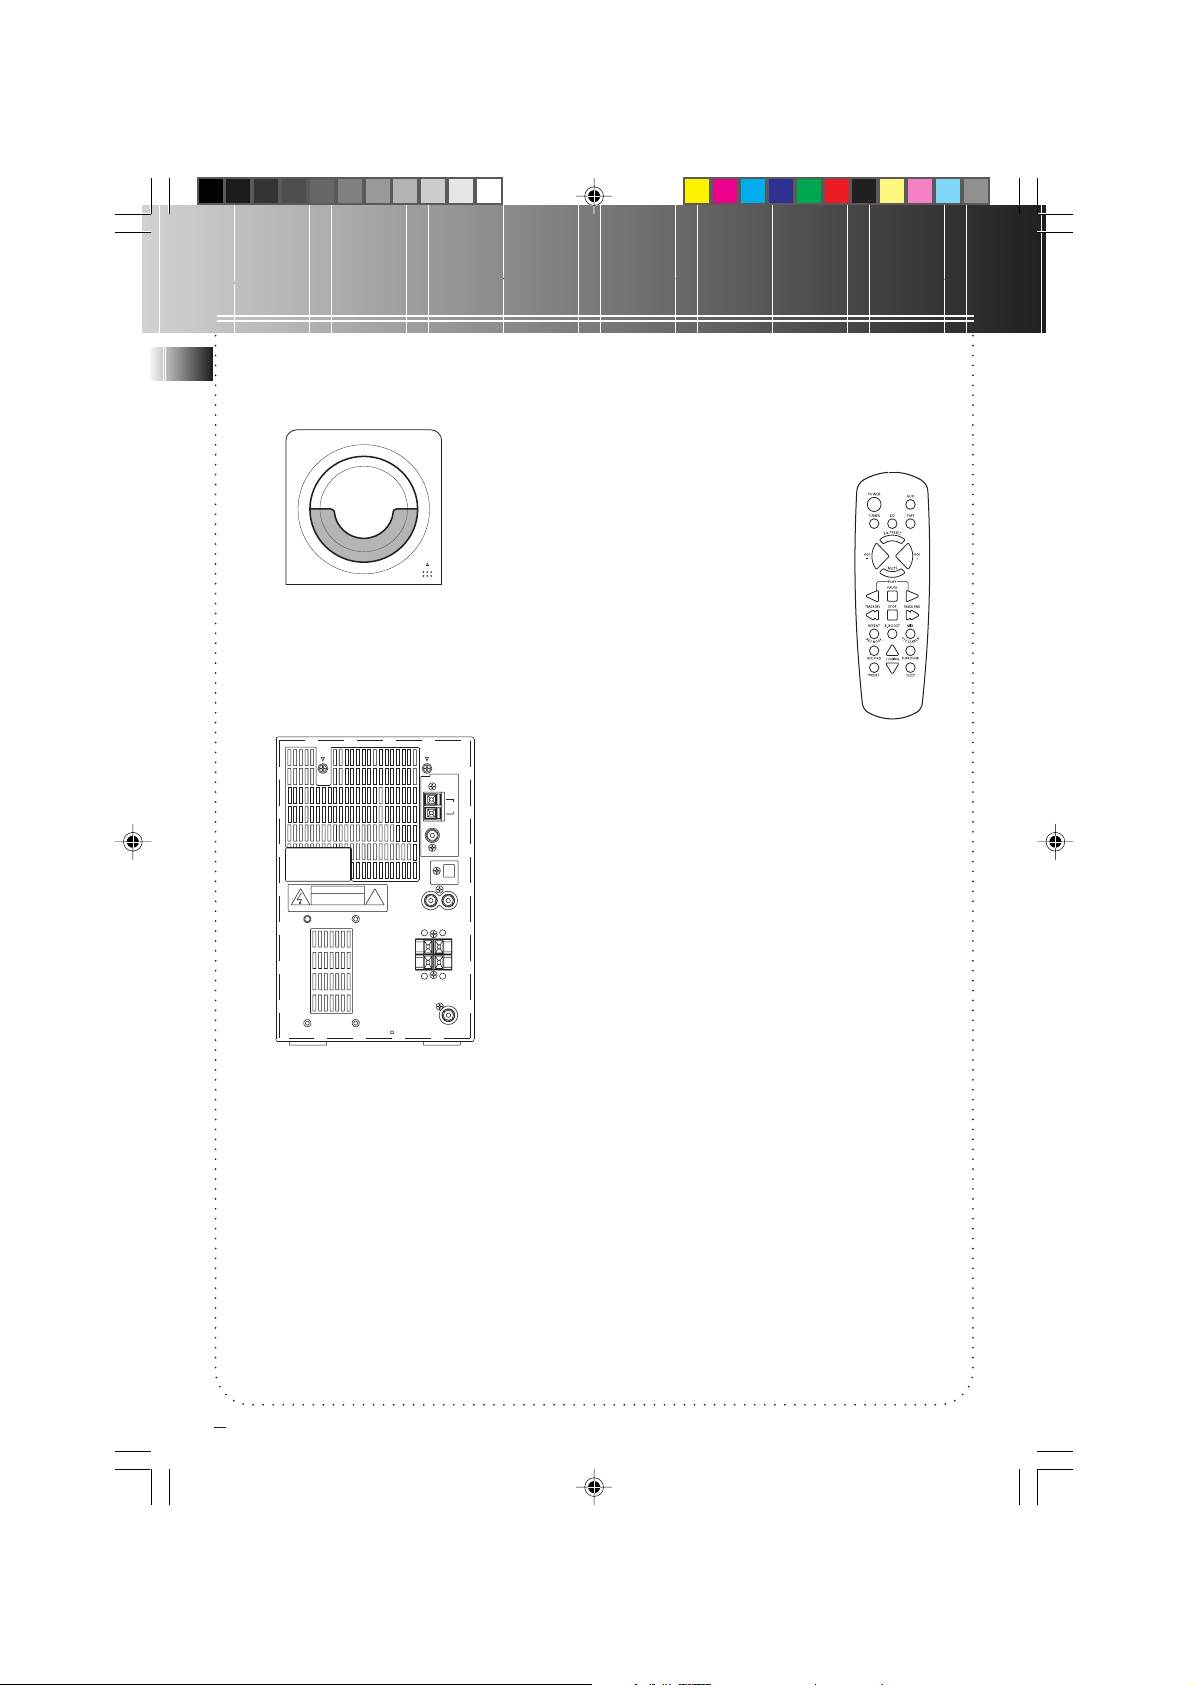
Top view
C
P
S
L
I
A
D
Y
E
T
R
C
S
A
Y
P
S
M
O
C
T
E
M
PUSH/OPEN
PUSH / OPEN – opens CD compartment door
when pushed and released
Back view
EXT.ANT
AM
LOOP
FM
75ߟ
CAUTION
RISK OF ELECTRIC SHOCK
DO NOT OPEN.
AVIS:RISQUE DE CHOC ELECTRIQUE-NE PAS OUVRIR.
AM LOOP – connects AM loop antenna
FM – connects FM antenna wire
OPTICAL OUT – outputs optical audio signals
AUX IN L(white) – receives corresponding
external analog audio signals
AUX IN R(red) – receives corresponding
external analog audio signals
SPEAKERS – outputs audio signals to speakers
SUBWOOFER – outputs low frequency audio
signals to subwoofer (not supplied)
OPTICAL OUT
!
RL
AUX IN
-
R
L
SPEAKERS
+ +
-
SUB WOOFER
Remote control
POWER – turns unit on/off
AUX – turns aux mode on
TUNER – turns tuner mode on
CD – turns CD mode on
TAPE – turns tape mode on
EQ PRESET – selects FLAT, POP,
ROCK, or JAZZ sound effect
VOL – — turns volume down
VOL + — turns volume up
MUTE – mutes volume
PAUSE – pauses CD/tape play
PLAY – starts CD/tape play
TRACK REV – searches / skips CD track
backward, searches tape backward
STOP – stops CD/tape play
TRACK FWD – searches / skips CD track forward,
searches tape forward
REPEAT(RDS MODE) – repeats 1 track or entire
disc play (enters RDS mode)
B. BOOST – turns bass boost on/off
MIX(PTY SEARCH) – plays CD tracks randomly
(searches radio stations by program type)
SHUFFLE – plays CD tracks randomly
RECORD – records to tape from CD, tuner, aux
mode
TUNING – tunes radio up or down
SURROUND – turns surround (3D) sound on/off
PRESET – toggles between preset/tune mode
for tuner
SLEEP – sets time period in minutes before the
unit automatically goes off
4
AM1450 Eng Version 3/27/00, 4:34 PM4
Page 5

Sound features
Using preset equalizers
1. Press MODE until the message [PRESET EQ MODE SEL] scrolls across the display
2. Turn MULTI JOG to select ROCK, JAZZ, FLAT or POP sound effect
OR
1. Press EQ PRESET on remote
Activating surround sound
Press SURROUND to turn on/off surround sound
Boosting bass
Press BASS BOOST to turn on/off bass boosting
OR
Press B.BOOST on remote
Muting audio
Turn MULTI JOG counterclockwise until the [MUTE] icon flashes on display
OR
Press and hold VOL -- until the [MUTE] icon flashes in display
OR
Press MUTE on remote control
EN
Exiting MUTE
Press any key
Showing demonstration
Press DISPLAY/DEMO to turn on/off demonstration mode
Setting sleep
Press SLEEP on remote to set the time period in minutes before the unit automatically goes off
Tip: To view the time period to go before the unit goes off, press
AM1450 Eng Version 3/27/00, 4:34 PM5
SLEEPSLEEP
SLEEP again
SLEEPSLEEP
5
Page 6

CD player
EN
Playing disc
1. Press CD to select CD mode
2. Press PUSH/OPEN to open tray cover
3. Insert a disc with label face up
4. Press PUSH/OPEN to close tray cover
5. Press PLAY/PAUSE to begin CD play
6. Adjust volume to your desired listening level
Tips:
1. You may listen through headphones by inserting
one set into phone jack.
2. When in play or pause mode, press
remaining time in track, remaining time in disc,
track number and time elapsed.
CDCD
CD to show
CDCD
Playing a program list
While in PROGRAM mode, press PLAY/PAUSE
Displaying the program list
1. While the CD player is stopped, press SET/PROG. to
enter PROGRAM mode
2. Press SET/PROG. repeatedly to list each track
assignment in the program list
Deleting a track from a program list
While in PROGRAM mode, display the programmed
track to be deleted (press SET/PROG. if necessary to
cycle through the list) and immediately press STOP
To clear the whole programmed list, press and hold
STOP for 5 seconds. The system displays the message
[CLEAR].
Sampling tracks
Press INTRO to play the first 10 seconds of each track on
the disc
Automatically Skipping Tracks (ATS)
Creating an ATS program
Pausing and Stopping
Press PLAY/PAUSE or STOP to pause or stop CD play
respectively
Repeating
Press REPEAT once to repeat current track
Press REPEAT twice to repeat entire disc
Press REPEAT a third time to turn off repeat mode
1. Press STOP
2. Press AT S
3. Press TRACK REV or TRACK FWD to specify
the first track to skip, and press SET/PROG.
4. Repeat the previous step to add more tracks
to the ATS program
5. Press PLAY to play the ATS program
Editing an ATS program
Shuffling
Press MIX to play tracks randomly
Skipping
Press (TRACK REV) or (TRACK
FWD) to go to previous or next track respectively
Searching
Press and hold (TRACK REV) or
(TRACK FWD) to search backward or forward respectively
1. Press STOP
2. Press ATS
3. Press SET/PROG. repeatedly until the display shows
the track you want to change
4. Press TRACK REV or TRACK FWD to specify the
replacement track to be skipped, and press SET/PROG.
5. Repeat the previous step to change other previously
programmed tracks
6. Press PLAY to play the program
Outputting CD signal digitally
Programming
When CD player is in stop mode,
1. Press SET/PROG. and [PROGRAM] appears on display
2. Press (TRACK REV) or (TRACK
FWD) to select tracks you want to program
3. Press PROG. again to confirm your selection
4. Repeat steps 1 to 3 to program to a maximum of 32
tracks
1. Insert one end of an optical cable (not supplied) into
the OPTICAL OUT jack on the back panel
2. Connect the other end of the optical cable to the
OPTICAL IN (or equivalent) jack of another equipment
6
AM1450 Eng Version 3/27/00, 4:34 PM6
Page 7

Tuner
Tuning to a station
1. Connect the antenna wires
2. Press TUNER to select tuner mode
3. Press TUNER again to select the next radio
band
4. Press PRESET/TUNE to select TUNE mode
5. Press TUNING UP or TUNING DOWN to tune
in your desired station
Tips:
1. Press and hold
DOWNDOWN
DOWN for more than 1 second to automatically
DOWNDOWN
tune up/down the band.
2. Press FM STEREO to toggle between FM
mono and stereo for stereo FM broadcast
TUNING UPTUNING UP
TUNING UP or
TUNING UPTUNING UP
TUNINGTUNING
TUNING
TUNINGTUNING
Using presets
1. Press PRESET/TUNE to select PRESET mode
and the [PROGRAM] light goes on
2. Press TUNING UP or TUNING DOWN to
access previous or next preset station. The
display first shows the frequency, and after a
few seconds, the program number
Setting presets
1. Press PRESET/TUNE to access TUNE mode
2. Press TUNER to select desired radio band
3. Press TUNING UP or TUNING DOWN to
access the desired frequency
4. Press SET/PROG. once
5. The most recently accessed program location
will be displayed together with a blinking
[PROG] icon
6. If a different program location is preferred,
press TUNING UP or TUNING DOWN to go to
the desired preset number (1-32)
7. Press SET/PROG. to store the selected
frequency at that preset
Displaying RDS station information
Toggle RDS MODE to display the frequency,
station name (PS), station type (PTY), clock time
(CT), or radio text (RT). In CT mode, press <RDS
TIME> to replace the displayed time by RDS
station time
Tip: RDS stations broadcast on FM only. When
the tuner detects an RDS signal, the RDS light
turns on
Searching by program type (PTY)
1. In tune mode, toggle PTY SEARCH on
remote to select from NONE, NEWS, INFO,
SPORT, EDUCATE, DRAMA, CULTURE, SCIENCE,
VARIED, POP M, ROCK M, MOR M, LIGHT,
CLASSICS, OTHER M, and ALARM
2. Within 5 seconds, press TUNING to search for
a station broadcasting the selected type of
program
Automatic preset programming
With Automatic Preset Programming activated,
each received station within the bandwidth will
be stored into up to 32 programs. Once
programming is done, the unit will go to preset
one.
1. In tuner mode, press and hold TUNER for
more than 2 seconds and the message [AUTO
PRESET PROGRAMMING] will scroll across the
display
EN
Tip: Your audio system has 32 preset stations
Tuning to an RDS station
1. Press PRESET/TUNE to access TUNE mode
2. Press TUNING UP or TUNING DOWN to tune
to an RDS station (RDS light turns on)
AM1450 Eng Version 3/27/00, 4:34 PM7
7
Page 8

Tape player
EN
Playing a tape
1. Press TAPE
2. Press PUSH/OPEN to open the tape deck door
3. Insert a tape into the door and push the door closed
4. Press (TRACK REV) or (TRACK FWD) to position the tape to the desired
starting position
5. Press PLAY
6. Press REV. MODE to select continuous play with auto reverse or one-time auto reverse play
Recording to tape
From tuner
1. Insert a tape into the deck
2. Press TUNER to access the desired radio band
3. Tune to the station to be recorded
4. Press RECORD to begin recording
5. Press STOP to end recording
From CD (Synchronous Recording)
Synchronous recording will start and end as CD play (normal or programmed) starts and ends.
1. Insert a tape into the deck
2. Press CD
3. Insert the disc to be recorded
4. Select the track or program to be recorded
5. Press RECORD to begin synchronous recording
6. To end CD play and recording earlier, press STOP
From an auxiliary input
1. Insert a tape into the deck
2. Check that the auxiliary device has been connected correctly to the AUX connectors on the back of
the audio system
3. Start playback on the auxiliary device
4. Press RECORD to begin recording
5. Press STOP to end recording
Auxiliary input
This audio system can receive audio signals from other devices, such as a television, VCR, tuner,
satellite, or DVD player and output them through the connected speakers. To listen to such output,
1. Insert one end of an audio cable (not supplied) into the AUX IN jacks on the back panel
2. Connect the other end of the audio cable to another equipment and play the device
3. Press AUX on the front or remote
4. Adjust to your desired volume level and sound effects
8
AM1450 Eng Version 3/27/00, 4:34 PM8
Page 9

Using MODE
Setting time
1. Press MODE until [CLOCK ADJUSTMENT] scrolls across display
2. Turn MULTI JOG wheel to set hour
3. Press or to go to minute digits
4. Turn MULTI JOG wheel to set minute
5. Press SET/PROG.
Setting timer
1. Press MODE> until [TIMER MODE SET] scrolls across display
2. Turn MULTI JOG wheel until either [TIMER ON] or [TIMER OFF] scrolls across the display
3. Press and the message [ON TIME] scrolls across display
4. Turn MULTI JOG wheel to set hour
5. Press to go to minute digits
6. Turn MULTI JOG wheel to set minute
7. Press and the message [OFF TIME] scrolls across display
8. Repeat steps 4 to 6 once
9. Press and the message [SOURCE SELECT] scrolls across display
10. Turn MULTI JOG wheel to select among CD, TAPE and TUNER
11. Press to:
select CD track to play by turning MULTI JOG wheel
OR
select preset radio station by turning MULTI JOG wheel
12. Press and [VOL. SET] appears
13. Turn MULTI JOG wheel to set volume level
EN
Tip: During timer setting process, you may press to go back to your previous settings.
Setting timer on/off
1. Press MODE until [TIMER MODE SET] scrolls across display
2. Turn MULTI JOG wheel until [TIMER ON] scrolls across display and the clock icon appears to
activate timer function or turn wheel until [TIMER OFF] scrolls across display and the clock icon goes
off to deactivate timer function
Adjusting display brightness
1. Press MODE until [DIMMER MODE SET] scrolls across display
2. Turn MULTI JOG wheel to select DIM 0, DIM 1, DIM 2 or DIM 3
AM1450 Eng Version 3/27/00, 4:34 PM9
9
Page 10

Troubleshooting tips
Troubleshooting tips
EN
Problem
System doesn’t turn on
No sound
Poor radio reception
CD doesn’t play
CD sound skips
Solution
• Unplug the unit for a moment, and then plug it back in.
• Check the outlet by plugging in another device
• Adjust volume setting.
• Make sure you’ve selected the correct function
• Adjust the antenna for better reception
• Try turning off electrical appliances near the unit, such as hair dryers,
vacuum cleaners, or fluorescent lights
• Make sure you’ve put a CD in the tray
• Make sure the CD’s label is facing up
• Try another CD
• Make sure that Pause mode is not activated
• Make sure CD function is selected
• Clean the CD (as explained in “Care and Maintenance”)
• Check CD for warping, scratches, or other damage
• Check for vibration or shock that may affect the unit; move the set
if necessary.
Care and Maintenance
Cleaning the exterior
Disconnect the system from AC power before cleaning the exterior of the unit with a soft dust cloth
Clean the exterior with a soft clean cloth or slightly moistened chamois leather. DO NOT use solvents
as it may cause damage to the unit.
Handling CDs
Do not touch the signal surfaces. Hold CDs by the edges, or by one edge and the hole.
Do not affix labels or adhesive tapes to the label surfaces. Do not scratch or damage the label.
CDs rotate at high speeds inside the player. Do not use damaged (cracked or warped) CDs
Make sure CDs are stored in their original case after use. Keep them away from damp, humid or
abnormally heated places.
Cleaning CDs
Dirty CDs can cause poor sound quality. Always keep CDs clean by wiping them gently with a soft
cloth from the inner edge toward the outer perimeter.
If a CD becomes dirty, wet a soft cloth in water, wring it out well, wipe the dirt away gently, and
then remove any water drops with a dry cloth.
Do not use record cleaning sprays or antistatic agents on CDs. Also, never clean CDs with benzene,
thinner, or other volatile solvents which may cause damage to disc surface
The descriptions and characteristics in this owner’s manual are for the purpose of general reference only and not as
a guarantee. In order to provide you with the highest quality product, we may make changes or modifications
without prior notice.
10
AM1450 Eng Version 3/27/00, 4:34 PM10
Page 11

Technical specifications
Power supply : 230 V ~ 50 Hz
Unit Dimensions (mm) : D: 200 - H: 250 -
W: 160
Tape deck : Response curve:
125 Hz - 8 kHz (-5 dB)
CD Player : Response curve (+/- 2 dB)
20 Hz to 20 kHz
λ
LASER
ADVERSEL !
USYNLIG LASERSTRÅLNING VED
ÅBNING. UNDGÅ UDSAETTELSE
FOR STRÅLNING
ATTENTION !
RAYONNEMENT LASER INVISIBLE
EN CAS D’OUVERTURE. EXPOSITION DANGEREUSE AU FAISCEAU,
LASER CLASSE 3B.
= 780 nm
P max = 5 mW
Rating Plate: Look for it at the back of the set.
In accordance with the rating plate of the unit,
this unit complies with current standards
concerning electrical safety and electromagnetic
compatibility.
Caution! The equipment must only be opened
by qualified personnel, to avoid accidents
caused by the laser beam.
VORSICHT !
UNSICHTBARE LASERSTRAHLUNG
TRITT AUS WENN DER DECKEL
GEÖFFNET IST ! NICHT DEM STRAHL
AUSSETZEN ! LASER KLASSE 3B.
CAUTION !
INVISIBLE LASER RADIATION WHEN
OPEN AVOID EXPOSURE TO BEAM
CLASS 3B LASER PRODUCT .
EN
VARNING !
OSYNLIG LASERSTRÅLNING NÄR
DENNA DEL ÄR ÖPPNAD. STRÅLEN
ÅR FARLIG.
VARO !
AVATESSEA OLET ALTTINA
NÄKYMÄTTÖM¨ALLE
LASERSÄTEILYLLE ÅLÅ KATSO
SÅTEESEEN.
AM1450 Eng Version 3/27/00, 4:34 PM11
CLASS 1 LASER PRODUCT
LASER KLASSE 1
APPAREIL A LASER DE CLASSE 1
LUOKAN 1 LASERLAITE
KLASS 1 LASERAPPARAT
11
 Loading...