

Thetford Aqua-Magic V, Aqua-Magic STYLE PLUS, Bravura, Aqua-Magic STYLE II Owner's Manual
3
3
2
2
1
1
1 Aqua-Magic IV
2 Aqua-Magic Galaxy/Starlite
3 Sealand 510, 910, 2000
Permanent RV Toilet Owner’s Manual
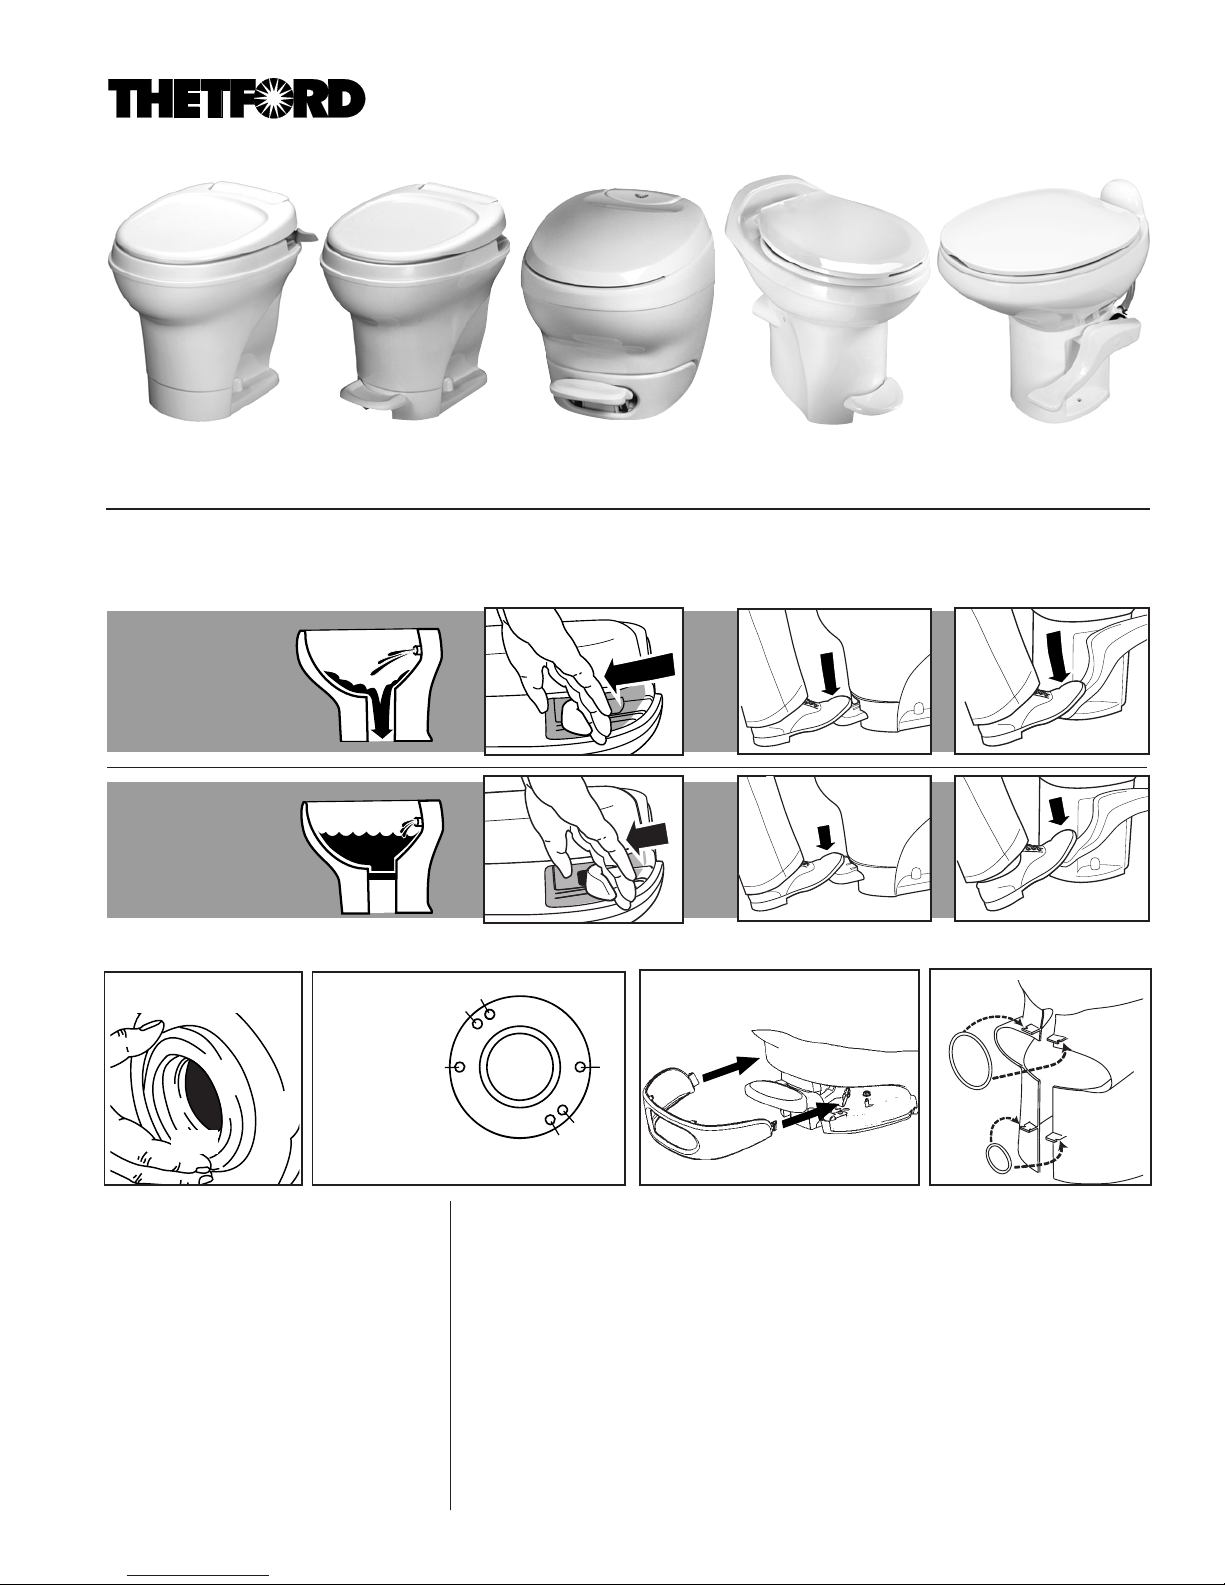
Fresh Water Flush
Aqua-Magic V
Hand or pedal flush
Operation
To flush, press
all the way
To add water,
press halfway
Installation
Fig. 1
Fig. 2
Bolt Pattern
1: Bravura,
Aqua-Magic V,
Aqua-Magic
STYLE
1, 2, 3: Bravura
(if replacing
Starlite/Galaxy)
Bravura
Pedal flush
Hand operation
Aqua-Magic V
Front
Fig. 3
Aqua-Magic STYLE PLUS & STYLE II
China Bowl – Pedal Flush
Pedal operation
Aqua-Magic V,
Bravura, STYLE Plus
Bravura
Aqua-Magic STYLE II
Fig. 4
STYLE PLUS
Required Tools
• Adjustable wrench
• 1/2” ratchet or box wrench
If carpeted:
• Carpet cutting tool
• Marker or chalk
Plumbing required:
For adequate flush, a 3/8” I. D. water supply line
with good flow is required.
Procedure
1. Remove old toilet and closet flange seal.
2. Attach new closet flange seal to new toilet,
lip side down (Fig. 1).
3. STYLE Plus and Bravura only: Remove
shroud from base of unit (Figs. 3 & 4).
With mounting bolts in place, position toilet
over closet flange (Fig. 2). If not carpeted,
go to Step 5.
4. If carpeted, trace around toilet, remove
toilet and cut away carpet to expose floor.
Carpet beneath pedal may also need to be
removed.
5. Reset toilet. Using body weight, press toilet
to floor.
6. Tighten nuts until toilet is stable. Do not
overtighten.
7. Connect water line to water valve/elbow
1
using 1/2” NPT tube fittings.
8. Turn on water and flush. Check for leaks.
9. Bravura only: Install Shroud (Fig. 3). STYLE
PLUS only: Attach shroud to toilet by depressing pedal and placing the pedal opening over
the pedal and pushing it firmly against the
base. Press the sides of the shroud to the toilet
and attach two O-rings on the hooks to secure
it. Make sure to engage dual lock under front
of shroud by tapping shroud above pedal
(Fig. 4).
Removal
Follow the installation directions in reverse
order.
Trouble Shooting
1) Leaks:
a) Back of toilet: check water supply line
connection at water valve. Resecure or
retighten as necessary. If leak persists
from water valve, replace.
b) Vacuum breaker leaks while flushing:
replace Vacuum Breaker or water module,
depending on model.
c) Between closet flange and toilet: check
flange nuts for tightness. If leak continues,
remove toilet and check flange height. Use
Thetford spacers to adjust, if necessary, to
7/16” above floor. Replace flange seal.
2) Toilet won’t hold water:
a) Check for and remove any debris from
blade/ball seal track.
b) Check blade/ball seal compression with
mechanism. If blade/ball seal is worn,
replace.
3) Harder than normal pedal or hand lever
operation: Apply light film of Thetford Toilet
Seal Lubricant & Conditioner or silicone spray
to blade/ball. (Note: To avoid damage do not
use spray lubricants other than silicone.)
4) Poor flush: Pedals or hand levers must be
held fully open during flush. A good flush
should be obtained within 2 to 3 seconds. If
problem persists, remove the water supply line
and check flow rate. The flow rate should be
at least ten quarts (9.5 liters) per minute.
Winterizing
Draining Method
Turn off RV’s water supply. Drain toilet bowl. Disconnect supply line at water valve. Completely
drain the toilet’s water supply line.
CAUTION: To avoid damage, when using air
pressure to blow water from lines, be sure
toilet valve is open.
CAUTION: If water is frozen in the toilet, do
not attempt to flush until ice thaws.
Antifreeze Method
Use RV(potable) antifreeze only.
CAUTION: Never use automotive type
antifreeze.
Options
Thetford Toilet Riser
• Increases comfort
• Raises toilet 2.5 inches
• Fits all Aqua-Magics and Bravura
Deodorizing
This toilet was designed to be
compatible with Thetford brand
holding tank deodorants.
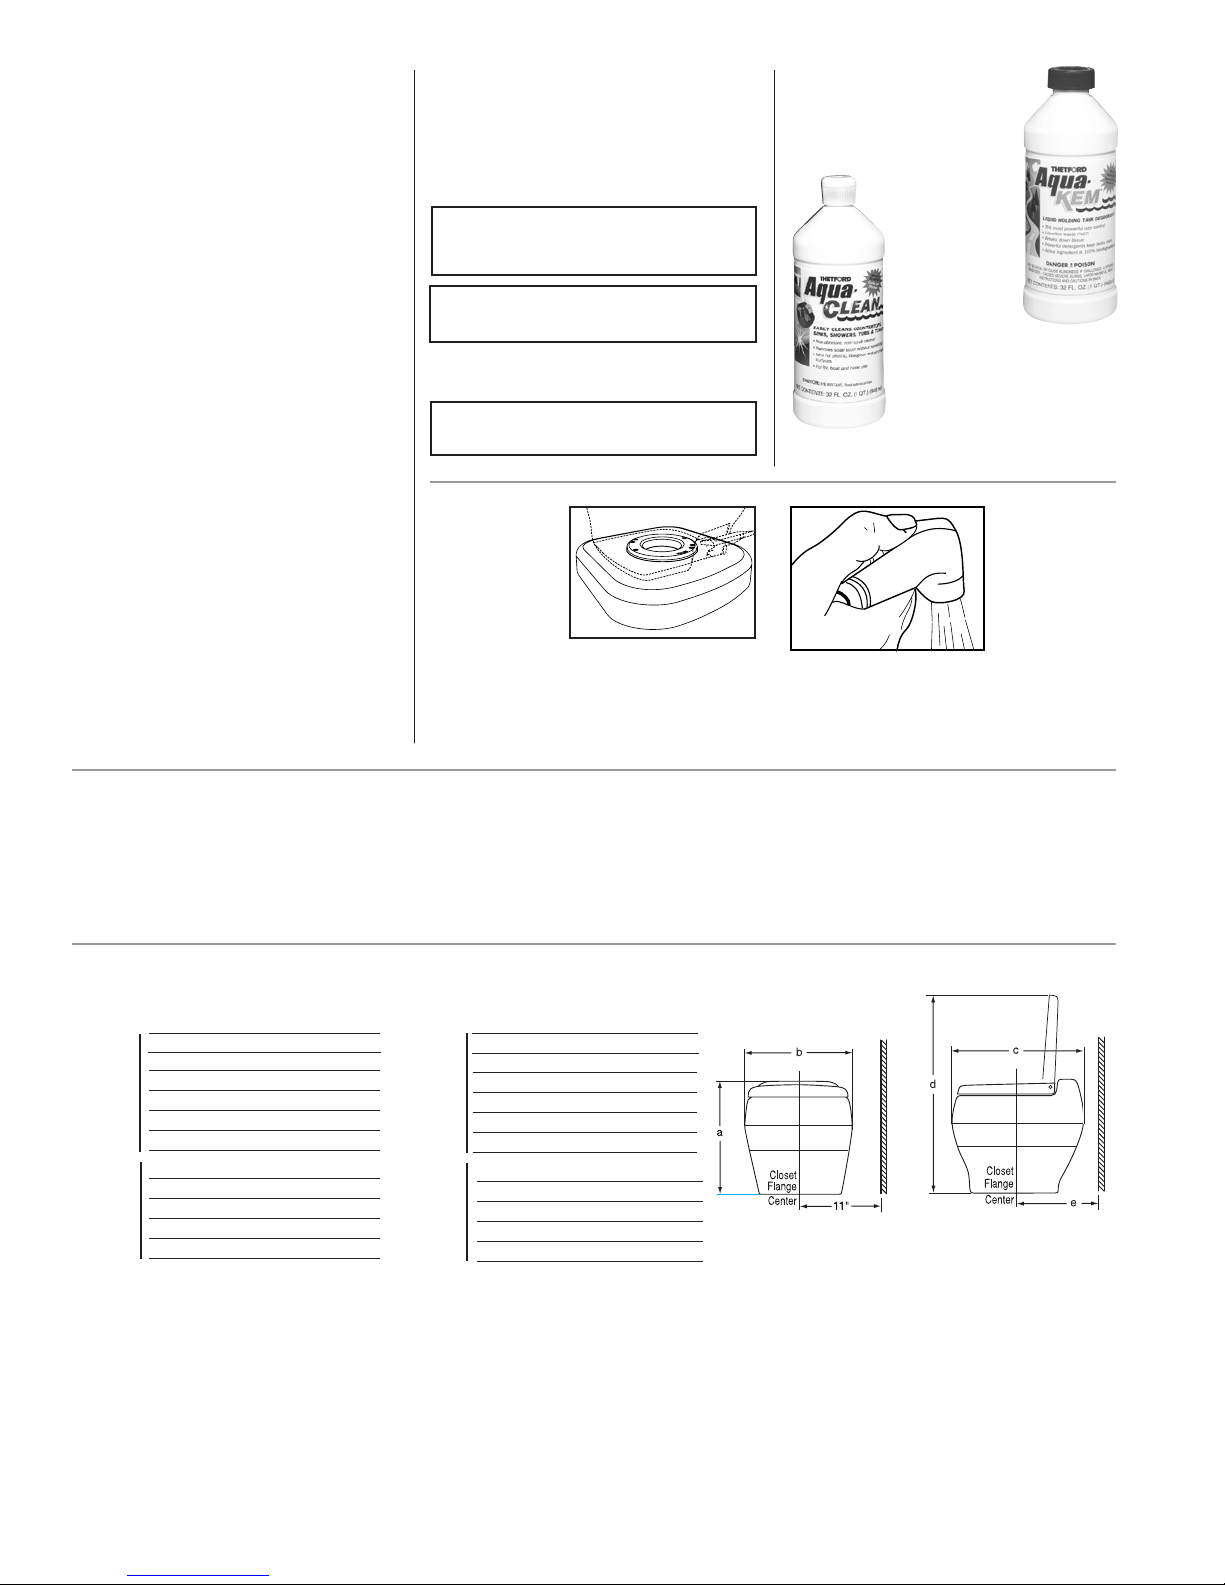
Cleaning
Us e Th e t f o r d
Aqu a-Cl eanTM
no n - a b ra si v e
cleaner with a
soft-bristle, nonab rasive bo wl
brush, sponge
or soft cloth. DO NOT USE
SCOURING POWDERS, ACIDS
OR CONCENTRATED CLEANERS, WHICH CAN DAMAGE
SURFACES, PLASTIC PARTS
AND RUBBER SEALS. FAILURE
TO DO SO CAN VOID YOUR WARRANTY.
Hand spray
(Option with Bravura, Aqua-Magic V & AquaMagic STYLE )
• Easy to attach to existing water valve
Dimensions
High Low
a: 17-7/8” 14”
Bravura
Magic V
b: 16-9/16” 16-9/16”
c: 20-3/16” 20-3/16”
d: 34-3/8” 30-1/2”
e: 11” 11”
a: 18-1/2” 14”
Aqua-
b: 15 -1/8” 15-1/8”
c: 17-1/8” 17-1/8”
d: 32-1/4” 28-1/8”
e: 11”/11 11”/11
Profile
3-Year Limited Warranty
Thetford Corporation warrants permanent toilets that are used for personal,
family or household purposes to be free from defects in material and workmanship for a period of three years from the date of purchase. For details see:
www.thetford.com
High Low
a: 20” 15”
STYLE
b: 16” 16”
PLUS
c: 21-7/8” 21-7/8”
d: 35-9/16” 30-9/16”
e: 11” 11”
a: 19-1/2” 14”
b: 15-1/16” 15-1/16”
STYLE
c: 20” 20”
d: 33-7/8” 28-1/2”
II
e: 9-1/2” 9-1/2”
Profile
Front View
Wall
Side View
Wall
2
 Loading...