

ThermoPro TP-65S Instruction Manual
WIRELESS INDOOR/OUTDOOR HUMIDITY AND TEMPERATURE MONITOR
INSTRUCTION MANUAL
Model No. TP-65S
Introduction
Congratulations on your purchase of the wireless indoor/outdoor humidity and temperature monitor. You will
now be able to know the outdoor/indoor temperature and humidity while sitting inside.
Components
1. One base station unit (Receiver)
2. One remote sensor (Transmitter)
* Although the remote sensor is designed to be rain-proof, it still must be always put in a dry place to
avoid direct rainfall.
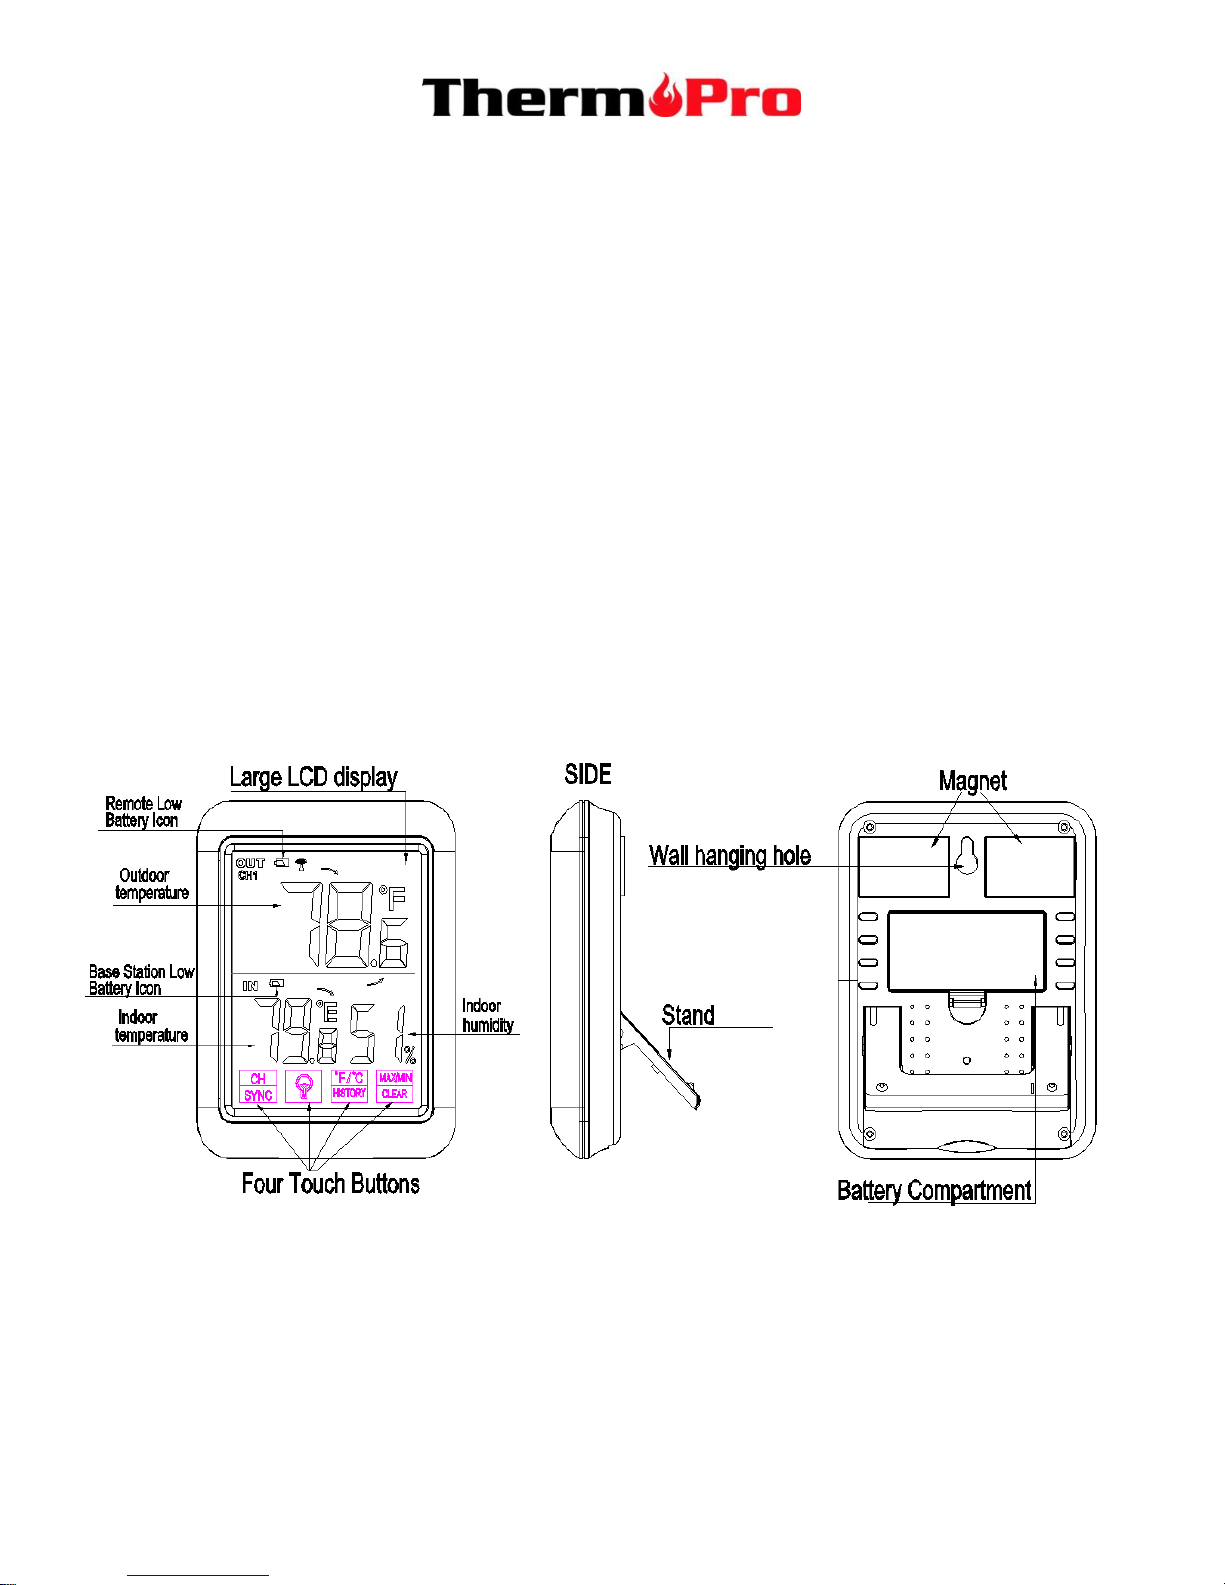
Indoor Base Station (Receiver) Features
1. LCD display: Displays the current outdoor temperature and indoor humidity/temperature
2. Battery Compartment: Holds 2 AAA batteries to power the unit
3. Tabletop and wall-mounted design
4. Indoor Temperature range: -4 °F ~ 158°F (-20 °C ~ 70 °C).
5. Humidity range: 10% ~ 99%.
6. Temperature display unit: °C and °F selectable
7. Temperature Resolution: 0.1 °C/°F
8. Humidity Resolution:1%

9. Low battery indication
10. Four touch buttons
11. Backlight
Touch Buttons
CHANNEL/SYNC: Press once to display the temperature readings from up to 3 outdoor remote sensors;
Press and hold this button to enter the synchronization mode.
MAX/MIN/CLEAR: Touch once to display the maximum or minimum temperature and humidity; Press and hold
to clear the history data.
°F /°C /History: Press to select the temperature display in ºC or ºF; When the display shows the maximum or
minimum temperature and humidity. Touch this button once to set the maximum and minimum data record time
interval between ALL TIME or 24 hours.
Note: Both ALL TIME and 24 hours represent the time after you manually cleared the history data last time or
installed a new battery.
: Touch once to turn on/off backlight. If you don’t press the button in 15 seconds, the backlight will
automatically turn off.
Temperature & HUMIDITY Trend
1. indicates the temperature & humidity is in an increasing trend.
2. indicates the temperature & humidity is in a no change trend.
3. indicates the temperature & humidity is in a decreasing trend.
Outdoor Remote Sensor (Transmitter) Features
1、Built-in rechargeable lithium battery: Type 18650
2、Rain-proof and wall-mounted design
3、Outdoor Temperature range: -58°F ~ 158°F (-50 °C ~ 70 °C)
4、Adapter input:AC100-240V 50/60Hz; Output:DC5.0V 300mA
Buttons

To access CHANNEL SELECTOR and RESET buttons, you need to unscrew the cover as per Fig.
CHANNEL Selector (1,2,3): Slide to set Channel 1,2 or 3.
RESET: Press once to reset the remote sensor.
: Press and hold for 2 seconds to turn ON/OFF the unit.
Low battery Warning
If the battery power (base station or remote sensor) is low, there will be low battery icon showing on the base
station display.
If the low battery icon for base station shows up, please replace the batteries with new one.
If the low battery icon for remote sensor shows up, please charge the remote sensor as soon as you can.
Installing Batteries
1. Base station: open the battery compartment of the base station and insert two “AAA” batteries with correct
polarity.
2. A built-in rechargeable lithium battery is installed in the remote sensor. Although there could be some power
in the rechargeable battery before the unit leaves factory, it is always good to fully recharge it before using by
following the below steps:
a. Connect the charger to the charging socket located on the back of the remote sensor;
b. Plug the charger into a standard AC outlet;
c. The red light on the remote sensor will light up;
d. Charge it for at least 4 hours until the light changes from red to green which indicates charging is complete.
Synchronize Remote Sensors with The Base Station
1. Place the remote sensor near the base station;
 Loading...