


Talento 371 Mini Plus

13
GB
Installation on DIN rail Terminal diagram
1 L
N
3 2
1 2 3L N
M
~
C1
–
–
Battery change
Type: CR 2032
Attention!
· The battery change may only be carried out
by a qualified electrician!
· Isolate the device before replacing the
battery!
· Check battery polarity when replacing.
Safety precautions
· The connection and installation of electrical devices may only be carried out by a qualified
electrician.
· Interventions in and changes to the device result in the voiding of the warranty claim.
· Observe your national regulations and the respective safety provisions.
· Fixed and flexible conductors of up to 2,5 mm
2
may be attached to the external terminal clips.
· Flexible cables with a cross-section ≤ 1 mm
2
should not be attached.
General information
· Deactivation commands take priority over activation commands.
· If the power supply is correct , the dots shown between the hours and minutes (
HH:MM) are
displayed permanently. The dots flash if the power supply is interrupted.
· If there is no power supply, the position indicator display goes out after 1 minute (sleep-function).
· The whole display flashes the battery needs to be changed for up to 2 weeks to warn that.
14
OK
reset
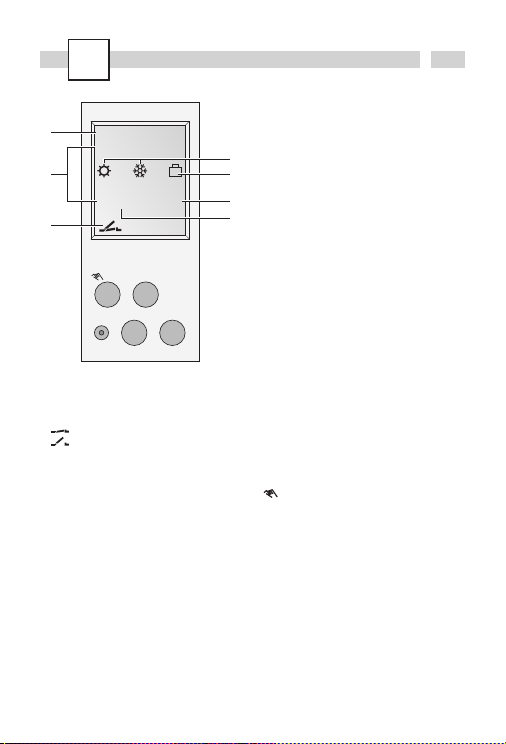
Display
A Channel status display
= Channel 1 ON
= Channel 1 OFF
B 2 communication lines for time display,
menu items, entry prompts etc.
C Day-of-week display
D Display of summer/winter time
E Holiday mode display
F Display of AM/PM
G Operating voltage (permanently lit dots)
Reserve power operation (dots flash)
General information
· The middle communication line shows the
selectable menu item. If confirmed with
OK,
this item is activated.
· Flashing texts or symbols require an entry.
· If no entries are made within the next
2 minutes, the clock reverts to Auto mode.
· The time switch has a
sleep-function when
not connected to power supply, that keeps
screen blank. This function is activated after
2 minutes of no key board operations.
All settings saved will remain in the memory.
Buttons
+ Scroll up in menu
Press briefly = +1
Press and hold (approx. 2 sec) = +5
– Scroll down in menu
Press briefly = -1
Press and hold (approx. 2 sec) = -5
Manual operation in the automatic
mode
Res The programs are retained in the case
of a reset. The date and time must be
set again. Press reset button with a
blunt object (pen).
Menu Exits the Automatic mode and enters
the Programming mode
Esc Press briefly = one step back
Press and hold (approx. 2 sec) = return
to Automatic mode
ok Make selection and apply
1 2 3 4 5 6 7
PROGRAM
14
:
26
AM
PM
FIX
Res Menu ok
Esc
–+
A
B
C
F
E
D
G
15
GB
ENGLISHLANGUAGE
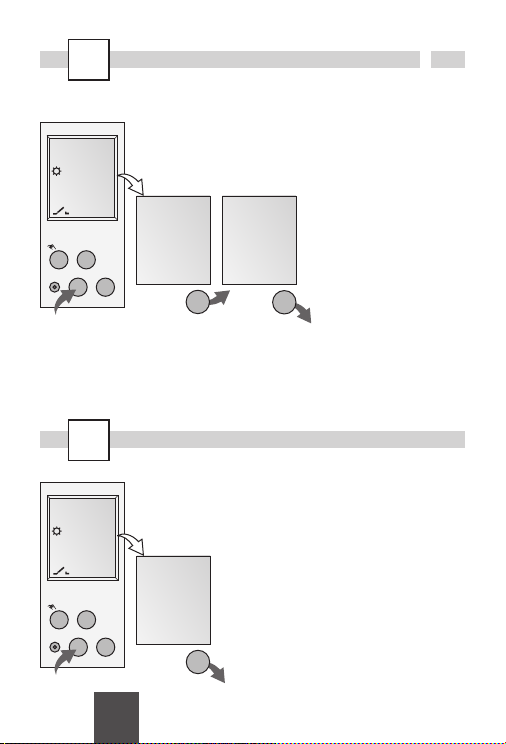
1.
Initial start-up - selection of menu language
1
14
:
26
Res Menu ok
Esc
–+
Info
In the delivered state the time switch is in the Auto mode with a preset time, date and the menu
language English. After selecting language, the time switch jumps automatically to Program mode
after 4 seconds.
Prog.
ok
ok
PROGRAM
1
14
:
26
Res Menu ok
Esc
–+
ok
English
Deutsch
Francais
Español
Italiano
Nederland
Portugues
Czech
16
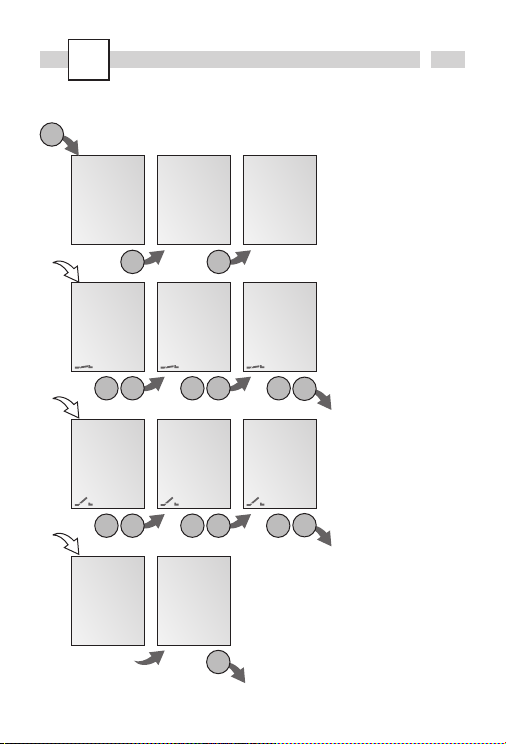
Prog.
New weekly program
FREE
50
WEEKLYNEW
ok ok
ok
5
ON MIN
15 OO
5
ON HOUR
OO
OO
1 2 3 4 5 6 7
ON DAY
ok+/- ok+/- +/-
ok
Info
The time switch has 50
memory spaces.
Example
ON command at 3 pm.
OFF command at 6 pm.
· Select NEW program
and confirm with
OK.
· Select WEEKLY program
and confirm with
OK.
· The free memory spaces
are briefly displayed.
· Select day block or
individual day (block
formation as desired)
and confirm with
OK.
· Enter hour for ON
command (
+/-) and
confirm with
OK.
· Enter minute for ON
command (
+/-) and
confirm with
OK.
· Enter hour for OFF
command (
+/-) and
confirm with
OK.
· Enter minute for OFF
command (
+/-) and
confirm with
OK.
· Program is saved.
· Program jumps to
selection WEEKLY. Now
additional programs can
be created.
5
OFF HOUR
15
OO
5
OFF DAY
ok+/- ok+/-
5
OFF MIN
18 OO
+/-
ok
SAVED
O1
O2
WEEKLY
Esc
 Loading...