

Page 1
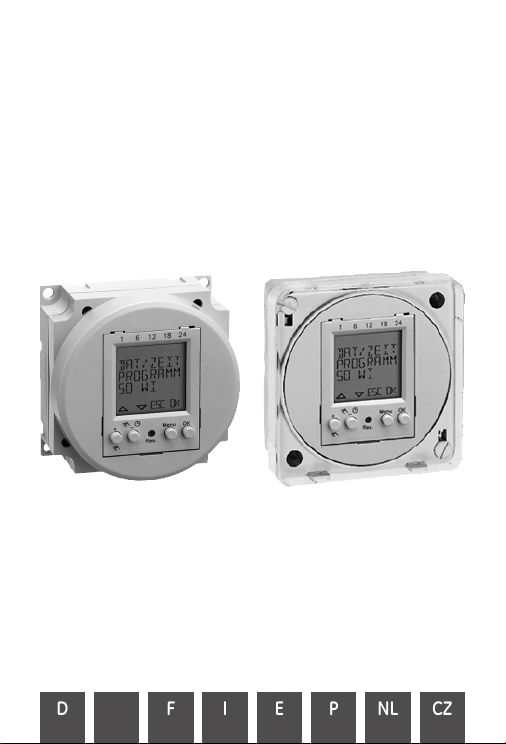
Instruction Manual
50 memories time switches
D GB F I E P NL CZ
Page 2
Safety precautions
· The connection and installation of electrical devices may only be carried out by a qualified
electrician.
· Interventions in and changes to the device result in the voiding of the warranty claim.
· Observe your national regulations and the respective safety provisions.
· Switch-off commands have priority over switch-on commands.
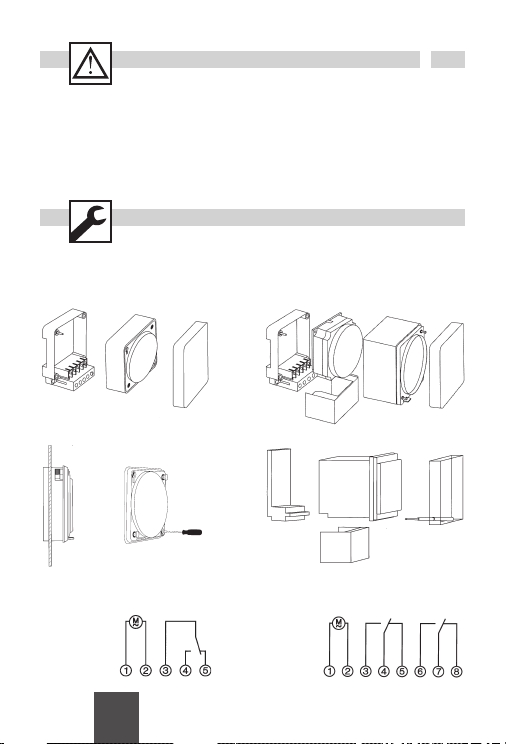
Assembly
MIL 72 D150 MIL 72A D150
MIL 72E D150 MIL 72 D250
Connection
MIL 72 D150
MIL 72A D150
MIL 72E D150
FMD 150
MIL 72 D250
13
GB
Page 3

Accessory
MIL 72 D150
14
MIL 72E D150
Terminal cover
01.78.0004.6
Sealing glas - IP40
01.78.0021.6
Multi-terminal busbar, latch
01.78.0036.6
Flush mounting base
01.79.0002.2
MIL 72 D250
Sealing glas
Sealing screw
16.10.0011.8
Page 4

OK
reset
MENU
1 6 12 18 24
Res.
1
F
B
C
D
E
G
H
I
J
K
C1
15:26:38
A
General information
· The middle communication line shows the
selectable menu item. If confirmed with
this item is activated.
· Flashing texts or symbols require an entry.
· If no entries are made within the next
2 minutes, the clock reverts to Auto mode.
Display
A Function displays of the two left-hand
buttons
B Channel status displays
= Channel 1 ON
= Channel 1 OFF
Channel 1 = C1, Channel 2 = C2
C 3 communication lines for time display,
menu items, entry prompts etc.
D Day-of-week display
E Overview of daily switching program
F Display of summer/winter time
G Operating voltage (permanently lit dots)
Reserve power operation (dots flash)
H Function displays of the two right-hand
buttons
Buttons
I Reset
The programs are retained in the case of a
reset. The date and time must be set again.
OK,
Press reset button with a blunt object (pen).
J Right-hand buttons
K Left-hand buttons with manual switch
function in Automatic mode
15
Function displays of the two left-hand
buttons:
scroll up in menu
scroll down in menu
Select/reject suggestion
Select/accept suggestion
+ Press briefly = +1
Press and hold (approx. 2 sec) = +5
- Press briefly = -1
Press and hold (approx. 2 sec) = -5
GB
Function displays of the two right-hand
buttons:
MENU Exits the Automatic mode and enters
the Programming mode
ESC Press briefly = one step back
Press and hold (approx. 2 sec) = return
to Automatic mode
OK Make selection and apply
EDT Change request in Read mode
NO Do not execute command
YES Execute command
DEL Delete
Page 5

1.
ESC
OK
DEUTSCH
ENGLISH
FRANCAIS
OK
12H 24H
LANGUAGE
DATETIME
ESC OK
OK
DEUTSCH
ENGLISH
FRANCAIS
ESC OK
ESC
MENU
1 6 12 18 24
1
C1
15:26: 38
Res.
MENU
Initial start-up - selection of menu language
Prog.
MENU
1 6 12 18 24
1
C1
15:26: 38
Res.
DATETIME
PROGRAM
DAYLIGHT
MENU
OK
REVIEW
NEW
DELETE
ESC OK
ESC OK
Info
In the delivered state the time switch is in the
Auto mode with a preset time, date and the
menu language English.
16
Page 6

17
Prog.
HOURS
00
CHL ON
ESC OK
OK
SELECT
DAY
CHL ON
ESC OK
MINUTES
15:00
CHL ON
ESC OK
MINUTES
18:00
CHL OFF
ESC OK
OK
HOURS
00
CHL OFF
ESC OK
SAVED
P01 P02
OK
FREE 50
OK
REVIEW
NEW
DELETE
ESC OK
OK
CHANNEL
SELECT
I
ESC
OK
CHANNEL
SELECT
I
ESC OK
New program
GB
only with 2-channel version
Info
The time switch has 50
memory spaces.
Example
ON command for channel
1 at 3 pm. OFF command
at 6 pm.
· Select NEW program
and confirm with
· The free memory spaces
are briefly displayed.
· Select channel and
confirm with
· Select day block or
individual day (block
formation as desired)
and confirm with
· Enter hour for ON
command (
confirm with
· Enter minute for ON
command (
confirm with
· Enter hour for OFF
command (
confirm with
· Enter minute for OFF
command (
confirm with
· Program is saved.
· Program jumps to
selection REVIEW,
DELETE. Now additional
programs can be
created.
OK.
+/-) and
OK.
+/-) and
OK.
+/-) and
OK.
+/-) and
OK.
OK.
OK.
NEW,
Page 7

18
Prog.
OK
ON P01
15:00
HH:MM
OK
DELETE
REVIEW
NEW
ESC OK
EDT OK
OK
OFF P02
18:00
HH:MM
EDT OK
OK
DELETE
ALL
OK
NEW
DELETE
REVIEW
ESC OK
YES NO
OK
CONFIRM
YESNO
OK
ON P01
15:00
HH:MM
DEL OK
OK
DELETE
ALL
YES NO
OK
CONFIRM
YESNO
View, edit program
Delete all programs
Delete individual programs
Info
· The program steps can
be scrolled through
▼ ▲.
with
· The respective program
can be edited by
EDT.
pressing
The procedure is the
same as when creating
a new program.
Info
· It is possible to delete all
programs with
· By pressing
individual programs
can be deleted.
Info
When deleting individual
programs, the corresponding program steps
are deleted (e.g. P01 ON
and P02 OFF).
NO,
YES
Page 8

19
OK
YEAR
2007
ESC OK
MONTH
2007:03
ESC OK
DAY
2007:03:25
ESC OK
OK
LANGUAGE
DATETIME
PROGRAM
ESC OK
MINUTES
13:45
ESC OK
OK
HOURS
13
ESC OK
OK
AM PM
24H
ESC OK
OK
DAYLIGHT
12H 24H
LANGUAGE
ESC OK
Set date and time
Set AM/PM (12-hour-) or 24-hour display
GB
Info
The date and time are preset at the factory.
Page 9

20
OK
CALIBRAT
AUTO
NO
ESC OK
OK
PROGRAM
DAYLIGHT
12H 24H
ESC OK
SU START
03
MONTH
ESC OK
OK
NO
CALIBRAT
AUTO
ESC OK
SU START
03:21
DAY
ESC OK
WI START
10
MONTH
ESC OK
WI START
10:31
DAY
ESC OK
SU WI
2103:3110
CALIBRAT
ESC OK
Switchover for summer/winter time
Info
The following settings are
possible:
AUTO
Factory presetting of the
published calendar dates.
This is automatically
recalculated for each year.
NO
No switchover
CALIBRAT
Programming. The start
date of the summer time
and winter time must be
entered for this purpose.
The factory presetting is
overwritten.
The programmed summer/
winter time is automati
cally recalculated for each
year.
The changeover takes
place on the same speci
fied day of the week in
the same week of each
month.
Example
03/21 Start summer time
10/31 Start winter time
-
-
Page 10

21
MENU
1 6 12 18 24
1
C1
15:26:38
FIX ON:
FIX OFF:
AUTO: (keine Anzeige) programmierte Schaltzeiten
FIX
FIX
Res.
Operating mode
Info
Left-hand button = Channel 1
Right-hand button = Channel 2 (only with
2-channel version)
Press 1 x = FIX ON = continuous ON
Press 2 x = FIX OFF = continuous OFF
Press 3 x = return to Auto mode
(no display) programmed switching times
GB
 Loading...