


Instruction Manual
Digital socket box timer
Grässlin UK
Vale Rise
Tonbridge/Kent TN9 1TB
Tel. (0 17 32) 35 98 88
Fax (0 17 32) 35 44 45
www.tfc-group.co.uk
GB

page
OK
reset
Menu
Prog
Prog.
P0x
prog
P--
prog
del
+1h
Safety precautions, short description, wiring diagram.................................................................3
Installation .......................................................................................................................................................... 3
Technical data ..................................................................................................................................................5
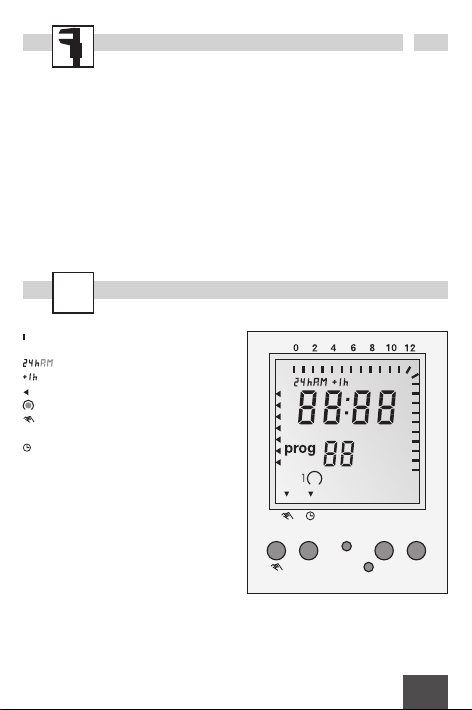
Symbols, keys ...................................................................................................................................................5
Setting the timer ..............................................................................................................................................6
Setting 24h or am/pm clock, time and weekday ............................................................................6
Pre-set programs.............................................................................................................................................8
Selecting pre-set programs P01 to P03................................................................................................ 9
User defined programs ...............................................................................................................................10
Deleting programs ........................................................................................................................................13
Summer/winter time ....................................................................................................................................14
Manual override .............................................................................................................................................14
2
GB

Safety precautions
· The connection and installation of electrical devices may only be carried out by a qualified
electrician.
· Interventions in and changes to the device result in the voiding of the warranty claim.
· Observe your national regulations and the respective safety provisions.
· Switch-off commands have priority over switch-on commands.
3
Mains installation
This product must be installed by a quailfied person in accordance with I.E.E. wiring
regulations. The examples are suitable for
connecting to a mains input / mains output
installation.
Volt-free switching
If there is no link between terminals 3 and
5, it is possible to use the timer to control
a load on a separate supply circuit, which
can be a different voltage value up to 250 V
AC. In this case, connect the mains live and
neutral to 5 and 4 respectively, then connect the live in / live out of the circuit to be
switched, to terminals 2 and 3.
Installation procedure
1. Switch off supply to socket box.
2. Unscrew the two screws located top left
and bottom right of the front module
cover; remove cover and gently pull
module from backplate. Do not put
undue stress on, or interfere with fixed
blue wires.
3. Fix backplate to socket box.
4. Connect wiring in accordance with
wiring diagram. Do not combine solid
and flexible conductors in the same
terminal. When connecting flexible con ductors use the ferrules supplied.
5. Fit cover over module and reassemble to
backplate. Ensure fixed blue wires
stowed neatly without being trapped.
6. Re-fit and tighten two screws.
7. Switch on mains.
GB

1 2 3 4
L N L N
5 E
M
~
to appliance mains supply
Backplate wiring: Example
54321
Wiring diagram
The link illustrated between terminals 3
and 5 (when required) must be fitted by the
installer. The diagram above is appropiate
when switching a mains load.
4
Technical Data
OK
reset
1
2
3
4
5
6
7
14
16
18
20
22
24
+ - Menu OK
Res.
+1h
Supply voltage see inprint on device
Switching capacity see inprint on device
Ambient temperature -10ºC to +55ºC
Protection class IP 51 electronic
IP 20 terminal box
Accuracy +/- 1 sec day at 20ºC
Reserve power 3 years from factory at +20ºC
Shortest switching time 1 min
Memory spaces 20
: Overview of daily switching
program
: Setting of 24h or am/pm
: Summer/winter clock changes
: Weekday display
: Switching status display ON/OFF
: Manual operation / advance ON /
advance OFF
: Automatic operation
+/- : Adjustment keys:
By pressing the key longer than
2 sec. you can adjust the timer in
steps of 5 units
Res. : Reset
Menu : By pressing the menu key
programming is terminated and
the system reverts to automatic
operation
OK : Confirmation of programming
5GB5

Menu
Prog
Setting the timer
+ - Menu OK
Res.
+1h
+ - Menu OK
Res.
+1h
1
2
3
4
5
6
7
14
16
18
20
22
24
+ - Menu OK
Res.
+1h
Setting of this programmable timer is depending of the user preference to use pre-set programs or defining own programming.
Using Pre-set programs
(first time installation)
Using Reset key you can adjust the following values:
24h or am/pm: see pg 6
Time (hour and minutes): see pg 7
Week day: see pg 7
Pre-set programs P01 to P03: see pg 8
User defined programming
by Menu mode
Using Menu key you can adjust / review the
following values:
24h or am/pm: see pg 6
Time (hour and minutes): see pg 7
Week day: see pg 7
Programs P--: see pg 8
Setting the clock
Sequence to follow after selecting programming by pre-set programs or Menu mode.
Set display format 24h or am/pm
1 21
Select 24h or am/pm (+/-) and confirm
with OK.
6

1
2
3
4
5
6
7
14
16
18
20
22
24
+ - Menu OK
Res.
+1h
1
2
3
4
5
6
7
14
16
18
20
22
24
+ - Menu OK
Res.
+1h
1
2
3
4
5
6
7
14
16
18
20
22
24
+ - Menu OK
Res.
+1h
7
Set hour
1 21
Select hour (+/-) and confirm with OK.
Set minutes
1 21
Select minutes (+/-) and confirm with OK.
Set week day
1 21
Select week day (+/-) and confirm with OK.
1 = Monday 5 = Friday
2 = Tuesday 6 = Saturday
3 = Wednesday 7 = Sunday
4 = Thursday
GB

Prog.
0 247 1 1812 14
0 246 22
0 247 2012 14
2220
8
Pre-set programs
P01: Mo - Su, 1 x ON/OFF
ON
P02:
Mo - Su, 2 x ON/OFF
ON
P03: Mo - Su, 3 x ON/OFF
ON
Programs P01-03
The switching on and off times for programs P01 to P03 are preset (pre).
The user can change these programs.
Individual program, P--
Under the menu option P-- you have the
option of creating a user-defined program.
This program can be changed at any time.
There are up to 20 memory locations available for 10 OFF and 10 ON commands.
You can allocate a corresponding weekday
or week block to each memory location.
Note:
For two channels version pre-set program
is established in the two channels.

P0x
prog
Selecting pre-set programs
1
2
3
4
5
6
7
14
16
18
20
22
24
+ - Menu OK
Res.
+1h
1
2
3
4
5
6
7
14
16
18
20
22
24
+ - Menu OK
Res.
+1h
1
2
3
4
5
6
7
14
16
18
20
22
24
Sequence to follow after setting time in the Reset mode.
1 1
Select pre-set program (+/-).
1a 1b
Once selected the program desired there
are following options:
Menu
terminate programming
OK
Going through pre-set programs to modify
selection (any program ON or OFF can
be modified by using ''+'' or ''-'' keys and
confirming with OK) or accept it with OK
key to go to the next free memory location
in order to add new user defined programs
(see pg 10).
e.g. after selecting P02 you should also
program:
Sa-Su 22:30 ON (prog05)
23:00 OFF (prog06)
GB
9

P--
prog
User defined programs
1
2
3
4
5
6
7
14
16
18
20
22
24
+ - Menu OK
Res.
+1h
1
2
3
4
5
6
7
14
16
18
20
22
24
+ - Menu OK
Res.
+1h
1
2
3
4
5
6
7
14
16
18
20
22
24
+ - Menu OK
Res.
+1h
Sequence to follow after setting time and week day while running Menu mode or adding
programs to the pre-set P01 to P03.
Select program ON
and confirm with OK.
Set hour ON
1 21
Select hour (+/-) and confirm with OK.
Set minutes ON
1 21
Select minutes (+/-) and confirm with OK.
10
1

P--
prog
1
2
3
4
5
6
7
14
16
18
20
22
24
+ - Menu OK
Res.
+1h
1
2
3
4
6
5
7
1
2
3
4
5
6
7
14
16
18
20
22
24
+ - Menu OK
Res.
+1h
11
Set week day ON
1 21
Select week day (+/-) and confirm with OK.
Possible week blocks and individual days
Set hour OFF
1 21
Select hour (+/-) and confirm with OK.
GB

P--
prog
1
2
3
4
5
6
7
14
16
18
20
22
24
Set minutes OFF
+ - Menu OK
Res.
+1h
1
2
3
4
5
6
7
14
16
18
20
22
24
+ - Menu OK
Res.
+1h
0 24320 243 20
1 21
Select minutes (+/-) and confirm with OK.
Set week day OFF
1c 1b1a
Should the OFF command be the same
day of ON command then select Menu to
terminate programming or select OK to go
to a new program ON setting.
Shift
Should the OFF command be the following day of ON command then select ''+'' key then
select Menu or OK.
Example:
Mo-Fr
20:00 p.m. - 03:00 a.m. ON 20:00 p.m. - 03:00 a.m. ON
03:00 a.m. - 20:00 p.m. OFF
03:00 a.m. - 20:00 p.m. OFF
Monday
Mo-Fr
Tu-Sa
ON
OFFOFF
Tuesday
12

del
Deleting programs
+ - Menu OK
Res.
+1h
1
2
3
4
5
6
7
14
16
18
20
22
24
+ - Menu OK
Res.
+1h
1
2
3
4
5
6
7
14
16
18
20
22
24
+ - Menu OK
Res.
+1h
13
1 2
Select Menu, then select OK key until
getting onto the ON time of the program
you want to delete.
1 1
Select ''--'' with (+/-) key and confirm
with OK.
2
Note:
Switching programmes are deleted in ONOFF pairs. If you delete a single ON instruction, the corresponding OFF instruction is
also deleted.
GB

+1h
Summer / winter time
1
2
3
4
5
6
7
14
16
18
20
22
24
+ - Menu OK
Res.
+1h
1
2
3
4
5
6
7
14
16
18
20
22
24
1
2
3
4
5
6
7
13
15
17
19
21
23
+ - Menu OK
Res.
+1h
Manual override
14
The +1h key is for the changeover from
summer to winter time.
· By pressing the
to the current time.
· +1h is shown on the display.
· By pressing
tracted from the current time.
The ''+'' key serves to change over between
automatic , advance ON and advance
OFF operations until next command is
executed.
+1h key 1 hour is added
+1h again 1 hour is sub-


80.10.1191.7/08/01
 Loading...