

Texecom Premier Elite ComIP, CEJ0000 Installation Manual

Installation Manual
Premier Elite ComIP
INS273-6
Product Type - CEJ0000
Premier Elite ComIP Installation Manual
2 INS273-6
1. Overview
Introduction
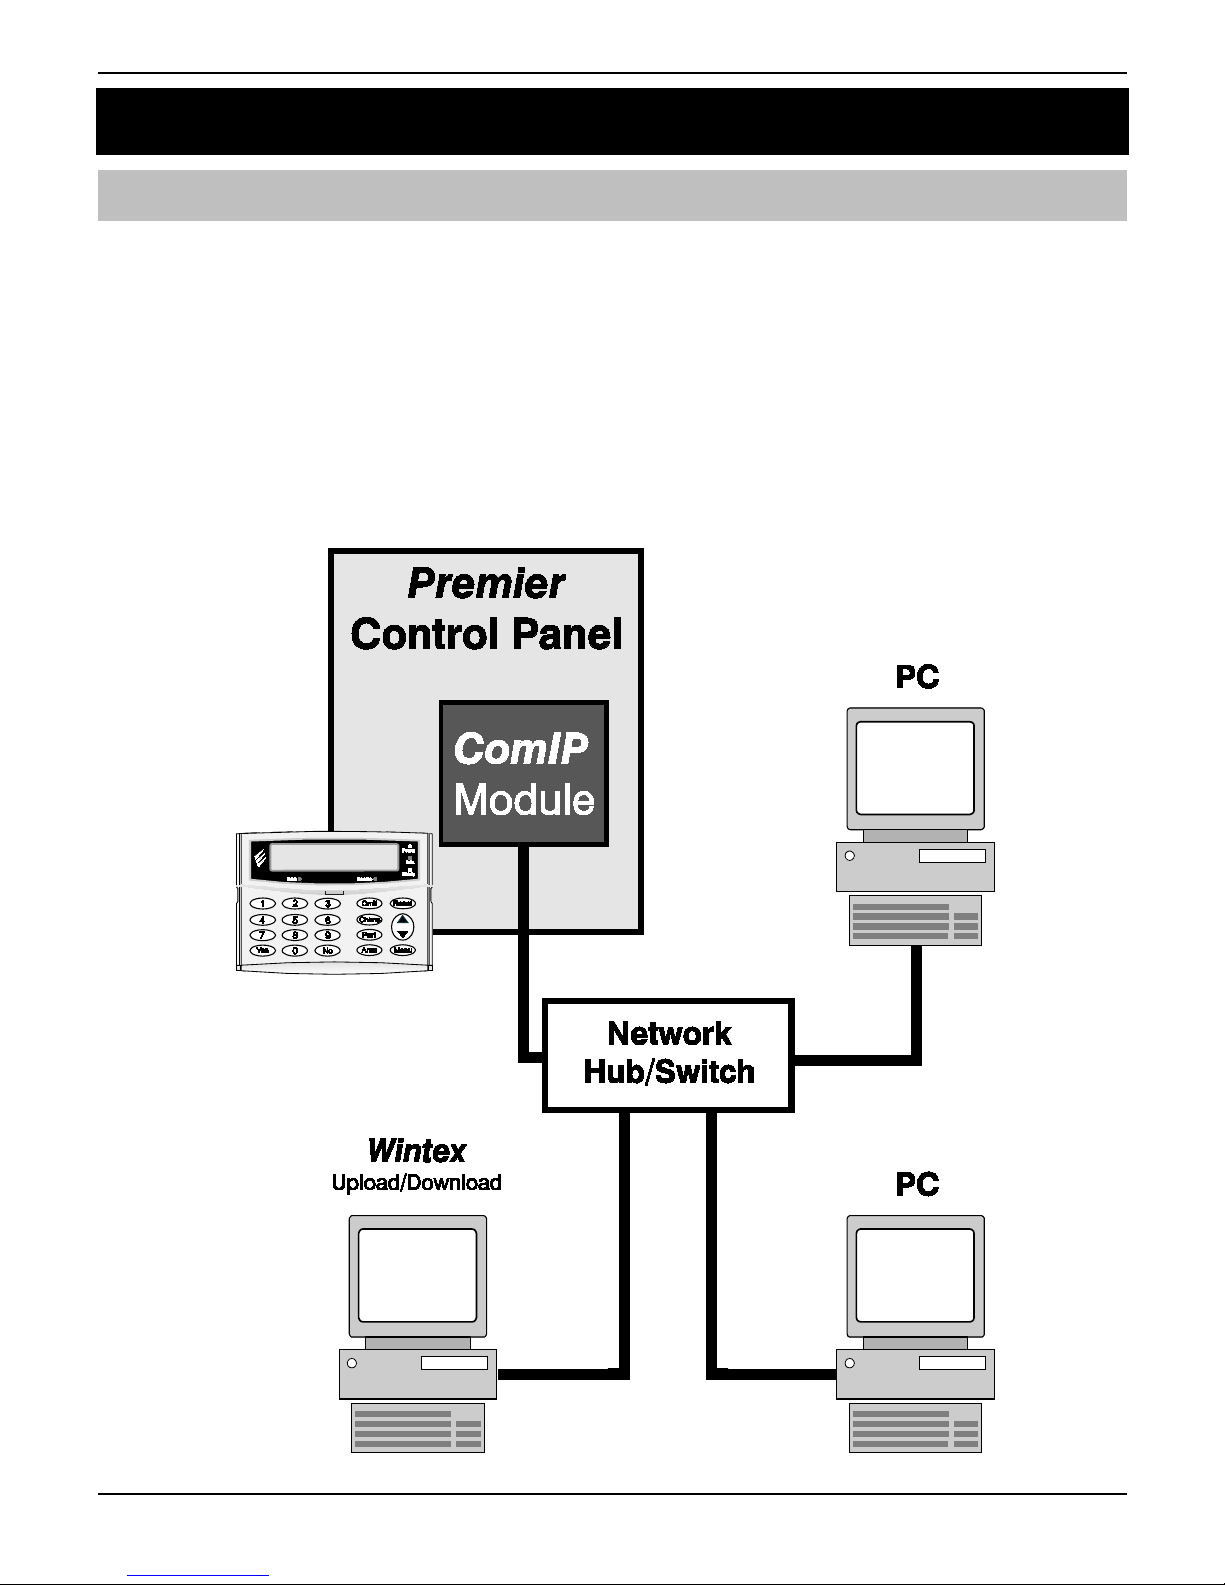
The ComIP module allows the Premier & Premier Elite control panels to be connected to either a
Local Area Network (LAN) or Wide Area Network (WAN). The internet is considered to be a WAN.
Once the control panel is connected to a network the following functions can be achieved:
• Upload/Download via Wintex UDL
• Receive Push Notifications, Arm, Disarm, Part Arm & Reset via Texecom mobile app's
• Signal alarms to an Alarm Receiving Centre
• High security polling by Alarm Receiving Centre
Typical LAN configuration
Premier Elite ComIP Installation Manual
INS273-6 3
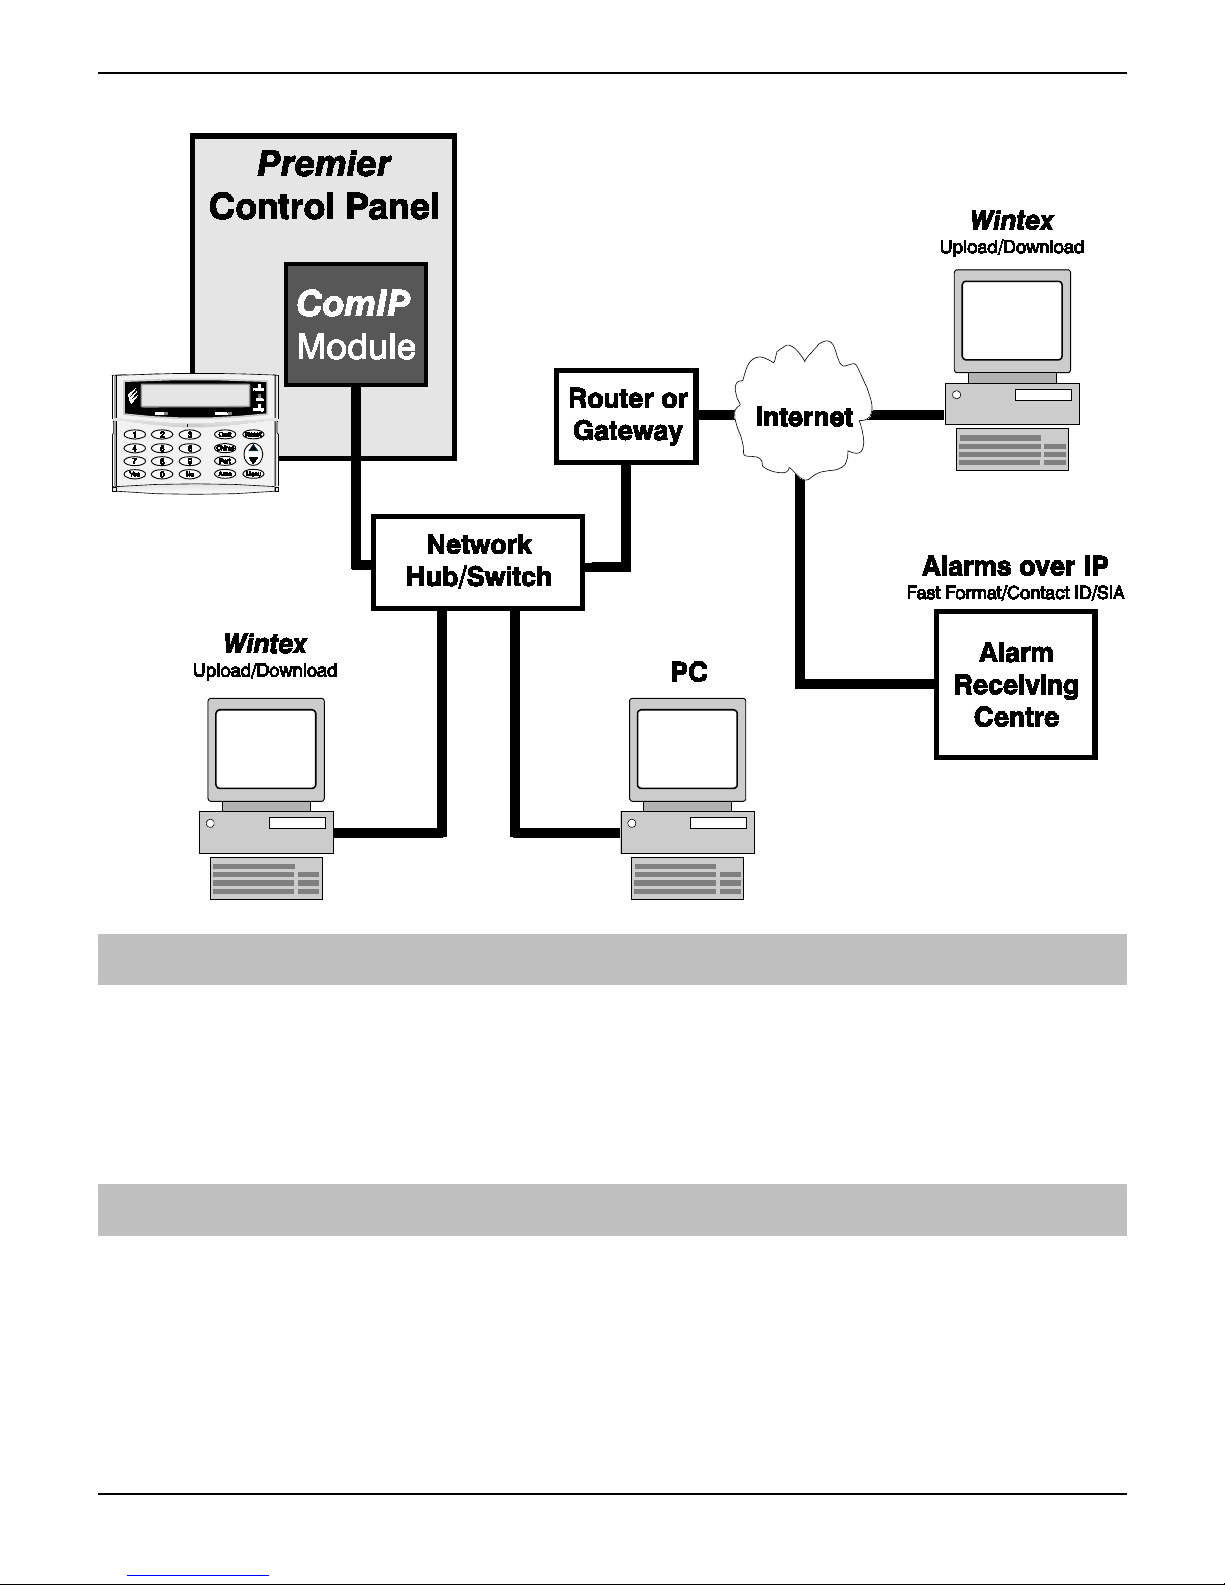
Typical WAN configuration
Supported Control Panels
The ComIP module is supported on the following Premier & Elite Series control panels, this manual
assumes use with Premier Elite panels:
• Premier 412/816 816 Plus & 832
• Premier Elite 12/24/48/88/168 & 640
• Premier 48/88/168 & 640 V7 or later
General
The installation of the ComIP module requires a basic understanding of networking and TCP/IP
protocol. If you are not familiar with these concepts, you may require assistance from an IT
professional before attempting to install the module.
The ComIP module is designed to be fitted inside the control panel and is powered via the harness
connection supplied.
Premier Elite ComIP Installation Manual
4 INS273-6
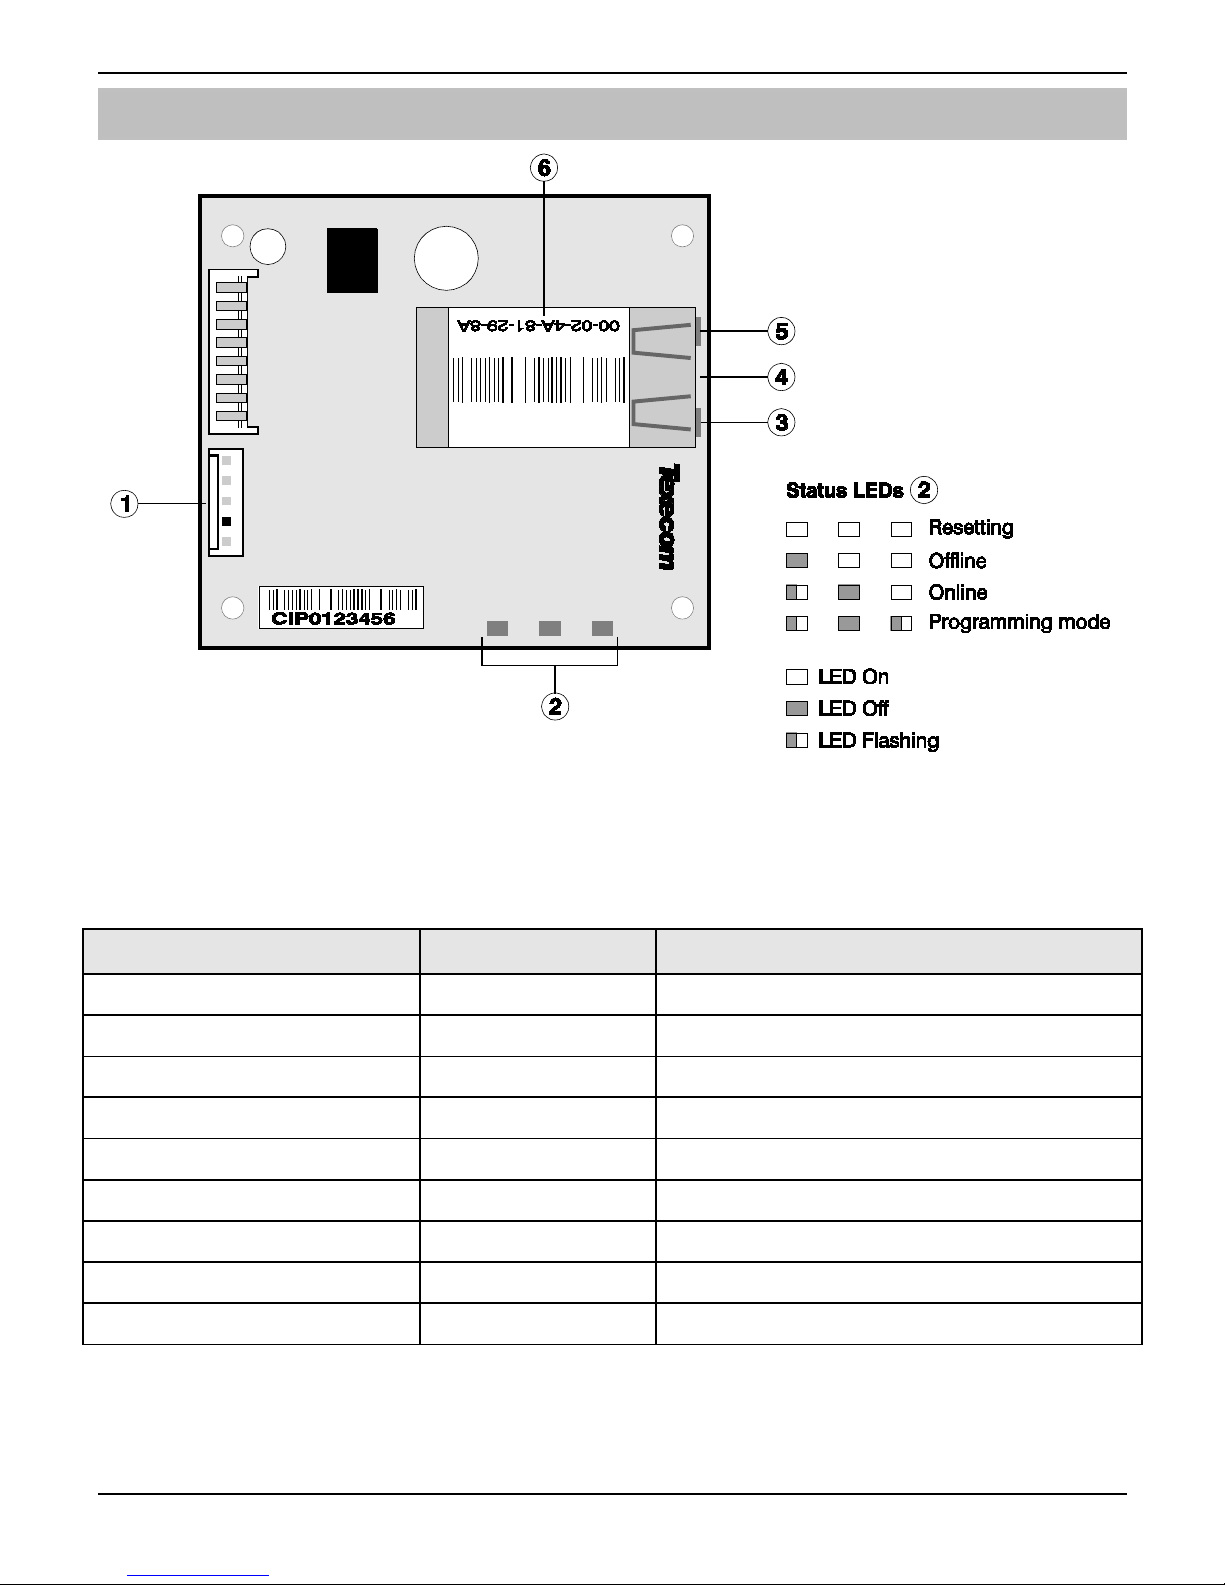
PCB Layout
5-way harness connection to control panel
ComIP Status LEDs
Network status LED (Left)
Network status LED (Right)
RJ45 network Connection
MAC address
Left LED Right LED Meaning
Off Off No Link
Off Solid Amber 100BASE-T Half Duplex Link
Off Blinking Amber 100BASE-T Half Duplex; Activity
Off Solid Green 100BASE-T Full Duplex Link
Off Blinking Green 100BASE-T Full Duplex; Activity
Solid Amber Off 10BASE-T Half Duplex Link
Blinking Amber Off 10BASE-T Half Duplex; Activity
Solid Green Off 10BASE-T Full Duplex Link
Blinking Green Off 10BASE-T Full Duplex; Activity

Premier Elite ComIP Installation Manual
INS273-6 5
Installation
Introduction
This step by step guide will allow you to achieve the following and should be carried out in the order
detailed in the manual.
• Installation
• Assign an IP address manually
o Reserve the IP address
o Set the DHCP Pool
• Setup port forwarding on the router
• Setup push notifications
• Programme the control panel
2. Assigning an IP address
Before proceeding you should ensure you can access the router as changes will need to be made to
ensure the ComIP will function as expected, and so that you can configure the router to allow
access from the outside world (WAN) should you require.
You will need to know the following; the default information should be available from the router
documentation:
• The IP address of the router
• The router name
• The router password
Before assigning an IP address it is important to understand how IP addresses work and the impact
this can have on the performance of the system and the ComIP.
IP Address Information
Each TCP/IP node on a network host has a unique IP address. This address provides the
information needed to forward packets on the local network and across multiple networks if
necessary.
IP addresses are specified as x.x.x.x, where each x is a number from 1 to 254; for example,
192.168.0.200. The ComIP must be assigned a unique IP address to use on a TCP/IP network. If the
address is left blank or is programmed as 0.0.0.0 the ComIP module will try to automatically obtain
an IP address from a DHCP server (if one is running on the network).
Port Numbers
The port number used to identify the channel for remote initiated connections. The default setting is
10001. The range for port settings is: 1-65535 except for the following reserved ports:
Port Numbers Reserved for
1-1024 Reserved (well known ports)
9999 Telnet setup
14000-14009 Reserved
30718 Reserved
10000 - 10999 Recommended for raw socket connections
 Loading...