

Page 1

Veritas User Guide Quick Reference Guide
THANK YOU FOR VOTING TEXECOM
USER GUIDE
Security Control Panels
Issue 2
1 INS167
Page 2
Overview Premier Series User Guide
1. Overview
Introduction
Users of the alarm system will be assigned a unique 4, 5 or 6 digit User code. User
codes are used to arm and disarm the system. Some User codes can also access
additional options such as, system tests and omitting zones.
Keypads will be installed throughout the premises, usually one at each entry/exit door.
The keypads are used to perform all of the system operations i.e. Arming, Disarming etc.
Most User codes can be used at any keypad on the system. However, Local Users will only
be able to use certain keypads on the system.
The Emergency Keys
In case of emergency, the alarm system can provide three immediate emergency alarms
by pressing and holding two specific keys for two seconds.
The emergency keys can be enabled/disabled for each keypad on the system.
!"
The Panic alarm can be programmed for either audible or silent operation.
The Panic alarm can be programmed for either instant or delayed operation.
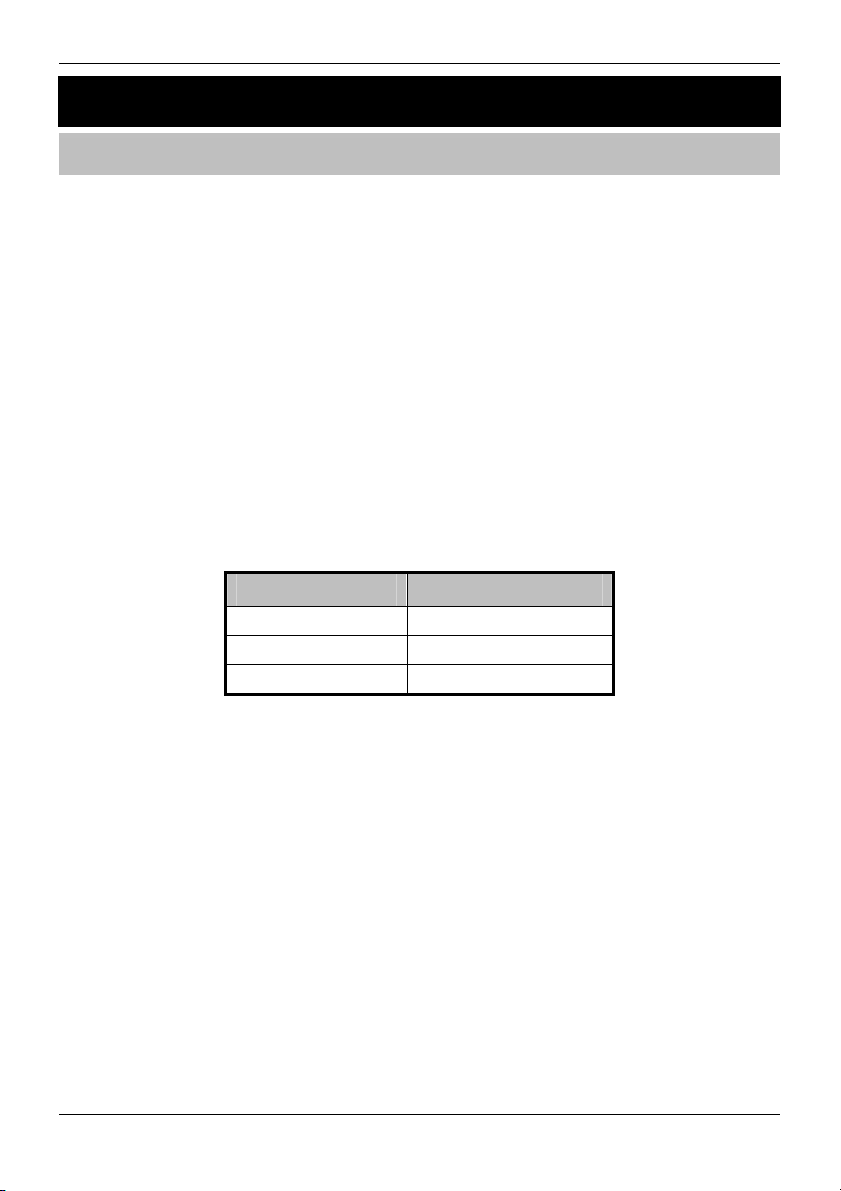
Emergency Alarm Press Keys
Panic Alarm (PA)
Fire
Medical
The Quick Arm Keys
The ‘Quick Arm’ keys allow the system to be armed without having to enter a User code first.
!
#
%
&
&
&
"
$
&
The ‘Quick Arm’ keys will only work if the keypad has been programmed to allow
!"
arming in this way.
To FULL arm the system, press
To PART arm the system, press
Keypad Lock
The keys on the keypad can be locked to prevent unwanted access to the system.
The Emergency keys will NOT operate with the keys locked.
!"
To Lock the keys, press
To Unlock the keys, press
2 INS221
*
*
and
.
'
!, (
together.
+
and
+
or
together again.
followed by
"
)
.
Page 3
Premier Series User Guide Overview
LED Indicators
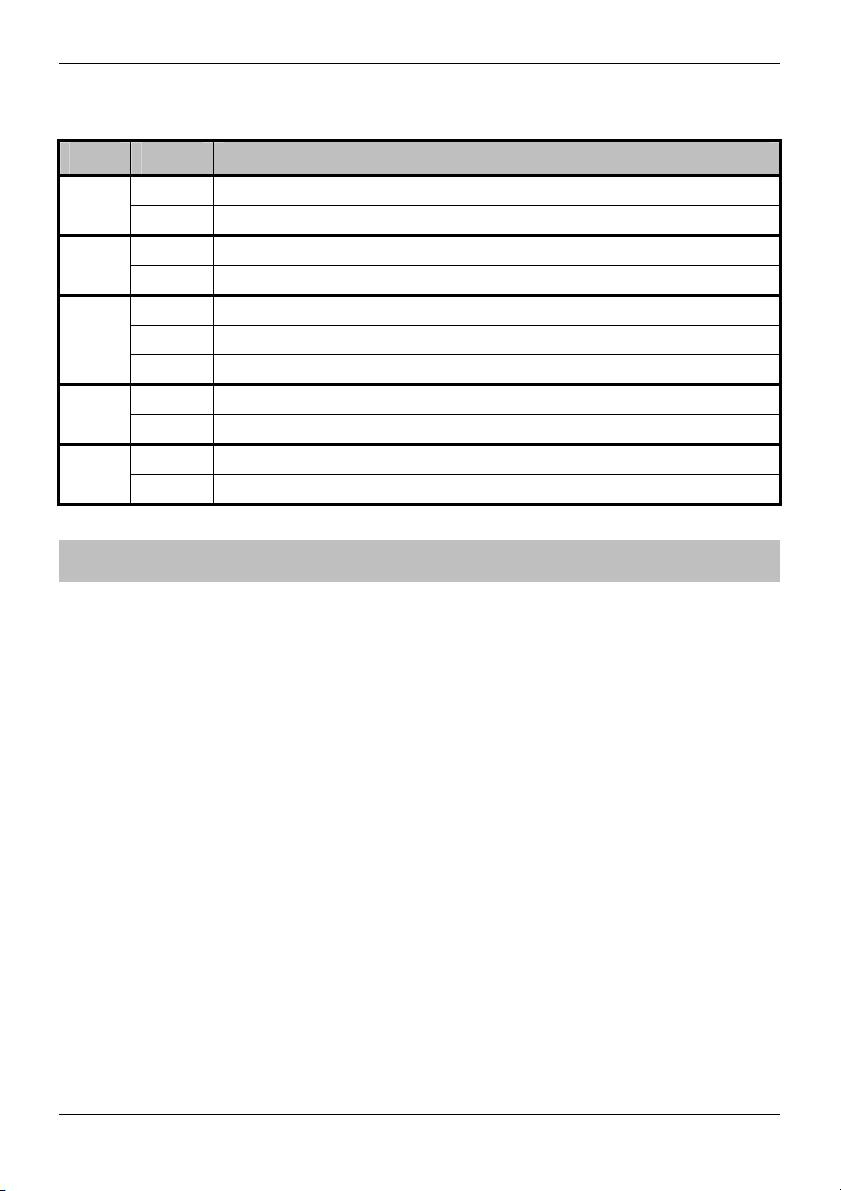
Five LED indicators have been provided to indicate the status of the system.
LED Status Meaning
Power On AC mains is present on the control panel
Flashing AC Mains is not present, the control panel is running on the standby battery
Service On The system requires attention, contact your installer
Off The system does NOT require attention
Ready On All zones are secure and the system is ready to be armed
Off One or more zones are active
Flashing The system has zones (with the ‘Force Omit’ attribute) that are active
Info. On The system is armed (can also be programmed for other indications)
Off The system is unarmed (can also be programmed for other indications)
Omit On One or more zones are omitted
Off No zones are omitted
Zone Faults During Arming
Before attempting to arm the system, ensure that the premises are secure (all doors and
windows closed etc.) and the Ready light is on.
If an attempt is made to arm the system with any zones active (e.g. door ajar, open
window, etc.) the internal sounders will bleep repeatedly (fault tone) and the display will
show the zones that are active.
The fault tone will stop and the exit tone will resume when all zones are secure. If it is
necessary to leave a zone open then it must be omitted (see page 8 for details).
If an active zone cannot be secured then it may be ‘in fault’, in this case contact
!"
the alarm company immediately.
Arm Fail - Failing to Arm
If the exit procedure is started and zones are still ‘Active’ at the end of the exit procedure,
an Internal alarm will occur (internal sounders only) and the strobe light on the external
sounder will flash.
If this occurs the arm fail must be cleared and the zone in fault identified before the
!"
system can be armed (see page 6 for details on clearing an Arm Fail).
The Ready LED
To help prevent faults during arming a Ready light has been provided, see table above
for details on how the Ready LED operates.
INS221 3
Page 4

Operating the Alarm System Premier Series User Guide
2. Operating the Alarm System
To FULL Arm the System
The system is FULL Armed when ALL zones are ON (not omitted).
Your Installer may have programmed the system so that it can be set by just pressing
!"
1. Ensure that the premises are secure (all doors and windows closed etc.) and the
Ready light is on
, if this is the case then there is no need to enter the User code below.
'
2. Enter a valid User code
3. Press
The exit tone will sound
4. Leave the premises
When the system has armed the exit tone will stop
*
to arm
,,,,
To PART Arm the System
The system is PART Armed, when ONE OR MORE zones have been left OFF (omitted)
i.e. the landing or a bedroom.
The system is only Part Armed when zones are omitted using the ‘Part Arm’ procedure
!"
(omitting zones manually (see page 8 for details) is not classed as Part Arming).
The bottom line of the display is programmable for each Part Arm.
Your Installer may have programmed the system so that it can be Part Armed by
just pressing
no need to enter the User code below.
1. Ensure that the premises are secure (all windows and doors not being omitted are
closed) and the Ready light is on
2. Enter a valid User code
3. Press
4. Use keys
5. Press
6. Leave the protected area
)
*
The exit tone will sound (if silent arm has not been selected)
When the system has armed, the exit tone (if sounding) will stop
!, (
-
!
"
to arm normally or press
or
,,,,
to select the required Part Arm
followed by
"
to arm silently
-
)
, if this is the case then there is
4 INS221
Page 5

Premier Series User Guide Operating the Alarm System
To ARM Individual Areas
If the system has been split up into separate areas of protection i.e. Area 1 = House,
Area 2 = Garage, Area 3 = Shed etc. These areas can be individually selected for FULL
or PART arming as required.
Areas are selected by using keys
!"
select an area followed by
Only areas that exist on the system can be selected. (A ‘Star’ means the area can
be selected and a ‘Dot’ means the area cannot be selected).
Pressing
first 8 areas and the second 8 areas (where applicable).
1. Ensure that the premises are secure (all windows and doors not being omitted are
closed) and the Ready light is on
2. Enter a valid User code
3. Press
4. Use keys
5. Press
Or
5. Press
6. Leave the premises
'
!
*
)!, (
The exit tone will sound (if silent arm has not been selected)
When the system has armed, the exit tone (if sounding) will stop
will select/deselect all areas, pressing
0
,,,,
-
to select the required areas
.
or
to FULL arm the areas
-
or
"
or
'
followed by
!
+
).
.
*
(the
or
key can also be used to
/
will toggle between the
'
to PART arm the areas
-
To DISARM the System
The entry time is divided into two sections, the Entry time and the 2nd Entry time. If the
Entry time expires, an Internal alarm will occur and the 2
Entry time expires, an Intruder alarm will occur (all internal and external sounders).
It is perfectly normal for the 2nd Entry time to be programmed as zero, in which
!"
case, an Intruder alarm will occur as soon as the Entry time expires.
1. Enter the premises via the designated entry point
The entry tone will start
2. Enter a valid User code
The entry tone will stop
INS221 5
,,,,
nd
Entry time will start. If the 2nd
Page 6

Operating the Alarm System Premier Series User Guide
To DISARM the System When Not in Entry
1. Enter a valid User code
2. Press
*
,,,,
To CANCEL the Exit Mode
Once the exit mode has been started you should leave the premises immediately,
however, if for some reason you decide not to leave, the exit mode must be cancelled.
1. Enter a valid User code
2. Press
The exit tone will stop.
*
,,,,
To CLEAR an Arm Fail
When the system tries to arm with zones active (open), the internal sounders will sound
and the external strobe will be flashing to indicate a problem. For details on preventing
an Arm Fail condition, please refer to page 3.
If you were not present when the Arm Fail occurred or you do not clear the Arm
!"
Fail, the internal sounders will continue to sound and the external strobe will
continue to flash.
1. Enter a valid User code
The internal and external sounders will stop, the external strobe will continue to flash
and the number of the zone that caused the Arm Fail will be displayed.
,,,,
2. Enter a valid User code
,,,,
and press
12
To SILENCE an Alarm
When an alarm occurs on the system, the internal and external sounders will normally
sound for a pre-programmed time (normally 15 minutes).
If you were not present when the alarm activated, the internal and external
!"
sounders may have already stopped but the external strobe will still be flashing.
When alarm information is being displayed, pressing the SCROLL key will slow
down the display and also allow manual scrolling through the events.
1. Enter a valid User code
The internal and external sounders will stop and the number of the zone that caused the
alarm will be displayed.
The alarm now needs to be reset.
6 INS221
,,,,
Page 7

Premier Series User Guide Operating the Alarm System
To RESET After an Alarm
USER Reset
Once the alarm has been silenced (see page 6 for details), the system will need to be reset.
If the system has been programmed, to be reset by an Engineer, pressing
!"
not return the display to normal, if this is the case see ENGINEER Reset for details.
The system may have been programmed to be reset by Anti-code, if this is the
case, see ANTI-CODE Reset for details.
1. Enter a valid User code
2. Press
The external strobe will stop, the system will chime and the display will return to normal.
ENGINEER Reset
If the system has been programmed to be reset by an Engineer following an alarm
activation, you will still be able to silence the alarm by entering a valid User code (see
page 6 for details).
The system cannot be armed again until the alarm has been reset.
!"
1. Contact the telephone number on the display (if programmed) or the telephone
number on the last page of this User Guide
ANTI-CODE Reset
If the system has been programmed to be reset using an Anti-Code following an alarm
activation, you will still be able to silence the alarm by entering a valid User code (see
page 6 for details).
The system cannot be armed again until the alarm has been reset.
!"
1. Enter a valid User code
2. Press
The display will show a random code number i.e. 4281.
3. Contact the telephone number on the display (if programmed) or the telephone
number on the last page of this User Guide and quote the random code number
You will be given a 4-digit Anti-Code i.e. 5624.
1
1
,,,,
,,,,
1
will
4. Enter the Anti-code that has been given to you
5. Press
If the Anti-code is correct, the keypad will bleep to indicate that the system has been
reset and the display will return to normal.
INS221 7
*
,,,,
Page 8

Operating the Alarm System Premier Series User Guide
To OMIT Zones
It is possible to exclude (omit) individual zones when arming i.e. if a zone is ‘in fault’. Users
with access to this function can only omit zones that have been programmed as ‘Omittable’.
If the zone can be omitted, there will be a ‘Star’ to the right of the zone number.
!"
Only zones that have the ‘Omit’ attribute assigned to them can be omitted.
A ‘Star’ will appear to the left of the zone number to indicate that the zone has been
selected for omitting.
All omitted zones will be automatically reinstated the next time the system is
disarmed, unless programmed otherwise.
To re-instate zones manually, simply follow the instructions again. However, when
the
key is pressed on this occasion, the zones will be re-instated.
3
1. Enter a valid User code
2. Enter the zone number
3. Press
Repeat for other zones if required.
4. Press
Continue to arm the system as normal.
to omit the selected zone
3
when finished
4
,,,,
,,,
and press
3
The Turn CHIME On and Off
The system can be set up so that activating (opening) certain zones will cause the
internal sounders to chime. This would normally be used on a front door, exit button etc.
Zones will only cause the internal sounders to chime if they are selected for chime
!"
(see page Master User Guide for details on selecting which zones chime).
Once a zone has been selected for chime, the Chime facility can be manually turned on
and off as required.
The system can also be programmed to automatically turn chime on and off under
!"
certain conditions i.e. certain times of the day, door left open etc.
If no zones have been programmed for Chime, then turning Chime on and off will
have no effect.
To turn CHIME On To turn CHIME Off
1. Press
The Chime tone will sound. The Error tone will sound.
8 INS221
1. Press
-
-
Page 9

Premier Series User Guide Operating the Alarm System
To CHANGE Your User Code
Users with access to this option can change their own User codes. User codes are
unique to each user and can be 4, 5 or 6 digits long.
Only the User code that is entered to access the change code menu will be changed.
!"
Before changing your code, it is vital that you memorise or write down the new
code you are about to program. Failure to remember your code will require an
engineer visit to re-program a new code for you. This may incur a call-out charge.
1. Enter the User code that requires changing
2. Press
3. Press
4. Press
5. Press
6. Enter a new 4, 5 or 6-digit User code
7. Press
8. Press
The display will return to normal.
4
*
(
*
to accept the new code
*
to exit the menu
1
,,,,
,,,,
INS221 9
Page 10
Quick Reference Guide Premier Series User Guide
4. Quick Reference Guide
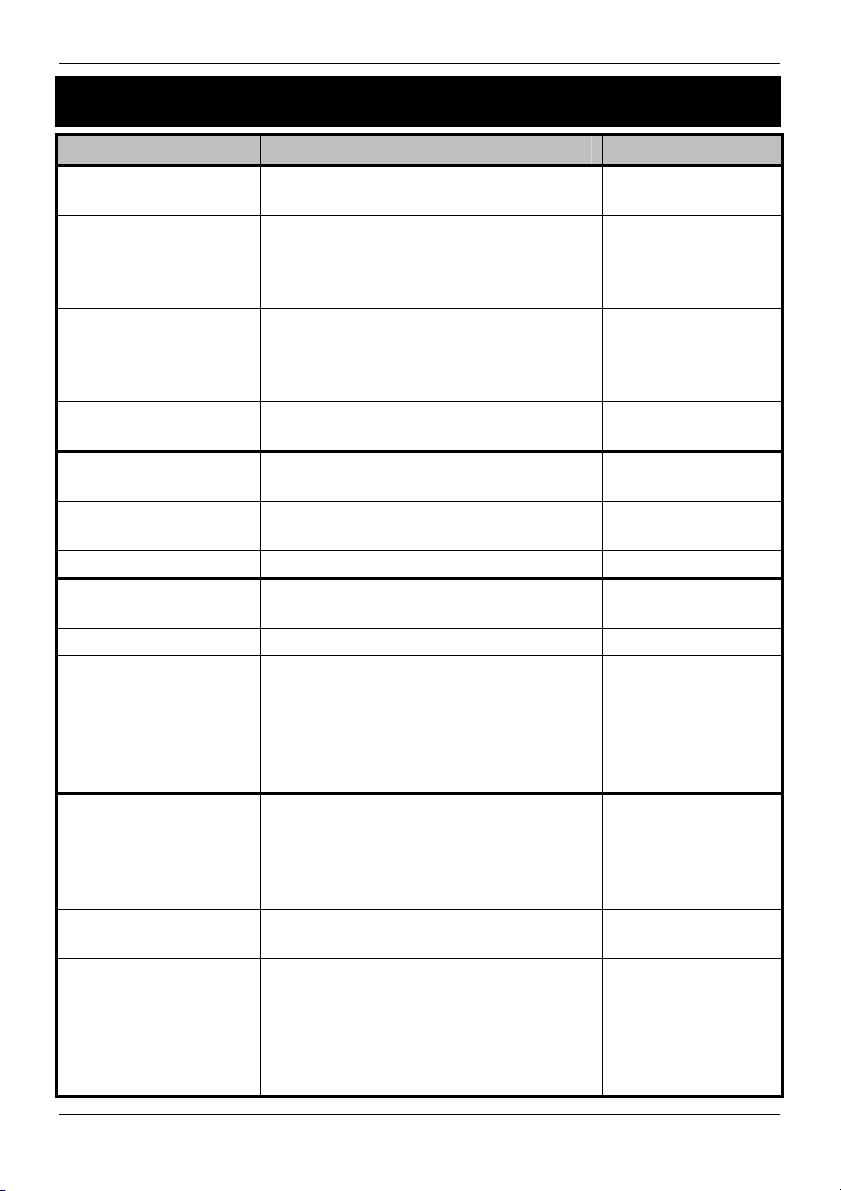
Operation Description Action
To Full Arm the System Enter a valid User code
Press Yes (or press Chime to arm silently)
To Part Arm the System Enter a valid User code
Press Part
Select Required Part Arm
Press Yes (or press Chime to arm silently)
To Arm Individual Areas Enter a valid User code
Press Area
Select Required Area using keys 1 - 8
Press Yes (or press Chime to arm silently)
To Disarm the System Enter a valid User code
To Cancel the Exit Mode Enter a valid User code
Press Yes
To Clear an Arm Fail Enter a valid User code
To Silence an Alarm Enter a valid User code
To Reset After an Alarm Enter a valid User code
Press Reset
To Engineer Reset Contact Your Installation Company
To Anti-code Reset Enter a valid User code
Press Reset
Contact Your Alarm Receiving Centre
Quote 4-digit code shown on display !"#$%&'((((
Enter 4-digit code given by Receiving Centre
Press Yes
To Omit Zones Enter a valid User code
Press Omit
Enter Zone Number(s)
Press Menu when finished
Press Yes to Arm
Turn Chime On/Off Press Chime Once to Turn ON
Press Chime Again to Turn OFF
To Change User Code Enter a valid User code
Press Menu followed by Yes
Press 2 followed by Yes
Enter a new 4, 5 or 6 digit User code
Press Yes to accept
Press Reset to return to the normal display
Press Yes (if the entry mode was not started)
Press Reset
,,,,
or
*
-
,,,,
)
or
,
!
(
or
*
-
,,,,
'
-
!
.
or
*
-
,,,,
*
,,,,
*
,,,,
1
,,,,
,,,,
1
_____________
,,,,
1
_____________
,,,,
*
,,,,
3
,,,…
3
*
-
,,,,
4*
(*
,,,,
*
1
"
'
10 INS221
Page 11
Premier Series User Guide Installation Details
5. Installation Details
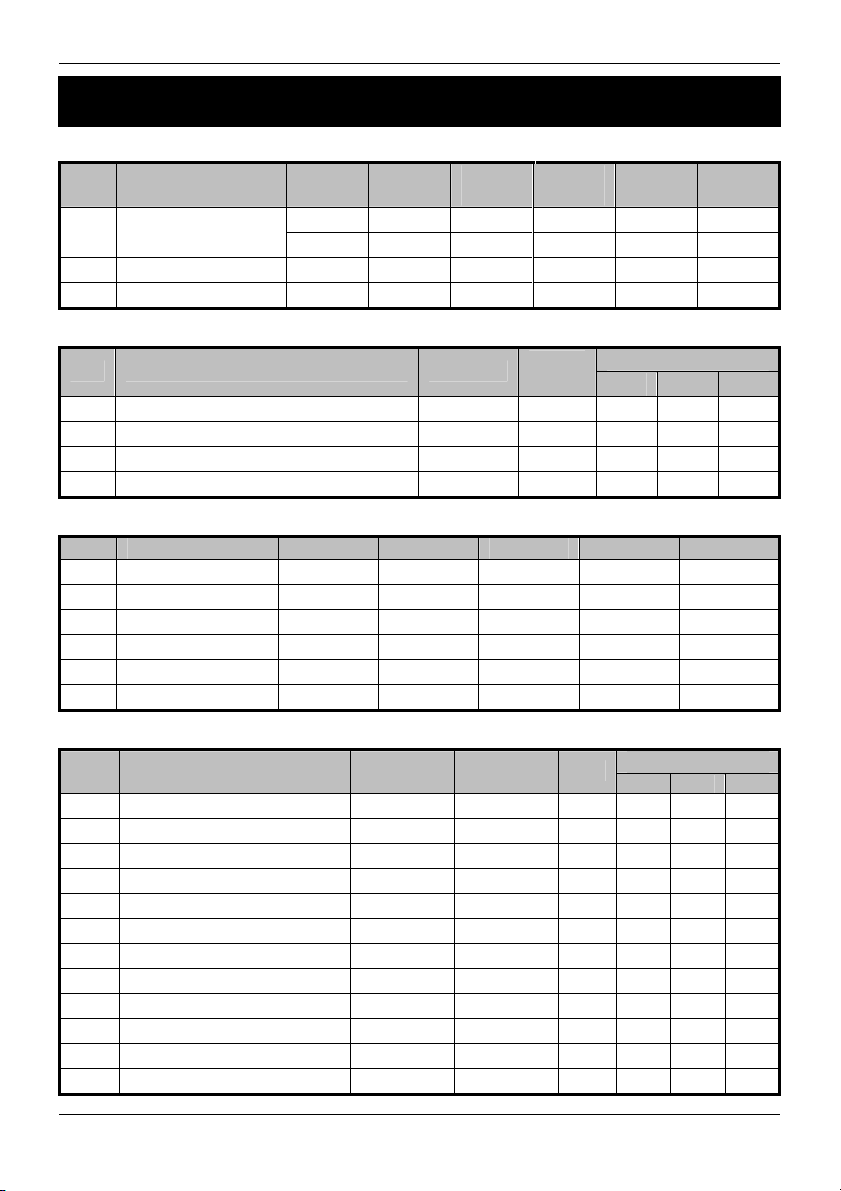
Areas
No. Description
Exit
Time
Keypads
No. Location Area
User Codes
User Name Type Default New Code Area Time Lock
01 Master 5678
N/A
N/A
N/A
N/A
N/A
Entry
Time 1
Sec. Sec. Sec. Min. Min. Sec.
Sec. Sec. Sec. Min. Min. Sec.
Sec. Sec. Sec. Min. Min. Sec.
Sec. Sec. Sec. Min. Min. Sec.
Entry
Time 2
Bell
Delay
Quick
Arm
Bell
Duration
Emergency Keys
PA Fire Med
Abort
Time
Zones
No. Description Type Area Omit
INS221 11
Part Arms
1 2 3
Page 12
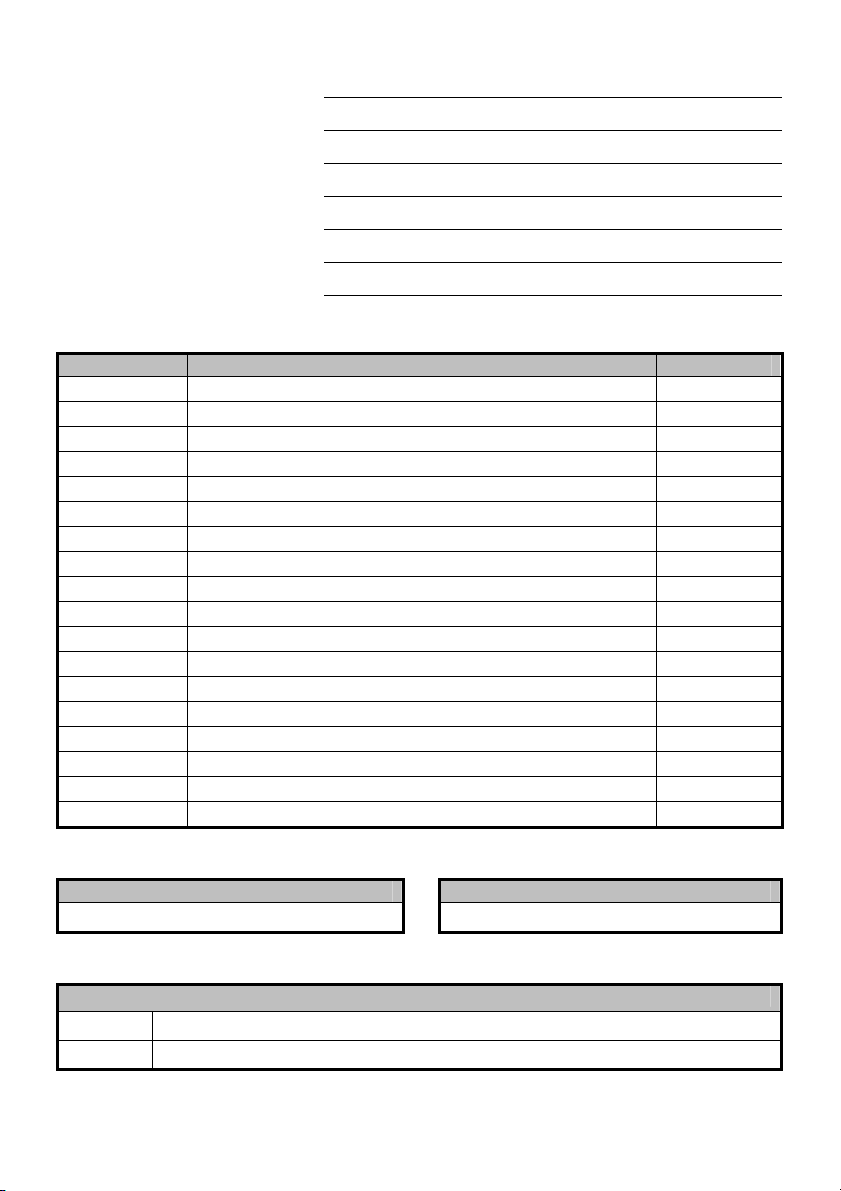
Installation Company Details
Installation Engineer:
Installation Company:
Address:
Telephone Number:
Installation Date:
Service Record
Date Serviced Comments Engineer
Emergency Telephone Numbers
For 24 Hour Call Out For Anti-Code Reset
Control Panel
Details
Model Premier 24
Location
❏
Premier 48
❏
Premier 88
❏
Premier 168
Premier 640 ❏
❏
© TEXECOM LTD. 2000 - 2005
INS221-2
 Loading...