

Page 1
Instructions for use
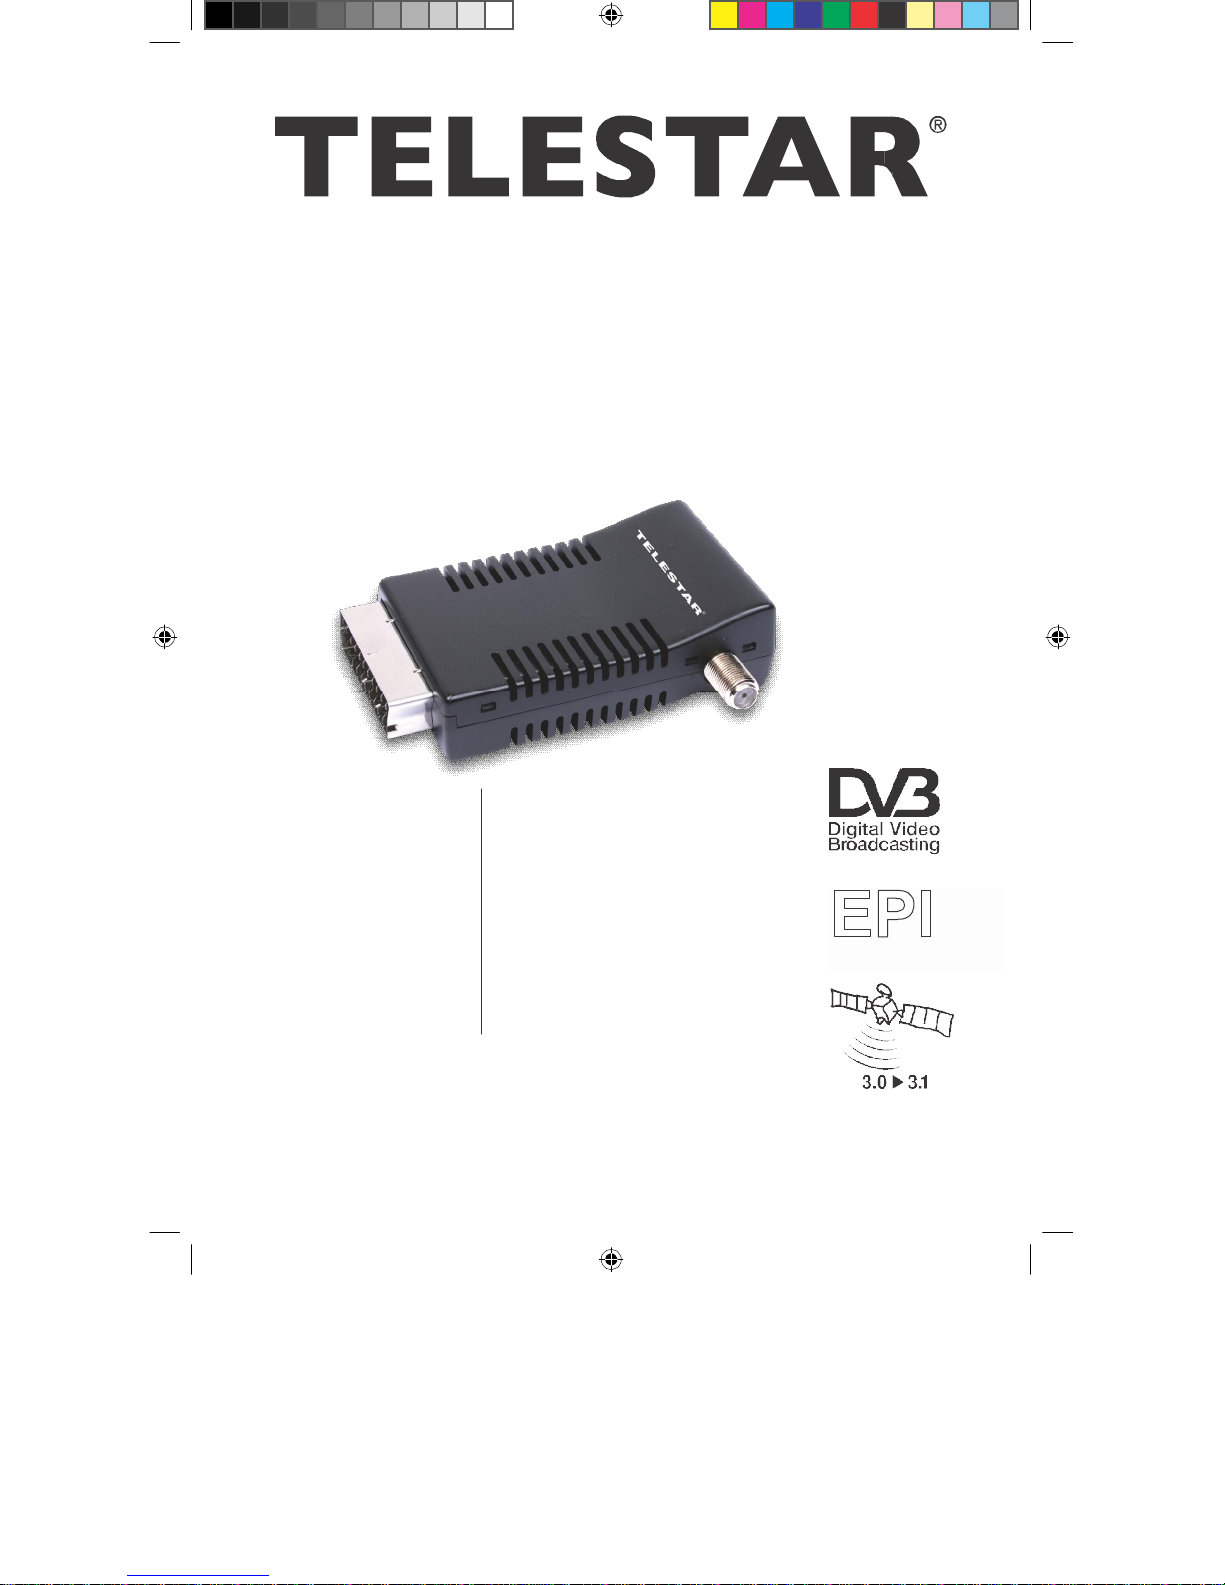
TELESTAR SSC 1
BDA TELE SSC 1 11_08 D.indd 1
01.01.1970 2:44:50 Uhr
Page 2

1
Contents
1 Contents
2 Figures
3 Please read first
Important instructions for use
Disposal instructions
Safety instructions
Non-required time
Disposal of electrical and electronic devices.....................8
4 Connection
4 .1
Mains connection
4 .2
External unit
4 .2 .1
4 .3
Connection to a TV set
5 First installation
5 .1
Language
5 .2
Adjustment of the receiver to the . . . . . . . . . . . . . 10
5 .3
Station search
5 .4 After the search...............
6 Settings
6 .1
Basic settings
6 .1 .1
6 .1 .2 Audio
6 .1 .3 LNB
6 .1 .4 Picture format
6 .1 .5 Video
6 .1 .6
6 .1 .7
6 .1 .8
6 .2
Child lock
..............................................................................................................................2
...................................................................................................................................4
......................................................................................................6
...........................................................................................6
..............................................................................................................7
......................................................................................................................7
.....................................................................................................................7
.......................................................................................................................9
...........................................................................................................9
............................................................................................................................9
Individual operation
...............................................................................................9
............................................................................................9
..................................................................................................10
.................................................................................................................................10
. . . . . . . . . . . . . . . . . . . . . . . . . . . . . 11
........................................................................................11
..............................................................................................................................11
.....................................................................................................................12
OSD-language
language
voltage
. . . . . . . . . . . . . . . . . . . . . . . . . . . 12
. . . . . . . . . . . . . . . . . . . . . . . . . . 12
. ........ . . . . . . . . . . . . . . . . . . . . . . . . . 13
. . . . . . . . . . . . . . . . . . . . . . . . . . . . 13
output
. ......... . . . . . . . . . . . . . . . . . . . . . . . . 13
Standby
TV-set type
Starting channel
time
. . . . . ... . . . . . . . . . . . . . . . . . . . . . 13
. . . . . . . . . . . . . . . . . . . . . . . . . . 13
. . . . . . . . . . . . . . . . . . . . . . . . . . 13
. . . . . . . . . . . . . . . . . . . . . . . . . . . 14
6 .3 Setting the time . . . . . . . . . . . . . . . . . . . . . . . . . . 14
6 .3 .1
Setting the local time . . . . . . . . . . . . . . . . . . . . 15
6 .3 .2
Summer time
6 .3 .3 Date and time
6 .4
Antenna configuration
6 .4 .1
Antenna
6 .4 .2 Model
6 .4 .3 Satellite
6 .4 .4 LNB type
6 .4 .5 LNB Freq
6 .4 .6 LNB Freq
6 .4 .7 22 kHz sound
6 .4 .8 DiSEqC
6 .4 .9 C/Ku band control
6 .4 .10 Calculate azimuth and elevation
. . . . . . . . . . . . . . . . . . . . . . . . . . . . 15
. . . . . . . . . . . . . . . . . . . . . . . 15
. . . . . . . . . . . . . . . . . . . . . . 15
. . . . . . . . . . . . . . . . . . . . . . . . . . . . . . . . 16
. . . . . . . . . . . . . . . . . . . . . . . . . . . . . . . . . . 16
. . . . . . . . . . . . . . . . . . . . . . . . . . . . . . . . . 17
. . . . . . . . . . . . . . . . . . . . . . . . . . . . . . . 17
. 1 . . . . . . . . . . . . . . . . . . . . . . . . . . . . . 17
. 2 . . . . . . . . . . . . . . . . . . . . . . . . . . . . . 17
. . . . . . . . . . . . . . . . . . . . . . . . . . . . . 18
. . . . . . . . . . . . . . . . . . . . . . . . . . . . . . . . 18
. . . . . . . . . . . . . . . . . . . . . . . 18
. . . . . . . . . .
18
BDA TELE SSC 1 11_08 D.indd 2
01.01.1970 2:44:51 Uhr
Page 3

7 Operation
7 .1 Switch on and off . . . . . . . . . . . . . . . . . . . . . . . 19
7 .2
Channel selection
7 .2 .1 With the help of the channel up/down keys
7 .2 .2 With the help of numeric keypad
7 .2 .3 With the help of channel lists
7 .2 .3 .1 Call channel with the complete list . 20
7 .2 .3 .2
Call channel with the help of favourites list . 21
7 .2 .3 .3
Call channels of a specific satellite . 21
7 .2 .4 Call locked channels . . . . . . . . . . . . . 21
7 .2 .5 Info-box
7 .3 Volume control
7 .4 Selecting a different language
7 .5
TV/radio changeover
7 .6
Return to the last selected channel
7 .7
Transponder Info
7 .8 Video text
7 .9 Subtitles
7 .10
Electronic Programme Info
7 .11 Timer
7 .11 .1 Programming the timer
7 .11 .2 Changing the timer programming
7 .11 .3 Deactivating the
7 .12 Rotating the antenna manually
8 Changing base programming
8 .1 Configuring channel lists
8 .1 .1 Sorting the channels
8 .1 .2 Deleting the channels
8 .1 .3 Locking the channels
8 .2 Channel search . . . . . . . . . . . . . . . . . . . . . . . . . . . 33
8 .2 .1
Network search
8 .2 .2
Transponder search
8 .2 .3 Manual search
8 .2 .4 After the search
8 .2 .5 Further options
8 .2 .5 .1 Search options
8 .2 .5 .2 Input of the satellite name
8 .3 Factory settings
8 .4
Software update
8 .5
Receiver
9
Technical terms
10 Technical data
11 Troubleshooting help
For the daily use
. . . . . . . . . . . . . . . . . . . . . . . . . . . . . 19
. . . . . . . . . . . . . . . . . . . . . . . . . . . 19
. . . . 19
. . . . . . . . . . . . 20
. . . . . . . . . . . . . . . 20
. . . . . . . . . . . . . . . . . . . . . . . . . . . . . . . . . 22
. . . . . . . . . . . . . . . . . . . . . . . . . 22
. . . . . . . . . . . . . . 22
. . . . . . . . . . . . . . . . . . . . . . 22
. . . 23
. . . . . . . . . . . . . . . . . . . . . . . . . . 23
. . . . . . . . . . . . . . . . . . . . . . . . . . . . . . . . 23
. . . . . . . . . . . . . . . . . . . . . . . . . . . . . . . . 23
EPI
. . . . . . . . . . . . . 24
. . . . . . . . . . . . . . . . . . . . . . . . . . . . . . . . . . 25
. . . . . . . . . . . . . . . . . . . 25
. . . . . . . . . . 27
timer programming
. . . . . . . . 27
(rotating system)27
. . . . . . . . . . . . 27
. . . . . . . . . . . . . . . . 28
. . . . . . . . . . . . . . . . . . . . . . 28
. . . . . . . . . . . . . . . . . . . . . 30
. . . . . . . . . . . . . . . . . . . . . 31
. . . . . . . . . . . . . . . . . . . . . . . . . . 35
. . . . . . . . . . . . . . . . . . . . . . . 35
. . . . . . . . . . . . . . . . . . . . . . . . . . 37
. . . . . . . . . . . . . . . . . . . . . . . 37
. . . . . . . . . . . . . . . . . . . . . . . . 38
. . . . . . . . . . . . . . . . . . . . . . 38
. . . . . . . . . . . . . 39
. . . . . . . . . . . . . . . . . . . . . . . . . . 39
. . . . . . . . . . . . . . . . . . . . . 39
information
. . . . . . . . . . . . . . . . . . . . . . . 41
. . . . . . . . . . . . . . . . . . . . . . . . . . 43
. . . . . . . . . . . . . . . . . . . . . . 45
.. . . . . . . . . . . . . . . . . . . 47
. . . . . . . . . . . . . . . . 48
Your device bears the
Changes and printing errors reserved
Duplication and reproduction only with the permission of the publisher.
CE-logo and fulfils all the necessary
.
Status 11/08
EU-standards.
BDA TELE SSC 1 11_08 D.indd 3
01.01.1970 2:44:51 Uhr
Page 4

Dear Customer,
Thank you for deciding to buy this high-quality product..
In case your DVB receiver does not work properly, it need not be defective.. Please do not return
the device immediately, call us!
Technical Hotline
for Germany: 0900-1001013
(Basic tariff 0.29 €/min from fixed line of Deutsche Telekom. During the call this tariff
cannot be reduced for the matters falling under general consultation with prior confirmation
of the caller. Tariffs for mobile phones can vary.)
for Austria
: 0 820-550
or 00 49-65
567 (0.14
95-9003004
€/min)
You can also send an e-mail to service@telestar.de or a fax to 0049-65 95-9 003 003.
In case your problem is not solved in this way, please return the device to our service centre at the
following address:
For Germany: TELESTAR
For Austria
:
GERINGER
On/off
Select channel/
data input
Page up/down in
channel list
Call menu
Channel up
confirm selection
Channel down
Show
information
for
Toggle button
TV
/radio mode
Select language
Service Centre, Vulkanhöhe/An
Gesellschaft mbH .,
2
Figures
Remote control
(standby)
the channel
!!Please note: the other buttons of the
remote control are without any function!!
Gregerstr
der B 410, D
.
3, A-2401
Sound off (mute)
Menu
back
Call EPI
Call favourites
list
Increase/decrease
volume
Toggle button
TV/AV
return to last
channel
Select audio
mode
Show
t
eletext/subtitles
54552-Dreis-
Fischamend
exit/
mode
Brück
BDA TELE SSC 1 11_08 D.indd 4
01.01.1970 2:45:02 Uhr
Page 5
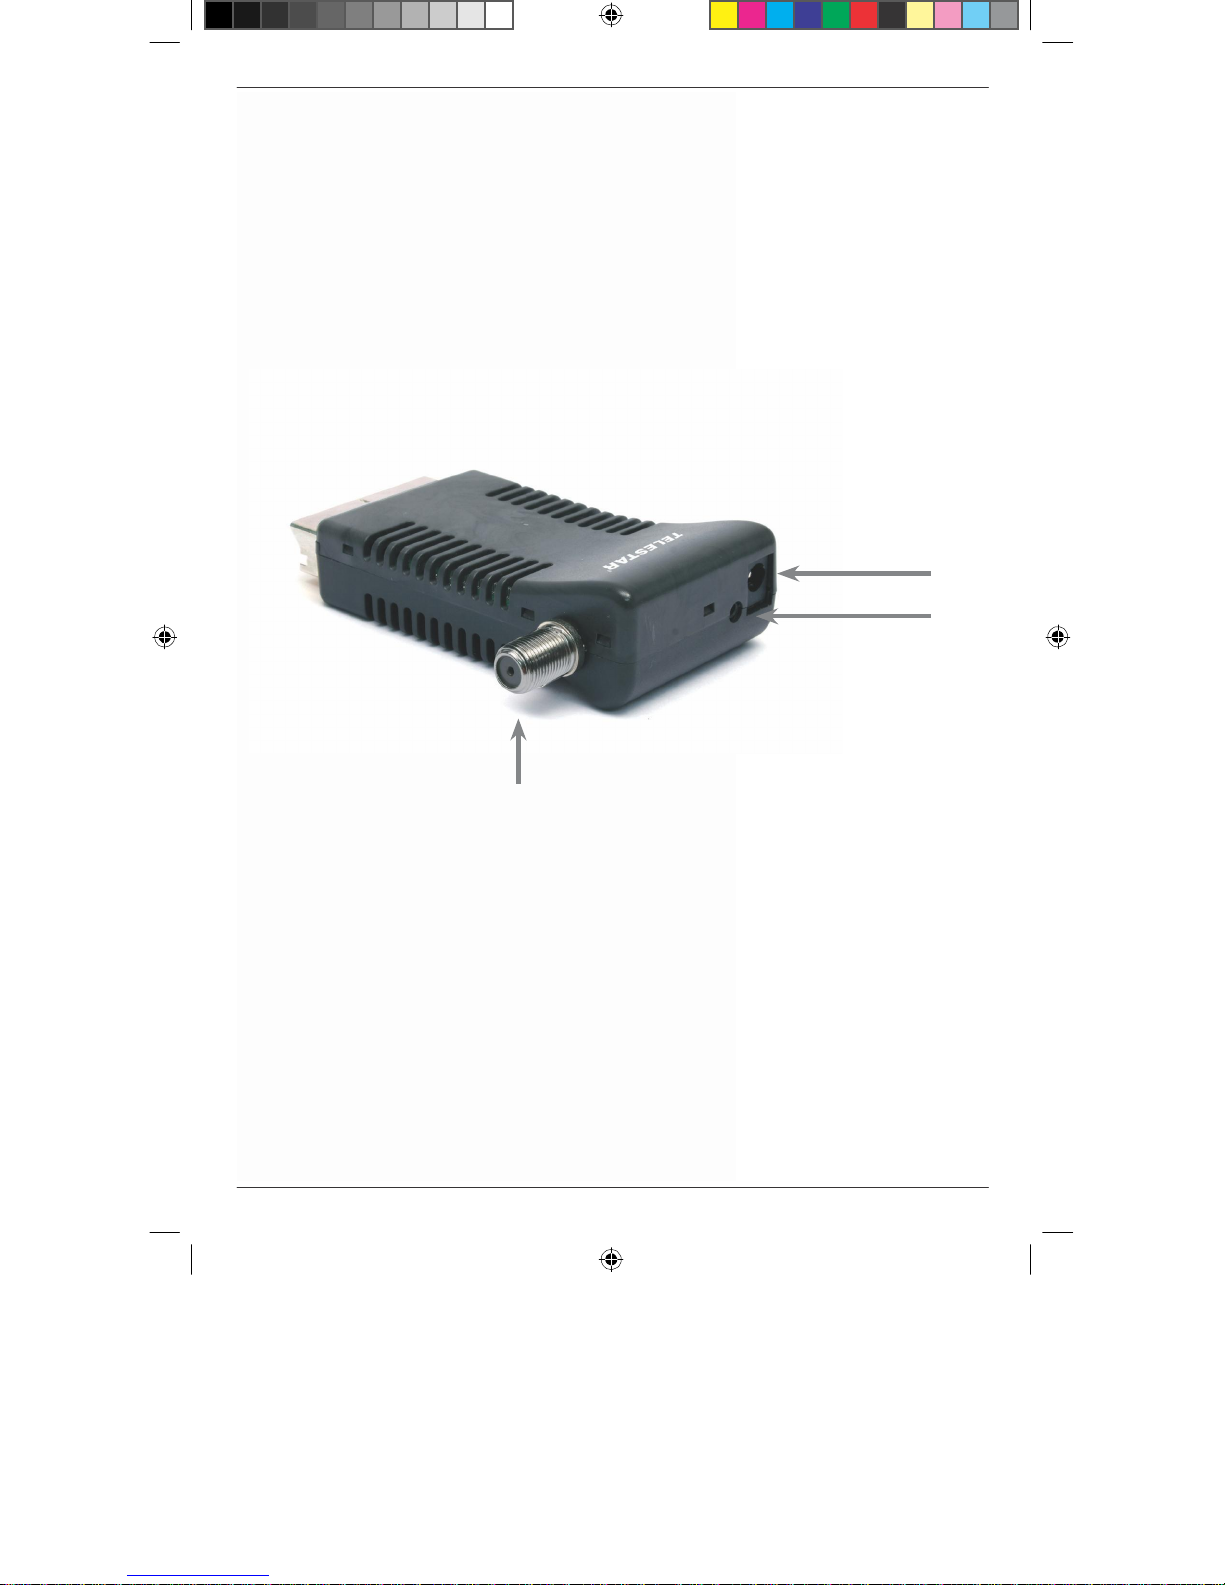
Mains supply
Remote control sensor
LNB-input
BDA TELE SSC 1 11_08 D.indd 5
01.01.1970 2:45:10 Uhr
Page 6
BDA TELE SSC 1 11_08 D.indd 6
3 Please read first
>
Before you start working with the device, please check the delivery
for completeness. The delivery package contains the following:
1 receiver, 1 remote control, 1 instructions for use, 1 warranty card, 2
batteries (1.5V micro-cell AAA), 1 SCART-extension, 1 remote control
sensor.
> Insert the accompanying batteries in the battery case of the remote control
by taking into account the polarity printed on it.
> Please read first the safety instructions in Chapter 3, before you connect
the receiver.
> Chapters 4, 5 and 6 describe the connection and the adjustment of the
receiver to the external unit (mirror, LNB, ...), to the TV-set. These
settings are one-time and need to be extended only when something
changes in your external unit or additional devices are connected.
> Chapter 7 describes all the functions that are necessary for the daily
use, such as channel selection or volume setting.
> Chapter 8 contains information about how you can set new channels or
change the sequence of channels.
> Technical terms used in the instructions are explained in Chapter 9.
> The technical data are given in Chapter 10.
> Troubleshooting help is given in Chapter 11.
Important instructions for use
The use of a so-called “On Screen Display” simplifies the use of the
receiver and reduces the number of remote control buttons. All
functions are shown on the screen and can be controlled with the help
of fewer buttons. Related functions are put together as “MENU”. The
selected functions are highlighted in colour. In the lower row the
“function buttons” red, yellow, green and blue are shown
through colour bars. These colour bars represent different
functions in the individual menus, which can be triggered on the
remote control by pressing the corresponding coloured button
(“multi-purpose button”). The “function buttons” are active only
when a corresponding short description is given in the
corresponding field.
Button names and terms appearing in the OSD-menu are given in
bold in these instructions for use.
The channel space of the respectively selected channel is also shown in
the display.
Disposal instructions
The packaging of your device is made exclusively of material that can
be recycled. Please add these again to the “dual system” sorted
accordingly. Please make sure that the empty batteries of the remote
control as well as the electronic waste is not thrown in the household
garbage, but instead are disposed off properly (return to the dealer,
special waste).
01.01.1970 2:45:11 Uhr
Page 7
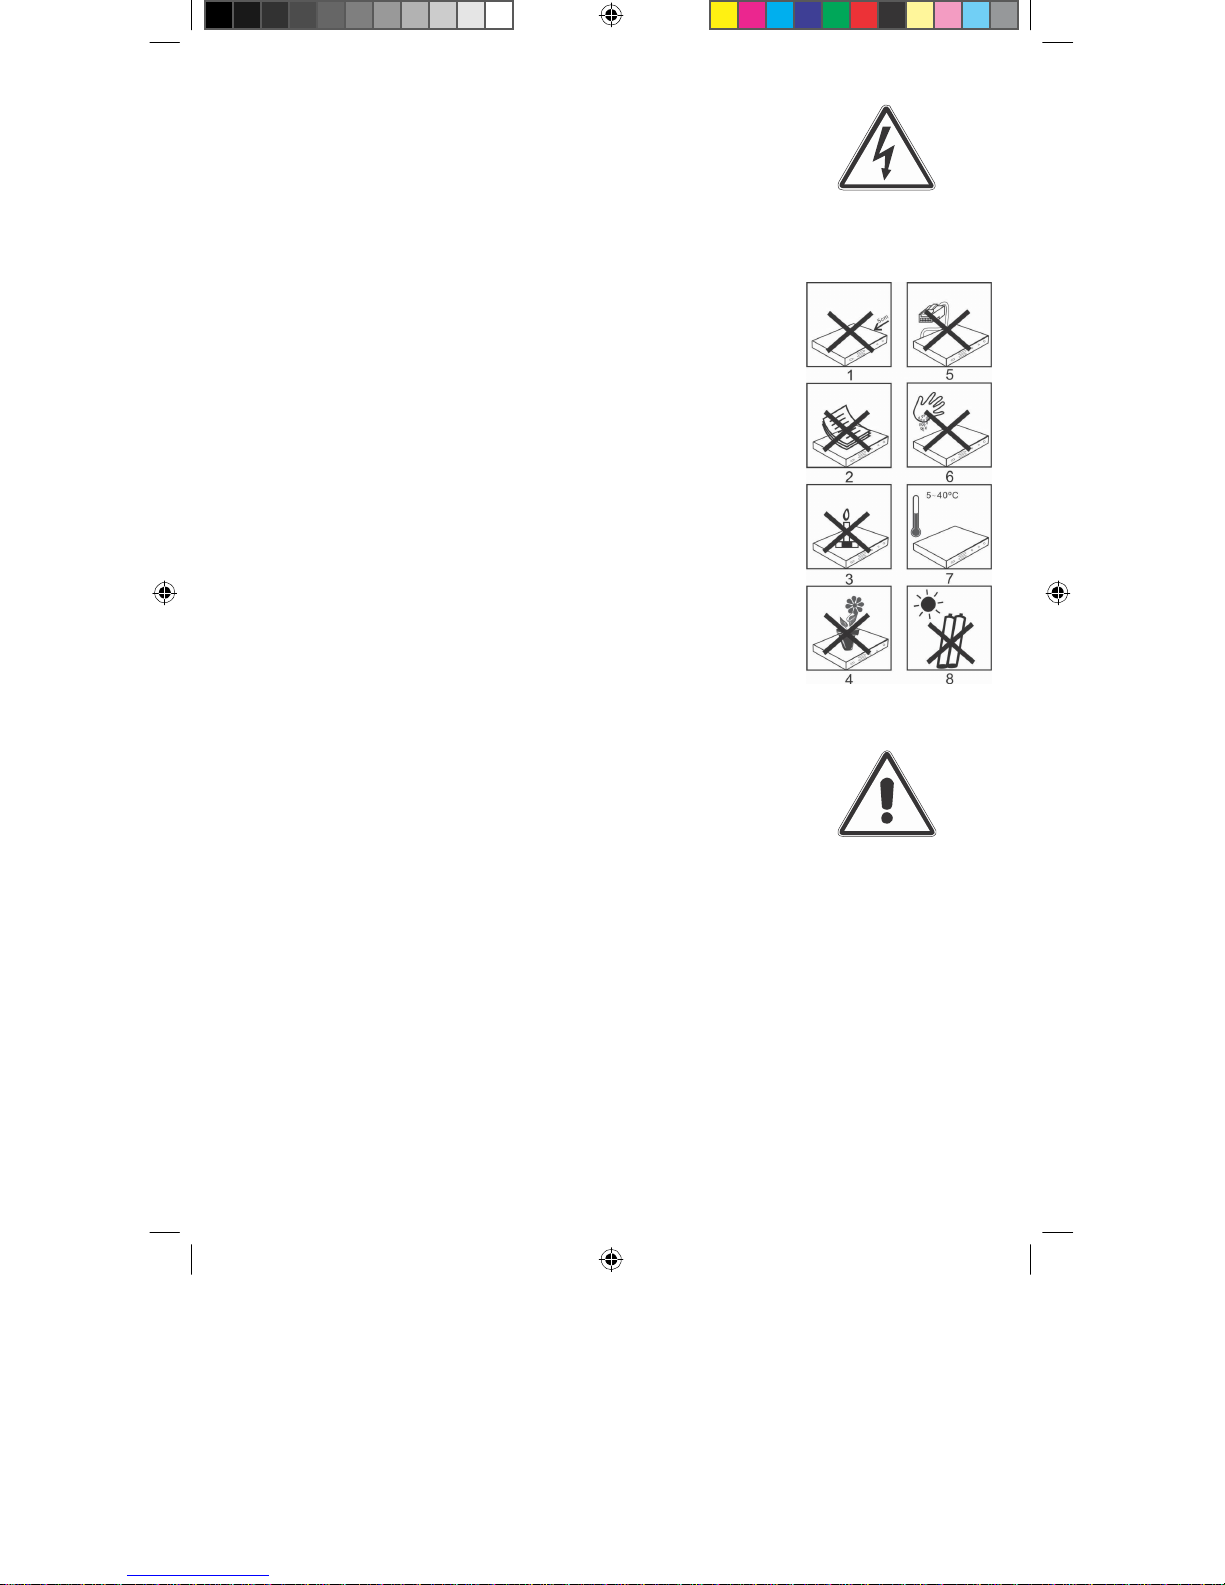
Caution! Important safety instructions
CAUTION: NEVER OPEN THE CASING TO AVOID
THE RISK OF AN ELECTRICAL SHOCK. SMALL
PARTS ARE PRESENT IN THE DEVICE, WHICH CAN
BE REPAIRED BY THE USER, IF NEEDED, TAKE
HELP OF A QUALIFIED SERVICE EXPERT.
SAFETY MEASURES:
This receiver was manufactured according to the specifications
of international safety standards. For your own safety, you
should carefully read the safety measures, before starting to
work with your new device.
The manufacturer is not liable for any damages arising
out of improper use and caused by not adhering to the
safety measures.
1. When you set up the receiver, see to it that a free space of
about 5 cm is present on all sides, so that the air can
circulate freely and the device does not get overheated.
2 Do not setup the device in a cramped space, such as in a
book shelf or similar places. Make sure that the air
circulation is not hampered, you should never cover the
ventilation slots with newspapers, table cloth, curtains, etc.
3. Do not place any burning objects e.g. a burning candle on
the device.
4. The receiver should never be exposed to liquids or
splash water. Never place objects filled with water,
such as vases, on the receiver.
5. Do not pull out the mains plug of the device to switch it
off.
6. The power cable must be connected properly. Never touch
the power cable or the plug with moist or wet hands.
7. The receiver should be operated at temperatures from 5ºC
to 40ºC. Use the device only in a moderate climate, not
under tropical conditions.
8. The batteries of the remote control should not be exposed to
extreme heat, such as direct sunlight or fire. While disposing
off the batteries, please adhere to the corresponding
environment safety guidelines.
CE-logo for the European markets
The CE-logo on this device gives you the assurance that the
device conforms to the guidelines of the EU-directive
2004/108/EC as well as to the directive for low-voltage
devices 2006/95/EC.
Non-required time
The device should be disconnected from the mains during a
thunderstorm or during longer non-required time (e.g. vacation).
BDA TELE SSC 1 11_08 D.indd 7
01.01.1970 2:45:13 Uhr
Page 8
Disposal of electrical and electronic devices
This symbol on an article or on a packing indicates
that the article cannot be disposed off in the normal
household garbage. The article must be returned to a
corresponding collection centre for the recycling of
old electrical and electronic devices. By making sure
that this device is disposed off properly, you are
contributing to avoiding the harmful effects on the
environment and on human health, which can arise in
case of an improper disposal of this device. The
reuse of the raw materials contributes to the
preservation of natural resources. For more detailed
information on the disposal of this device please
contact your local authorities, waste recycling in your
area, or the dealer from whom you purchased this
device.
Connecting the DVB-receiver to a Sat-system
a. Mains connection (plug power supply)
b. Connecting the LNB with the LNB-input (LNB IN) of the DVB-
receiver.
c. Connecting the DVB-receiver with the remote control sensor of the
Scart-connection to the TV-set.
b
c
a
d
Rear-side of TV
BDA TELE SSC 1 11_08 D.indd 8
01.01.1970 2:45:30 Uhr
Page 9

4
Connection
The references a, b, c, etc. given below refer to the
drawing given on page 8.
4.1
Mains connection
The digital receiver should be connected to the
power supply only when the device is completely
cabled with all the related components. This rules
out damages to the digital receiver or to the other
components.
a After you have made all the connections,
connect the receiver to a socket 230 V/50-60 Hz
with the help of the power supply unit.
4.2
External unit
4.2.1
Individual operation
b
Connect the LNB-input of the digital receiver
with the LNB of your external unit by using a
suitable coaxial cable. Please also note the Point
6 “Settings”.
4.3
Connecting to a TV-set
c
Connect the receiver and the TV-set, insert the
receiver in the SCART-socket of the TV. If this
is not possible mechanically, use the
accompanying adapter cable. If your TV-set is
equipped accordingly, then upon switching on
the digital receiver, it will switch automatically
to AV and hence to Sat-operation.
BDA TELE SSC 1 11_08 D.indd 9
01.01.1970 2:45:31 Uhr
Page 10
r
eception system
t want to receive any other satellite, you can
(Figure
After you have gone through the safety instructions
and connected the device as described in Chapter 4,
switch on the device now as described in Chapter 7.
During the first commissioning of the device the menu
“Installation done” appears (Figure 5-1). Here you can
do the most important settings of the digital receiver
in an easy way.
5-1)
5.1 Language
In this menu option you can select the language, in
which the on-screen displays are to be shown.
> Highlight the row of the OSD-language with the
up/down arrow buttons.
> Press the button OK. A window opens showing
the available operating languages.
> Select the desired language with the up/down
buttons and confirm with OK.
5.2
Adjusting the receivers to the
You can now adjust the settings of your digital receiver
to the configuration of your antenna. From the factory
the receiver is set to the satellites ASTRA 19.2° (Port
A), Eutelsat/ Hotbird (Port B) and Türksat 1c (Port C).
If you do no
accept the factory setting as such by pressing the green
button.
Satellite 1
> Highlight the row SAT A with the up/down
buttons.
> Press OK. A window opens with the available
satellites.
> Select the satellite with the arrow buttons
up/down or page up/down, which you receive
with the DiSEqC-setting position A/option A and
confirm with OK.
Satellite 2
> Highlight the row SAT B with the up/down
buttons.
> Press OK. A window opens with the available
satellites.
> Select the satellite with the arrow buttons
up/down or page up/down, which you receive
with the DiSEqC-setting position B/option A and
confirm with OK.
10
BDA TELE SSC 1 11_08 D.indd 10
01.01.1970 2:45:32 Uhr
Page 11

Satellite 3
> Highlight SAT C with the up/down arrow buttons.
> Press OK. A window opens with the available
satellites.
> Select the satellite with the arrow buttons
up/down or page up/down, which you receive
with the DiSEqC-setting position A/option B and
confirm with OK.
Satellite 4
> Highlight SAT D with the up/down arrow buttons.
> Press OK. A window opens with the available
satellites.
> Select the satellite with the arrow buttons
up/down or page up/down, which you receive
with the DiSEqC-setting position B/option B and
confirm with OK.
By pressing the green button you can save the settings
and changeover to the main menu. By pressing the
EXIT-button you then reach the TV-mode and the
factory-set pre-programmed list is activated. However,
if you wish to do a search, please proceed as described
in „5 .3 Station search”.
5.3
Station search
>
The search is started by pressing the red button
for channel search. Thereby, all the satellites set
earlier are searched automatically for channels.
Depending upon the configuration of the
receiving system, the search can take up to 20
minutes.
5.4
After the search
> After the search comes to an end, select the row
Done with the up/down arrow buttons and
confirm with OK. You now come back to the
menu for First Installation.
> The settings are saved and you come back to the
main menu by pressing the green button for
save.
6 Settings
After you have connected and started your new
receiver, you can optimise the receiver for your usage,
if necessary.
11
BDA TELE SSC 1 11_08 D.indd 11
01.01.1970 2:45:32 Uhr
Page 12
Open the main menu on the screen with the menu
(Figure
(Figure
(Figure
(Figure
6.1 Basic settings
To be able to use your DVB-receiver optimally, you
should set it to your individual usage.
>
button. (Figure 6-1).
> Select now the menu row Installation by
highlighting it with the up/down arrow button. A
6-1)
6-2)
6-3)
6-4)
window opens showing the menu options
available in the installation menu. (Figure 6-2)
> Highlight the row System Settings with the
up/down button and confirm with OK. You
are now present in the System Settings
menu (Figure 6-3).
> With the up/down buttons you can move the
marker within the menu and modify the4
individual options as described. Please pay
attention to the on-screen displays shown
when you select a menu option.
The following settings can be made:
6.1.1
OSD-language
In this menu option you can set the menu language as
per your wishes. Proceed as follows to change the OSDlanguage:
> Highlight the row OSD-language with the
up/down arrow buttons.
> Press the button OK to open a window with the
available languages.
> Highlight the desired language with the help
of the up/down arrow button.
> Save your entry by pressing the OK button.
> Press the Exit button to return to the System
Settings menu.
6.1.2
Audio language
Set your preferred language in this menu option. The
language is set automatically with the help of this
function, if it is being transmitted.
> Highlight the row Audio Language with the
up/down arrow buttons.
> Press OK to open another window(Figure 6-4).
You can set here the first, second, third and
fourth language.
1
Page 13

BDA TELE SSC 1 11_08 D.indd 12 01.01.1970 2:45:34 Uhr
Page 14

>
Select the row First language with the up/down
Set the picture format of your TV set as 4:3, 4:3 Letter
6.1.7
TV-
device model
button.
> Press OK to open a window with the available
languages.
> Highlight the desired language with the
arrow buttons.
> Confirm your selection with OK.
> Highlight the row OK and confirm it by pressing
OK to save your settings.
6.1.3 LNB voltage
In this menu option you can switch on and off the LNB
voltage with the help of the right/left arrow buttons.
6.1.4 Picture
format
box or 16:9 with the help of right/left arrow buttons.
With this function the picture format is adjusted
automatically to your TV-set. In case of the setting 4:3
Letterbox the picture, being transmitted in the 16:9
format, is shown without both the two black bars at the
upper and lower margin of the screen.
6.1.5 Video
Set FBAS or RGB in this row according to your TV set
with the right/left arrow buttons
6.1.6
Set the time in this row, after which the device
automatically switches to passive standby.
output
Standby time
Set PAL or NTSC in this row with the help of the arrow
buttons.
6.1.8
You can set the channel here, which your receiver
should display after being switched on.
> Highlight the row starting channel with the
> Highlight the row OK and press the button OK
> You can now select a starting channel here with the
> In order that your receiver starts with the channel
Starting channel
up/down buttons and press OK.
A query now appears, whether you really want to
activate the starting channel.
again to open a window for selecting a starting
channel (Figure 6-5).
up/down arrow buttons and accept with the OK
button.
last set, highlight the row Cancel and confirm it
with OK.
(Figure
6-5)
1
Page 15
BDA TELE SSC 1 11_08 D.indd 13 01.01.1970 2:45:35 Uhr
Page 16

(Figure
(Figure
(Figure
“No” starting channel is then shown in the system
settings menu.
By pressing the Exit button you come back to the menu
of user installation. Press the button Menu to completely
exit the menu.
6.2 Child l o c k
Your device is equipped with a child lock. Like this,
important functions (e.g. calling the installation menu)
can be safeguarded against unauthorised access.
Further, the channels that you have locked according to
Point 8.1.3 can be set only upon entering a four-digit
PIN-code (password).
> Open the main menu with the Menu button (Figure
6-6).
> Select the row user installation by highlighting
it with the arrow buttons. A window opens
with the options available in the Installation
menu (Figure 6-7).
> Highlight the row Child lock with the
up/down arrow buttons and confirm with OK.
You are now present in the Child lock
6-6)
6-7)
6-8)
menu (Figure 6-8).
> Enter the password with the help of the number
buttons. (factory setting: 0000).
> To activate child lock, highlight the row Child
lock with the up/down buttons and set Yes with
the right/left arrow buttons.
> If you wish to protect the menu against
unauthorised changes, then highlight the row
Block installation and set Yes with the
right/left arrow buttons.
> You can enter a new password in the row New
Password with the numeric buttons.
> Confirm the new password in the row Confirm
password.
> Press the button EXIT to come out of the Child
lock menu.
> Press the EXIT button twice to completely exit the
menu.
6.3
Setting the time
Your device is equipped with a clock. This can be
synchronised to Greenwich Mean Time via Satreception.
1
BDA TELE SSC 1 11_08 D.indd 14
01.01.1970 2:45:37 Uhr
Page 17

This only needs to be corrected with respect to your
local time. For Germany, this time difference is +1
hour.
> Open the main menu with the Menu button.
> Select now the menu row Timer by
highlighting it with the up/down buttons and
pressing OK. A window now opens with the
options available in the Installation menu
(Figure 6-9).
> Select now the menu option Time with the arrow
buttons and confirm it with OK. Figure 6.10
now opens.
6.3.1 Setting the local time
> Enter in this row the difference between your
local time and GMT with the help of the
right/left buttons.
6.3.2
Summer time
> In this row select the switchover to the summer
time with the right/left arrow buttons.
6.3.3
Date and time
> If the date and time are not being shown
correctly, you can set them manually in
these rows with the help of the right/left
and the numeric buttons. With the up/down
buttons you can select year, month, date
and hour.
> To exit the Timer menu, press the Exit button
thrice.
6.4
Antenna configuration
After you have set your receiver as you want, you can
now also set the receiver to your antenna, if needed.
Ex-factory your receiver is pre-programmed to
ASTRA and EUTELSAT with Universal-LNB (see
Annexure for technical terms). These channels are
received after the start-up without any further
settings.
If you wish to receive other satellites or use a
different LNB, set your receiver to your desired data
as follows:
> Open the main menu with the Menu button.
(Figure 6-11)
> Highlight the row user installation with the
up/down arrow button.
1
(figure
(Figure
(Figure
6-9)
6-10)
6-11)
BDA TELE SSC 1 11_08 D.indd 15
01.01.1970 2:45:38 Uhr
Page 18

(Figure
(Figure
> Confirm by pressing OK.
> Highlight the row Antenna Configuration with the
up/down buttons.
> Confirm with OK. The menu Antenna Configuration
appears. (Figure 6-12)
The following settings can be made in this sub-menu:
6.4.1
6-12)
6-13)
Antenna
You can store a total of 16 different antennas (satellite positions).
> Select one of the 16 possible antennas in
this menu option with the right/left button.
6.4.2
Type
> Set here with the right/left buttons, whether
you receive the satellites with a fixed antenna
(standard) or with a rotating system (DiSEqC
1.2).
Caution!
If you have selected the setting DiSEqC 1.2
(operating a digital receiver at a rotating system with
a DiSEqC 1.2 motor), you must first set the east and
the west borders. Like this, mechanical damages to
the reflector by an obstacle are avoided. If the
obstacles (chimney, wall, etc.) are present in the
rotating range of the reflector, it must then be
observed while setting the east-west borders. If no
obstacle is present in the rotating range of the
reflector, then define the borders in such a way that
the reflector can be rotated a little beyond the
outermost satellites to be received.
Setting the east-west borders
>
Press the green button to open the menu for setting
the borders. The row East demarcation is highlighted.
(Figure 6-13).
> Rotate the reflector now by pressing the
left-arrow button to the maximum possible
or the desired east-position.
> A query appears after the OK button is pressed.
> Save the east border with OK. The row West demarcation
is now highlighted.
> Rotate the reflector now by pressing the right-
arrow button to the maximum possible or the
desired west-position.
1
BDA TELE SSC 1 11_08 D.indd 16
01.01.1970 2:45:39 Uhr
Page 19

> A query appears upon pressing the OK button.
> Save the West-border with OK.
Delete East-West borders
If you call the menu for setting the borders when the
East-West borders are already set, the row DiSEqC
demarcation is highlighted.
> To delete the available borders, press the OK
button and confirm the query that follows once
again with OK.
> Exit the menu by pressing the Exit button.
6.4.3
Satellite
> Select the row Satellite with the up/down
buttons and confirm with OK. A window now
appears with the different satellites.
> Set either one of the pre-programmed satellites
with the up/down arrow or select one of the
freely programmable satellite Newsat01 to
Newsat14 and confirm with OK.
6.4.4 LNB
Type
> Enter in this row the LNB type you are using
with the left/right arrow buttons. The following
are available for selection: LNBF, Uni-Cable
and Normal for manual input of LNB data.
If you have entered Normal in LNB-Type, further
settings can then be made.
6.4.5 LNB
Freq. 1
> Highlight the row LNB Freq. 1 with the
up/down buttons and confirm with OK. Select
the LNB frequency 1 to be set from the list and
confirm with OK.
6.4.6 LNB
Freq. 2
> Highlight the row LNB Freq. 2 with the
up/down buttons and confirm with OK. Select
the LNB frequency 2 to be set from the list and
confirm with OK.
> Press the button Exit after you have made all the
settings.
> To save the settings, confirm the query that now
appears with OK.
1
BDA TELE SSC 1 11_08 D.indd 17
01.01.1970 2:45:39 Uhr
Page 20

A A
B A
A B
B B
Example:
A B
Position
Output
A B
Option
Output
A B
Position
Output
6.4.7 22 kHz-sound
> Enter in this row with the help of left/right
buttons, whether you want to add the 22 kHz
control signal.
6.4.8 DiSEqC
DiSEqC (Digital Satellite Equipment Control) is a
digital control signal for controlling the DiSEqCcompatible components via the antenna line. If your
external unit has DiSEqC-components, you must
activate the DiSEqC-control. Four switching criteria of
the DiSEqC-control can be selected in the menu. Your
device is pre-programmed such that ASTRA is
received on port 1 and Eutelsat on port 2 of a multiswitch. In case the switching matrix of your receiving
system has a different structure or if you want to
receive other satellites, you can adjust the receiver to
your receiving system.
> In case you are not using any DiSEqC-
components, deactivate the DisEqC-control
(none) with the left/right buttons. When using
the DiSEqC-components set one of the
DiSEqC-positions port A, port B, port C or port
D. These are assigned to the DiSEqC-switching
criteria as per the following table.
Sat
1
Sat
2
Sat
3
Sat
4
6.4.9 C/Ku band control
> In this menu option you can set a C/Ku-band
switching signal with the left/right buttons.
6.4.10
Calculate
To be able to align your satellite antenna correctly to a
satellite, you need the azimuth and elevation angle for
your location. Your receiver offers you the option for
calculating these values.
> Open the menu Antenna Configuration as described in
Point 6.4.
> Press the red button for Antenna alignment help.
Position
Option
azimuth and elevation
BDA TELE SSC 1 11_08 D.indd 18
1
01.01.1970 2:45:48 Uhr
Page 21

The menu Antenna settings help (Figure 6-
14) appears.
> Highlight the row Satellite with the up/down
buttons and confirm with OK.
A list with the available satellites appears.
> With the up/down buttons select the desired
satellite. If the desired satellite is not
available in the list, select a freely definable
satellite e.g. Newsat 01.
> If you have selected a freely definable
satellite, enter the position in both the next
two rows with the help of numeric buttons
and arrow buttons.
> Highlight the row Longitude with the
up/down arrow buttons.
> Enter the longitude of your location with the
help of numeric keypad.
> In the next row, enter with the help of left/right
buttons, whether it is an eastern or western
longitude.
> Similarly, enter also the latitude of your
location.
> Highlight the row Calculate with the up/down
buttons and confirm with OK.
The result now appears on the screen with the
elevation and azimuth angle.
> You can return to the normal operation by
pressing the Exit button several times.
7
Operation
7.1
Switch on and off
> Switch on the receiver by pressing the button
On/Standby on the remote control.
> The device is switched off if you press this button
again.
> The device is now in the ready mode (standby)
> During operation the LED on the receiver glows
in green, during standby in red.
7.2
Channel selection
7.2.1
With the help of Channel up/down buttons
> Switch the channels with the help of the buttons
hen
(Figure
6-14)
BDA TELE SSC 1 11_08 D.indd 19
1
01.01.1970 2:45:48 Uhr
Page 22

Channel up/down on the receiver or on the remote
(Figure
control by one channel space up or down.
7.2.2 With the help of numeric keypad
> Enter the desired channel number with the help of
the numeric keypad.
For example:
1
for channel No. 1
1, then 4 for channel No. 14
2, then 3, then 4 for channel No. 234
While entering the multi-digit channel numbers you
have about 2 seconds time after pressing a button, in
order to complete your input.
If you wish to enter a single or a two-digit number,
then you can accelerate the switching process by
pressing the OK button after entering the last digit.
7.2.3 With the help of channel lists
To simplify the calling of channels, your device has
various channel lists. All the channels present in the
receiver are present in the complete list. Further, your
receiver also has 6 different favourites lists, (see Point
8.1.4) in which only selected channels are present. The
channels can also be displayed sorted on the satellites.
7.2.3.1 Calling channels with the help of complete list
Proceed as follows to select a channel from the
complete list:
> Press the button OK.
A channel list now appears. In the TV-mode
only the TV and radio programmes appear.
The channel currently set is highlighted.
(Figure 7-1)
> You can now highlight the desired channel
7-1)
with the up/down arrow buttons.
> The highlighted channel is set by pressing the OK
button.
> The up/down arrow buttons help you to move
the marker by one row in the list.
> With the buttons Page up/down you can move
by one page up and down respectively in the
list.
> The channel list is faded out upon pressing the
button Exit.
0
BDA TELE SSC 1 11_08 D.indd 20
01.01.1970 2:45:49 Uhr
Page 23

7.2.3.2 Calling channels with a favourites list
>
Press the button FAV. A favourites
list appears (Figure 7-2).
Select now the desired FAV channel
>
by pressing the FAV button several
times.
Highlight the channel you want by
>
pressing the button Page up/down.
Confirm with OK.
>
The list is faded out by pressing the
>
Exit button.
.
7.2.3.3 Selecting channels of a specific satellite
> Press the button SAT. A window opens
with the set satellites (Figure 7-3)
> Select the satellite with the up/down
buttons, whose channels you want to
see. (Figure 7-3)
> Confirm with OK. A channel list
appears that contains only the channels
of the selected satellite.
> Highlight the channel you want to watch
with the Channel up/down or Page
up/down buttons.
> Confirm with OK.
> The channel list is faded out by pressing
the Exit button.
7.2.4 Calling the locked channels
If a channel is set, which is locked through
child lock, the message Password appears
on the screen. (Figure 7-4)
> Enter your password with the help of
the numeric keypad
channel is now set.
or
>
Switch to a channel that is not
locked. Please read 8.1.3 for
locking a channel.
. The desired
1
BDA TELE SSC 1 11_08 D.indd 21
01.01.1970 2:45:50 Uhr
Page 24

7.2.5
1 2 3 6 9 8 4
7 5
(Figure
7-5)
Info-box
Each time you change the channel a small info-box
appears (Figure 7-5) with the channel properties,
such as channel number (1), channel name (2), title of
the programme (3), date (4) and time (5). In addition,
further properties are also shown, such as video text
(6), subtitles (7), different audio channels (8) (e.g.
multilingual films or different radio stations),
encrypted channel (9).
7.3 Volume control
You can control the volume of your receiver. This
simplifies the handling of the receiver, because you
thus have all the important functions on one
receiver and seldom need to use the remote
control of your television set. After switching on
the receiver, the sound is reproduced with the
volume last set.
> Control the volume of the receiver with the
button Volume + louder and the button
Volume - softer.
> Upon pressing the button Sound on/off the sound
is muted and upon pressing it again the sound
comes back.
7.4 Selecting a different language
If a programme is broadcast in several languages or
with several sound channels (see 7.2.5 Info-box), you
can set a different language or a different sound
channel as follows:
> Press the red button several times in normal
operation, till the desired language appears
on the screen.
You can now listen to the channel in the set
language. The reception of mono-channels is also
possible with your receiver.
> By pressing the blue button several times you
can choose from left, right and stereo.
7.5
TV/Radio switchover
The pre-programming also contains radio programmes
along with television programmes.
> Switch the receiver in the radio mode with the
button TV/Radio.
The receiver now switches to the last radio
programme heard.
BDA TELE SSC 1 11_08 D.indd 22 01.01.1970 2:45:51 Uhr
Page 25

to set
Use the arrow buttons left/right to browse through
> By pressing the TV/Radio button again the last
viewed TV channel is set.
7.6
Return to the last channel set
> Press the button Back on the remote control
the last viewed channel again.
> Press the button again to view the channel you
were viewing last.
7.7
Transponder-Info
> Press the button Info to view the data of the
transponder set (Figure 7-6).
> Press the button Exit to return to the normal
mode.
7.8
Video text
If transmitted, you can use the built-in video-text
decoder to view the video-text information of the
individual channels.
> Switch on the channel, for which you wish to
view the video-text information.
> Activate the video-text by pressing the yellow
button Videotext (Figure 7-7).
> With the help of the numeric keypad enter the
desired video-text page. Your input is shown in
the top left corner of the screen. After you
enter the desired video-text page, the device
searches for the page.
Since all the video-text pages cannot be
transmitted at the same time, it can take a few
seconds, till the device locates your page and
shows it on the screen.
In case of all video-text operators the page 100
shows the table of contents.
>
the pages.
Press the button Exit to come back to the normal mode.
en,
7.9 Sub-titles
Some broadcasters also transmit the subtitles. Proceed
as follows to activate the display of the sub-titles:
ch
(Figure
(Figure
7-6)
7-7)
BDA TELE SSC 1 11_08 D.indd 23
01.01.1970 2:45:51 Uhr
Page 26

> Press the yellow button. If the transmission is
there, a list now appears with the available
subtitle languages.
> Highlight the desired subtitle language with
the up/down arrow buttons.
> Confirm now with OK. The subtitles are
now shown.
Note that this function is available only when the
subtitles are actually being transmitted and that this
setting is lost after you change the channel.
7.10
Electronic Programme Information EPI
With the help of the EPI-function (Electronic
Programme Info) it is possible to display the channel
offers and the contents of various channels on the
screen. As such, you can have a quick overview of all
the programmes and their contents.
> Switch on the receiver and the TV-set.
> Press the button EPI on the remote control or
call the EPI through the main menu.
(Figure
7-8)
The electronic programme magazine now
appears with the superimposed picture of the
current channel as PIG (Picture in Graphic)
on the screen (Figure 7-8). The channel
name and the title of the current programme
are also shown. Please note that only the
information of the currently switched
channel or the channel visible as PIG and of
the channels being transmitted by the same
transponder (see Technical Terms) is
available.
> With the up/down buttons highlight the
channel, for which you wish to see the EPIinformation.
> By pressing OK the TV-picture of the selected
channel appears on the screen as PIG and the EPI
data is shown.
> By pressing the left/right arrow buttons you can
view the information of the next or the previous
channel respectively. For visual control, a
marker is moved above the time line in the EPI
window.
> With the green or the yellow button you can
move the marker 6 hours before or after
respectively.
BDA TELE SSC 1 11_08 D.indd 24
01.01.1970 2:45:52 Uhr
Page 27

(
Figure 7-9)
If detailed information is available for a programme
, it
can programme up to 10 events for switching on and
reservation
(
Figure
7-10) .
is symbolised below the date and time display with a
blue point having the legend Detail.
> If available, the detailed information for the
selected programme is shown by pressing the
blue button (Figure 7-9).
> To exit the detailed information, press the button
Exit.
> Press the Exit button again to return to the
normal mode.
7.11
Timer
Your receiver has a timer. With the help of this you
off the receiver.
> Call the main menu with the Menu button.
> Highlight the row Timer with the up/down arrow
buttons.
> Confirm by pressing OK.
> Select now the row Timer reservation with the
up/down arrow buttons.
> Press the OK button to open the menu for time
7.11.1 Programming the timer
Proceed as follows to programme a timer event:
Timer number
> Highlight the row Timer number with the arrow
buttons.
> Set a timer event between 1 and 10 with the help
of the left/right arrow buttons.
Switch-on channel
> Highlight the row Switch-on Channel with the
arrow buttons.
> Call the channel list by pressing the OK button.
> You can switchover between the lists of TV and
radio programmes with the TV/Radio button.
> Select the programme with the arrow buttons
left/right or the buttons Page up/down, for which
you want to programme a timer event.
> Confirm with OK.
(Figure
7-10)
BDA TELE SSC 1 11_08 D.indd 25 01.01.1970 2:45:53 Uhr
Page 28

Timer type
> Highlight the row Timer type with the arrow
buttons.
> Set with the help of left/right buttons, whether
the time is to be executed at the set time only
once (one-time), daily, weekly or monthly.
Depending upon which timer type you
choose, the input of month, date, day or
weekday, described below, becomes
necessary.
Programme type
> Highlight the row Programme type with the arrow
buttons.
> Set with the help of the left/right buttons,
whether the receiver should switch on or off at
the set time.
If you have selected switch on, the programmed
channel is switched on when the set time is
reached. In case of switch-off, the receiver is
switched off when the set time is reached.
Activate timer
> Highlight the row Activate with the up/down
buttons.
> Set with the help of left/right buttons to
activate the timer event.
Month
> Highlight the row Month with the up/down buttons.
> Set the month with the left/right buttons, in which
the timer event should take place.
Date
> Highlight the row Date with the up/down buttons.
> Set the date with the left/right buttons, on which
the timer event should take place.
Time
> Highlight the row Time with the up/down buttons.
> Set the four-digit time with the number keys,
at which the timer event should take place.
Duration
> Highlight the row Duration with the up/down
buttons.
BDA TELE SSC 1 11_08 D.indd 26 01.01.1970 2:45:53 Uhr
Page 29

> Set the weekday with the left/right buttons
,
on
8 Changing
base programming
which the timer event should take place.
Confirm with OK. Enter the duration of the timer event
with the help of the numeric keypad and confirm with
OK.
7.11.2 Change timer programming
> To modify an existing timer event, highlight
the corresponding timer number with the arrow
buttons and modify the entries as described
above.
7.11.3 Deactivate
> To deactivate an existing timer event,
highlight it with the arrow buttons.
> Highlight the row Activate with the up/down
buttons.
> Set No with the left/right buttons, in order to
deactivate the timer event. Return to the normal
mode by pressing the EXIT button several times.
Caution!!!
Please pay attention that the clock time is recorded in
the device. This is shown in the display in the standby
mode. If this is not the case, leave your device
switched on for about 30 seconds to e.g. ZDF, so that
the clock time can be read.
The time should now be shown in the standby mode.
7.12 Rotating the
When using a rotating system, the position of the
antenna can be set or adjusted manually.
> Press the green button in the normal mode. A
menu window appears (Figure 7-11).
> Rotate the antenna by pressing the arrow button
right (West) or left (East), till the desired
position is reached.
> Return to the normal mode by pressing the Exit
button.
timer programming
antenna manually (rotating system)
(Figure
7-11)
Ex-factory the device is preset with a base
programming, which contains the programmes of
ASTRA 19.2° East, EUTELSAT 13° East and
TÜRKSAT.
BDA TELE SSC 1 11_08 D.indd 27 01.01.1970 2:45:54 Uhr
Page 30

8.1
Configuring channel lists
This chapter describes how you can change the preprogramming of your receiver and the favourite
programmes list as per your wishes. This function is
also needed to sort the newly found programmes in a
list after a search.
You should be aware of the following here: Your device
has the complete list and the different favourites lists.
The favourites programmes list contain all programmes,
which you have included as described below. All the
available programmes are present in the complete list.
This chapter also describes how you can delete
programmes or safeguard them by using the child lock.
(Figure
(Figure
(Figure
Proceed as follows to edit the programme lists:
> Call the main menu with the Menu button (Figure
8-1)
> Highlight the row Programme management with the
up/down buttons.
> Confirm with OK.
> Select with the up/down buttons, whether you
wish to edit the TV or the radio programmes.
> Confirm your selection with OK.
8-1)
The programme management appears for editing
the respective programme lists (TV or radio
lists). (Figure 8-2)
In the left half of the screen you see the picture
of the current programme as PIG and the related
data. In the right half you see the complete list, in
8-2)
which the currently ongoing programme is
highlighted. The currently active favourites list is
shown in the header line of the complete list.
8.1.1 Sorting the programmes
Manual sorting
You can sort the programmes of the complete list
according to your wishes.
> The entry Move (Figure 8-3) appears in the
header line of the complete list when you press
the yellow button.
> Highlight the programme, which you want to
move to a different place with the help of the
8-3)
buttons up/down or Page up/down.
BDA TELE SSC 1 11_08 D.indd 28
01.01.1970 2:45:55 Uhr
Page 31

> Press OK to select the programme for moving. A
double arrow now appears instead of the
programme number.
> Move the programme with the help of the arrow
buttons up/down or with the buttons Page
up/down to the point in the list, where you
want to place it.
> The programme is stored at the new place by
pressing OK.
> After you have configured the programme list in
this way as you want, return to the normal mode
by pressing the Exit button twice.
Automatic sorting
In addition to manual sorting, you can also sort the
complete list automatically on different criteria.
> Open the menu for Programme management as
described above.
> Press the Menu button. Another window now
opens (Figure 8-4).
> Highlight the row Sort with the up/down buttons and
confirm with OK.
A list appears showing the selection criteria for
sorting the complete list. Select the entry:
(Figure
8-4)
Favourite to sort the favourite programmes in
ascending order
Lock to sort the locked programmes in
ascending order
Encrypt to sort the encrypted programmes in
ascending order
Sat-Names to sort the programmes according to
satellites
K-Name to sort the programmes alphabetically
> Highlight the criterion with the up/down buttons
e.g. programme name, on which the complete list is
to be sorted.
> Press the OK button.
The complete list is sorted on the selected criterion.
BDA TELE SSC 1 11_08 D.indd 29
01.01.1970 2:45:55 Uhr
Page 32

(Figure
8.1.2 Delete programmes
Delete individual programmes
> Call the menu for Programme management as described
under Point 8.1.
> Upon pressing the red button several times the entry
Delete Channel now appears in the header line of the
complete list. (Figure 8-5).
> Highlight the channel with the up/down or with the Page
up/down buttons, which you want to delete.
> Press the OK button.
The channel to be deleted is now marked with a cross.
8-5)
> Mark all the channels you want to delete in this way.
> Press now the button Exit.
A query now appears, whether the marked programmes
should really be deleted.
> Confirm with OK to physically delete the programmes.
Delete all channels of a transponder
> Call the menu for Programme management as described
under Point 8.1.
> Upon pressing the red button several times the entry
Delete TP now appears in the header line of the
complete list.
> Highlight the transponder with the up/down or Page
up/down buttons, whose channels you want to delete.
> Press OK.
All channels of the transponder to be deleted are now
marked with a cross.
> Mark all the transponders in this way, whose channels
you want to delete.
> Press now the button Exit.
A query now appears, whether the marked programmes
should really be deleted.
> Confirm with OK to physically delete the programmes.
Delete all channels of a satellite
> Call the menu for Programme management as
described under Point 8.1.
> Upon pressing the red button several times the
entry Delete Satellite now appears in the header
line of the complete list.
0
BDA TELE SSC 1 11_08 D.indd 30
01.01.1970 2:45:56 Uhr
Page 33

> With the up/down or Page up/down buttons
highlight the channel of the satellite, whose
programmes you want to delete.
> Press OK.
All channels of the satellite to be deleted are
now marked with a cross.
> Mark all the satellites in this way, whose
channels you want to delete.
> Press now the button Exit.
A query now appears, whether the marked
channels should really be deleted.
> Confirm with OK to delete the channels
physically.
Delete all channels
> Call the menu for Programme management as
described under Point 8.1.
> Upon pressing the red button several times the
entry Delete All now appears in the header line
of the complete list.
> Highlight the channel with the up/down or with
the Page up/down buttons, which you want to
delete.
> Press OK.
All channels are now marked with a cross.
> Press now the Exit button.
A query now appears, whether the marked
channels should really be deleted.
> Confirm with OK to delete the channels
physically.
8.1.3
Lock channels
You can also lock the channels. A locked channel is
shown on the screen only when you enter the password
after activating the channel. Before you select the
channel that you want to lock, activate the child lock as
described in Point 6.2.
> Call the menu for Programme management as
described under Point 8.1.
> Upon pressing the blue button the entry Lock
now appears in the header line of the complete
list shown (Figure 8-6). If the child lock is
already active as described in 6 .2, first the
password must be entered with the help of the
numeric keypad.
1
(Figure
8-6)
BDA TELE SSC 1 11_08 D.indd 31
01.01.1970 2:45:56 Uhr
Page 34

> Highlight the channel you want to lock with the
up/down or Page up/down buttons.
> Press the OK button to lock the highlighted channel.
A lock symbol appears near the name of the locked
channel.
> Highlight in this way all the channels you want to
lock.
> Return to the normal mode by pressing the Exit
button several times.
> To unlock the individual channels, proceed as
described above. Highlight the corresponding
channel and remove the lock symbol by pressing the
OK button.
8.1.4
Configuring favourites list
To make it easy to locate the channels, your receiver has
three favourites list for TV and radio mode. You can
include your favourite channels from the complete list in
the favourites list and configure it as you want.
> Call the menu for Programme management as
described in Point 8.1.
> Upon pressing the green button the name of the first
favourites list now appears in the header line of the
complete list e.g. Favourite 1. (Figure 8-7)
> Select the favourites list you want to edit by pressing
the green button several times.
> Highlight the channel you want to add in the header
line of the shown favourites list with the up/down or
Page up/down buttons.
> Press the OK button to include the selected channel
in the favourites list.
A channel included in the favourites list is marked
by a “Smiley” symbol.
> Proceed in the opposite way to delete a channel from
a favourites list.
Rename favourites list
You can rename the favourites list the way you want.
Proceed as follows to rename a favourites list as “Sport”,
which, for instance, contains only sports channels:
> Call the menu for Programme management as
described in Point 8.1.
BDA TELE SSC 1 11_08 D.indd 32
01.01.1970 2:45:57 Uhr
Page 35

Eingabe
des
8.2 Channel se
arch
> Select the favourites list by pressing the green
button several times, which you want to rename.
> Press the Menu button. Another menu window
opens. (Figure 8-8)
> Highlight the row Rename favourites group
with the up/down buttons and confirm with
OK.
A keypad dialogue now opens for
entering the new name of the
favourites list. (Figure 8-9).
> Highlight with the arrow buttons the 1st letter of
the name (e.g. S) and confirm with OK.
The alphabet now appears in the header line of
the keypad dialogue.
> Highlight now the 2nd letter of the name with the
arrow buttons and confirm with OK.
This alphabet too appears in the header line of
the dialogue.
> Complete the name in this way so that it can be
read in the header line.
> To save the name, highlight the row OK with the
arrow buttons and then press the button OK.
The name now appears in the header line of the
complete list.
> Return to the normal mode by pressing the Exit
button several times.
9)
vergeben
opfzeile
Sie
wieder
er
Kopfzeile
Namen bis
Sie mit
des
den
(Figure
8-8)
(Figure
8-9)
As already mentioned, your receiver is preprogrammed for receiving the satellites ASTRA and
EUTELSAT. There are several ways to do a channel
search, in order to receive new channels or channels of
another satellite. Press the button Menu to open the
Main Menu. Select the menu option User Installation
with the up/down buttons and confirm with OK.
Highlight the row Programme search with the up/down
buttons and confirm with OK.
1. Satellite search
Select this search to search for a selected satellite or to
search all the set satellites for channels.
2. Network search
Select this search to search for channels of a selected
network.
BDA TELE SSC 1 11_08 D.indd 33 01.01.1970 2:45:58 Uhr
Page 36

(Figure
(Figure
3. Transponder search
Select this search to search specifically for a transponder of
a satellite.
4. Manual search
Select this search to search specifically for a channel using
the channel-specific PID numbers. After the search the new
channels are stored in the complete list and can then be
included in the favourites list as described in Point
> Open first the Main Menu for channel search. (Figure
8-10)
> Highlight the row User Installation with the help of
up/down buttons.
> Confirm with OK.
> Highlight now the row Channel Search and confirm
with OK. The menu Channel Search now appears.
(Figure 8-11)
8.2.1 Satellite search
8-10)
Proceed as follows to search a satellite for channels:
Antenna
> Highlight the row Antenna with the up/down buttons.
> Set the antenna with the left/right arrow buttons, with
which the satellite you want to search for new channels
is received.
Satellite
> The satellite assigned to this antenna as per Point 6.4
8-11)
now appears in the row Satellite.
Position
The row Position is active only when the satellite position set
in the row Antenna is received with a rotating system
(DiSEqC 1.2). Please note here Point 8.3.6.
Start search
> Highlight the lowermost line of the input menu with the
up/down buttons.
> Set the search type Search 1 with the left/right arrow
buttons. When using a rotating system, you can also set
the search type Search All. In this type of search all the
satellites being received by the rotating system are
searched for channels.
8.1.4
.
BDA TELE SSC 1 11_08 D.indd 34 01.01.1970 2:45:59 Uhr
Page 37

> Press OK to start the search
.
The search can take up to 15 minutes. Please pay
attention to the screen messages.
8.2.1
Network search
If transmitted and updated by the respective
broadcaster, each transponder of a satellite contains
information about the transponder values of the entire
satellite or of complete satellite systems in the form of
an NIT (Network Information Table). In the network
search the channels are searched with the help of
information taken from the NIT.
> To conduct a network search, select the
antenna and the satellite as described in
Point 8.3.1.
> Highlight the lowermost line of the input menu
with the up/down buttons.
> Set the search type Network search with the
arrow buttons left/right.
> Press OK to start the search.
The search can take up to 15 minutes. Please
pay attention to the screen messages.
8.2.2
Transponder search
You can search specifically a transponder (see Point 9
Technical Terms) for channels. To do this, it is
necessary to enter the transponder data.
Proceed as follows to search a transponder for
channels:
Antenna
> Highlight the row Antenna with the up/down
arrow buttons.
> Set the antenna with the left/right buttons, via
which the transponder to be searched for
channels is being received.
Satellite
> The row Satellite now shows the satellite, which
is assigned to this antenna according to Point
6.4. Please pay attention to Point 8.2.6 if using a
rotating system
Transponder
Your receiver is pre-programmed with the transponder
data of the most common satellites.
.
BDA TELE SSC 1 11_08 D.indd 35 01.01.1970 2:46:00 Uhr
Page 38

> Set the transponder with left/right buttons, which
you want to search. If you wish to modify the data
of a transponder or enter the data of a new
transponder
> Set the transponder with left/right buttons, which
you want to modify. To enter a new transponder, set
the transponder with the highest consecutive
number.
> Press the red button for editing mode.
You can now modify the data of the transponder.
Frequency
> Highlight the row Frequency with the up/down
arrow buttons.
> Enter the frequency of the desired transponder
with the number keys.
Symbol rate
> Highlight the row Symbol rate with the up/down arrow
buttons.
> Enter the symbol rate of the desired transponder
with the number keys.
Polarity
> Highlight the row Polarity with the up/down arrow
buttons.
> Enter the polarity of the desired transponder with the
left/right arrow buttons.
22 KHz
> Highlight the row 22 KHz with the up/down
buttons.
> Switch on or off the 22 KHz control signal with the
left/right arrow buttons.
This setting can be made only when a C-Band LNB has
been set in Point 6.4.
> To come out of the input mode, press the red button
Input Mode.
Start search
> Highlight the lowermost row of the input menu with
the up/down arrow buttons.
> Set the search type Transponder with the left/right
arrow buttons.
> Press OK to start the search. Pay attention to the
on-screen messages being shown.
, then proceed as follows
:
BDA TELE SSC 1 11_08 D.indd 36
01.01.1970 2:46:00 Uhr
Page 39

ünscht
e
8.2.3
Manual search
If a channel is not found in the automatic search or in
the transponder search, it can be come necessary to
enter the channel-specific PID number for this
channel. These numbers may be found out in the
Internet or requested directly from the respective
channel broadcaster.
> Set the transponder as described under
Transponder search, on which the desired
channel is being transmitted.
> Press the green button PID Input. (Figure
8-12)
> Enter the Video PID in the row Video
PID with the numeric keypad and confirm
with OK.
> Highlight the row Audio PID with the
up/down buttons.
> Enter the Audio PID in the row Audio
PID with the numeric keypad and confirm
with OK.
> Highlight the row PCR PID with the
up/down buttons.
ätigen
Zeile
tigen
Zeile
Sie
Sie
(Figure
8-12)
> Enter the PCR PID in the row PCR PID
with the numeric keypad and confirm
with OK.
> Highlight the row OK with the up/down
buttons and confirm with.
The message “PID-input completed” now
appears.
> Confirm this once again with OK. The
channel is now generated.
> Press the Exit button several time to return
to normal mode.
A channel generated in this way is stored at the
end of the complete list and has the name Own
PR. You can change this name as described in
Point 8.1.5.
8.2.4
After the search
The search of the transponder can be followed up on
the screen during the search itself. After completing
the search the number of transponders searched and
the channels found are shown (Figure 8-13). The
channels are included automatically in the complete
list.
BDA TELE SSC 1 11_08 D.indd 37
01.01.1970 2:46:01 Uhr
Page 40

In addition, a query appears on the screen.
> To exit the menu Channel Search and to switch to
the last channel of the complete list, highlight the
row Display with the arrow buttons and confirm
with OK.
> If you wish to return to the menu Channel Search,
then highlight the row Done with the up/down
buttons and confirm with OK.
8.2.5 Further options
> Open the menu Channel Search as described in
Point 8.3.
> Press the button Menu to open another window.
8.2.5.1 Search options
> Highlight the row Search Options with the up/down
buttons and confirm with OK.
> The following options are now available:
Search only for freely receivable channels
> Highlight the row Only Free to Air Programmes
with the up/down buttons.
> Upon pressing OK a cross appears at the end of
the line. During a search now only the free to air
programmes are searched.
Search new transponders
> Highlight the row Only not searched transponders
with the up/down button.
> Upon pressing OK a cross appears at the end of
the line. During a search now only the not
searched transponders free are searched.
Sort encrypted channels
> Highlight the row Sort on encryption with the
up/down buttons.
> Upon pressing OK a cross appears at the end of
the line. During a search now the channels found
are sorted according to the encryption.
Delete transponder
You can delete a transponder, if its data are no longer
valid.
> Highlight the row Delete TP with the up/down
buttons and confirm with OK.
BDA TELE SSC 1 11_08 D.indd 38
01.01.1970 2:46:01 Uhr
Page 41

> To actually delete the transponder set in the
menu Channel Search, confirm the query that
follows with OK.
8.2.5.2
You can change the name of any satellite according to
your wishes.
> Open the menu Channel Search as described in
> Set the name of the satellite in the row Satellite,
> Press OK to open the keypad dialogue for
> Enter the name of the satellite in the keypad
Press the EXIT button several times to return to the
normal mode.
8.3
You can revert back to the factory settings at any time.
By calling this function the factory settings are restored
again and your own settings are deleted.
> Open the Main Menu with the Menu button.
> Select now the menu row User Installation by
> Confirm with OK.
> Highlight now the row Factory Settings with the
> Confirm with OK.
> To restore the factory settings, highlight the
8.4
Furthermore, you can also update the operating
software and the channel list of your receiver via
satellite (ASTRA 19° East).
> Open the Main Menu with the Menu button.
> Select now the option User Installation by
> Confirm with OK.
Entering the satellite name
the Point 8.3.
whose name you want to change.
entering the new name.
dialogue as described under 8.1.5.
Factory setting
(Figure 8-14).
highlighting it with the up/down arrow buttons.
up/down arrow buttons.
line OK with the up/down buttons and confirm
with OK.
Software update
highlighting it with the up/down buttons.
(Figure
8-14)
BDA TELE SSC 1 11_08 D.indd 39
01.01.1970 2:46:2 Uhr
Page 42

(Figure
8-15)
> Highlight now the row Download via Satellite with
the help of up/down buttons.
The menu Download via Satellite appears. (Figure 8-15)
> Set the antenna in this row with the left/right
arrow buttons, via which you are receiving the
satellite ASTRA 19.2°.
> Highlight the row Download Type with the
up/down buttons. You can do here the
following settings.
Software
Select this entry to update only the operating
software. The channel list remains intact.
> Set the software with the left/right arrow buttons.
> Confirm with OK. It is now checked whether a
new software is available for your receiver. If
this is the case, then it is downloaded
automatically. Please pay attention to the on-
screen messages displayed.
Data
Select this entry to update only the channel list.
> Set Data with the left/right arrow buttons.
> Confirm with OK. It is now checked whether a
new channel list is available for your receiver. If
this is the case, then it is downloaded
automatically. Please pay attention to the on-
screen messages displayed.
Software + Data
Select this entry to update the software as well as the
channel list.
> Set Software + Data with the left/right arrow
buttons.
> Confirm with OK. It is now checked whether a
new software and channel list are available for
your receiver. If this is the case, then they are
downloaded automatically. Please pay attention
to the on-screen messages displayed.
In case the parameters of the data channel for
downloading the software update have changed, you
can correct them in the menu. In normal cases there
should be no need for you to make changes in this
menu.
> To modify the data of the data channel,
highlight the row Mode with the up/down arrow
buttons.
0
BDA TELE SSC 1 11_08 D.indd 40
01.01.1970 2:46:3 Uhr
Page 43

> Set the user mode with the left/right arrow
buttons.
> You can now enter new data in the rows
Frequency, Symbol Rate, Polarisation and PID
Input.
8.5
Receiver Information
In this menu option you can view the specific device
data.
> Open the Main Menu with the button Menu.
(Figure 8-16).
> Select now the row Receiver Information with
the help of the up/down arrow buttons.
> Confirm by pressing OK. A window now
opens with the receiver information. (Figure 8-
17).
> Return to the normal mode by pressing the Exit
button twice.
(Figure
8-16)
(Figure
8-17)
1
BDA TELE SSC 1 11_08 D.indd 41
01.01.1970 2:46:4 Uhr
Page 44

1
9
Technical terms
Antenna cable
Connecting cable between the modulator of the satellite
receiver and the antenna input of the television, as an
alternative, if a SCART-socket is not available.
External unit
Name for the system mounted in the open, comprising of
parabolic/offset reflector and one or more LNBs, for
receiving one or more satellites.
AV
: see SCART data compression/MPEG1/MPEG2:
The transmission of the current television standard
(625 rows and 50 Hz image refresh rate) results in a
data quantity of 216 MBit/s.
This would require bandwidths, which are available neither
terrestrially nor in satellites. For this reason, the data
quantity is reduced through data reduction. For Europe,
MPEG-2 has been laid down as the worldwide standard for
data compression. MPEG2 is an extension of MPEG1.
De-emphasis
Adjustment of the audio frequencies to the transmission
signal, is defined by the transmission parameters of the
satellite.
DiSEqC
Digital Satellite Equipment Control: A digital Control signal
for controlling the DiSEqC-enabled components of the
external unit via the antenna line. A example of how a
system made of DiSEqC-components can look like is given
on page 19.
DVB
:
Digital Video Broadcasting: A digital, universal
transmission technique, for image, graphics, sound and text
i.e. for data in every possible form and in every possible,
appropriate quality.
Frequency
Physical quantity, specifies the number of vibrations per
second, unit is Hertz (Hz).
Frequency range
a) Satellite/LNB:
11 GHz range from 10.70 GHz – 11.70 GHz, 12 GHz range
from 11.70 GHz – 12.75 GHz
b) Receiver: Intermediate frequency or 1.ZF 950 till 2150
MHz.
Unit
1 Hz
1 kHz 1 Kilohertz
1 MHz 1 Megahertz
1 GHz 1 Gigahertz
:
:
:
:
:
Name
1 Hertz
:
Vibrations per second
1,000
1,000,000
1,000,000,000
BDA TELE SSC 1 11_08 D.indd 42
01.01.1970 2:46:04 Uhr
Page 45

Coaxial cable
Connecting cable between LNB and satellite receiver,
for transmitting the received signals and for supplying
power to the LNBs.
LNB/LNC (Low Noise Block/Converter):
Receiving unit at the focus of the parabolic reflector,
converts the frequency range of the satellite in the
intermediate frequency of the receiver.
LOF
:
Local oscillator frequency; specified in MHz or GHz;
different depending upon LNB and the frequency
range received
Receiving frequency of the receiver = transmission
frequency of the satellite – LOF
Modulation with 22 KHz
Along with the 14/28 volt switchover helps in the
switchover between 2 LNBs. In universal-LNB for
switching in the high-range.
Parabolic reflector
Parabolic shaped reflector made of metal or coated
plastic for bundling at a focus the electromagnetic
waves transmitted by the satellite.
Polarisation level
For a better utilisation of the available frequency range
the satellites transmit the adjacent channels with opposite
polarisation (horizontal and vertical or left- and righthanded). For receiving both the polarisation levels two
single LNBs or one V/H-LNB is needed.
Receiver
Satellite
Name of the satellite, mostly with name and position
on the orbit,
ASTRA 19° East
EUTELSAT 13° East
Satellite receiver
The signals received and converted by LNB cannot be
processed by the television set. They are prepared in the
satellite receiver such that audio and video signals (AV)
are present at its outputs, which are passed on to the TV.
SCART
Plug connector at television sets, video recorders,
satellite receivers and other devices for entertainment
electronics for transmitting audio (sound) and video
(image) signals (AV).
:
:
:
:
: see satellite receiver
:
:
:
BDA TELE SSC 1 11_08 D.indd 43
01.01.1970 2:46:05 Uhr
Page 46

Software update
In digital television this is a new medium, which along
with an improved image and sound quality also offers the
possibility of providing interactive services. These new
services are constantly enhanced and improved by the
programme providers. To be able to use these services, it
can be necessary to update the software of the receiver.
Transponder
Does the processing of one or more channels at the
satellite. This means receiving the data from the ground
station, amplifying them and transmitting them back to
Earth.
Universal LNB
For receiving the ranges FFS (10.70 – 11.70 GHz), BBS
(11.70 – 12.50 GHz) and FFS High Band (12.50 – 12.75
GHz). The complete range is divided into two bands:
Low Band: 10.70 – 11.80 GHz; LOF 9750 MHz
High Band: 11.70 – 12.75 GHz; LOF 10600 MHz
Supply voltage
Power is supplied to the LNBs via the coaxial cable, the
receiver supplies a voltage of 14 or 18 volt
Intermediate frequency
The frequency range beamed by the satellite cannot be
transmitted by a cable and is hence converted by an LNB
in the intermediate frequency range of 950 to 2150 MHz.
This makes a transmission and processing at the receiver
possible.
1. ZF = Intermediate frequency
:
:
:
:
:
BDA TELE SSC 1 11_08 D.indd 44
01.01.1970 2:46:05 Uhr
Page 47

01.01.1970
2:46:05
a.m.
10
Technical data
DBS tuner:
Input frequency range: 950 .... 2150 MHz
Input noise range: - 65 dBm ... - 25 dBm
DBS tuner input: F-socket
Input/output impedance: 75 Ohm
Output for 1.ZF: 950 ... 2150 MHz (loop through)
Demodulation: QPSK
Symbol rate: 2 ... 45 Mbaud/s, SCPC/ MCPC
Viterbirates: 1/2, 2/3, 3/4, 5/6, 7/8
De-multiplexing: according to ISO 13818-1
Power consumption: 0.3 A / 5V
Video decoding:
Video compression: MPEG-2, up to MP@ML (main
Video standard: PAL / NTSC
Active screen area: 720 pixel x 576 rows (PAL), 720 Pixel x 480 Pixel (NTSC)
Picture format: 4:3 / 16:9
Audio decoding:
Audio compression: MPEG-1 & MPEG-2 Layer I and II
Audio mode: Dual (main/sub),
Stereo scanning frequencies: 32 kHz, 44 .1 kHz, 48 kHz
SCART output: FBAS or RGB
LNB power supply:
LNB power: 350 mA max.; short-circuit proof
LNB voltage vertical: 14V; LNB voltage horizontal: 19V
22 kHz modulation: 22 kHz +/- 4KHz
Amplitude 0.6 V
Number of channels:
Complete list TV/Radio: Total 4000 channels
DiSEqC: DiSEqC 1.0 and DiSEqC 1.2
Timer events: maximal 10 events
Power supply: Power intake: max. 19 W
Input voltage: 12 V, 1.5 A max., 50 Hz alternating voltage
General:
Dimensions (W x D x H): 100mm x 62 mm x 26 mm
profile @ main level)
+/- 0.2 V
BDA TELE SSC 1 11_08 D.indd 45
Page 48

01.01.1970
2:46:06
a.m.
11 Troublesho ot ing help
Error Possible reason Solution
No image, no sound, No power from mains Check power cable and plug
No reception in channels, which
were OK earlier
Varoius channels not being shown
in the channel list
Sound OK, no TV- picture Radio-mode activated Switch to TV mode
Channels like Pro , Sat 1, Kabel
DSF and HOT are partly disturbed
Antenna misaligned or defective Check antenna
Channel transmitted on a different
transponder
Channel no longer transmitted
Incorrect channel list selected Select different channel list
Interference through “DECT-
1,
phones” (radio phones)
Do a search (see Point
none
(see Point. . .1)
Increase distance between the
receiver station and the receiver
.)
Device cannot be used Defective data current -->
device blocked
Pull out mains plug for approx.
seconds, then switch on device
again
Small square blocks partly appear in
the picture. Temporarily the devices
switches to still image, no sound.
Screen temporarily black with the
message “no signal”.
No picture, no sound, Short-circuit in the LNB cable Switch-off device, remove short-
Strong rain or snow Remove snow from the reflector
Antenna not aligned correctly Realign the antenna
Reflector is too small at receiving place Realign the antenna
There is an obstacle between reflector Mount reflector with “free view”
and satellite (e.g. a tree)
circuit, switch on device again
Defective or missing cable
connection
Defective LNB Replace LNB
Incorrect external unit set at the
receiver
Antenna aligned incorrectly Realign the antenna
Check all cable connections
Correct the setting (see Point
. )
BDA TELE SSC 1 11_08 D.indd 46
Page 49

BDA TELE SSC 1 11_08 D.indd 47 01.01.1970 2:46:06
Page 50

For the daily use
Switch on and off
> Switch on the receiver by pressing the button
On/Standby on the remote control or at the
device.
> Pressing this button again switches off the
device.
> The device is now in ready mode (standby), the
time is thereby shown in the display on the
device.
Channel selection
With the channel up/down buttons
> Switch the channels one space up and down
with the help of the channel buttons up/down
on the remote control or at the device.
With the help of numeric keypad
> Enter the desired channel number with the help of
the numeric keypad. For example:
1 for channel number 1
1, then 4 for channel number 14
2, then 3, then 4 for channel number 234
When entering multi-digit channel numbers, you have a
time of about 3 seconds after pressing a button to
complete your input.
If you wish to enter only a single- or two-digit
number, you can accelerate the switching process by
keeping the last number pressed for a longer time.
With the help of channel list:
> Press the OK button.
> You can now highlight the desired channel with
the help of the channel up/down arrow buttons.
> Press the OK button to set the highlighted
channel.
> With the help of the up/down arrow buttons you
can move the marker by one space in the list.
> With the buttons Page up/down you can go up
and down one page in the list.
Volume control
> Control the volume of your receiver with the
help of the buttons Volume + for louder and
Volume – for softer.
> The sound can be switched on/off by pressing
the button Sound on/off.
BDA TELE SSC 1 11_08 D.indd 48 01.01.1970 2:46:07
 Loading...