

Tecsun PL-380 Operation Manual
TECSUN RADIO
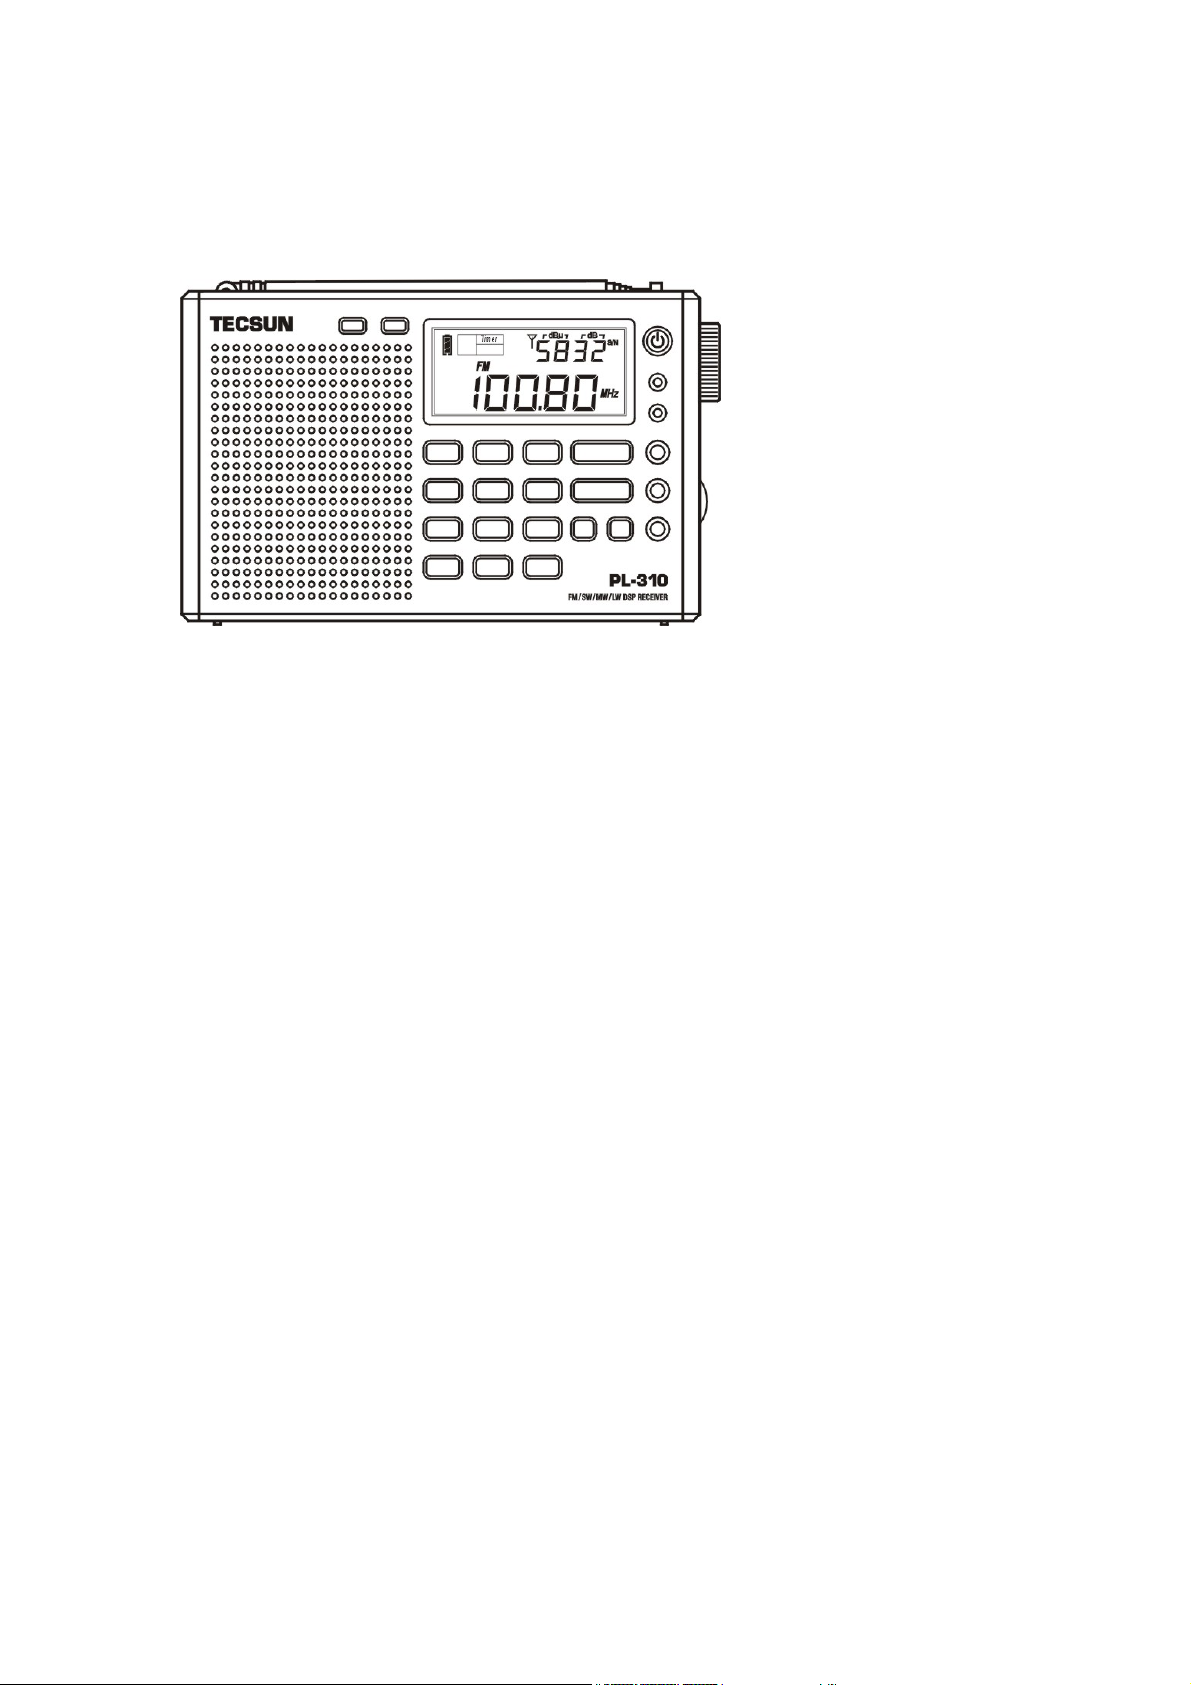
PL-380
FM stereo / SW / MW / LW DSP RECEIVER
OPERATION MANUAL
www.tecsunradio.com
www.tecsunradio.com hch@cantonmade.com

PL-380 Functional Block Diagram
PL-380 is using DSP si4734 Microchips (from Silicon Labs in USA) to digitalize the analog
AM/FM broadcasting signal base on the modern software technology and radio principles.
It can highly improve on radio's sensitivity, selectivity, S/N ratio and anti-interference.
www.tecsunradio.com hch@cantonmade.com

TABLE OF CONTENTS
CONTROL LOCATIONS.....................................................2
LCD DISPLAY.....................................................................3
QUICK START GUIDE........................................................4
TURN THE RADIO ON OR OFF.........................................6
●Using the ETM (Easy Tuning Mode) to listen radio
●Manual tuning
●Auto browsing stations
●Direct frequency entry
TO STORE STATION……………………………………….. 8
●ATS (Auto Tuning Storage) on FM, MW, LW or SW band
● To store a station manually
● To store a station with semi-auto storing function
LISTEN TO STATIONS IN THE MEMORY............................9
● Memory search manually
●Auto browsing pre-stored stations
● Direct key in the station address number
DELETE MEMORY..............................................................10
●Manual delete memory
● To delete stations with auto search memory function
●Semi auto-delete radio stations
●To delete all memories
SLEEP FUNCTION..............................................................10
CLOCK SETTING.................................................................11
ALARM SETTING.................................................................11
●Auto on / off function
● Set the alarm by radio
● Set alarm by buzzer
● Snooze
●To turn off the alarm
DISPLAY MODE...................................................................12
USING THE LOCK BUTTON................................................12
USING THE LIGHT BUTTON...............................................13
USING THE FM ST. BUTTON..............................................13
USING THE AM BW BUTTON..............................................13
SYSTEM SETTING...............................................................13
●Frequency range setting for FM
APPLYING INTELLIGENT CHARING FUNCTION...............14
IMPORTANT MATTERS FOR USING BATTERIES..............15
USING THE EXTERNAL ANTENNA………………………….16
TROUBLE SHOOTING..........................................................15
"B" SOUND VIA FUNCTIONS................................................17
www.tecsunradio.com hch@cantonmade.com
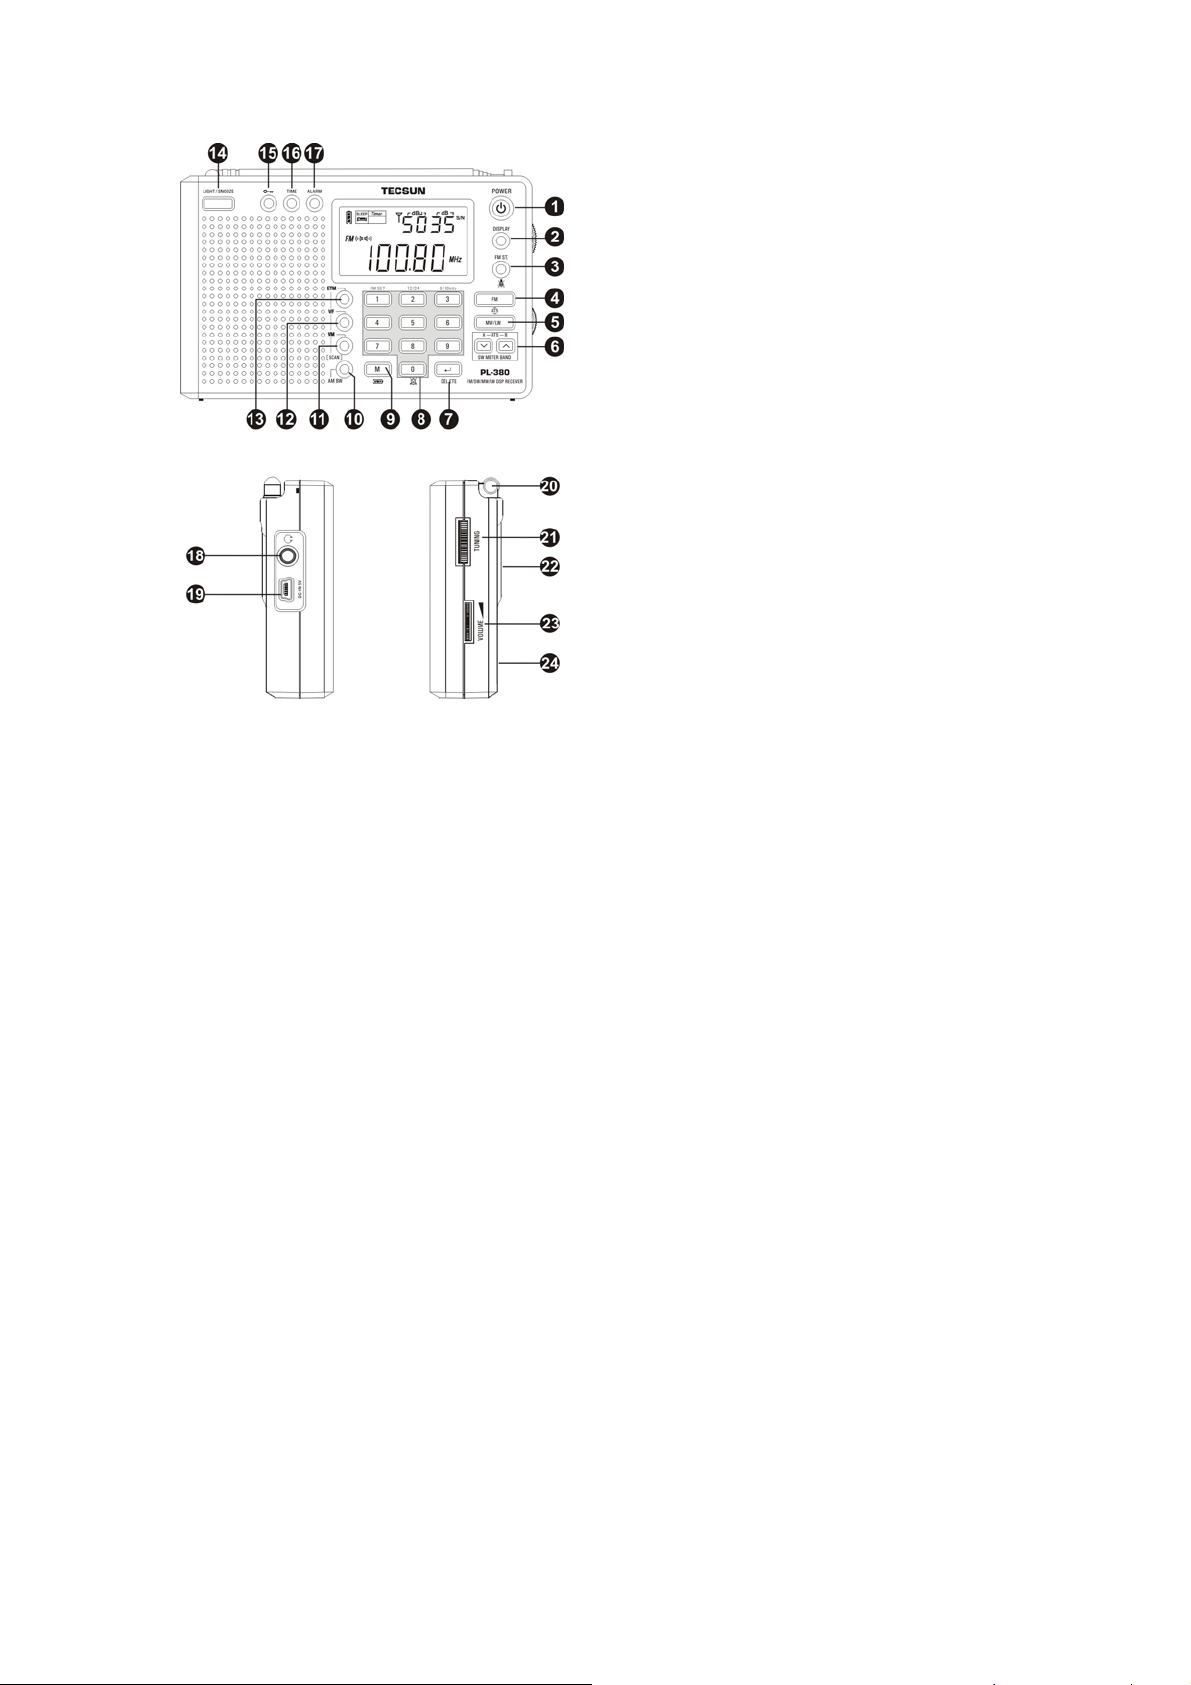
CONTROL LOCATIONS
1. Power button
2. Display & Lock button
3. FM ST. button
4. FM / ATS button (FM band selector and Auto Tuning Storage)
5. MW / LW button ( MW / LW band selector & Auto Tuning Storage)
6. SW/ ATS button (SW meter band selector & Auto Tuning Storage)
7. ENTER / DELETE button
8. 0-9 NUMBER keys (Numeric keys)
9. MEMORY button (Storing radio stations) / BATTERIES TYPE selector
10. AM / BW button (Band width)
11. VM (View Memory) & SCAN button
12. VF (View Frequency) & SCAN button
13. ETM (Easy Tuning Mode) button
14. LIGHT / SNOOZE
15. LOCK button
16. TIME button (Time settings)
17. ALARM button (Alarm settings)
18. EARPHONE JACK
19. USB 5V DC-JACK
20. FM & SW TELESCOPIC ANTENNA
21. MULTIFUNCTIONAL TUNING KNOW
22. BACK STAND
23. VOLUME KNOB
24. BATTERY COMPARTMENT
www.tecsunradio.com hch@cantonmade.com
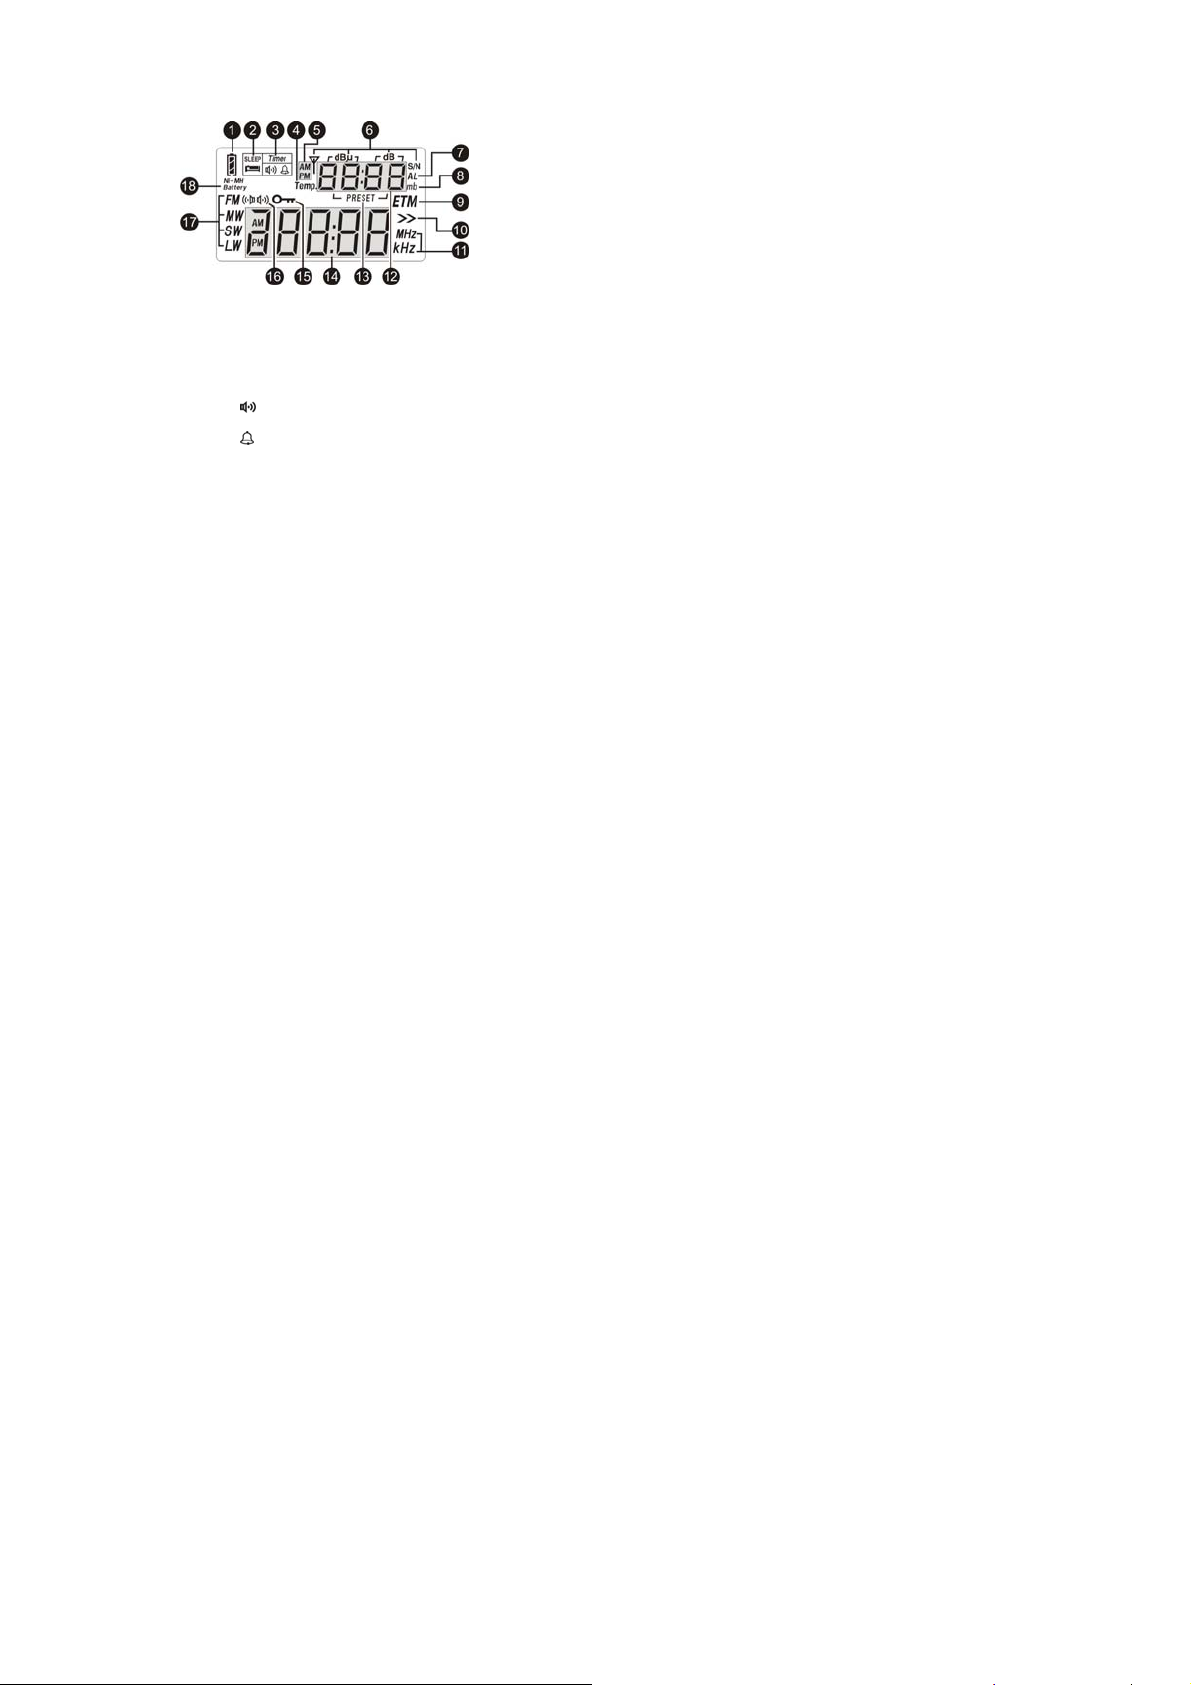
LCD DISPLAY
1. Battery consumption indicator / Charging indicator
2. SLEEP TIMER ON INDICATOR
3. ALARM ON / OFF INDICATOR
"
4. Temperature (Temp.)
5. AM, PM indicator for 12-hour format clock
6. Signal indicators
7. ALARM TIME INDICATOR
8. SW Meter band indicator
9. ETM indicator
10. Tuning speed
11. kHz: frequency unit for MW, LW & SW
12. Digital Number display (4 Digits)
13. Preset Memory address.
14. Digital Number Display
15. LOCK indicator
16. FM stereo status indicator.
17. Band indicator
18. Rechargeable batteries status indicator.
" alarm on by radio
" alarm on by buzzer
"
dBu: signal strength unit
dB : Signal to Noise Ratio (S/N) unit
" > " Slow Tuning
" > > " Fast Tuning
MHz: frequency unit for FM
With radio off: alarm time, temperature
With radio on: strength units of signals / SNR, alarm time, temperature, local time,
memory address, meter band.
With radio off: local time, system settings
With radio on: frequency of radio
www.tecsunradio.com hch@cantonmade.com

QUICK START GUIDE
Time settings
1. Long press [TIME] button until "hour" is flashing in the display. Rotate the [TUNING]
knob to adjust the correct "hour".
2. Short press [TIME] button again, rotate the [TUNING] knob to adjust "minute".
3. Press the [TIME] button again to confirm your time setting.
Alarm Settings
1. Long press [ALARM] button. Rotate the [TUNING] knob when "hour" is flashing in the
display.
2. Short press [ALARM] button again, the "minute" flashing. Rotate the [TUNING] knob to
adjust the "minute".
3. Short press [ALARM] button again to select 1 ~ 90 minutes for the Alarm's duration and
to be powered off afterwards.
4. Finally, short press [ALARM] button again to confirm.
5. To activate the alarm, short press [ALARM] button to select in between alarm by radio
or buzzer.
Note: In ALARM section, [
set to buzzer, or if the display remains blank, which means the alarm is off.
Listen to the radio
1. Short press [POWER] button to turn on your radio.
2. Select FM by pressing the [FM] button, MW or LW by pressing the [MW/LW] button, SW
by pressing the [
meter band.
3. Turn the TUNING knob to your desired radio station.
4. You can also direct key-in the frequency numbers by pressing the numeric keys.
5. Adjust the volume level by turning the VOLUME knob up & down.
Note:
Be sure to fully extend the telescopic antenna when listening to SW and FM and adjusting
the volume you want.
ETM (Easy Tuning Mode)
1. Turn on the radio.
2. Select your band.
3. Short press [ETM] button to switch to ETM status.
4. Long press on [ETM] button to scan the frequency of radio stations within present
frequency band. You find frequency number is running on the display. All the
available stations will be selected. It will stop when it is done.
5. Then use the [TUNING] knob to tune around for those scanned stations.
Special note: 1.) Press & release [VF] button or [VM] button to exit the ETM status.
2.) Those scanned stations will not be stored in the regular memories, but
it will remain in the ETM temporary storage until next ETM scanning.
Auto search & stored radio stations
1.) After radio is on, then fully extended the FM / SW antenna. Press the [FM] button to
] or [ ] button sequentially until you have selected the desired
] means ALARM is set to radio-on; [ ] means ALARM is

select the FM frequency.
2.) Press & hold [FM] button until digital number is running, this radio would search &
stored the available radio stations automatically.
3.) After finished the ATS operation, turn the [TUNING] knob to select the radio station
MW, LW or SW ATS are same as the FM ATS.
Special note: There are mode A & mode B for ATS in SW.
Mode A : Auto-searching & storing all the radio stations within all meter bands.
Mode B: Auto-searching & storing all the radio stations within present meter band only.
.
Special note:
During ATS process in FM / MW / LW & SW mode A, pre-stored radio stations will be
deleted & covered automatically by the new searched stations. If ATS is interrupted or
being turned off during process, for those radio stations without deleted & covered by ATS
would still be kept.
With ATS in SW mode B, those existing memories will not be deleted & covered; all the
newly found radio stations would be stored in the blank memories addresses.
Storing frequencies into memory
1. Turn on your radio, and tune into your favorite station.
2. Short press [M] button, with the memory address is flashing in the display, press [M]
button again to confirm.
Listen to stations in the memory
1. Turn on the radio, press and release the [VM] button with notice that the PRESET
stations show in the display's upper right corner.
2. Turn the [TUNING] knob to selected stored stations.
Delete memory
1. Turn on the radio and press the [VM] button, causing PRESET stations to appear in the
display's upper right corner.
2. Use the [TUNING] knob to select the memory that you want to delete.
3. Long press [DELETE] button. " DEL " is flashing in the display, press [DELETE] button
again to confirm it.
Auto browse stations
1. Turn on the radio and press the [VF] button with notice that Frequency flashes.
2. Long press [FM] button to search for those available stations. Auto search will stop on
each available station for 5 seconds before it goes on searching for the next available
station.
3. To stop auto search function, simply press [VF] button again.
Auto browse memory
1. Turn on the radio, press the [VM] button to switch to memory
address status.
2. Long press [VM] button and it will search all the stations within
the memory, and stop on each station for 5 seconds.
www.tecsunradio.com hch@cantonmade.com
 Loading...