


 Loading...
EN
Fax System
P-4035 MFP
User Manual
P-4035 MFP
Fax System
Copy / Print / Scan / Fax
A4

Contents
|
Contents .................................................................................................................................... |
i |
|
Preface ..................................................................................................................................... |
v |
|
About the FAX Operation Guide (this Guide) ........................................................................... |
v |
|
Structure of the guide ..................................................................................................... |
v |
|
Conventions in This Guide ............................................................................................ |
vi |
1 |
Legal and Safety Information .............................................. |
1-1 |
|
Notice ................................................................................................................................... |
1-2 |
|
Safety Conventions in This Guide .............................................................................. |
1-2 |
|
About this Operation Guide ........................................................................................ |
1-3 |
|
Legal Notice ............................................................................................................... |
1-3 |
|
IMPORTANT SAFETY INSTRUCTIONS ................................................................... |
1-3 |
|
IMPORTANTES MESURES DE SECURITE ............................................................. |
1-3 |
|
Declarations to European Directives .......................................................................... |
1-4 |
|
Technical regulations for terminal equipment ............................................................ |
1-4 |
|
Network Compatibility Declaration ............................................................................. |
1-5 |
|
Trademark Information ............................................................................................... |
1-5 |
2 |
Before Using the Fax Machine ............................................. |
2-1 |
|
Part Names and Functions ................................................................................................... |
2-2 |
|
Machine ...................................................................................................................... |
2-2 |
|
Operation Panel ......................................................................................................... |
2-4 |
|
Operation Method ...................................................................................................... |
2-5 |
|
Setting Date and Time .......................................................................................................... |
2-6 |
|
Local FAX Information Entry ................................................................................................ |
2-8 |
|
TTI (Transmit Terminal Identification) ........................................................................ |
2-8 |
|
Local FAX Name ........................................................................................................ |
2-8 |
|
Local FAX Number ..................................................................................................... |
2-9 |
|
Local FAX ID ............................................................................................................ |
2-10 |
|
FAX Dialing Mode .................................................................................................... |
2-10 |
|
ECM TX .................................................................................................................... |
2-11 |
|
TX Start Speed ......................................................................................................... |
2-12 |
|
PBX Setting (Europe only) ....................................................................................... |
2-13 |
|
Registering Destinations in the Address Book ................................................................... |
2-14 |
|
Adding a Destination (Address Book) ...................................................................... |
2-14 |
|
Adding a Destination on One Touch Key ................................................................. |
2-24 |
3 |
Sending Faxes ...................................................................... |
3-1 |
|
Basic transmission procedure .............................................................................................. |
3-2 |
|
Checking and Editing Destinations ............................................................................ |
3-5 |
|
Checking the Send Status .......................................................................................... |
3-7 |
|
Priority Override Send ................................................................................................ |
3-7 |
|
Cancelling the Transmission ...................................................................................... |
3-9 |
|
Using redial .............................................................................................................. |
3-11 |
|
Methods For Entering the Destination ................................................................................ |
3-12 |
|
Entering the destination fax number with the numeric keys ..................................... |
3-12 |
|
Choosing from the Address Book ............................................................................ |
3-13 |
|
Choosing by One Touch Key ................................................................................... |
3-15 |
|
Login/Logout ....................................................................................................................... |
3-16 |
|
Logging in when User Accounting has been Enabled .............................................. |
3-16 |
|
Logging in when Job Accounting has been Enabled ............................................... |
3-18 |
|
Fax transmission functions ................................................................................................. |
3-19 |
|
Quiet Mode ......................................................................................................................... |
3-20 |
|
Original Size ....................................................................................................................... |
3-20 |
|
Original Image .................................................................................................................... |
3-20 |
i

|
FAX Resolution .................................................................................................................. |
3-21 |
|
Orig.Orientation .................................................................................................................. |
3-21 |
|
Continuous Scan ................................................................................................................ |
3-21 |
|
File Name Entry .................................................................................................................. |
3-21 |
|
JobFinish Notice ................................................................................................................. |
3-21 |
|
FAX Delayed Transmission ................................................................................................ |
3-22 |
|
Cancelling and Sending Delayed Transmissions (Queued) ..................................... |
3-22 |
|
FAX Direct Transmission .................................................................................................... |
3-23 |
|
Cancelling Direct Transmission ................................................................................ |
3-24 |
|
FAX TX Report ................................................................................................................... |
3-24 |
|
Density ............................................................................................................................... |
3-24 |
|
Duplex ................................................................................................................................ |
3-24 |
|
Manual Send ...................................................................................................................... |
3-25 |
|
Using Chain Dial ................................................................................................................. |
3-26 |
|
Program .............................................................................................................................. |
3-28 |
|
Registering Programs .............................................................................................. |
3-28 |
|
Confirming the Registered Program ......................................................................... |
3-29 |
|
Recalling Program .................................................................................................... |
3-29 |
|
Overwriting Program ................................................................................................ |
3-29 |
|
Deleting Program ..................................................................................................... |
3-30 |
4 |
Receiving Faxes ................................................................... |
4-1 |
|
FAX Automatic Reception .................................................................................................... |
4-2 |
|
Reception Method ...................................................................................................... |
4-2 |
|
Checking and Changing the Reception Method ......................................................... |
4-2 |
|
Flow of reception ........................................................................................................ |
4-3 |
|
Canceling reception (Disconnection of communication) ............................................ |
4-4 |
|
Manual Reception ................................................................................................................ |
4-5 |
|
Flow of reception ........................................................................................................ |
4-5 |
|
Fax reception functions ........................................................................................................ |
4-6 |
|
Fax reception settings .......................................................................................................... |
4-7 |
|
FAX Media Type ........................................................................................................ |
4-7 |
|
RX Date/Time ............................................................................................................. |
4-8 |
|
2 in 1 Printing ............................................................................................................. |
4-8 |
|
Batch Print .................................................................................................................. |
4-8 |
|
Duplex Printing ........................................................................................................... |
4-9 |
5 |
Using Convenient Fax Functions ......................................... |
5-1 |
|
Forward Settings .................................................................................................................. |
5-2 |
|
Type of Forwarding Destination ................................................................................. |
5-2 |
|
Setting Forwarding ..................................................................................................... |
5-2 |
|
Registering Forwarding Destination ........................................................................... |
5-3 |
|
Changing and Deleting Registration Contents ........................................................... |
5-5 |
|
Forwarding Time Setting ............................................................................................ |
5-6 |
|
File Format Setting ..................................................................................................... |
5-7 |
|
E-mail Subject Add. Info Setting ................................................................................ |
5-8 |
|
FTP Encrypted TX Setting ......................................................................................... |
5-9 |
|
File Name Entry ......................................................................................................... |
5-9 |
|
Print Setting .............................................................................................................. |
5-10 |
|
Settings for Forwarding from Embedded Web Server RX (Forward Settings) ......... |
5-11 |
|
Sub Address Box Function ................................................................................................. |
5-12 |
|
Sub Address Box ..................................................................................................... |
5-12 |
|
Sub Address Communication ................................................................................... |
5-12 |
|
Registering a Sub Address Box ............................................................................... |
5-13 |
|
Changing/Deleting Sub Address Box ....................................................................... |
5-14 |
|
Printing Originals from a Sub Address Box .............................................................. |
5-15 |
|
Checking Details ...................................................................................................... |
5-17 |
|
Deleting Originals after Printing from a Sub Address Box ....................................... |
5-17 |
ii

|
Deleting Originals from a Sub Address Box ............................................................. |
5-18 |
|
Printing a Sub Address Box List ............................................................................... |
5-19 |
|
Sub Address Transmission ...................................................................................... |
5-20 |
|
Polling Communication ....................................................................................................... |
5-22 |
|
Polling Transmission ................................................................................................ |
5-22 |
|
Polling Reception ..................................................................................................... |
5-25 |
|
Printing from a Polling Box ....................................................................................... |
5-27 |
|
Checking Details ...................................................................................................... |
5-28 |
|
Deleting Originals in a Polling Box ........................................................................... |
5-28 |
|
Encryption .......................................................................................................................... |
5-30 |
|
Registering an Encryption Key ................................................................................. |
5-31 |
|
Changing and Deleting Registration Contents of Encryption Key ............................ |
5-31 |
|
Using the Encrypted Transmission .......................................................................... |
5-32 |
|
Setting the Encrypted Reception .............................................................................. |
5-34 |
|
Using a Connected Telephone ........................................................................................... |
5-36 |
|
FAX/TEL Auto Switch Reception ............................................................................. |
5-36 |
|
FAX/Answering Machine Auto Switch Reception ..................................................... |
5-38 |
|
DRD Reception (Available for inch versions only) ................................................... |
5-40 |
|
Manual Send ............................................................................................................ |
5-41 |
|
Manual Reception .................................................................................................... |
5-42 |
|
Remote Switch Function .......................................................................................... |
5-43 |
6 |
Sending Faxes from PC ........................................................ |
6-1 |
|
Flow of Sending Faxes from PC ........................................................................................... |
6-2 |
|
Flow of Network FAX Receiving ........................................................................................... |
6-2 |
|
Setup .................................................................................................................................... |
6-3 |
|
Installing the FAX Driver ............................................................................................ |
6-3 |
|
Uninstalling the FAX Driver ........................................................................................ |
6-5 |
|
Basic Transmission .............................................................................................................. |
6-6 |
|
Configuring the Driver Default Settings ...................................................................... |
6-9 |
|
Default Settings Dialog Box ..................................................................................... |
6-10 |
|
Changing Transmit Settings ..................................................................................... |
6-13 |
|
Using Cover Pages .................................................................................................. |
6-17 |
|
Cover Page Registration (Default Settings) ............................................................. |
6-22 |
|
Transmission Control ............................................................................................... |
6-27 |
7 |
Managing Jobs ..................................................................... |
7-1 |
|
Various Reports for FAX ...................................................................................................... |
7-2 |
|
Checking FAX Job History ................................................................................................... |
7-3 |
|
Send Job Log and Print Job Log ................................................................................ |
7-3 |
|
Outgoing FAX Log and Incoming FAX Log ................................................................ |
7-4 |
|
Printing Administrative Reports (Result Rpt Set.) ................................................................ |
7-5 |
|
Send Result Reports (Send Result) ........................................................................... |
7-5 |
|
Report for Job Canceled before Sending ................................................................... |
7-6 |
|
Recipient Format ........................................................................................................ |
7-6 |
|
FAX RX Result Reports ............................................................................................. |
7-7 |
|
Activity Report (Outgoing FAX Rpt and Incoming FAX Rpt) ................................................ |
7-9 |
|
Printing Activity Reports ............................................................................................. |
7-9 |
|
Automatic Printout ...................................................................................................... |
7-9 |
|
Status Page ........................................................................................................................ |
7-11 |
|
Reporting FAX Receipt Result by E-mail ........................................................................... |
7-12 |
|
Confirmation Screen of Destinations .................................................................................. |
7-14 |
8 |
Fax Settings ......................................................................... |
8-1 |
|
Default fax settings ............................................................................................................... |
8-2 |
|
System Menu Settings ............................................................................................... |
8-2 |
|
Report ........................................................................................................................ |
8-3 |
iii

|
Common Settings ....................................................................................................... |
8-3 |
|
FAX ............................................................................................................................ |
8-4 |
|
Adjust/Maint. .............................................................................................................. 8-8 |
|
|
Transmission Restriction ...................................................................................................... |
8-9 |
|
Registering Permit FAX No. ..................................................................................... |
8-10 |
|
Changing and Deleting Permit FAX No. ................................................................... |
8-11 |
|
Registering Reject FAX No. ..................................................................................... |
8-11 |
|
Changing and Deleting Reject FAX No. ................................................................... |
8-12 |
|
Registering Permit ID No. ........................................................................................ 8-13 |
|
|
Changing and Deleting Permit ID No. ...................................................................... |
8-14 |
|
Setting Send Restriction ........................................................................................... |
8-15 |
|
Setting Reception Restriction ................................................................................... |
8-16 |
|
Unknown Number Reception ................................................................................... |
8-16 |
|
Unusable Time ................................................................................................................... |
8-18 |
|
Account Management ........................................................................................................ |
8-20 |
9 |
Troubleshooting ................................................................... |
9-1 |
|
Indicators During Sending/Receiving Operation .................................................................. |
9-2 |
|
Responding to an Attention Indicator Flashes ...................................................................... |
9-2 |
|
Precautions When Turning Power OFF ............................................................................... |
9-3 |
|
Messages ............................................................................................................................. |
9-4 |
|
Error Code List ..................................................................................................................... |
9-6 |
|
Troubleshooting .................................................................................................................... |
9-9 |
10 |
Appendix ............................................................................. |
10-1 |
|
Character Entry Method ..................................................................................................... |
10-2 |
|
Using the Keys ......................................................................................................... |
10-2 |
|
Selecting Type of Characters ................................................................................... |
10-3 |
|
Characters That Can be Entered Using the Numeric Keys ...................................... |
10-3 |
|
Entering Symbols ..................................................................................................... |
10-4 |
|
Entering Characters ................................................................................................. |
10-4 |
|
Specifications ..................................................................................................................... |
10-6 |
|
Menu Map .......................................................................................................................... |
10-8 |
|
Received FAX Sizes and Paper Priority (Metric Model) ................................................... |
10-12 |
|
Received FAX Sizes and Paper Priority (Inch Model) ...................................................... |
10-13 |
|
Index ............................................................................................................................... |
Index-1 |
iv

Preface
This Operation Guide is intended to help you operate the machine correctly, perform routine maintenance and take a simple troubleshooting action as necessary, so that you can always use the machine in good condition.
Please read the Operation Guide before using the facsimile. Keep it close to the facsimile for easy reference.
About the FAX Operation Guide (this Guide)
Structure of the guide
This Operation Guide contains the following chapters.
|
Chapter |
Contents |
|
|
|
1 |
Legal and Safety Information |
Provides precautions regarding use of the machine and |
|
|
trademark information. |
|
|
|
2 |
Before Using the Fax Machine |
Explains the part names and the settings required before |
|
|
using fax. |
|
|
|
3 |
Sending Faxes |
Explains the general methods for sending faxes and |
|
|
transmission functions. |
|
|
|
4 |
Receiving Faxes |
Explains the general methods for receiving faxes and |
|
|
reception functions. |
|
|
|
5 |
Using Convenient Fax Functions |
Explains convenient fax functions such as storing received |
|
|
faxes in boxes in the memory, forwarding received faxes, |
|
|
and polling communication (a function that allows the |
|
|
receiving party to call and initiate fax reception). |
|
|
|
6 |
Sending Faxes from PC |
Explains how to send a FAX from a PC. |
|
|
|
7 |
Managing Jobs |
Explains how to check the status of recently performed |
|
|
transmission and reception operations in the message |
|
|
display. Also explains how to print administrative reports |
|
|
showing communication results, machine settings, and |
|
|
registered information. |
|
|
|
8 |
Fax Settings |
Explains various settings for controlling fax usage, such as |
|
|
restricting transmission destinations, blocking fax |
|
|
reception, and setting prohibited use times. |
|
|
|
9 |
Troubleshooting |
Explains what to do when errors are displayed or other |
|
|
problems occur. |
|
|
|
10 |
Appendix |
Explains how to enter characters, and lists the fax |
|
|
specifications. |
|
|
|
v

Conventions in This Guide
Adobe Reader X is used as an example in the explanations below.
Click an item in the Table of Contents to jump to the corresponding page.
Click to move from the current page to the previously displayed page. This is convenient when you want to return to the page from which you jumped to the current page.
 IMPORTANT
Indicates operational requirements and restrictions to operate the machine correctly, and avoid damage to the machine or property.

 NOTE
NOTE
Indicates supplemental explanations and reference information for operations.
Refer to
Click the underlined text to jump to the corresponding page.
Indicates that personal injury or mechanical damage may result from insufficient attention to or incorrect compliance with the related points.
NOTE
The items that appear in Adobe Reader vary depending on how it is used. If the Table of Contents or tools do not appear, refer to Adobe Reader Help.
Certain items are indicated in this guide by the conventions described below.
Convention |
Description |
Example |
|
|
|
[Bold] |
Indicates keys on the operation panel and buttons on |
Press the [Start] key. |
|
your computer screen. |
Click [OK]. |
|
|
|
|
|
|
[Regular] |
Indicates a message or setting displayed on the |
[Ready to copy.] appears in the message display. |
|
message display. |
Press the [▲] or [▼] key to select [On]. |
|
|
|
|
|
|
"Regular" |
Indicates a message or setting displayed on the |
You can select from the "Print size" menu. |
|
computer screen. |
|
|
|
|
vi

Conventions used in procedures for operating the machine
Operation panel keys that are pressed are outlined in red.
Procedures consisting of a sequence of operation panel or touch panel operations are numbered as shown below.
1
2
vii
1Legal and Safety Information
Please read this information before using your machine. This chapter provides information on the following topics. |
|
Notice ................................................................................................................................................................. |
1-2 |
Safety Conventions in This Guide ........................................................................................................... |
1-2 |
About this Operation Guide ..................................................................................................................... |
1-3 |
Legal Notice ............................................................................................................................................. |
1-3 |
IMPORTANT SAFETY INSTRUCTIONS ................................................................................................. |
1-3 |
IMPORTANTES MESURES DE SECURITE ........................................................................................... |
1-3 |
Declarations to European Directives ....................................................................................................... |
1-4 |
Technical regulations for terminal equipment .......................................................................................... |
1-4 |
Network Compatibility Declaration ........................................................................................................... |
1-5 |
Trademark Information ............................................................................................................................. |
1-5 |
1-1
Legal and Safety Information > Notice
Notice
Safety Conventions in This Guide
The sections of this handbook and parts of the facsimile marked with symbols are safety warnings meant to protect the user, other individuals and surrounding objects, and ensure correct and safe usage of the facsimile.
WARNING: Indicates that serious injury or even death may result from insufficient attention to or incorrect compliance with the related points.
CAUTION: Indicates that personal injury or mechanical damage may result from insufficient attention to or incorrect compliance with the related points.
Symbols
The symbol indicates that the related section includes safety warnings. Specific points of attention are indicated inside the symbol.
... [General warning]
... [Warning of high temperature]
The  symbol indicates that the related section includes information on prohibited actions. Specifics of the prohibited action are indicated inside the symbol.
... [Warning of prohibited action]
... [Disassembly prohibited]
The symbol indicates that the related section includes information on actions which must be performed. Specifics of the required action are indicated inside the symbol.
... [Alert of required action]
... [Remove the power plug from the outlet]
... [Always connect the machine to an outlet with a ground connection]
Please contact your service representative to order a replacement if the safety warnings in this Operation Guide are illegible or if the guide itself is missing (fee required).
NOTE
Due to performance updating, information in this Operation Guide is subject to change without notice.
1-2
Legal and Safety Information > Notice
About this Operation Guide
This Operation Guide contains information on using the facsimile functions of this machine. Please read the Operation Guide before you start using the machine.
During use, refer to the Operation Guide for your machine for information regarding the sections listed below.
Environment
Precautions for Use
Loading Paper
Cleaning
Toner Container Replacement
Waste Toner Box Replacement
Solving Malfunctions
Responding to Messages
Clearing Paper Jams
Legal Notice
WE SHALL HAVE NO LIABILITY FOR LOSS, WHETHER OR PARTIAL, OF RECEIVED DOCUMENTS WHEN SUCH LOSS IS CAUSED BY DAMAGES TO THE FAX SYSTEM, MALFUNCTIONS, MISUSE, OR EXTERNAL FACTORS SUCH AS POWER OUTAGES; OR FOR PURELY ECONOMIC LOSSES OR LOST PROFITS RESULTING FROM MISSED OPPORTUNITIES ATTRIBUTABLE TO MISSED CALLS OR RECORDED MESSAGES RESULTING THEREFROM.
IMPORTANT SAFETY INSTRUCTIONS
When using your telephone equipment, basic safety precautions should always be followed to reduce the risk of fire, electric shock and injury to persons, including the following:
CAUTION: To reduce the risk of fire, use only No.26 AWG or larger UL listed or CSA certified telecommunication line cord.
1Do not use this product near water, for example, near a bath tub, wash bowl, kitchen sink or laundry tub, in a wet basement or near a swimming pool.
2Avoid using a telephone (other than a cordless type) during an electrical storm. There may be a remote risk of electric shock from lightning.
3Do not use the telephone to report a gas leak in the vicinity of the leak.
4Use only the power cord and batteries indicated in this manual. Do not dispose of batteries in a fire. They may explode. Check with local codes for possible special disposal instructions.
SAVE THESE INSTRUCTIONS
IMPORTANTES MESURES DE SECURITE
Certaines mesures de sécurité doivent être prises pendant l'utilisation de matériel téléphonique afin de réduire les risques d'incendie, de choc électrique et de blessures. En voici quelques unes:
1Ne pas utiliser l'appareil près de l'eau, p. ex., près d'une baignoire, d'un lavabo, d'un évier de cuisine, d'un bac à laver, dans un sous-sol humide ou près d'une piscine.
2Eviter d'utiliser le téléphone (sauf s'il s'agit d'un appareil sans fil) pendant un orage électrique. Ceci peut présenter un risque de choc électrique causé par la foudre.
1-3

Legal and Safety Information > Notice
3Ne pas utiliser l'appareil téléphonique pour signaler une fuite de gaz s'il est situé près de la fuite.
4Utiliser seulement le cordon d'alimentation et le type de piles indiqués dans ce manuel. Ne pas jeter les piles dans le feu: elles peuvent exploser. Se conformer aux règlements pertinents quant à l'élimination des piles.
CONSERVER CES INSTRUCTIONS
 Declarations to European Directives
DECLARATION OF CONFORMITY TO 2004/108/EC, 2006/95/EEC, 93/68/EEC, 1999/5/EC and 2009/125/EC
We declare under our sole responsibility that the product to which this declaration relates is in conformity with the following specifications.
Limits and methods of measurement for immunity |
EN55024 |
||||
characteristics of information technology |
|
||||
equipment |
|
||||
Limits and methods of measurement for radio |
EN55022 Class B |
||||
interference characteristics of information |
|
||||
technology equipment |
|
||||
Limits for harmonic currents emissions for |
EN61000-3-2 |
||||
equipment input current |
|
16A per phase |
|
||
|
|
||||
Limitation of voltage fluctuations and flicker in low- |
EN61000-3-3 |
||||
voltage supply systems for equipment with rated |
|
||||
current |
|
16A |
|
||
|
|
||||
Safety of information technology equipment, |
EN60950-1 |
||||
including electrical business equipment |
|
||||
Terminal Equipment (TE); |
TBR 21 |
||||
Attachment requirements for pan-European |
|
||||
approval for connection to the analogue Public |
|
||||
Switched Telephone Networks (PSTNs) of TE (excluding TE supporting the voice telephony service) in which network addressing, if provided, is by means of Dual Tone Multi Frequency (DTMF) signalling
Technical regulations for terminal equipment
This terminal equipment complies with:
• |
TBR21 |
|
• |
DE 05R00 |
National AN for D |
• |
AN 01R00 |
AN for P |
• |
DE 08R00 |
National AN for D |
• |
AN 02R01 AN for CH and N |
• |
DE 09R00 |
National AN for D |
|
• |
AN 05R01 AN for D, E, GR, P and N |
• |
DE 12R00 |
National AN for D |
|
• |
AN 06R00 AN for D, GR and P |
• |
DE 14R00 |
National AN for D |
|
• |
AN 07R01 |
AN for D, E, P and N |
• |
ES 01R01 |
National AN for E |
• |
AN 09R00 |
AN for D |
• |
GR 01R00 |
National AN for GR |
1-4

Legal and Safety Information > Notice
• |
AN 10R00 |
AN for D |
• |
GR 03R00 |
National AN for GR |
• |
AN 11R00 |
AN for P |
• |
GR 04R00 |
National AN for GR |
• |
AN 12R00 |
AN for E |
• |
NO 01R00 |
National AN for N |
• |
AN 16R00 |
General Advisory Note |
• |
NO 02R00 |
National AN for N |
• |
DE 03R00 |
National AN for D |
• |
P 03R00 |
National AN for P |
• |
DE 04R00 |
National AN for D |
• |
P 08R00 |
National AN for P |
Network Compatibility Declaration
The manufacturer declares that the equipment has been designed to operate in the public switched telephone networks (PSTN) in the following countries:
Austria |
France |
Liechtenstein |
Slovakia |
Belgium |
Germany |
Lithuania |
Slovenia |
Bulgaria |
Greece |
Luxembourg |
Spain |
Cyprus |
Hungary |
Malta |
Sweden |
Czech |
Iceland |
Norway |
Switzerland |
Denmark |
Ireland |
Poland |
The Netherlands |
Estonia |
Italy |
Portugal |
United Kingdom |
Finland |
Latvia |
Romania |
|
Trademark Information
•Microsoft, Windows, Windows XP, Windows Server 2003, Windows Vista, Windows Server 2008, Windows 7, Windows Server 2012, Windows 8 and Internet Explorer are registered trademarks or trademarks of Microsoft Corporation in the U.S.A. and/or other countries.
•Adobe Acrobat, Adobe Reader and PostScript are trademarks of Adobe Systems, Incorporated.
•Ethernet is a registered trademark of Xerox Corporation.
•IBM and IBM PC/AT are trademarks of International Business Machines Corporation.
All other company and product names in this Operation Guide are trademarks or registered trademarks of their respective companies. The designations™ and ® are omitted in this guide.
1-5
2Before Using the Fax Machine
This chapter explains the following topics: |
|
Part Names and Functions ................................................................................................................................ |
2-2 |
Machine ................................................................................................................................................... |
2-2 |
Operation Method .................................................................................................................................... |
2-5 |
Setting Date and Time ....................................................................................................................................... |
2-6 |
Local FAX Information Entry .............................................................................................................................. |
2-8 |
TTI (Transmit Terminal Identification) ...................................................................................................... |
2-8 |
Local FAX Name ...................................................................................................................................... |
2-8 |
Local FAX Number ................................................................................................................................... |
2-9 |
FAX Dialing Mode .................................................................................................................................. |
2-10 |
ECM TX .................................................................................................................................................. |
2-11 |
TX Start Speed ....................................................................................................................................... |
2-12 |
PBX Setting (Europe only) ..................................................................................................................... |
2-13 |
Registering Destinations in the Address Book ................................................................................................. |
2-14 |
Adding a Destination (Address Book) .................................................................................................... |
2-14 |
Adding a Destination on One Touch Key ............................................................................................... |
2-24 |
2-1

Before Using the Fax Machine > Part Names and Functions
Part Names and Functions
Machine
This chapter explains the names of parts when the machine is used as a fax machine. For the parts required when functions other than FAX are used, refer to the machine’s Operation Guide.
3


 4 1
4 1 


2
1 |
Operation panel |
Perform the fax operation with this panel. |
|
|
|
2 |
Power switch |
Set this switch to the ON side when performing the fax or copier operation. |
|
|
|
3 |
LINE connector |
Connect the modular cord for the telephone line to this connector. |
|
|
|
4 |
TEL connector |
When using a commercially available telephone set, connect the modular cord to this |
|
|
connector. |
|
|
|
IMPORTANT
You cannot automatically receive a fax when the power switch is turned off.
2-2

Before Using the Fax Machine > Part Names and Functions
Document Processor (DP)
5 6
9 |
7 |
|
|
|
8 |
5 |
Top Cover |
Open this cover when the original jammed in the Document Processor. |
|
|
|
6 |
Original Width Guides |
Adjust these guides according to the original width. |
|
|
|
7 |
Original Table |
Stack the sheet originals on this table. |
|
|
|
8 |
Original Eject Table |
Read originals are ejected onto this table. |
|
|
|
9 |
Open/Close Handle |
Hold this handle when opening or closing the Document Processor. |
|
|
|
2-3

Before Using the Fax Machine > Part Names and Functions
Operation Panel
Displays the Status/Job
Cancel screen.
Displays the Document
Box screen.
Displays the System
Menu/Counter screen.
Displays the Copy screen.
Displays the screen for sending. You can change it to display the Address Book screen.
Displays the FAX screen.
Displays the function menu for copy, print, transmission and document box.
Increments or decrements numbers, or selects menu in the message display. In addition, moves the cursor when entering the characters
Finalizes a function or menu, and numbers that have been entered.
Returns to the previous display.
Message display.
Displays the setting menu, machine status, and error messages.
Numeric keys.
Enter numbers and symbols.
Clears entered numbers and characters.
Returns settings to their default states.
Cancels or pauses the job in progress.
Starts copying and scanning operations and processing for setting operations.
Displays the Address Book screen.
Calls the previous destination. Also used to enter a pause when entering a FAX number.
Confirms the destination or adds a destination.
Switches between on-hook and off-hook when manually sending a FAX.
Recalls the destination registered for One Touch Keys.
Select Key: Selects the menu displayed at the bottom of the message display.
Processing: Blinks while printing or sending/receiving.
Memory: Blinks while the machine is accessing the machine memory, fax memory or USB memory (general purpose item).
Attention:Lights or blinks when an error occurs and a job is stopped.
Used to register or recall programs.
Puts the machine into Sleep Mode. Recovers from Sleep if in Sleep Mode.
Authenticates user switching, and exits the operation for the current user (i.e. log out).
2-4

Before Using the Fax Machine > Part Names and Functions
Operation Method
This section explains how to operate the setting menus on the message display.
Displaying the Menus and Configuring Settings
Press the [System Menu/Counter] key, or [Function Menu] key to display the setting menus. Press the [▲] key, [▼] key, [◄] key, [►] key, [OK] key, or [Back] key to select a menu, and perform settings.
Ready to send. |
Ready to send. |
||
2013/08/08 10:10 |
2013/08/08 10:10 |
||
Off |
200x100dpi |
Off |
200x100dpi |
Quiet |
FAX Res. |
Quiet |
FAX Res. |
Normal screen |
|
|
|
|
|
|
|
Press the [System Menu/Counter] key, |
||||||||||||||||||||||||||||||||||||||
|
|
|
|
|
|
|
[Function Menu] key, or function keys to |
|||||||||||||||||||||||||||||||||||||||
|
|
|
|
|
|
|
|
|
|
|
|
|
|
|
|
|
|
|
|
|
|
display the setting menus. |
||||||||||||||||||||||||
|
|
|
|
|
|
|
|
|
|
|
|
|
|
|
|
|
|
|
|
|
|
|
|
|
|
|
|
|
|
|
|
|
|
|
|
|
|
|
|
|
|
|
|
|
|
|
|
|
|
|
|
|
|
|
|
|
|
|
|
|
|
|
|
|
|
|
|
|
|
|
|
|
|
|
|
|
|
|
|
|
|
|
|
|
|
|
|
|
|
|
|
|
|
Setting menus |
|
|
|
|
|
|
|
|
|
|
|
|
|
|
The directions of usable arrow keys |
|||||||||||||||||||||||||||||||
|
|
|
|
|
|
|
|
|
|
|
|
|
|
|
|
|
|
|
|
|
|
|
|
|
|
|
|
|
are shown on the screen displayed. |
|||||||||||||||||
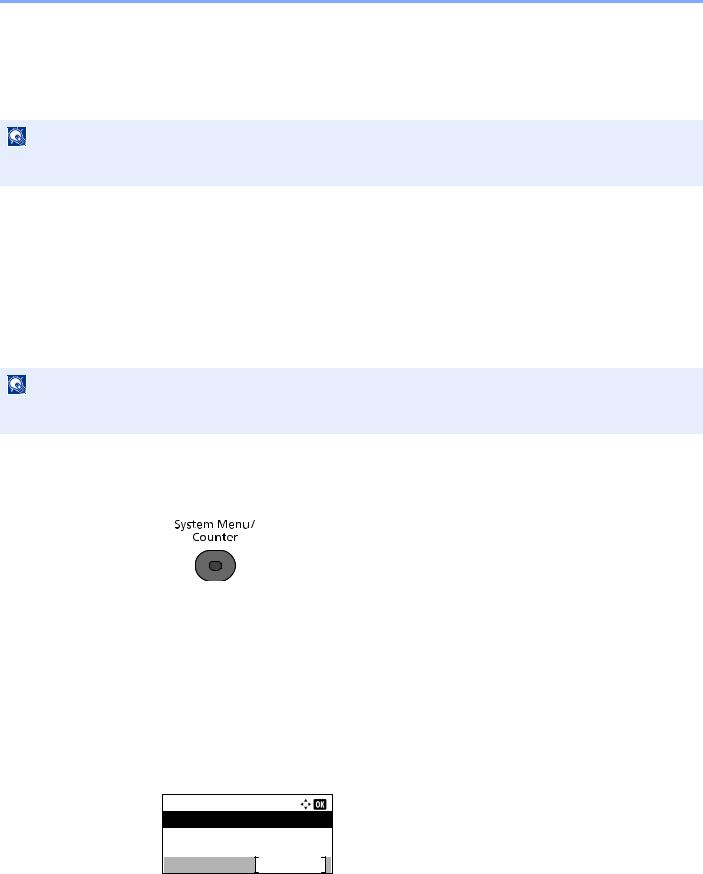
Sys. Menu/Count.:
01 |
Report |
02 |
Counter |
03 |
System/Network |
Exit
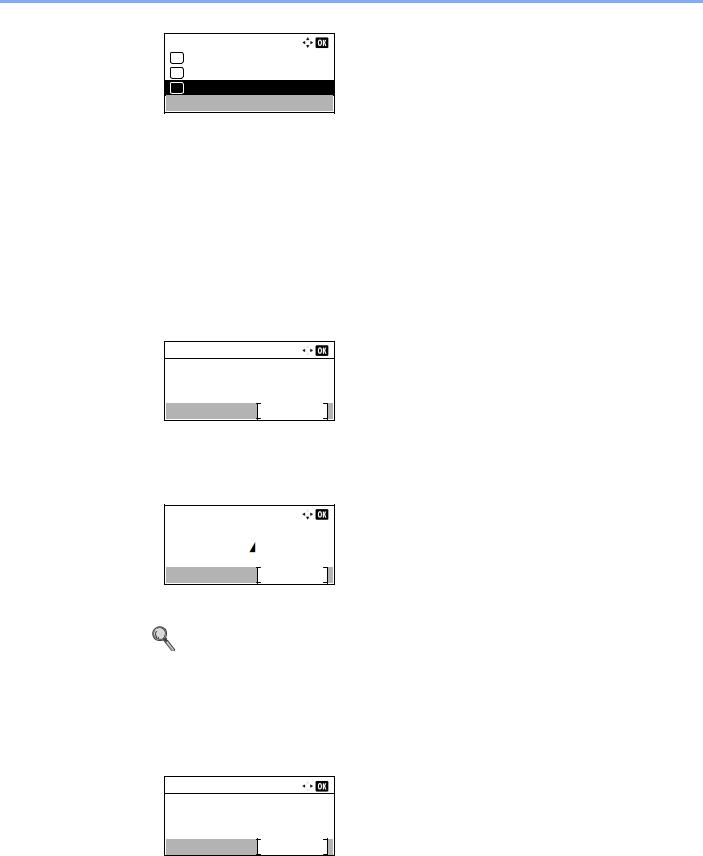
Sys. Menu/Count.:
04 User/Job Account
05 User Property
06 Common Settings
Exit
When the [▲] or [▼] key is pressed, the selection moves line by line.
When the [◄] or [►] key is pressed, the selection moves in units of one page.
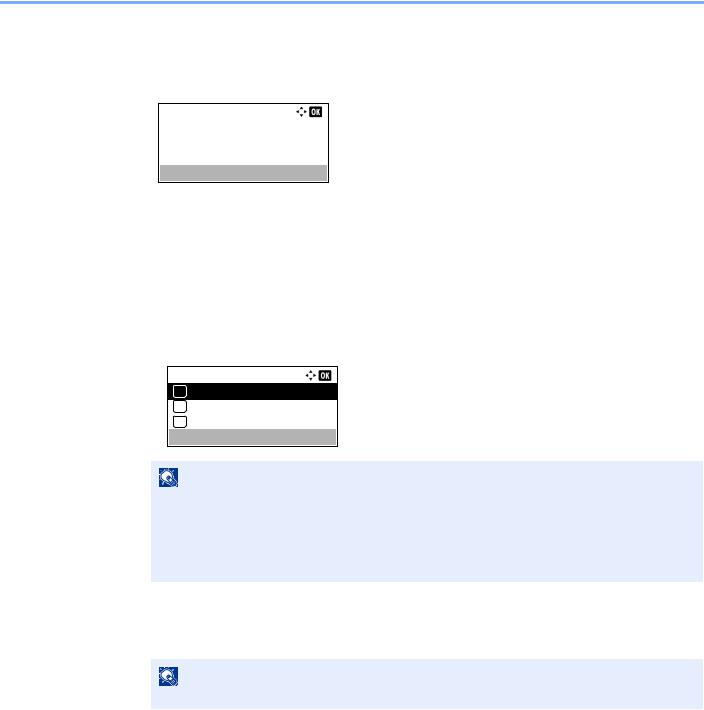
When [OK] is displayed, press the [OK] key to confirm the selection.
Press the [OK] key to display the selected menu.
The selected item is displayed with [*] (asterisk) at the beginning.
Sys. Menu/Count.:
01 Report
02 Counter
03 System/Network
Canceling the menu operation
When [Exit] is displayed, press [Exit] to exit the setting menu and return to the normal screen.
When other function keys are pressed, the menu operation is canceled and the screen of the corresponding function appears.
When the [▲] or [▼] key is pressed, the selection moves line by line.
Common Settings:
01 Language
02 Default Screen
03 Sound
Exit
Language: |
|
|
English |
|
Deutsch |
03 |
Francais |
Language: |
Press the [Back] key to return to the screen one level higher.
Press the [OK] key to confirm the selected setting.
2-5

Before Using the Fax Machine > Setting Date and Time
Setting Date and Time
Set the local date and time at the place of installation.
When you send a fax using the transmission function, the date and time as set here will be printed in the header of the fax. Set the date, time and time difference from GMT of the region where the machine is used.
NOTE
Be sure to set the time difference before setting the date and time.
If the login user name entry screen appears during operations, log in by referring to the machine's Operation Guide for Administrator User Name and Password.
The factory default login user name and login password are set as shown below.
|
Login User Name |
Login Password |
|
|
|
|
4000 |
4000 |
|
|
|
1 Display the screen. |
|
|
1Press the [System Menu/Counter] key.
2Press the [▲] or [▼] key to select [Common Settings].
3Press the [OK] key.
4Press the [▲] or [▼] key to select [Date Setting].
5Press the [OK] key.
2 Set the time difference.
1Press the [▲] or [▼] key to select [Time Zone].
2Press the [OK] key.
3Press the [▲] or [▼] key to set the time zone.
4Press the [OK] key.
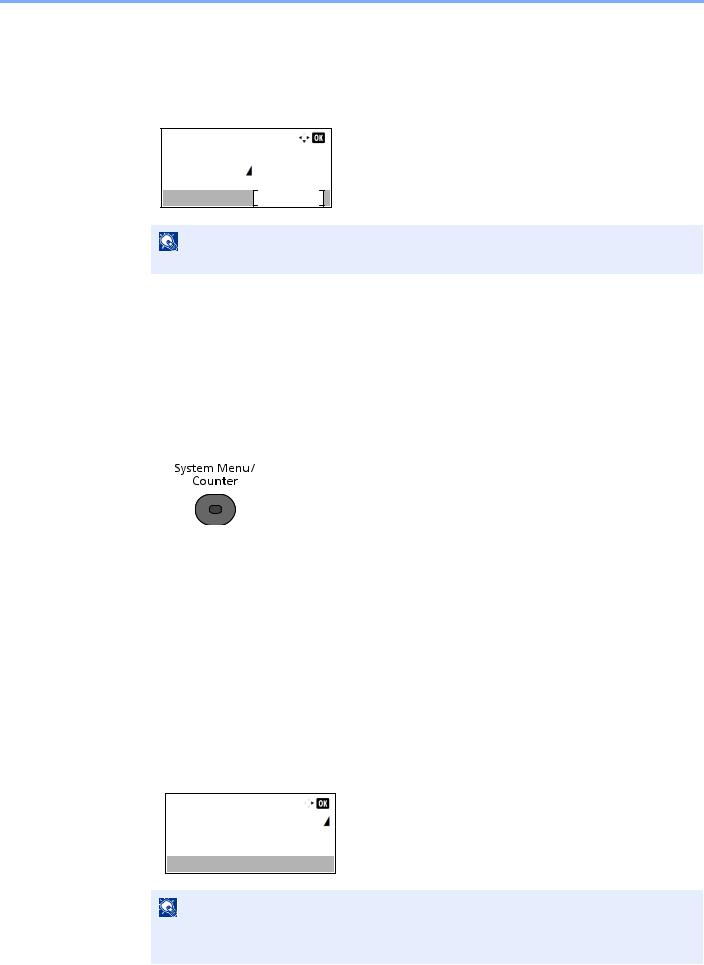
3 Set the date and time.
1Press the [▲] or [▼] key to select [Date/Time].
2Press the [OK] key.
3Press the [▲] or [▼] key to set the year, month, and day. Press the [◄] and [►] key to move the cursor right and left.
Date/Time:
Year Month Day
2013 01 01
(Time Zone:Pfic Time )
2-6
Before Using the Fax Machine > Setting Date and Time
4Press the [OK] key.
5Press the [▲] or [▼] key to set the hour, minute, and second. Press the [◄] and [►] key to move the cursor right and left.
Date/Time: |
Second |
||
Hour |
Min. |
||
10 |
: |
10: |
50 |
(Time Zone:Pfic Time )
6 Press the [OK] key.
4 Set the Date Format.
1Press the [▲] or [▼] key to select [Date Format].
2Press the [OK] key.
3Press the [▲] or [▼] key to select the display format of year, month, and date.
Date Format:
01*Month/Day/Year
02 Day/Month/Year
03 Year/Month/Day
NOTE
The following date formats are available.
•[Month/Day/Year]
•[Day/Month/Year]
•[Year/Month/Day]
4 Press the [OK] key.
5 Set the Summer Time.
NOTE
Summer Time can be set according to the region set in Time Zone.
1Press the [▲] or [▼] key to select [Summer Time].
2Press the [OK] key.
3Press the [▲] or [▼] key to select [On] or [Off].
4Press the [OK] key.
2-7
Before Using the Fax Machine > Local FAX Information Entry
Local FAX Information Entry
Register the local FAX information below.
TTI (Transmit Terminal Identification)
Select whether or not to print the local fax information on the fax on the receiving system.
1 Display the screen.
1Press the [System Menu/Counter] key.
2Press the [▲] or [▼] key to select [FAX].
3Press the [OK] key.
4Press the [▲] or [▼] key to select [Transmission].
5Press the [OK] key.
6Press the [▲] or [▼] key to select [TTI].
7Press the [OK] key.
2 Set the TTI.
1Press the [▲] or [▼] key to select the desired location for printing the information or [Off] if you don't want to print it.
2Press the [OK] key.
Local FAX Name
Register the local fax name printed on the fax on the receiving system.
1 Display the screen.
1Press the [System Menu/Counter] key.
2Press the [▲] or [▼] key to select [FAX].
3Press the [OK] key.
4Press the [▲] or [▼] key to select [Transmission].
5Press the [OK] key.
6Press the [▲] or [▼] key to select [Local FAX Name].
2-8
Before Using the Fax Machine > Local FAX Information Entry
7 Press the [OK] key.
2 Set the Local FAX Name
1 Use the numeric keys to enter the local fax name.
Local FAX Name:
Sales department
Common SettingsABC
Text
NOTE
Refer to Character Entry Method on page 10-2 for details on entering characters.
2 Press the [OK] key.
Local FAX Number
Enter the local fax number to be printed on the fax on the receiving system.
1 Display the screen.
1Press the [System Menu/Counter] key.
2Press the [▲] or [▼] key to select [FAX].
3Press the [OK] key.
4Press the [▲] or [▼] key to select [Transmission].
5Press the [OK] key.
6Press the [▲] or [▼] key to select [Local FAX Number].
7Press the [OK] key.
2 Local FAX Number Entry
1 Use the numeric keys to enter the local fax number.
Local FAX Number: 0123456789
NOTE
Up to 20 digits can be entered as the local fax number.
Press the [*/.] keys on numeric keys to enter "+".
2 Press the [OK] key.
2-9
Before Using the Fax Machine > Local FAX Information Entry
Local FAX ID
Enter the local fax ID. The local fax ID can limit other parties with which you can communicate. The Local FAX ID is used for transmission limit purposes. (Refer to Transmission Restriction on page 8-9.)
1 Display the screen.
1Press the [System Menu/Counter] key.
2Press the [▲] or [▼] key to select [FAX].
3Press the [OK] key.
4Press the [▲] or [▼] key to select [Transmission].
5Press the [OK] key.
6Press the [▲] or [▼] key to select [Local FAX ID].
7Press the [OK] key.
2 Local FAX ID Number Entry
1 Press the [▲] or [▼] key or numeric keys to enter the four-digit local FAX ID number.
Local FAX ID:
(0000 - 9999)
0000
2 Press the [OK] key.
FAX Dialing Mode
Select the dialing mode according to the line type.
NOTE
This setting does not appear in some regions.
1 Display the screen.
1Press the [System Menu/Counter] key.
2Press the [▲] or [▼] key to select [FAX].
3Press the [OK] key.
4Press the [▲] or [▼] key to select [Transmission].
2-10

Before Using the Fax Machine > Local FAX Information Entry
5Press the [OK] key.
6Press the [▲] or [▼] key to select [FAX Dialing Mode].
7Press the [OK] key.
2 Set the FAX Dialing Mode.
1 Press [▲] or [▼] to select [Tone(DTMF)] or [Pulse(10pps)].
FAX Dialing Mode:
01*Tone(DTMF)
02 Pulse(10pps)
2 Press the [OK] key.
ECM TX
Set whether ECM TX is performed. ECM is a communication mode specified by the ITU-T (International Telecommunication Union) that retransmits data when an error occurs. Fax machines that have ECM mode check for errors as they communicate, preventing distortion of the image due to noise on the line and other conditions.
NOTE
When there is a large amount of noise on the line, communication may take slightly longer than when [Off] is selected.
1 Display the screen.
1Press the [System Menu/Counter] key.
2Press the [▲] or [▼] key to select [FAX].
3Press the [OK] key.
4Press the [▲] or [▼] key to select [Transmission].
5Press the [OK] key.
6Press the [▲] or [▼] key to select [ECM TX].
7Press the [OK] key.
2 Configure the settings.
1Press [▲] or [▼] to select [On] or [Off].
2Press the [OK] key.
2-11

Before Using the Fax Machine > Local FAX Information Entry
TX Start Speed
Set the TX Start Speed. When communication conditions are bad, the fax may not be transmitted correctly. In that case, set a lower TX Start Speed.
NOTE
Normally this should be used with the default setting.
1 Display the screen.
1Press the [System Menu/Counter] key.
2Press the [▲] or [▼] key to select [FAX].
3Press the [OK] key.
4Press the [▲] or [▼] key to select [Transmission].
5Press the [OK] key.
6Press the [▲] or [▼] key to select [TX Start Speed].
7Press the [OK] key.
2 Configure the settings.
1 Press [▲] or [▼] to select [9600bps], [14400bps] or [33600bps].
TX Start Speed:
01 9600bps
02 14400bps
03*33600bps
2 Press the [OK] key.
2-12

Before Using the Fax Machine > Local FAX Information Entry
PBX Setting (Europe only)
When using this machine in environment in which PBX for connection to multiple phones for business use is installed, perform the following PBX setting.
NOTE
Before connecting this machine to PBX, it is recommended to contact the company that installed the PBX system to request connection of this machine. Note that correct operation cannot be guaranteed in environment in which this machine is connected to PBX because the functions of this machine may be restricted.
Item |
Setting value |
Description |
|
|
|
Exchange Select. |
PSTN |
Use when connecting this machine to a public switched |
|
|
telephone network (default). |
|
|
|
|
PBX |
Use when connecting this machine to PBX. |
|
|
|
Dial No. to PSTN |
0-9 |
Set a number to access an outside line. For the number, |
|
00-99 |
contact the PBX administrator. |
|
|
|
For more information about configuring settings, refer to Service Setting on page 8-8.
2-13
Before Using the Fax Machine > Registering Destinations in the Address Book
Registering Destinations in the Address Book
Save frequently used destinations to the Address Book or One Touch Keys. The saved destinations can be changed. The destinations are available for Send as E-mail, Send to Folder, and Fax Transmission.
NOTE |
Contact addresses can also be registered with Embedded Web Server RX. For details, refer to the machine’s |
Operation Guide. |
Adding a Destination (Address Book)
Add a new destination to the Address Book. There are two registering methods, contacts and groups. When adding a group, enter the group name and select group members from the Address Book.
Adding a contact
A maximum of 200 contact addresses can be registered. Contact name, fax number, sub address communication, encryption, transmission start speed, and ECM can be registered for each destination.
NOTE
If user login administration is enabled, you can only edit destinations in the Address Book by logging in with administrator privileges.
1 Display the screen.
1Press the [System Menu/Counter] key.
2Press the [▲] or [▼] key to select [Edit Destination].
3Press the [OK] key.
4Press the [▲] or [▼] key to select [Address Book].
5Press the [OK] key.
2 Adds a new destination.
1 Press [Menu].
Address Book:
 Sales Department 1
 Sales Group
 Support Department
Menu
2 Press the [▲] or [▼] key to select [Add Address].
2-14
Before Using the Fax Machine > Registering Destinations in the Address Book
Menu:
01 Detail/Edit
02 Delete
03 Add Address
3 Press the [OK] key.
3 Select the registration method.
1Press the [▲] or [▼] key to select [Contact].
2Press the [OK] key.
4 Enter the contact name.
1 Press the [] or [] key to select [Contact Name].
Detail:
Contact Name |
1/ 6 |
Edit
2Press [Edit].
3Enter the destination name.
Contact Name:
Sales department
Common SettingsABC
Text
Up to 32 characters can be entered.
For details on character entry, refer to Character Entry Method on page 10-2.
4 Press the [OK] key.
5 Enter the fax number.
1 Press the [] or [] key to select [FAX Number].
Detail:
 FAX Number: 2/ 6 0123456789
Edit
2 Press [Edit].
2-15

Before Using the Fax Machine > Registering Destinations in the Address Book
3 Enter the fax number.
FAX No. Entry: 0123456789
Detail
Enter the fax number of the receiving system using the numeric keys. Up to 32 digits can be entered as the fax number of the receiving system.
Pressing the [Address Recall/Pause] key adds about three seconds of waiting time during dialing. For example, when dialing the receiving system on an external line, you can use this method to insert a pause before resuming dialing after you dial a specific number.
6 Select transmission settings.
Sub address communication, encrypted transmission, transmission start speed and ECM can be set.
1 Press [Detail].
FAX No. Entry: 0123456789
Detail
2Press [] or [] to select the item to change the settings for and then press [Edit] or [Change].
FAX Detail: |
|
|
|
|
|
Sub Address: |
1/ 6 |
|
|||
1234567890 |
|
|
|
|
|
|
|
Edit |
|
|
|
|
|
|
|
|
|
|
|
|
|
|
|
Item |
Description |
|
|
Sub Address |
Set this to transmit using a Sub Address. For details, refer to Sub Address |
|
Transmission on page 5-20. |
|
|
Encrypted TX |
This is set when using encrypted transmission to send the data. For details, refer |
|
to Using the Encrypted Transmission on page 5-32. |
|
|
TX Start Speed |
This is set to change the transmission start speed. Select the speed from 33,600 |
|
bps, 14,400 bps, and 9,600 bps. |
|
|
NOTE |
|
Normally the default setting should be used. |
|
|
|
|
ECM |
ECM is a communication mode specified by the ITU-T (International |
|
|
Telecommunication Union) that retransmits data when an error occurs. Fax |
|
|
machines that have ECM mode check for errors as they communicate, |
|
|
preventing distortion of the image due to noise on the line and other conditions. |
|
3 Press the [OK] key.
2-16

Before Using the Fax Machine > Registering Destinations in the Address Book
4 Press the [OK] key.
FAX No. Entry: 0123456789
Detail
7 Enter the address number.
1 Press the [] or [] key to select [Address Number].
Detail:
Address Number: 6/ 6
053
Edit
2Press [Edit].
3Enter the address number.
Address Number: 
 (001 - 250)
053
Press the [▲], [▼] key or numeric keys to enter a particular Address Number (001-250). Address Number is an ID for a destination.
4 Press the [OK] key.
8 Register the destination.
1 Press the [OK] key.
Detail:
Address Number: 6/ 6
053
Edit
[Completed.] is displayed and the destination is registered.
2-17
Loading...