

Page 1

Instruction Handbook
DC 2025 | 2035
Scan (N)
Digital Multifunctional
System
Page 2
Operation Guide <Functions Edition>
Click on the button to jump to the desired section.
Using the Scanner Function
Sending Scanned Image Data to Your Computer
Sending Scanned Image Data by Email
Using TWAIN Capabilities
Page 3
Sending Scanned Image Data to Your Computer (Scan to PC)
Create a destination folder in your computer and you can have scanned image data sent directly to that
folder. The flowchart below shows a simple illustration of the steps required up to transmission of the data to
the computer.
For a more detailed explanation of each step, refer to the indicated reference page.
Click on the reference page will take you directly to that page.
Making basic settings
In order to use the Scan to PC function it is necessary to utilize the included utilities and make network
settings and register such information as the sender and destination addresses.
Settings and registration using Address
Editor
See page
3-22
Settings and registration using Address
Book
See page
3-63
Creating destination folders
Scanner File Utility
See page
3-4
Sending scanned image data
Use the scanner to designate a destination and
have scanned image data sent directly to that
location.
i
Settings and registration using an Internet
Web browser
* Network settings as well
as the sender and
destination address
registration procedures
can be accomplished at
the scanner itself. For
information on these
procedures, refer to the
<Setup Edition> of this
Operation Guide.
See page
2-1
Page 4
Sending Scanned Image Data by Email (Send E-mail)
Have scanned image data sent directly by email to a registered email address. The flowchart below shows a
simple illustration of the steps required up to transmission of the email message.
For a more detailed explanation of each step, refer to the indicated reference page.
Click on the reference page will take you directly to that page.
Making basic settings
In order to use the Send E-mail function it is necessary to utilize the included utilities and make network
settings and register such information as the sender and destination addresses.
Settings and registration using Address
Editor
See page
3-22
Settings and registration using Address
Book
See page
3-63
Sending scanned image data
Use the scanner to designate a destination and
have scanned image data sent directly to that
location.
ii
Settings and registration using an Internet
Web browser
* Network settings as well
as the sender and
destination address
registration procedures
can be accomplished at
the scanner itself. For
information on these
procedures, refer to the
<Setup Edition> of this
Operation Guide.
See page
2-1
Page 5
Using TWAIN Capabilities (TWAIN)
Use scanner image data in TWAIN-compatible applications. The flowchart below shows a simple illustration
of the steps required up to scanning of the data using the TWAIN source.
For a more detailed explanation of each step, refer to the indicated reference page.
Click on the reference page will take you directly to that page.
Making basic settings
In order to use the TWAIN source it is necessary
to make certain scanner-related settings.
Settings related to
the TWAIN source
See page
3-95
Starting the scanning operation
Use the TWAIN source to initiate the scanning
operation.
Scanning with
the TWAIN source
iii
See page
3-100
Page 6

Trademark Information
• Microsoft, Windows, Windows NT and Internet Explorer are registered trademarks of Microsoft Corporation of America and other countries.
• Windows Me is a trademark of Microsoft Corporation.
• Ethernet is a registered trademark of Xerox Corporation.
• IBM and IBM PC/AT are trademarks of International Business Machines Corporation of America.
• Adobe and Acrobat are registered trademarks of Adobe Systems Incorporated.
• PaperPort is a registered trademark of ScanSoft Inc. of America and other countries.
All other company and product names contained in this Instruction Handbook are trademarks or registered
trademarks of their respective companies. The designations ™ and ® will not be used in this handbook.
iv
Page 7

Contents
What is the Network Scanning System? .................................................................... 1-1
Sending Scanned Image Data to Your Computer (Scan to PC).................................. i
Sending Scanned Image Data by Email (Send E-mail)............................................... ii
Using TWAIN Capabilities (TWAIN) ............................................................................ iii
Trademark Information ................................................................................................ iv
Contents ...................................................................................................................... v
1-1 Outline .................................................................................................................. 1-2
1-2 Using the Scanner Utilities CD-ROM ................................................................... 1-3
1-2-1 Contents of the CD-ROM ........................................................................ 1-4
(1) Scanner Utilities.............................................................................. 1-5
(2) TWAIN Source................................................................................ 1-6
(3) Documents ..................................................................................... 1-6
(4) Select Language............................................................................. 1-6
1-2-2 On-Line Manual ...................................................................................... 1-7
v
Page 8

1-3 Using the Scanner Function ................................................................................. 1-8
1-3-1 Basic Settings ......................................................................................... 1-12
(1) Original size selection (“Select original size”) ................................. 1-12
(2) Image transmission size selection (“Select sending size”) ............. 1-13
(3) Scanning resolution selection (“Scanning resolution”) ................... 1-13
(4) Original orientation selection (“Orig. set direction”) ........................ 1-14
(5) Image file format selection (“File type”) .......................................... 1-14
1-3-2 Image Quality Settings ............................................................................ 1-15
(1) Scanning density adjustment (“Scanning density”) ........................ 1-15
(2) Original type selection (“Original image quality”) ............................ 1-15
(3) JPEG quality selection (“JPEG level set”) ...................................... 1-15
(4) Color mode selection (“Color mode”) ............................................. 1-16
1-3-3 Other settings.......................................................................................... 1-17
(1) Page separation mode (“Page separation”) ................................... 1-17
(2) Border erase mode (“Erase”).......................................................... 1-18
(3) Output by page function (“Output by page”) ................................... 1-18
(4) Continuous scanning function
(“Continuous scanning”) ................................................................. 1-19
(5) Filing mode (“Auto selection”) ......................................................... 1-19
(6) Default file name (“File name input”) .............................................. 1-19
vi
Page 9

Making Settings from a Web Browser ........................................................................ 2-1
2-1 WebPage Functions ............................................................................................. 2-2
2-2 Index of Objectives ............................................................................................... 2-3
2-3 Cautions ............................................................................................................... 2-4
2-3-1 If you are having trouble connecting to the scanner
from a Web browser… ............................................................................ 2-4
2-3-2 If a message appears which informs you that you can not connect,
such as “Could not open Internet Site XXXXX”... ................................... 2-4
2-3-3 If “Cannot Find Page” appears… ............................................................ 2-4
2-3-4 If a message appears which informs you that access is not allowed,
such as “xxx Access is not allowed”........................................................ 2-4
2-4 Using the WebPage Functions Interface .............................................................. 2-5
2-5 The Home Page ................................................................................................... 2-7
2-5-1 The Top Frame........................................................................................ 2-8
2-5-2 The Menu Frame .................................................................................... 2-9
2-5-3 The Main Frame...................................................................................... 2-10
2-6 System Setting ..................................................................................................... 2-11
2-6-1 Setting Conditions ................................................................................... 2-11
2-6-2 System Basic Setting .............................................................................. 2-12
2-6-3 Scanner Setting ...................................................................................... 2-16
2-6-4 Sender List .............................................................................................. 2-18
vii
Page 10

2-7 Scan to PC Setting ............................................................................................... 2-21
2-7-1 Destination List ....................................................................................... 2-21
2-8 Send E-mail Setting.............................................................................................. 2-28
2-8-1 E-mail Basic Setting ................................................................................ 2-28
2-8-2 Destination List ....................................................................................... 2-31
viii
Page 11

Additional Utilities ........................................................................................................ 3-1
3-1 What Utilities are Included with this Product? ...................................................... 3-2
3-2 Scanner File Utility ............................................................................................... 3-4
3-2-1 What is the Scanner File Utility? ............................................................. 3-4
(1) Preparations ................................................................................... 3-4
(2) Operation Flow ............................................................................... 3-5
3-2-2 Computer Environment ........................................................................... 3-6
3-2-3 Installation and Uninstallation ................................................................. 3-7
(1) Installing the Scanner File Utility .................................................... 3-7
(2) Uninstalling the Scanner File Utility ................................................ 3-8
3-2-4 Initial Dialogue Box for the Scanner File Utility ....................................... 3-9
(1) Accessing the Initial Dialogue Box for the Scanner File Utility ....... 3-9
(2) Contents of the Initial Dialogue Box for the Scanner File Utility ..... 3-10
3-2-5 Destination Folders for Scanned Data .................................................... 3-11
(1) The Setup Dialogue Box................................................................. 3-11
(2) Designating a New Destination Folder for
Receiving Scanned Data ................................................................ 3-13
(3) Changing Settings for a Registered Destination Folder ................. 3-16
(4) Removing a Destination Folder Designation .................................. 3-18
ix
Page 12

3-2-6 Saving Scanned Data as a File............................................................... 3-19
(1) Outline of the Procedure................................................................. 3-19
(2) The File Name ................................................................................ 3-20
(3) The Image Data .............................................................................. 3-21
(4) If an Error Occurs when Writing Data to the Hard Disk… .............. 3-21
x
Page 13

3-3 Address Editor ...................................................................................................... 3-22
3-3-1 The Address Editor ................................................................................. 3-22
3-3-2 Computer Environment ........................................................................... 3-22
3-3-3 Installation and Uninstallation ................................................................. 3-23
(1) Installing the Address Editor ........................................................... 3-23
(2) Uninstalling the Address Editor....................................................... 3-24
3-3-4 Running Address Editor .......................................................................... 3-25
3-3-5 Editing Data Selection screen ................................................................. 3-27
(1) Scanner address settings ............................................................... 3-28
3-3-6 Scanner Search ...................................................................................... 3-30
3-3-7 Password Entry (when connected to the scanner) ................................. 3-32
3-3-8 System Setting ........................................................................................ 3-33
(1) System Basic Setting...................................................................... 3-33
(2) Administrator Tab............................................................................ 3-36
(3) Change Password .......................................................................... 3-37
(4) Default Setting ................................................................................ 3-38
(5) Sender (User) List .......................................................................... 3-40
(6) Registering and editing user information ........................................ 3-42
xi
Page 14

3-3-9 Send E-mail Setting ................................................................................ 3-44
(1) E-mail Basic Setting ....................................................................... 3-44
(2) Destination List (E-mail) ................................................................. 3-46
(3) Registering and Editing Destination Information
(Send E-mail function) .................................................................... 3-48
(4) Registering and Editing Destination Group Information ................. 3-49
3-3-10 Scan to PC Setting.................................................................................. 3-51
(1) Destination List (PC)....................................................................... 3-51
(2) Registering and Editing Destination Information
(Scan to PC function) ..................................................................... 3-53
(3) Registering and editing destination computer group information ... 3-54
3-3-11 Tool Bar ................................................................................................... 3-56
3-3-12 Importing Data from Address Editor ........................................................ 3-57
(1) Importing Address Data into the Sender (User) List
(Send E-mail and Scan to PC functions) ........................................ 3-57
(2) Making the corresponding field settings ......................................... 3-59
(3) Checking Information to be Imported ............................................. 3-60
3-3-13 Address Editor Version Information ........................................................ 3-62
xii
Page 15

3-4 Address Book ....................................................................................................... 3-63
3-4-1 About the Address Book ......................................................................... 3-63
3-4-2 Computer Environment ........................................................................... 3-64
3-4-3 Installation and Uninstallation ................................................................. 3-65
(1) Installing the Address Book ............................................................ 3-65
(2) Uninstalling the Address Book ........................................................ 3-66
3-4-4 Initial Dialogue Box for the Address Book............................................... 3-67
(1) Accessing the Initial Dialogue Box for the Address Book ............... 3-67
(2) Contents of the initial dialogue box for the Address Book .............. 3-68
3-4-5 Destination List Settings ......................................................................... 3-69
(1) Contents of the Address Book Dialogue Box.................................. 3-69
(2) Destination List for the Send E-mail function.................................. 3-71
(3) Registering and editing destination information for
the Send E-mail function ................................................................ 3-73
(4) Registering and editing destination group information
for the Send E-mail function ........................................................... 3-75
(5) Adding destinations to or deleting destinations from
a destination group for the Send E-mail function............................ 3-77
(6) Destination List for the Scan to PC function ................................... 3-79
(7) Registering and editing destination information for
the Scan to PC function .................................................................. 3-81
(8) Registering and editing destination group information for
the Scan to PC function .................................................................. 3-83
xiii
Page 16

(9) Registering or changing password of a destination group
for the Scan to PC function............................................................. 3-85
(10) Adding destinations to or deleting destinations from a
destination group for the Scan to PC function ................................ 3-86
3-4-6 Importing an Address Data File ............................................................... 3-88
(1) Importing from Address Book ......................................................... 3-88
(2) Importing a csv file.......................................................................... 3-90
xiv
Page 17

3-5 TWAIN Source ..................................................................................................... 3-95
3-5-1 TWAIN source......................................................................................... 3-95
3-5-2 Computer Environment ........................................................................... 3-96
3-5-3 Installing the TWAIN source.................................................................... 3-97
3-5-4 Uninstalling the TWAIN source ............................................................... 3-98
3-5-5 Image Data ............................................................................................. 3-99
3-5-6 Scanning an Image ................................................................................. 3-100
(1) Starting the scanning operation at your computer… ...................... 3-100
(2) Starting the scanning operation at the scanner… .......................... 3-100
3-5-7 Main Dialogue Box .................................................................................. 3-101
3-5-8 Changing the Scanner’s IP Address ....................................................... 3-105
3-5-9 Copy Management Setting ..................................................................... 3-107
3-5-10 If You Can’t Connect to the Scanner... .................................................... 3-108
xv
Page 18

Section
1
What is the Network Scanning System?
Page 1-1
Page 19

1-1 Outline
This Network Scanning System enables multiple computers to share the use of a scanner that is connected
to their network. A Scanner Interface Card, Scanner Library CD-ROM and a TWAIN-compatible application
CD-ROM are included as accessories with this product. The Scanner Interface Card should be installed in
the scanner itself and the Scanner Library CD-ROM is for use in the computer(s).
Refer to the User’s Guide included on the TWAIN-compatible application CD-ROM for information regarding
to how to use the TWAIN-compatible application.
This On-Line Manual contains explanations regarding the functions of the utility programs that are included
on the Scanner Library CD-ROM (Scanner File Utility, Address Editor, Address Book and TWAIN Source) as
well as the procedures for making scanner-related settings from a Web browser.
For more information on using the scanner itself, refer to the Scanner Set-up Edition of the Operation Guide
for your scanner.
Page 1-2
Page 20

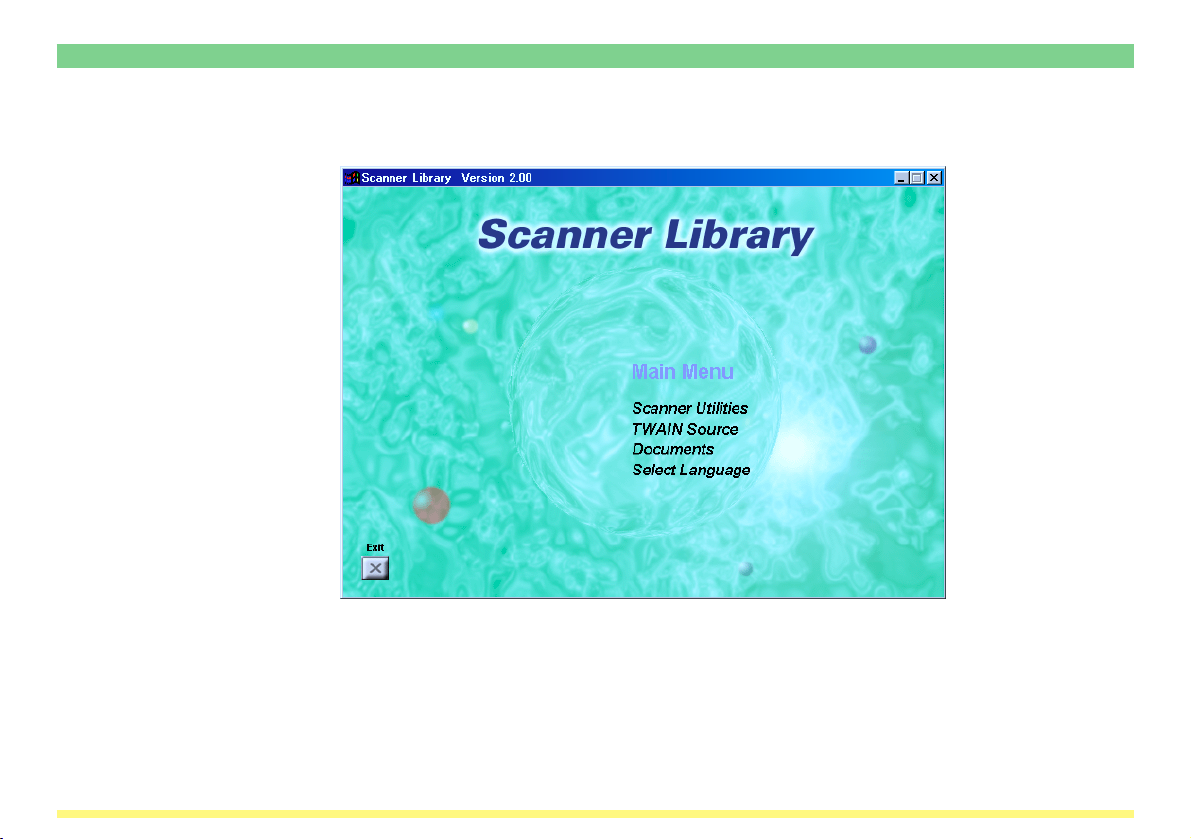
1-2 Using the Scanner Utilities CD-ROM
Included on the Scanner Utilities CD-ROM is the 4 other scanner utilities (Scanner File Utility, Address
Editor, Address Book and TWAIN source) as well as an On-Line Manual. In order to use this Network
Scanning System, it will be necessary for you to install the TWAIN source and other scanner utilities from
the CD-ROM onto an appropriate computer.
The following describes the procedure to access the Main Menu on the Scanner Utilities CD-ROM.
1. Insert the Scanner Utilities CD-ROM that is included with this product into the CD-ROM drive of the
computer.
2. If the “Auto Run” function is turned on in the computer, the Main Menu screen for the Scanner Utilities
CD-ROM will appear automatically.
* If the “Auto Run” function is turned off, double-click on the Setup.exe file that is on the CD-ROM to run
that file. The Main Menu screen for the Scanner Utilities CD-ROM will appear.
Page 1-3
Page 21
1-2 Using the Scanner Utilities CD-ROM
1-2-1 Contents of the CD-ROM
The contents of the Scanner Utilities CD-ROM that you can access are displayed as selectable items in the
Main Menu screen.
Page 1-4
Page 22

1-2 Using the Scanner Utilities CD-ROM
The following offers a basic outline of each of these available items. Click on the desired item to access it.
(1) Scanner Utilities
• Address Editor
This item installs the “Address Editor” in the computer. Using this utility enables you to register or edit the
contents of the scanner’s Address Book (shared Address Book). This utility is used by the administrator in
order to manage that Address Book. If there are multiple scanners accessing the Address Editor, the same
destination list can be easily registered into all of these scanners. Network settings as well as scanner
default settings can also be made using the Address Editor utility. This utility should be installed in one
computer on the same network as the scanner. (Refer to page 3-22.)
• Scanner File Utility
This item installs the “Scanner File Utility” in the computer. Using this utility enables you to have scanned
image data sent from the scanner to a network computer, with the resulting file then compressed and
saved into the designated folder on that computer. If there are going to be multiple destination computers
designated for reception of such data, this utility should be installed in each of those computer. (Refer to
page 3-4.)
• Address Book
This item installs the “Address Book” in the computer. Using this utility enables you to create and use your
own personal destination list. By selecting the [Private book] tab on the scanner’s operation panel, the
personal Address Book that you are allowed to use will be displayed and you will be able to select the
desired destinations from that data. This utility should be installed in each computer on the same network
that will use the scanner. (Refer to page 3-63.)
Page 1-5
Page 23

1-2 Using the Scanner Utilities CD-ROM
(2) TWAIN Source
This item installs the “TWAIN Source” in the computer. Once this driver is installed, you will be able to
operate the scanner and use the scanned image data right away using a TWAIN-compatible application on
the computer in which the TWAIN source is installed. If there are going to be multiple computers using this
capability, the TWAIN source should be installed in each of those computers. (Refer to page 3-95.)
(3) Documents
This item allows you to view the On-Line Manual for the software that is included on the Scanner Utilities
CD-ROM (Refer to page 1-7.)
(4) Select Language
This item lets you select the language that you want to be used on-screen.
Page 1-6
Page 24

1-2 Using the Scanner Utilities CD-ROM
1-2-2 On-Line Manual
The On-Line Manual that is on this Scanner Utilities CD-ROM is prepared in a PDF (Printer Description File)
format and can only be viewed using the Adobe Acrobat Reader application.
Thus, prior to reading the On-Line Manual, you will first need to install Adobe Acrobat Reader on your
computer. (The Adobe Acrobat Reader installer application is included on the CD-ROM as well.)
IMPORTANT! Adobe Acrobat Reader should be used in accordance with the contract conditions
set forth by Adobe Systems Incorporated.
Page 1-7
Page 25
1-3 Using the Scanner Function
The following gives an explanation of the scanning functions of your copier. Make the appropriate settings
according to your scanning needs.
For more detailed information regarding the setting procedures for the functions in each different scanner,
refer to the <Setup Edition> of your Operation Guide.
Basic settings
Select original size
Input size
Select sending
size
Scanning
resolution
Orig. set direction
File type
Selects the available original sizes (scanning area).
Selects the desired scanning area based on the entered
original size.
Selects the available image transmission sizes (size of
the transmitted image).
Sets the desired level of fineness (resolution) at which
the original will be scanned.
Specifies the position of the top edge of the original once
the original is set.
Sets the desired format of the image file.
Page 1-8
See page
1-12
See page
1-12
See page
1-13
See page
1-13
See page
1-14
See page
1-14
Page 26
1-3 Using the Scanner Function
Image quality settings
Scanning density
Original image
quality
JPEG level set
Color Mode
Adjusts the density of the scanned image to a desired
value.
Sets the appropriate image quality mode in order to have
the image processed according to the specific type of
original being scanned.
Sets the desired JPEG quality level.
Sets the desired color mode.
See page
1-15
See page
1-15
See page
1-15
See page
1-16
Page 1-9
Page 27
1-3 Using the Scanner Function
Other settings
Page separation
Erase
Output by page
Continuous
scanning
Auto selection
File name input
With this mode, the two facing pages of an open-faced original such as a magazine, book or the like, as well as the two
sides of a 2-sided original, can each be scanned separately.
With this mode, you can erase the dark shadows and lines
that appear when scanning originals such as books,
magazines, etc.
With this mode, the original is scanned and a file is created
and sent for each individual page of the scanned original.
After scanning one original, other originals can be scanned
under the same job.
With this mode, originals of different sizes can be set and
scanned together.
Designate the file name.
See page
1-17
See page
1-18
See page
1-18
See page
1-19
See page
1-19
See page
1-19
Page 1-10
Page 28
1-3 Using the Scanner Function
Note Available function symbols
Some functions can or can not be used depending on the transmission mode that is selected or
the type of copier in use. The following symbols indicate the transmission modes and types of
copiers under which that particular function can be used.
Transmission mode symbols
Send to PC .....................................................................
Send E-Mail ....................................................................
TWAIN (the Waiting Scan checkbox is selected) ..........
Symbols for functions that are only available in monochrome or color copiers.
For monochrome copiers only ........................................
For color copiers (color & monochrome) only .................
Page 1-11
Page 29
1-3 Using the Scanner Function
1-3-1 Basic Settings
(1) Original size selection
(“Select original size”)
The original sizes (scanning area) available for selection are as follows.
• Inch specifications: Auto, 11" x 17", Computer Form (11" x 15"), 8-1/2" x 14", 8-1/2" x 11" and 5-1/2" x 8-1/2"
* A4 is also available in monochrome copiers.
• Metric specifications: Auto, A3, Computer Form (11" x 15"), B4, Folio, A4, B5, A5 and B6
* 11" x 8-1/2" is also available in monochrome copiers.
* Factory default setting: Auto
• Custom original size (“Input size”)
Align the original with the left-rear portion of the platen and select the desired scanning area.
Acceptable scanning area ..... Length: 50 mm – 297 mm
Width: 50 mm – 432 mm
* The original size cannot be entered manually when using an optional Document Processor.
Page 1-12
Page 30
1-3 Using the Scanner Function
(2) Image transmission size selection
(“Select sending size”)
The image transmission sizes (size of the transmitted image) available for selection are as follows.
• Inch specifications: Auto, 11" x 17", 8-1/2" x 14", 8-1/2" x 11" and 5-1/2" x 8-1/2"
* A4 is also available in monochrome copiers.
• Metric specifications: Auto, A3, B4, Folio, A4, B5, A5 and B6
* Factory default setting: Auto
* 11" x 8-1/2" is also available in monochrome copiers.
* This setting is not available when the original size is custom selected.
* When you select a scanning resolution of 600 dpi, it is not possible to select an image transmission size
larger than the original size.
* If the width of any black and white original (any originals other than those containing color or grayscale)
that is being scanned is larger than 13-5/8" (346 mm) and the selected resolution is 600 dpi, the image
data will be rotated 90 degrees.
(3) Scanning resolution selection
(“Scanning resolution”)
Sets the desired level of fineness (resolution) at which the original will be scanned. The higher the resolution
value is, the finer the image will be. In this case, however, the size of the resulting file (data volume) will
become larger and the scanning time will be increased.
•“600 dpi”, “400 dpi”, “300 dpi” or “200 dpi”
* The image resolution that is generally used for viewing on computer screens is 96 dpi for a Windows
environment and between 150 dpi and 600 dpi for printing.
* A high scanning resolution needs to be selected when enlarging or printing an image.
Page 1-13
Page 31

1-3 Using the Scanner Function
(4) Original orientation selection
(“Orig. set direction”)
Specifies the position of the top edge of the original once the original is set.
•“Back Edge” or “Left top corner”
* If the original set direction is not selected, the scanning may not be performed correctly.
(5) Image file format selection (“File type”)
Sets the desired format of the image file.
Monochrome copiers “Black & White” ..... TIFF, PDF
“Full Color” .............................................. JPEG, PDF-JPEG, TIFF-JPEG
“Gray” ...................................................... JPEG, PDF-JPEG, TIFF-JPEG
Page 1-14
Page 32

1-3 Using the Scanner Function
1-3-2 Image Quality Settings
(1) Scanning density adjustment
(“Scanning density”)
Adjusts the density of the scanned image to a desired value. (This setting will also affect the density of the
machine’s copier functions.)
•“Original Image Type” (manual switching)
•“ACS Adjustment”
* “ACS Adjustment” is only selectable under the “Black & White” mode.
(2) Original type selection
(“Original image quality”)
Sets the appropriate image quality mode in order to have the image processed according to the specific
type of original being scanned.
Photo mode ........................... Select this mode when the original contains mostly photographs.
* This setting is not available in the Send E-mail function.
Text+Photo mode .................. Select this mode when the original contains a mixture of both text and
photographs.
Text mode .............................Select this mode when the original contains mostly text.
OCR mode ............................ Select this mode when creating image data that will be used with OCR (Optical
Character Recognition) software for converting the characters into text data.
(3) JPEG quality selection (“JPEG level set”)
Sets the desired JPEG quality level.
1 .......... “Low” 4
2 5 ......... “High”
3 .......... “Middle”
The higher the image quality is, the larger the resulting file size (data volume) will become. Be sure to select
the file type when you set the JPEG quality level.
Page 1-15
Page 33

1-3 Using the Scanner Function
(4) Color mode selection
(“Color mode”)
Sets the desired color mode.
•“A.C.S” (Auto Color System) ... Automatically determines whether the original is a black and white or a
•“Full Color” .............................. Performs full color scanning.
•“Black & White” ....................... Performs monochrome scanning.*
*1: When a function other than those bearing the symbol [B/W] has been selected for the transmission
mode, scanning will be performed in grayscale (8 bit).
color original and selects the appropriate mode for scanning.
1
Page 1-16
Page 34

1-3 Using the Scanner Function
1-3-3 Other settings
(1) Page separation mode
(“Page separation”)
With this mode, the two facing pages of an open-faced original such as a magazine, book or the like, as well
as the two sides of a 2-sided original, can each be scanned separately.
“1 side” ..... Select this setting when you want to scan only one side of the original.
“2 side” ..... Select this setting when you want to scan the front and back sides of two-sided originals as
separate images.
•“Left/Right”•“To p”
* When using originals where the top and bottom are reverse on the front and back sides
(“To p”), the image for the back side of the original will be rotated by 180 degrees before
scanning.
* An optional Document Processor is required for page separation of 2-sided originals.
* When setting the original, make sure that the positioning of the top edge is correct.
“Book” ...... Select this setting when you want to scan the two facing pages of an open-faced original such
as a magazine, book or the like into separate page data.
• Binding direction: Select here the direction that the book-type original is opened. For example,
if “Left” is selected, the left page will be scanned first and then the right page.
•“Right”•“Left”
* Set book-type originals with their top edge towards the rear of the scanner.
* When using book-type originals, only 11" x 8-1/2", 11" x 17"R, B5R, B4, A5R, A4R
and A3 size originals and 8-1/2" x 5-1/2", 11" x 8-1/2", B6, B5 and A4 transmission
sizes can be used with the page separation mode.
When using a color copier, only 11" x 8-1/2"R, 11" x 17"R, B5R, B4, A5R, A4R and
A3 size originals and 8-1/2" x 5-1/2", 11" x 8-1/2", B6, B5, A5 and A4 transmission
sizes can be used with the “Full Color” or “Gray” modes.
Page 1-17
Page 35

1-3 Using the Scanner Function
(2) Border erase mode (“Erase”)
With this mode, you can erase the dark shadows and lines that appear when scanning originals such as
books, magazines, etc.
•“Sheet Erase” ......... Select this setting when you want to erase the surrounding border of the original.
Border
•“Book Erase” .......... Select this setting when you want to erase the surrounding border as well as the
center line of the original.
Border Center
* It is possible for you to select the size of the border that will be erased.
(3) Output by page function (“Output by page”)
With this mode, the original is scanned and a file is created and sent for each individual page of the scanned
original.
If this function is set to “off” when scanning multiple originals, all of the originals will be scanned and saved
into a single file.
Page 1-18
Page 36

1-3 Using the Scanner Function
(4) Continuous scanning function
(“Continuous scanning”)
After scanning one original, other originals can be scanned under the same job. When this function is turned
ON, each time an original is scanned a screen will appear to ask you whether to continue scanning other
originals or not.
* This function can be used when the “Waiting Scan” checkbox is selected for scanning an image using a
TWAIN compatible application.
(5) Filing mode (“Auto selection”)
With this mode, originals of different sizes can be set and scanned together during continuous scanning
(refer to “(4) Continuous scanning function” above) from an optional Document Processor. The following
combinations of original sizes can be used in this mode.
• 11" x 17" and 11" x 8-1/2"
• A3 and A4
• B4 and B5
(6) Default file name (“File name input”)
In the initial mode, the default file name will be set automatically. Change the file name manually as
necessary.
* This function is only available with scanners that possess a touch panel.
<Example>
Page 1-19
Page 37

Section
2
Making Settings from a Web Browser
Page 2-1
Page 38

2-1 WebPage Functions
The WebPage Functions interface enables the management of certain scanner functions using standard
Internet Web browser software. Performing such tasks as changing network settings and basic scanner
settings, in addition to performing settings related to email and data transmission to a computer and the like,
can be easily accomplished over the network.
IMPORTANT! Cautions before use…
• The Internet Web browser software must be installed in your computer in advance. It is
recommended that you use version 4.0 or later of either Netscape Navigator or Internet Explorer.
• In order to use WebPage Functions, the TCP/IP address of the Scanner Interface Card must be
registered in advance. (Refer to page 2-13.)
Page 2-2
Page 39

2-2 Index of Objectives
The following table lists, by objective, the different settings that are possible using the WebPage Functions
interface. Use this table as a reference index when making the corresponding settings.
Make networkrelated settings
Set the administration password
Change scanningrelated default settings for the scanner
Register the
transmitting site’s
email address
Register the
destination
computer
Register the
destination site’s
email address
Contains explanations on the network-related settings
for the Scanner Interface Card.
Contains explanations on the administration password
that must be entered whenever you access the WebPage
Functions interface.
Contains explanations on settings for scanning images,
such as the type of originals and the scanning resolution.
Contains explanations on registering the transmitting
site’s email address for sending email (scanned data)
from the scanner to the computer.
Contains explanations on registering the destination
computer for sending data from the scanner to the
computer.
Contains explanations on registering the destination site’s
email address for sending email (scanned data) from the
scanner to the computer.
See page
2-13
See page
2-15
See page
2-16
See page
2-18
See page
2-21
See page
2-31
Page 2-3
Page 40

2-3 Cautions
2-3-1 If you are having trouble connecting to the scanner from a Web browser…
2-3-2 If a message appears which informs you that you can not connect, such as
2-3-3 If “Cannot Find Page” appears…
2-3-4 If a message appears which informs you that access is not allowed, such as “xxx
If you are trying to make settings related to the Scanner interface Card or to utilities in the scanner itself
from a Web browser and those settings are not being applied properly regardless of the fact that the
network settings in the scanner itself are correct, turn the power to the scanner off and then back on again.
The Scanner Interface Card will then reboot. This will take a few minutes, so please wait until the reboot is
completed.
“Could not open Internet Site XXXXX”...
Check the following point:
• Is the initial mode screen (“Ready to copy.”) displayed on the scanner?
→ If the initial mode screen is NOT displayed, return to that mode screen.
Check the following point:
• Is the scanner fully up and running?
→ If NOT, wait for awhile before trying to connect again.
Access is not allowed”...
Check the following point:
• Is another operation in progress on the copier-scanner?
→ Confirm that the operation is completed and that the message display has returned to the Select
Scanner Function screen, and then attempt the desired scanning operation again.
Page 2-4
Page 41

2-4 Using the WebPage Functions Interface
1. Start up your Internet Web browser software.
2. Type the IP address or host name of the Scanner Interface Card into the address field.
3. Press the Enter key on your computer keyboard.
4. The home page for WebPage Functions will appear.
* The display will be in English at first, but you can select the language that you want to use. (Refer to
page 2-10.)
Page 2-5
Page 42

2-4 Using the WebPage Functions Interface
5. If the administration password has been registered, the following dialogue box will appear when you
click on one of the setting links in the menu frame, such as System Basic Setting or Scanner Default
Setting. In this case, type in the correct password and click on the OK button.
Page 2-6
Page 43

2-5 The Home Page
The home page is constructed of 3 different frames.
• The top frame ..................... Displays the IP address of the Scanner Interface Card and the status of the
scanner. (Refer to page 2-8.)
The top frame
The menu frame
• The menu frame ................. Allows selection of various settings related to the Scanner Interface Card and
the scanner itself. (Refer to page 2-9.)
• The main frame ..................Displays system information in regard to the scanner. (Refer to page 2-10.)
Page 2-7
The main frame
Page 44

2-5 The Home Page
2-5-1 The Top Frame
The top frame shows the IP address of the Scanner Interface Card and the status of the scanner.
<IP Address>
• Displays the IP address that is registered for the Scanner Interface Card.
<Scanner Status>
• If the scanner is in a “Ready” state, “O OK” will be displayed under Scanner Status.
• If the scanner is not “Ready”, “O OTHER” will be displayed.
* To check the status of the scanner when “O OTHER” is displayed, look under Scanner Status
Information.
* The scanner status will be checked and updated every minute.
Page 2-8
Page 45

2-5 The Home Page
2-5-2 The Menu Frame
The menu frame allows selection of various settings related to the Scanner Interface Card and the scanner
itself.
* You can select each item in the menu frame one after another. However, if you happen to select an item in
the middle of setting that same item, the information that you have already entered will be deleted.
• Home
Select Home when you want to return to the home page while you are accessing the Scanner Interface
Card with your Internet Web browser software.
• System Setting
This item consists of 3 settings which can be performed in relation to the Scanner Interface Card.
• System Basic Setting ............... For making network-related settings.
• Scanner Default Setting ........... For making the default settings for the main functions of the scanner.
• Sender (User) List .................... For registering the list of those users who will be allowed to use the
• Send E-mail Setting
This item consists of 2 basic settings which can be performed in relation to sending email (scanned data).
• E-mail Basic Setting ................. For making basic settings related to sending email (scanned data)
• Destination List (E-mail) .......... For registering destination email addresses
• Scan to PC Setting
Select when you want to make settings related to sending files to the computer where they will be saved.
• Destination List (PC) ................ This item allows you to register destination computers, etc.
network scanning functions (Send E-mail and Send to PC).
Page 2-9
Page 46

2-5 The Home Page
2-5-3 The Main Frame
The main frame displays system information in regard to the scanner. Selecting the language that you want
to use is also accomplished here.
* The registered default values will be displayed during start up of WebPage Functions.
• Scanner Status Information
When “O OTHER” is displayed under Scanner Status on the home page, click on the Refresh button at
the bottom of the screen and the status of the scanner will be displayed here. When “O OK” is displayed
under Scanner Status, “Ready to Scan” will be displayed here.
<Scanner Status>
The following 6 status indications can be received from the scanner: “Ready to Scan”, “Using Scanner”,
“Paper Misfeed in Feeder”, “System Error”, “Processing” and “Energy Save Mode”
• Ethernet Address
Displays the MAC (Medium Access Control) address of the Scanner Interface Card.
• Scanner Firmware
Displays the firmware version of the scanner.
• Network Firmware
Displays the firmware version of the Scanner Interface Card.
• Language
You can select the language that you want to use in WebPage Functions.
Page 2-10
Page 47

2-6 System Setting
Settings for the Scanner Interface Card are performed under the System Setting items. The settings for
each item can only be changed when the scanner is in the “Ready” state.
2-6-1 Setting Conditions
It is necessary for you to enter the administrator’s password in order to access the settings related to either
the Scanner Interface Card or to the scanner itself.
• The administration password can be changed through the Administrator item under System Basic
Setting. There is no password registered in the factory default settings for the Scanner Interface Card.
Page 2-11
Page 48

2-6 System Setting
2-6-2 System Basic Setting
You can make network and administrator-related settings for the Scanner Interface Card here.
IMPORTANT! BE SURE to click on the Registration button after you have completed the desired
settings.
Page 2-12
Page 49

2-6 System Setting
Network
• Host Name
Register the host name of the scanner (up to 32 single-byte characters) in this field.
• IP Address
Register the IP address of the Scanner Interface Card in this field in the following form:
XXX.XXX.XXX.XXX
• Subnet Mask
Register the subnet mask of the Scanner Interface Card in this field in the following form:
XXX.XXX.XXX.XXX
• Default Gateway
Register the default gateway of the Scanner Interface Card in this field in the following form:
XXX.XXX.XXX.XXX
• DHCP/BOOTP
The DHCP and BOOTP can be set to either “DISABLE” or “ENABLE”. The factory default setting is
“ENABLE”.
• RARP
The RARP can be set to either “DISABLE” or “ENABLE”. The factory default setting is “ENABLE”.
• DNS Server (Pri.)
When a Host Name is used for transmitting data under an environment that uses a DNS server, register
the IP address of the primary DNS server in this field in the following form: XXX.XXX.XXX.XXX
Page 2-13
Page 50

2-6 System Setting
• DNS Server (Sec.)
Register the IP address of the secondary DNS server in this field in the following form:
XXX.XXX.XXX.XXX
• DNS Domain Name
Register the domain name (up to 32 characters) in this field.
• WINS Server (Pri.)
When WINS (Windows Internet Name Service) is used to resolve the IP address using the name of the
computer, register the IP address of the primary WINS server in this field in the following form:
XXX.XXX.XXX.XXX
• WINS Server (Sec.)
Register the IP address of the secondary WINS server in this field in the following form:
XXX.XXX.XXX.XXX
• SMTP Server
Register the IP address of the SMTP server in this field in the following form: XXX.XXX.XXX.XXX
• Registration button
Click on this button to have all of the selected settings registered in the Scanner Interface Card.
• Reset button
Click on this button to return all of the settings back to their factory default values.
IMPORTANT! If you go to another screen without clicking on the Registration button, any settings
that have not been properly registered will be deleted and, therefore, will NOT be
registered in the Scanner Interface Card.
Page 2-14
Page 51

2-6 System Setting
Administrator
• E-mail address
Type the email address of the administrator here.
• Change password
If you want to change the administration password, select “Ye s ”. If you do NOT want to change it, select
“No”.
• New Password
If you want to change the administration password, type a new password into this field (up to 8
characters).
* The password that you register here is NOT related to the 4-number password that is required in order to
access the Network screen in the scanner itself.
• Confirm new password
Type the same password as you did in the New Password field in here.
* This procedure is necessary in order to ensure that the password was entered correctly.
• Registration button
Once you type the new administration password into both the New Password and Confirm new
password fields and then click on this button, the new password will be registered in the Scanner
Interface Card.
* If you leave the Confirm new password field blank, or the password that you typed into that field does
not match the password that you typed into the Change admin password field, an error message will
be displayed.
IMPORTANT! BE SURE to click on the Registration button after you set or change the password.
Page 2-15
Page 52

2-6 System Setting
2-6-3 Scanner Setting
Default settings related to scanning in images at the scanner are performed under this item.
You can also make settings related to certain scanning conditions and the default file name (for saving
scanned data).
Page 2-16
Page 53

2-6 System Setting
• Original Type
You can select from among the following 4 original types in order to suit the originals that are actually
being scanned: Photo, Text, Text+Photo and OCR
• Resolution
You can select from among the following 4 scanning resolutions: 600 dpi, 400 dpi, 300 dpi and 200 dpi
• File Type
Sets the file format in which scanned data will be saved: TIFF and PDF
• Continuous scan
You can select whether to perform continuous scanning or not.
Yes/No
• File Name
Sets the file name (up to 16 single-byte characters) for saving scanned data.
Page 2-17
Page 54

2-6 System Setting
2-6-4 Sender List
You can register the list of those users who will be allowed to use the network scanning functions (Send
E-mail and Send to PC).
• Sender (User) List
Click on this item when you want to access the Sender (User) List screen where you can register, confirm
and edit information for up to 40 (Nos. 001 – 020 and Nos. 021 – 040) users.
* If a registration name has already been registered for any number, it will be displayed in the
corresponding text box.
If you click on the number for which you want to register or edit the related information, the Sender (User)
Setting screen will appear and you will be able to perform the desired settings.
IMPORTANT! BE SURE to click on the Registration button after you have completed the desired
settings in the Sender (User) List.
Page 2-18
Page 55

2-6 System Setting
• Sender (User) Setting
• Registration Number
The number that was selected in the Sender (User) List will be displayed here. This is merely information
in order to remind you which number from the list it is that you are registering or editing information for and
this number cannot be edited itself.
• Registration Name
Type the desired registration name into this field. The name registered here will be displayed in the sender
table and in the scanner’s operation panel.
* The registration name can be up to 16 single-byte characters in length.
Page 2-19
Page 56

2-6 System Setting
• E-mail address
The email address of the user can be up to 64 single-byte characters in length.
• Registration button
Click on this button to have all the selected settings registered in the scanner. If you move to the next page
without clicking on the Registration button, any settings that have not been properly registered will be
deleted.
• Reset button
Click on this button to return all of the settings back to their factory default values.
• Delete button
Click on this button to delete the displayed user.
Page 2-20
Page 57

2-7 Scan to PC Setting
You can send scanned image files to a folder on a computer that was designated in advance, when you use
the Scanner Interface Card. This items explains how to register the destination computer.
* Refer to pages 3-3 through 3-20 for an explanation on the functions of the Scanner Delivery Utility.
2-7-1 Destination List
• Destination List (PC)
Click on this item when you want to access the destination address registration screen where you can
register, confirm and edit information for up to 20 (No. 001 to No. 100) destination computers.
* If a registration name has already been registered for any number, it will be displayed in the
corresponding text box.
If you click on the number for which you want to register the destination computer, the Destination PC
screen will appear.
• No.
The registration number is displayed here. Click on the number for which you want to register or edit
information in order to access the corresponding Destination Registration (PC) screen.
Page 2-21
Page 58

2-7 Scan to PC Setting
• Class
The registration type (single or group) is displayed here.
: Displayed for group registration
: Displayed for single registration
• Registration Name
The registered name is displayed here.
IMPORTANT! BE SURE to click on the Registration button after you have completed the desired
settings for the destination PC.
Page 2-22
Page 59

2-7 Scan to PC Setting
• Destination Registration (PC)
You can select the registration type (single registration or group registration).
If you click on the Single Regist. or the Group Regist. button, the corresponding Registration and Editing
screen will appear.
Page 2-23
Page 60

2-7 Scan to PC Setting
• Destination Registration (PC) [Single Registration]
You will be able to register and edit registration names, destination computers and destination “save
numbers” for each folder.
• Registration Number
The number that you selected from the Destination List will be displayed here. This is merely information
in order to remind you which number from the list it is that you are registering or editing information for and
this number cannot be edited itself.
• Registration Name
Type the desired registration name (name of the destination party) into this field. The name registered here
will be displayed in the destination computer table and in the scanner’s operation panel.
* The registration name can be up to 16 single-byte characters in length.
Page 2-24
Page 61

2-7 Scan to PC Setting
• Destination PC
Enter the destination computer’s IP address or host name into this field. If you enter both, the IP address
will normally be accessed prior to the host name.
* The host name can be up to 32 single-byte characters in length.
• Save Number
If you want to designate multiple destination folders in a single computer, enter the corresponding “save
number” of each folder.
* You can designate up to 100 (save numbers “1” to “100”) folders per computer.
• Registration button
Click on this button to have all of the selected settings registered in the scanner. If you move to the next
page without clicking on the Registration button, any settings that have not been properly registered will
be deleted.
• Reset button
Click on this button to return all of the settings back to their factory default values.
• Delete button
Click on this button to delete the displayed destination.
Page 2-25
Page 62

2-7 Scan to PC Setting
• Destination Group Registration (PC)
You will be able to register and edit information for groups of destination computers.
Choose the destinations that you want to register as a group and click on the checkbox next to the desired
number. Type the registration name and password for that group and click on the Registration button to
complete the registration of the destination group.
Page 2-26
Page 63

2-7 Scan to PC Setting
• Registration Number
The number that you selected from the Destination List will be displayed here. This is merely information
in order to remind you which number from the list it is that you are registering or editing information for and
this number cannot be edited itself.
• Change Group Password
Register the group password into this field.
If you want to change the password, select “Ye s ”. If you do NOT want to change it, select “No”.
• New Password
If you want to change the password number, type a new number into this field (up to 8 digits).
• Confirm new password
Type the same password as you did in the New Password field in here.
* This procedure is necessary in order to ensure that the password was entered correctly.
• Registration button
Click on this button to have all the selected settings registered in the scanner. If you move to the next page
without clicking on the Registration button, any settings that have not been properly registered will be
deleted.
• Reset button
Click on this button to return all of the settings back to their factory default values.
• Delete button
Click on this button to delete the displayed group.
Page 2-27
Page 64

2-8 Send E-mail Setting
The following explains the various settings for sending scanned images by email to a computer.
2-8-1 E-mail Basic Setting
Make basic settings related to sending email (scanned data) here.
IMPORTANT! BE SURE to click on the Registration button after you have completed the desired
settings.
1
2
Page 2-28
Page 65

2-8 Send E-mail Setting
• Item
1. Transmission Domain Setting .... Select from among Non-restricted sending, Permitted destination
* If you select Non-restricted sending, there will be no restriction under the Send E-mail function in
regard to the destination domain, and the information registered in the domain data field will be
ignored.
* If you select Permitted destination domain names, sending email via the Send E-mail function will
only be permitted only to the addresses that have a domain matching one of the registered domains.
* If you select Restricted destination domain names, sending email via the Send E-mail function will
NOT be permitted to the addresses that have a domain matching one of the registered domains.
* By using an asterisk (*), you can designate a full range of domains in a single entry.
Example: *.co.jp
2. Domain Data .............................. Register the domain information here.
* Each domain must be separated by a return and can be up to 500 single-byte characters in length.
* Up to 10 domains can be registered.
• Data Size
Designate the maximum image data size for each email sent under the Send E-mail function. Available
settings are: Non-restricted, High (2048 KB), Mid. (1024 KB) and Low (512 KB)
• Subject
Type the subject of the email message (up to 32 single-byte characters) into this field.
• Body
Type the text (content) of the email message into this field (up to 64 single-byte characters).
domain names, and Restricted destination domain names.
Page 2-29
Page 66

2-8 Send E-mail Setting
• Character Code
Designate the character code that will be used in the email message. You can select from among the
following character codes: US-ASCII (English), Shift-JIS (Japanese) and ISO-8859-1 (West Europe)
• Registration button
Click on this button to have all the selected settings registered in the scanner. If you move to the next page
without clicking on the Registration button, any settings that have not been properly registered will be
deleted.
• Reset button
Click on this button to return all of the settings back to their factory default values.
Page 2-30
Page 67

2-8 Send E-mail Setting
2-8-2 Destination List
• Destination List (E-mail)
Click on this item when you want to access the destination address registration screen where you can
register, confirm and edit information for up to 100 (No. 001 to No. 100) destination addresses.
* If a registration name has already been registered for any number, it will be displayed in the
corresponding text box.
If you click on the number for which you want to register the destination address, the Destination
Registration (E-mail) screen will appear.
Page 2-31
Page 68

2-8 Send E-mail Setting
• No.
The registration number is displayed here. Click on the number for which you want to register or edit
information in order to access the corresponding Destination Registration (E-mail) screen.
• Class
The registration type (single or group) is displayed here.
: Displayed for group registration
: Displayed for single registration
• Registration Name
The registered name is displayed here.
IMPORTANT! BE SURE to click on the Registration button after you have completed the desired
settings.
Page 2-32
Page 69

2-8 Send E-mail Setting
• Destination Registration (E-mail)
You can select the registration type (single registration or group registration).
If you click on the Single Regist. or the Group Regist. button, the corresponding Registration and Editing
screen will appear.
Page 2-33
Page 70

2-8 Send E-mail Setting
• Destination Registration (Single)
You will be able to register and edit registration names and destination email addresses for each number.
Page 2-34
Page 71

2-8 Send E-mail Setting
• Registration Number
The number that you selected from the Destination Address List will be displayed here. This is merely
information in order to remind you which number from the list it is that you are registering or editing
information for and this number cannot be edited itself.
• Registration Name
Type the desired registration name (name of the destination party) into this field. The name registered
here will be displayed in the destination list (E-mail) and in the scanner’s operation panel.
* The registration name can be up to 16 characters in length.
• E-mail address
Enter the destination’s email address into this field.
• Registration button
Click on this button to have all of the selected information registered in the scanner. If you do not click on
the Registration button, any information that has not been properly registered will be deleted.
• Reset button
Click on this button to return all of the settings back to their factory default values.
• Delete button
Click on this button to delete the displayed destination.
Page 2-35
Page 72

2-8 Send E-mail Setting
• Destination Group Registration (E-mail)
You will be able to register and edit information for destination groups (E-mail).
Choose the destinations that you want to register as a group and click on the check box next to the
number. Type the registration name and click on the Registration button to complete the registration of
the destination group.
Page 2-36
Page 73

2-8 Send E-mail Setting
• Registration Number
The number that you selected from the Destination List will be displayed here. This is merely information
in order to remind you which number from the list it is that you are registering or editing information for and
this number cannot be edited itself.
• Registration button
Click on this button to have all the selected settings registered in the scanner. If you move to the next page
without clicking on the Registration button, any settings that have not been properly registered will be
deleted.
• Reset button
Click on this button to return all of the settings back to their factory default values.
• Delete button
Click on this button to delete the displayed group.
Page 2-37
Page 74

Section
3
Additional Utilities
Page 3-1
Page 75

3-1 What Utilities are Included with this Product?
Scanner File Utility
The Scanner File Utility is used for sending graphic image
data that is prepared by the scanner to a designated folder
on a computer. This utility is also responsible for saving the
received data in that computer.
* Refer to pages 3-4 through 3-21.
Address Editor
The Address Editor is a utility tool that enables you to
register or edit the contents of the scanner’s Address Book
(the Shared Address Book). This utility should used by the
administrator when managing information in the Address
Book, etc. If there are multiple scanners accessing the
Address Editor, the same destination list can be easily
registered into all of these scanners.
* Refer to pages 3-22 through 3-62.
Page 3-2
Page 76

3-1 What Utilities are Included with this Product?
Address Book
The Address Book is the address directory utility that is
installed in your computer. Using this utility enables you to
create and use your own personal destination list. By
selecting the [Private book] Tab on the scanner’s operation
panel, the personal Address Book that you are allowed to
use will be displayed and you will be able to select the
desired destinations from that data.
* Refer to pages 3-63 through 3-94.
TWAIN source
The TWAIN source is used for controlling the scanning
operation with a TWAIN-compatible application and having
that scanned image displayed in that application. The
scanned data can then be edited and/or saved in your
computer using that application.
* Refer to pages 3-95 through 3-108.
Page 3-3
Page 77

3-2 Scanner File Utility
3-2-1 What is the Scanner File Utility?
The Scanner File Utility is used to receive graphic image data from a scanner into a computer. This utility
also compresses and saves the received data in the corresponding computer. Once the Scanner File Utility
is installed and the computer booted up again, the utility will also be started up automatically. In this case,
an icon that indicates the status of the Scanner File Utility will be displayed in the Windows Task Bar and the
utility will remain in a waiting state for data to be sent from the scanner. Other than installation of the utility,
the only operation necessary at the computer is to register in advance the desired destination folder and
folder password. After that, you only need to perform the appropriate procedure at the scanner and the
scanned image data will be saved into the designated folder.
* In order to use the Scanner File Utility, it is necessary for you to use the Address Editor, Address Book or
WebPage Functions and register in the scanner, in advance, the information regarding the destination
computer and designated folder.
(1) Preparations
First, perform the following set-up procedure in order to use the Scanner File Utility.
1. Install the Scanner File Utility into the desired computer. (Refer to page 3-7.)
2. Run the Scanner File Utility and register the folder into which you want the scanned data to be saved.
(Refer to page 3-11.)
3. Use the Address Editor, Address Book or a Web browser to register the IP address of the destination
computer, and the corresponding registration name and “save number”.
* Be sure to enter the same number as the “save number” (1 – 100) that you registered in the Save
Number field of the Scanner File Utility.
Page 3-4
Page 78

3-2 Scanner File Utility
(2) Operation Flow
The following illustrates the steps to save scanned image data in a computer using the Scanner File Utility.
Network Manager
2
Use the Address
Editor, Address
Book or a Web
browser to register
the destination
computer.
Scanner
Scan
the original.
3
4
Page 3-5
Destination Computer
The scanned data
will be sent.
Use the Scanner File Utility
to designate the
1
destination folder.
The transmitted data
will be received.
5
Page 79

3-2 Scanner File Utility
3-2-2 Computer Environment
• Hardware ............................ IBM PC/AT or compatible
• Interface ............................. 10BASE-T or 100BASE-TX
• OS ...................................... Windows NT 4.0 (Service Pack 5), Windows 2000,
Windows 98 (Second Edition), Windows 95 (OSR2) and Windows Me
Page 3-6
Page 80

3-2 Scanner File Utility
3-2-3 Installation and Uninstallation
(1) Installing the Scanner File Utility
1. Click on Scanner Utilities in the Main Menu of the Scanner CD-ROM. The following window will appear.
* In order to access the Main Menu, refer to “1-2 Using the Scanner CD-ROM” on page 1-3.
2. Click on Scanner File Utility.
Page 3-7
Page 81

3-2 Scanner File Utility
3. Follow the instructions indicated in the wizard to continue the installation procedure.
* Once installation is complete, you will be able to use the Scanner File Utility once you reboot the
computer. After that, the Scanner File Utility will start up automatically with the computer and will run in
the background. In addition, an icon that indicates that the utility is running will appear in the Windows
Task Bar.
(2) Uninstalling the Scanner File Utility
Use the “Add/Remove Programs” function in Windows to uninstall the Scanner File Utility.
Page 3-8
Page 82

3-2 Scanner File Utility
3-2-4 Initial Dialogue Box for the Scanner File Utility
The Scanner File Utility will automatically start up after installation. However, any time you want to quit the
utility program, whenever you want to designate the folder into which data – received from the scanner – will
be saved, as well as when you want to set a security password for that folder, you will need to access the
initial dialogue box for the Scanner File Utility.
(1) Accessing the Initial Dialogue Box for the Scanner File Utility
• When the Scanner File Utility is running…
Double-click on the utility’s icon in the Task Bar. The initial dialogue box for the Scanner File Utility will
appear.
• When the Scanner File Utility is NOT running…
Click on Start in the Windows Task Bar and then select Program -> Scanner User Software -> Scanner
File Utility in that order from the successive menus. An icon that indicates that the utility is now running will
appear in the Windows Task Bar. Double-click on that icon and the initial dialogue box for the Scanner File
Utility will appear.
Page 3-9
Page 83

3-2 Scanner File Utility
(2) Contents of the Initial Dialogue Box for the Scanner File Utility
1
1. Status field ..................... Displays the current status of the scanner.
2. OK button ....................... Click on this button when you want to close the initial dialogue box.
3. Setup button ................... Click on this button when you want to designate a new destination folder for
4. Close button ................... Click on this button when you want to quit the Scanner File Utility.
2
3
4
receiving scanned data, or when you want to change settings or set a security
password for any of the currently registered folders. (Refer to page 3-11.)
Page 3-10
Page 84

3-2 Scanner File Utility
3-2-5 Destination Folders for Scanned Data
(1) The Setup Dialogue Box
When you want to select a new destination folder for receiving scanned data, or when you want to change
settings or set a security password for any of the currently registered folders, click on the Setup button in
the Start Dialogue Box. The Setup Dialogue Box will appear and the currently registered destination folders
will be listed.
5
1 2
4
3
6
9
8
7
Page 3-11
Page 85

3-2 Scanner File Utility
1. New button ..................... Click on this button when you want to designate a new destination folder for
2. Edit button ...................... Click on this button when you want to change the settings for any currently
3. Delete button .................. Click on this button when you want to remove the designation of any folder as
4. No. column ..................... Displays the designated number of the currently registered destination folders.
5. Folder column ................ Displays the currently registered destination folders.
6. Comment column ........... Displays any comments registered in regard to each folder.
7. Hard Disk
Warning (%) field ........... Once the volume of data on the hard disk reaches the percentage registered
8. Reception notice
checkbox ......................... Put a check mark in this checkbox if you want to receive notice whenever
receiving scanned data.
registered destination folder.
a destination folder for receiving scanned data.
here, a warning message will be displayed in the Status field of the Start
Dialogue Box.
* If the volume of data on the hard disk reaches the designated percentage,
the icon that is displayed in the Windows Task Bar whenever the Scanner
File Utility is running will turn yellow as well in order to indicate that status.
scanned data has been received into your folder.
9. OK button ....................... Click on this button when you have completed registering or changing settings
related to destination folders. The initial dialogue box for the Scanner File
Utility will be displayed once again.
Page 3-12
Page 86

3-2 Scanner File Utility
(2) Designating a New Destination Folder for Receiving Scanned Data
When you want to designate a new destination folder for receiving scanned data, click on the New button in
the Setup Dialogue Box. The Folder Setting Dialogue Box for making the corresponding settings will
appear.
1. Enter an unregistered number (type in a number between 1 and 100) into the No. field.
* The number that you enter here will be used as the designated number for that destination folder. It is
this number that you will have to register as the “save number” in the WebPage Functions interface
and then select in the scanner in order to have data sent to that folder.
Page 3-13
Page 87

3-2 Scanner File Utility
2. Click on the Browse button to the right of the Folder field in order to select the new folder that you want
to use as a destination folder for receiving scanned data. The Select Folder Dialogue Box will appear.
* You may also select the desired folder by typing the path for that folder directly into the Folder field.
A list of all of the folders available on the available hard disk(s) will be displayed in the Select Folder
Dialogue Box. Select the folder that you want to designate as a destination folder for receiving scanned
data and click on the OK button.
* You WILL be able to switch among available drives, but you will NOT be able to select any removable
drive such as a Floppy Disk drive, an MO drive or a virtual drive on the network.
Page 3-14
Page 88

3-2 Scanner File Utility
3. If you want to enter a comment about that folder, type the desired information directly into the Comment
field (up to 32 characters).
4. You can also designate a password for that folder for security purposes. If you want to set a security
password for that folder, type the desired password directly into the Folder Password field (up to 8
characters).
* If you do not want to designate a security password for the folder, no special settings are required in
that field.
5. If you did enter a security password in the Folder Password field, type the same password into the
Confirm New Password field. This step is necessary in order to ensure that the password was entered
correctly.
* If you did enter a security password, it will also be necessary to enter that password in the scanner
during the scanning procedure there.
6. Once you have completed all of the settings, click on the OK button. The selected folder will be registered with the entered information.
Page 3-15
Page 89

3-2 Scanner File Utility
(3) Changing Settings for a Registered Destination Folder
When you want to change the settings of a destination folder currently registered to receive scanned data,
select the folder you want from among the displayed list and then click on the Edit button in the Setup
Dialogue Box. The Folder Setting Dialogue Box for making the corresponding settings will appear.
1. If you want to change the settings in the No. field, the Folder field or the Comment field, follow the
corresponding procedure described in “(2) Designating a New Destination Folder for Receiving Scanned
Data” on page 3-13.
Page 3-16
Page 90

3-2 Scanner File Utility
2. If you want to change the security password for that folder, type the currently registered password into
the Old Password field.
3. Type the new password that you want to register directly into the New Password field (up to 8 charac-
ters).
4. In order to ensure that the new password was entered correctly, type the same password into the
Confirm New Password field.
5. Click on the OK button. If there was no mistake in any of the password fields, the selected folder will be
registered with the new information.
Page 3-17
Page 91

3-2 Scanner File Utility
(4) Removing a Destination Folder Designation
Perform the following procedure when you want to remove the designation of any folder as a destination
folder for receiving scanned data.
1. In the Folder field of the Setup Dialogue Box, click on the folder that you want to remove the destination
folder designation for, in order to select it.
2. Click on the Delete button. The designation of that folder as a destination folder for receiving scanned
data will be removed.
Page 3-18
Page 92

3-2 Scanner File Utility
3-2-6 Saving Scanned Data as a File
(1) Outline of the Procedure
The following procedure explains in general how to use the Scanner File Utility to receive graphic image
data from the scanner.
1. Make sure that the Scanner File Utility is running in the computer in which you want to receive the data.
* If the Scanner File Utility is NOT running, refer to “(1) Accessing the Start Dialogue Box for the
Scanner File Utility” on page 3-9 and start up the utility.
2. Set the original that you want to scan into the scanner.
3. On the scanner’s operation panel, select the destination computer that you want to save the scanned
data into.
4. If a security password has been registered for that folder, enter that password.
* If no password has been registered, this step is not necessary.
* If the entered password does not match the registered one, an error will occur and you will be unable
to continue the procedure.
5. Press the Start key on the scanner’s operation panel. The original that was set in the scanner will be
scanned and the resulting data will be sent to the designated computer. The received image data will be
compressed and then saved into the designated folder.
* The saved file can then be used as desired. It can, for example, be sent to other parties via email, or
displayed and edited using any application that is commercially available for that purpose, etc.
Page 3-19
Page 93

3-2 Scanner File Utility
(2) The File Name
Whenever a graphic image data is saved as a file on any computer, the file name (up to 16 characters +
suffix) will be created based on information registered in advance using the WebPage Functions interface. If
no settings have been made in advance, the file name will be automatically determined based on the
following rules.
File name:
•
• nnnn ................................... Refers to document number (job number) designated in the scanner. This will
• mmm .................................. Refers to the page number within a set of multiple originals. Each page will be
• suffix ................................... Refers to the suffix that is added automatically by the Scanner File Utility
IMPORTANT! If the file name that is automatically assigned to a file is exactly the same name as a
................................. Refers to the file name that is registered in the scanner where the original was
*******
nnnn_mmm.suffix
*******
processed. This will be displayed in standard numbers, letters and/or symbols.
be displayed as a
4-digit number between “0000” and “9999”.
saved as an individual file and given it’s own page number. This will be
displayed as a 3-digit number between “000” and “999”.
based on the file format of the saved file.
file that already exists in the same folder, the pre-existing file will be deleted and the
new file written over it.
Page 3-20
Page 94

3-2 Scanner File Utility
(3) The Image Data
• File format
Supports TIFF and PDF* formats.
* Using PDF Convert Library by HyperGEAR, Inc.
• Image data size
Standard sizes: A3, A4, A5, B4, B5, B6, 11" x 17", 8-1/2" x 11", 8-1/2" x 14", 5-1/2" x 8-1/2"; 11" x 15" and
Folio
Custom sizes: Width - between 50 mm and 432 mm (17"); Length - between 50 mm and 297 mm (A4
length)
* When multiple pages of image data are received in the computer, it is NOT possible to designate the page
size for each page individually.
• Resolution (dpi)
Supports 4 different scanning resolutions: 200 x 200, 300 x 300, 400 x 400 and 600 x 600
* When multiple pages of image data are received in the computer, it is NOT possible to designate the
scanning resolution for each page individually.
(4) If an Error Occurs when Writing Data to the Hard Disk…
If there is insufficient space on the hard disk to save any file that is sent from the scanner, reception of any
subsequent data will be stopped and the data received up to the point that the hard disk becomes full will be
deleted.
Caution If the Scanner File Utility icon turns yellow…
If the volume of data on the hard disk reaches a designated percent, the Scanner File Utility icon that is
displayed in the Windows Task Bar will turn yellow to indicate that status. In this case, free up space on the
hard disk by saving data to another disk or media, etc.
Page 3-21
Page 95

3-3 Address Editor
3-3-1 The Address Editor
The Address Editor enables you to register or edit the contents of the scanner’s Address Book (the Shared
Address Book) as well as selecting the network settings, initial settings for the scanning functions, etc. This
utility should used by the administrator when managing information in the Address Book, etc. If there are
multiple scanners allowing the use of the Address Editor, the same destination list can be easily registered
into all these scanners.
3-3-2 Computer Environment
• Hardware ............................ IBM PC/AT or compatible
• Interface ............................. 10BASE-T or 100BASE-TX
• OS ...................................... Windows NT 4.0 (Service Pack 5), Windows 2000,
Windows 98 (Second Edition), Windows 95 (OSR2) and Windows Me
Page 3-22
Page 96

3-3 Address Editor
3-3-3 Installation and Uninstallation
(1) Installing the Address Editor
1. Click on Scanner Utilities in the Main Menu of the Scanner CD-ROM.
* In order to access the Main Menu, refer to “1-2 Using the Scanner CD-ROM” on page 1-3.
2. Click on Address Editor.
3. Follow the instructions indicated in the wizard to continue the installation procedure.
Page 3-23
Page 97

3-3 Address Editor
(2) Uninstalling the Address Editor
Use the “Add/Remove Programs” function in Windows to uninstall the Address Book.
Page 3-24
Page 98

3-3 Address Editor
3-3-4 Running Address Editor
1. Start up Address Editor.
* Click on Start in the Windows Task Bar and then select Program -> Scanner User Software ->
Address Editor in that order and the Address Book will start up.
2. The screen for the Main Menu of the Address Book will appear.
1
2
3
4
Page 3-25
Page 99

3-3 Address Editor
1. Menu Bar ........................ Items displayed in the Tool Bar as well as by the buttons in the Menu Area can
2. Tool Bar ........................... Contains buttons for easy execution of tasks such as writing new or edited
3. Menu Area ...................... Enables actual selection of items such as scanning and Send E-mail related
4. Work Area ....................... Displays the settings window for the selected item and allows you to make the
be selected here as well.
data to the scanner, etc.
settings.
desired settings.
Page 3-26
Page 100

3-3 Address Editor
3-3-5 Editing Data Selection screen
Select the Address Editor data that you want to edit. You can then connect to the scanner and edit or
register the setting data directly in the scanner, or create and edit setting data without being connected to
the scanner. In the latter case, once editing is complete, your computer will connect to the scanner and
register the new or edited data there.
* If the Address Book is running, select Connect (Scanner Address Setting) when you want to access the
Editing Data Selection screen.
Page 3-27
 Loading...