Taser X2 User Manual

TASER® X2™ CEW
Quick Start Guide

Congratulations on purchasing your X2 CEW.
Read this section to start using your X2 CEW quickly.
Your TASER X2 Conducted Electrical Weapon (CEW) includes the following components:
Performance or Power Magazine
(PPM)
Tactical Performance X2 CEW (cartridges sold separately) Power Magazine (TPPM)
Several power magazines are available for use with your X2 CEW .
NOTE: Before using your X2 CEW, confirm with your armorer or other qualified person that the X2 firmware has been updated.
 WARNING
Complete Training First
Significant differences exist between each of the TASER International, Inc. (“TASER”) Conducted Electrical Weapon (“CEW”) models. Do not use or attempt to use any CEW model unless you have been trained and certified by a Certified TASER Instructor on that particular model.

Quick Reference |
|
|
Get to Know the X2 CEW |
|
|
Rear Sight |
Selector Switch |
|
|
||
|
Safety Switch |
|
Front Sight |
Trigger Switch |
|
Index Finger Rest |
Power Magazine |
|
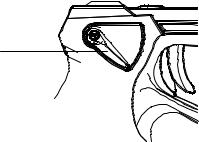
Release |
||
|
||
|
ARC Switch |
|
Wire |
Power Magazine |
Probe
AFIDs
Cartridge Release Button (underneath cartridge bays)
Top & Bottom LASER
Flashlight |
Blast Door |
Smart Cartridge
(Sold Separately)

Step 1: Place the Safety Switch in the SAFE Position
The ambidextrous safety can be operated from either side. Shift the safety switch to the down (SAFE) position.
Down (SAFE)
Step 2: Inspect the Power Magazine Battery Pack
1 Inspect the Power Magazine contacts to confirm they are clean and free of damage.

Step 3: Install the Battery Pack
Install the new battery pack and confirm that it is fully inserted into the X2 CEW. Apply sufficient force to ensure it is fully seated. When the battery pack seats properly, the battery release button should pop out from the recessed position with an audible click.
Release Button

Step 4: Set the Sighting Options
You can set up your X2 CEW to turn the LED flashlight and LASER sights off or on, in several configurations.
To set the sighting options, follow these steps:
1Ensure that the safety switch is in the down (SAFE) position.
2Press and hold the selector switch ( ) until the main menu displays.
3Press the left ARC ( ) switch to display the sighting options.
4Press the right ARC ( ) switch to select the needed setting.
OO – Flashlight OFF and LASER OFF
LO – LASER ON and flashlight OFF
OF – LASER OFF and flashlight ON
LF – LASER ON and flashlight ON
5Press the selector switch to return to the main menu.
You can set the other options. If you are done configuring the X2 CEW, press the selector switch again to exit.
 Loading...