

Page 1
»
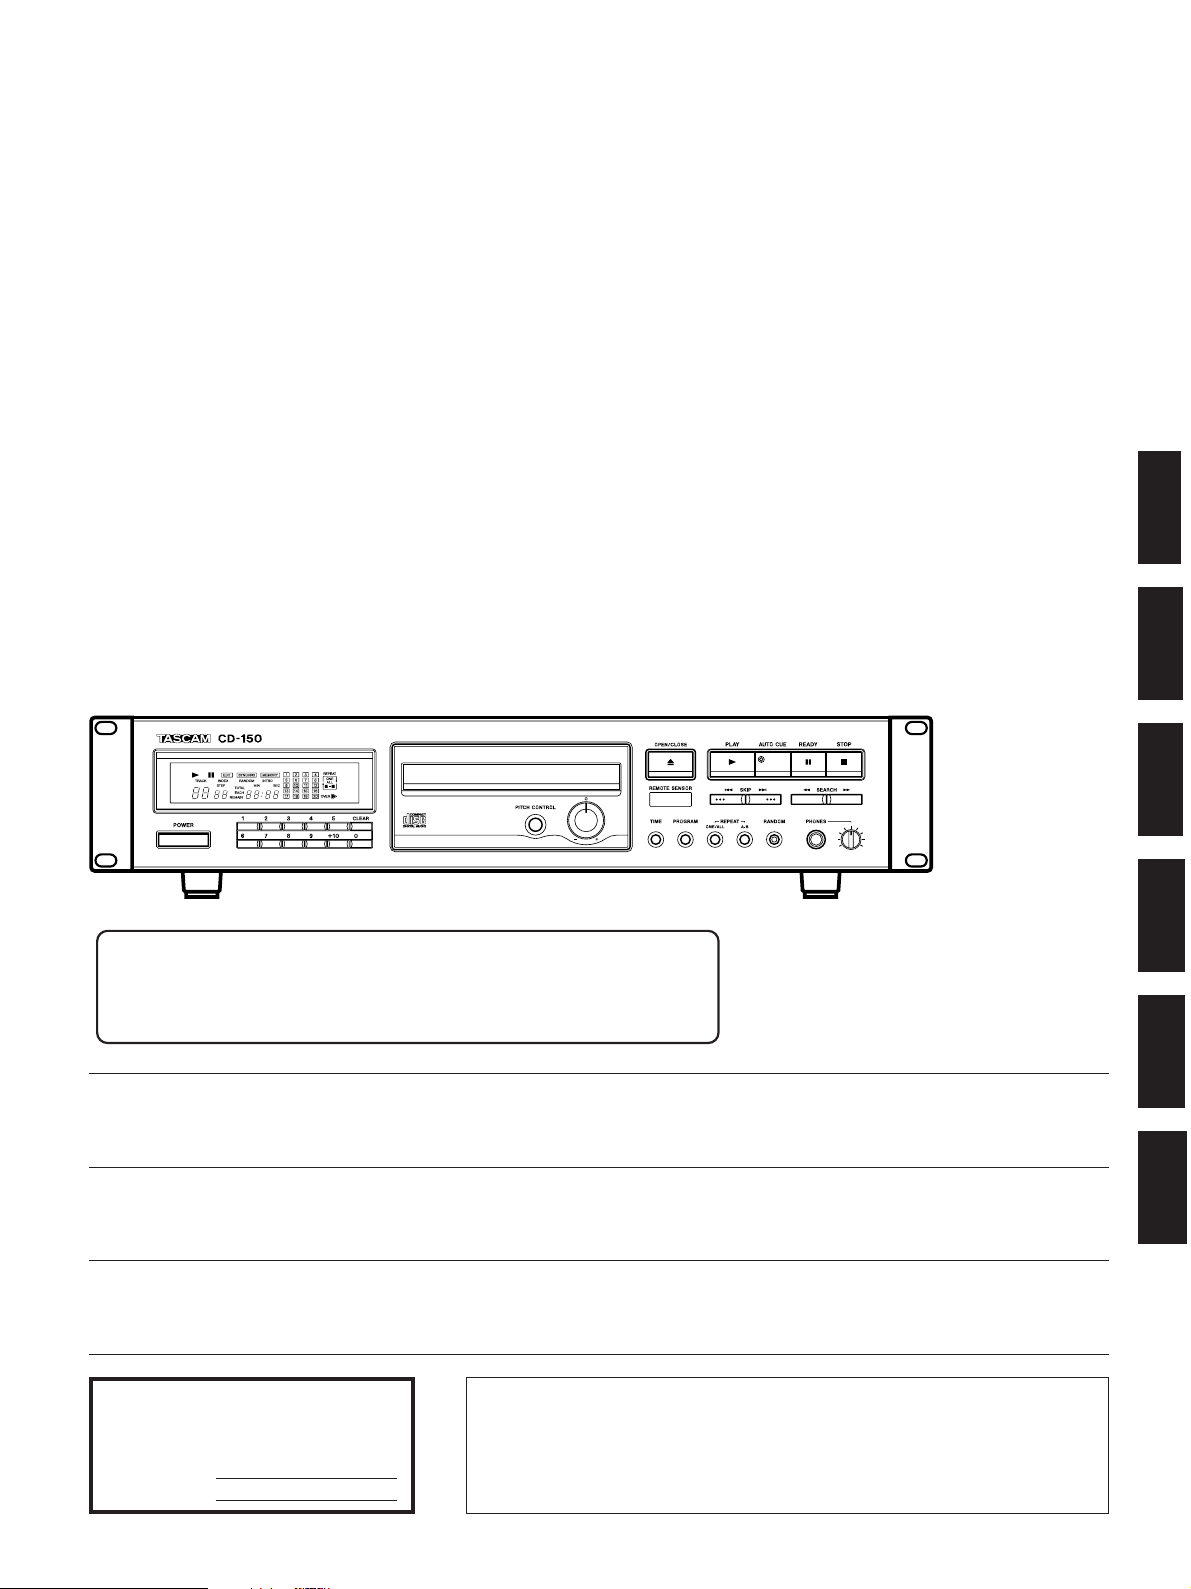
CD-150
9A07483800
Compact Disc Player
˛
OWNER'S MANUAL / MANUEL DU PROPRIETAIRE
BEDIENUNGSANLEITUNG / MANUALE DI ISTRUZIONI
MANUAL DEL USUARIO / GEBRUIKSAANWIJZING
CAUTION: TO REDUCE THE RISK OF ELECTRIC SHOCK, DO NOT
REMOVE COVER (OR BACK). NO USER-SERVICEABLE PARTS INSIDE.
Ü
REFER SERVICING TO QUALIFIED SERVICE PERSONNEL.
ENGLISH
FRANÇAIS
DEUTSCH
ITALIANO
ESPAÑOL
The lightning flash with arrowhead symbol, within an equilateral triangle, is intended to alert
the user to the presence of uninsulated “dangerous voltage” within the product’s enclosure
ÿ
Ÿ
This appliance has a serial number located
on the rear panel. Please record the model
number and serial number and retain them
for your records.
Model number
Serial number
that may be of sufficient magnitude to constitute a risk of electric shock to persons.
The exclamation point within an equilateral triangle is intended to alert the user to the
presence of important operating and maintenance (servicing) instructions in the literature
accompanying the appliance.
NEDERLANDS
WARNING: TO PREVENT FIRE OR SHOCK
HAZARD, DO NOT EXPOSE THIS
APPLIANCE TO RAIN OR MOISTURE.
Page 2
IMPORTANT SAFETY INSTRUCTIONS
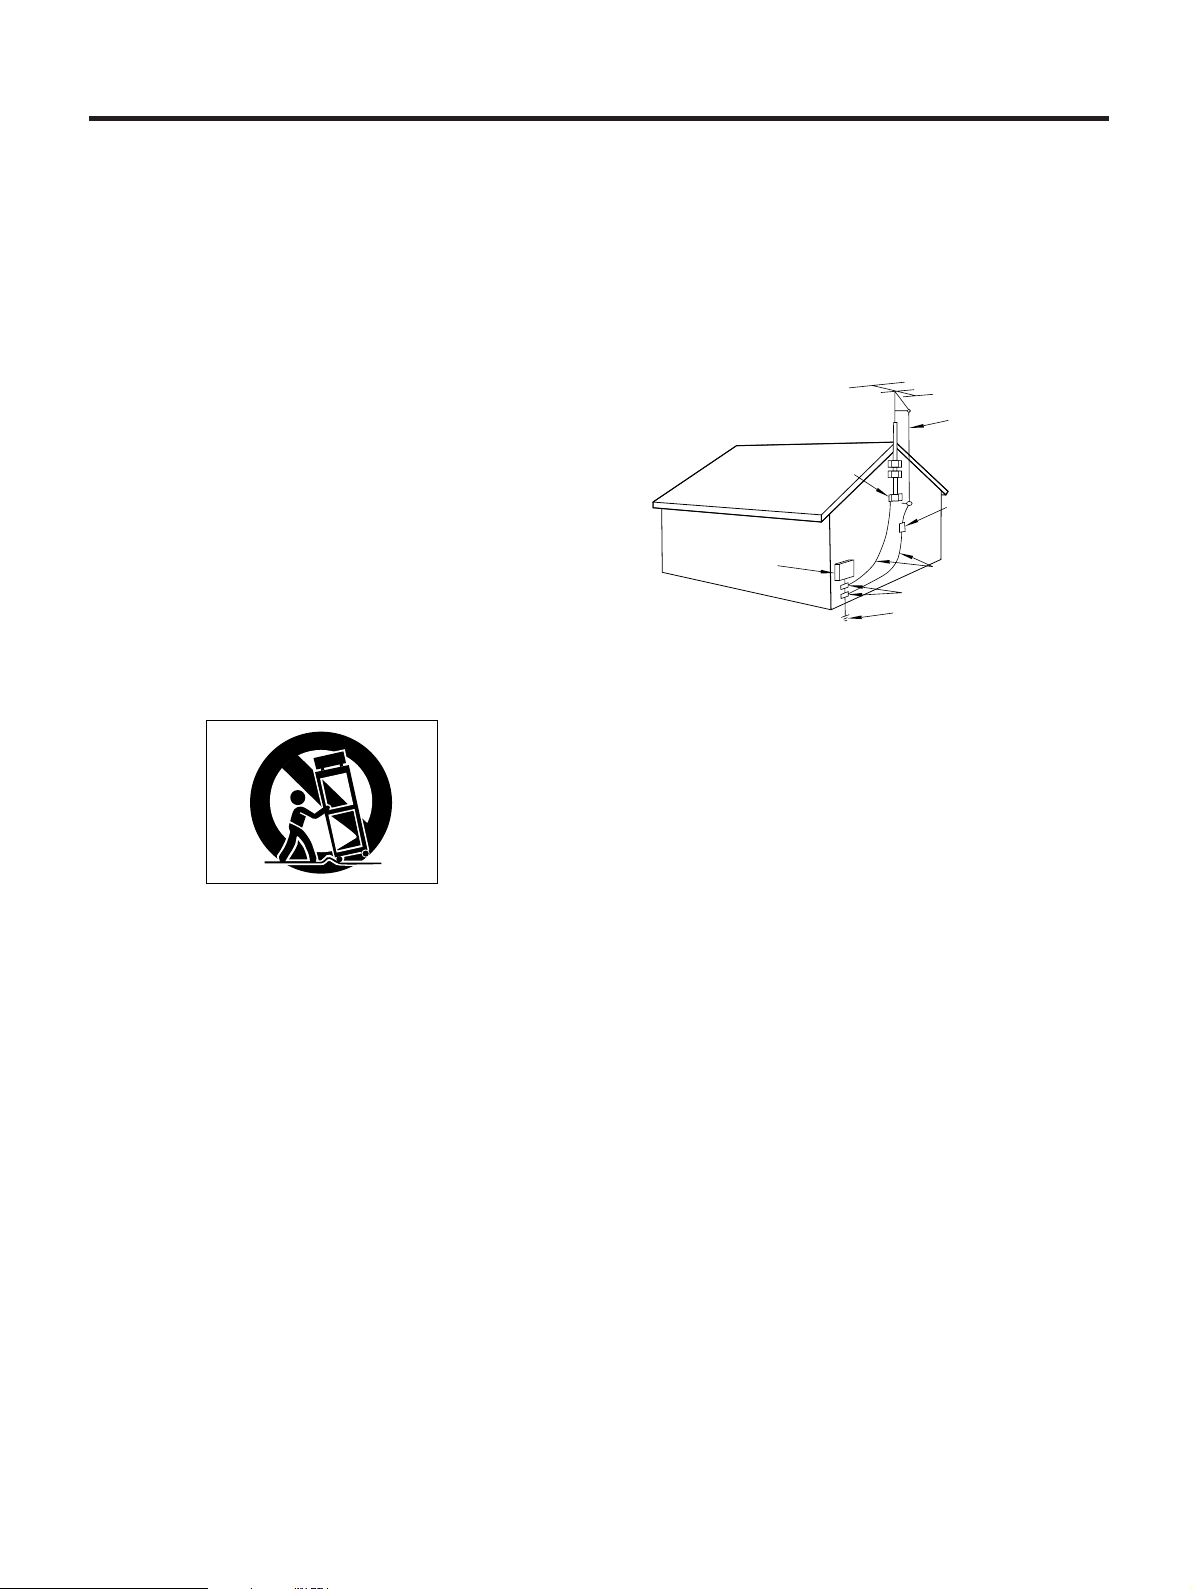
ANTENNA
LEAD IN
WIRE
ANTENNA
DISCHARGE UNIT
(NEC SECTION 810-20)
GROUNDING CONDUCTORS
(NEC SECTION 810-21)
GROUND CLAMPS
POWER SERVICE GROUNDING
ELECTRODE SYSTEM
(NEC ART 250. PART H)
NEC - NATIONAL ELECTRICAL CODE
ELECTRIC
SERVICE
EQUIPMENT
Example of Antenna Grounding as per
National Electrical Code, ANSI/NFPA 70
GROUND
CLAMP
CAUTION:
• Read all of these Instructions.
• Save these Instructions for later use.
• Follow all Warnings and Instructions marked on the audio
equipment.
1) Read Instructions — All the safety and operating instructions
should be read before the product is operated.
2) Retain Instructions — The safety and operating instructions
should be retained for future reference.
3) Heed Warnings — All warnings on the product and in the
operating instructions should be adhered to.
4) Follow Instructions — All operating and use instructions should
be followed.
5) Cleaning — Unplug this product from the wall outlet before
cleaning.Do not use liquid cleaners or aerosol cleaners. Use a damp
cloth for cleaning.
6) Attachments — Do not use attachments not recommended by
the product manufacturer as they may cause hazards.
7) Water and Moisture — Do not use this product near water _for
example, near a bath tub, wash bowl, kitchen sink, or laundry tub; in
a wet basement; or near a swimming pool; and the like.
8) Accessories — Do not place this product on an unstable cart,
stand, tripod, bracket, or table.The product may fall, causing serious
injury to a child or adult, and serious damage to the product. Use
only with a cart, stand, tripod, bracket, or table recommended by the
manufacturer, or sold with the product. Any mounting of the product
should follow the manufacturer’s instructions, and should use a
mounting accessory recommended by the manufacturer.
9) A product and cart combination should be moved with care.Quick
stops, excessive force, and uneven surfaces may cause the product
and cart combination to overturn.
10) Ventilation — Slots and openings in the cabinet are provided for
ventilation and to ensure reliable operation of the product and to
protect it from overheating, and these openings must not be blocked
or covered. The openings should never be blocked by placing the
product on a bed, sofa, rug, or other similar surface. This product
should not be placed in a built-in installation such as a bookcase or
rack unless proper ventilation is provided or the manufacturer’s
instructions have been adhered to.
— This product should be operated only from the type of power
source indicated on the marking label. If you are not sure of the type
of power supply to your home, consult your product dealer or local
power company. For products intended to operate from battery
power, or other sources, refer to the operating instructions.
12) Grounding or Polarization — This product may be equipped
with a polarized alternating-current line plug (a plug having one
blade wider than the other).This plug will fit into the power outlet only
one way. This is a safety feature.If you are unable to insert the plug
fully into the outlet, try reversing the plug. If the plug should still fail
to fit, contact your electrician to replace your obsolete outlet. Do not
defeat the safety purpose of the polarized plug.
13) Power-Cord Protection — Power-supply cords should be
routed so that they are not likely to be walked on or pinched b y items
placed upon or against them, paying particular attention to cords at
plugs, convenience receptacles, and the point where they exit from
the product.
14) Outdoor Antenna Grounding — If an outside antenna or
cable system is connected to the product, be sure the antenna or
cable system is grounded so as to provide some protection against
voltage surges and built-up static charges. Article 810 of the
National Electrical Code, ANSI/NFPA 70, provides information with
regard to proper grounding of the mast and supporting structure,
grounding of the lead-in wire to an antenna discharge unit, size of
grounding conductors, location of antenna-discharge unit,
connection to grounding electrodes, and requirements for the
grounding electrode.
"Note to CATV system installer:
This reminder is provided to call the CATV system installer’s
attention to Section 820-40 of the NEC which provides guidelines for
proper grounding and, in particular, specifies that the cable ground
shall be connected to the grounding system of the building, as close
to the point of cable entry as practical."
15) Lightning — For added protection for this product during a
lightning storm, or when it is left unattended and unused for long
periods of time, unplug it from the wall outlet and disconnect the
antenna or cable system. This will prevent damage to the product
due to lightning and power-line surges.
16) Power Lines — An outside antenna system should not be
located in the vicinity of overhead power lines or other electric light
or power circuits, or where it can fall into such po wer lines or circuits .
When installing an outside antenna system, extreme care should be
taken to keep from touching such power lines or circuits as contact
with them might be fatal.
17) Overloading — Do not overload wall outlets, extension cords, or
integral convenience receptacles as this can result in risk of fire or
electric shock.
18) Object and Liquid Entry — Never push objects of any kind into
this product through openings as they may touch dangerous voltage
points or short-out parts that could result in a fire or electr ic shock.
Never spill liquid of any kind on the product.
19) Ser vicing — Do not attempt to service this product yourself as
opening or removing covers may expose you to dangerous voltage
or other hazards. Refer all servicing to qualified service personnel.
20) Damage Requiring Service — Unplug this product from the
wall outlet and refer servicing to qualified service personnel under
the following conditions:
a) when the power-supply cord or plug is damaged.
b) if liquid has been spilled, or objects have fallen into the product.
c) if the product has been exposed to rain or water.
d) if the product does not operate normally by following the
operating instructions.Adjust only those controls that are covered by
the operating instructions as an improper adjustment of other
controls may result in damage and will often require extensive work
by a qualified technician to restore the product to its normal
operation.
e) if the product has been dropped or damaged in any way.
f ) when the product exhibits a distinct change in performance _ this
indicates a need for service.
21) Replacement Parts — When replacement parts are required,
be sure the service technician has used replacement parts specified
by the manufacturer or have the same characteristics as the original
part. Unauthorized substitutions may result in fire, electric shock, or
other hazards.
22) Safety Check — Upon completion of any service or repairs to
this product, ask the service technician to perform safety checks to
determine that the product is in proper operating condition.
23) Wall or Ceiling Mounting — The product should be mounted to
a wall or ceiling only as recommended by the manufacturer.
24) Heat — The product should be situated away from heat sources
such as radiators, heat registers, stoves , or other products (including
amplifiers) that produce heat.
– 2 –
Page 3
SAFETY INFORMATION
This product has been designed and manufactured according to FDA regulations "title 21, CFR, chapter 1, subchapter J, based on the Radiation
Control for Health and Safety Act of 1968", and is classified as a class 1 laser product. There is no hazardous invisible laser radiation during operation
because invisible laser radiation emitted inside of this product is completely confined in the protective housings.
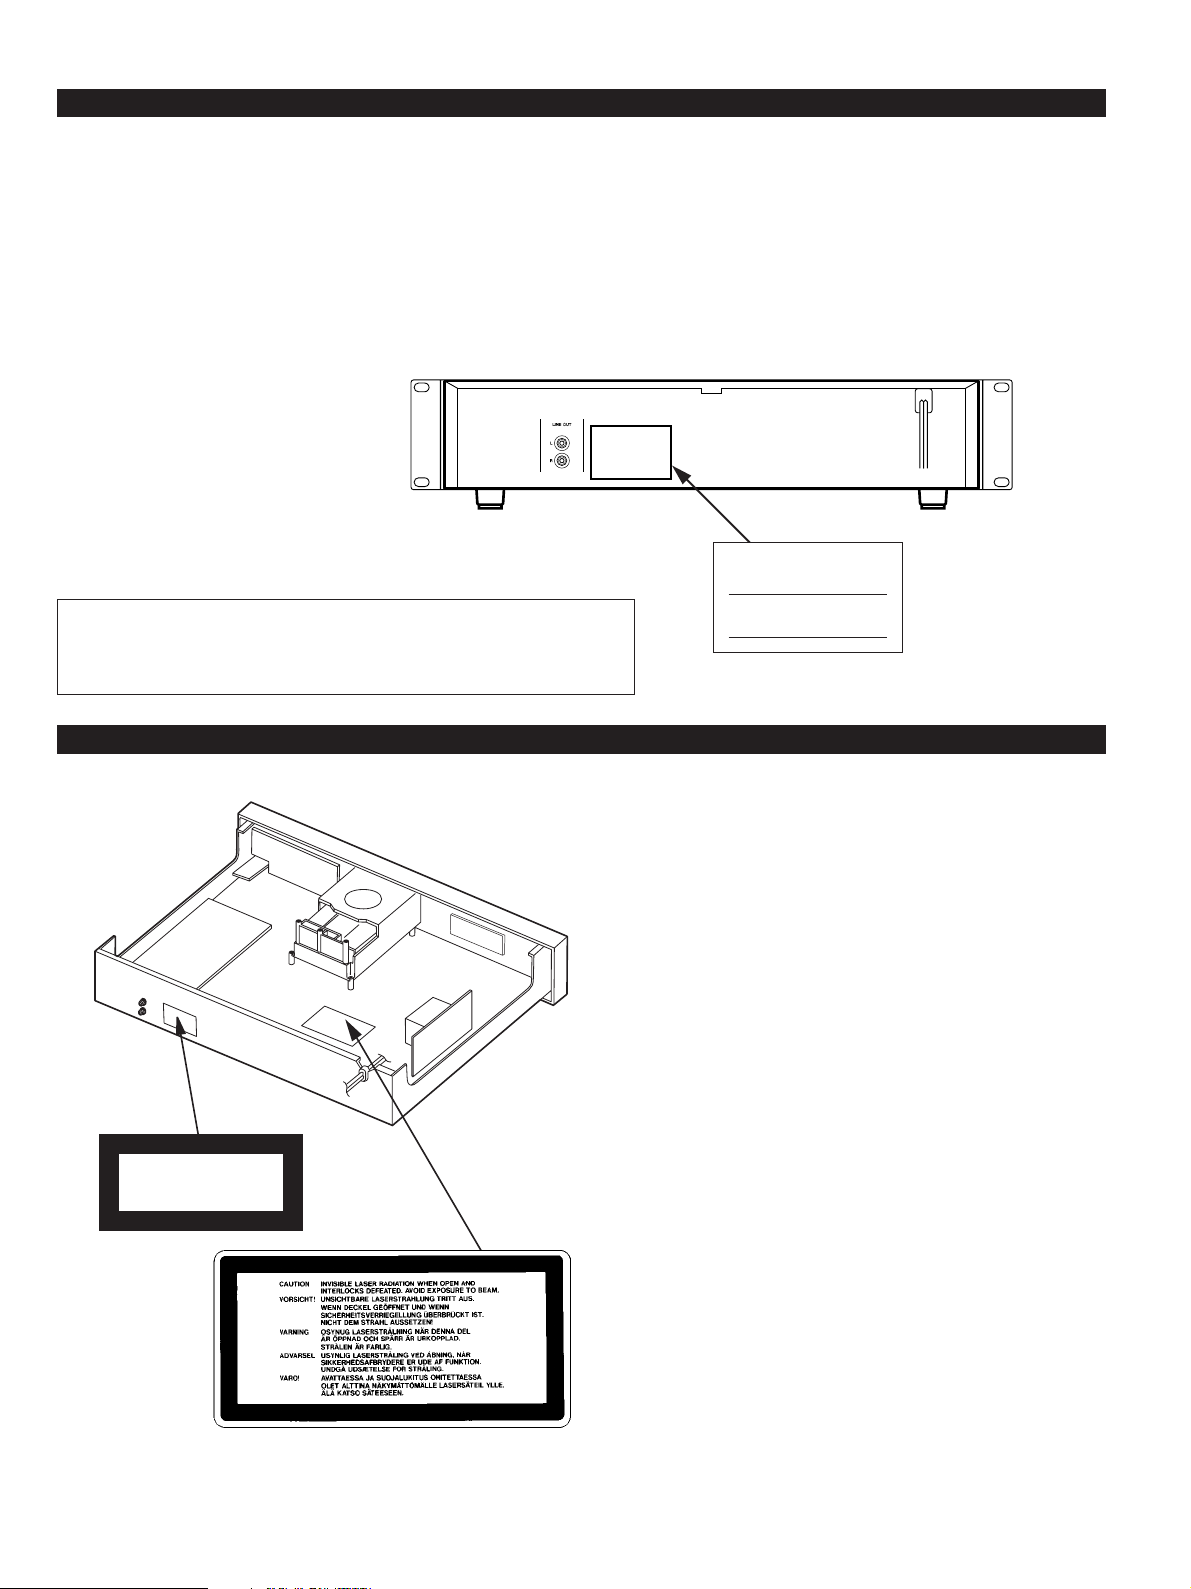
The label required in this regulation is shown 1.
… CAUTION
- DO NOT REMOVE THE PROTECTIVE HOUSING USING A SCREWDRIVER.
- USE OF CONTROLS OR ADJUSTMENTS OR PERFORMANCE OF PROCEDURES OTHER THAN THOSE SPECIFIED HEREIN MAY RESULT IN
HAZARDOUS RADIATION EXPOSURE.
- IF THIS PRODUCT DEVELOPS TROUBLE, CONTACT YOUR NEAREST QUALIFIED SERVICE PERSONNEL, AND DO NOT USE THE PRODUCT IN ITS
DAMAGED STATE.
Optical pickup: Type : SF-P101
Manufacturer : SANYO Electric CO., Ltd.
Laser output : Less than 0.7 mW on the objective lens
Wavelength : 765_815nm
CLASS 1 LASER PRODUCT
LUOKAN 1 LASERLAITE
KLASS 1 LASERAPPARAT
1
CERTIFICATION
THIS PRODUCT COMPLIES WITH DHHS
RULES 21 CFR SUBCHAPTER J APPLICABLE AT DATE OF MANUFACTURE.
TEAC CORPORATION
3-7-3 NAKA-CHO, MUSASHINO-SHI, TOKYO, JAPAN
MANUFACTURED
For U.S.A.
…CAUTION …ACHTUNG …OBSERVERA …ADVARSEL
1 THIS LABEL IS ATTACHED TO THE PLACE AS ILLUSTRATED TO
INFORM THAT THE APPARATUS CONTAINS A LASER COMPONENT.
1 DIESE AUFKLEBEMARKE IST AN DEM IN DER ABBILDUNG
GEZEIGTEN ORT ANGEBRACHT UM D ARAUF HINZUWEISEN, DASS
IM INNERN DES GERÄTS EINE LASER-KOMPONENTE BEFINDET.
1 PÅSKRIFTEN SITTER PÅ APPARATEN SOM VISAS SOM
UPPMANING OM ATT APPARATEN OMFATTAR EN INBYGGD
LASERKOMPONENT.
1 DETTE MÆRKAT ER ANBRAGT SOM VIST I ILLUSTRATIONEN FOR
AT ADVARE BRUGEREN OM AT APPARATET INDEHOLDER EN
LASERKOMPONENT.
2 DETTE MÆRKAT ER SOM VIST PÅ ILLUSTRATIONEN ANBRAGT PÅ
INDERSIDEN AF TOPDÆKSLET FOR AT ADV ARE BR UGEREN OM AT
YDERLIGERE FREMTRÆNGEN VIL VÆRE FORBUNDET MED FARE
FOR AT UDSÆTTE SIG FOR LASERSTRÅLING.
ADVARSEL — BETJENING AF ANDRE KONTROLLER OG
REGULATORER ELLER BENYTTELES AF ANDRE
FREMGANGSMÅDER END BESKREVET HERI ER FORBUNDET MED
FARE FOR UDSÆTTELSE FOR LASERSTRÅLING.
MADE IN CHINA
VARING:APPARATEN INNEHÅLLER LASER LOMPONENT MED
STRÅLNING ÖVERSTIGANDE KLASS 1.
"ADVARSEL: USYNLIG LASERSTRÅLING VED ÅBNING NAR
SIKKERHEDSAFBRYDERE ER UDE AF FUNKTION.UNDGÅ
UDSAETTELSE FOR STRÅLING"
"VAROITUS! SUOJAKOTELOA EI SAA AVATA. LAITE SISÄLTÄÄ
LASERDIODIN. JOKA LÄHETTÄ (NÄKYMÄTÖNTÄ) SILMILLE
VAARALLISTA LASERSÄTEILYÄ".
ADVARSEL: USYNLIG LASERBESTRÅLING NÅR DENNE
DELEN ER ÅPEN OG SIKKERHETSSPERREN ER UTKOBLET
UNNGÅ UTSETTELSE FOR STRÅLING.
– 3 –
Page 4
Before Use
Read This Before Operating
O Choose the installation location of your
unit carefully. Avoid placing it in direct
sunlight or close to a source of heat.
Also avoid locations subject to
vibrations and excessive dust, heat, cold
or moisture. Keep away from such
sources that hum, such as transformers
or motors.
O Do not open the cabinet as this might
result in damage to the circuitry or
electrical shock. If a foreign object
should get into the set, contact your
dealer.
O Be sure not to handle discs with dirty
fingers. Never insert a disc which has a
crack on the surface.
O When removing the power plug from the
wall outlet, always pull directly on the
plug, never yank the cord.
O To keep the laser-pickup clean, do not
touch it, and do not forget to close the
disc tray.
O Do not attempt to clean the unit with
chemical solvents as this might damage
the finish. Use a clean, dry cloth.
O Keep this manual in a safe place for
future reference.
Beware of condensation
When the player (or a compact disc) is
moved from a cold to a warm place or
used after a sudden temperature
change, there is the danger of
condensation. Water vapor in the air
could condense on the mechanism or
the laser pickup. If droplets of water
form on these parts, correct playback
will be impossible because the laser
cannot read the information from the
disc correctly. To prevent this, if you
are going to use the player in a
condition where condensation could
occur, you should leave the player for 1
or 2 hours after plugging it into an AC
outlet depending on the amount of
condensation. If this is done, the player
will stabilize at the temperature of its
surroundings.
Handling the Discs
This unit has been designed specifically for
reproduction of compact discs bearing the
"
" mark. No other discs can be
D
reproduced.
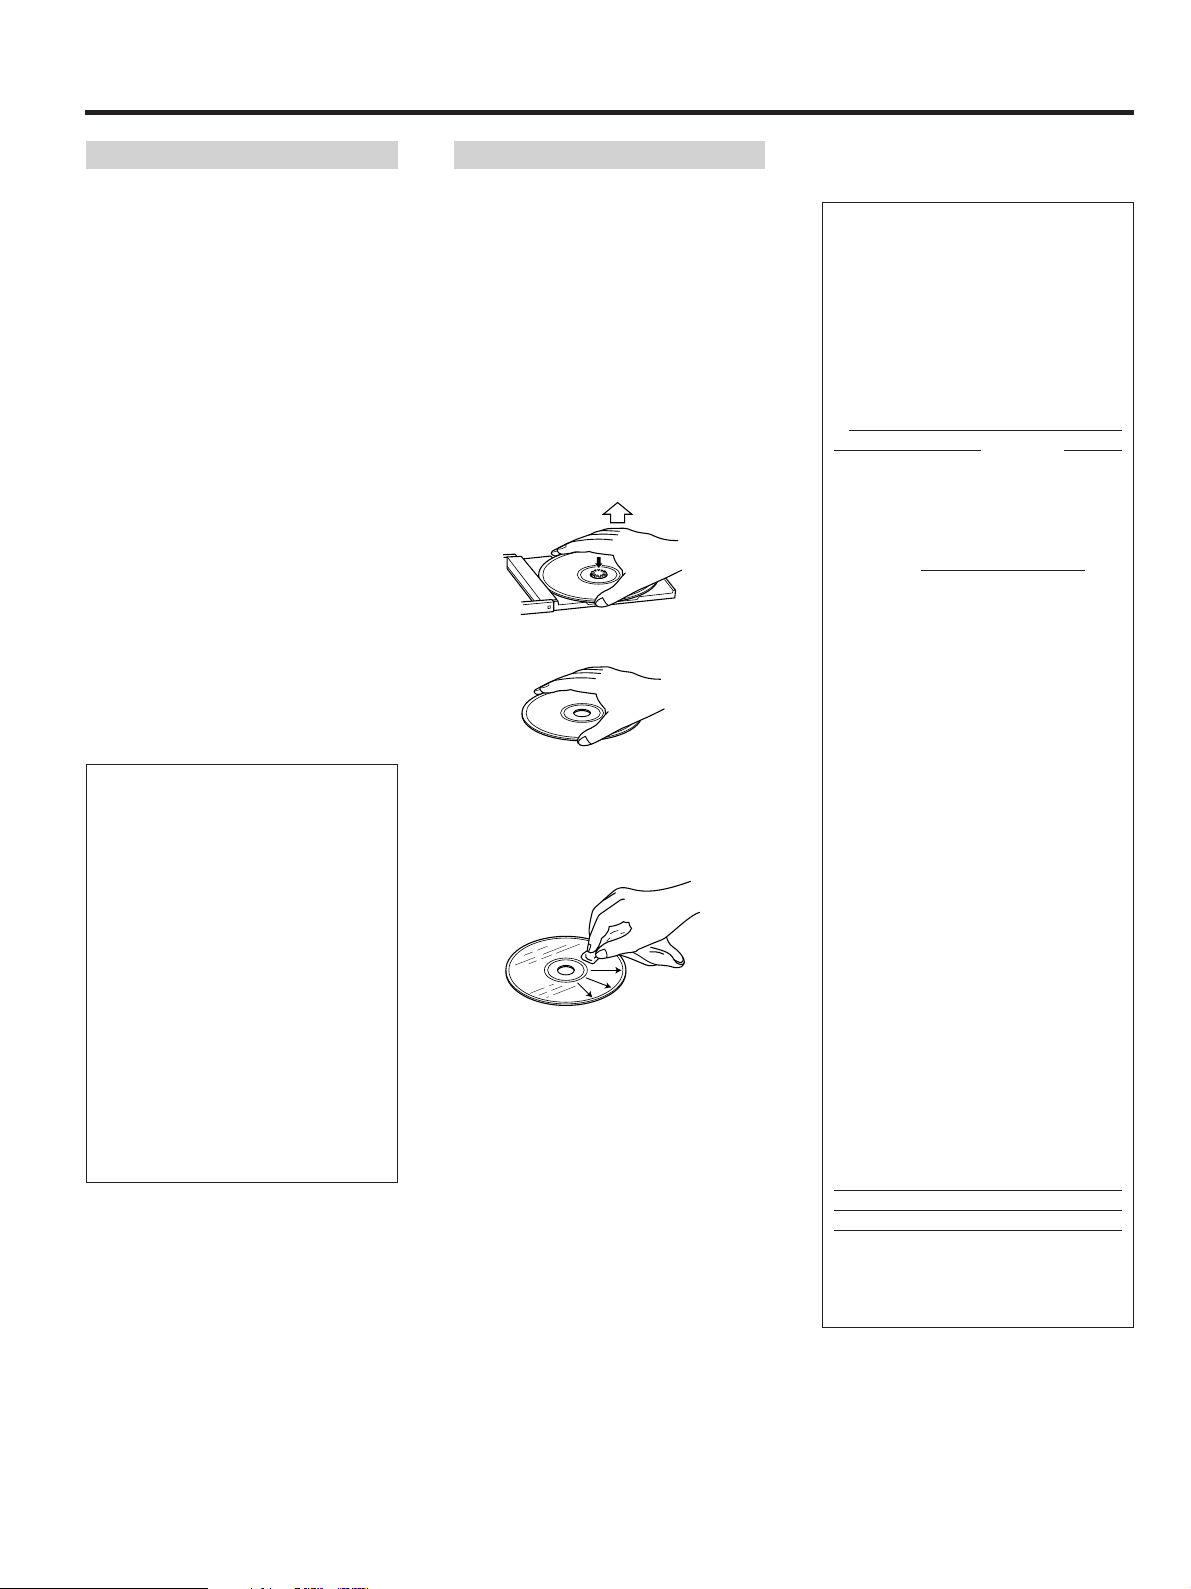
O Always place the compact disc in the
disc tray with the label facing upward.
(Compact discs can be played only on
one side.)
O To remove a disc from its storage case,
press down on the center of the case
and lift the disc out, holding it carefully
by the edges.
How to remove the disc
How to hold the disc
O Fingermarks and dust should be
carefully wiped off the disc's recorded
surface with a soft cloth.
Wipe radially
O Never use such chemicals as record
sprays, antistatic sprays or fluid,
benzine or thinner to clean compact
discs. Such chemicals will do
irreparable damage to the disc's plastic
surface.
O Discs should be returned to their cases
after use to avoid serious scratches that
could cause the laser pickup to "skip."
O Do not expose discs to direct sunlight or
high humidity and temperature for
extended periods.
Long exposure to high temperatures can
warp the disc.
O Do not stick paper or write anything with
a ballpoint pen on the surface of the
label side.
IMPORTANT (for U.K. Customers)
DO NOT cut off the mains plug from this
equipment. If the plug fitted is not
suitable for the power points in your
home or the cable is too short to reach a
power point, then obtain an appropriate
safety approved extension lead or
consult your dealer.
If nonetheless the mains plug is cut of
remove the fuse and dispose of the plug
immediately, to avoid a possible shock
hazard by inadvertent connection to the
mains supply.
If this product is not provided with a
mains plug, or one has to be fitted,
follow the instructions given below:
IMPORTANT. DO NOT make any
connection to the larger terminal which
is marked with the letter E or by the
safety earth symbol © or coloured
GREEN or GREEN-and-YELLOW.
The wires in the mains lead on this
product are coloured in accordance
with the following code:
BLUE: NEUTRAL
BROWN: LIVE
As these colours may not correspond
with the coloured markings identifying
the terminals in your plug proceed as
follows:
The wire which is coloured BLUE must
be connected to the terminal which is
marked with the letter N or coloured
BLACK.
The wire which is coloured BROWN
must be connected to the terminal
which is marked with the letter L or
coloured RED.
When r
correctly rated approved type should be
used and be sure to re-fit the fuse cover.
IF IN DOUBT — CONSULT A
COMPETENT ELECTRICIAN.
eplacing the fuse only a
then
f,
– 4 –
Page 5

Connections
Before making connections, be sure to read
the instruction manual of the stereo
amplifier carefully and turn the power of the
stereo amplifier and the player OFF.
Caution:
If the CD player interferes with the tuner, TV
receiver, etc., allow a reasonable distance
between them.
ª Connection with a stereo
amplifier
LINE OUT terminals
… Connect the LINE OUT terminals to the
CD or AUX terminals of the stereo
amplifier using an RCA pin plug cord.
… Make sure to match the color-coded
plugs to the appropriate jacks on the
components — white to white (L), and
red to red (R).
… Be sure to insert each plug securely.
∑ Headphones
When using headphones, connect the
headphone plug into the PHONES jack.
O Adjust the level of the signals output
from the phones jack.
ª Power cord
Be sure to connect the power cord to an AC
outlet which supplies the correct voltage.
… Hold the power plug when plugging or
unplugging the power cord.
ENGLISH
Rack Mounting
Install this deck with the provided
mounting screw kit as illustrated.
– 5 –
Page 6

Name of Each Control
1 POWER switch
2 Multi-function display window
a Á (play) / ƒ (ready) indicators
b INDEX indicator
c RANDOM indicator
d INTRO Check indicator
e MEMORY indicator
f Music Calendar display
g REPEAT (ONE/ALL/A-B) indicators
h TRACK indicator
i STEP indicator
j TOTAL/EACH/REMAIN time indicators
k Time counter
l OVER indicator
3 Disc tray
4 REMOTE SENSOR
5 OPEN/CLOSE button (ø)
6 SKIP buttons (Â/¯)
7 PLAY button (Á)
8 AUTO CUE button (R)
9 READY button (ƒ)
0 STOP button (∑)
q SEARCH buttons (Ô / )
w Numeric buttons (1~9, +10, 0)
e CLEAR button
r PITCH CONTROL on/off button / PITCH CONTROL knob
t TIME button
y PROGRAM button
u REPEAT (ONE/ALL, A-B) buttons
i RANDOM play button
o PHONES level control / PHONES jack
p CHECK button
a INTRO CHECK button
– 6 –
Page 7

Operations
Basic Operation
1. Press the POWER switch.
indicator blinks in the
display.
● When no disc is inserted, "no dISC"
lights.
● Be sure to turn the volume of the
amplifier down to protect the speakers
from damage.
2. Press the OPEN/CLOSE (∫) button.
The disc tray will slide out and "OPEn"
will be indicated in the display. Place the
disc gently on the tray with its label side
facing upward. The disc is set within the
disc guides at the center of the tray.
3. Press the OPEN/CLOSE (∫) button
again.
The disc tray will close.
Several seconds later, the following
information is displayed and the player
enters the standby mode.
Total number of
tracks on the disc
● The Music Calendar then lights,
displaying track numbers up to 20.
4. Press the PLAY (Á) button.
Disc playback starts from the first track,
and the Á(play) indicator will light.
● If the total track number exceeds 20
(OVER blinks), the track number should
be confirmed on the TRACK display.
● During playback, the number of the
currently played track blinks on the
Music Calendar.
● When tracks have been played, their
numbers will disappear from the Music
Calendar display.
● Press the TIME button in the stop mode
to display the total disc playback time
and the total number of tracks on the
disc.
● Press the TIME button during playback
to display the each remaining time of the
track being played.
Displayed when the TIME button is
pressed twice. The time displayed is the
total remaining playback time from the
position being played, to the end of the
disc.
6. To temporarily suspend playback
(ready mode):
Press the ƒ button.
Playback stops at the current position
and the ƒ indicator blinks. To resume
playback from the same position, press
the Á or ƒ button.
7. To stop playback:
Press the STOP (∑) button.
The player enters the stop mode.
8. To unload the disc:
Press the OPEN/CLOSE (∫) button.
Playback stops and the disc tray will
slide out, and all functions are reset to
their initial settings.
m Even if the disc tray is open....
When the Á button is pressed:
The disc tray will close and playback starts
from the first track.
Direct access play:
Press the numeric buttons corresponding
to the required track. The player starts from
the specified track directly.
Example 1:
To play the 5th track:
Press
Example 2:
To play the 21st track:
Press
CAUTION:
● Do not force the tray by hand during
● Do not leave the disc tray open
.
.
opening and closing operations.
when the player is not in use to
prevent dirt and dust from entering
the mechanism.
1. Press the RANDOM button.
The RANDOM indicator lights in the
display.
2. The indication rotates on the
TRACK display while the player is
shuffling the tracks.
3. Tracks will be randomly selected and
played back.
● Press the ¯ button with random play
function engaged to select a track at
random. Press the  button to replay
currently played track from its
beginning.
● A track cannot be replayed after it has
been played in this mode.
● To release the random play function
while it is engaged, press the STOP (ª)
button, then press the RANDOM button.
Auto Cue
1. Press the AUTO CUE (R) button in the
stop mode.
The AUTO CUE indicator will light, and
AUTO CUE function is activated.
2. To cue to the first track on the disc,
press the PLAY (Á) button.
The player will automatically search the
beginning of the first track, and enters
the ready mode.
3. Press the PLAY (Á) button again to
begin playback.
4. To select a track other than the first
track, enter the desired track number
using the numeric buttons on the unit or
the remote control.
The player will automatically search to
the beginning of the track selected, and
enter the ready mode.
5. Press the PLAY (Á) button to begin
playback of the selected track.
6. When the SKIP button (Â/¯) is
pressed while the AUTO CUE function is
activated, the player will skip to the
beginning of the new desired track and
enter the ready mode.
7. Press the PLAY (Á) button to begin
playback of the new desired track.
Pitch Control
ENGLISH
5. To check the playing time:
Press the TIME button.
Random Playback
● This function is possible only when the
player is in the stop mode.
– 7 –
Press the PITCH CONTROL button in the
stop mode.
● Changing pitch rapidly during playback
may cause noise problems.
● The PITCH CONTROL button is
operational only in the stop mode.
Page 8

1. Press the PITCH CONTROL button.
The PITCH CONTROL button lights.
2. Turn the PITCH CONTROL knob right or
left to change pitch.
3. Turning right makes playback speed
faster within the range O ~ +6%.
4. Turning left makes playback speed
slower within the range O ~ –6%.
Intro Check Function
The Intro Check function allows only the
beginning of each track to be played for 10
seconds.
● This function is operational both at stop
and during normal playback.
1. Press the INTRO CHECK button.
2. Press the PLAY (Á) button.
The INTRO indicator lights in the display.
3. Press the INTRO CHECK button again to
clear the Intro Check function.
● The Intro Check function also works
together with RANDOM and REPEAT
ONE/ALL functions. This function will not
stop until the STOP (ª) button is
pressed.
● The Intro Check function also works
together with the PROGRAM function.
● To release the Intro Check function
while it is engaged, press the STOP (ª)
button twice.
Program Playback
● Programming tracks is possible only
when the player is in the stop mode.
● The program playback function allows
you to program up to 32 tracks for
playback in any desired order.
● If more than 20 tracks are entered, the
rest will not be shown on the Music
Calendar display.
m Programming required tracks
Example:
To program tracks in the order 7 ∑ 4
∑ 15 ∑ 10 in the stop mode.
1. Press the STOP (ª) button.
2. Press the PROGRAM button.
The player enters the program mode.
The MEMORY indicator lights in the
display.
The TRACK No. and STEP No. indicators
blink.
3. Press the numeric buttons in the
following order;
They are automatically stored in the
program memory in order.
● Press "7" with the numeric buttons on
the unit or the remote control. "7"
appears in the Music Calendar, TRACK
No. "7" and next STEP "2" blink in the
display.
● When "+10" is pressed, "1-" will be lit in
the TRACK indication and "3" will blink in
the STEP indication.
When "5" is pressed, "15" appears in the
Music Calendar, TRACK No. "15" and
next STEP "4" blinks in the display.
● The same track can be programmed
repeatedly.
● To program in the stop mode, select a
track using the Â/¯ buttons (the
track number blinks). Press the
PROGRAM button to store it in memory.
4. Press the PLAY (Á) button.
Programmed playback starts from the
first programmed track.
● Playback stops when the last
programmed track has finished playing.
● The programmed contents will be held
in memory even after programmed
playback has been completed or when
programmed playback is stopped by
pressing the STOP (ª) button.
● To release the program mode, press the
PROGRAM button in the stop mode.
m Checking the programmed
contents
The programmed contents can be checked
easily using the CHECK button.
1. Press the STOP (ª) button.
2. Press the CHECK button.
Each time the CHECK button is pressed,
the TRACK number and STEP number
appear in the programmed order.
m Clearing the program memory
1. Press the STOP (ª) button.
2. Press the CLEAR button (more than 2
seconds) to clear the program memory.
● Press the OPEN/CLOSE (ø) button once,
and the program memory will be
cleared.
● The program memory will also be
cleared if the CD player's power is
switched off.
m Changing the program
After programming is complete, unnecessary tracks can be deleted from the
original program or new tracks can be
added after a track originally programmed,
in the following way.
m Renewing a track
1. Press the STOP (ª) button, then press
the CHECK button to indicate the
desired STEP number in the display.
2. To modify the program, input the desired
TRACK No. using the numeric buttons.
The indicated track which was
previously programmed is modified.
m Adding a track
1. Press the STOP (ª) button.
2. Press the CHECK button until the last
step is shown in the display.
3. To add new tracks to a program, input
the track number using the numeric
buttons.
● The track is added after the indicated
track which was previously programmed.
m Deleting a specific track
1. Press the STOP (ª) button, then press
the CHECK button to indicate the
desired STEP number in the display.
2. Press the CLEAR button.
● The track number displayed will be
deleted and the next track advances up.
● Repeat the same steps to delete other
track numbers.
Repeat Function
All or one of the tracks, or a specified
portion (between A - B) of a track can be
played repeatedly. Program playback and
Random playback can also be repeated.
● To repeat random playback, press the
REPEAT ONE/ALL and RANDOM buttons
(REPEAT/ALL and RANDOM light).
Random playback of all tracks is
repeated.
● To repeat program playback, press the
REPEAT ONE/ALL and PROGRAM
buttons (MEMORY and REPEAT/ALL
– 8 –
Page 9

or
light). All programmed tracks are played
Press
Press Again
Light
back repeatedly.
● To cancel Repeat playback and continue
normal playback from the current track,
press the ONE/ALL button repeatedly
until the REPEAT indicator disappears.
● Press the STOP (∑) button to abort the
operation.
∑ To repeat an entire disc
(All repeat mode)
1. Press the ONE/ALL button.
The REPEAT and ALL indicators light.
2. Press the PLAY (Á) button.
Playback starts and, when the end of
the disc is reached, the player will
return to the beginning of the first track,
and then playback continues repeatedly.
m To repeat one track
(Single repeat mode)
1. Press the ONE/ALL button twice.
The REPEAT and ONE indicators light.
2. Press the numeric buttons corresponding to the required track.
The selected track is played, then when
the end of the track is reached, the
player will return to the beginning of the
track and playback starts again. In this
way, the selected track will be played
back repeatedly.
● This function does not work together
with Random function.
m To repeat a designated section
(A-B repeat mode)
1. Press the PLAY (Á) button to start
playback.
2. Designate the point at which playback
should start (point A) by pressing the
A-B button.
The REPEAT and A – indicators light.
3. Press the A-B button again (REPEAT and
A-B light.) at the ending point (B).
● The portion (A-B) will be played
repeatedly.
● To cancel Repeat playback and resume
normal playback, press the A-B button.
● When you specify an A-B section during
programmed playback, pressing the
Â/¯ buttons to change the track
erases the A-B section.
● This function does not work together
with Intro Check and Random functions.
Music Search Operation
m Music search using SKIP
buttons (Â/¯)
The beginning of any track can be easily
located using the  and ¯ SKIP
buttons during playback or in the ready
mode. This operation is indicated clearly in
the TRACK display.
∑ To skip to the next track
Press the ¯ button.
The player will skip ahead to the next track
each time the ¯ button is pressed. The
player can be advanced to the last track in
this way, but once the beginning of the last
track is reached, the player will not
advance even if the ¯ button is pressed.
∑ To skip back to the previous track
Press the  button.
The player will skip back one track each
time the  button is pressed. If this
button is pressed in the middle of a track,
the player will skip back to the beginning of
the current track. To make it skip back to
the previous track, the button must be
pressed twice.
In this way, the player can be returned to
the beginning of the first track on the disc.
m Music search using SEARCH
buttons (Ô/)
During playback, hold down the
button to move the playing position quickly
in the forward direction, and hold down the
Ô button to move quickly in the reverse
direction.
During the manual search operation, sound
will be audible but the output level will be
lowered. This lets you search for any
required portion while checking the sound.
When the desired position is reached,
release the button to reenter the previous
mode.
ENGLISH
Time Counter Display
The time counter shows various time
readouts, as follows.
Stop mode during normal playback:
1 EACH indicator
After the disc tray is closed with the disc
loaded, the EACH indicator lights in the
display and the player enters the
standby mode.
2 Total disc playback time (TOTAL)
Press the TIME button in the stop mode
to display the total disc playback time
and the total number of tracks on the
disc.
During normal playback:
1 Elapsed time display (EACH)
The elapsed time of the track being
played is then displayed in minutes and
seconds.
– 9 –
Page 10

Remote-Controlled Operation
2 Remaining time display
(EACH REMAIN)
Press the TIME button to light EACH
REMAIN up.
This provides an easy check of the total
remaining time of the track being
played.
3 Total remaining time display
(TOTAL REMAIN)
Press the TIME button to light TOTAL
REMAIN up.
This provides an easy check of the total
remaining time required to finish the
disc.
● Displayed after the TIME button is
pressed three times. The time displayed
is the elapsed playback time.
● The TOTAL REMAIN time may not
appear in the display during program
playback or random playback, and the
time counter will not be displayed while
in the stop mode during program
playback, even when the TIME button is
pressed.
m Remote Control Unit
The provided Remote Control Unit allows
the unit to be operated from a distance.
When operating the remote control unit,
point it towards the remote sensor on the
front panel of the unit.
m Battery Installation
1. Remove the battery compartment cover.
2. Insert two "AA" (R6, SUM-3) dry
batteries.
Make sure that the batteries are
inserted with their positive ≠ and
negative – poles positioned correctly.
3. Close the cover until it clicks.
Battery Replacement
If you notice that the distance between the
remote control unit and the player for
correct operation becomes shorter, it
indicates that the batteries are exhausted.
In this case replace the batteries with new
ones.
● Even if the remote control unit is
operated within the effective range,
remote control operation may be
impossible if there are any obstacles
between the player and the remote
control.
● If the remote control unit is operated
near other appliances which generate
infrared rays, or if other remote control
devices using infrared rays are used
near the player, the player may operate
incorrectly. In the reverse way, the
other appliances may operate
incorrectly.
Precautions Concerning Batteries
● Be sure to insert the batteries with
correct positive ≠ and negative –
polarities.
● Use batteries of the same type. Never
use different types of batteries together.
● Rechargeable and non-rechargeable
batteries can be used. Refer to the
precautions on their labels.
● When the remote control unit is not to
be used for a long time (more than a
month), remove the batteries from the
remote control unit to prevent them
from leaking. If they leak, wipe away the
liquid inside the battery compartment
and replace the batteries with new
ones.
● Do not heat or disassemble batteries
and never dispose of old batteries by
throwing them in a fire.
– 10 –
Page 11

Specifications
CD PLAYER
Disc: 8-cm/12-cm CD
Audio Channel: 2 channels
Quantization: 16-bit linear
Sampling Frequency: 44.1 kHz
Analog Output (RCA)
Nominal output level: –10 dBV
(load impedance 10 kohms,
unbalanced)
Maximum output level: +6 dBV (2 Vrms)
Output impedance: 2.5 kohms
Headphone Output (standard stereo phone
jack): 11 mW at max. (load impedance 32
ohms)
Frequency Response: 20 Hz – 20 kHz ±1.5dB
Signal-to-Noise Ratio (S/N): >85 dB (1 kHz)
Total Harmonic Distortion: < 0.02 % (1 kHz)
Channel Separation: >80 dB (1 kHz)
Pitch Control: ±6 %
Auto Cue Level: –60 dB
Troubleshooting
GENERAL
Power Requirements:
120 VAC, 60 Hz (U.S.A./ Canada
Model)
230 VAC, 50Hz (UK/Europe Model)
240 VAC, 50Hz (Australia Model)
Power Consumption: 9 Watts (AC)
Dimensions (W x H x D): 482 x104 x304mm
(19" x 4-1/8" x 11-15/16")
Net Weight: 4.4 kg (9.7 Ibs.)
482mm
465mm 304mm
435mm
Standard Accessories:
Wireless Remote Control Unit
(RC-150C), Battery (SUM-3, "AA", "R6"
type) x 2, Rack Mounting Screw Kit,
RCA Pin-plug Cord
● Improvements may result in specification or feature changes without notice.
● Illustrations may differ slightly from
production models.
290mm
76mm
88mm
16mm
ENGLISH
Basic troubleshooting of a CD player is similar to troubleshooting of any other electrical or electronic equipment. Always check the most obvious
possible causes first. To give you a few ideas of what to look for, check the following:
Problem Probable Cause Remedy
No power when POWER is pressed. Power plug not inserted securely. Plug in securely.
No playback when disc is loaded. Disc loaded with label side down. Load with label side up.
Disc dirty. Clean disc surface.
No audio output. Connection to stereo system is incorrect. Check connections.
A single track can only be played. ONE/ALL button engaged. Press button to disengage it.
No program playback. PROGRAM button not pressed. Press button to display “MEMORY”.
Mistracing (sound jumping). Player receiving vibration or shock. Change the installation position of the player.
Disc dirty. Clean disc surface.
Hum. Pin-cord plug not connected securely. Re-connect plug securely.
Noise in tuner. Player too near tuner. Keep a reasonable distance between them
or switch off player’s power.
Remote control unit operation is impossible. Player’s POWER switch set to OFF. Set switch to ON.
Batteries not inserted in remote control unit. Insert batteries.
Caution:
Since the unit incorporates a microcomputer, it may not operate correctly because of external noise, etc. If this happens, turn the power switch
OFF, then turn it ON again and restart operations.
– 11 –
Page 12

For U.S.A.
TO THE USER
This equipment has been tested and found to comply with the limits for a Class B digital device, pursuant to Part 15
of the FCC Rules.These limits are designed to provide reasonable protection against interference in a residential area.
This device generates and uses radio frequency energy and if not installed and used in accordance with the
instructions, it may cause interference to radio or TV reception. If this unit does cause interference with TV or radio
reception you can try to correct the interference by one or more of the following measures:
a) Reor ient or relocate the receiving antenna.
b) Increase the separation between the equipment and the receiver.
c) Plug the equipment into a different outlet so that it is not on the same circuit as the receiver.
If necessary, consult the dealer or an experienced radio/TV technician for additional suggestions.
CAUTION:
Changes or modifications to this equipment not expressly approved by TEAC CORPORATION for compliance could
void the user's authority to operate this equipment.
For CANADA
AC POWER CORD CONNECTION
CAUTION:
TO PREVENT ELECTRIC SHOCK, MATCH WIDE
BLADE OF PLUG TO WIDE SLO T, FULLY INSERT.
CORDE DE CONNEXION CA
ATTENTION:
POUR ÉVITER LES CHOCS ÉLECTRIQUES,
INTRODUIRE LA LAME LA PLUS LARGE DE LA
FICHE DANS LA BORNE CORRESPONDANTE DE
LA PRISE ET POUSSER JUSQU’AU FOND.
TEAC CORPORATION 3-7-3, Nakacho, Musashino-shi, Tokyo 180-8550, Japan Phone:(0422) 52-5082
TEAC AMERICA, INC. 7733 Telegraph Road, Montebello, California 90640 Phone: (213) 726-0303
TEAC CANADA LTD. 5939 Wallace Street, Mississauga, Ontario L4Z 1Z8, Canada Phone:905-890-8008 Facsimile: 905-890-9888
TEAC MEXICO, S.A. De C.V Privada De Corina, No.18, Colonia Del Carmen Coyoacon, Mexico DF 04100 Phone:5-658-1943
TEAC UK LIMITED 5 Marlin House, Marlins Meadow, The Croxley Centre, Watford, Herts. WD1 8YA, U.K. Phone: 01923-819699
TEAC DEUTSCHLAND GmbH Bahnstrasse 12, 65205 Wiesbaden-Erbenheim, Germany Phone:0611-71580
TEAC FRANCE S.A. 17 Rue Alexis-de-Tocqueville, CE 005 92182 Antony Cedex, France Phone: 01.42.37.01.02
TEAC BELGIUM NV/SA P.A.TEAC Nederland BV, Perkinsbaan 11a, 3439 ND Nieuwegein, Netherlands Phone: 0031-30-6048115
TEAC NEDERLAND BV Perkinsbaan 11a, 3439 ND Nieuwegein, Netherlands Phone: 030-6030229
TEAC AUSTRALIA PTY., LTD.
A.C.N. 005 408 462
TEAC ITALIANA S.p.A. Via C. Cantù 11, 20092 Cinisello Balsamo, Milano, Italy Phone: 02-66010500
106 Bay Street, Port Melbourne, Victoria 3207, Australia Phone: (03) 9644-2442
PRINTED IN CHINA .M-1481
 Loading...