

Page 1
BODY COMPOSITION ANALYZER
SC-331S
Instruction manual
Eng
SC-331S
Temperature Range for Use : 0°C – 35°C
Relative Humidity : 30% – 80%
(without condensation)
Max Altitude : 2,000m ASL
Pressure Range of Environment : 86kPa - 106kPa
Please read this Instruction Manual carefully and keep it
handy for future reference.
SC-331S with Column Kit
<Storage Conditions><Usage Conditions>
Temperature Range of Environment : -10°C – 60°C
Range of Relative Humidity : 10% – 90% (without condensation)
To avoid malfunctions, avoid storing the equipment where there is direct sunlight,
significant temperature changes, the risk of dampness, a large amount of dust, in
the vicinity of fires, or where there is the risk of receiving vibrations or shocks.
Page 2
Eng
Contents
Eng
Intended use
•This equipment can be used in the screening of certain adult diseases and conditions
related to body weight and composition.
•It can be used in the monitoring and prevention of conditions caused by excessive
deposits of fat tissue such as diabetes, hyperlipidemia, cholelithiasis and fatty liver.
•It can be used in the monitoring of changes in individuals‘ body composition related to
differences in the ratio of fat tissue to lean.
•It can be used to assess the effectiveness of individuals‘ nutrition and exercise
programmers, both for health and physical fitness.
•The TANITA Body Composition Analyzer is indicated for use in the measurement of
weight and impedance , and the estimation of body mass index (BMI), total body fat
percent, total body water percent and weight , muscle mass (skeletal and smooth),
physique rating, bone mass, visceral fat rating with healthy range, basal metabolic rate
(BMR), metabolic age, and target body fat percent with predicted weight and fat mass,
using B IA (Bioelectrical Impedance Analysis).
The device is indicated for use for healthy children 5-17 years old and healthy adults
with active, moderately active, to inactive lifestyles.
Efficacy
Before use
Safety Notes
Product Assembly and Components
Preparation
Various settings
••••••••••••••••••••••••••••••••••••••••••••••••
••••••••••••••••••••••••••••••••••••••••••••••••
••••••••••••••••••••••••••••••••••••••••••
How to use
Operating Instructions
•When using as a body composition analyzer
•Target body fat %
•when using as a scale
Various criteria
••••••••••••••••••••••••••••••••••••••••••••••••••••••••••••••
•••••••••••••••••••••••••••••••••••••••••••
••••••••••••••••••••••••••••••••••
•••••••••••••••••••••••••••••••••••••••••••••••••••••••••
When necessary
••••••••••••••••••
••••••••••••••••••••••••
4
8
11
12
28
28
38
39
42
1. This product is simple
to use, and requires no
specialized facilities or
expertise to take
measurements.
2. Measurements can be
taken quickly and easily,
causing minimal
inconvenience to the
patient during
measurments.
Troubleshooting
Connection with a personal computer
Technical Notes
••••••••••••••••••••••••••••••••••••••••••
•••••••••••••
••••••••••••••••••••••••••••••••••••••••••
The New Regression Formula for Basal
Metabolic Rate (BMR)
Specifications
••••••••••••••••••••••••••••••••••••••••••••
••••••••••••••••••••••••••••••••••
48
50
54
58
60
2
3
Page 3
For Your Safety
Eng
The following outlines precautionary measures to be taken to avoid injury to the users of this device
Before use
(For Your Safety)
and others, and to prevent damage to property. Please familiarise yourself with the contents to
ensure the safe operation of this equipment.
Ignoring instructions highlighted with this mark could result in death or
Warning
Caution
severe injury.
Ignoring instructions highlighted with this mark could result in injury or
damage to property.
This mark indicates actions that are prohibited.
This mark indicates instructions that must always be adhered to.
Warning
This device must not be used on subjects with pacemakers or other
mechanical implants.
This device passes a weak electrical current through the body which could
interfere with and cause the malfunction of electrical medical implants,
resulting in serious repercussions.
Prohibited
Caution
Keep off wet circumstance.
Avoid using on subjects with allergies to metals.
Allergic reactions may be caused by the stainless steel used in the electrodes of this device.
Do not jump on the equipment.
Do not lean on the equipment.
Do not use this equipment near other products that emit electromagnetic waves.
Do not insert fingers into gaps and holes.
Avoid impacts on the display.
The screen panel may split and cause injury.
Ensure disabled persons do not attempt to use the equipment by themselves.
A companion must perform the measurements.
Be sure to clean the scale platform with appropriate disinfectant after each use.
For your safety to avoid the risk of electric shock and to secure the accuracy, keep a
clearance with patients during measuring.
Eng
Before use
(For Your Safety)
Prohibited
Always…
Do not handle the plug with a wet hand.
Such action may result in electric shock, fire, or leakage.
Keep this equipment away from flammable gas and oxygen rich
environment.
No modification of this equipment is allowed.
There is a risk of electrocution or injury. Nor can precise analysis be
guaranteed.
Do not use double adapters.
May result in fire.
Use only a correctly wired outlet.
Only genuine cables and equipments are allowed.
Always…
Continually monitor both the subject and the equipment for anomalies.
Should an anomaly with the subject or the equipment be discovered, take appropriate action, such
as stopping the equipment, while ensuring the safety of the subject.
Unplug the equipment from the wall outlet when it will not be in use for long periods of
time.
Do not interpret analysis results yourself (including evaluating measurements and
formulating exercise programmes based on results, etc.).
Weight loss and exercise based on self-analysis could be detrimental to you health. Always follow
the advice of a qualified professional.
This equipment is designated a Class B IT equipment (mainly for systems intended to be
used in domestic environments) and CE (EMC), but weak equipment may be affected.
If you connect your computer or peripherals, please use the compliance with IEC60601-1
(EN60601-1). Or if using the compliance with IEC60950 (EN60950), power must be supplied from
themedical isolating transformer. Keep at a distance of 1.5m between each equipment during
operation. If you ignore this requirement, may cause electrical shock of patients or operation.
4
5
Page 4
6
Before use
(For Your Safety)
Eng
For Your Safety
For Accurate Measurements
Avoid measuring after hard exercise.
May result in measurement errors. Please take measurements after sufficient rest.
Avoid measuring after over-eating or over-drinking, and when severely
dehydrated.
May result in measurement errors. For greater accuracy, avoid using directly after
waking up. Use at the same time on each occasion, at least three hours after eating.
Do not take measurements while using transmitters, such as mobile phones, which may affect
readings.
Bare feet should be placed correctly on the electrode panel for measurement.
Use the device under the same conditions and in the same position as much as
possible to track changes.
Readings are greatly affected by the level of hydration and position of the body. Please
use at the same time each day, under the same conditions and in the same body position.
Avoid measuring in locations of greatly differing temperature.
May result in measurement errors. When the equipment has been moved to a location
±20ºC, allow to stand for at least 2 hours before using.
Also, make sure the soles of feet are free of excess dirt, as this may also act as a barrier to the mild
current.
Use in a stable location.
Errors in measurements may occur when the device is used in an unstable location.
Page 5
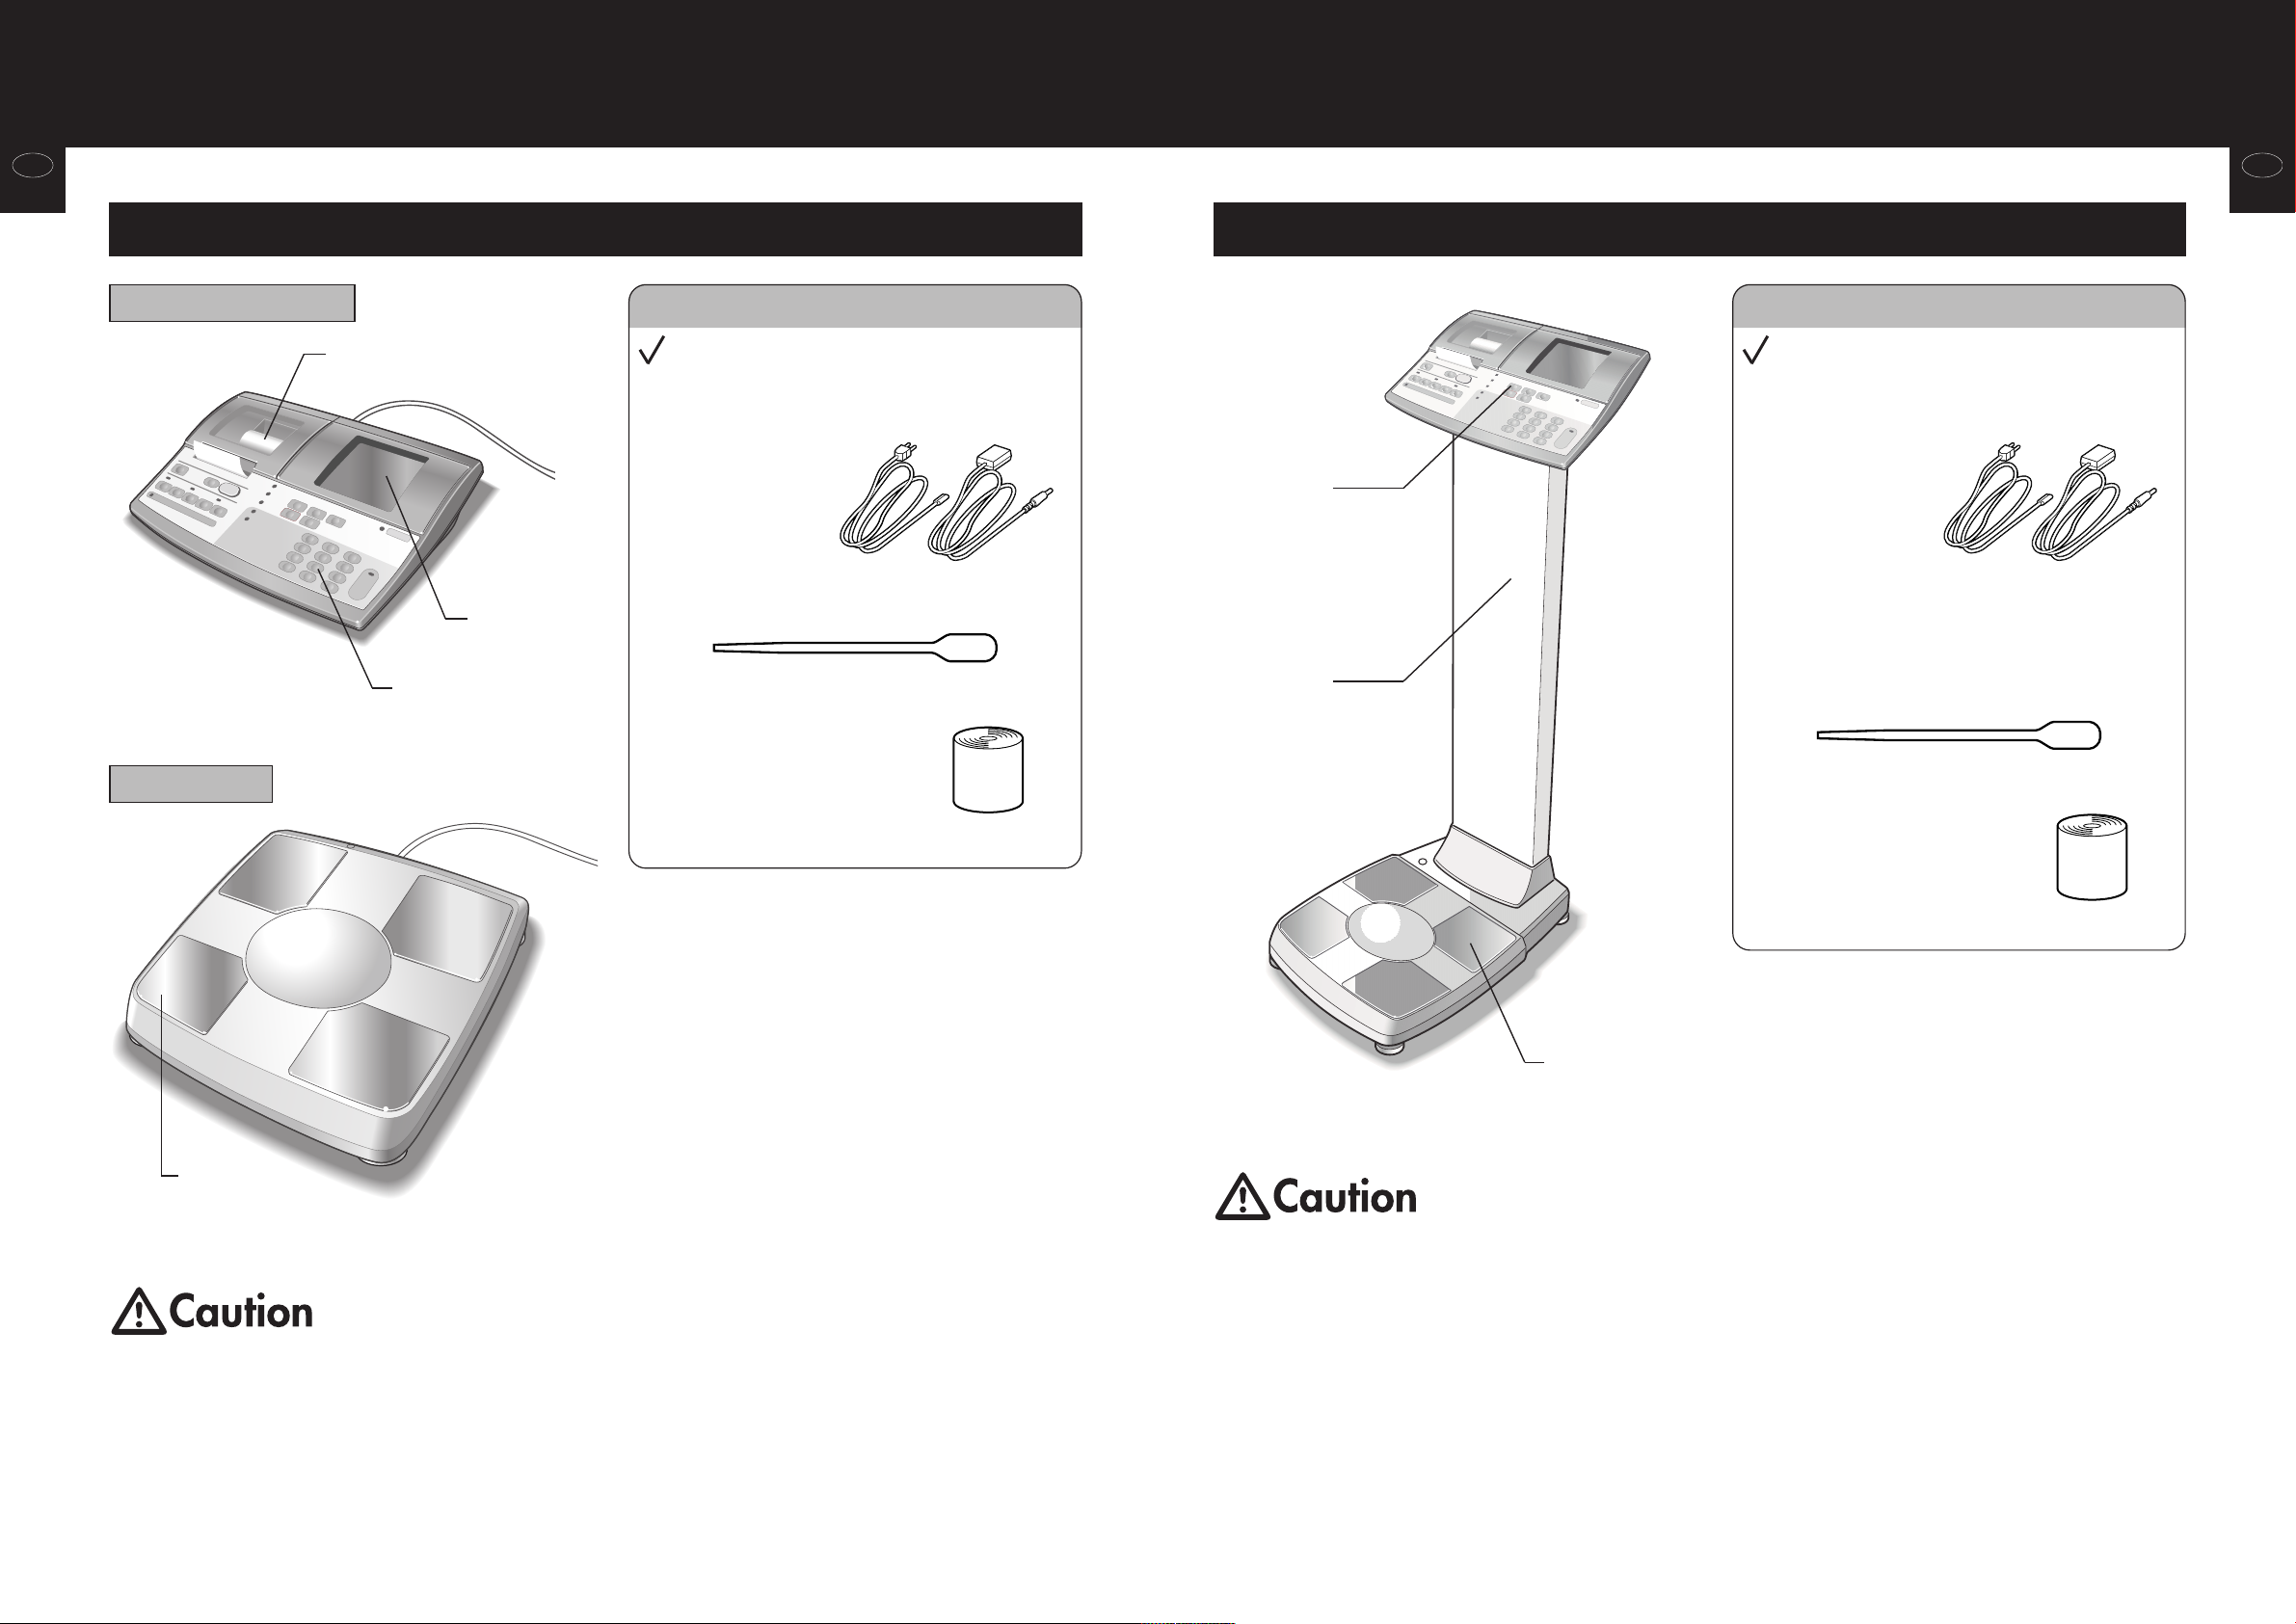
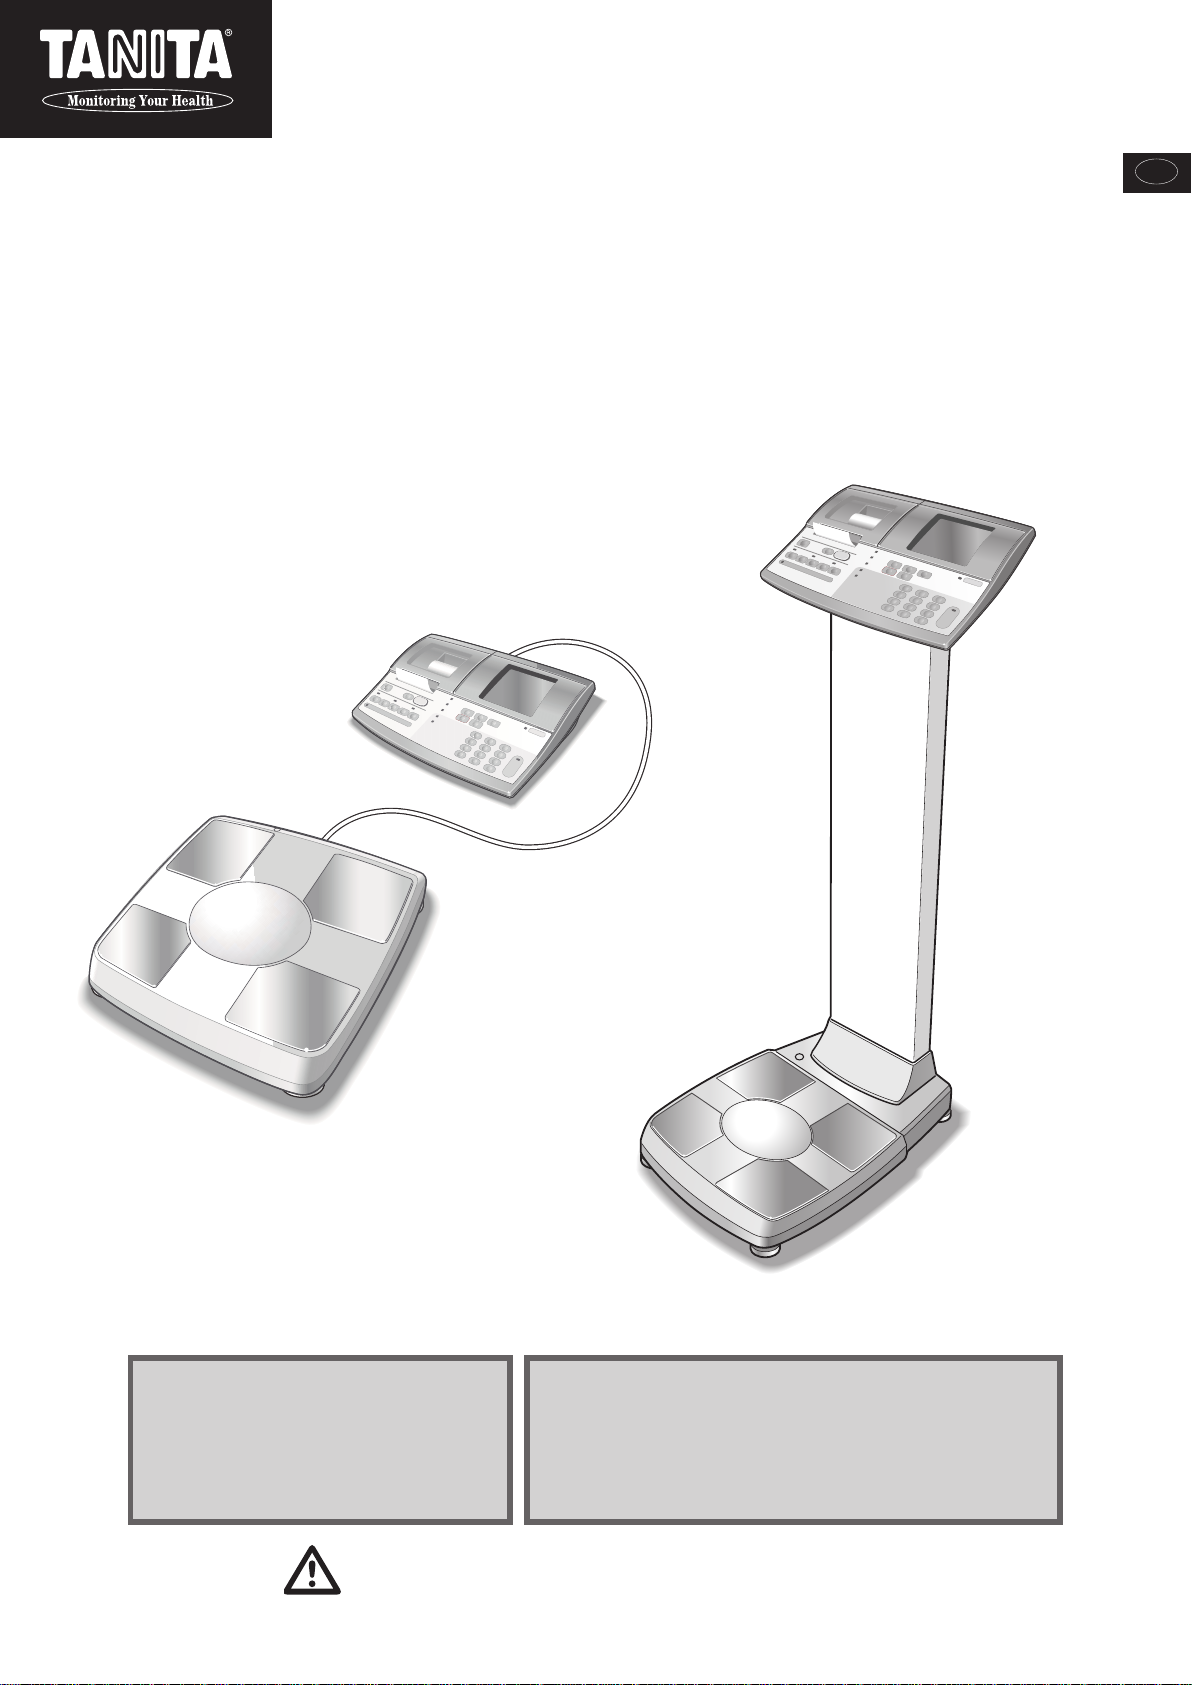
Product Assembly and Components
Eng
Before use
(Product Assembly and Components)
Control Box
Platform
Printer cover
Operating key
SC-331S SC-331S with Column Kit
Display
□Instruction manual (This manual)
□Quick reference guide
□CD-ROM (USB driver)
□AC adapter
□Power cord
Dropper (1 item)
□
□Printer paper
(Thermal paper, roll diameter:
2.2in / 55mm, roll length:
approx. 112ft / 34m)
* Please contact the agent from
which you have purchased
the product for details.
Control Box
Column
□Instruction manual (This manual)
□Quick reference guide
□CD-ROM (USB driver)
□Assembling guide
□AC adapter
□Power cord
□
□
□
□Printer paper
AccessoriesAccessories
Hexagonal wrench (1 item)
Hexagon socket head bolts
(M5L12) (4 items)
Dropper (1 item)
(Thermal paper, roll diameter:
2.2in / 55mm, roll length:
approx. 112ft / 34m)
* Please contact the agent from
which you have purchased
the product for details.
Eng
Before use
(Product Assembly and Components)
8
Electrode
(4 positions)
Platform
Make sure you place the Platform on a stable, level surface.If the Platform is not stable
because not all the feet are on the surface, for example, there is a risk of stumbling or
inaccurate measurement.
Make sure you place the Platform on a stable, level surface.If the Platform is not stable
because not all the feet are on the surface, for example, there is a risk of stumbling or
inaccurate measurement.
9
Page 6
Preparation
Setting of the printer paper
Eng
Before use
(Product Assembly and Components)
Control panel
1
2
3
•Please change the printer paper when red lines appear along the sides of the paper.
•Please pay careful attention to avoid injury from the sharp edge.
•Please turn off the machine before clearing Paper jams.
Setting of the printer paper
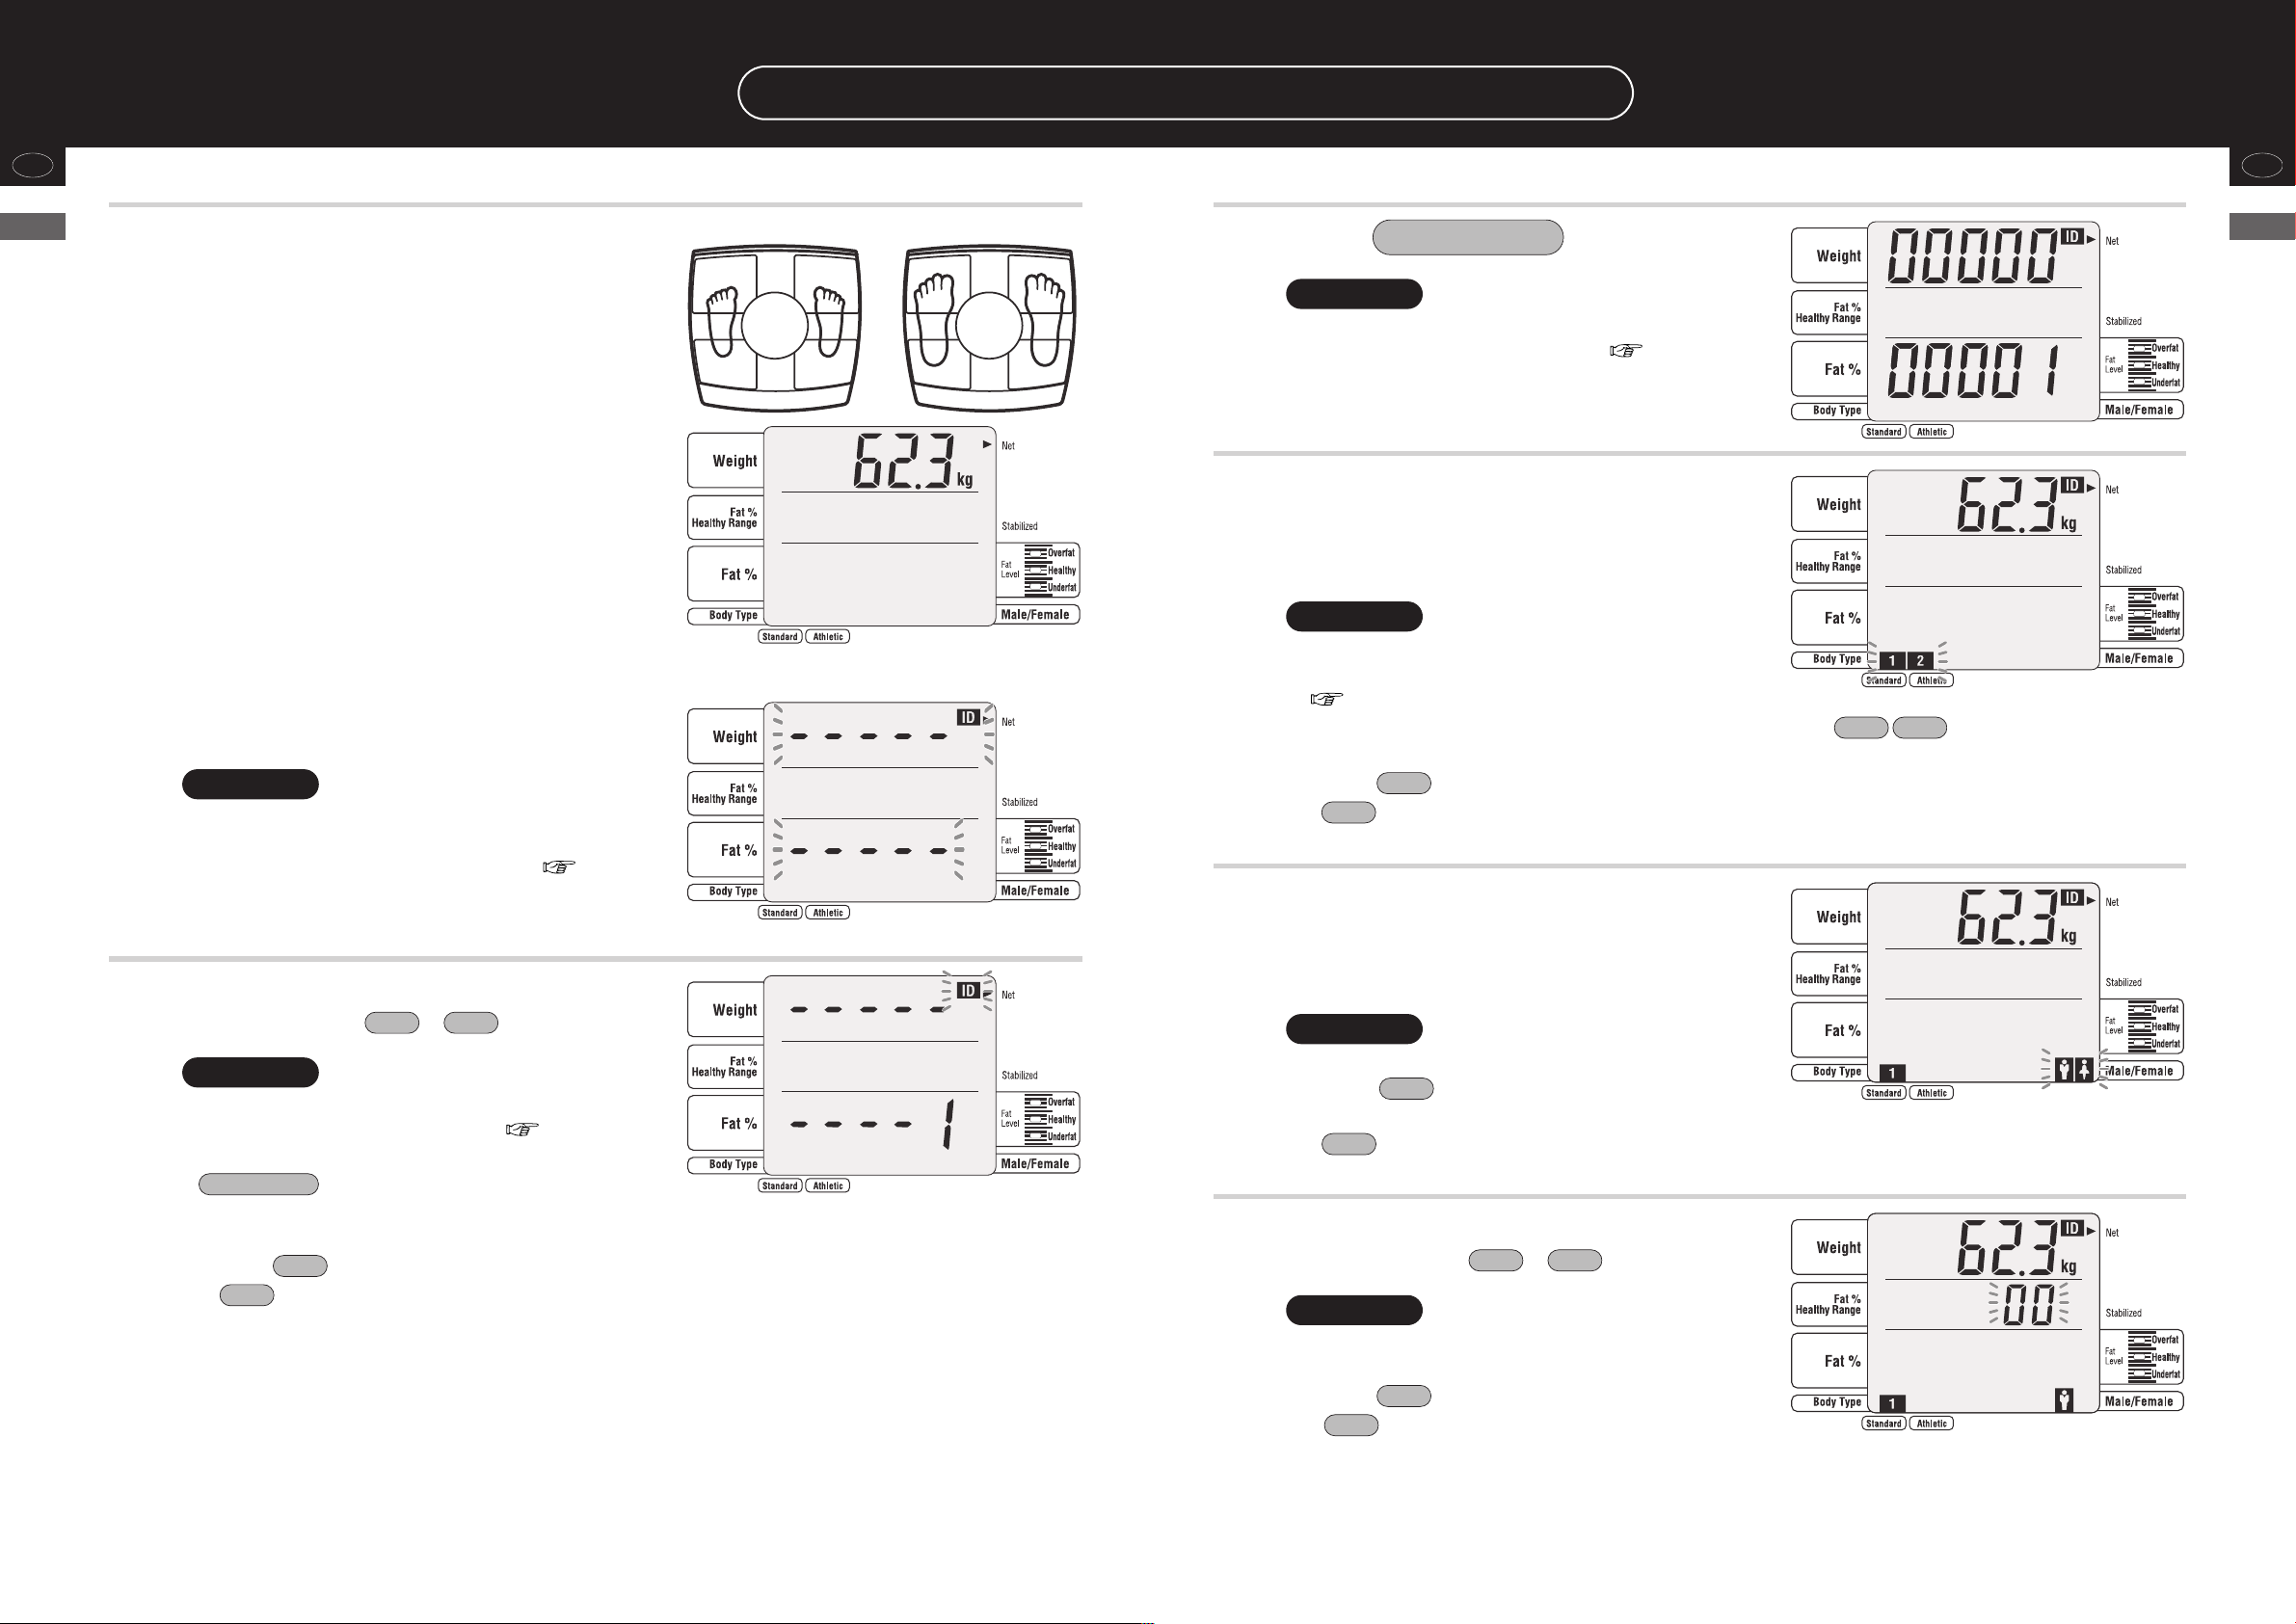
Press to turn on the power.
• After all lamps light up, the model number is displayed as ,
and is displayed.
(1) Press .
(2) Remove the printer cover.
(3) Set up the printer paper
• Remove the adhesive of the printer paper and draw it
out approx. 4in / 10cm.
OPEN
Eng
Before use
(Preparation)
Connection of Plugs
Rear side of the
control box
AC adapter
•To avoid electric shock, do not insert or remove the plug with wet
hands.
•To avoid electric shock, do not use the equipment near water.
•To avoid measurement error, do not measure while using equipment that generates
radio waves, such as cellular phone.
•Use only the original AC adapter. Using AC adapters other than the original one may
cause malfunction, smoke or fire.
4
5
6
Return the printer cover.
• In the case that is displayed,
The printer cover is open, so please close it
e
again properly ( page 49).
Press the , and cut off the
excessive paper.
• In the case that the automatic cutting is set to
“OFF,” the automatic cutting does not function
( page 16).
Setting completed.
FEED
10
11
Page 7
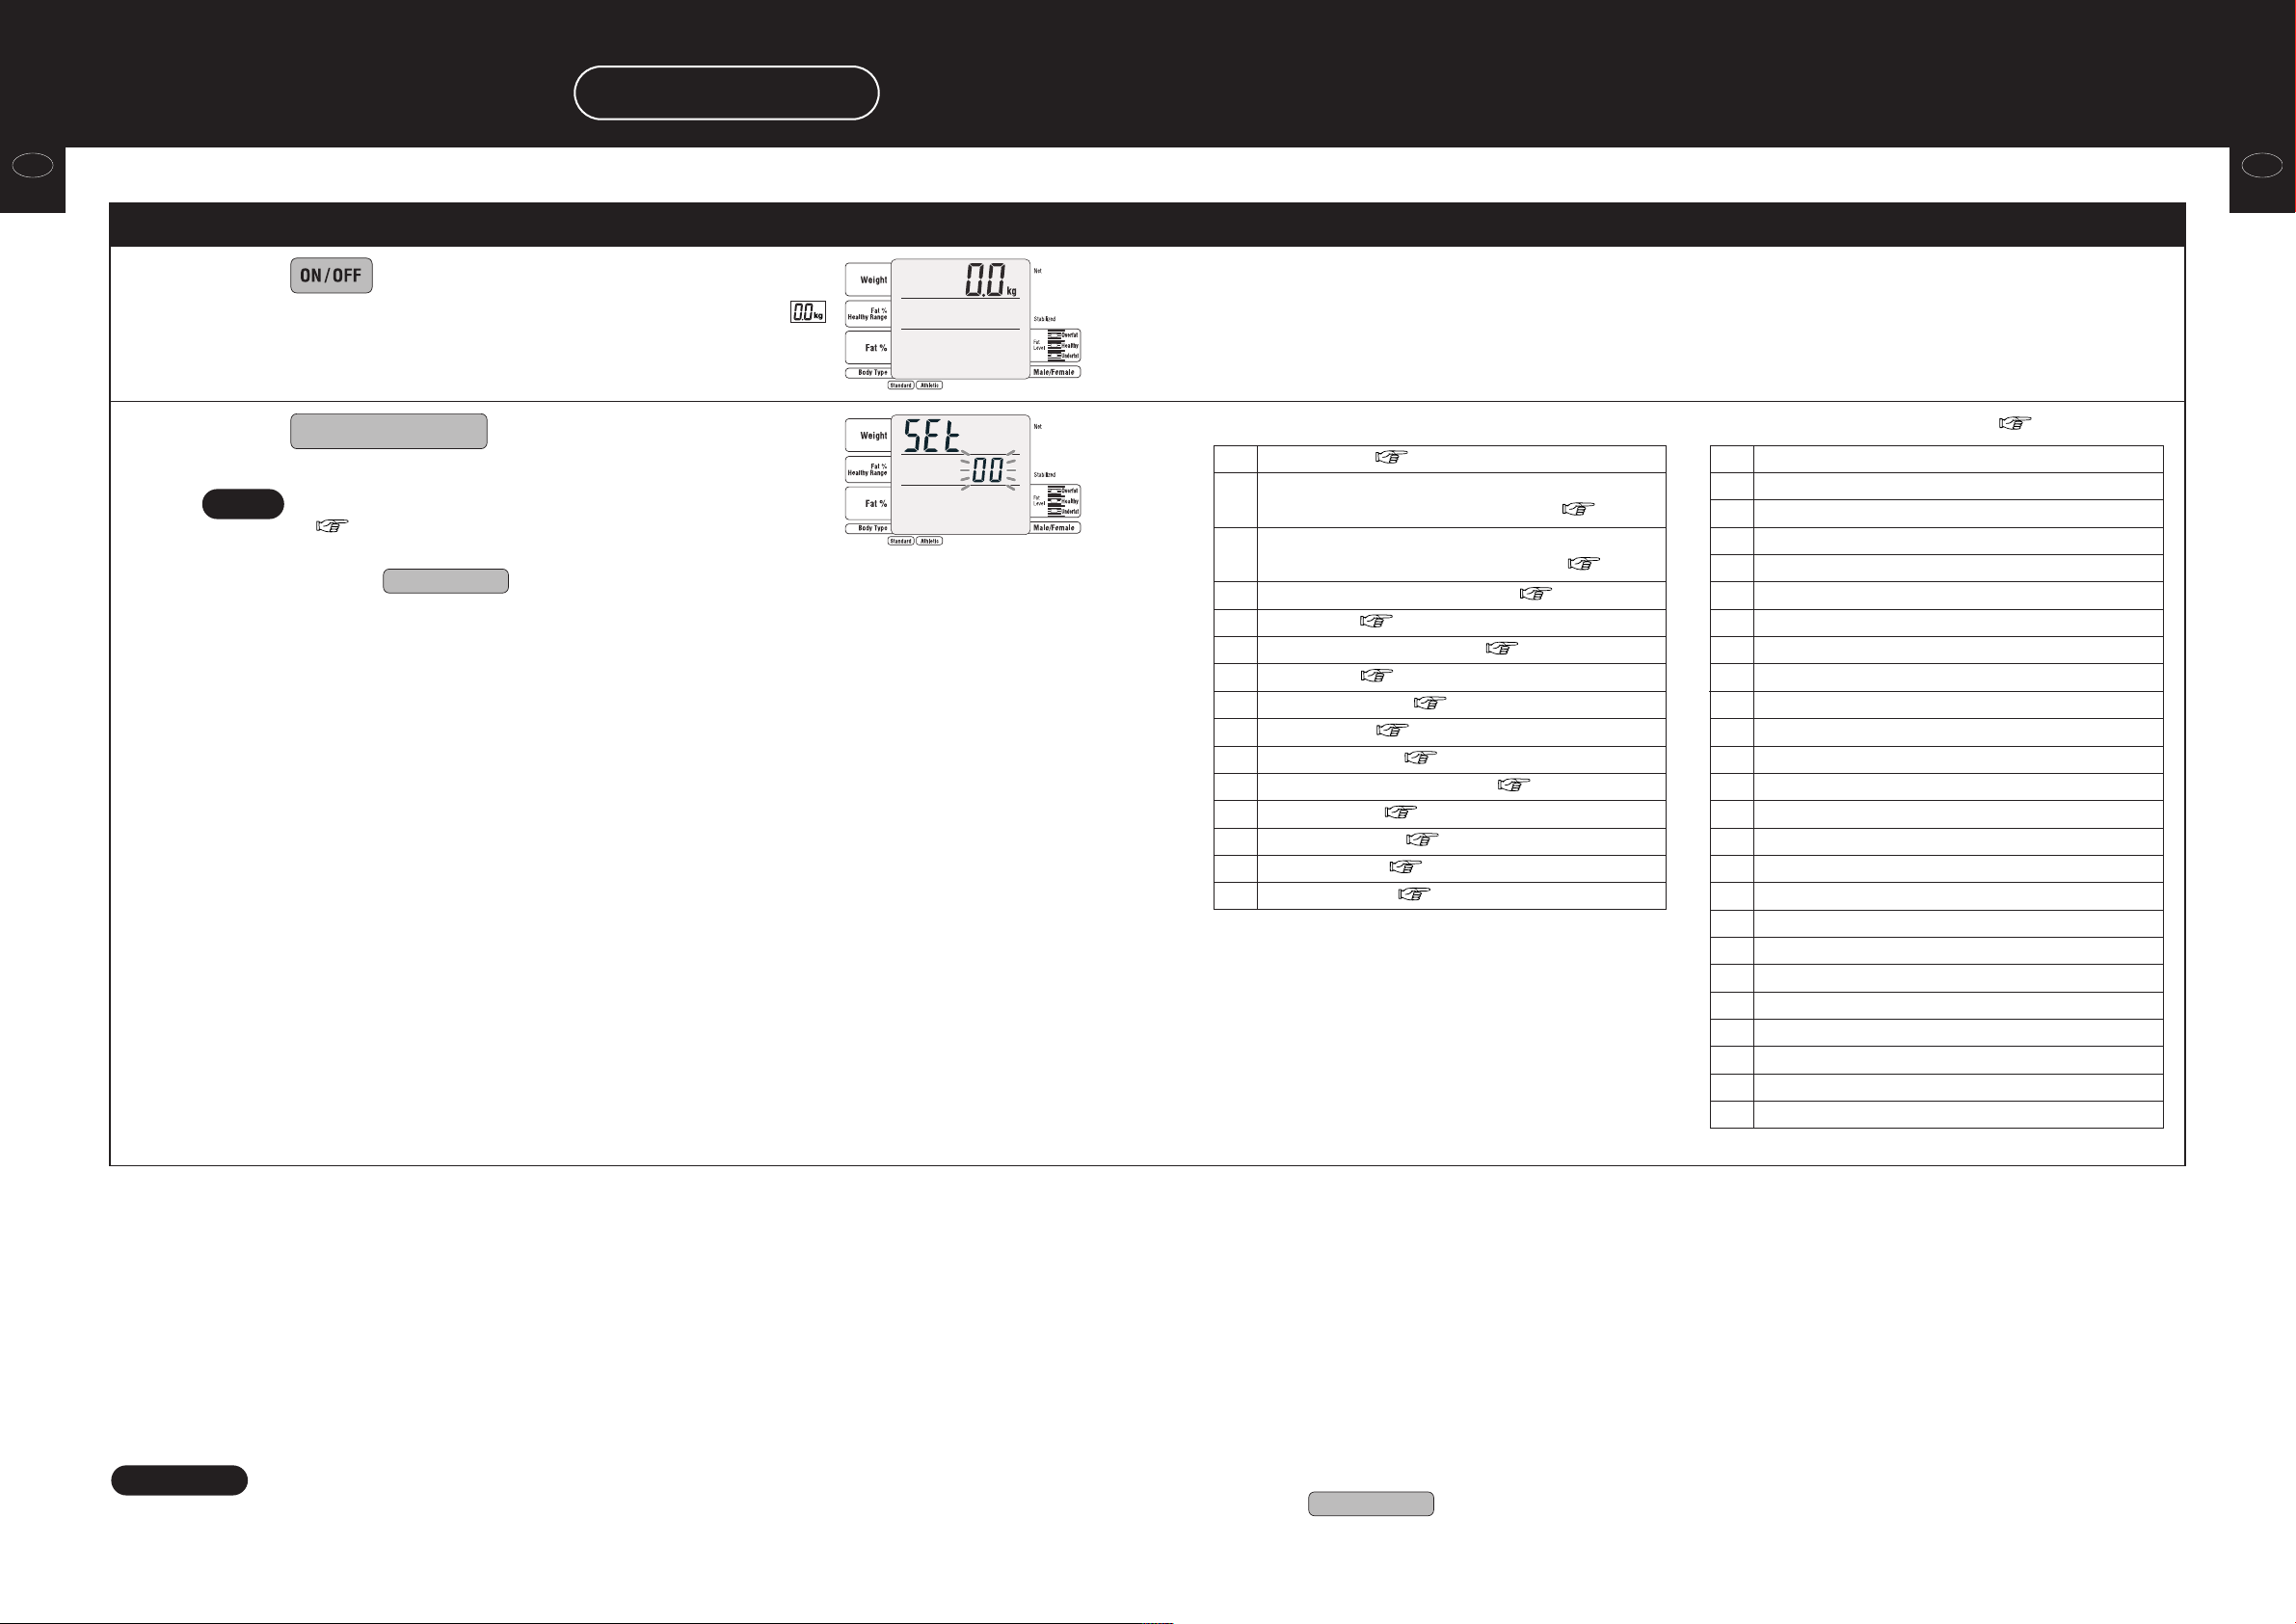
Various settings
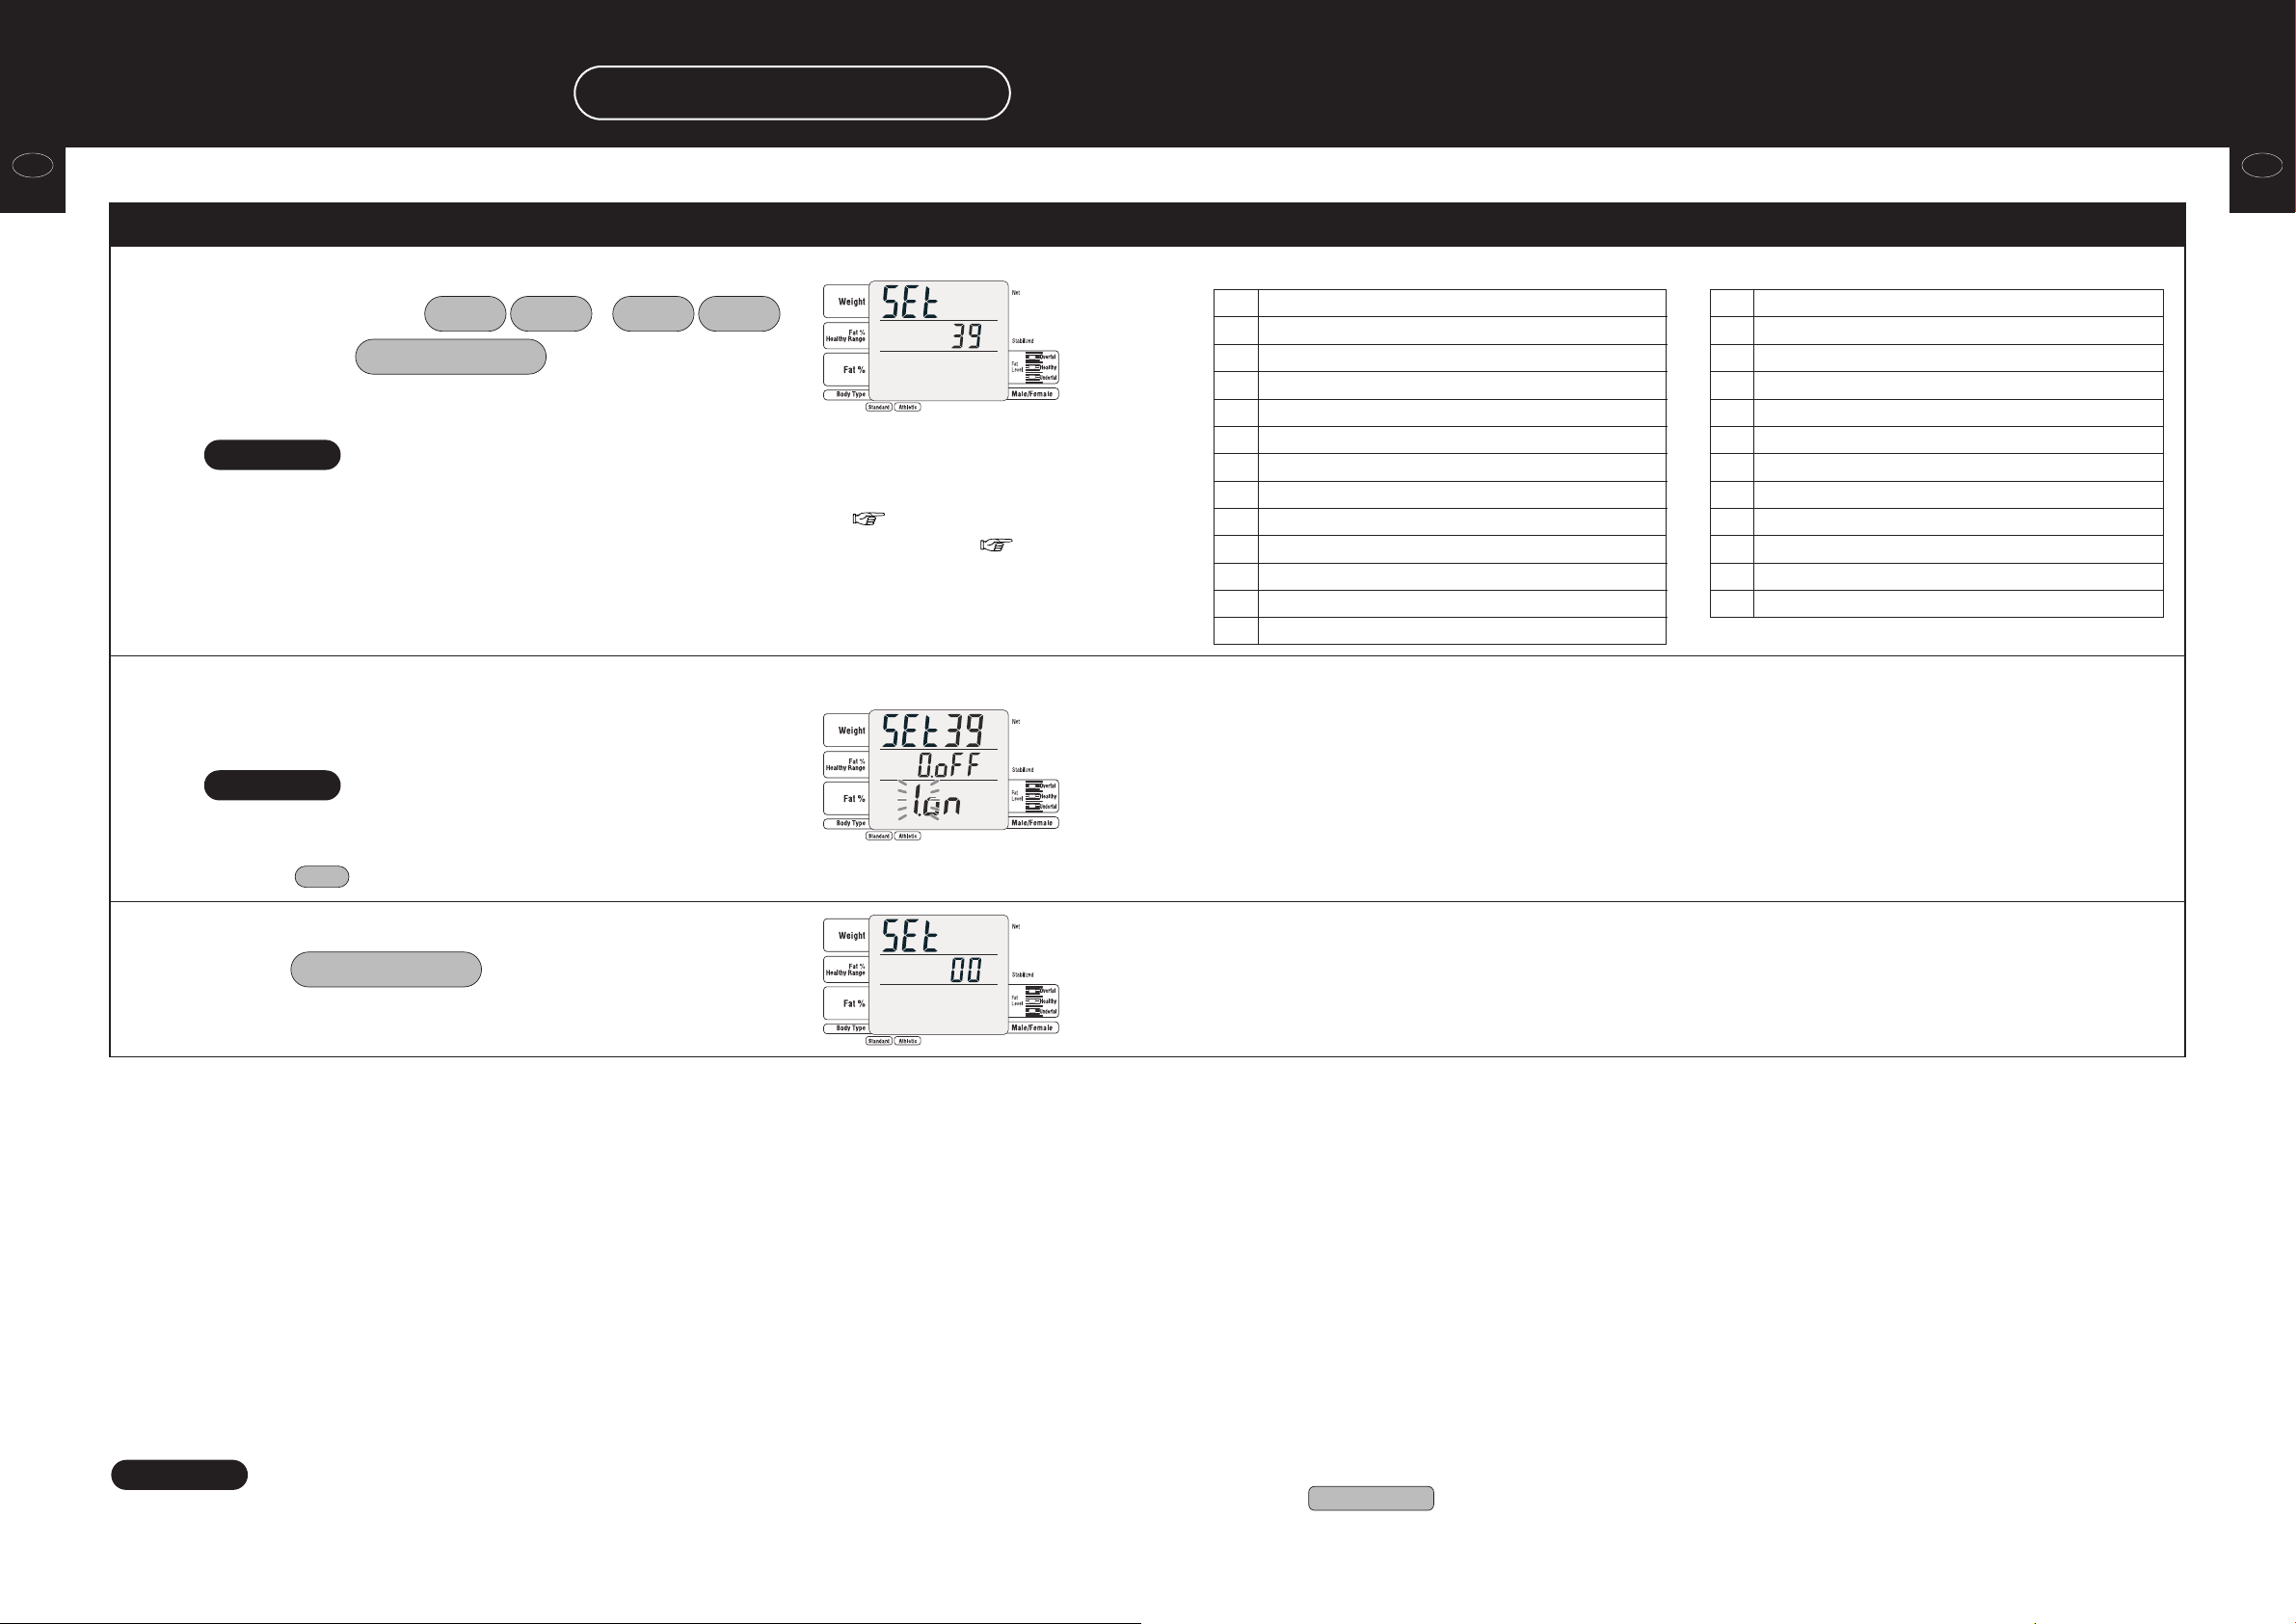
Setting methods
Eng
Before use
(Various settings)
1
2
Call up the setting item selection screen.
Press to turn on the power.
• After all lamps light up, the model number is displayed, and
is displayed.
Press
• The setting item input screen is displayed.
Note
Mode Setting
• 39 – 64 are the setting items related to print out items
( page 24).
• When the various settings are all completed,
Press on the “Setting item selection” screen (
e
tare input screen
Mode Setting
).
it returns to the preset
Setting items
Date and time( page 14)
1
Number of sheets to print
2
Number of sheets to print
3
Auto Cutting of the printer paper ( page 16)
4
Beep sound ( page 16)
5
Display Fat % Healthy range ( page 17)
6
ID Number ( page 17)
7
Measurement flow ( page 18)
8
Athletic mode ( page 18)
9
Height increment ( page 19)
10*
Automatic determination time ( page 19)
11
Wrestler mode ( page 20)
17
Target body fat % ( page 21)
18
Select language ( page 21)
19
Print item preset ( page 22)
20
* Invalid in “lb” mode.
Body composition analyzer ( page 16)
Weight only mode ( page 15)
Print item setting ON / OFF
39 TANITA Logo
40 Category name
41
Date and Time
Serial number 42
Memo space 43
ID Number44
Fat mass 45
Fat free mass 46
47 Muscle mass
Total body water 48
Total body water % 49
Bone mass 50
Basal metabolic rate 51
Metabolic age 52
53
Visceral fat rating
BMI
54
Ideal body weight 56
Degree of obesity 57
Desirable range Body fat 58
Indicator - Fat % 59
60
Indicator - BMI
61
Indicator - Visceral fat rating
62
Indicator - Muscle mass
63
Indicator - BMR
64
Physique rating
( page 24)
Eng
Before use
(Various settings)
12
Note
*When various settings are continuously carried out,
press each number to set.
e
*The set contents are memorized until they are changed next time.
*When various settings are all completed,
press on the “setting item selection screen” (
e
Mode Setting
it returns to the preset tare input screen
).
13
Page 8
Various settings
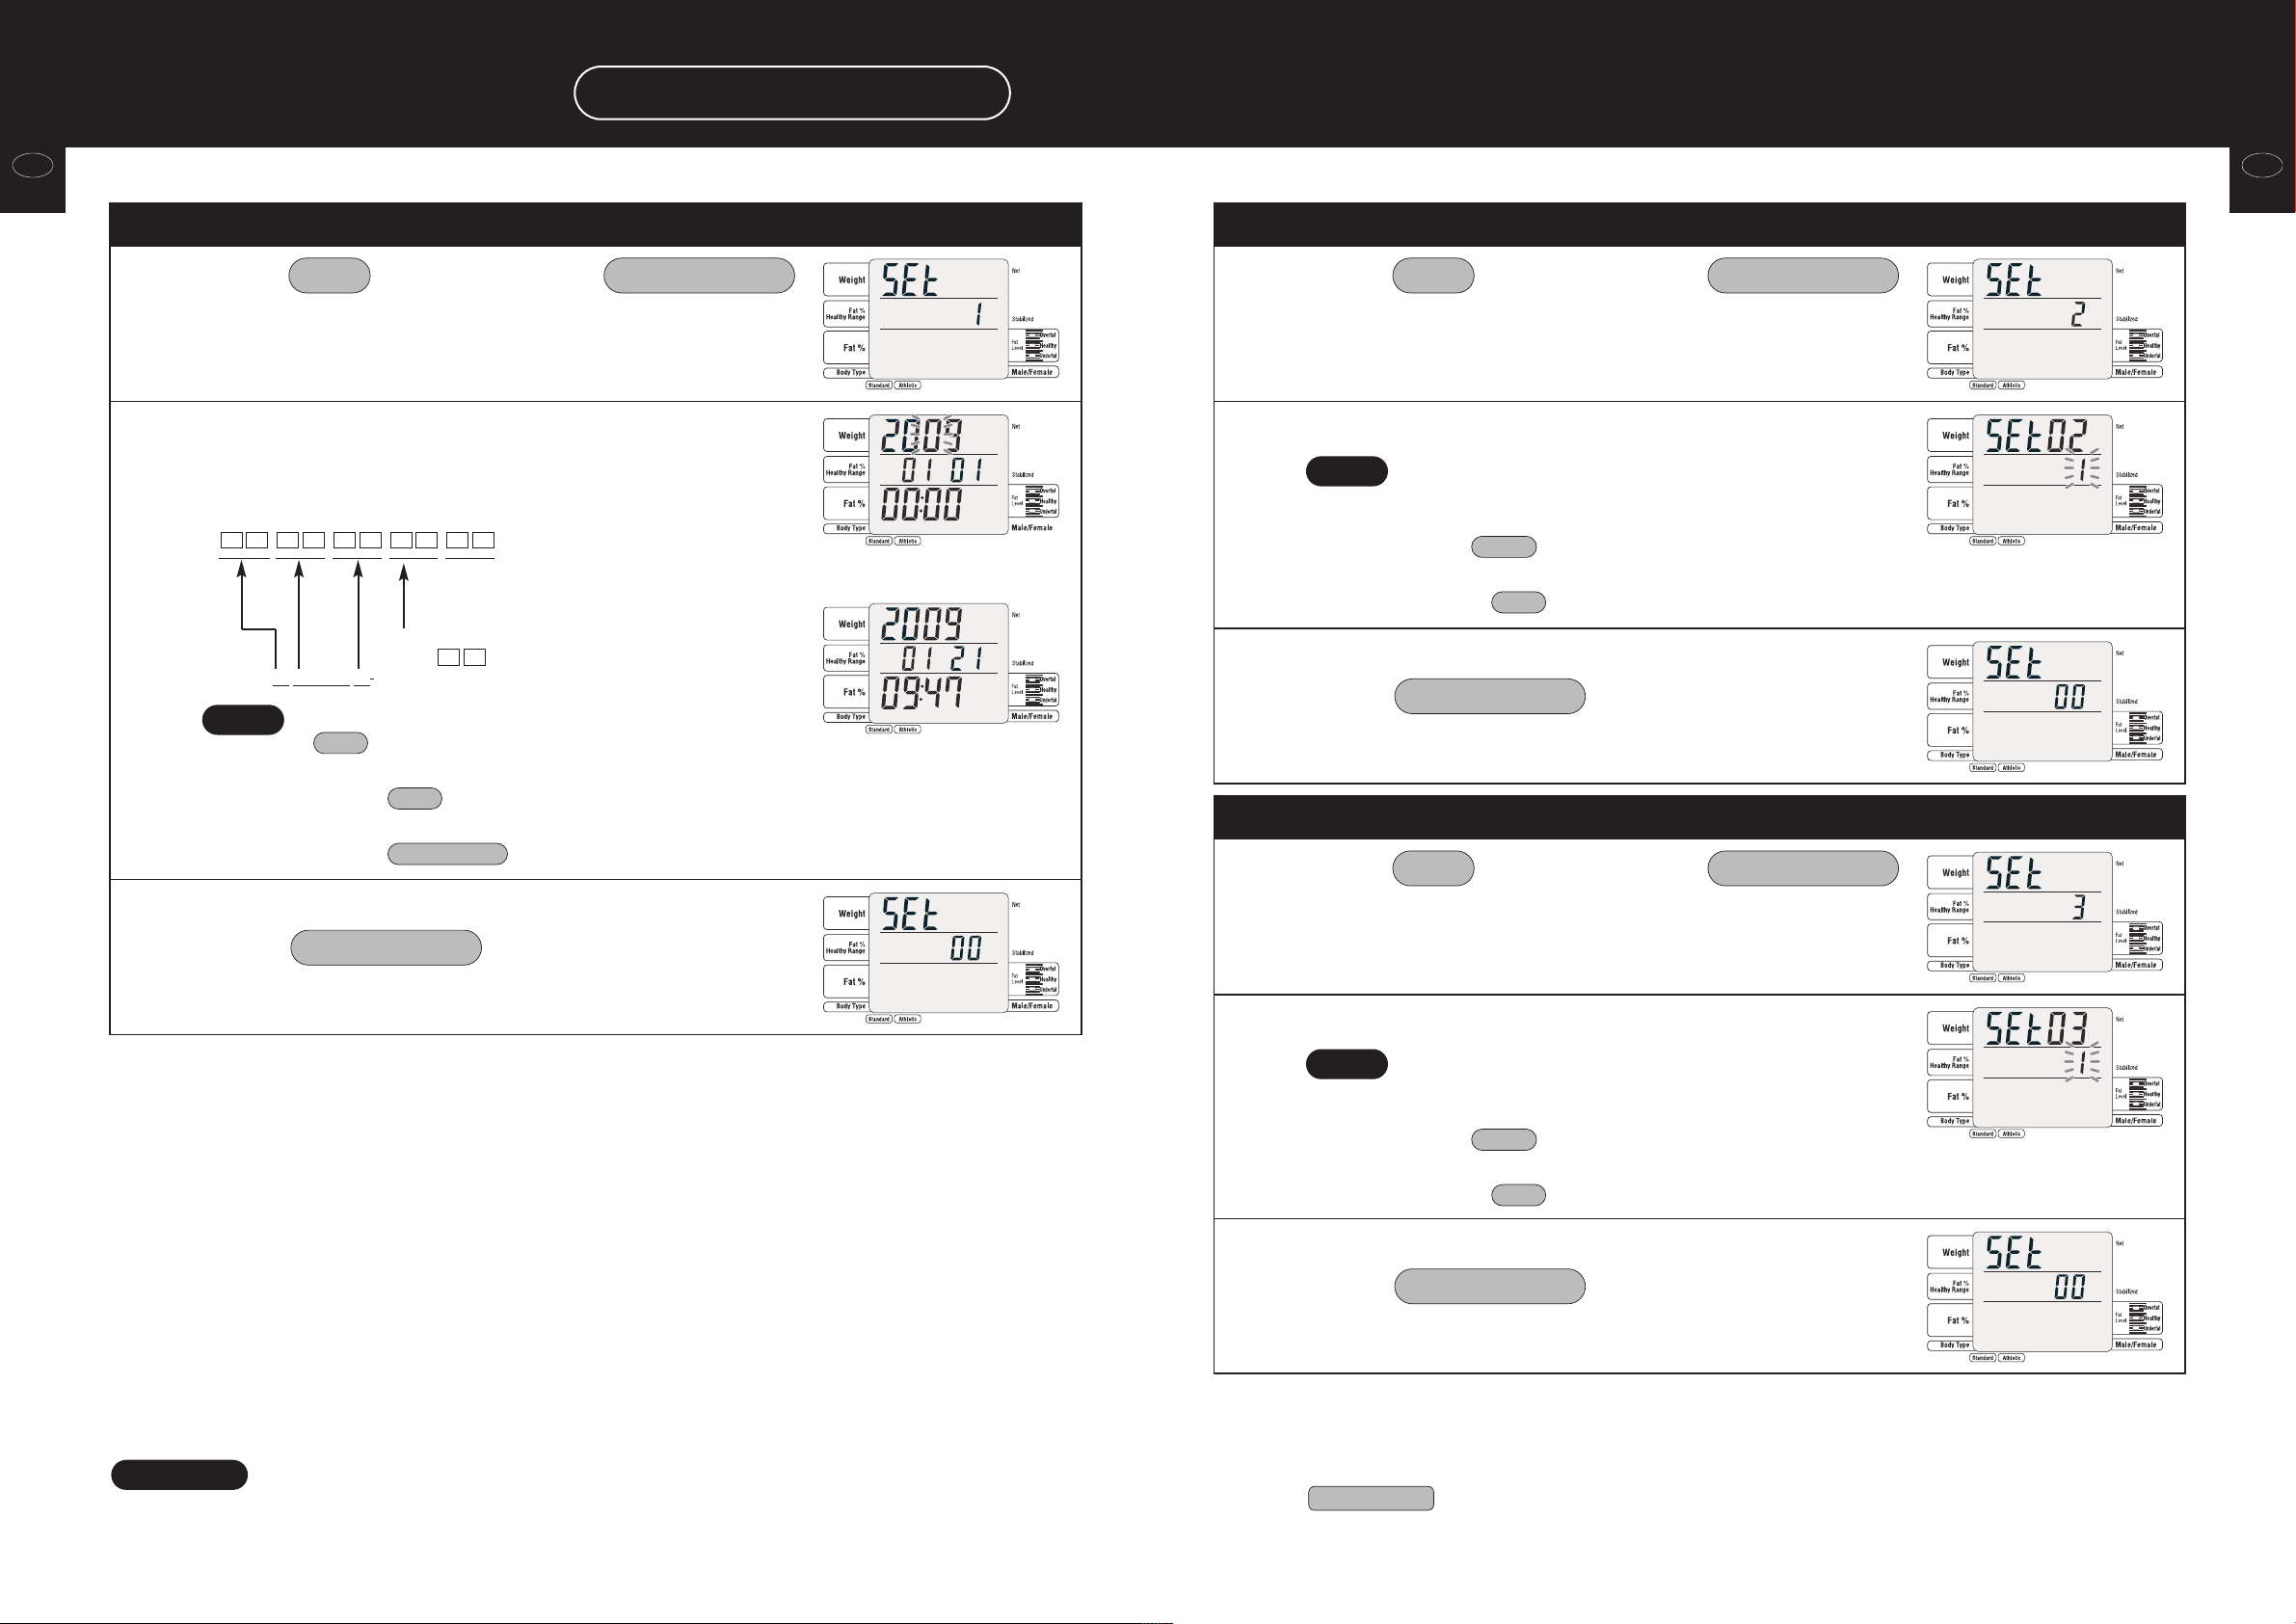
Setting methods (continued)
Eng
Before use
(Various settings)
3
4
5
Register the date and time
Press and then press .
• The “date and time” setting screen is displayed.
(Continued from page 12).
Enter / Next1
Input the date and time
• Input the year, month, day, hour and minute in order with 2
digits.
st
Example:
Year 2009
Note
In the case to input: 9:47 am January 21
7490121090
In the case of 6:00 pm,
press
January 21
• To input a number with 1 digit (0 – 9), first press
• To correct the input value, or cancel the input,
e
• To end inputting in midstream,
e
st
.
0
press (the input is deleted).
press .
CE
Enter / Next
81
, 2009
After inputting all the items,
press .
• It returns to the “setting item selection” screen.
Enter / Next
s
Set the number of sheets to print for the body composition Analyzer
3
Press and then press .
• The “number of sheets to print for the body composition
analyzer” setting screen is displayed.
Enter / Next2
Input the number of sheets to print.
4
Note
• The default is “1” (input range: 0 – 3).
• In the case that the number of sheets to print is set to
“0” for both the body composition analyzer and the
scale, key does not function.
• To correct the input value, or cancel the input,
e
FEED
press (the input is deleted).
CE
After inputting the numeric value,
press .
5
• It returns to the “setting item selection” screen.
Set the number of sheets to print for the scale
Press and then press .
• The “number of sheets to print for the scale” setting screen is
3
displayed.
Enter / Next
(Continued from page 12).
Enter / Next3
(Continued from page 12).
Eng
Before use
(Various settings)
Note
*When various settings are continuously carried out,
press each number to set.
e
*The set contents are memorized until they are changed next time.
Input the number of sheets to print.
4
Note
• The default is “1” (input range: 0 – 3).
• In the case that the number of sheets to print is set to
“0” for both the body composition analyzer and the
scale, key does not function.
• To correct the input value, or cancel the input,
e
FEED
press (the input is deleted).
CE
After inputting the numeric value,
press .
5
*When various settings are all completed,
e
• It returns to the “setting item selection” screen.
press on the “setting item selection screen” (
Mode Setting
Enter / Next
it returns to the preset tare input screen
).
14
15
Page 9

Various settings
Before use
(Various settings)
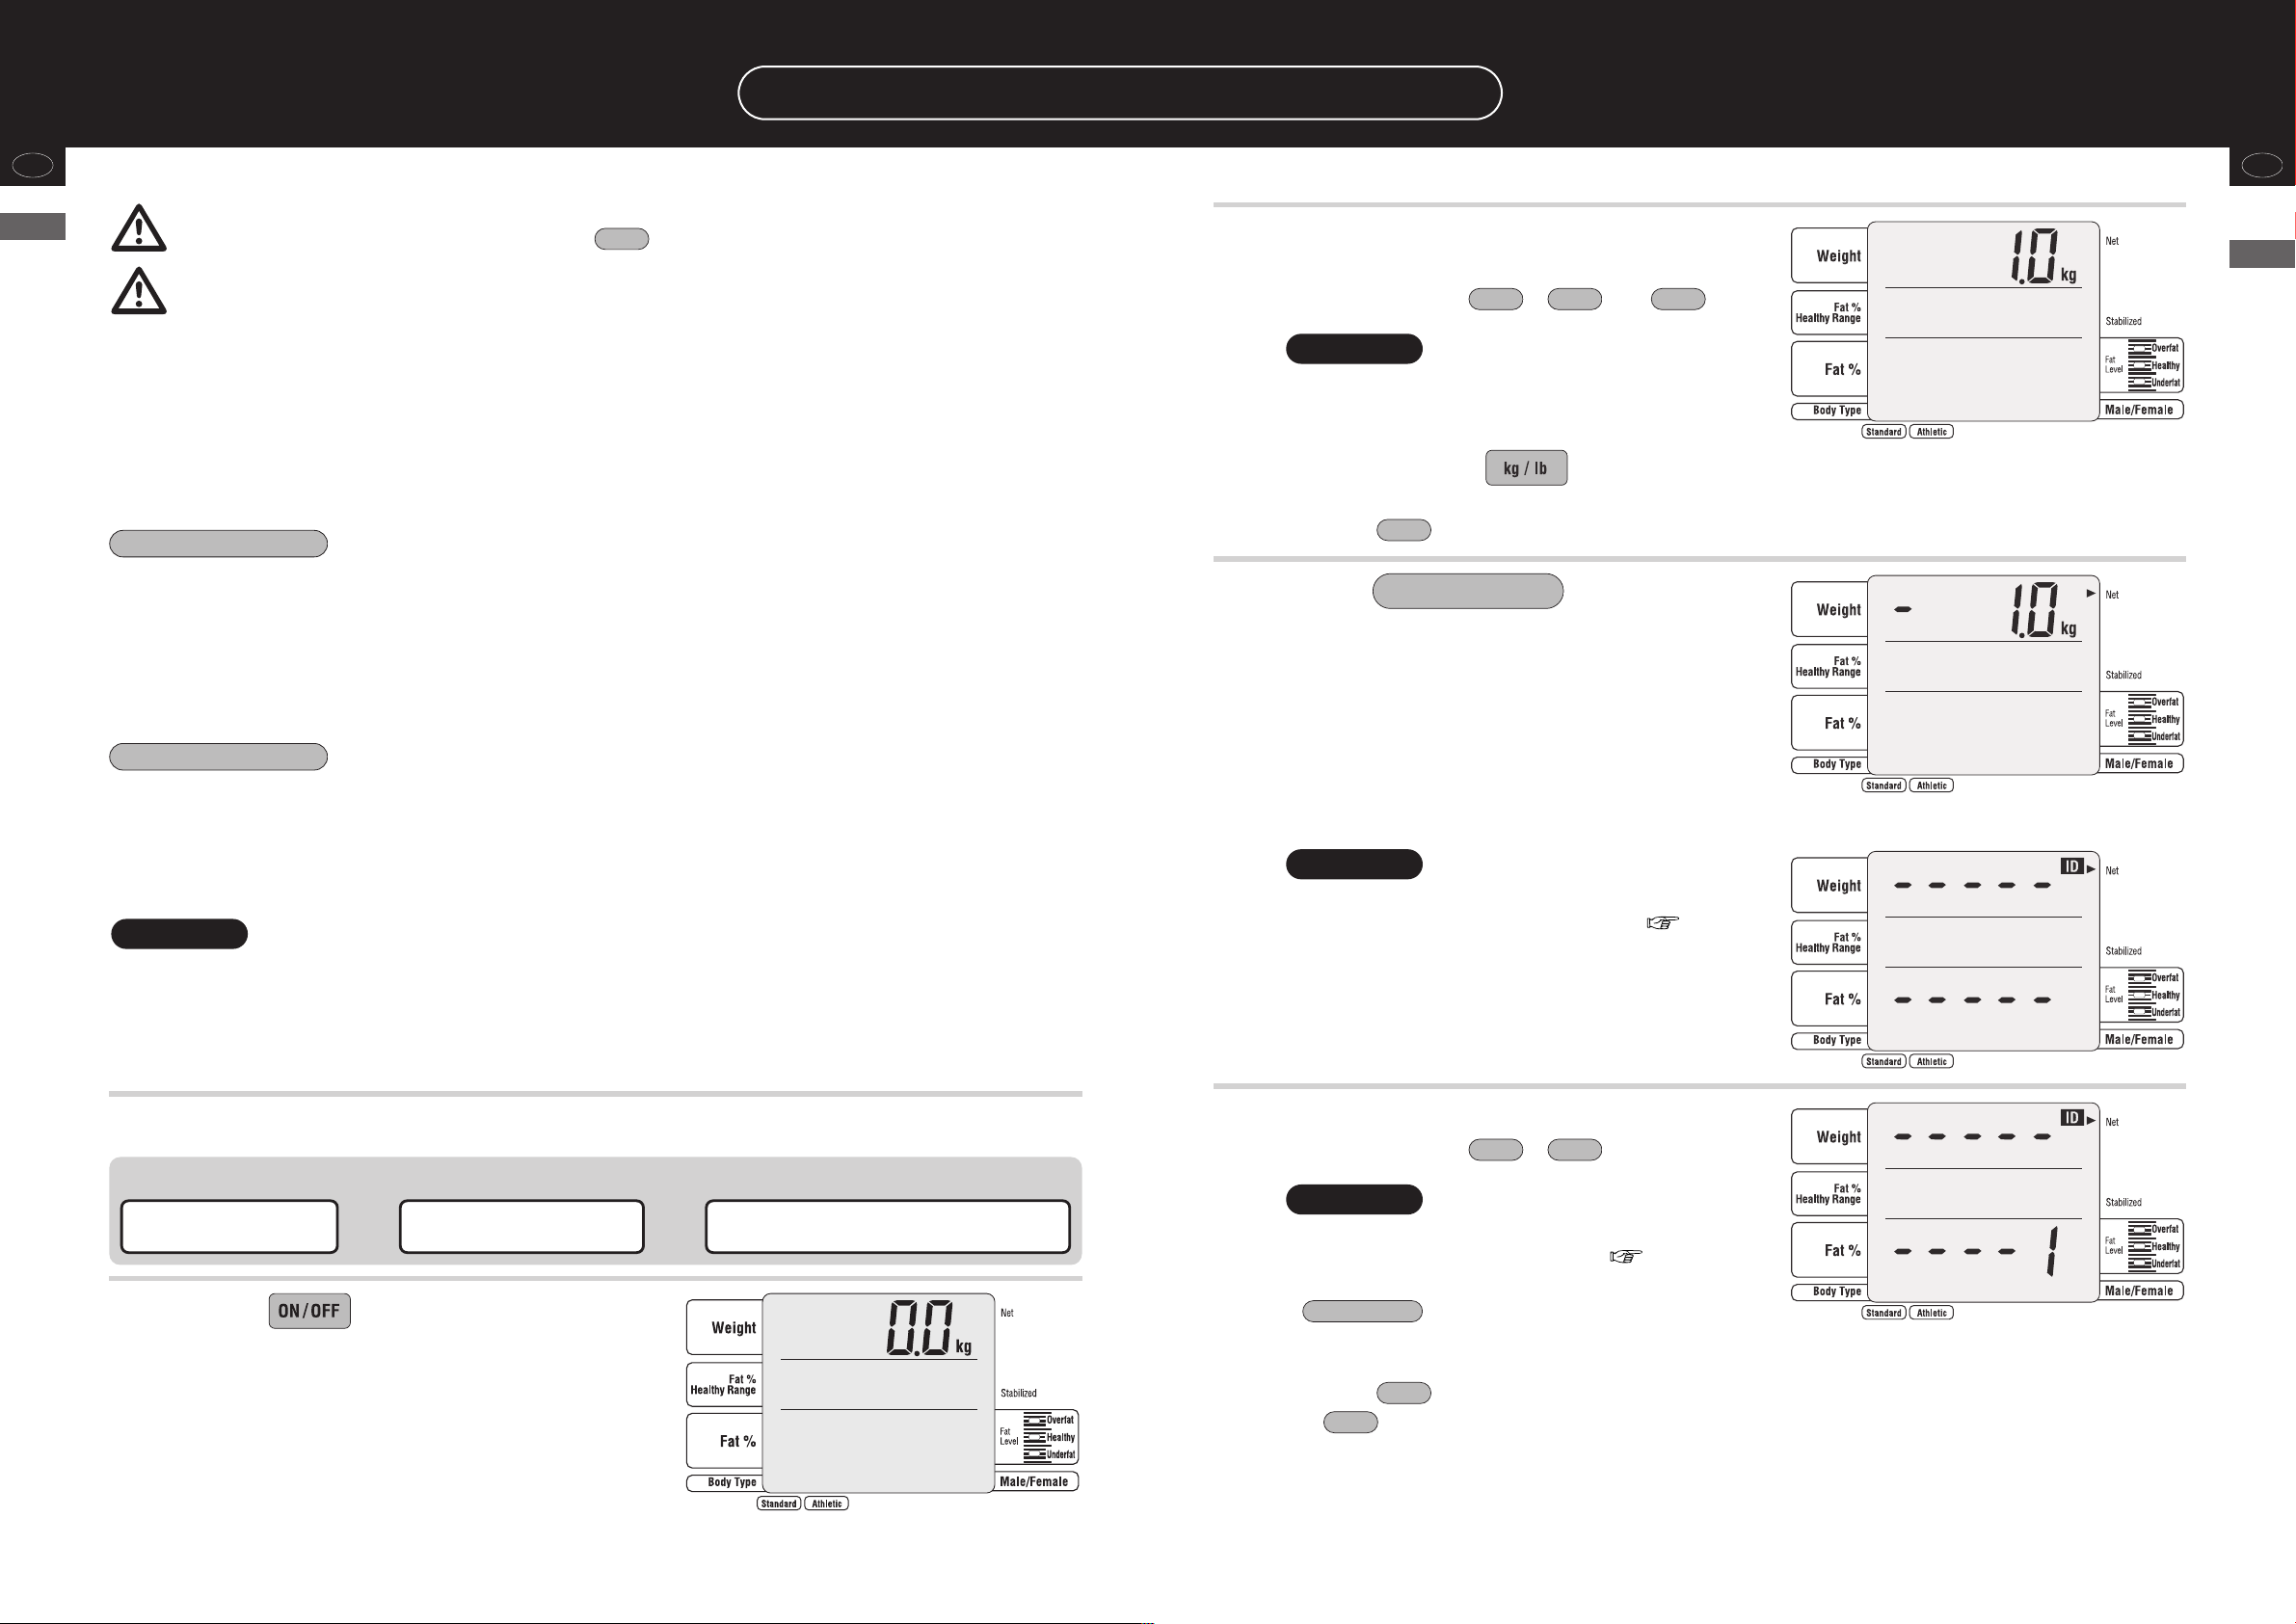
Set ON / OFF of the automatic cutting of the printer paper
Setting methods (continued)
(Continued from page 12).
Set ON / OFF of the Fat % Healthy range display
(Continued from page 12).
EngEng
Before use
(Various settings)
3
4
5
3
Press and then press .
• The “ON or OFF of automatic cutting” selection screen is
displayed.
Set ON or OFF of the automatic cutting.
Note
After inputting the numeric value,
press .
• It returns to the “setting item selection” screen.
Press and then press .
• The “ON or OFF of the beep sound” selection screen is
displayed.
Set ON or OFF of the beep sound.
• The default is “0.off.” (“1. on” for valid, “0. off” for
invalid.)
• To correct the input value, or cancel the input,
press (the input is deleted).
e
Enter / Next
Set ON / OFF of the beep sound
CE
Enter / Next4
(Continued from page 12).
Enter / Next5
3
4
5
3
Press and then press .
• The “ON or OFF of the Fat % Healthy range” selection screen is
displayed.
Set ON or OFF of the Fat % Healthy
range display when using the body
composition
Note
After inputting the numeric value,
press .
• It returns to the “setting item selection” screen.
Press and then press .
• The “with or without an ID” setting screen is displayed.
• The default is “1.on.” (“1. on” for valid, “0. off” for
invalid.)
• To correct the input value, or cancel the input,
press (the input is deleted).
e
Enter / Next
Set with or without an ID
CE
Enter / Next6
(Continued from page 12).
Enter / Next7
4
5
Note
Note
After inputting the numeric value,
press .
• It returns to the “setting item selection” screen.
• The default is “1.on.” (“1. on” for valid, “0. off” for
invalid.)
• To correct the input value, or cancel the input,
press (the input is deleted).
e
Enter / Next
*When various settings are continuously carried out,
press each number to set.
e
*The set contents are memorized until they are changed next time.
CE
Set with or without an ID.
4
Note
After inputting the numeric value,
press .
5
*When various settings are all completed,
e
• It returns to the “setting item selection” screen.
press on the “setting item selection screen” (
Mode Setting
• The default is “0.off.” (“1. on” for valid, “0. off” for
invalid.)
• To correct the input value, or cancel the input,
press (the input is deleted).
e
Enter / Next
CE
it returns to the preset tare input screen
).
1716
Page 10
Various settings
Before use
(Various settings)
Setting methods (continued)
Select the measurement flow
(Continued from page 12).
Set the height increment
(Continued from page 12).
EngEng
Before use
(Various settings)
3
4
5
Press and then press .
• The “ON or OFF of the one step mode” selection screen is
displayed.
Note
Set ON or OFF of the one step mode
when using the body composition
analyzer.
Note
After inputting the numeric value,
press .
• It returns to the “setting item selection” screen.
• The one step mode is
a mode to measure body weight after inputting
e
personal information.
• The default is “0. off.” (“1. ON” for valid, “0. off” for
invalid.)
• To correct the input value, or cancel the input,
press (the input is deleted).
e
Enter / Next
CE
Enter / Next8
Press and then press
3
Enter / Next
• The “height increment” selection screen is displayed.
* Invalid in “lb” mode.
Selects the height incremant.
Note
4
After inputting the numeric value,
press .
5
Set the automatic determination time when inputting
• It returns to the “setting item selection” screen.
1
• The default is “1. on” (1 cm / 0.5 in).
0. off: sets 0.1 cm increment
1. on: sets 1 cm / 0.5 in increment
• To correct the input value, or cancel the input,
press (the input is deleted).
e
Enter / Next
0
.
CE
(Continued from page 12).
Set ON or OFF of the athletic mode selection
3
4
5
Press and then press .
• The “Set ON / OFF of the athletic mode selection” setting screen
is displayed.
Set ON or OFF of the athletic mode selection
when using the body composition analyzer.
Note
After inputting the numeric value,
press .
• It returns to the “setting item selection” screen.
• The default is “1. on.” (“1. on” for valid, “0. off” for
invalid.)
• To correct the input value, or cancel the input,
press (the input is deleted).
e
Enter / Next
CE
Enter / Next9
(Continued from page 12).
3
4
5
Press and then press
Enter / Next
• The “automatic determination time when inputting” setting
screen is displayed.
Note
Set the automatic determination time
when inputting.
Note
After inputting the numeric value,
press .
• It returns to the “setting item selection” screen.
• Automatic determination when inputting is,
a function to determine the input value automatically even without pressing
e
Enter / Next
• The default is 5 seconds (“5”). (input range: 0 – 9).
*If “0” is set, it is not automatically determined.
• To correct the input value, or cancel the input,
press (the input is deleted).
e
Enter / Next
11
.
, after inputting the numeric value.
CE
Note
*When various settings are continuously carried out,
press each number to set.
e
*The set contents are memorized until they are changed next time.
*When various settings are all completed,
press on the “setting item selection screen” (
e
Mode Setting
it returns to the preset tare input screen
).
1918
Page 11
Various settings
Setting methods (continued)
Eng
Before use
(cautions for safety)
3
4
Set ON / OFF of Wrestler mode
Press and then press
Enter / Next
Set ON or OFF of Wrestler mode.
Note
After inputting the numeric value,
• The default is 0.off
• 0: Set Wrestler mode off
• 5: Set Wrestler mode 5%
• 7: Set Wrestler mode 7%
• When the “Wrestler Mode” is activated, the SC-331S automatically calculates the
Minimum Wrestling Weight at a predetermined minimum body fat %. The 1996
ACSM Position Stand “Weight Loss in Wrestlers” as adopted by the NCAA
recommends the following MINIMUM body fat % as follows:
5% for Collegiate Athletes (male)
7% for High School Athletes (male)
71
.
The target body fat % value is completely separate from the Minimum
Wrestling Weight (Min Weight) calculations.
For example:
The target body fat % value may be entered as 15%, even though the Min
Weight is calculated at a predetermined minimum body fat of 5 or 7%.
(Continued from page 12).
3
4
5
3
Set ON / OFF of the target body fat %
Press and then press
Enter / Next
Set ON or OFF of the target body fat %.
Note
After inputting the numeric value,
press .
• It returns to the “setting item selection” screen.
Press and then press
Enter / Next
• The default is “0. off” (“1. on” for valid, “0. off” for
invalid.)
• To correct the input value, or cancel the input,
press (the input is deleted).
e
Enter / Next
Set print language
81
.
CE
(Continued from page 12).
91
.
(Continued from page 12).
Eng
Before use
(cautions for safety)
5
Note
press .
• It returns to the “setting item selection” screen.
Enter / Next
*When various settings are continuously carried out,
press each number to set.
e
*The set contents are memorized until they are changed next time.
Set the print language.
4
Note
After inputting the numeric value,
press .
5
*When various settings are all completed,
e
• It returns to the “setting item selection” screen.
press on the “setting item selection screen” (
Set Up
• 1: English / 2: French / 5: Spanish / 7: Portuguese
• To correct the input value, or cancel the input,
press (the input is deleted).
e
Enter / Next
CE
it returns to the preset tare input screen
).
20
21
Page 12
Various settings
Date and time
Setting methods (continued)
EngEng
Before use
(Various settings)
3
4
5
Set the print item preset
Press and then press
Enter / Next
• The “print out preset” setting screen is displayed.
02
.
(Continued from page 12).
Set the print item preset.
• Set with – .
Note
1 3
• The print items preset are
a function to set the print items of the pattern 1 – 3
e
to ON automatically at once ( page 23). The
default is “1” (pattern 1).
• When ON or OFF of print items are changed with the “setting of the print out
item” after the print out preset ( page 26), the state set for the last time is valid.
After inputting the numeric value,
press .
• It returns to the “setting item selection” screen.
Enter / Next
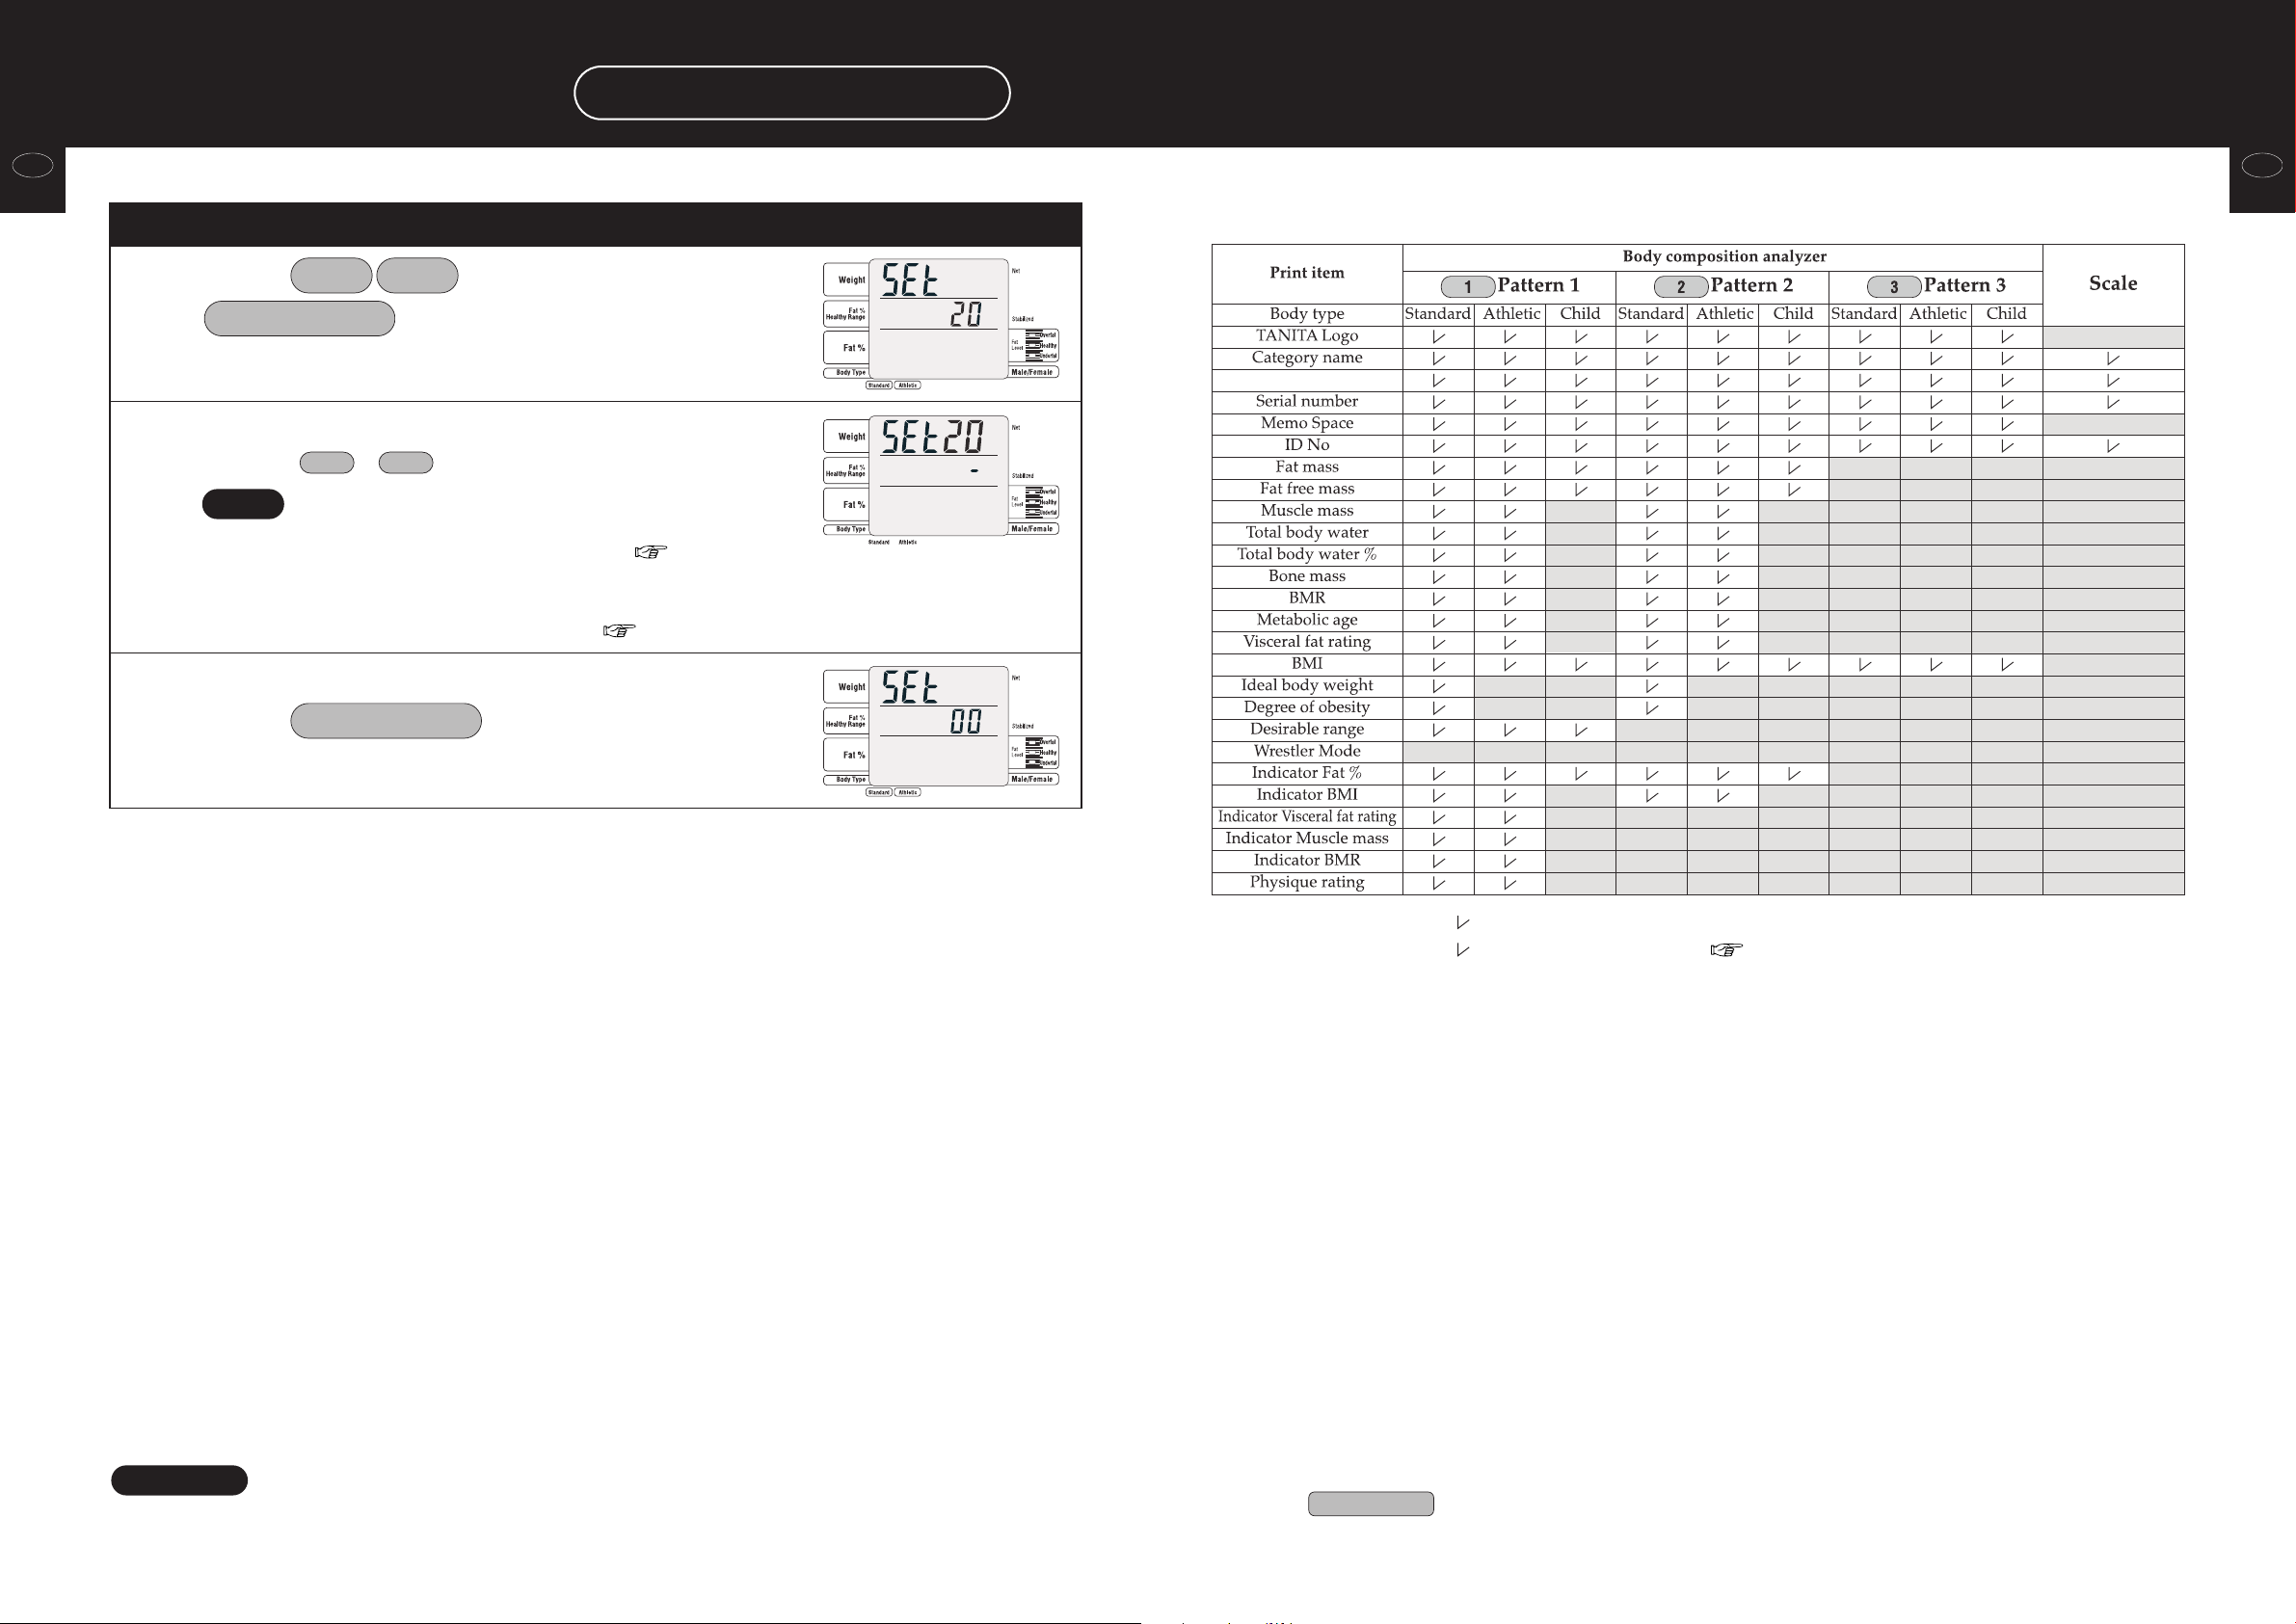
[Lists of contents of the print item preset]
Before use
(Various settings)
Note
*When various settings are continuously carried out,
press each number to set.
e
*The set contents are memorized until they are changed next time.
• The items marked with “ ” are printed.
• The items marked with “ ” can be selected to print ( page 24)
* See page 24 for an example of preset print.
*When various settings are all completed,
press on the “setting item selection screen” (
e
Mode Setting
it returns to the preset tare input screen
).
2322
Page 13
Various settings
Setting methods (continued)
EngEng
Before use
(Various settings)
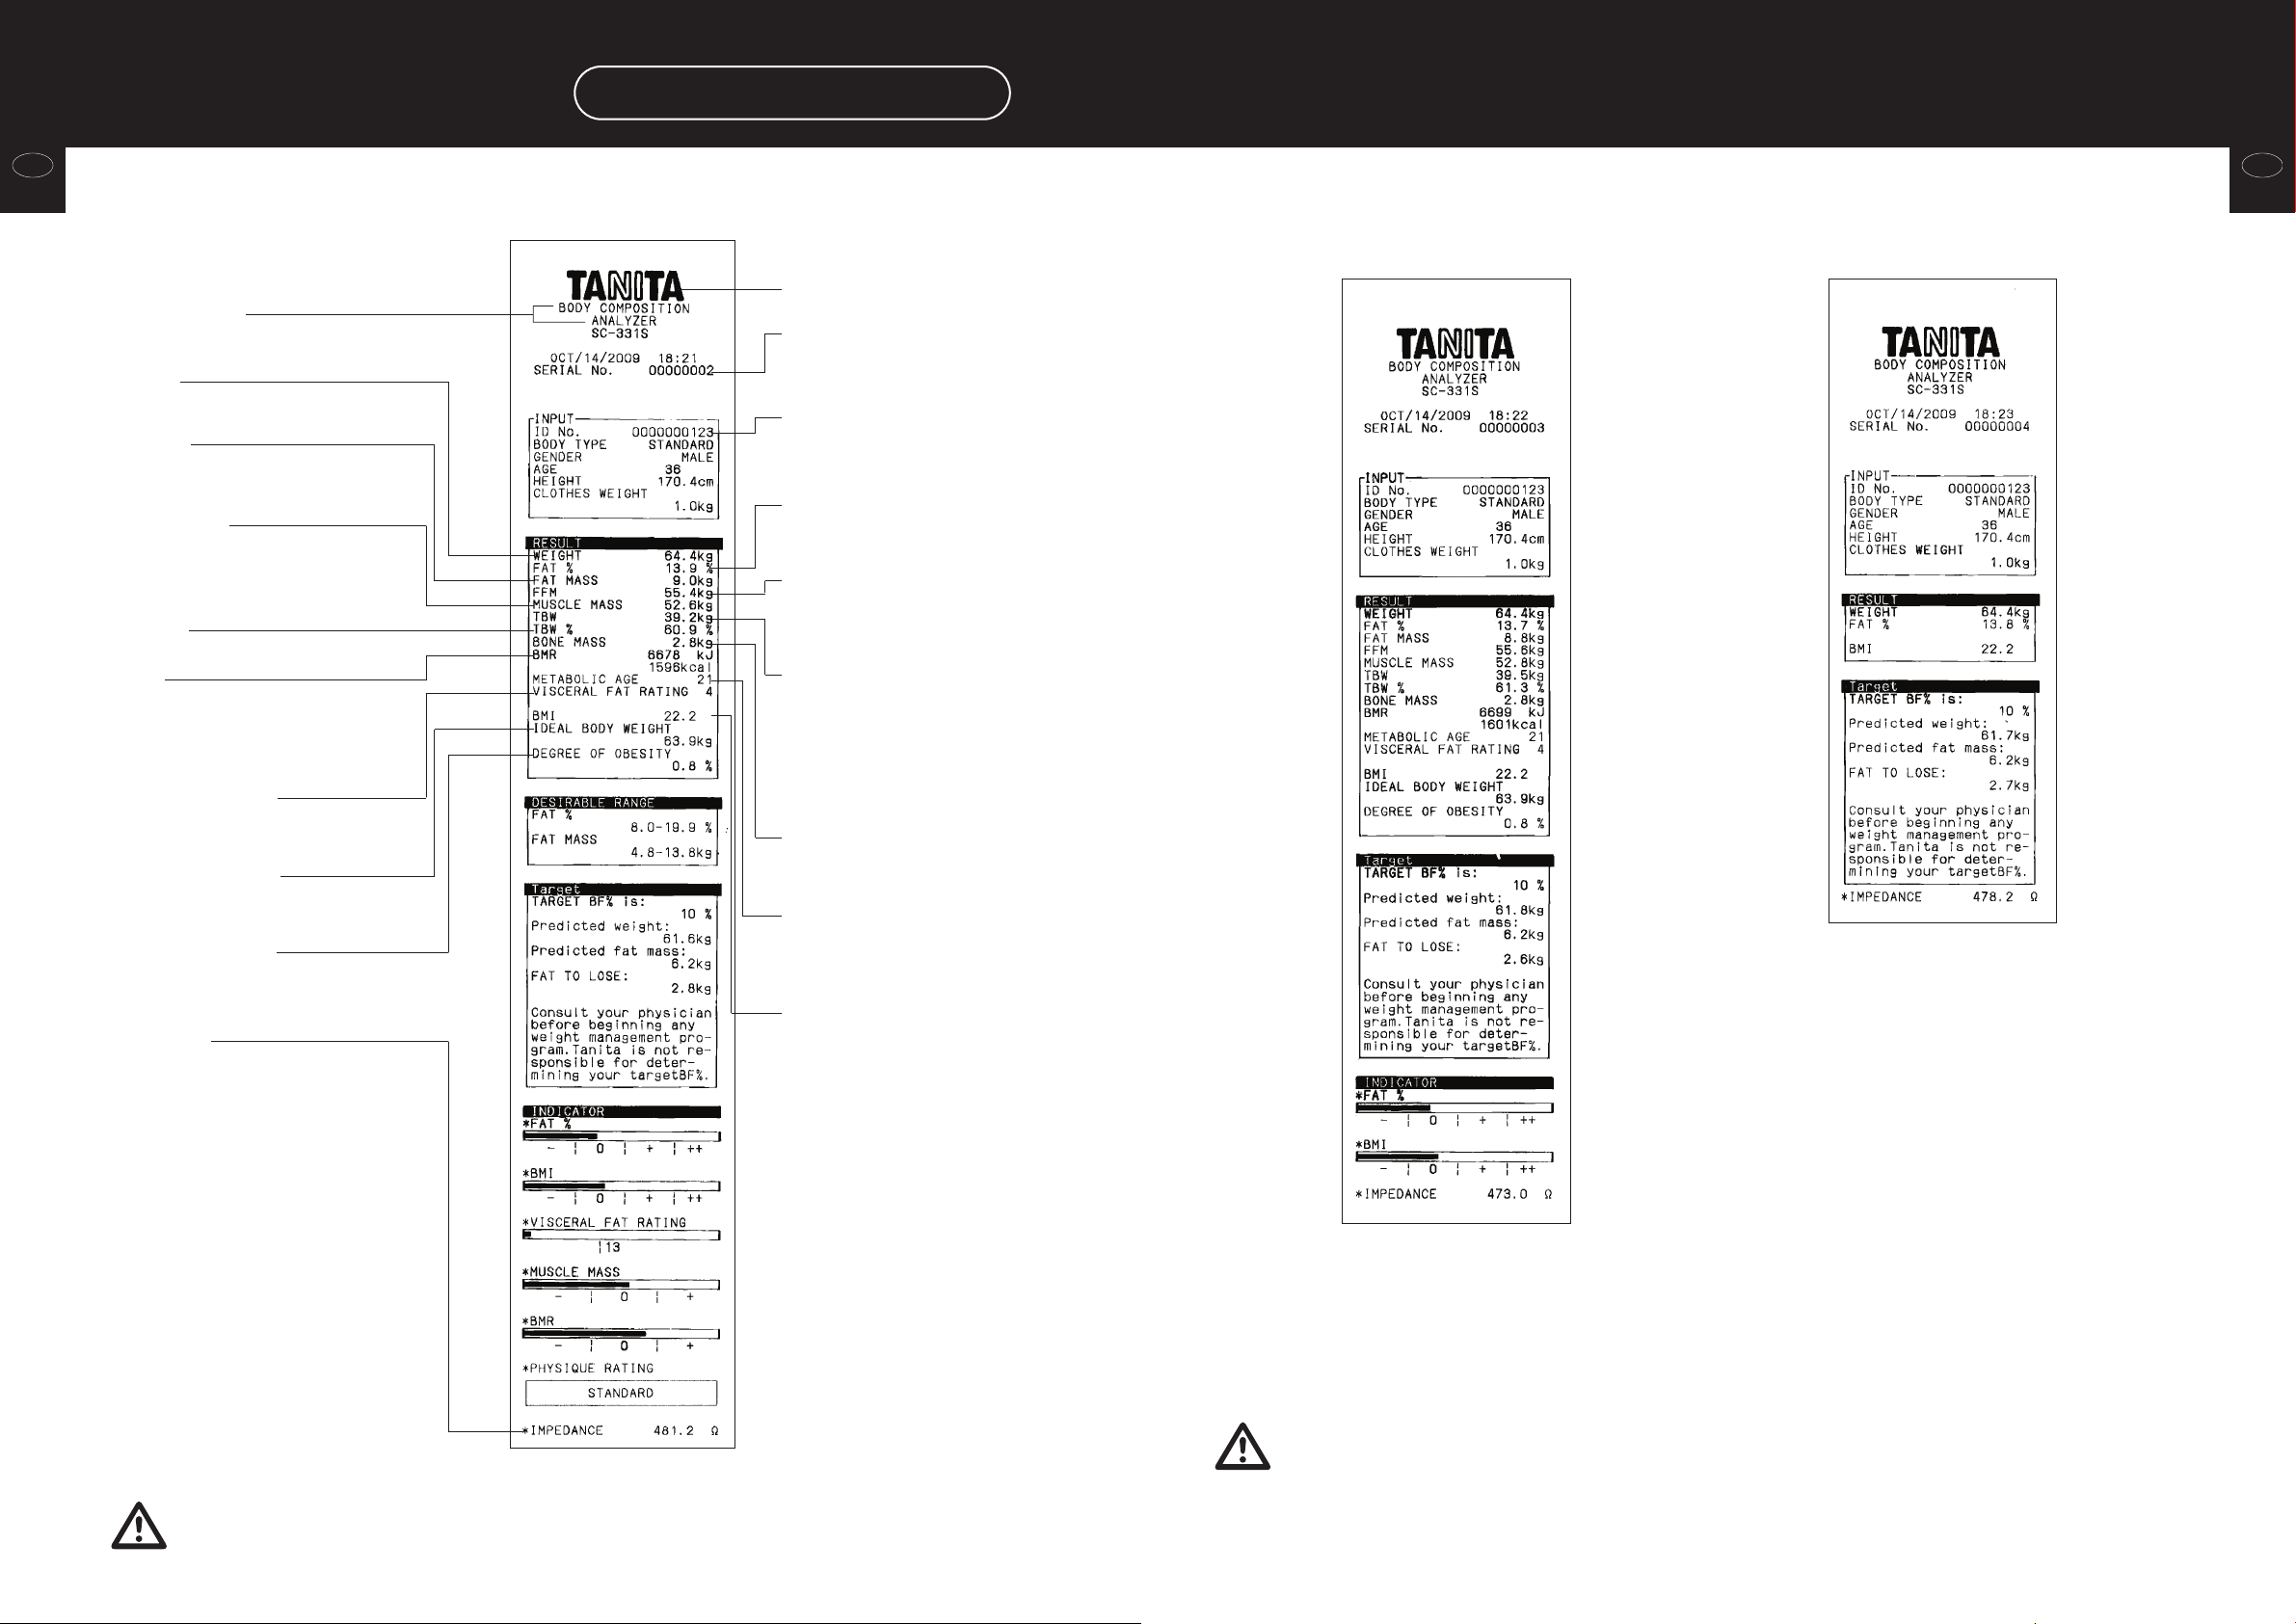
[In the case to select the print item preset “1”] [In the case to select
Category name
Weight
•Measured weight.
Fat mass
•-Total weight of fat mass in the body.
Muscle mass*
•- Bone-free lean tissue mass (LTM)
TBW %*
BMR*
•Basal Metabolic Rate represents the
total energy expended by the body to
maintain normal functions at rest such
as respiration and circulation.
Visceral fat rating*
•- Visceral fat rating feature indicates the
rating of visceral fat.
Ideal body weight*
•Ideal body weight is a value for which
the BMI is 22.
Degree of obesity*
•Calculated as (weight – Ideal body
weight) / Ideal body weight ×100.
Impedance
•Impedance (This do es not af fect
judgment of the measurement results.)
LOGO
Serial No.
•The default is 00000001.
Adds 1 each time it measures.
ID
•When it is set with an ID, it is printed
out. (The default is without an ID.)
Fat %
•Fat % is amount of body fat as a
proportion of body weight.
FFM
•Fat Free Mass is comprised of muscle,
bone, tissue, water, and all other fat
free mass in the body.
TBW*
•Total Body Water is the amount of
water retained in the body. TBW is said
to comprise between 50% - 70% of total
body weight. Generally, men tend to
have higher water weight than women
due to a greater amount of muscle.
Bone mass*
•Bone mineral amount included in the
entire bone.
Metabolic age*
•Metabolic age is evaluated young when
a muscular amount is larger, and BMR
is higher.
BMI
•Calculated with “weight (kg) / height
2
(m)
”
•The standard value is for the Standard
mode. In the case of the Athletic mode,
the standard value is just a reference.
And for those who are 17 years old or
yo unger, only the b ody f at % is
displayed as the standard value. The
muscle mass, total body water and the
estimated bone mass for those who are
17 years old or younger are f or
reference.
the print item preset “2”]
[In the case to select
the print item preset “3”]
Before use
(Various settings)
*18 - 99 years only
Please consult your doctor before you start a body weight management program. Tanita is not responsible
for the target body fat ratio.
Please consult your doctor before you start a body weight management program. Tanita is not responsible
for the target body fat ratio.
2524
Page 14
Various settings
Before use
(Various settings)
Setting methods (continued)
Set the items to print out
(Continued from page 12).
EngEng
Before use
(Various settings)
3
4
Select the number to set with the
numeric keys ( –)
and press .
• The setting screen is displayed.
Note
• See the next page for the setting number of each item.
• When the print item preset is set, after setting the items to print out ( page 24), the items
to print may be changed automatically. Please confirm, “Print items preset list” ( page
23).
Enter / Next
4693
Selects ON or OFF of the item to print
<In the case of selecting 39>
In the case of selecting
<>
the logo setting on.
out.
Note
• “0. off” is not to print out and “1. on” is to print out.
• To correct the input value, or cancel the input,
press (the input is deleted).
e
CE
Print item setting ON / OFF
39 TANITA Logo
40 Category name
41
Date and Time
Serial number42
Memo space43
ID Number44
Fat mass45
Fat free mass46
47 Muscle mass
Total body water48
Total body water %49
Bone mass50
Basal metabolic rate (BMR)51
Metabolic age52
Visceral fat rating
53
BMI54
Ideal body weight56
Degree of obesity57
Desirable range Body fat %58
Indicator - Fat %59
60
Indicator - BMI
61
Indicator - Visceral fat rating
62
Indicator - Muscle mass
63
Indicator - BMR
64
Physique rating
5
Note
After inputting the numeric value,
press .
• It returns to the “setting item selection” screen.
Enter / Next
*When various settings are continuously carried out,
press each number to set.
e
*The set contents are memorized until they are changed next time.
*When various settings are all completed,
press on the “setting item selection screen” (
e
Mode Setting
it returns to the preset tare input screen
).
2726
Page 15
Operating Instructions
when using as a body composition analyzer
Eng
How to use
(Operating Instructions)
About Athletic Mode
• It is recommended for those who are 18 years old or older and meet the following conditions to select
”Athletic Mode” and measure as reference values.
- Those who exercise for 12 hours or more per a week.
- Those who belong to a sport team or a sport organization with the aim of participation in competition, etc.
- Those who exercise to build up like a bodybuilder.
- Those who are professional athletes.
This explains the procedure when the printer is turned on. Please be aware that the display may be
different if the number of sheets to print is set to .
•Do not wipe the equipment with corrosive chemicals (gasoline, cleaner, etc.). Please use a neutral
detergent to clean the equipment.
•When the equipment has been transferred to any location where there is a temperature difference of
36˚F / 20˚C or more, wait for at least two hours before using it.
•In taking measurements, please keep the person away from the unit, who uses transmitters such as a
cellular phone avoid causing margin errors.
•The SC-331S estimates the various outputs specified in the Specification Section of this Manual. Keep in
mind that there are many factors that can influence the accuracy of these measurements. Please refer to
the General Instructions Section of this manual as this will help you minimize the variability (inaccuracy)
of the measurements.
0
2
3
Check that the body composition is selected,
input weight of closthing.
Input it by pressing – and .
Note
• The clothes weight (preset tare) can be input in the
range of 0.0-20.0lb or 0.0-10.0kg.
*0.2lb / 0.1kg increments
*Unit is changed by key.
• If it is mistakenly input,
press (the input is deleted).
e
Press .
CE
Enter / Next
90
.
Eng
How to use
(Operating Instructions)
Attention
• The posture when measuring
- Stand with both feet parallel on the electrodes.
- Stand fullface without bending knees.
• The age input range is 5 – 99 years old.
Input age 99 for those who are 100 years old or older.
Note
• False results may be reported after excessive food/fluid intake, or after periods of intense exercise.
• When the user is 18 years or older, Athletic mode can be used.
• When Clothes weight is input, Clothes weight is subtracted from measurements and it displays it as Weight.
•
“One step mode”should be the default.
•
“Option mode”should move to back of “One step mode” page.
In the case of the “one step mode”
In the one step mode, after inputting the personal data, the weight and body composition are measured.
Personal data input
s
Weight measurement Body composition measurement
s
Press to turn on the
power.
1
4
s
Note
• This screen is not displayed if OFF is set in the
“setting with or without an ID” ( page 17).
(The “body type selection” screen is displayed.)
Input ID number.
Input it by pressing – .
Note
•
This screen is not displayed if OFF is set in the
“setting with or without an ID” ( page 17).
• The ID number can be input from 0 – 9999999999. If
Enter / Next
filled with 0s.
• If it is mistakenly input,
press (the input is deleted).
e
• If is pressed in the state that an ID number is not input, it returns to the “measurement
CE
start” screen.
is pressed, the non-inputted digits are
CE
90
28
(kg mode)
29
Page 16
Operating Instructions
when using as a body composition analyzer(continued)
Eng
How to use
(Operating Instructions)
5
6
Select body type.
Press the body type selection keys to input.
When the body type is selected, the lamp flashes on
the “Gender”.
Note
• This screen is not displayed if OFF is set in the
“setting ON or OFF of the athletic mode selection”
( page 18).
• The body type can also be selected with the numeric keys ( ).
• If it is mistakenly input,
press (the input is deleted, and it returns to the “body type selection” screen).
e
• If is pressed in the state that the body type is not input, it returns to the “ID number input”
screen (or “measurement start” screen).
CE
CE
21
Select gender.
Press the male / female selection keys to input.
When male or female is selected, the lamp flashes on
the “Age”.
Note
• If it is mistakenly input,
press (the input is deleted, and it returns
e
to the “gender selection” screen).
• If is pressed in the state that the male or female is not selected, it returns to the “body type
selection” screen.
CE
CE
9
10
Input height.
Input it by pressing – .
Note
• The height can be input from 3ft -7ft11.5in / 90.0-
249.9cm.
*Unit is changed by key.
• If it is mistakenly input,
press (the input is deleted).
e
• If is pressed in the state that the height is not input, it returns to the “age input” screen.
Press .
CE
CE
Enter / Next
90
s
The “Step on” lamp flashes.
Note
• When is pressed, it returns to the previous
screen.
CE
Eng
How to use
(Operating Instructions)
7
8
Input age.
Input it by pressing – .
Note
• The age can be input from 5 – 99.
• If it is mistakenly input,
press (the input is deleted).
e
• If is pressed in the state that the age is not
input, it returns to the “gender selection” screen.
Press .
When the age is input, the lamp flashes on the
“Height”.
CE
CE
Enter / Next
90
11
12
Step on the electrodes with bare
feet.
Take off your socks and stockings before stepping on.
Under measurement of the body
composition.
display goes off sequentially.
3130
Page 17
Operating Instructions
when using as a body composition analyzer(continued)
EngEng
How to use
(Operating Instructions)
13
Measurement completion
The measurement result and the body fat percentage
evaluation are displayed.
It is automatically printed out. (In the case that other
than 0 is set in the “Setting the number of sheets to
print” ( page 15).
Note
• Fat % Healthy range is not displayed if OFF is set
in the “setting ON or OFF of the Fat % Healthy
range display” ( page 17).
Step off the platform.
It returns to the “ID input” screen.
Note
• The “body type selection” screen is displayed in
the case that OFF is set in the “setting with or
without an ID” ( page 17).
How to read the display <kg mode>
s
How to read the display <lb mode>
2
3
Check that the body
composition is selected and
input weight of clothing.
Input it by pressing – and .
Note
• The clothes weight (preset tare) can be input in the
range of 0.0-20.0lb or 0.0-10.0kg.
*0.2lb / 0.1kg increments
• To correct the input value,
press (the input is deleted).
e
Press .
CE
Enter / Next
90
.
s s
How to use
(Operating Instructions)
Judgment result
based on the body
fat percentage.
( page 42.)
Judgment result
based on the body
fat percentage.
( page 42.)
In the case of the “Option mode” (not the one step mode)
In the option mode, after measuring weight, personal data is input and then body composition is measured.
Weight measurement
Press to turn on the
1
power.
Note
• Unit is changed by key.
s
Personal data input
s
Body composition measurement
The “Step on” lamp flashes.
Note
• When is pressed, it returns to the previous
screen.
CE
(kg mode)
32 33
Page 18
Operating Instructions
when using as a body composition analyzer(continued)
Eng
How to use
(Operating Instructions)
4
5
Step on the electrodes with bare
<Child> <Adult>
feet.
Take off your socks and stockings before stepping on.
s
When the weight becomes stable, it changes to the
screen at the right.
Note
• Do not step off the platform.
• This screen is not displayed if OFF is set in the
“setting with or without an ID” ( page 17).
(The “body type selection” screen is displayed.)
Input ID number.
Input it by pressing – .
Note
•
This screen is not displayed if OFF is set in the
“setting with or without an ID” ( page 17).
• The ID number can be input from 0 – 9999999999. If
Enter / Next
filled with 0s.
• If it is mistakenly input,
press (the input is deleted).
e
• If is pressed in the state that an ID number is not input, it returns to the “measurement
CE
start” screen.
is pressed, the non-inputted digits are
CE
90
6
7
8
9
Press .
Note
• This screen is not displayed if OFF is set in the
“setting with or without an ID” ( page 17).
Enter / Next
Select body type.
Press the body type selection keys to input.
When the body type is selected, the lamp flashes on
the “Gender”.
Note
• This screen is not displayed if OFF is set in the
“setting ON or OFF of the athletic mode selection”
( page 18).
• The body type can also be selected with the numeric keys ( ).
• If it is mistakenly input,
press (the input is deleted, and it returns to the “body type selection” screen).
e
• If is pressed in the state that the body type is not input, it returns to the “ID number input”
screen (or “measurement start” screen).
CE
CE
21
Select gender.
Press the male / female selection keys to input.
When male or female is selected, the lamp flashes on
the “Age”.
Note
• If it is mistakenly input,
press (the input is deleted, and it returns
e
to the “gender selection” screen).
• If is pressed in the state that the male or female is not selected, it returns to the “body type
selection” screen.
CE
CE
Input age.
Input it by pressing – .
Note
• The age can be input from 5 – 99.
• If it is mistakenly input,
press (the input is deleted).
e
• If is pressed in the state that the age is not
input, it returns to the “gender selection” screen.
CE
CE
90
Eng
How to use
(Operating Instructions)
34
35
Page 19
Operating Instructions
when using as a body composition analyzer(continued)
Eng
How to use
(Operating Instructions)
10
11
Press .
When the age is input, the lamp flashes on the
“Height”.
Enter / Next
Input height.
Input it by pressing – .
Note
• The height can be input from 3ft -7ft11.5in / 90.0-
249.9cm.
*Unit is changed by key.
• If it is mistakenly input,
press (the input is deleted).
e
• If is pressed in the state that the height is not input, it returns to the “age input” screen.
CE
CE
90
14
Measurement completion
The measurement result and the body fat percentage
evaluation are displayed.
It is automatically printed out. (In the case that other
than 0 is set in the “Setting the number of sheets to
print” ( page 15).
Note
• Fat % Healthy range is not displayed if OFF is set
in the “setting ON or OFF of the Fat % Healthy
range display” ( page 17).
Step off the platform.
It returns to the “measurement start” screen.
s
Eng
How to use
(Operating Instructions)
12
13
Press .
Enter / Next
Under measurement of the body
composition.
display goes off sequentially.
How to read the display <kg mode>
Judgment result
based on the body
fat percentage.
( page 42.)
How to read the display <lb mode>
Judgment result
based on the body
fat percentage.
( page 42.)
36
37
Page 20
Operating Instructions
Target body fat %
Operating Instructions
when using as a scale
Eng
How to use
(Operating Instructions)
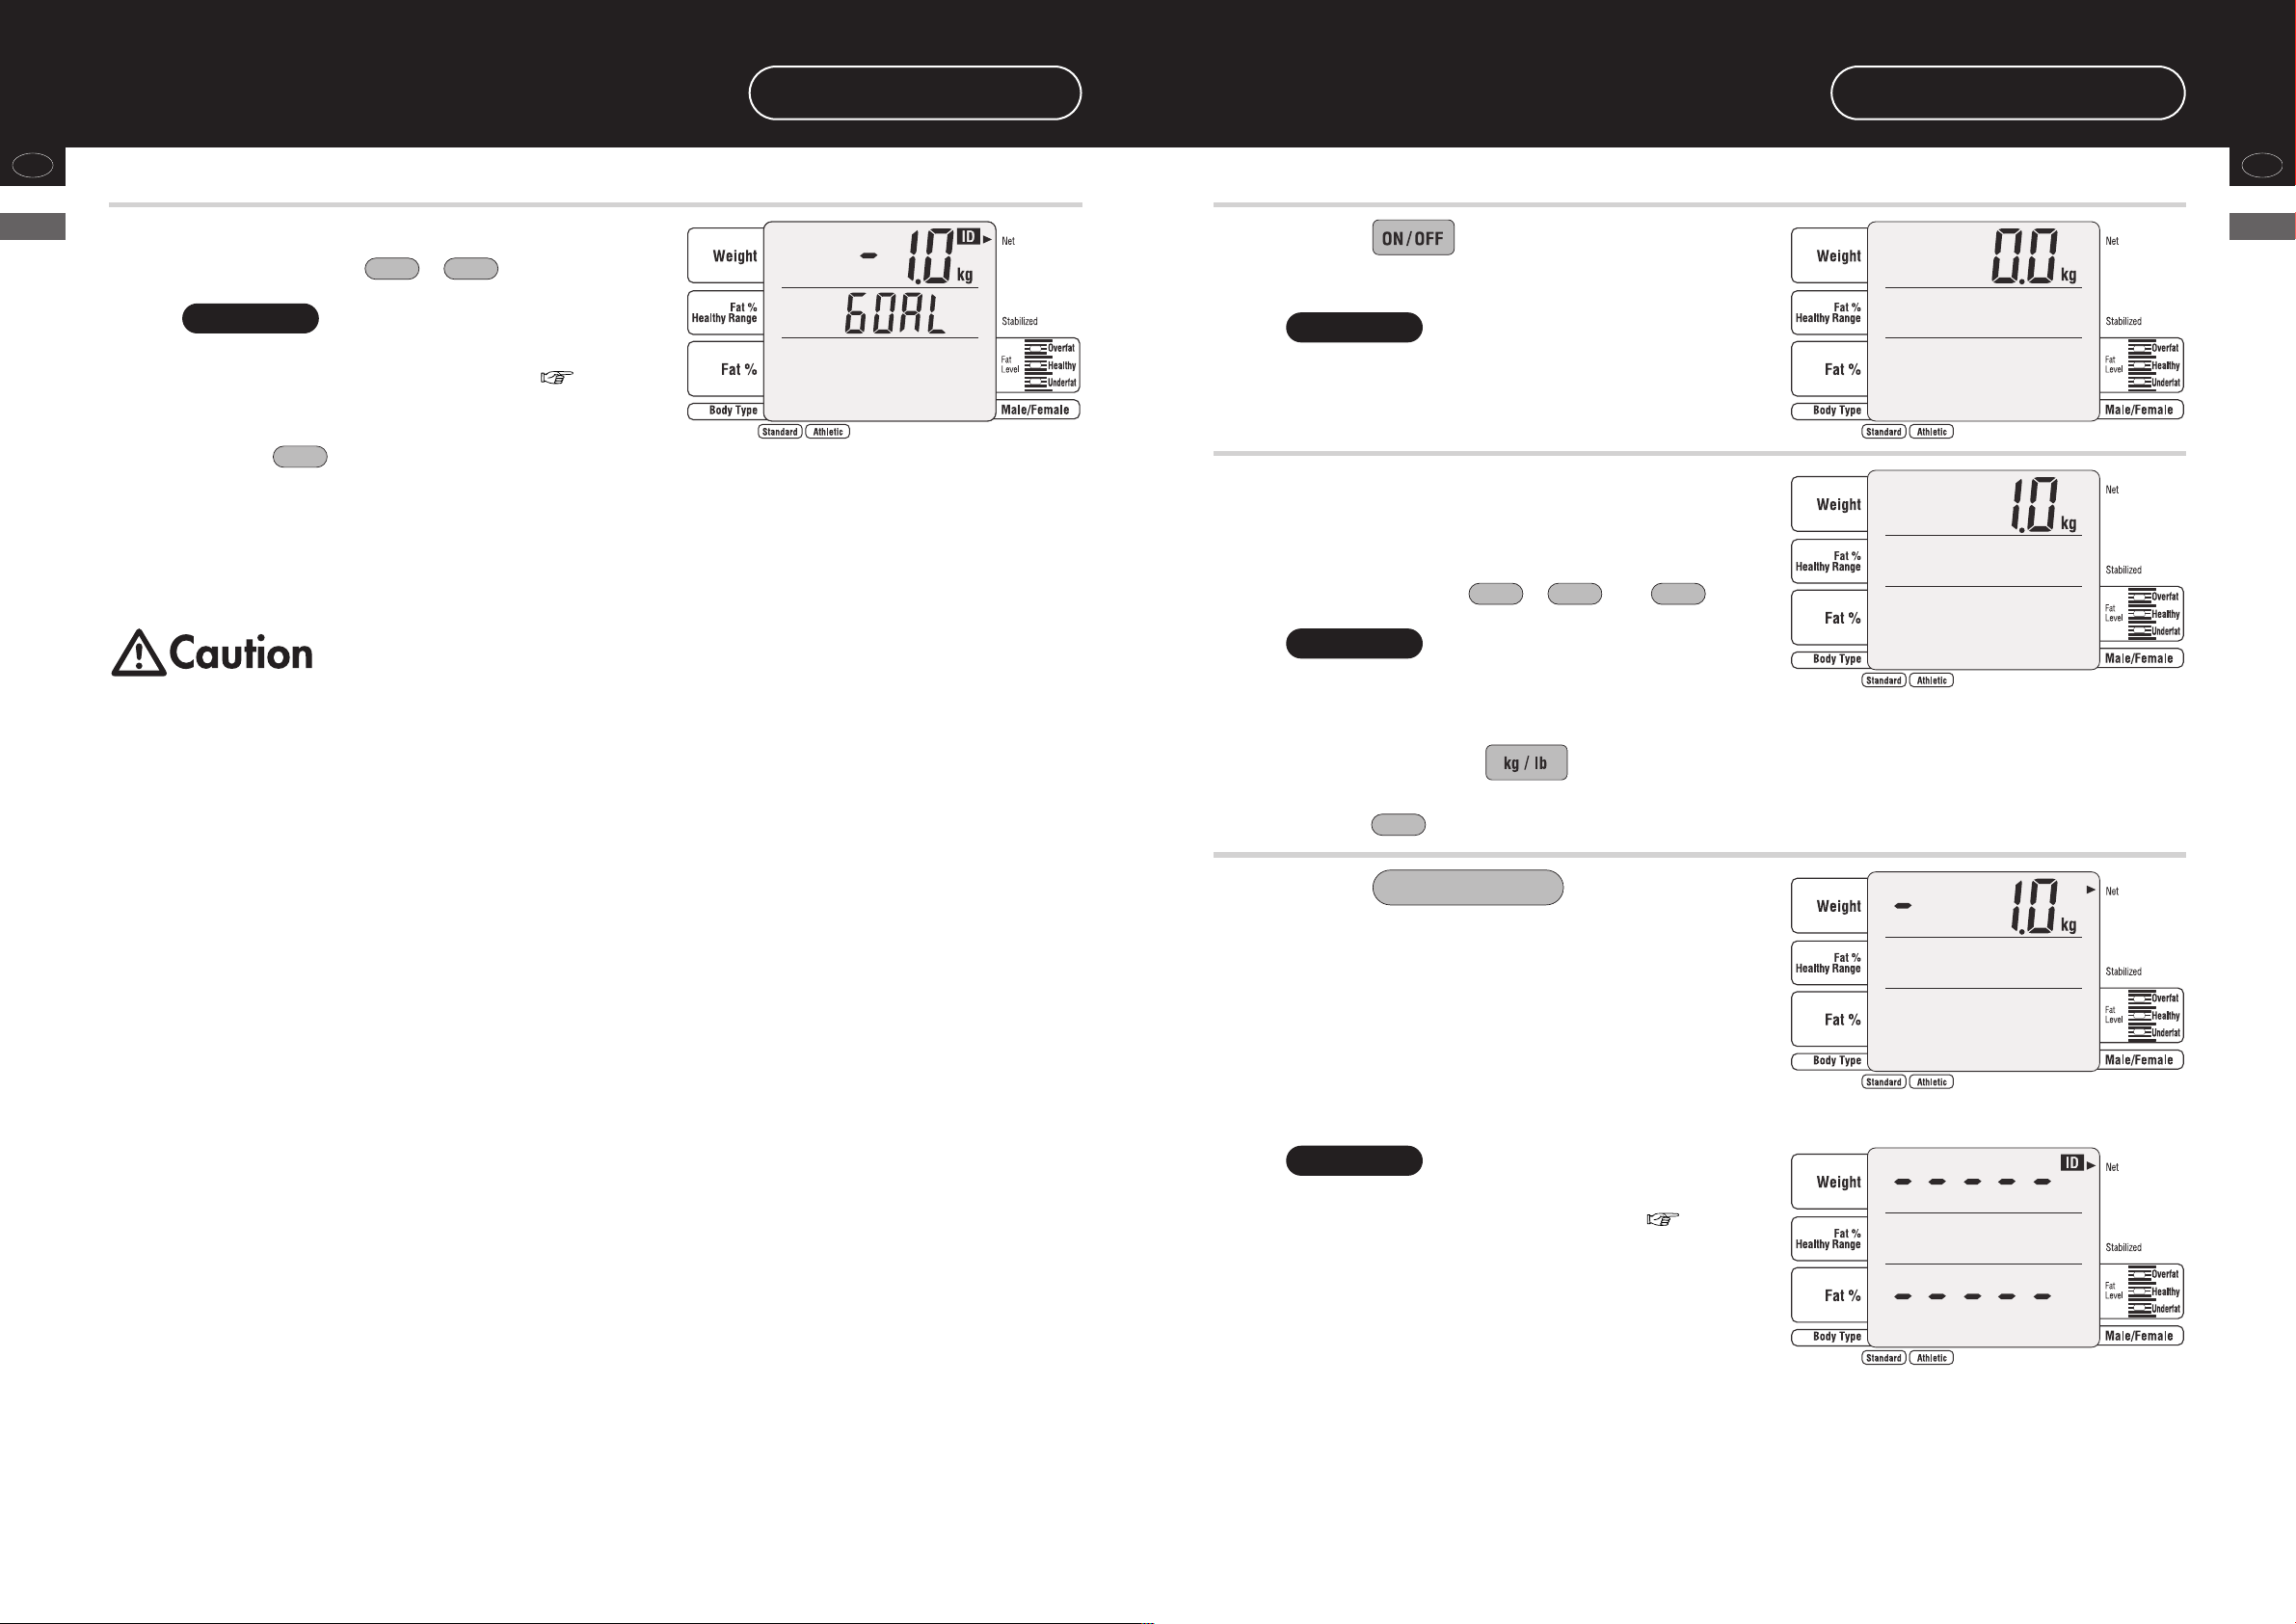
1
Input the target body fat %.
Input it by pressing – .
Note
• This screen is displayed if ON is set in the “setting
ON or OFF of the target body fat %” ( page 21).
• The target body fat % can be input from 4-55.
• If it is mistakenly input,
press (the input is deleted).
e
If the number of sheet to print is set to “0”, target body fat % setting function will be OFF,
automatically.
If the target body fat is set to 0 or nothing, the target body fat % will not print.
CE
Before you start a body weight management program and set the appropriate personal
body fat %, please consult your doctor. Tanita is not responsible for setting the
appropriate target body fat % for specific individuals.
90
1
2
Press to turn on the
power.
Note
• There is no automatic weight lock function.
Check that the body weight is
selected and input the clothes
weight.
Input it by pressing – and .
Note
• The clothes weight (preset tare) can be input in the
range of 0.0-20.0lb or 0.0-10.0kg.
*0.2lb / 0.1kg increments
90
.
Eng
How to use
(Operating Instructions)
3
*Unit is changed by key.
• If it is mistakenly input,
press (the input is deleted).
e
Press .
• This screen is not displayed if OFF is set in the
“setting with or without an ID” ( page 17).
(The “measurment start” screen is displayed.)
CE
Enter / Next
Note
s
38
39
Page 21

Operating Instructions
when using as a scale (continued)
Eng
How to use
(Operating Instructions)
4
5
Input an ID number.
Input it by pressing – .
Note
• This screen is not displayed in the case that OFF is
set in the “setting with or without an ID” (
page 17).
• The ID number can be input from 0 – 9999999999.
• If it is mistakenly input,
press (the input is deleted).
e
• If is pressed in the state that an ID number is not input, it returns to the “measurement
start.”
Press .
Note
• This screen is not displayed in the case that OFF is
set in the “setting with or without an ID” (
page 17).
CE
CE
Enter / Next
90
6
Measurement completion
It is automatically printed out. (In the case that other
than 0 is set in the “Setting the number of sheets to
print” ( page 15).
Step off the platform.
It returns to the “measurement start” screen.
s
Eng
How to use
(Operating Instructions)
The lamp flashes for “Step on.”
Note
• If is pressed, it returns to the previous
CE
screen.
s
s
40
41
Page 22

Various criteria
EngEng
- What is body fat percentage? (Applicable age 5 - 99)
How to use
(Various criteria)
Body fat percentage is the amount of body fat as a proportion of your body weight.
Reducing excess levels of body fat has shown to reduce the risk of certain conditions such as high blood
pressure, heart disease,diabetes and cancer. The chart below shows the healthy ranges for body fat.
- What is total body water percentage? (Applicable age 18 - 99)
Total Body Water Percentage is the total amount of fluid in a person’s body expressed as a percentage
of their total weight.
Water plays a vital role in many of the body’s processes and is found in every cell, tissue and organ.
Maintaining a healthy total body water percentage will ensure the body functions efficiently and will
reduce the risk of developing associated health problems.
Your body water levels naturally fluctuate throughout the day and night. Your body tends to be
dehydrated after a longnight and there are differences in fluid distribution between day and night.
Eating large meals, drinking alcohol, menstruation, illness, exercising, and bathing may cause variations
in your hydration levels.
Your body water percentage reading should act as a guide and should not be used to specifically
determine your absolute recommended total body water percentage. It is important to look for long-term
changes in total body water percentage and maintain a consistent, healthy total body water percentage.
Drinking a large quantity of water in one sitting will not instantly change your water level. In fact, it will
increase your body fat reading due to the additional weight gain. Please monitor all readings over time
to track the relative change.
Every individual varies but as a guide the average total body water percentage ranges for a healthy
adult are:
Female : 45 to 60%
Male : 50 to 65%
Source : Based on Tanita's Internal Research
How to use
(Various criteria)
Healthy Range Indicator
Your Body Composition Analyzer automatically compares your body fat percentage reading to the
Healthy Body Fat Range chart. After your body fat percentage has been calculated, the LED on the side
of the display will light up, identifying where you fall within the Body Fat Ranges for your age and
gender.
(-) : Underfat; below the healthy body fat range. Increased risk for health
problems.
(0) : Healthy; within the healthy body fat percentage range for your
age/gender.
(+) : Overfat; above the healthy range. Increased risk for health problems.
(++): Obese; high above the healthy body fat range.
Greatly increased risk of obesity-related health problems.
*Note : Athletes may have a lower body fat range depending on their
particular sport or activity.
Note: The total body water percentage will tend to decrease as the percentage of body fat increases. A
person with a high percentage of body fat may fall below the average body water percentage. As you lose
body fat the total body water percentage should gradually move towards the typical range given above.
- What is visceral fat rating? (Applicable age 18 - 99)
This feature indicates the rating of visceral fat in your body.
Visceral fat is the fat that is in the internal abdominal cavity, surrounding the vital organs in the trunk
(abdominal) area. Research shows that even if your weight and body fat remains constant, as you get
older the distribution of fat changes and is more likely to shift to the trunk area especially post
menopause. Ensuring you, have healthy levels of visceral fat my reduce the risk of certain diseases such
as heart disease, high blood pressure, and the onset of type 2 diabetes.
The Tanita Body Composition Analyzer will provide you with a visceral fat rating from 1 – 59.
Rating from 1 to 12
Indicates you have a healthy level of visceral fat. Continue monitoring your rating to ensure that it stays
within the healthy range.
Rating from 13 – 59
Indicates you have an excess level of visceral fat. Consider making changes in your lifestyle possibly
through diet changes or increasing exercise.
Source : 1) Tanita Institute Contract Study. Algorithm Development for Estimating Visceral Fat Rating.
SB Heymsfield MD. Columbia University College of Physicians and Surgeons 2004.
2) Wang, Z., et al. Japanese-American Differences in Visceral Adiposity and a Simplified
Estimation Method for Visceral Adipose Tissue. North American Association for the Study
of Obesity. Annual Meeting. Abstract 518-P. 2004
Note:
•Even if you have a low body fat rate, you may have a high visceral fat level.
•For medical diagnosis, consult a physician.
4342
Page 23

EngEng
kg
- What is basal metabolic rate (BMR)? (Applicable age 18 - 99)
How to use
(Various criteria)
WHAT IS BMR?
Your Basal Metabolic Rate(BMR) is the minimum level of energy your body needs when at rest to
function effectively including your respiratory and circulatory organs, neural system, liver, kidneys, and
other organs. You burn calories when sleeping.
About 70% of calories consumed every day are used for your basal metabolism. In addition, energy is
used when doing any kind of activity however; the more vigorous the activity is the more calories are
burned. This is because skeletal muscle (which accounts for approximately 40% of your body weight)
acts as your metabolic engine and uses a large amount of energy. Your basal metabolism is greatly
affected by the quantity of muscles you have, therefor increasing your muscle mass will help increase
your basal metabolism.
By studying healthy individuals, scientists have found that as people age, their metabolic rate changes.
Basal metabolism rises as a child matures. After a peak at the age of 16 or 17, it typically starts to
decrease gradually.
Having a higher basal metabolism will increase the number of calories used and help to decrease the
amount of body fat. A low basal metabolic rate will make it harder to lose body fat and overall weight.
HOW DOES A TANITA BODY COMPOSITION ANALYZER CALCULATE BMR?
The basic way of calculating Basal Metabolic Rate BMR is a standard equation using weight and age.
Tanita has conducted in-depth research into the relationship of BMR and body composition giving a
much more accurate and personalized reading for the user based on the impedance measurement. This
method has been medically validated using indirect calorimetry (measuring the breath composition).*
- What is mascle mass? (Applicable age 18 - 99)
This feature indicates the weight of muscle in your body. the muscle mass displayed includes the skeletal
muscles, smooth muscles (such as cardiac and digestive muscles) and the water contained in these
muscles.
Muscles play an important role as they act as an engine in consuming energy. As your muscle mass
increase, your energy consumption increases helping you reduce excess body fat levels and lose weight
in a healthy way.
What is physique rating?
This feature assesses your physique according to the ratio of body fat ad muscle mass in your body.
As you become more active and reduce the amount of body fat, your physique rating will also change
accordingly. Even though your weight may not change, your muscle mass and body fat levels may be
changing making you healthier and at lower risk of certain diseases.
Each person should set their own goal of which physique they would like and follow a diet and fitness
program to meet that goal.
How to use
(Various criteria)
* Reliability on equation for Basal Metabolic Rate: At 2002 Nutrition Week : A Scientific and Clinical Forum and Exposition Title:
International Comparison: Resting Energy Expenditure Prediction Models: The American Journal of Clinical Nutrition
- What is metabolic age? (Applicable age 18 - 99)
This feature calculates your BMR and indicates the average age associated with that type of
metabolism.
If your BMR Age is higher than your actual age, it is an indication that you need to improve your metabolic
rate. Increased exercise will build healthy muscle tissue, which will improve your metabolic age.
You will obtain a reading between 12 and 90. Under 12 will be displayed as “12” and over 90 displayed
as “90”.
4544
Page 24

Eng
- What is bone mass? (Applicable age 18 - 99)
How to use
(cautions for safety)
This feature indicates the amount of bone (bone mineral level, calcium or other minerals) in the body.
Research has shown that exercise and the development of muscle tissue are related to stronger, healthier
bones. While bone structure is unlikely to make noticeable changes in a short period, it is important that
you develop and maintain healthy bones by having a balanced diet and plenty of exercise. People
worried about bone disease should consult their physician. People who suffer from osteoporosis or low
bone densities due to advanced age, young age, pregnancy,hormonal treatment or other causes, may not
get accurate estimations of their bone mass.
Below is the result of estimated bone masses of persons aged 20 to 40, who are said to have the largest
amounts of bone masses, by weight. (Source : Tanita Body Weight Science Institute)
Please use the below charts as a guide to compare your bone mass reading.
Women : Average of estimated bone mass
Eng
How to use
(cautions for safety)
Weight (lb)
Less than 110 lb 110lb - 165 lb 165 lb and up
4.3 lb 5.3 lb 6.5 lb
Men : Average of estimated bone mass
Weight (lb)
Less than 143 lb 143 lb - 209 lb 209 lb and up
5.9 lb 7.3 lb 8.1 lb
Note: Persons described below may obtain varying readings and should take the values given for
reference purposes only.
- Elderly persons - Women during or after menopause
- People receiving hormone therapy
"Estimated bone mass" is a value estimated statistically based on its correlation with the fat-free amount
(tissues other than the fat). "Estimated bone mass" does not give a direct judgment on the hardness or
strength of the bones or the risks of bone fractures. If you have concerns over your bones, you are
recommended to consult a specialist physician.
Less than 50 kg 50 kg - 75 kg 75 kg and up
1,95 kg 2,40 kg 2,95 kg
Less than 65 kg 65 kg - 95 kg 95 kg and up
2,66 kg 3,29 kg 3,69 kg
Weight (kg)
Weight (kg)
46
47
Page 25

Troubleshooting
- Please check the following before asking for repair.
EngEng
When necessary
(Troubleshooting)
How to
measur
e
Symptom Please check
Impedance
measurement error
•Measure with bare feet.
•When the soles of your feet are dry, drop
water for about 0.5 ml with the attached
dropper on the electrodes before
measurement.
•Check the input information.
Zero point error
•Turn off the power, and remove the items on
the platform and turn on the power again, and
then redo the measurement.
•Is it installed at a place with vibrations?
•Is the platform inclined?
Keep the platform horizontal. ( pages 8
The measured
weight is not stable.
e
and 9)
•Is anything caught in the gaps of the
platform?
Remove anything caught in the gaps.
e
Printer
Symptom Please check
Run out of printer paper
•Printer paper is not supplied.
Supply paper.
e
In the case that the printer is not used, press
e
and redo the initial setting.
CE
Printer cover open
•The printer cover is open.
Properly close it.
e
Check that the printer paper is not slanted.
e
Check the settings.
•Is 0 set for the number of sheets to print in the
“determination of the number of sheets to
Paper does not come
out.
The paper comes
out, however,
nothing has been
printed.
print?”
Press 1 – 3. ( page 15)
e
•The printer may be broken.
Contact the agent from which you have
e
purchased the product.
•Is the reverse side of the printer paper set?
Set the paper properly. ( page 11)
e
•The printer may be broken.
Contact the agent from which you have
e
purchased the product.
When necessary
(Troubleshooting)
Display
part
Nothing is
displayed even after
turning on the
power.
━━━━━
is
displayed.
•Check that the power supply is connected
correctly.
•The weight to measure exceeds the
measurement range.
Note
• In the case that an error is displayed other than the above, turn off the power once, and then measure
again.
If the same error is displayed repeatedly, contact our customer service center.
4948
Page 26

Connection with a personal computer
Eng
The USB interface enables input and output from this equipment.
When necessary
(Connection with a personal computer)
- Specifications
Communication standards
Communication method
Signal speed
Data bit length
Parity
Stop bit
Flow control
Terminator
Note
• USB connector (B - Type 4 - pin female) are located on the back of the control box.
• Please provide your own cable as necessary as none are included.
USB cable : A - Type 4 - pin (male) - B - Type 4 - pin (male)
• You must install the secessary driver onto your PC, available download from http://www.tanita.com.
USB
Asynchronous Transmission
9600 baud
8 bits
None
1 bit
None
CR+LF
- Transmit data
Transmission Data is output immediately after measurement regardless of the status of
the receiving equipment (personal computer, etc.). Therefore the receiving equipment
needs to be ready to accept the data before measuring.
(1) Output example (in the case to kg unit)
Note
• The data are divided with commas (,) for each data.
• The terminator (end of the data) is CR (ASCII code 0DH), LF (ASCII code 0AH).
• The control data for the items 1 – 4 are for expansion. They are not used presently so the receiving side
can ignore them.
• Because of its specifications, the scale will output an irrelevant signal approximately 0.1 second after data
output. Make sure you ignore this signal and do not import it.
Eng
When necessary
(Connection with a personal computer)
50
51
Page 27

Eng
Eng
(2) Output data items
When necessary
(Connection with a personal computer)
<kg / cm mode> <lb / ft-in mode>
Item
Control data
Control data
Control data
Control data
Model number
Body type
Gender
Age
Height
Preset tare
Body weight
Fat %
Fat mass
FFM
Muscle mass
Muscle score
Bone mass
Body water
Body water %
BMI
Ideal body weight
Degree of obesity
Visceral fat rating
BMR (kJ)
BMR (kcal)
BMR score
Metabolic age
Target body fat %
Predicted weight
Predicted fat mass
Header
{0
˜0
˜1
˜ 2
MO
SN 646 610 bytes fixed length"XXXXXXXX"Serial number
ID 757 712 bytes fixed length"XXXXXXXXXX"ID number
Dt 868 812 bytes fixed length ("mm / dd / yyyy")"mm / dd / yyyy"Date
TI 979 97 bytes fixed length"hh : mm"Time
Bt
GE
AG
Hm
Pt
Wk
FW
fW
MW
mW
sW
bW
wW
ww
MI
Sw
OV
IF
rb
rB
rJ
rA
gF
gW
gf
gt 35 33 233-7 bytes variable length (increments 0.1kg)XXXXX.XFat gain / lose
ZF 36 34 245-6 bytes variable length (increments 0.1)XXXX.XImpedance (50kHz)
CS 37 1035 252 bytes fixed lengthXXChecksum
format kg / cm mode
2 bytes fixed length 1
1 byte fixed length
1 byte fixed length
1 byte fixed length
"XXXXXX"
0 or 2
1 or 2
XX
XXX.X
XX.X
XXX.X
XX.X
XXX.X
XXX.X
XXX.X
XX
XXX.X
XXX.X
XX.X
XXX.X
XXX.X
XXX.X
XX
XXXXX
XXXXX
XX
XX
XX
XXX.X
XXX.X
8 bytes fixed length ("SC-331")
1 byte fixed length (0:Standard 2:Athletic)
1 byte fixed length (1:Male 2:Female)
1-2 bytes variable length
4-5 bytes variable length (cm)
3-4 bytes variable length (increments 0.1kg)
3-5 bytes variable length (increments 0.1kg)
3-4 bytes variable length (increments 0.1%)
3-5 bytes variable length (increments 0.1kg)
3-5 bytes variable length (increments 0.1kg)
3-5 bytes variable length (increments 0.1kg)
1-2 bytes variable length (1-24)
3-5 bytes variable length (increments 0.1kg)
3-5 bytes variable length (increments 0.1kg)
4 bytes fixed length (increments 0.1%)
3-5 bytes variable length (increments 0.1)
3-5 bytes variable length (increments 0.1kg)
3-5 bytes variable length (increments 0.1%)
1-2 bytes variable length
1-5 bytes variable length (increments 1kJ)
1-5 bytes variable length (increments 1kcal)
1-2 bytes variable length (1-24)
2 bytes fixed length
1-2 bytes variable length (4-55)
3-5 bytes variable length (increments 0.1kg)
3-5 bytes variable length (increments 0.1kg)
Order of output
Body composition
Adult
Athlete
111
2
3
4
5
10
11
12
13
14
15
16
17
18
19
20
21
22
23
24
25
26
27
28
29
30
31
32
33
34
2 2
33
44
55
10 10
11 11
12 12
13 13
14 14
15 15
16 16
17 17
18 18
19
20
21
22
23
24 19
25
26
27
28
29
30 20
31 21
32 22
Child
Scale
2
3
8
9
Item
Control data
Control data
Control data
Control data
Model number
Body type
Gender
Age
Height
Preset tare
Body weight
Fat %
Fat mass
FFM
Muscle mass
Muscle score
Bone mass
Body water
Body water %
BMI
Ideal body weight
Degree of obesity
Visceral fat rating
BMR (kJ)
BMR (kcal)
BMR score
Metabolic age
Target body fat %
Predicted weight
Predicted fat mass
Header
{0
˜0
˜1
˜ 2
MO
SN 646 610 bytes fixed length"XXXXXXXX"Serial number
ID 757 712 bytes fixed length"XXXXXXXXXX"ID number
Dt 868 812 bytes fixed length ("mm / dd / yyyy")"mm / dd / yyyy"Date
TI 979 97 bytes fixed length"hh : mm"Time
Bt
GE
AG
Hi
Pt
Wp
FW
fW
MW
mW
sW
bW
wW
ww
MI
Sw
OV
IF
rb
rB
rJ
rA
gF
gW
gf
gt 35 33 233-7 bytes variable length (increments 0.2lb)XXXXX.XFat gain / lose
ZF 36 34 245-6 bytes variable length (increments 0.1)XXXX.XImpedance (50kHz)
CS 37 1035 252 bytes fixed lengthXXChecksum
format lb / ft-in mode
2 bytes fixed length 1
1 byte fixed length
1 byte fixed length
1 byte fixed length
"XXXXXX"
0 or 2
1 or 2
XX
XX.X
XX.X
XXX.X
XX.X
XXX.X
XXX.X
XXX.X
XX
XXX.X
XXX.X
XX.X
XXX.X
XXX.X
XXX.X
XX
XXXXX
XXXXX
XX
XX
XX
XXX.X
XXX.X
8 bytes fixed length ("SC-331")
1 byte fixed length (0:Standard 2:Athletic)
1 byte fixed length (1:Male 2:Female)
1-2 bytes variable length
4 bytes variable length (in)
3-4 bytes variable length (increments 0.2lb)
3-5 bytes variable length (increments 0.2lb)
3-4 bytes variable length (increments 0.1%)
3-5 bytes variable length (increments 0.2lb)
3-5 bytes variable length (increments 0.2lb)
3-5 bytes variable length (increments 0.2lb)
1-2 bytes variable length (1-24)
3-5 bytes variable length (increments 0.2lb)
3-5 bytes variable length (increments 0.2lb)
4 bytes fixed length (increments 0.1%)
3-5 bytes variable length (increments 0.1)
3-5 bytes variable length (increments 0.2lb)
3-5 bytes variable length (increments 0.1%)
1-2 bytes variable length
1-5 bytes variable length (increments 1kJ)
1-5 bytes variable length (increments 1kcal)
1-2 bytes variable length (1-24)
2 bytes fixed length
1-2 bytes variable length (4-55)
3-5 bytes variable length (increments 0.2lb)
3-5 bytes variable length (increments 0.2lb)
Order of output
Body composition
Adult
Athlete
1 11
2
3
4
5
10
11
12
13
14
15
16
17
18
19
20
21
22
23
24
25
26
27
28
29
30
31
32
33
34
22
33
44
55
10 10
11 11
12 12
13 13
14 14
15 15
16 16
17 17
18 18
19
20
21
22
23
24 19
25
26
27
28
29
30 20
31 21
32 22
Child
Scale
2
3
8
9
When necessary
(Connection with a personal computer)
52
Output sample
• Oct-09-2009, 19:59, Standard, Male, 25 years old, Height 174.5cm
{0,16,~0,1,~1,1,~2,1,MO,"SC-331",SN,"0000000002",ID,"0000000112",Dt,"10/09/2009",TI,"19:59",Bt,0,GE,1,AG,25,
Hm,174.5,Pt,1.5,Wk,65.6,FW,20.3,fW,13.3,MW,52.3,mW,49.6,sW,0,bW,2.7,wW,33.6,ww,51.2,MI,22.7,
Sw,63.6,OV,-5.8,IF,10,rb,7134,rB,1705,rJ,10,rA,30,gF,4,gW,123.4,gf,123.4,gt,-123.4,ZF,490.9,CS,C7
53
Page 28

Technical notes
EngEng
When necessary
(Technical notes)
Body composition measurement by the BIA method.
Introduction
This equipment provides estimated values for each measured value of body fat percentage, fat mass,
fatfree mass, muscle mass and bone mass by the DXA method, estimated value for the total body water
measured value by the dilution method and estimated value for the visceral fat rating by MRI method
using the Bioelectrical Impedance Analysis (BIA method).
For measurement, a mode must be selected based on body type.
1) Standard (for 5-99 years of age)
2) Athletic (for Athletic persons who exercise considerably more than non-athlete)
Making a distinction by body type in the measurement mode produces more reliable body composition
measurements for athletic persons, whose body compositions differ from those of average persons.
- Principles of body composition measurement
BIA is a means of measuring body composition – fat mass, predicted muscle mass, etc. – by measuring
bioelectrical impedance in the body. Fat within the body allows almost no electricity to pass through, while
electricity passes rather easily through water, much of which is found in muscles. The degree of difficulty
with which electricity passes through a substance is known as the electrical resistance, and the percentage
of fat and other body constituents can be inferred from measurements of this resistance.
The Tanita Body Composition Analyzer measures body composition using a constant current source with a
high frequency current (50kHz, 90µA). The 8 electrodes are positioned so that electric current is supplied
from the electrodes on the tips of the toes of both feet, and voltage is measured on the heel of both feet. The
current flows into the upper limbs or lower limbs, depending on the body part(s) to be measured.
- What is the visceral fat?
Visceral Adipose Tissue (VAT) has been associated with increased risk of developing lifestyle-related
diseases. Accordingly, knowing and periodically checking the estimated VAT accumulation serves as one
factor of a number of factors in assessing the prevention of lifestyle related diseases.
Tanita has developed the technology for measuring the VAT accumulation risk through bioelectrical
impedance analysis (BIA) in comparison with image analysis applied to magnetic resonance imaging
(MRI), in addition to the established technology for measuring the percent of body fat. The VAT
accumulation risk is calculated by estimating the VAT area by the BIA method on the basis of MRI image
processing. This method has a higher correlation than the estimation of the VAT accumulation risk based
on BMI or abdominal circumference (waist circumference), allowing estimation that corresponds more
precisely to individuals.
*The VAT area by MRI is calculated by carrying out an image processing of the cross section of the lumber
vertebra L4-L5 regions.
(Fig. 1 - Fig. 3: Research results by N. Y. Columbia University and Jikei University Published by the North
American Association for the Study of Obesity [NAASO] in 2004.)
When necessary
(Technical notes)
- What is the DXA method?
DXA was originally designed to measure bone mineral content, but in
the full-body scan mode the body fat percentage, fat mass, and fat free
mass of individual body parts (arms, legs, trunk) can also be measured.
The image below shows one example of body composition
measurement results obtained by DXA.
Body composition measurement results
obtained by DXA (Lunar Co., Ltd; DPX-L)
- What is dilution method?
In the dilution method, a labeled substance for a known amount is given and the concentration in
equilibrium diffusing evenly is measured to obtain the total amount of the solvent that dilutes the labeled
substance.
To measure the total body water (TBW), deuterium oxide (D
Deuterium oxide uses the overall total body water as dilution space so the total body water can be
obtained. To obtain the extracellular fluid amount, sodium bromide (NaBr) is used as a labeled substance.
Bromine (Br) is said to not enter the inside of cells, and uses extracellular fluid as the dilution space.
2
O) is generally used as the labeled substance.
54
55
Page 29

EngEng
When necessary
(Technical notes)
- Factors giving errors in measurement
In the BIA method, impedance is measured and the body composition is calculated based on the value. It is
known that impedance changes by the amount of the total body water that occupies about 60% of weight
and the change in its distribution and temperature change. Therefore, for the purpose of research or for
daily repeating of measurements, the measurement conditions must be kept constant. Measurement under
the changing conditions of temperature and total body water distribution or blood flow volume of
extremities due to exercising, taking a bath, etc., affects the measurement result since the electric resistance
in the body also changes.
Therefore, it is recommended to measure under the following conditions for stable measurement.
1) 3 hours have passed after getting up and normal lifestyle activities are carried out during this period.
(The impedance transits staying at a high level if you remain sitting after getting up or drive a car, etc.)
2) 3 hours or more have passed after eating. (For 2 – 3 hours after eating, the impedance has a tendency to
decrease.)
3) 12 hours or more have passed after vigorous exercise for measurement. (The tendency toward changes
in impedance is not stable depending on the type and rigorousness of the exercise.)
4) If possible urinate before taking measurement.
5) For repeated measurements, measure at the same hour as much as possible. (At the same time of
measurement of weight, the measurements can be made more stable by measuring at the same time of
the day)
Very stable measured values can be obtained by measuring under the above conditions.
And in the development of this equipment, the following 6 items were set as conditions for the regression
equation.
1) Prohibition of alcohol intake for 12 hours before measurement
2) Prohibition of excessive exercise for 12 hours before measurement.
3) Prohibition of excessive eating and drinking the day before measurement
4) Prohibition of eating and drinking for 3 hours before measurement
5) Urination just before measurement
6) Avoid measurements during menstruation (for female)
These inter-day changes stem from such causes as:
1) Temporary increases in body weight (total body water) through overeating and overdrinking
2) Dehydration due to heavy sweating during vigorous exercise
3) Dehydration due to alcohol consumption or the use of diuretics
4) Dehydration due to heavy sweating during saunas, etc.
Accordingly, it is recommended that instructions be provided to the subject to help eliminate these causes
when accurate measurements are needed.
When necessary
(Technical notes)
2) Inter-day changes
The diagrams below offer examples of actual measurements made
of inter-day changes. A study was done to determine the degree of
change in the impedance between the feet during dehydration; the
first two days represent a normal daily routine, while in the latter
two days a state of dehydration was induced using a sauna.
No significant inter-day change was measured in body weight,
impedance between the feet, or body fat percentage during the
normal daily routine. During the dehydrated state, however, a
drop in body weight of 1kg was noted, with the impedance
between the feet rising approximately 15Ω on the first day of
dehydration and 30-35Ω on the second day. As a result, body fat
percentage was up by around 1% on the first day of dehydration
and by 1.5-2% on the second day.
As mentioned earlier, impedance increases when body weight is
reduced (such as by dehydration), and decreases when body
weight is increased through excess consumption of food and
drink. The inter-day change in impedance is thus inversely
proportional to the change in body weight.
56
57
Page 30

The Regression Formula for Basal Metabolic Rate (BMR)
EngEng
It has long been said among medical and nutritional specialists that "The Basal Metabolic Rate (BMR) is
more determined by the Fat Free Mass (FFM) than by the body weight" (Persons of a given body weight
When necessary
(The New Regression Formula for Basal Metabolic Rate (BMR))
with a higher FFM will have a higher BMR), and that from the aspect of evaluating the body composition,
should be estimated from the FFM. In addition, in cases of simple estimation formulae which can calculate
from the height, weight and age, without evaluating the body composition, there was a problem with
excessively high evaluations being given to obese persons with large body weight, and conversely
excessively small BMR evaluations given to muscular athletes, though these are not as many in number.
Currently, the BMR estimation recursion formula developed by Tanita, the manufacturer of body
composition analyzers, based on their research, works by multiple regressive analysis using this FFM, and
has a higher degree of accuracy in the individual differences in body composition. In order to derive the
BMR, resting respiratory metabolism (Resting Energy Expenditure: REE) was measured using a breath gas
analysis device, and this estimation recursion formula was created based on this data.
<Figure 1> The Relationship Between Resting Energy Expenditure (REE) According to Breath
Gas Analysis and Weight, FFM
(Presented at Nutrition Week, Held in San Diego in 2002)
As shown in Figure 1: the REE (BMR) has a stronger relationship to the FFM than to body weight, and a
difference is visible between males and females in the distribution trends. We see that in principle that we
should calculate from the FFM rather than by the old formula centred on the relationship with weight.
<Figure 2> Comparison of BMR Values from the TANITA Multiple regression model and
Breath Analysis
(Presented at Nutrition Week Held in San Diego in 2002)
The current BMR retrogression formula is a formula which acts on the principle of using the FFM value
from the results of body composition measurement according to the BIA, A good relationship is shown in
the BMR value based on actual breath analysis REE or R=0.9 (p<0.0001). These results were presented at
the First Annual Nutrition Week (American College of Nutrition, American Society for Clinical Nutrition,
American Society for Parenteral and Enteral Nutrition, North American Association for the Study of
Obesity) held in 2002 in San Diego.
NOTE:
This model has been calibrated for those between ages of 18-84. Those individuals outside of this
age range may not be obtain accurate readings.
When necessary
(The New Regression Formula for Basal Metabolic Rate (BMR))
58
59
Page 31

Specifications
EngEng
When necessary
(Specifications)
Model number
Power source
Power Consumption
Measurement System
Measurement Frequency
Impedance
Measurement
Weight
Measurement
Input Items Output Items
Measurement Current
Electrode Material
Measurement Style
Measurement Range
Accuracy at first calibration
Measurement System
Maximum Capacity / Minimum Graduation
Accuracy at first calibration
Clothes Weight
Gender
Body Type
Age
Height
Target Body Fat %
SC-331S
AC adapter (included) Center Minus
Input Voltage: 100-240 VAC 50/60 Hz 1.5A Output Voltage: 7 VDC
Rated Current: 4 A No Load Input Voltage: 7VDC
28 W
Tetra polar Bioelectrical Impedance Analysis
50 kHz
90 µA
Pressure Contact Stainless Steel Foot Pads
Between Both Feet
150 - 1200Ω
± 2%
Strain Gauge Load Cell
270 kg / 0.1 kg
600 lb / 0.2 lb
± 0.2 kg / ± 0.4 lb
0 - 10 kg / 0.1 kg increments 0 - 20 lb / 0.2 lb increments
Male / Female
Standard (5 - 99 years) / Athletic (18 - 99 years)
5 - 99 years old / 1 year increments
90.0 - 249.9 cm / 0.1 cm increments 3 ft - 7 ft 11.5 in / 0.5 in increments
4 - 55 %
Display
Output Data Interface
Temperature Range of Usage
Relative Humidity
Weight of Equipment (Remote Display Version)
Weight of Equipment (Column Mounted Version)
Size
Target Body Fat %
Weight
Gender
Display
Print-out
Platform
Height (Column Mounted Version)
Body Type
Age
Height
FAT%
Logo
Model number
Date and Time
Serial Number
ID
Body Type
Gender
Age
Height
Clothes Weight
Weight
FAT%
Fat Mass
FFM
Muscle Mass
TBW
TBW%
Predicted Fat Mass
BMR
Metabolic Age
Visceral FAT Rating
BMI
Predicted Weight
Desirable range
Indicator - FAT %
Indicator - BMI
Indicator - Visceral FAT Level
Indicator - Muscle Mass
Indicator - BMR
Physique Rating
Impedance
4 - 55 %
0 - 270 kg / 0.1 kg increments 600lb / 0.2 lb increments
Male / Female
Standard / Athletic
5 - 99 years old / 1 year increments
90.0 - 249.9 cm / 0.1 cm increments 3 ft - 7 ft 11.5 in / 0.5 in increments
3 - 75% / 0.1% increments
TANITA LOGO (240x64 dot)
SC-331S
2009 / 1 / 1 - 2099 / 12 / 31
00000001 - 99999999
0000000000 - 9999999999
Standard (5 - 99 years) / Athletic (18 - 99 years)
Male / Female
5 - 99 years old / 1 year increments
90.0 - 249.9 cm / 0.1 cm increments 3 ft - 7 ft 11.5 in / 0.5 in increments
0 - 10 kg / 0.1 kg increments 0 - 20 lb / 0.2 lb increments
0 - 270 kg / 0.1 kg increments 600lb / 0.2 lb increments
3 - 75% / 0.1% increments
0.1 kg increments
0.1 kg increments
0.1 kg increments
0.1 kg increments
15 - 85% / 0.1% increments
0.1 kg increments
1 kJ increments / 1 kcal increments
1 years increments ( 12 - 90 years)
1 Level increments ( 1-59 Level)
0.1 increments
0.1 kg increments
3 - 75% / 0.1% increments
150 - 1200Ω
3 Rows, 5 Digits LCD
USB
32˚F to 95˚F / 0˚C to 35˚C
30 - 80% (without condensation)
6.8 kg
12.1kg
372 ×375 ×101 mm (14.6 ×14.8 ×4.0 in)
1024 mm (40.3in)
0.2 lb increments
0.2 lb increments
0.2 lb increments
0.2 lb increments
0.2 lb increments
0.2 lb increments
15.0 lb
26.7 lb
When necessary
(Specifications)
6160
Page 32

Eng
USA and Canada
Federal Communications Commission and Canadian ICES Notice
This equipment has been tested and found to comply with the limits for a Class B digital device, pursuant to Part 15 of the FCC Rules
and Canadian ICES-003. These limits are designed to provide reasonable protection against harmful interference in a residential
installation. This equipment generates, uses and can radiate radio frequency energy and, if not installed and used in accordance with
the instructions, may cause harmful interference to radio communications. However, there is no guarantee that interference will not
occur in a particular installation. If this equipment does cause harmful interference to radio or television reception, which can be
determined by turning the equipment off and on, the user is encouraged to
try to correct the interference by one or more of the following measures:
• Reorient or relocate the receiving antenna.
• Increase the separation between the equipment and receiver.
• Connect the equipment into an outlet on a circuit different from that to
which the receiver is connected.
• Consult the dealer or an experienced radio or television technician for
help.
Modifications
The FCC requires the user to be notified that any changes or modifications
made to this device that are not expressly approved by Tanita Corporation
may void the user’s authority to operate the equipment.
This equipment is electronic device. Please
dispose of this equipment appropriately as
not the genera l household waste but
electronic equipment. Please follow a
regional regulation when you dispose of this.
Disposal
Copyright © 2013 TANITA Corporation. All Rights Reserved.
Feb 2013.TY.C.SC3317601(3)
Page 33

ANALIZADOR DE COMPOSICIÓN CORPORAL
SC-331S
Manual de instrucciones
E
SC-331S
VERSIÓN CON UNIDAD DE
VISUALIZACIÓN REMOTA
Intervalo de temperatura de uso: 0°C – 35°C
Humedad relativa : 30% – 80%
(sin condensación)
Altitud máxima : 2,000m ASL
Gama de presión de Medio Ambiente
: 86kPa - 106kPa
Lea atentamente este MANUAL DE INSTRUCCIONES y
téngalo a mano para posibles consultas.
SC-331S
VERSIÓN MONTADA EN COLUMNA
<Condiciones de almacenamiento><Condiciones de uso>
Intervalo de temperatura ambiental : -10°C – 60°C
Intervalo de humedad relativa : 10% – 90% (sin condensación)
Para evitar problemas de funcionamiento no almacene este equipo donde haya luz
solar directa, cambios significativos de temperatura, riesgo de humedad, mucho
polvo, fuego cercano o donde haya riesgo de que reciba choques o vibraciones.
Page 34

Índice
Uso previsto
Antes de utilizar
•Este equipo puede usarse en la detección de ciertas enfermedades de los adultos y
condiciones relacionadas con el peso y composición corporal.
•El equipo puede usarse en el control y prevención de afecciones causadas por depósitos
excesivos de tejido graso, tales como diabetes, hiperlipidemia, colelitiasis (cálculos
biliares) e hígado graso.
•El equipo puede usarse en el control de cambios en la composición corporal de las
E
personas relacionados con la razón de tejido graso a tejido magro.
•El equipo puede usarse para evaluar la efectividad de los programas de nutrición y
ejercicios de las personas para la salud y el bienestar físico.
•El analizador de composición corporal Tanita Body Composition Analyzer es indicado
para uso en la medición de peso e impedancia y el presupuesto del índice de masa
corporal (BMI), el porcentaje de grasa corporal total agua corporal, la masa muscular
(esquelétal y lisa) , Tipo de cuerpo, la masa osea, el nivel de grasa visceral con margen
saludable, el indice del metabolismo basal (BMR), la edad metabolica, y con el enfoqué
al porcentaje de grasa corporal con peso y masa grasa predichos, usando BIA (análisis
de la impedancia Bioelectrica).
El dispositivo es indicado para el uso para niños sanos de 5-17 años y adultos sanos
con vidas activas, vidas moderadas, o de vidas inactivas.
Notas sobre seguridad
Nombre de los componentes / método de
conexión
Preparación
••••••••••••••••••••••••••••••••••••••••••••••••••
••••••••••••••••••••••••••••••••••••••••••••••
Varios parámetros
Instrucciones de uso
Instrucciones de uso
•Al usar la máquina como analizador
de composición corporal
•Índice de grasa corporal deseado
•Al utilizar la máquina como báscula
Diversos criterios
••••••••••••••••••••••••••••••••
•••••••••••••••••••••••••••••••••••••
••••••••••••••••••••••••••••••••••
•••••••••••••••••••••••••••••••••••••••••••••••••••
•••••••••••••••••••••••••••••••••••••••
••••••••••••••••••••••••••••••••••
••••••••••••••••••••••••••••••••••••••
128
132
135
136
152
152
162
163
166
E
Eficacia
1. Este equipo es fácil de usar y no requiere instalaciones especializadas ni experiencia
para tomar las mediciones.
2. Las mediciones pueden tomarse en
forma rápida y sencilla, causando
un mínimo de inconvenientes al
paciente durante la medición.
Cuando sea necesario
Daño a la unidad
Conexión a un ordenador personal
Aspectos técnicos
La nueva fórmula de regresión para
calcular la Tasa Metabólica Basal (MB)
Especificaciones
•••••••••••••••••••••••••••••••••••••••
••••••••••••••••
••••••••••••••••••••••••••••••••••••••
••••••••••••••
•••••••••••••••••••••••••••••••••••••••
172
174
178
182
184
126
127
Page 35

Para su seguridad
Esta sección explica las medidas de precaución que deben tomarse para evitar lesiones a los
usuarios de este dispositivo y a otras personas, así como para evitar daños a la propiedad. Es
recomendable que se familiarice con esta información para garantizar la operación segura de este
equipo.
Precaución
Manténgalo lejos del agua.
Advertencia
E
Precaución
Antes de utilizer
(precauciones de seguridad)
No seguir las instrucciones resaltadas con este símbolo podría producir la
muerte o una lesión grave.
No seguir las instrucciones resaltadas con este símbolo podría producir una
lesión o daño a la propiedad.
Este símbolo indica las acciones que están prohibidas.
Este símbolo indica las instrucciones que siempre deben seguirse.
Advertencia
Este equipo no debe usarse en personas con marcapasos o cualquier
otro implante mecánico.
Este equipo envía una pequeña corriente eléctrica a través del cuerpo, la
cual podría interferir o causar el mal funcionamiento de los implantes
médicos eléctricos, produciendo un grave daño.
Prohibido
Evite usar el equipo en personas con alergias a los metales.
Las reacciones alérgicas pueden ser causadas por el acero inoxidable utilizado en los electrodos de
este dispositivo.
No salte en el equipo.
No se apoye en el equipo.
No use este equipo cerca de otros productos que emitan ondas electromagnéticas.
No use este equipo cerca de otros productos que emitan ondas electromagnéticas.
No aplique fuerza a la pantalla.
El panel de la pantalla puede romperse o producir una lesión.
Ayude a las personas con discapacidades.
Otra persona debe realizar las mediciones para las personas con discapacidades que afecten su
capacidad de hacerlo ellas mismas.
Asegúrese de limpiar la plataforma de la balanza con un desinfectante adecuado después
de cada uso.
E
Antes de utilizer
(precauciones de seguridad)
Prohibido
Siempre…
No manipule el enchufe con las manos húmedas.
Esto puede producir un choque eléctrico, incendio o fuga.
Mantenga este equipo lejos de los gases inflamables y ambientes
ricos en oxígeno.
No modifique este equipo de ninguna forma.
Esto puede producir un choque eléctrico o lesión, o puede afectar la
precisión del análisis.
No utilice un adaptador para múltiples enchufes.
Esto puede producir un incendio.
Utilice sólo una toma correctamente cableada.
Sólo los cables originales y los equipos se les permite.
Siempre…
Manténgase lejos de la persona durante la medición para evitar un choque eléctrico y para
garantizar la precisión.
Controle continuamente tanto a la persona como al equipo para detectar anomalías.
Si se detecta alguna anomalía en la persona o en el equipo, tome la acción adecuada, tal como
detener el equipo a la vez que garantiza la seguridad de la persona.
Desenchufe el cable de corriente alterna (CA) cuando mueva el equipo.
La interpretación de los resultados del análisis (por ejemplo, evaluación de las mediciones
y formulación de los programas de ejercicios basada en los resultados) debe ser realizada
por un profesional.
Las medidas para perder peso y los ejercicios basados en el autoanálisis podrían ser dañinos para
su salud. Siga siempre el consejo de un profesional calificado.
Este equipo está designado como un dispositivo de Clase B IT (principalmente para
sistemas diseñados para utilizarse en ambientes domésticos) y tiene la certificación de CE
(EMC), pero puede afectar a los dispositivos que son sensibles a las ondas
electromagnéticas.
Si va a conectar una computadora o dispositivos periféricos a este equipo, utilice los dispositivos
cumpliendo con IEC60601-1 (EN60601-1). La energía debe suministrarse desde un transformador
de aislamiento para uso médico para los dispositivos IEC60950 (EN60950). Mantenga una
distancia de 1,5 m entre las unidades durante la operación. No hacerlo puede producir un choque
eléctrico a las personas o un mal funcionamiento.
128
129
Page 36

Para su seguridad
Para realizar una medición precisa
Evite realizar mediciones después de un ejercicio extenuante.
Esto puede producir mediciones inexactas. Realice las mediciones después de un
descanso suficiente.
E
Evite realizar mediciones después de una ingesta de alimentos o líquido en
Antes de utilizer
(Para su seguridad)
exceso o cuando esté deshidratado.
Esto puede producir mediciones inexactas. Para una mayor precisión, evite usar el
equipo directamente después de levantarse. Utilícelo a la misma hora en cada ocasión,
por lo menos tres horas después de cada comida.
No tome medidas cuando utilice transmisores, como los teléfonos móviles, que pueden afectar las
lecturas.
Use el equipo bajo las mismas condiciones y en la misma posición, en la medida
de lo posible, para registrar en forma precisa los cambios.
Las lecturas se afectan enormemente por el nivel de hidratación y la posición del cuerpo.
Úselo a la misma hora del día cada vez, bajo las mismas condiciones y con la misma
posición del cuerpo.
Mantenimiento programado
Siempre…
TANITA recomienda que cada instalación realice inspecciones periódicas de cada unidad.
1. Revise lo siguiente por lo menos diariamente:
• Que la unidad esté sobre una superficie estable y nivelada
2. Inspeccione visualmente lo siguiente por lo menos semanalmente:
• La pantalla, para detectar daños o contaminación
• Todos los cables, cordones y extremos de los conectores, para detectar daños o contaminación
• Todas las etiquetas relacionadas con la seguridad, para verificar que estén legibles
• Todos los accesorios (sensores, electrodos, etc.), para detectar desgaste o daños
• documentación de la revisión actual de los equipos
3. Inspeccione visualmente lo siguiente por lo menos mensualmente:
• Los tornillos de montaje en la base
Actualice los ajustes, reemplace los ítems o llame al servicio técnico, según sea necesario,
de acuerdo a los resultados de la inspección visual. No utilice la unidad si ve signos de
daños. El equipo que está dañado debe ser inspeccionado por personal calificado para
verificar su operación adecuada antes de usarlo nuevamente.
El equipo debe ser inspeccionado de acuerdo con la normativa de cada país.
E
Antes de utilizer
(Para su seguridad)
Evite las mediciones en múltiples ubicaciones con grandes diferencias de
temperaturas.
Esto puede producir mediciones inexactas. Deje que el equipo descanse por lo menos dos
horas antes de usarlo, si ha sido llevado a una nueva ubicación con una diferencia de
temperaturas de 20°C o más.
Los pies desnudos deben colocarse correctamente sobre la plataforma de electrodos.
Asegúrese de que las plantas de sus pies estén libres de exceso de suciedad, ya que esto puede
actuar como un obstáculo para el paso de la suave corriente eléctrica.
Use una ubicación estable.
Pueden producirse errores en las mediciones si el dispositivo se utiliza en una ubicación inestable.
130
131
Page 37

Nombre de los componentes / método de conexión
Versión con unidad de visualización remota Versión montada en columna
Caja de control
Tapa de la impresora
E
Antes de utilizar
(Nombre de los componentes / método de conexión)
Plataforma
Pantalla
Tecla de funcionamiento
□Manual de instrucciones (este manual)
□Guía de funcionamiento
□D-ROM (controlador USB)
□Adaptador de
alimentación de CA
□Cable de
corriente alterna
Cuentagotas 1 unidad
□
□Rollo de papel de impresora
(Papel térmico común; diámetro
del rollo: 55 mm, longitud del
rollo: aprox. 34 m)
* Pa ra obte ner más
in formación, póngase en
co ntacto con el distribuidor que le vendió el
producto.
Caja de control
Columna
AccesoriosAccesorios
□Manual de instrucciones (este manual)
□Guía de funcionamiento
□D-ROM (controlador USB)
□Montaje de guía
□Adaptador de
alimentación de CA
□Cable de
corriente alterna
Llave hexagonal (1 unidad)
□
Pernos de cabeza hexagonal
□
(M5L12) (4 unidades)
Cuentagotas 1 unidad
□
□Rollo de papel de impresora
(Papel térmico común; diámetro
del rollo: 55 mm, longitud del
rollo: aprox. 34 m)
* Pa ra obte ner más
in formación, póngase en
co ntacto con el distribuidor que le vendió el
producto.
E
Antes de utilizar
(Nombre de los componentes / método de conexión)
132
Electrodo
(4 posiciones)
Plataforma
Asegúrese de que la plataforma de medición esté situada sobre una superficie
nivelada y estable. Si la plataforma de medición no se encuentra estable debido, por
ejemplo, a que no todas las patas se apoyan en el suelo, existe el riesgo de dar un
traspiés o de que las mediciones sean inexactas.
Asegúrese de que la plataforma de medición esté situada sobre una superficie
nivelada y estable. Si la plataforma de medición no se encuentra estable debido, por
ejemplo, a que no todas las patas se apoyan en el suelo, existe el riesgo de dar un
traspiés o de que las mediciones sean inexactas.
133
Page 38

Preparació
Instalación del rollo de papel en la impresora
Caja de control (nombre de las teclas)
E
Antes de utilizar
(Nombre de los componentes / método de conexión)
Conexión de enchufes
1
2
3
•Por favor, cambie el rollo de papel cuando aparezcan líneas rojas en los laterales
del papel.
•Por favor, preste especial atención para evitar lesionarse con el borde afilado.
•Por favor, apague la máquina antes de eliminar atascos de papel.
Instalación del rollo de papel en la impresora
Pulse para encender la unidad.
• Después de que se encienden todas las lámparas, aparece el
número de modelo y luego se visualiza .
(1) Pulse (abrir).
(2) Abra la tapa de la impresora.
(3) Instale el rollo de papel en la
impresora.
• Quite el adhesivo del rollo de papel y desenróllelo
aproximadamente 10 cm.
OPEN
E
Antes de utilizar
(Preparación)
Parte posterior del
controlador
Adaptador de alimentación de CA
•Para evitar descargas eléctricas, no conecte o desconecte el
enchufe con las manos húmedas.
•Para evitar descargas eléctricas, no utilice este equipo cerca
del agua.
•Para evitar errores de medición, no realice mediciones mientras utiliza
equipos que generan ondas de radio, como los teléfonos portátiles.
•Use solamente el adaptador CA original (Modelo: SA25-0535U). Utilizar
otros adaptadores diferentes del original puede alterar el funcionamiento
o provocar humo o incendios.
4
5
6
Cierre la tapa de la impresora.
• Si se visualiza
La tapa de la impresora está abierta; asegúrese
e
de cerrarla correctamente ( página 173).
Pulse la tecla (papel) y
corte el exceso de papel.
• Si la opción de corte automático está ajustada a
“OFF,” el corte automático no se lleva a cabo
( página 140).
Instalación completa.
FEED
134
135
Page 39

Varios parámetros
Abra la pantalla de selección del ajuste.
Pulse para encender la unidad.
• Después de que se encienden todas las lámparas, aparece el
1
número de modelo y luego se visualiza .
Métodos de ajuste
E
Pulse .
Antes de utilizar
(Varios parámetros)
• Aparece la pantalla de introducción del ajuste.
2
Nota
Mode Setting
• Los elementos 39 – 67 son los ajustes para imprimir (
página 148).
• Una vez realizados todos los ajustes:
Pulse en la pantalla “Selección del ajuste” (
e
pantalla de introducción de tara
Mode Setting
).
vuelve a aparecer la
Elementos de ajuste
Fecha y hora ( página 138)
1
Cantidad de hojas a imprimir
2
3
4
5
6
7
8
9
10*
11
17
18
19
20
* Inválido:lb
Modo de composición corporal ( página 140)
Cantidad de hojas a imprimir
Modo de sólo peso ( página 139)
Corte automático del papel de la impresora
( página 140)
Señal audible ( página 140)
Visualización del margen de % de grasasaludable
( página 141)
Núm. de ID ( página 141)
Flujo de medición ( página 142)
Modo atlético ( página 142)
Introducción de unidad de estatura ( página 143)
Tiempo de determinación automática ( página 143)
Modalità Lottatore ( página 144)
Porcentaje objetivo de grasa corporal ( página 145)
Seleccionar idioma ( página 145)
Preajuste de elementos a imprimir ( página 146)
Activación / desactivación de ajustes de impresión
39 Logotipo de TANITA
40 Nombre de categoría
41
Fecha
Número de serie42
Memoria43
Núm. de ID44
Masa de grasa45
Masa libre de grasa46
47 Masa muscular
Agua corporal total48
% de agua corporal total49
Masa ósea50
Tasa de metabolismo basal (TMB)51
Edad metabólica52
53
Índice de grasa visceral
IMC (índice de masa corporal)
54
Peso corporal ideal56
Grado de obesidad57
Rango deseable de % de grasa corporal58
Gráfico de % de grasa %59
60
Gráfico de IMC
61
Gráfico de índice de grasa visceral
62
Gráfico de masa muscular
63
Gráfico de TMB
64
Índice de físico
( página 146)
E
Antes de utilizar
(Varios parámetros)
136
Nota
*Al realizar diversos ajustes de forma continua,
pulse cada número para registrarlo.
e
*La máquina retendrá la información introducida hasta la próxima vez que se modifique.
*Una vez realizados todos los ajustes:
Pulse en la pantalla “selección del ajuste” (
e
introducción de tara
Mode Setting
).
vuelve a aparecer la pantalla de
137
Page 40

Varios parámetros
Métodos de ajuste
(continuación)
Pulse y luego pulse .
• Aparece la pantalla de ajuste de “fecha y hora”.
3
E
Introduzca la fecha y la hora.
Antes de utilizar
(Varios parámetros)
• Introduzca el año, mes, día, horas y minutos con 2 dígitos, en ese
4
orden.
Ejemplo:
Año 2009
Nota
Registre la fecha y la hora
(viene de la página 136).
1 Enter / Next
Para introducir: 9:47 am, 21 de enero, 2009
7490121090
Para introducir las 6:00 pm,
pulse
Enero 21
• Para introducir un número de 1 dígito (0 – 9), primero
• Para corregir el valor introducido o cancelar la entrada:
• Para dejar de introducir durante el proceso,
st
pulse .
e
e
0
pulse (se borra la información introducida).
pulse .
CE
Enter / Next
81
s
Establezca el número de páginas a imprimir para el analizador de composición corporal
3
Pulse y luego pulse .
• Aparece la pantalla de ajuste del “número de hojas a imprimir
para el monitor de composición corporal”.
2 Enter / Next
(viene de la página 136).
E
Introduzca el número de hojas a imprimir.
Antes de utilizar
(Varios parámetros)
4
Nota
• El ajuste predeterminado es “ 1” (margen de
introducción: 0 – 3).
• Si el número de hojas a imprimir se ajusta a “0” tanto
para el monitor de composición corporal como para la
báscula, la tecla (papel) no funcionará.
• Para corregir el valor introducido o cancelar la entrada:
pulse (se borra la información introducida).
e
CE
FEED
Después de introducir el valor
numérico, pulse .
5
• La máquina vuelve a mostrar la pantalla “selección del ajuste”.
Ajuste el número de hojas a imprimir para la báscula
Enter / Next
(viene de la página 136).
5
Después de introducir todos los
elementos, pulse .
• La máquina vuelve a mostrar la pantalla “selección del ajuste”.
Enter / Next
3
4
5
Pulse y luego pulse .
• Aparece la pantalla de ajuste del “número de hojas a imprimir
para la bascula”.
3 Enter / Next
Introduzca el número de hojas a imprimir.
Nota
• El ajuste predeterminado es “ 1” (margen de
introducción: 0 – 3).
• Si el número de hojas a imprimir se ajusta a “0” tanto
para el monitor de composición corporal como para la
báscula, la tecla (papel) no funcionará.
• Para corregir el valor introducido o cancelar la entrada:
pulse (se borra la información introducida).
e
CE
FEED
Después de introducir el valor numérico, pulse
Enter / Next
• La máquina vuelve a mostrar la pantalla “selección del ajuste”.
.
138
Nota
*Al realizar diversos ajustes de forma continua,
pulse cada número para registrarlo.
e
*La máquina retendrá la información introducida hasta la próxima vez que se modifique.
*Una vez realizados todos los ajustes:
Pulse en la pantalla “selección del ajuste” (
e
introducción de tara
Mode Setting
).
vuelve a aparecer la pantalla de
139
Page 41

Varios parámetros
Métodos de ajuste
(continuación)
Seleccione ON / OFF para la opción de corte automático del papel de la impresora
Pulse y luego pulse .
• Aparece la pantalla de selección “corte automático ON / OFF.”
3
Seleccione ON u OFF para la opción de
Antes de utilizar
(Varios parámetros)
corte automático.
4
Después de introducir el valor numérico, pulse
5
• La máquina vuelve a mostrar la pantalla “selección del ajuste”.
4 Enter / Next
Nota
Enter / Next
• El ajuste predeterminado es “1.on.” (“1. on” = válido,
“0. off” = no válido)
• Para corregir el valor introducido o cancelar la entrada:
pulse (se borra la información introducida).
e
(viene de la página 136).
CE
.
Seleccione ON / OFF para la opción Visualización del margen de % de grasa saludable
3
4
5
Pulse y luego pulse .
• Aparece la pantalla de selección “ON o OFF para la opción
Visualización del margen de % de grasa saludable”.
Seleccione ON u OFF para la opción
“Visualización del margen de % de
grasa condición” al utilizar el
analizador de composición corporal.
Nota
Después de introducir el valor numérico, pulse
Enter / Next
• La máquina vuelve a mostrar la pantalla “selección del ajuste”.
6 Enter / Next
• El ajuste predeterminado es “1.on.” (“1. on” = válido, “0. off” = no válido)
• Para corregir el valor introducido o cancelar la entrada:
pulse (se borra la información introducida).
e
CE
.
(viene de la página 136).
EE
Antes de utilizar
(Varios parámetros)
Seleccione ON u OFF para la señal audible
Pulse y luego pulse .
• Aparece la pantalla de selección “señal audible ON / OFF”.
5 Enter / Next
3
Seleccione ON u OFF para la señal
audible.
4
5
Nota
Después de introducir el valor
numérico, pulse .
• La máquina vuelve a mostrar la pantalla “selección del ajuste”.
• El ajuste predeterminado es “1.on.” (“1. on” = válido,
“0. off” = no válido)
• Para corregir el valor introducido o cancelar la entrada:
pulse (se borra la información introducida).
e
CE
Enter / Next
(viene de la página 136).
3
4
5
Realice el ajuste con/sin un ID
Pulse y luego pulse .
• Aparece la pantalla de ajuste “con o sin ID”.
Realice el ajuste con o sin un ID.
Nota
Después de introducir el valor numérico, pulse
Enter / Next
• La máquina vuelve a mostrar la pantalla “selección del ajuste”.
7 Enter / Next
• El ajuste predeterminado es “0. off.” (“1. on” = con ID,
“0. off” = sin ID)
• Para corregir el valor introducido o cancelar la
entrada:
pulse (se borra la información introducida).
e
CE
.
(viene de la página
136
).
Nota
*Al realizar diversos ajustes de forma continua,
pulse cada número para registrarlo.
e
*La máquina retendrá la información introducida hasta la próxima vez que se modifique.
*Una vez realizados todos los ajustes:
Pulse en la pantalla “selección del ajuste” (
e
introducción de tara
Mode Setting
).
vuelve a aparecer la pantalla de
141140
Page 42

Varios parámetros
Métodos de ajuste
(continuación)
Pulse y luego pulse .
• Aparece la pantalla de selección “ON u OFF para el modo de un
3
Antes de utilizar
(Varios parámetros)
4
5
Seleccione ON u OFF para el modo de
un solo paso al utilizar el analizador de
composición corporal.
Después de introducir el valor
numérico, pulse .
• La máquina vuelve a mostrar la pantalla “selección del ajuste”.
Seleccione el flujo de medición
solo paso”.
Nota
Nota
• El modo de un solo paso es
un modo que se utiliza para medir el peso corporal
e
después de introducir información personal.
• El ajuste predeterminado es “0. off.” (“1. on” = válido,
“0. off” = no válido)
• Para corregir el valor introducido o cancelar la entrada:
pulse (se borra la información introducida).
e
CE
Enter / Next
(viene de la página 136).
Enter / Next8
Seleccione la unidad de introducción de estatura
3
4
5
Pulse y luego pulse
Enter / Next
• Aparece la pantalla de selección “introduzca unidad de peso”.
* Inválido:lb
Seleccione la unidad de introducción de estatura.
Nota
Después de introducir el valor
numérico, pulse .
• La máquina vuelve a mostrar la pantalla “selección del ajuste”.
1
• El ajuste predeterminado es “0. off.”
0. off: establece una unidad de introducción de
1. on: establece una unidad de introducción de
• Para corregir el valor introducido o cancelar la entrada:
pulse (se borra la información introducida).
e
0
.
estatura de 0,1 cm
estatura de 1 cm
CE
Enter / Next
(viene de la página 136).
EE
Antes de utilizar
(Varios parámetros)
Seleccione ON / OFF para la selección de modo atlético
3
4
5
Pulse y luego pulse .
• Aparece la pantalla de selección “Seleccione ON / OFF para la
selección del modo atlético”.
Seleccione ON u OFF para la selección de
modo atlético al utilizar el analizador de
composición corporal.
Nota
Después de introducir el valor
numérico, pulse .
• La máquina vuelve a mostrar la pantalla “selección del ajuste”.
• El ajuste predeterminado es “1.on.” (“1. on” = válido,
“0. off” = no válido)
• Para corregir el valor introducido o cancelar la entrada:
pulse (se borra la información introducida).
e
CE
Enter / Next
Enter / Next9
(viene de la página 136).
Establezca el tiempo de determinación automática durante la introducción de información
3
4
5
Pulse y luego pulse
Enter / Next
• Aparece la pantalla de selección “tiempo de determinación
automática durante la introducción de información”.
Nota
Establezca el tiempo de determinación automática
durante la introducción de información.
Nota
Después de introducir el valor
numérico, pulse .
• La máquina vuelve a mostrar la pantalla “selección del ajuste”.
• La función de determinación automática durante la introducción de información es:
una función que determina automáticamente el valor introducido, incluso si no se
e
pulsa de manera inmediata , después de introducir un valor numérico.
• El ajuste predeterminado es 5 segundos (“5”). (margen
de introducción: 0 – 9).
*Si se selecciona “0”, los valores no se determinan automáticamente.
• Para corregir el valor introducido o cancelar la entrada:
pulse (se borra la información introducida).
e
11
.
Enter / Next
CE
Enter / Next
(viene de la página 136).
Nota
*Al realizar diversos ajustes de forma continua,
pulse cada número para registrarlo.
e
*La máquina retendrá la información introducida hasta la próxima vez que se modifique.
*Una vez realizados todos los ajustes:
Pulse en la pantalla “selección del ajuste” (
e
introducción de tara
Mode Setting
).
vuelve a aparecer la pantalla de
143142
Page 43

Varios parámetros
Métodos de ajuste
(continuación)
Pulse y luego pulse
3
E
Establecimiento del modo de luchador
Antes de utilizar
(Varios parámetros)
4
Después de introducir el valor numérico, pulse
Establecimiento del modo de luchador
71
Enter / Next
Nota
• El valor predeterminado es 0.off
• 0: el modo esta desactivado
• 5: Establecimiento del 5% en el modo de luchador
• 7: Establecimiento del 7% en el modo de luchador
• Lorsque vous activez le “mode Lutteur”, la TBF-300A calcule automatiquement le
poids minimum du lutteur pour un pourcentage de masse grasse minimum
prédéterminé. La prise de position de 1996, de l’ACSM, intitulée “Perte de poids
chez les lutteurs”, adoptée par la NCAA, recommande les pourcentages de masse
grasse MINIMUMS suivants:
.
5% for Collegiate Athletes (male)
7% for High School Athletes (male)
L’objectif de pourcentage de masse grasse est complètement indépendant des
calculs du poids de lutte minimum (POIDS min).
Exemple :
Vous pouvez régler l’objectif de pourcentage de masse grasse sur 15%, même
si le POIDS min est calculé pour une masse grasse minimum prédéterminée
de 5 ou de 7%.
(viene de la página 136).
Seleccione ON /OFF de la ratio de grasa corporal objetivo
3
4
5
3
Pulse y luego pulse
Enter / Next
Seleccione ON u OFF de la ratio de grasa
corporal objetivo
Nota
Después de introducir el valor
numérico, pulse .
• La máquina vuelve a mostrar la pantalla “selección del ajuste”.
Determine el lenguaje de impresión
Pulse y luego pulse
Enter / Next
• El valor por defecto es “0.off” (“1.on” para válido,
“0.off” para inválido)
• Para corregir el valor introducido o cancelar la entrada:
pulse (se borra la información introducida).
e
81
.
CE
Enter / Next
(viene de la página 136).
91
.
(viene de la página 136).
E
Antes de utilizar
(Varios parámetros)
5
Nota
Enter / Next
• La máquina vuelve a mostrar la pantalla “selección del ajuste”.
*Al realizar diversos ajustes de forma continua,
pulse cada número para registrarlo.
e
*La máquina retendrá la información introducida hasta la próxima vez que se modifique.
.
Determine el lenguaje de impresión
4
Nota
Después de introducir el valor
numérico, pulse .
5
*Una vez realizados todos los ajustes:
e
introducción de tara
• La máquina vuelve a mostrar la pantalla “selección del ajuste”.
Pulse en la pantalla “selección del ajuste” (
Mode Setting
• 1. Inglés 2. Francés 3. Alemán
4. Italiano 5. Español 6. Holandés
• Para corregir el valor introducido o cancelar la
entrada:
pulse (se borra la información introducida).
e
).
CE
Enter / Next
vuelve a aparecer la pantalla de
144
145
Page 44

Varios parámetros
Métodos de ajuste
(continuación)
Establezca el preajuste de elementos a imprimir
Pulse y luego pulse
3
• Aparece la pantalla de selección “print out preset”.
Establezca el preajuste de elementos a imprimir.
Antes de utilizar
(Varios parámetros)
• Realice el ajuste con – .
4
Después de introducir el valor
numérico, pulse .
5
• La máquina vuelve a mostrar la pantalla “selección del ajuste”.
Enter / Next
Nota
• La función de preajuste de elementos a imprimir es
una función que permite ajustar los elementos de
e
impresión del patrón 1 – 3 a ON automáticamente
( página 147). El ajuste predeterminado es “1” (patrón 1).
• Cuando se cambia el ajuste ON u OFF de los elementos de impresión con
“selección de los elementos de impresión” después de preestablecer los elementos
a imprimir ( página 150), el último estado establecido es válido.
02
.
1 3
Enter / Next
(viene de la página 234).
[Lista de elementos de impresión]
EE
Antes de utilizar
(Varios parámetros)
Nota
*Al realizar diversos ajustes de forma continua,
pulse cada número para registrarlo.
e
*La máquina retendrá la información introducida hasta la próxima vez que se modifique.
• Los elementos marcados con “ ” se imprimen.
• Se pueden seleccionar los elementos marcados con para imprimirlos ( página 148)
* Para ver un ejemplo de impresión de elementos preestablecidos, consulte la página 148.
*Una vez realizados todos los ajustes:
Pulse en la pantalla “selección del ajuste” (
e
introducción de tara
Mode Setting
).
vuelve a aparecer la pantalla de
147146
Page 45

Varios parámetros
Métodos de ajuste
(continuación)
[Al seleccionar el patrón de elementos de impresión “1”] [Al seleccionar el patrón
Nombre de categoría
Peso
•Peso corporal medido.
Antes de utilizar
(Varios parámetros)
Masa Grasa
•Peso total de la masa de grasa
contenida en el cuerpo.
Masa Muscular
•Masa muscular magra libre de hueso
(LTM)
% Agua Total
MB*
•El Índice de metabolismo basal
representa la cantidad total de energía
gastada por el cuerpo para mantener
las funciones normales en reposo como
la respiración y la circulación.
Nivel de Grasa Visceral*
•El nivel de grasa visceral indica la
cantidad de grasa visceral.
Peso Ideale*
•El peso corporal ideal es un valor para
el cual el IMC es 22.
Grado de Obesidad*
•Se calcula como (peso) – (peso
estándar) / (peso estándar) ×100.
Impedancia
•Impedancia (No tiene efecto sobre la
ev aluación de los resultados de
medición).
*18 - 99 anos
Logotipo
Número de Serie
•La selección por defecto es 00000001.
Añade 1 por cada medición que realiza.
ID
•Cuando se introduce con un
Identificador de usuario, éste se imprime.
(Por defecto se imprime sin ID).
Masa Grasa %
•El porcentaje de grasa es la grasa
corporal en proporción con el peso
corporal.
Masa Magra
•La masa libre de grasa se compone de
músculo, huesos, tejido, agua y otras
masas libres de grasa en el cuerpo.
Agua Total
•El agua corporal total es la cantidad de
agua retenida en el cuerpo. Se dice que
el ACT corresponde a aproximadamente
el 50% - 70% del peso corporal total.
Generalmente, los hombres tienden a
tener un mayor peso de agua que las
mu jeres debido a que poseen una
mayor masa muscular.
Masa Ósea*
•La cantidad de mineral óseo contenida
en el hueso completo.
Edad Metabólica*
•Se considera que la edad metabólica es
baja (joven) cuando la masa muscular
es grande y la TMB es elevada.
BMI
•Se calcula con la fórmula “peso (kg) /
altura (m)
•Ámbito deseable 18,5 – 24,9
* El valor estándar es para el modo
Es tándar. En el caso del modo
Atlético, el valor estándar es sólo una
referencia. Y para los menores de 17
años, sólo se muestra como valor
es tándar el porcentaje de grasa
co rporal. La masa mus cular, la
ca ntidad total de agua en el
organismo y la masa ósea estimada
para los menores de 17 años son sólo
valores de referencia.
2
”
de elementos de impresión “2”]
Consulte a su médico antes de comenzar cualquier programa de control de peso. Tanita no se hace
responsable de la determinación del objetivo de proporción de grasa corporal.
[Al seleccionar el patrón
de elementos de impresión “3”]
EE
Antes de utilizar
(Varios parámetros)
Consulte a su médico antes de comenzar cualquier programa de control de peso. Tanita no se hace
responsable de la determinación del objetivo de proporción de grasa corporal.
149148
Page 46

Varios parámetros
Métodos de ajuste
(continuación)
Cuando se selecciona la activación del ajuste del logotipo
Seleccione el número que desea
introducir con las teclas numéricas
3
(–) y,
a continuación, pulse .
• Aparece la pantalla de ajuste.
Antes de utilizar
(Varios parámetros)
• Consulte la página siguiente para obtener información sobre el número de ajuste de cada
• Cuando se selecciona impresión de elementos preestablecidos, después de establecer los
Seleccione ON u OFF para el elemento a
imprimir.
4
(viene de la página 136).
<In the case of selecting 39>
3 9 6 4
Enter / Next
Nota
elemento.
elementos a imprimir ( página 148), los elementos a imprimir pueden cambiarse
automáticamente. Compruebe la “Lista de elementos de impresión” ( página 147).
In the case of selecting
<>
the logo setting on.
Impresión de la configuración de elementos ON / OFF
39 Logotipo de TANITA
40 Nombre de categoría
41
Fecha
Número de serie42
Memoria43
Núm. de ID44
Masa de grasa45
Masa libre de grasa46
47 Masa muscular
Agua corporal total 48
% de agua corporal total49
Masa ósea50
Tasa de metabolismo basal (TMB)51
Edad metabólica52
Índice de grasa visceral
53
IMC (índice de masa corporal)54
Peso corporal ideal56
Grado de obesidad57
Rango deseable de % de grasa corporal58
Gráfico de % de grasa %59
60
Gráfico de IMC
61
Gráfico de índice de grasa visceral
62
Gráfico de masa muscular
63
Gráfico de TMB
64
Índice de físico
EE
Antes de utilizar
(Varios parámetros)
5
Nota
• “0. off” = no se imprime, “1. on” = se imprime.
• Para corregir el valor introducido o cancelar la entrada:
pulse (se borra la información introducida).
e
CE
Después de introducir el valor numérico, pulse
Enter / Next
• La máquina vuelve a mostrar la pantalla “selección del ajuste”.
.
Nota
*Al realizar diversos ajustes de forma continua,
pulse cada número para registrarlo.
e
*La máquina retendrá la información introducida hasta la próxima vez que se modifique.
*Una vez realizados todos los ajustes:
Pulse en la pantalla “selección del ajuste” (
e
introducción de tara
Mode Setting
).
vuelve a aparecer la pantalla de
151150
Page 47

Instrucciones de uso
Explica el procedimiento cuando la impresora está encendida. Observe que el display puede ser diferente
si el número de impresiones se configura en .
0
al usar la máquina como analizador de composición corporal
Compruebe que el monitor de
•No limpie el equipo con productos químicos corrosivos (gasolina, limpiadores, etc). Utilice un
detergente neutro para limpiarlo.
•Cuando se haya trasladado el equipo a un lugar con una diferencia de temperatura de 20ºC o más,
espere al menos dos horas antes de utilizarlo.
•Al tomar medidas, mantenga alejada de la unidad a cualquier persona que utilice transmisores como
E
Acerca de la selección de tipo de cuerpo atlético
Instrucciones de uso
(al usar la máquina como analizador de composición corporal)
• Se recomienda que las personas mayores de 18 años y que cumplan los siguientes requisitos
seleccionen el “modo atlético” y lo utilicen como valores de referencia.
- Personas que realizan al menos 12 horas de ejercicio físico por semana.
- Personas que pertenecen a un equipo u organización deportiva con el fin de participar en competiciones,
etc.
- Personas que practican físicoculturismo.
- Atletas profesionales.
• Postura durante la medición
- Párese con ambos pies paralelos sobre los electrodos.
- Párese derecho sin doblar las rodillas.
• El margen de introducción de edad es de 5 a 99 años.
En el caso de personas mayores de 100 años, introduzca 99.
teléfonos móviles a fin de evitar causar errores de margen.
Atención
2
3
composición corporal está
seleccionado e introduzca el
peso de la ropa.
Introduzca la información pulsando – y
.
.
Nota
• El peso de la ropa (tara preestablecida) puede introducirse dentro del margen de 0,0-20,0lb o 0,010,0kg.
*incrementos de 0,2lb / 0,1kg
*Unidad se cambia por clave.
• Para corregir el valor introducido:
pulse (se borra la información introducida).
e
Pulse .
CE
Enter / Next
0 9
E
Instrucciones de uso
(al usar la máquina como analizador de composición corporal)
152
Nota
• La impedancia, que es la base para el cálculo de la composición corporal, varía considerablemente
inmediatamente después de realizar ejercicios intensos, por lo que puede no ser medida de forma
correcta.
• Si se selecciona “atlético” para tipo corporal, la selección cambia automáticamente a “estándar” en el caso
de personas de 17 años o menores.
• Cuando se introduce el peso de la ropa, éste se resta del peso obtenido durante la medición.
Cuando se selecciona flujo estándar (no el modo de un solo paso)
En el modo de flujo estándar, primero se mide el peso, luego se introducen los datos personales y, finalmente,
se mide la composición corporal.
Medición del peso
s
Introducción de datos personales Medición de la composición corporal
s
Pulse para encender la
unidad.
1
(kg modo)
4
s
Nota
• Esta pantalla no aparece si se ha seleccionado OFF
en “con o sin ID” ( página 141). (Aparece la
pantalla “selección del tipo corporal”)
Introduzca el número de ID.
Introdúzcalo pulsando – .
Nota
•
Esta pantalla no aparece si se ha seleccionado OFF
en “con o sin ID” ( página 141).
• El número de ID puede introducirse dentro del
margen de 0 a 9999999999. Si se pulsa ,
los dígitos no introducidos se rellenan con ceros.
• Si ha introducido información incorrecta:
pulse (se borra la información introducida).
e
• Si se pulsa sin haber introducido un número de ID, la máquina vuelve a mostrar la
pantalla “inicio de medición”.
CE
CE
0 9
Enter / Next
153
Page 48

Instrucciones de uso
al usar la máquina como analizador de composición corporal (continuación)
Seleccione el tipo corporal.
Pulse las teclas de selección de tipo corporal para
5
E
Instrucciones de uso
(al usar la máquina como analizador de composición corporal)
introducir la información.
Cuando se selecciona el tipo corporal, la lámpara
parpadea en “Gender” (sexo).
Nota
• Esta pantalla no aparece si se ha seleccionado OFF
en “ON u OFF para el modo atlético” ( página 142).
• El tipo corporal también puede seleccionarse con las teclas numéricas ( ).
• Si ha introducido información incorrecta:
pulse (se borra la información introducida y la máquina vuelve a mostrar la pantalla
e
“selección de tipo corporal”).
• Si se pulsa (borrar) sin haber introducido el tipo corporal, la máquina vuelve a mostrar la
pantalla “introducción de número de ID” (o la pantalla “inicio de medición”).
CE
CE
Seleccione el sexo.
Pulse las teclas de selección de sexo masculino /
6
femenino para introducir la información.
Cuando se selecciona masculino o femenino, la
lámpara parpadea en “age input” (introducción de
edad).
Nota
• Si ha introducido información incorrecta:
pulse (se borra la información introducida y la máquina vuelve a mostrar la pantalla
e
“selección de sexo”).
• Si se pulsa sin haber seleccionado sexo masculino o femenino, la máquina vuelve a
mostrar la pantalla “selección de tipo corporal”.
CE
CE
1 2
9
10
Introduzca la estatura.
Introdúzcala pulsando – .
Nota
• La estatura puede introducirse dentro del margen
de 3ft -7ft11,5in /90,0 a 249,9 (90 a 249).
*Unidad se cambia por clave.
• Si ha introducido información incorrecta:
pulse (se borra la información introducida).
e
• Si se pulsa sin haber introducido la estatura, la máquina vuelve a mostrar la pantalla
“selección de edad”.
Pulse .
CE
CE
Enter / Next
0 9
s
La lámpara “ step on” (suba a la plataforma)
parpadea.
Nota
• Cuando se pulsa , la máquina vuelve a
mostrar la pantalla anterior..
CE
E
Instrucciones de uso
(al usar la máquina como analizador de composición corporal)
7
8
Introduzca la edad.
Introdúzcala pulsando – .
Nota
• La edad puede introducirse dentro del margen de 5
a 99.
• Si ha introducido información incorrecta:
pulse (se borra la información introducida).
e
• Si se pulsa sin haber introducido la edad, la máquina vuelve a mostrar la pantalla
“selección de sexo masculino/femenino”.
Pulse .
Cuando se introduce la edad, la lámpara parpadea en
“height input” (introducción de estatura).
CE
CE
Enter / Next
0 9
11
12
Step on the electrodes with bare
feet.
Take off your socks and stockings before stepping on.
Se realiza la medición de la
composición corporal.
La indicación se apaga de forma secuencial.
155154
Page 49

Instrucciones de uso
al usar la máquina como analizador de composición corporal (continuación)
La medición finaliza.
Se visualiza el resultado de la medición y la
13
Instrucciones de uso
(al usar la máquina como analizador de composición corporal)
estimación del porcentaje de grasa corporal.
La información se imprime automáticamente. (Si se
ha introducido un número distinto de 0 en “Selección
del número de hojas a imprimir” ( página 139).
Nota
• Margen de grasa saludable (el valor numérico en la
etapa intermedia) no se visualiza si se ha
seleccionado OFF en “ON / OFF para Visualización
del margen de % de grasa saludable” ( página
141).
Baje de la plataforma.
La máquina vuelve a mostrar la pantalla “inicio de
medición”.
s
2
3
Compruebe que el monitor de
composición corporal está
seleccionado e introduzca el
peso de la ropa.
Introduzca la información pulsando – y
.
.
Nota
• El peso de la ropa (tara preestablecida) puede introducirse dentro del margen de 0,0-20,0lb o 0,010,0kg.
*incrementos de 0,2lb / 0,1kg
*Unidad se cambia por clave.
• Para corregir el valor introducido:
pulse (se borra la información introducida).
e
Pulse .
CE
Enter / Next
0 9
EE
Instrucciones de uso
(al usar la máquina como analizador de composición corporal)
Cómo leer la información de la pantalla <kg modo>
Evaluación basada
en el porcentaje de
grasa corporal.
( página 166.)
Cómo leer la información de la pantalla <lb modo>
Evaluación basada
en el porcentaje de
grasa corporal.
( página 166.)
Alternativa (no el modo de un solo paso)
En el modo de un solo paso, después de introducir los datos personales, se mide el peso y la
composición corporal.
Introducción de datos personales
s
Pulse para encender la
1
unidad.
Nota
Medición del peso Medición de la composición corporal
s
La lámpara “ step on” (suba a la plataforma)
parpadea.
Nota
• Cuando se pulsa , la máquina vuelve a
mostrar la pantalla anterior.
CE
s s
• Unidad se cambia por clave.
(kg modo)
156 157
Page 50

Instrucciones de uso
al usar la máquina como analizador de composición corporal (continuación)
Pise los electrodos con los pies
descalzos.
4
E
Instrucciones de uso
(al usar la máquina como analizador de composición corporal)
Quítese los calcetines o medias antes de pisar la
báscula.
Cuando el peso se estabiliza, la máquina cambia a la
pantalla que se muestra a la derecha.
Nota
• No se baje de la plataforma.
• Esta pantalla no aparece si se ha seleccionado OFF
en “con o sin ID” ( página 141). (Aparece la
pantalla “selección del tipo corporal”)
Introduzca el número de ID.
Introdúzcalo pulsando – .
5
Nota
•
Esta pantalla no aparece si se ha seleccionado OFF
en “con o sin ID” ( página 141).
• El número de ID puede introducirse dentro del
margen de 0 a 9999999999. Si se pulsa ,
los dígitos no introducidos se rellenan con ceros.
• Si ha introducido información incorrecta:
pulse (se borra la información introducida).
e
• Si se pulsa sin haber introducido un número de ID, la máquina vuelve a mostrar la
pantalla “inicio de medición”.
158
CE
CE
0 9
Enter / Next
<Niño><Adulto>
s
6
7
8
9
Pulse .
Nota
• Esta pantalla no aparece si se ha seleccionado OFF
en “con o sin ID” ( página 141).
Enter / Next
Seleccione el tipo corporal.
Pulse las teclas de selección de tipo corporal para
introducir la información.
Cuando se selecciona el tipo corporal, la lámpara
parpadea en “Gender” (sexo).
Nota
• Esta pantalla no aparece si se ha seleccionado OFF
en “ON u OFF para el modo atlético”( página 142).
• El tipo corporal también puede seleccionarse con las teclas numéricas ( ).
• Si ha introducido información incorrecta:
pulse (se borra la información introducida y la máquina vuelve a mostrar la pantalla
e
“selección de tipo corporal”).
• Si se pulsa (borrar) sin haber introducido el tipo corporal, la máquina vuelve a mostrar la
pantalla “introducción de número de ID” (o la pantalla “inicio de medición”).
CE
CE
1 2
Seleccione el sexo.
Pulse las teclas de selección de sexo masculino /
femenino para introducir la información.
Cuando se selecciona masculino o femenino, la
lámpara parpadea en “age input” (introducción de
edad).
Nota
• Si ha introducido información incorrecta:
pulse (se borra la información introducida y la máquina vuelve a mostrar la pantalla
e
“selección de sexo”).
• Si se pulsa sin haber seleccionado sexo masculino o femenino, la máquina vuelve a
mostrar la pantalla “selección de tipo corporal”.
CE
CE
Introduzca la edad.
Introdúzcala pulsando – .
Nota
• La edad puede introducirse dentro del margen de 5
a 99.
• Si ha introducido información incorrecta:
pulse (se borra la información introducida).
e
• Si se pulsa sin haber introducido la edad, la máquina vuelve a mostrar la pantalla
“selección de sexo masculino/femenino”.
CE
CE
0 9
E
Instrucciones de uso
(al usar la máquina como analizador de composición corporal)
159
Page 51

Instrucciones de uso
al usar la máquina como analizador de composición corporal (continuación)
Pulse .
Cuando se introduce la edad, la lámpara parpadea en
10
E
Instrucciones de uso
(al usar la máquina como analizador de composición corporal)
“height input” (introducción de estatura).
Introduzca la estatura.
Introdúzcala pulsando – .
Enter / Next
11
Nota
• La estatura puede introducirse dentro del margen
de 3ft -7ft11,5in / 90,0-249,9cm.
*Unidad se cambia por clave.
• Si ha introducido información incorrecta:
pulse (se borra la información introducida).
e
• Si se pulsa sin haber introducido la estatura, la máquina vuelve a mostrar la pantalla
“selección de edad”.
CE
CE
0 9
14
La medición finaliza.
Se visualiza el resultado de la medición y la
estimación del porcentaje de grasa corporal.
La información se imprime automáticamente. (Si se
ha introducido un número distinto de 0 en “Selección
del número de hojas a imprimir” ( página 139).
Nota
• Margen de grasa saludable (el valor numérico en la
etapa intermedia) no se visualiza si se ha
seleccionado OFF en “ON / OFF para Visualización
del margen de % de grasa saludable” ( página
141).
Baje de la plataforma.
La máquina vuelve a mostrar la pantalla “inicio de
medición”.
s
E
Instrucciones de uso
(al usar la máquina como analizador de composición corporal)
12
13
Pulse .
Enter / Next
Se realiza la medición de la
composición corporal.
La indicación se apaga de forma secuencial.
Cómo leer la información de la pantalla <kg modo>
Evaluación basada
en el porcentaje de
grasa corporal.
( página 166.)
Cómo leer la información de la pantalla <lb modo>
Evaluación basada
en el porcentaje de
grasa corporal.
( página 166.)
160
161
Page 52

Instrucciones de uso
Índice de grasa corporal deseado
Cómo realizar una
medición
al usar la máquina como báscula
Introduzca el índice de grasa
corporal deseado.
1
E
Instrucciones de uso
(Índice de grasa corporal deseado)
Introdúzcalo pulsando un número del al
.
9
Nota
• Se visualizará esta pantalla si la configuración
ON/OFF del índice de grasa corporal deseado se
encuentra en posición ON ( página 145).
• Puede introducir un índice de grasa corporal deseado de 4 a 55.
• Si introduce una cifra incorrecta,
Pulse (la cifra se borra).
e
Si el número de la página a imprimir se fija en “0”, la función de configuración del índice de grasa
corporal deseado se apagará (OFF) automáticamente.
Si el índice de grasa corporal deseado se fija en 0 ó nada, este no se imprimirá.
CE
0
Antes de iniciar un programa de gestión del peso corporal y configurar el índice de
grasa corporal más adecuado, consulte a su médico. Tanita no se responsabiliza de
la configuración del índice de grasa corporal más adecuado para personas
específicas.
1
2
Pulse para encender la
unidad.
Compruebe que el monitor de
composición corporal está
seleccionado e introduzca el
peso de la ropa.
Introdúzcalo pulsando – al .
Nota
• El peso de la ropa (tara preestablecida) puede introducirse dentro del margen de 0,0-20,0lb o 0,010,0kg.
*incrementos de 0,2lb / 0,1kg
*Unidad se cambia por clave.
0 9
.
E
Instrucciones de uso
(al usar la máquina como báscula)
3
• Si ha introducido información incorrecta:
pulse (Se borra la información introducida).
e
Pulse .
Nota
• Esta pantalla no se muestra si la “configuración
con o sin Identificador de usuario” de la página
139 está seleccionada en OFF ( página 141). (Se
muestra la pantalla de “selección de tipo de
estructura corporal.)
CE
Enter / Next
s
162
163
Page 53

Cómo realizar una medición
al usar la máquina como báscula (continuación)
Introduzca un número de ID.
Introdúzcalo pulsando – .
4
Nota
• Esta pantalla no aparece si se ha seleccionado OFF
en “con o sin ID” ( página 141).
E
Instrucciones de uso
(al usar la máquina como báscula)
5
• El número de ID puede introducirse dentro del
margen de 0 a 9999999999.
• Si ha introducido información incorrecta:
pulse (se borra la información introducida).
e
• Si se pulsa sin haber introducido un número de ID, la máquina vuelve a mostrar la
pantalla “inicio de medición”.
Pulse .
Nota
• Esta pantalla no aparece si se ha seleccionado OFF
en “con o sin ID” ( página 141).
0 9
CE
CE
Enter / Next
s
6
La medición finaliza.
La información se imprime automáticamente (si se ha
introducido un número distinto de 0 en “Selección
del número de hojas a imprimir” ( página 139).
Cuando se baje de la plataforma, la máquina
cambiará a la pantalla de inicio de medición.
s
E
Instrucciones de uso
(al usar la máquina como báscula)
164
La lámpara parpadea para “step on” (suba a la
plataforma).
Nota
• Si se pulsa , la máquina vuelve a mostrar la
pantalla anterior.
CE
s
165
Page 54

Diversos criterios
- ¿Que es el porcentaje de grasa corporal?
Porcentaje de grasa corporal es la cantidad de grasa corporal expresada como una proporción del peso
corporal.
Se ha demostrado que la reducción de los niveles excesivos de grasa corporal disminuye el riesgo de ciertas
enfermedades tales como la hipertensión arterial, las enfermedades cardiacas, la diabetes y el cáncer. En el
gráfico se muestran los niveles saludables de grasa corporal.
Instrucciones de uso
(Diversos criterios)
-¿Que es el porcentaje de agua corporal total?
Porcentaje de agua corporal total es la cantidad total de líquido que hay en el cuerpo de una persona,
expresada como porcentaje de su peso total.
El agua desempeña un papel vital en muchos de los procesos corporales, y se encuentra en todas las células,
tejidos y órganos del cuerpo. El mantenimiento de un porcentaje adecuado de agua corporal total garantizará que
el cuerpo funcione de manera eficiente, y reducirá el riesgo de aparición de los trastornos de salud asociados.
Los niveles de agua del cuerpo fluctúan naturalmente a lo largo del día. De hecho, el cuerpo tiende a
deshidratarse después de una noche larga y se observan diferencias en la distribución de fluidos entre el día y
la noche. Ingerir grandes cantidades de comida, beber alcohol, menstruar, enfermarse, hacer ejercicio y
bañarse pueden provocar variaciones en los niveles de hidratación.
Su porcentaje de agua corporal debe servirle de guía, y no debe ser utilizado específicamente para determinar
el porcentaje de agua corporal total absoluto recomendado para usted. Es importante tratar de lograr cambios
a largo plazo en el porcentaje de agua corporal total y mantenerlo a un nivel saludable y constante.
Si bebe de golpe una gran cantidad de agua, su nivel de agua no cambiará inmediatamente. De hecho,
aumentará la lectura de su grasa corporal debido al incremento de peso. Supervise periódicamente todas las
lecturas para realizar un seguimiento del cambio relativo.
El porcentaje varía de una persona a otra, pero como guía, los porcentajes de agua corporal total medios para
un adulto saludable son:
Mujer : 45 a 60%
Varón : 50 a 65%
Fuente : Información basada en investigación interna de Tanita
EE
Instrucciones de uso
(Diversos criterios)
Indicador de los niveles saludables de grasa corporal
El monitor de composición corporal compara automáticamente su porcentaje de grasa corporal con el gráfico
de niveles saludables de grasa corporal. Después de realizado el cálculo de porcentaje de grasa corporal, en la
parte inferior del display, parpadeará una barra negra que identifica su posición en los niveles de grasa
corporal para su edad y sexo.
(-) :
corporal. Aumento del riesgo de problemas de salud.
(0) :
corporal para su edad/sexo.
(+) :
Aumento del riesgo de problemas de salud.
(++) :
corporal. Aumento considerable del riesgo de problemas de salud
relacionados con la obesidad.
*Note :
Si selecciona el modo de Atleta, la unidad no mostrará el indicador de
margen saludable. Los Atletas podrían tener un margen de grasa
corporal más bajo según su deporte o actividad particulares.
Bajo en grasa; por debajo del margen saludable de grasa
Saludable; dentro del margen saludable de grasa
Alto en grasa; por encima del margen saludable.
Obeso; muy por encima del margen saludable de grasa
Nota: El porcentaje de agua corporal total tenderá a disminuir a medida que el porcentaje de grasa corporal
aumente. Una persona que tenga un alto porcentaje de grasa corporal puede estar por debajo del porcentaje de
agua corporal medio. A medida que pierda grasa corporal, el porcentaje de agua corporal total deberá
acercarse gradualmente a los niveles típicos indicados anteriormente.
- ¿Que es el nivel de grasa visceral?
Esta función indica el nivel de grasa visceral de su cuerpo.
Grasa visceral es la grasa que se encuentra en el interior de la cavidad abdominal, rodeando los órganos vitales
de la zona del tronco (zona abdominal). Las investigaciones han demostrado que aunque el peso y la grasa
corporal se mantengan constantes, a medida que se envejece varía la distribución de la grasa en el cuerpo, y que
es mucho más probable que ésta se desplace a la zona del tronco, especialmente después de la menopausia.
Asegurándose de tener los niveles sanos de grasa visceral reducirá el riesgo de contraer ciertas enfermedades
tales como enfermedades cardiacas e hipertensión arterial, y retardar la aparición de la diabetes tipo 2.
El monitor de composición corporal Tanita le proporcionará una medición del nivel de grasa corporal en una
escala que va del 1 al 59.
1 a 12
Indica que usted tiene un nivel saludable de grasa visceral. Continúe controlando su nivel de grasa visceral
para garantizar que siempre mantenga el nivel adecuado.
13 a -59
Indica que usted tiene un nivel excesivo de grasa visceral. Piense en la introducción de algunos cambios en su
forma de vida, posiblemente a través de un cambio en su dieta o haciendo más ejercicios.
Fuente :
Nota:
•Aunque usted tenga un índice de grasa corporal bajo, es posible que tenga un nivel de grasa visceral alto.
•Si desea un diagnóstico medico, consulte a un medico.
Información de la Universidad de Columbia (Nueva York) y del Instituto Tanita (Tokio)
167166
Page 55

- ¿Que es el metabolismo basal (MB)?
¿QUÉ ES BMR?
El MB es el nivel mínimo de energía que su cuerpo necesita para funcionar eficientemente en reposo,
incluyendo los órganos de los sistemas respiratorio y circulatorio, el sistema nervioso, el hígado, los riñones y
otros órganos. Usted quema calorías independientemente de la actividad que esté realizando, incluso cuando
duerme.
Aproximadamente un 70 % de las calorías que se consumen diariamente son utilizadas para el metabolismo
basal. Además, cuando se realiza cualquier tipo de actividad se utiliza energía, sin embargo, cuanto más
vigorosa sea esa actividad, mayor será la cantidad de calorías que se queme. Ello se debe a que el músculo
Instrucciones de uso
(Diversos criterios)
estriado (que representa aproximadamente un 40% del peso corporal) funciona como un motor y utiliza una
gran cantidad de energía. El metabolismo basal se ve afectado en gran medida por la cantidad de músculos
que usted tenga; el aumento de la masa muscular ayuda al metabolismo basal.
Realizando estudios con individuos sanos, los científicos han observado que a medida que las personas
envejecen, varía su metabolismo basal. El metabolismo basal aumenta a medida que el niño crece. Después de
alcanzar un máximo, a la edad de 16 ó 17 años, el metabolismo basal comienza a disminuir como se muestra
en el gráfico que aparece a continuación.
Tener un metabolismo basal más elevado aumentará la cantidad de calorías utilizadas y ayudará a reducir la
cantidad de grasa corporal. Un metabolismo basal bajo hará que resulte más difícil perder grasa corporal y
peso en general.
¿CÓMO CALCULA EL MONITOR DE COMPOSICIÓN CORPORAL TANITA EL MB?
El método básico para calcular el MB es una ecuación estándar que utiliza el peso y la edad. Tanita ha
investigado exhaustivamente la relación entre el MB y la composición corporal, por lo que ofrece al usuario
una medición mucho más exacta y personalizada, basada en la medición de la impedancia. Este método ha
sido validado médicamente mediante la utilización de calorimetría indirecta (análisis de la composición del
aliento)*.
- ¿Que es la masa muscular?
El valor de masa muscular que aparece en el display incluye los músculos esqueléticos, los músculos lisos
(tales como los del corazón y del aparato digestivo) así como el agua contenida en los mismos.
Los músculos desempeñan un papel importante ya que funcionan como un motor en cuanto a lo que a
consumo de energía se refiere.
A medida que aumenta su masa muscular, aumenta el consumo su de energía, lo que le ayuda a reducir los
niveles excesivos de grasa corporal y a perder peso de una manera saludable.
¿Qué es la complexión física?
Esta función evalúa su complexión física de acuerdo con el nivel de grasa corporal y masa muscular de su
cuerpo.
A medida que aumenta su actividad y reduce la cantidad de grasa corporal, también variará su complexión
física, en correspondencia.
Aunque es posible que no varíe su peso, su masa muscular y sus niveles de grasa corporal pueden estar
variando, mejorando su salud y reduciendo los riesgos de contraer ciertas enfermedades.
Cada persona debe trazarse su propio objetivo de complexión física que desee tener, y seguir una dieta y un
programa de fitness para alcanzar ese objetivo.
EE
Instrucciones de uso
(Diversos criterios)
* Reliability on equation for Basal Metabolic Rate: At: 2002 Nutrition Week: A Scientific and Clinical Forum and Exposition Title:
International Comparison: Resting Energy Expenditure Prediction Models: The American Journal of CLINICAL NUTRITION
(1Fiabilidad de la ecuación para el cálculo del metabolismo basal: Publicado en: Semana de nutrición del año 2002: Foro científico y
clínico, y título de exposición: Comparación internacional: Modelos para la predicción del gasto de energía en estado de reposo: Revista
Americana de NUTRICIÓN CLÍNICA).
- ¿Qué es la edad metabólica?
Esta función calcula el MB e indica la edad media asociada a ese tipo de metabolismo.
Si su edad metabólica es mayor que su edad real, ello es una señal de que necesita mejorar su metabolismo
basal. Hacer más ejercicios ayudará a la creación de tejido muscular sano, lo que a su vez mejorará su edad
metabólica.
Los valores de las mediciones que se visualizan en el display van de 12 a 50. Si el valor de la medición fuera
menor de 12 aparecerá en el display como “12”, y si fuera mayor de 50 aparecerá como “50”.
169168
Page 56

- ¿Qué se entiende por masa ósea?
Esta función indica la cantidad de hueso (nivel mineral del hueso, calcio y otros minerales) en
elcuerpo.
Los estudios realizados han demostrado que el ejercicio y el desarrollo de tejido muscular están
relacionados con unos huesos más sanos y fuertes. Mientras que es muy probable que la estructura ósea
no experimente cambios notables a corto plazo, es importante que tenga huesos sanos y los cuide a
E
Instrucciones de uso
(Diversos criterios)
través de una dieta equilibrada y mucho ejercicio. Las personas que estén preocupadas por las
enfermedades óseas deberían consultar a su médico de cabecera. Puede que la lectura de la masa ósea de
personas que tengan osteoporosis o densidad baja del hueso, debido a una edad avanzada, o juvenil,
embarazo, tratamientos hormonales u otras causas no sea del todo precisa.
A continuación, se incluye el resultado de la masa ósea estimada de las personas de 20 a 40 años _franja
de edad en la que se supone que tenemos la mayor cantidad de masa ósea_ por peso. (Fuente: Tanita
Body Weight Science Institute).
Utilice los gráficos siguientes como referencia para cotejar la lectura de su masa ósea.
Mujeres : media de la masa ósea estimada
E
Instrucciones de uso
(Diversos criterios)
Peso (lb)
Less than 110 lb 110lb - 165 lb 165 lb and up
4,3 lb 5,3 lb 6,5 lb
Hombres : media de la masa ósea estimada
Peso (lb)
Less than 143 lb 143 lb - 209 lb 209 lb and up
5,9 lb 7,3 lb 8,1 lb
Nota: Las personas descritas seguidamente pueden obtener lecturas distintas y deben considerar los
valores facilitados únicamente como referencia.
- Personas ancianas - - Mujeres durante o después de la menopausia
- Personas que reciban terapia a base de hormonas
La “masa ósea estimada” es el valor calculado estadísticamente en función de su correlación con la
cantidad libre de grasa (tejidos distintos al graso). Dicha masa no indica directamente la dureza o
resistencia de los huesos, ni el riesgo a sufrir fracturas óseas. Si le preocupa el estado de sus huesos, le
recomendamos encarecidamente que consulte a un especialista.
Less than 50 kg 50 kg - 75 kg 75 kg and up
1,95 kg 2,40 kg 2,95 kg
Less than 65 kg 65 kg - 95 kg 95 kg and up
2,66 kg 3,29 kg 3,69 kg
Peso (kg)
Peso (kg)
170
171
Page 57

Daño a la unidad
Compruebe los siguientes puntos antes de solicitar reparaciones.
Síntoma Comprobar
Error de medición de
Cuando sea necesario
(Daño a la unidad)
Cómo
Error de punto cero
medir
El peso medido no
es estable.
No aparece ninguna
impedancia
•Efectúe la medición con los pies descalzos.
•Si tiene las plantas de los pies secas, aplique
aproximadamente 0,5 ml de agua con el
cuentagotas suministrado en los electrodos
antes de realizar la medición.
•Compruebe la información introducida.
•Apague la unidad, retire los elementos de la
plataforma y vuelva a encender la unidad;
luego, vuelva a realizar la medición.
•¿Está instalada la máquina en un lugar
afectado por vibraciones?
•¿Está inclinada la plataforma?
Mantenga la plataforma en posición
e
horizontal. ( páginas 132 y 133)
•¿Hay algún objeto atascado en los espacios de
la plataforma?
Retire cualquier objeto que esté atascado en
e
los espacios.
Impresora
Síntoma Comprobar
El papel se ha acabado
•No se ha introducido papel en la impresora.
Introduzca papel.
e
Si la impresora no está en uso, pulse
e
y vuelva a realizar los ajustes iniciales.
La tapa de la
impresora está abierta
El papel no sale.
El papel sale, pero la
información no se
imprime.
•La tapa de la impresora está abierta.
Ciérrela correctamente.
e
Compruebe que el papel de la impresora no
e
se esté alimentando de forma oblicua.
Compruebe los ajustes.
•¿Se ha seleccionado 0 para el número de hojas
a imprimir en “selección del número de hojas
a imprimir?”
Pulse 1 – 3. ( página 139)
e
•La impresora puede tener un desperfecto.
Póngase en contacto con el distribuidor que
e
le vendió el producto.
•¿Se ha introducido el papel al revés en la
impresora?
Introduzca el papel correctamente (
e
página 135)
•La impresora puede tener un desperfecto.
Póngase en contacto con el distribuidor que
e
le vendió el producto.
CE
EE
Cuando sea necesario
(Daño a la unidad)
indicación en la
pantalla después de
conectar la
Sección de
visualización
alimentación
eléctrica.
Se visualiza
━━━━━
Nota
•Compruebe que la fuente de alimentación está
conectada correctamente.
•El peso que se desea medir excede el margen
.
de medición.
• Si aparece un error distinto de los descritos anteriormente, apague la unidad y vuelva a realizar la
medición.
Si aparece un mismo error repetidamente, póngase en contacto con nuestro centro de atención al cliente.
173172
Page 58

Conexión a un ordenador personal
- Especificaciones
Normas de comunicación
Método de comunicación
Velocidad de la señal
Longitud de bits de datos
E
Cuando sea necesario
(
Conexión a un ordenador personal
Nota
• En la parte trasera de la unidad, se encuentran ubicados un conector USB (hembra de 4 clavijas y tipo B).
• Los cables de conexión no viene incluidos, utilice los suyos según proceda.
USB: (macho) de 4 clavijas y tipo A - (macho) de 4 clavijas y tipo B.
• Vous devez installer sur votre PC le pilote nécessaire, à télécharger depuis http://www.tanita.com.
)
Paridad
Bit de parada
Control de flujo
Terminador
USB
Método de comunicación asincrónica
9600 bps
8 bits
NINGUNA
1 bit
NINGUNA
CR+LF
- Datos de transmisión
La transmisión de datos se efectúa inmediatamente después de realizar las
mediciones sea cual sea el tipo de equipo receptor (ordenador personal, etc.). Por
tanto el equipo receptor ha de estar preparado antes de las mediciones para recibir
los datos.
(1) Formato de datos de salida
Nota
• Les données respectives sont séparées par des virgules (,).
• El terminador (fin de los datos) es CR (código ASCII 0DH), LF (código ASCII 0AH). Un 0 aquí
corresponde a cero.
• Les données de contrôle pour les éléments 1 – 4 sont pour des extensions. Elles ne sont pas utilisées
actuellement et le côté réception peut donc les ignorer.
• En raison de ses spécifications, le pèse-personne sortira un signal non pertinent approximativement 0,1
secondes après la sortie de données. Assurez-vous que ce signal est ignoré et ne l'importez pas.
E
Cuando sea necesario
(
Conexión a un ordenador personal
)
174
175
Page 59

(2) Datos de salida
<modo kg / cm> <modo lb / ft-in>
Elemento
Datos de control
E
Cuando sea necesario
(
Conexión a un ordenador personal
)
Datos de control
Datos de control
Datos de control
Modelo
Tipo corporal
Sexo
Edad
Altura
Peso de la ropa
Peso
% grasa
Masa grasa
Masa libre de grasa
Masa muscular
Puntuación de masa muscular del cuerpo entero
Masa ósea
Agua total en el cuerpo
Índice de agua corporal
Índice masa corporal
Peso estándar
Obesidad
Índice de grasa visceral
Índice de metabolismo basal (kJ)
Índice de metabolismo basal (kcal)
Análisis metabolismo basal
Edad metabólica
Target% de grasa corporal
Predicción de peso
Predicción de masa grasa
Aumento de grasa / pérdida
Encabezado
{0
˜0
˜1
˜ 2
MO
SN 646 6Fijado a 10 bytes"XXXXXXXX"Número de serie
ID 757 7Fijado a 12 bytes"XXXXXXXXXX"Número de ID
Dt 868 8Fijado a 12 bytes ("mm / dd / yyyy")"mm / dd / yyyy"Fecha
TI 979 9Fijado a 7 bytes"hh : mm"Hora
Bt
GE
AG
Hm
Pt
Wk
FW
fW
MW
mW
sW
bW
wW
ww
MI
Sw
OV
IF
rb
rB
rJ
rA
gF
gW
gf
gt 35 33 23Puede variar de 3 a 7 (unidades de 0,1kg)XXXXX.X
ZF 36 34 24Puede variar de 5 a 6 (unidades de 0,1)XXXX.XImpedancia (50kHz)
CS 37 1035 25Fijado a 2 bytesXXSuma de comprobación
Formato
"XXXXXX"
0 or 2
1 or 2
XX
XXX.X
XX.X
XXX.X
XX.X
XXX.X
XXX.X
XXX.X
XX
XXX.X
XXX.X
XX.X
XXX.X
XXX.X
XXX.X
XX
XXXXX
XXXXX
XX
XX
XX
XXX.X
XXX.X
Índice
Fijado a 2 bytes 1
Fijado a1 byte
Fijado a1 byte
Fijado a1 byte
Fijado a 8 bytes ("SC-331")
Fijado a1 byte (0:Estándar 2:Atleta)
Fijado a1 byte (1:Masculino 2:Femenino)
Puede variar de 1 a 2 bytes
Puede variar de 4 a 5 bytes (cm)
Puede variar de 3 av 4 bytes (unidades de 0,1kg)
Puede variar de 3 a 5 bytes (unidades de 0,1kg)
Puede variar de 3 a 4 bytes (unidades de 0,1%)
Puede variar de 3 a 5 bytes (unidades de 0,1kg)
Puede variar de 3 a 5 bytes (unidades de 0,1kg)
Puede variar de 3 a 5 bytes (unidades de 0,1kg)
Puede variar de 1 a 2 bytes (1 a 24)
Puede variar de 3 a 5 bytes (unidades de 0,1kg)
Puede variar de 3 a 5 bytes (unidades de 0,1kg)
Fijado a 4 bytes
Puede variar de 3 a 5 bytes (unidades de 0,1)
Puede variar de 3 a 5 bytes (unidades de 0,1kg)
Puede variar de 3 a 5 bytes (unidades de 0,1%)
Puede variar de 1 a 2 bytes
Puede variar de 1 a 5 bytes (unidades de 1kJ)
Puede variar de 1 a 5 bytes (unidades de 1kcal)
Puede variar de 1 a 2 bytes (1 a 24)
Fijado a 2 bytes
Puede variar de 1 a 2 bytes (4 a 55)
Puede variar de 3 a 5 bytes (unidades de 0,1kg)
Puede variar de 3 a 5 (unidades de 0,1kg)
Orden de salida
Monitor de composición corporal
Adulto
Atleta
111
2
3
4
5
10
11
12
13
14
15
16
17
18
19
20
21
22
23
24
25
26
27
28
29
30
31
32
33
34
2 2
33
44
55
10 10
11 11
12 12
13 13
14 14
15 15
16 16
17 17
18 18
19
20
21
22
23
24 19
25
26
27
28
29
30 20
31 21
32 22
Niño
Báscula
Orden de salida
Elemento
Datos de control Fijado a 2 bytes
2
3
8
9
Datos de control
Datos de control
Datos de control
Modelo
Tipo corporal
Sexo
Edad
Altura
Peso de la ropa
Peso
% grasa
Masa grasa
Masa libre de grasa
Masa muscular
Puntuación de masa muscular del cuerpo entero
Masa ósea
Agua total en el cuerpo
Índice de agua corporal
Índice masa corporal
Peso estándar
Obesidad
Índice de grasa visceral
Índice de metabolismo basal (kJ)
Índice de metabolismo basal (kcal)
Análisis metabolismo basal
Edad metabólica
Target% de grasa corporal
Predicción de peso
Predicción de masa grasa
Aumento de grasa / pérdida
Encabezado
{0
˜0
˜1
˜ 2
MO
SN 646 6"XXXXXXXX"
ID 757 7"XXXXXXXXXX"
Dt 868 8"mm / dd / yyyy"
TI 979 9"hh : mm"
Bt
GE
AG
Hi
Pt
Wp
FW
fW
MW
mW
sW
bW
wW
ww
MI
Sw
OV
IF
rb
rB
rJ
rA
gF
gW
gf
gt 35 33 23XXXXX.X
ZF 36 34 24XXXX.X
CS 37 1035 25XX
Formato
"XXXXXX"
0 or 2
1 or 2
XX
XX.X
XX.X
XXX.X
XX.X
XXX.X
XXX.X
XXX.X
XX
XXX.X
XXX.X
XX.X
XXX.X
XXX.X
XXX.X
XX
XXXXX
XXXXX
XX
XX
XX
XXX.X
XXX.X
Índice
Fijado a1 byte
Fijado a1 byte
Fijado a1 byte
Fijado a 8 bytes ("SC-331")
Fijado a 10 bytesNúmero de serie
Fijado a 12 bytesNúmero de ID
Fijado a 12 bytes ("mm / dd / yyyy")Fecha
Fijado a 7 bytesHora
Fijado a1 byte (0:Estándar 2:Atleta)
Fijado a1 byte (1:Masculino 2:Femenino)
Puede variar de 1 a 2 bytes
Puede variar de 4 a 5 bytes (in)
Puede variar de 3 av 4 bytes (unidades de 0,2lb)
Puede variar de 3 a 5 bytes (unidades de 0,2lb)
Puede variar de 3 a 4 bytes (unidades de 0,1%)
Puede variar de 3 a 5 bytes (unidades de 0,2lb)
Puede variar de 3 a 5 bytes (unidades de 0,2lb)
Puede variar de 3 a 5 bytes (unidades de 0,2lb)
Puede variar de 1 a 2 bytes (1 a 24)
Puede variar de 3 a 5 bytes (unidades de 0,2lb)
Puede variar de 3 a 5 bytes (unidades de 0,2lb)
Fijado a 4 bytes
Puede variar de 3 a 5 bytes (unidades de 0,1)
Puede variar de 3 a 5 bytes (unidades de 0,2lb)
Puede variar de 3 a 5 bytes (unidades de 0,1%)
Puede variar de 1 a 2 bytes
Puede variar de 1 a 5 bytes (unidades de 1kJ)
Puede variar de 1 a 5 bytes (unidades de 1kcal)
Puede variar de 1 a 2 bytes (1 a 24)
Fijado a 2 bytes
Puede variar de 1 a 2 bytes (4 a 55)
Puede variar de 3 a 5 bytes (unidades de 0,2lb)
Puede variar de 3 a 5 (unidades de 0,2lb)
Puede variar de 3 a 7 (unidades de 0,2lb)
Puede variar de 5 a 6 (unidades de 0,1)Impedancia (50kHz)
Fijado a 2 bytesSuma de comprobación
Monitor de composición corporal
Adulto
Atleta
1
2
3
4
5
10
11
12
13
14
15
16
17
18
19
20
21
22
23
24
25
26
27
28
29
30
31
32
33
34
1 11
22
33
44
55
10 10
11 11
12 12
13 13
14 14
15 15
16 16
17 17
18 18
19
20
21
22
23
24 19
25
26
27
28
29
30 20
31 21
32 22
Niño
Báscula
2
3
8
9
E
Cuando sea necesario
(
Conexión a un ordenador personal
)
176
177
Page 60

Aspectos técnicos
Medición de la composición corporal mediante el
método BIA.
Introducción
Este equipo proporciona valores estimados para cada valor medido de porcentaje de grasa corporal, masa
de grasa, masa libre de grasa, masa muscular y masa ósea mediante el método DXA para Japón, así como
un valor estimado para el valor medido de agua corporal total mediante el método de dilución que utiliza
un análisis de impedancia bioeléctrica (método BIA).
Para realizar una medición, se debe seleccionar un modo según el tipo corporal.
1) Estándar (para 5 a 99 años de edad)
Cuando sea necesario
(Aspectos técnicos)
2) Atlético (para atletas que se ejercitan más que el común de las personas)
La fiabilidad de la medición de la composición corporal de atletas, etc., que tienen una composición distinta
al común de las personas, puede mejorarse dividiendo el modo de medición según cada tipo corporal.
- Principios de medición de la composición de estructura corporal
AIB es un método para medir la composición corporal – masa grasa, masa muscular estimada, etc. –
mediante la medición de la impedancia bioeléctrica en el cuerpo. La grasa que se encuentra en el cuerpo no
es un buen conductor de electricidad, mientras que el agua, cuya mayor parte se encuentra en los
músculos, es un conductor eficaz de la electricidad. El grado de dificultad con el que la electricidad se
transmite a través de una sustancia se conoce como resistencia eléctrica y el porcentaje de grasa y otros
componentes corporales puede inferirse a partir de la medición de esta resistencia. El Analizador de la
Composición Corporal de Tanita mide la composición corporal utilizando una fuente de corriente continua
que genera una corriente de alta frecuencia (50kHz, 90µA).
- ¿Qué es la grasa visceral?
El tejido adiposo visceral (VAT) es la grasa que se acumula en la cavidad abdominal y alrededor de los
órganos internos. Se dice que el VAT es más susceptible de causar enfermedades relativas al estilo de vida
que el tejido adiposo subcutáneo (SCAT). Por ello, conocer y revisar periódicamente el riesgo de
acumulación de VAT es un valioso consejo para la prevención de enfermedades relativas al estilo de vida.
Tanita ha desarrollado una tecnología para la medición del riesgo de acumulación de VAT por análisis de
impedancia bioeléctrica (BIA) mediante comparación con el análisis de imágenes aplicadas a las imágenes
de resonancia magnética, además de la tecnología tradicional para la medición de la grasa corporal. El
riesgo de acumulación de VAT se calcula mediante la estimación del área VAT por el método BIA en base al
procesado de imágenes de resonancia magnética. Este método tiene una correlación superior a la
estimación de riesgo de acumulación de VAT sobre el índice de masa corporal o la circunferencia
abdominal (circunferencia en la cintura), permitiendo una estimación que se corresponde de una forma
más precisa con cada individuo.
*El área VAT mediante resonancia magnética se calcula con la realización del procesado de imágenes de la
sección transversal de las regiones de las vértebras lumbares L4-L5.
(Imagen 1 – Imagen 3: Resultados de la investigación realizada por N.Y Columbia University y Jikei
University publicados por la Asociación norteamericana para el estudio de la obesidad (NAASO) en 2004)
EE
Cuando sea necesario
(Aspectos técnicos)
- ¿Qué es el método DXA?
La absorciometría radiológica dual (DXA) se diseñó en un principio
para medir el contenido mineral de los huesos, pero en el modo de
exploración mediante escáner del cuerpo entero el porcentaje de grasa
corporal, la masa grasa y la masa libre de grasa de determinadas partes
del cuerpo (brazos, piernas, tronco) también puede medirse. La imagen
de abajo muestra un ejemplo de los resultados de la medición de la
composición corporal obtenidos mediante la DXA.
Resultados de la medición de la
composición corporal obtenidos mediante la
DXA (Lunar Co., Ltd; DPX-L)
- ¿Qué es el método de dilución?
En el método de dilución se utiliza una cantidad conocida de una sustancia etiquetada y se mide la
concentración en equilibrio que se diluye uniformemente para obtener la cantidad total de disolvente que
diluye a la sustancia etiquetada.
Para medir el agua corporal total (ACT), generalmente se utiliza óxido de deuterio (D
etiquetada. El óxido de deuterio utiliza el agua corporal total general como medio de dilución, lo que
permite obtener el agua corporal total. Para obtener la cantidad de fluido extracelular se utiliza bromuro
de sodio (NaBr) como sustancia etiquetada. Se dice que el bromuro (Br) no penetra al interior de las células
y que utiliza el fluido extracelular como medio de dilución.
2
O) como sustancia
179178
Page 61

- Factores que producen errores de medición
En el método BIA se mide la impedancia y se calcula la composición corporal a partir del valor obtenido.
Se sabe que la impedancia cambia en una cantidad correspondiente al agua corporal total que ocupa
aproximadamente el 60% del peso y que su distribución y temperatura cambian. Por esta razón, ya sea
para fines de investigación para realizar mediciones que se repiten diariamente, las condiciones de
medición deben mantenerse constantes. La adopción de la tecnología de reactancia permite obtener
mediciones de una estabilidad nunca antes vista; sin embargo, los cambios de temperatura y distribución
del agua corporal total o de volumen de flujo sanguíneo en las extremidades debido a ejercicios, baños,
etc., afectan los resultados de las mediciones debido a que la resistencia eléctrica del cuerpo también
cambia.
Cuando sea necesario
(Aspectos técnicos)
Por lo tanto, se recomienda efectuar las mediciones en las condiciones siguientes para obtener resultados
estables.
1) Después de 3 horas de levantarse, habiendo realizado las actividades diarias normales de este período.
(La impedancia se mantiene en un nivel alto si usted permanece sentado después de levantarse o si sólo
se mueve en un coche, etc.)
2) Cuando hayan transcurrido 3 horas o más tiempo después de comer. (2 a 3 después de comer, la
impedancia tiende a disminuir).
3) Cuando hayan transcurrido 12 horas o más tiempo después de hacer ejercicio. (Dependiendo del tipo e
intensidad del ejercicio, la impedancia no tiende a cambiar de forma estable).
4) Vacíe la vejiga antes de realizar la medición.
5) En caso de mediciones repetidas, realice las mediciones a la misma hora si es posible. (Al mismo tiempo
que se realiza la medición de peso, las mediciones pueden ser más estables si se realizan a la misma
hora del día).
primer día en el que se indujo la deshidratación, y de 30-35Ω el segundo día. Como consecuencia de ello, el
porcentaje de grasa corporal
aumentó el 1% el primer día en el que se indujo la deshidratación y el 1,5-2% el segundo día.
Como se ha mencionado anteriormente, la impedancia aumenta cuando el peso corporal disminuye (por
ejemplo, debido a la deshidratación) y disminuye cuando el peso corporal aumenta debido a excesos en el
consumo de comida y bebida. La variación interdiaria de la impedancia es por lo tanto inversamente
proporcional al cambio del peso corporal.
Estas variaciones interdiarias son causadas por factores como:
1) Aumentos temporales del peso corporal (agua corporal total) originados por comer o beber en exceso.
2) Deshidratación debida a sudoración abundante durante la realización de ejercicio intenso.
3) Deshidratación debida al consumo de alcohol o al uso de diuréticos.
4) Deshidratación debida a la sudoración abundante durante la toma de saunas, etc.
Por consiguiente, se recomienda proporcionar al sujeto instrucciones para ayudar a eliminar estas causas
cuando se requieran mediciones precisas.
EE
Cuando sea necesario
(Aspectos técnicos)
Se pueden obtener valores muy estables realizando las mediciones en las condiciones descritas
anteriormente.
En el desarrollo de este equipo se establecieron 6 puntos como condiciones para la ecuación de regresión.
1) Prohibición de ingerir alcohol hasta 12 horas antes de la medición.
2) Prohibición de hacer ejercicio excesivo hasta 12 horas antes de la medición.
3) Prohibición de comer y beber en exceso en el día anterior a la medición
4) Prohibición de comer y beber hasta 3 horas antes de la
medición.
5) Evitar realizar las mediciones durante el período menstrual
(mujeres)
2) Variaciones interdiarias
Los diagramas que se muestran debajo incluyen ejemplos de
mediciones reales sobre variaciones interdiarias. Se realizó un
estudio para determinar el grado de variación de la impedancia
entre los pies durante el estado de deshidratación. Los primeros
dos días representan la rutina cotidiana normal del sujeto,
mientras que en los dos días posteriores se indujo el estado de
deshidratación mediante una sauna.
Durante la rutina cotidiana no se registraron variaciones
interdiarias de importancia en cuanto al peso corporal, la
impedancia entre los pies o el porcentaje de grasa corporal. Sin
embargo, durante el estado de deshidratación se registró una
disminución del peso corporal de 1kg y un aumento de la
impedancia entre los pies de aproximadamente 15Ω , durante el
181180
Page 62

La nueva fórmula de regresión para calcular la Tasa Metabólica Basal (MB)
Hace tiempo que los médicos y los especialistas en nutrición afirman que “La Tasa Metabólica Basal (MB)
depende más de la Masa Libre de Grasa (MLG) que del peso corporal” (es decir, las personas que tengan
un peso corporal determinado con mayor MLG tendrán una mayor MB) y que la evaluación de la
composición corporal debería estimarse a partir de la MLG. Además, en ocasiones las fórmulas de
estimación sencillas que permiten la realización de cálculos a partir de la altura, el peso y la edad, sin
evaluar la composición corporal, suponían un problema al proporcionar resultados de evaluaciones de la
MB excesivamente altos a personas obesas con un peso corporal elevado y, a la inversa, resultados
excesivamente bajos a atletas musculosos, aunque estos casos no fuesen tan numerosos. En la actualidad,
la fórmula de recurrencia para la estimación de la MB desarrollada por Tanita, el fabricante de
analizadores de la composición corporal, basándose en sus investigaciones, funciona mediante el análisis
de regresión múltiple utilizando la MLG y proporciona un grado de precisión más elevado respecto a las
Cuando sea necesario
(La nueva fórmula de regresión para calcular la Tasa Metabólica Basal (MB))
diferencias individuales de la composición corporal. Para obtener la MB, se midió el metabolismo
respiratorio durante el reposo (Gasto Energético en Reposo: GER) mediante un analizador de los gases
respiratorios y basándose en estos datos se creó la fórmula de recurrencia para la realización de
estimaciones.
<Gráfica 1> La relación entre el Gasto Energético en Reposo (GER) según el análisis de los
gases respiratorios y del peso, MGL
(Presentado en la Semana de la Nutrición “Nutrition Week”, celebrada en San Diego en el
2002)
Como se muestra en la Gráfica 1: el GER (MB) mantiene una relación más afín con la MLG que con el peso
corporal, además se observa una diferencia en las tendencias de distribución entre los hombres y las
mujeres. Por ello, entendemos que, en un principio, los cálculos deberían realizarse a partir de la MLG en
vez de utilizar la fórmula anterior centrada en la relación con el peso.
<Gráfica 2> Comparación de los valores de la MB según el modelo de regresión múltiple y el
análisis de la respiración de TANITA.
(Presentado en la Semana de la Nutrición “Nutrition Week”, celebrada en San Diego en el
2002)
La fórmula de regresión actual de la MB es una fórmula que se basa en el principio de utilizar el valor de la
MLG resultante de la medición de la composición corporal según el AIB. Se muestra una estrecha relación
entre el valor de la MB basado en el análisis de la respiración GER o R=0,9 (p<0,0001). Estos resultados
fueron presentados en la Primera Semana Annual de la Nutrición “First Annual Nutrition Week”
(American College of Nutrition, American Society for Clinical Nutrition, American Society for Parenteral
and Enteral Nutrition, North American Association for the Study of Obesity) celebrada en San Diego en el
2002.
NOTA:
Este modelo ha sido calibrado para usuarios con edades comprendidas entre los 18 y los 84 años.
Los usuarios cuyas edades se encuentren fuera de este margen de edad podrían obtener lecturas
imprecisas.
EE
Cuando sea necesario
(La nueva fórmula de regresión para calcular la Tasa Metabólica Basal (MB))
183182
Page 63

Especificaciones
Modelo
Fuente de suministro eléctrico
Consumo eléctrico
Sistema de medición
Frecuencia de medición
Medición de
impedancia
Cuando sea necesario
(Especificaciones)
Medición de
peso
Elementos de
información
de entrada
Corriente de medición
Material de electrodos
Estilo de medición
Rango de medición
Precisón al primer calibrado
Sistema de medición
Capacidad máxima / graduación mínima
Precisón al primer calibrado
Peso de la ropa
Sexo
Tipo de estructura corporal
Edad
Altura
Porcentaje de grasa corporal objetivo
SC-331S
Adaptador AC (incluido) Center Minus
Voltaje de entrada: 100-240 VAC 50/60 Hz 1,5A Voltaje de salida: 7 VDC
Corriente de régimen: 4 A Voltaje de entrada en vacío: 7VDC
28 W
Análisis de impedancia bioeléctrica tetra polar
50 kHz
90 µA
Almohadillas para los pies de acero inoxidable activadas mediante contacto por presión
Entre ambos pies
150 - 1200Ω
± 2%
Célula de carga indicadora de tensión
270 kg / 0,1 kg
600 lb / 0,2 lb
± 0,2 kg / ± 0,4 lb
0 - 10 kg / incrementos de 0,1 kg incrementos de 0 - 20 lb / 0,2 lb
Hombre / mujer
Estándar (5 - 99 años) / Atlético (18 - 99 años)
5 - 99 años de edad / incrementos de 1 año
90 – 249,9 cm / incrementos de 0,1 cm 3 ft - 7 ft 11,5 in / incrementos de 0.5 in
4 - 55 %
Porcentaje de grasa corporal objetivo
Peso
Sexo
Display
Elementos de
información
de salida
Impresión
Display
Interfaz de datos de salida
Rango de temperature de uso
Humedad relativa
Peso del equipo (versión de display remoto)
Peso del equipo (versión de montaje en columna)
Tamaño
Plataforma de pesaje
Altura (versión de montaje en columna)
Tipo de estructura corporal
Edad
Altura
FAT%
Logo
Nombre del modelo
Fecha y hora
Nº de serie
ID
Tipo de estructura corporal
Sexo
Edad
Altura
Peso de la ropa
Peso
Porcentaje de grasa
Masa corporal
Masa Magra
Masa muscular
Agua Total
% Agua Total
Masa ósea prevista
MB
Edad metabólica
Nivel de grasa visceral
BMI
Peso previsto
Rango deseable
Gráfico de porcentaje de grasa
Gráfico de BMI
Gráfico de nivel de grasa visceral
Gráfico de masa muscular
Gráfico de MB
Evaluación física
Resistencia
4 - 55 %
0 - 270 kg / incrementos de 0,1 kg 600lb / incrementos de 0,2 lb
Hombre / mujer
Estándar / Atlético
5 - 99 años de edad / incrementos de 1 año
90 - 249,9 cm / incrementos de 0,1 cm 3 ft - 7 ft 11,5 in / incrementos de 0,5 in
3 - 75% / 0.1% increments
Logo de TANITA (240 ×64 puntos)
BC-420MA
2005 / 1 / 1 - 2099 / 12 / 31
00000000 - 99999999
0000000000 - 9999999999
Estándar (5 - 99 años) / Atlético (18 - 99 años)
Hombre / mujer
5 - 99 años de edad / incrementos de 1 año
90 - 249,9 cm / incrementos de 0,1 cm 3 ft - 7 ft 11,5 in / incrementos de 0,5 in
0 - 10 kg / incrementos de 0,1 kg 0 - 20 lb / incrementos de 0,2 lb
0 - 270 kg / incrementos de 0,1 kg 600lb / incrementos de 0,2 lb
3 - 75% / incrementos de 0,1%
incrementos de 0,1 kg
incrementos de 0,1 kg
incrementos de 0,1 kg
incrementos de 0,1 kg
15 - 85% / incrementos de 0,1%
incrementos de 0,1 kg
incrementos de 1 kJ / incrementos de 1kcal
incrementos de 1 año (12 - 90 años)
incrementos de 1 nivel (nivel 1 - 59)
incrementos de 0,1
incrementos de 0,1 kg
3 - 75% / incrementos de 0,1 kg
150 - 1200Ω
Pantalla LCD de 3 filas y 5 dígitos
RS-232C (conector hembra de 9 pins D-sub )
0 - 35˚C
30 - 80% (sin condensación)
6,8 kg
12,1kg
372 ×375 ×101 mm (14,6 ×14,8 ×4,0 in)
1024 mm (40,3in)
incrementos de 0,2 lb
incrementos de 0,2 lb
incrementos de 0,2 lb
incrementos de 0,2 lb
incrementos de 0,2 lb
incrementos de 0,2 lb
15,0 lb
26,7 lb
EE
Cuando sea necesario
(Especificaciones)
185184
Page 64

E
USA y Canada
Comisión Federal de Comunicaciones y Canadá CIEM comentario
Este equipo ha sido probado y cumple con los límites para un dispositivo digital de Clase B, según la Parte 15 de las normas FCC y
canadienses ICES-003. Estos límites están diseñados para proporcionar una protección razonable contra las interferencias perjudiciales
en una instalación residencial. Este equipo genera, utiliza y puede irradiar energía de radiofrecuencia y, si no se instala y utiliza de
acuerdo con las instrucciones, puede causar interferencias perjudiciales en las comunicaciones de radio. Sin embargo, no hay garantía
de que no se produzcan interferencias en una instalación en particular. Si este equipo causa interferencias perjudiciales en la
interferencia de radio o televisión, lo que puede determinarse encendiéndolo y apagándolo, se recomienda al usuario que intente
corregir la interferencia mediante una o más de las siguientes medidas:
• Cambiar la orientación o ubicación de la antena receptora.
• Aumentar la separación entre el equipo y el receptor.
• Conectar el equipo a un tomacorriente en un circuito diferente de aquel al
que está conectado el receptor.
• Consultar con el distribuidor o con un radio o televisión con experiencia
con experiencia.
Modificaciones
La FCC exige que el usuario sea notificado de que cualquier cambio
realizado en este dispositivo que no sea aprobado expresamente por Tanita
Corporation podría invalidar el usuario para utilizar el equipo.
Eliminación
Este equipo es un dispositivo electrónico. No
lo deseche junto con los residuos generales;
cumpla con las normas regionales de
eliminación de equipos eléctricos.
Copyright © 2013 TANITA Corporation. All Rights Reserved.
Feb 2013.TY.C.SC3317601(3)
 Loading...