

Page 1

P.1P.40
MEMO
Before Using
●About the AM-180E Activity Monitor 2
●Safety Precautions 4
●Handling, Storage & Daily Maintenance 5
●Checking the Package Contents 6
●Names of Parts 7
●Inserting the Battery 8
●Replacing the Battery 9
●Initial Setup 10
Method of Use
●Wearing the Activity Monitor 20
●Attaching/Removing the Slide Clip 21
●How to Use the Anti-slip Strap 22
●Performing Measurement 23
●Viewing Measurement Results 26
●Display Screen 28
●Changing Settings (Modifying Personal Data) 34
●Resetting the System (Returning to Factory Settings) 35
Appendices
●Specifications 36
●Troubleshooting 38
User Manual
2012.12(GN)(E)(0)
Thank you for buying the Activity Monitor.
To ensure safe use of this Activity Monitor, be sure to read this User Manual before using.
After you have finished reading the User Manual, store it in a safe place for future reference.
Including Warranty
Activity Monitor
Contents
AM-180E
AM
180E
Before Using Method of Use
Appendices
Page 2

Thank you for buying the AM-180E Activity Monitor.r.
Thank you for purchasing the Tanita AM-180E.
Once you have input the set up data, your Activity Monitor
is ready to go! Special features include:
■
Number of steps walked and number of
steps run are displayed individually.
■
Daily data is automatically stored and can also be
viewed on a computer via the USB connection.
■
Set the target number of steps per day. The goal
feature will notify you 1,000 steps before you
reach your goal.
■
The memory function allows you to recall
14 days' worth of data.
■
The amount of energy consumed in 24 hours by
physical activity is displayed.
■
The intensity (Metabolic Equivalent of Task, or MET) of
your physical activity is measured and displayed as follows:
For more information on this product and related software,
visit www.tanita.eu
tanitaeurope tanitaeuropetanitaeurope
①
Setup
Make the following settings:
●
Date (year/month/day)●Time (hours/minutes)
●Date of birth ●Gender ●Height ● Weight
●Body fat (%) ●Target number of steps
⇒
p.10-19
②
Wear the activity monitor
●
Put it in your shirt pocket.
●
Use slide clip to fix it in place.
⇒
p.20-22
③
Perform measurement
⇒
p.23-24
④
View measurement results
⇒
p.26-33
About the AM-180E Activity Monitor
General Operation Procedure
32
Before Using
P.3
P.2
AM-180E
Page 3
P.5
P.4
54
MUST OBSERVE
●
Never disassemble this product. Doing so might cause it to malfunction.
●
Do not subject the product to excessive impact or
vibration. Doing so might cause it to malfunction.
PROHIBITED
●
Do not put this product in your rear trouser pocket.
●This product is not waterproof. Do not use it
in humi d locations , location s subject to
splashing with water or in the rain.
●Do not swing this product around by its strap.
●When this product is hung from your neck by
its strap, take care to prevent the strap from
being pulled or getting caught on surrounding
objects.
●Do not clean this product with alcohol, hot
water, paint thinner, or benzene.
●
This product is not waterproof. Do not store it in
humid locations or locations subject to splashing.
■ Daily Maintenance
■ Storage
MUST OBSERVE
MUST OBSERVE
Handling, Storage & Daily Maintenance
■ Handling
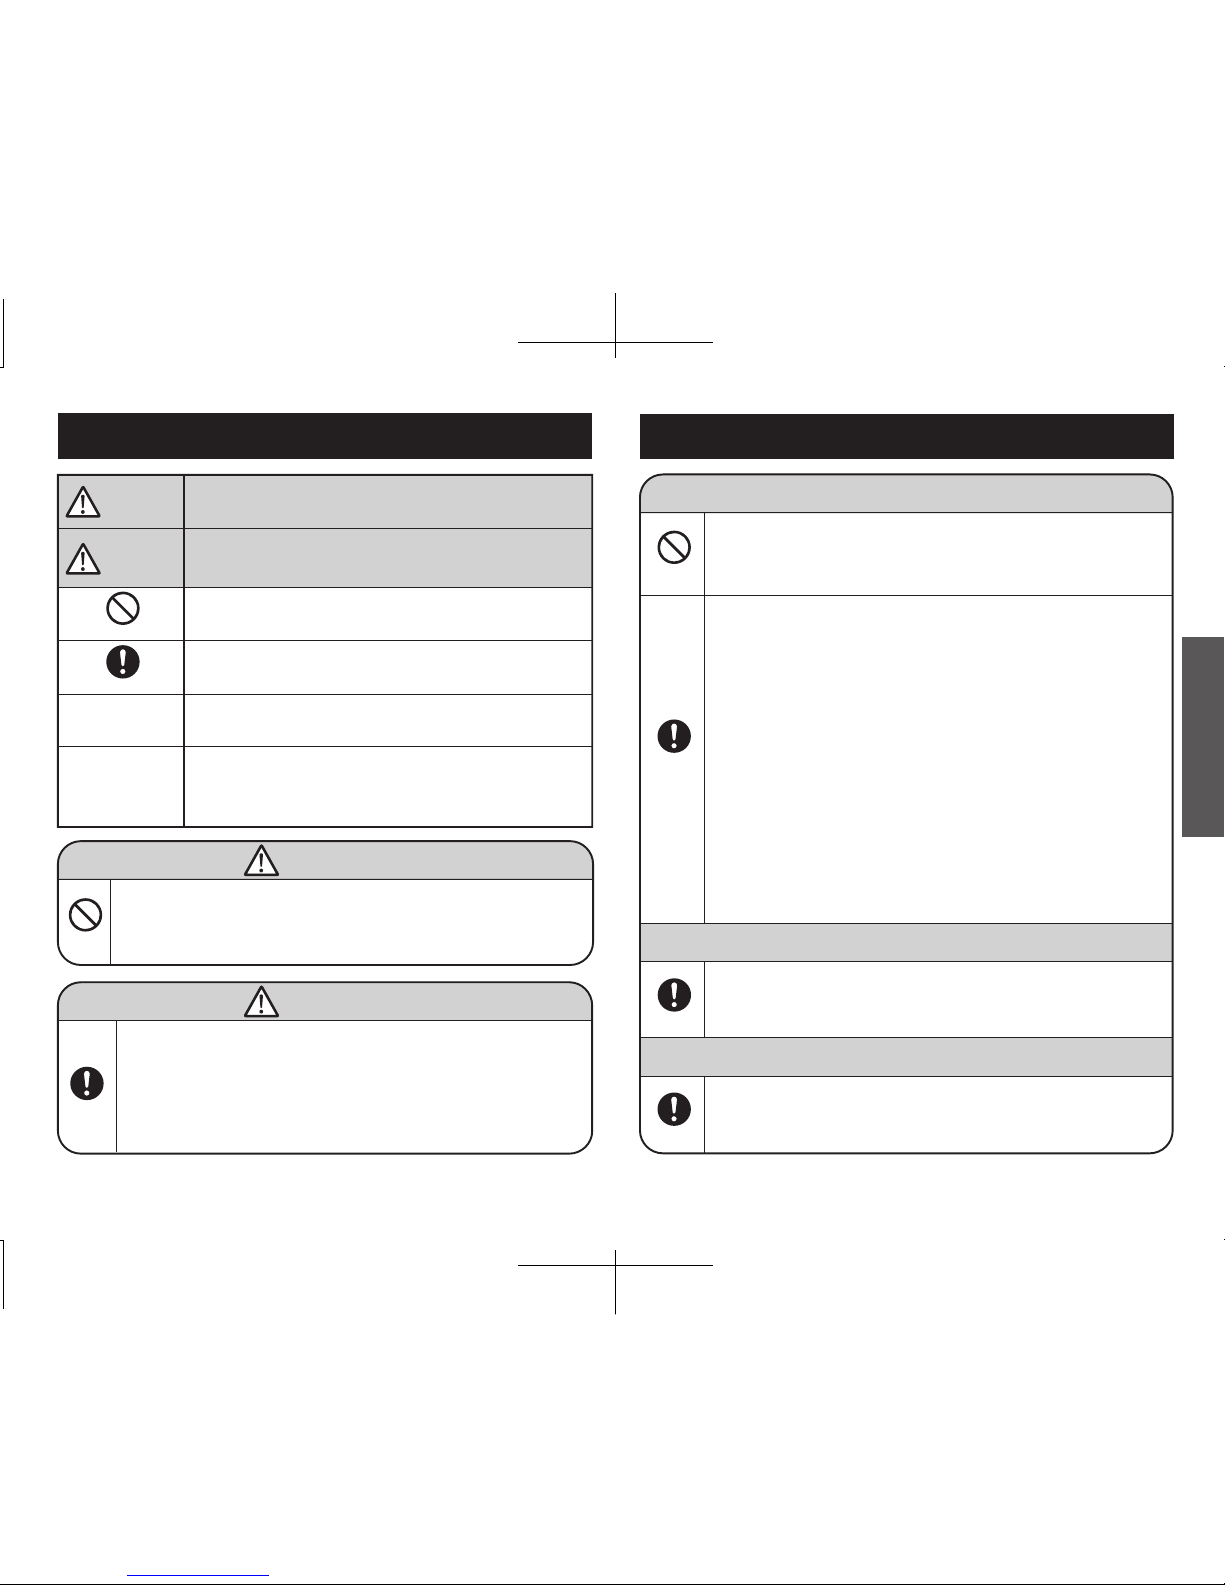
Instances that might result in serious
injury
Instances where danger of injury or danger of
physical damage to property is anticipated
Actions, etc. that must not be done
Details that must be observed
Supplementary information that the customer
should know when using and inspecting this
product
Details that must be observed to keep the
product in an optimum working state
CAUTION
MUST OBSERVE
PROHIBITED
●Those not used to daily exercise, receiving
medical treatment or recovering from an injury
should consult a doctor or medical
professional first.
●Keep batteries and this product out of the reach
of babies and small children.
●Do not throw batteries into flames.
MUST OBSERVE
PROHIBITED
WARNING
WARNING
CAUTION
Safety Precautions
REQUEST
NOTE
AM-180E
Before Using
Page 4

P.7
P.6
76
Names of Parts
〔Front〕
Accessories
〔Rear〕
USB cap
unlock
LED display
▲button:
Past memory,
Up button
●button:
Display switch,
Apply button
▼button:
Past memory,
Down button
USB cover
cap
Battery cover
screw
Battery cover
Strap hole
Checking the Package Contents
Activity
Monitor
Screwdriver
User’s manual
Slide clip
Anti-slip strap
Test battery (coin lithium CR2032 x 1)
* The test battery may reach the end of its service life within
six months.
USB terminal: This is used to connect the Activity Monitor to a computer
or special device. For details on connection method and precautions,
refer to the User’s Manual for the special software or special device.
Make sure that the package contains everything below.
AM-180E
Before Using
Page 5
P.9P.8
98
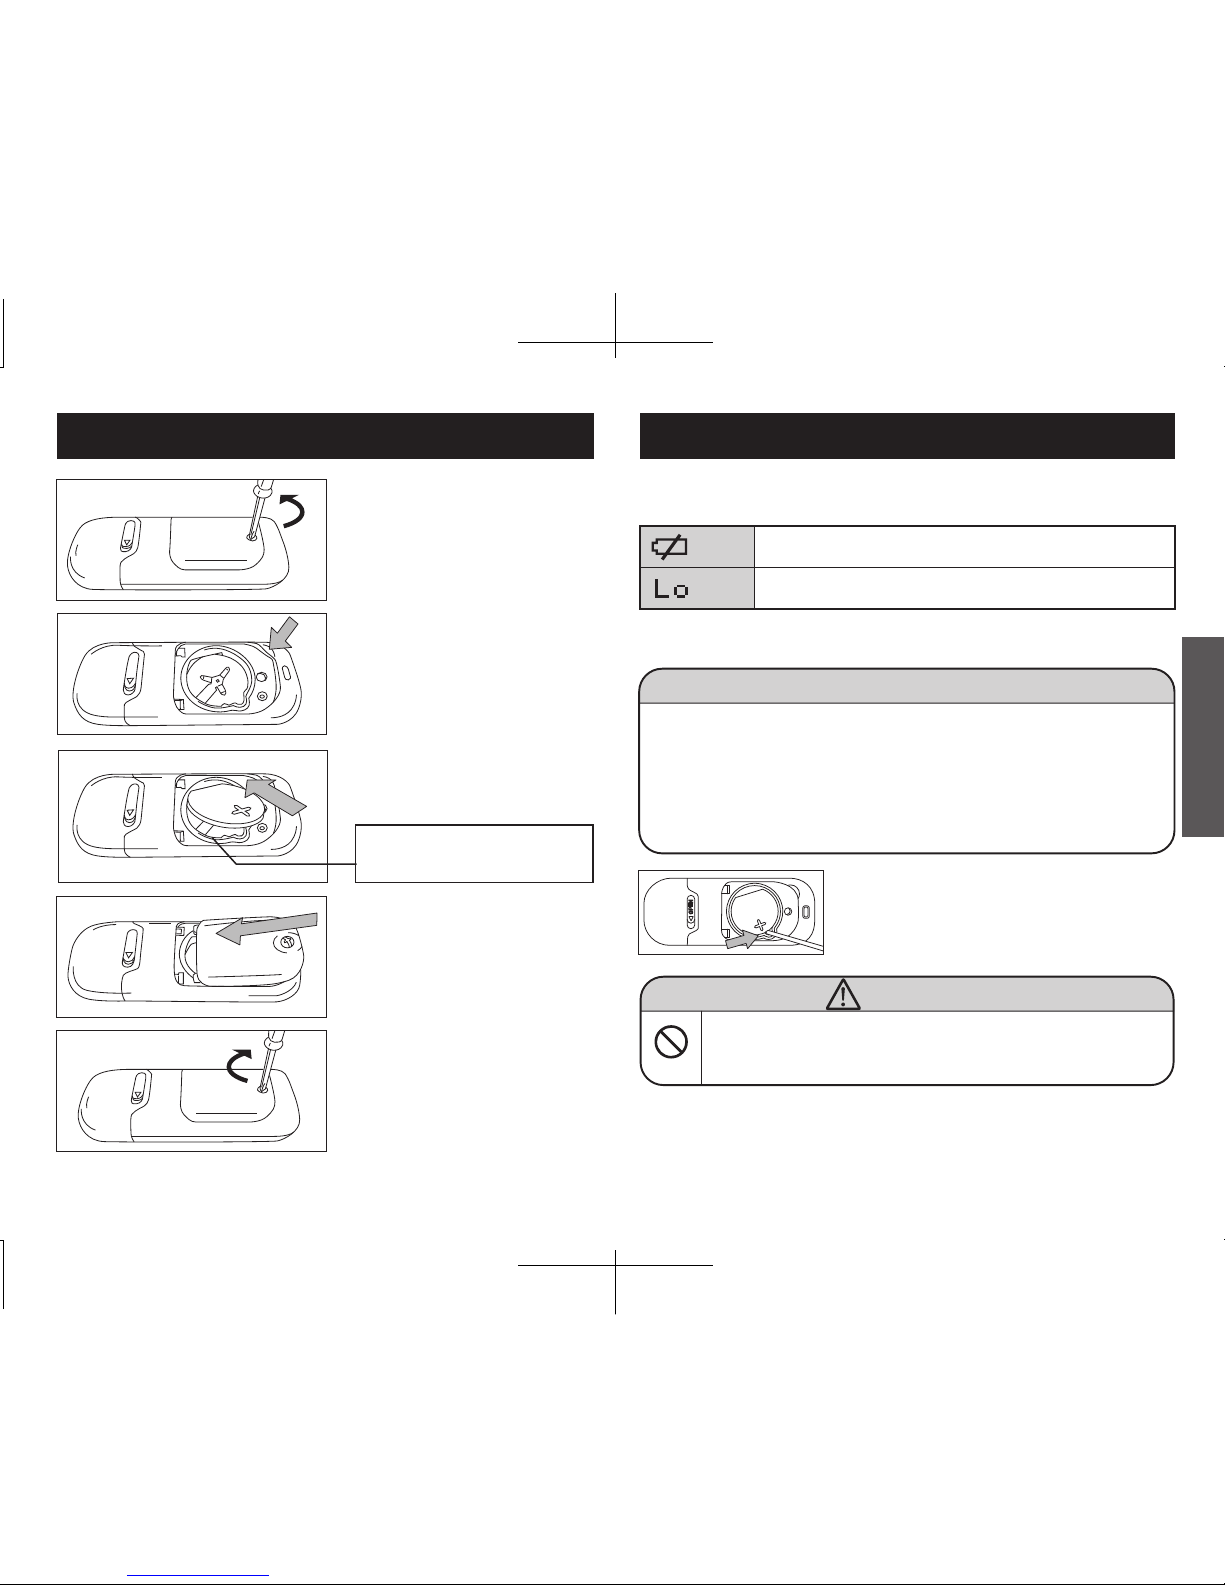
①Loosen the battery cover
screw with the screwdriver
(provided).
The battery has little power left. Replace soon with a new
battery (CR2032).
The battery has run out of power and measurement is no
longer possible. Replace with a new battery (CR2032).
②
Remove the battery cover.
③
Insert the battery (CR2032) with
its side facing up.
◯
Blinking
Lo indication
About the 【Battery Mark】
④Insert the battery cover
in the direction marked
by the arrow.
⑤Tighten the battery cover
screw firmly.
Next, perform the initial setup.
⇒p.10
The battery can be removed easily by prizing the
part shown in the figure with a fine-tipped object.
※For details on opening and closing the battery
cover and inserting the battery, see page 8.
◆Keep batteries out of the reach of babies and small
children.
WARNING
PROHIBITED
Replacing the BatteryInserting the Battery
◆Do not replace the battery between 23:55 pm and 00:05 am. Doing
so may interfere with the data.
◆
Measured values are applied and recorded to memory once every hour on the hour (e.g.
15:00). When the battery is replaced, the measurement data before measured values are
applied is cleared, and measurement is resumed from the applied measured values.
◆Replace the battery before using in the morning, for example.
◆Note that past memory may be damaged if the wrong current year,
date and time are set when the battery is replaced.
Before Replacing the Battery
Retur n the inne r rin g to its
original position if it comes loose.
◆
After replacing the battery, perform the initial setup again. See page 10.
※
The battery provided is a test battery, and so may have a short service life.
※
The life of a new battery when used for 16 hours per day is about six months.
AM-180E
Before Using
+
Page 6
P.11P.10
1110
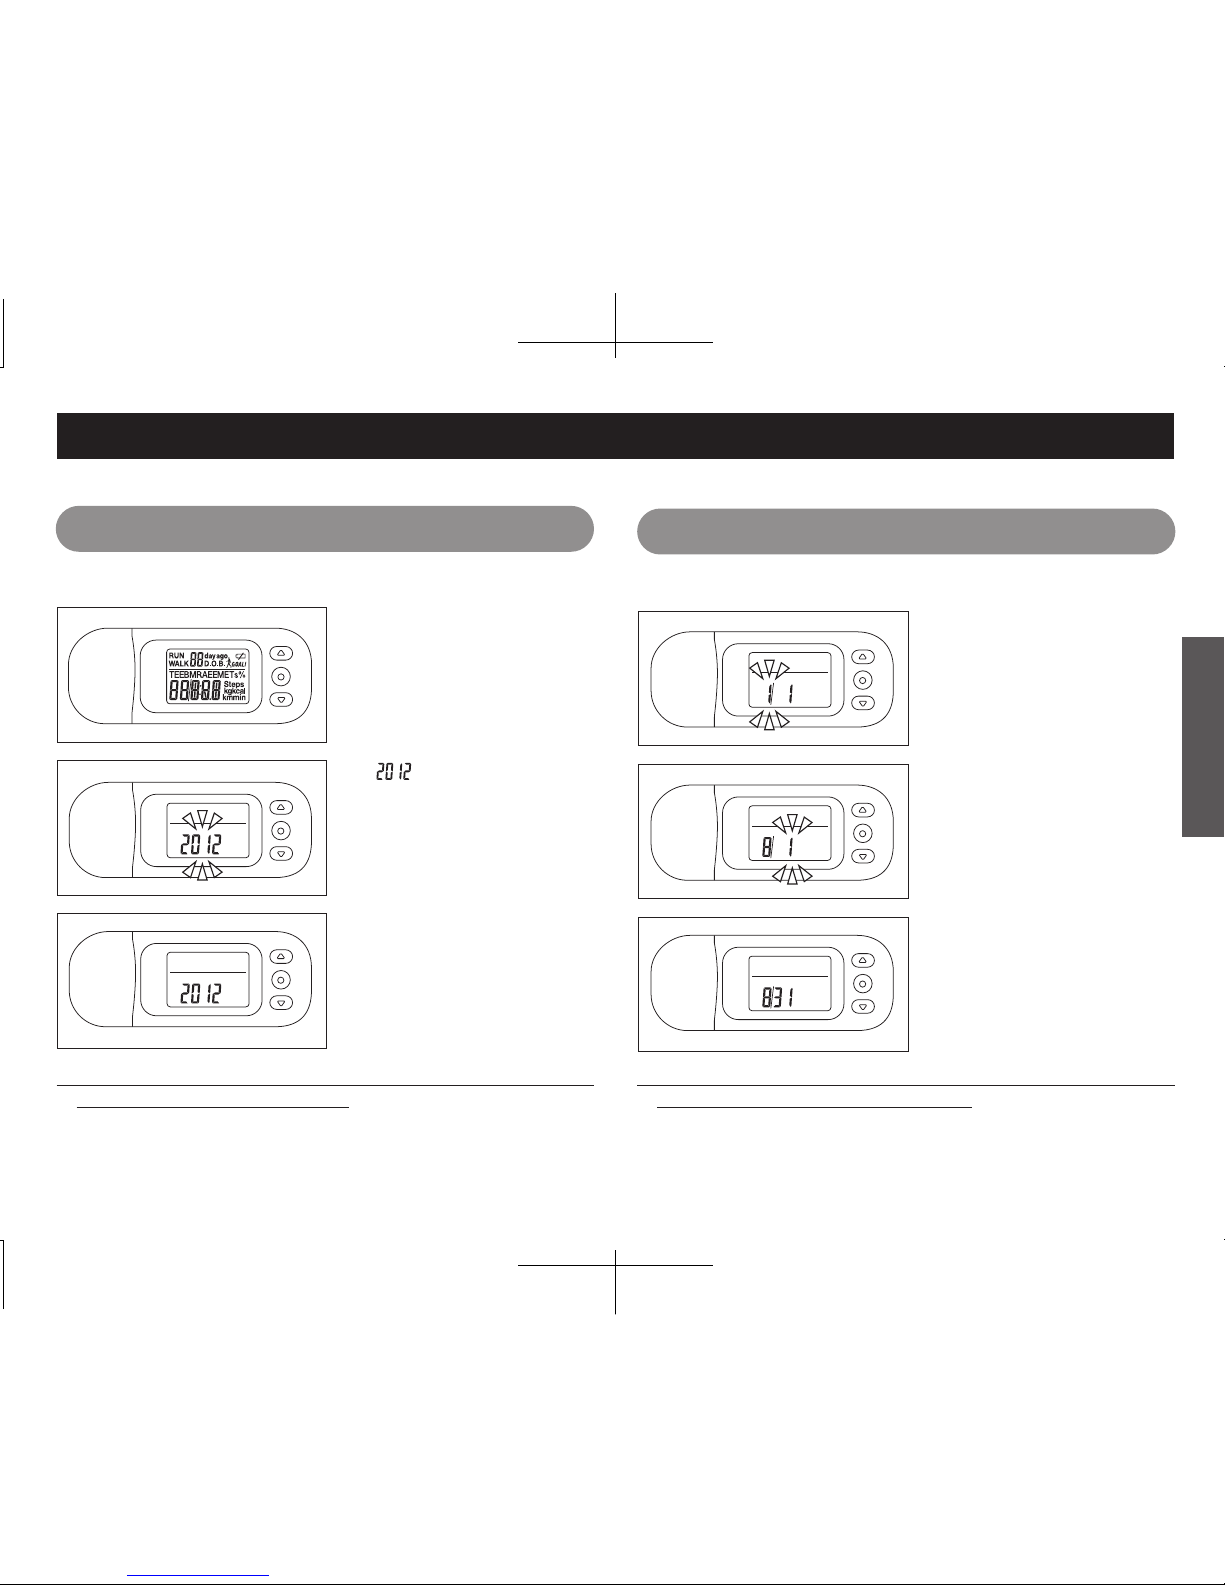
Initial Setup
①All item s on the LCD
screen will appear when
the battery is inserted.
Setting the Current Year
②
" " blinks. Press ▲ or ▼
to select the correct "year".
Holding down these button s
fast feeds the year (setting
range: 2011 to 2099)
③Press the ● butto n to
set the "year".
Next, set the "current time". Next, set the "current date".
①After settin g the year,
"month" blinks.
Setting the Current Date
②Press ▲ or ▼ to select
the correct "month".
Holding down these buttons fast feeds the month.
③Press the ● button to
set the "month".
※
Note that setting a very different year, date and time may
interfere with past memory data.
④Press ▲ or ▼ to select
the correct "day".
Holding down these buttons fast feeds the month.
⑤Press the ● button to
set the "day".
Example: To set the year 2012
Set up is required only when you have just bought the Activity
Monitor or have replaced the battery.
The following setting is required only when you have just bought
the Activity Monitor or have replaced the battery.
Example: To set August 31
※Note that setting a very different current year, date and time
may interfere with past memory data.
AM-180E
Before Using
Page 7

P.13
P.12
1312
Initial Setup
Next, set the "date of your
date of birth".
Next, set the "year of your
date of birth".
①
After settin g the time, the
"year of your birth" blinks.
Setting Your Date of Birth
②Press ▲ or ▼ to select
the correct "year".
Holding down these buttons fast feeds the year
(setting range: 1900 to 2099).
③Press the ● button to
apply the "year".
①After settin g the date ,
"hours" blinks.
Setting the Current Time
②Press ▲ or ▼ to select
the correct "hour".
Holding down these buttons fast feeds the hour.
③Press the ● button to
apply the "hour".
④Press ▲ or ▼ to select
the correct "minutes".
Holding down these buttons fast feeds the hour.
⑤Press the ● button to
apply the "minutes".
To select the correct time,
press the ● button at the
time signal.
Example: To set 1:45 p.m. ※Time is displayed according to the 24-hour clock.
Example: To set your birth year to 1974
AM-180E
Before Using
The followin g settin g is required only when you have just
bought the Calorie Meter or have replaced the battery.
If you change the settings, please take the following steps (See page 34).
※Note that setting a very different current year, date and time
may interfere with past memory data.
Page 8

P.15
P.14
1514
Initial Setup
Next, set your "height". Next, set your "gender".
①After setting the date of
your date of birth, " "
blinks.
Setting Your Gender
②Press ▲ or ▼ to select
your "gender".
Male: Select .
Female: Select .
③Press the ● butto n to
set your "gender".
①
After setting the year of your date of birth,
the "month of your date of birth" blinks.
Setting Your Date of Birth
②Press ▲ or ▼ to select
the correct "month".
Holding down these buttons fast feeds the month.
③Press the ● butto n to
set the "month".
④Press ▲ or ▼ to select
the correct "day".
Holding down these buttons fast feeds the day.
⑤Press the ● butto n to
set the "day".
Example: To set your date of birth to July 4 Example: To set to female
AM-180E
Before Using
Page 9

Example: To set your height to 158 cm Example: To set your weight to 52 kg
P.17
P.16
1716
Initial Setup
Next, set your "body fat (%)".
Next, set your "weight".
①After setting your gender,
your "weight" blinks.
Setting Your Weight
②Press ▲ or ▼ to select
your "weight".
Holding down these buttons fast feeds the year
(setting range: 20 kg to 200 kg).
③Press the ● button to
set your "weight".
①
After setting your gender,
your "height" blinks.
Setting Your Height
②Press ▲ or ▼ to select
your "height".
Holding down these buttons fast feeds the year
(setting range: 90 cm to 240 cm).
③Press the ● button to
set your "height".
AM-180E
Before Using
Page 10

P.19
P.18
1918
Initial Setup
Next, set the "target number
of steps".
①
After setting your weight,
your "body fat (%)" blinks.
※
The displayed body fat (%) is estimated from your
height and weight. If you do not exactly know
your body fat (%), please leave this setting as it
is. From the second measurement onwards, the
previous set value will be displayed and will not
be recalculated.
Setting Your Body Fat (%)
②Press ▲ or ▼ to select
your "body fat (%)".
Holding down these buttons fast feeds the year
(setting range: 5.0% to 75.0%).
③
Press the ● butto n to
set your "body fat (%)".
Example: To set your body fat (%) to 24.6%
AM-180E
This completes the initial setup.
①
After setting your body fat (%), the
"target number of daily steps" blinks.
Setting the Target Number of Steps
②
Press ▲ or ▼ to select the
"target number of steps".
Holding down these buttons fast feeds the target
number of steps (setting range: 1000 to 59000,
setting increment: 1000 steps).
③
Press the ● button to apply
the "target number of steps".
※
If you make a mistake with the setting, remove
and re-inser t the batter y and repea t the
procedure from the beginning.
Example: To set the target to 10,000 steps
When number of steps has reached within 1,000 steps of the target number,
the " " mark will blink, and will light when the target number is reached.
※
If the target number of steps is 1,000, until 999 steps the "
" mark will
not be displayed, but will light when the 1,000 step target is reached.
NOTE
Before Using
Page 11

P.21
P.20
2120
NOTE
※
We recommend wearing the Activity Monitor
at chest level to ensure the most accurate
physical activity monitoring.
Example: In your chest pocket
※
The Activity Monitor can also be attacched to waist
belts. However, in this case, activity centering on
the upper half of your body sometimes may not be
measured accurately.
※
Do not put
the Activity Monitor in your trouser pocket. This will
result in lower precision, and it might break and cause you injury.
※
For details on how to attach and remove the slide clip, see page 21.
※Be sure to use the anti-slip strap. See page 22.
Wearing the Calorie Meter
Put it in your shirt pocket. Use slide clip to fix it in place.
AM-180E
Attaching/Removing the Slide Clip
①Align the side clip from the
side of the Activity Monitor as
shown in the figure on the left.
②Push in the slide clip to the
center of the Activity Monitor as
shown in the figure on the left.
③To remove, slide the slide clip
as when you attached it but in
the opposite direction.
Method of Use
Page 12

P.23
P.22
2322
How to Use the Anti-slip Strap
Opening/closing the clip
Attaching the strap to the Activity
Monitor
Open
Close
AM-180E
※
The total amount of consumed energy increases even if the Activity Monitor
does not detect movement. Even in a rested state without any physical
activity, the human body is consuming energy.
※
The Activity Monitor with a power save mode. If no buttons are operated for
30 seconds in the past mode, the mode returns to the main mode. Also, if no
movement is detected for about three minutes, the display
turns off. Display is
restored by detection of movement or pressing of a button.
●Putting the Activity Monitor on and trying it out.
Put the Activity Monitor on and try it out. Data is calculated and
saved automatically simply by wearing the Activity Monitor.
●How the Activity Monitor calculates start of walking to
prevent erroneous measurement.
⇒
If movement is stable for at least six seconds, this is assessed to be
walking, and the measured values are displayed. Also, when movement
is stopped temporarily, measured values are not added unless there is
stable movement for at least six seconds again.
※
Measured values other than "total number of steps", "number of walked steps",
"number of run steps", "distance", and "time" that are calculated from walking activity
are measured at all times since they are taken from the intensity of physical activity.
●
The number of walked steps and number of run steps are calculated from
the walking state during the past six seconds. For this reason, the values
for the number of walk and run steps are updated every six seconds.
Measurement of Number of Steps
Performing Measurement
Method of Use
Page 13

P.25
P.24
2524
Accurate measurements may be affected by the following activities:
●Movement accompanied by vertical movement
●
Going up or down stairs
●
Going up or down steep slopes
●Intense sports
●
Sports characterized by sudden instantaneous movement
●Walking in an irregular manner
●
Shuffle-like walking (on snowy paths, etc.)
●
Walking while wearing sandals or similar footwear
●
Disrupted pace when walking in crowded streets, etc.
●
When the Calorie Meter moves in an irregular manner
●
Irregular jumping movement
●
When the location where the Activity Monitor is worn moves irregularly
●During setup
To Ensure accurate measurements
AM-180E
Method of Use
Page 14

P.27
P.26
2726
Total amount of
consumed energy
⇒p.28
Viewing Measurement Results
Amount of activity energy
⇒p.29
Total number of steps
⇒p.29
Number of walked steps
⇒p.30
Metabolic rate
in rested state
⇒p.28
●button
●button
●button
●button
●button
●button
●button
Number of run steps
⇒p.30
●button
Distance⇒p.31
Time period⇒p.31
METs
⇒p.32
Time
⇒p.32
●button
●button
AM-180E
Method of Use
Page 15

P.29
P.28
2928
This is the amount of energy consumed since 00:00 a.m.
When a day has passed, this value becomes the total amount of
consumed energy for one day (0 to 99999 kcal).
※
The initial setting is the value so far since the initial setup.
※
When the battery is replaced, the value recorded at 00 minutes
before replacement and the
value since battery replacement are
to become the total amount of consumed energy.
・
Past data can be viewed by pressing the
▲
or ▼ button (1 day ago to 14 days ago).
・Past data can be viewed by pressing the ▲ or ▼ button
(1 day ago to 14 days ago).
・Past data can be viewed by pressing the ▲ or ▼ button
(1 day ago to 14 days ago).
Total Amount of Consumed Energy
Display Screen
The display is fixed at the calories consumed in a
single day spent in a rested state. This numerical
value changes when any of age, height, weight,
and body fat (%) is changed.
Metabolic Rate in Rested State
This is the numbe r of calorie s consume d by
physical activity so far since 00:00 a.m. today.
"Physical activity" refers to all actions that result in more calories
than in a rested state being consumed (0 to 99999 kcal).
This value also includes calories consumed by
walking and running.
Amount of Activity Energy
AM-180E
This is the total number of walked and run
steps (0 to 99999 steps)
Total Number of Steps
・
Past data can be viewed by pressing the ▲ or
▼
button (1 day ago to 14 days ago).
Method of Use
Page 16

P.31
P.30
3130
Display Screen
This is the number of regular walked steps
(0 to 99999 steps).
※The number of walked steps is assessed
and displayed every six seconds.
Number of Walked Steps
This is the number
of run steps, for example,
in jogging (0 to 99999 steps).
※The number of run steps is assessed
and displayed every six seconds.
Number of Run Steps
・
Past data can be viewed by pressing the
▲
or ▼ button (1 day ago to 14 days ago).
・
Past data can be viewed by pressing the
▲
or ▼ button (1 day ago to 14 days ago).
AM-180E
This is the distance moved by walking and running.
This is calculated by your pace estimated
from your height (0 to 9999.9 km).
Distance
This is the total of the walk and run times
(0 to 1440 minutes).
Time Period
・
Past data can be viewed by pressing the
▲
or ▼ button (1 day ago to 14 days ago).
・
Past data can be viewed by pressing the
▲
or ▼ button (1 day ago to 14 days ago).
Method of Use
Page 17

P.33
P.32
3332
Display Screen
※
This is calculated from the amount of activity during the past minute. So, check
this as you please. After physical activity has stopped for a while, this amount
returns to 1 MET. For a full breakdown of METS definitions see page 39.
※MET indicates the intensity of physical activity at the current
moment in time, and so there is no past data.
This unit indicates the intensity of physical activity. A
seated and relaxed state is taken as 1 MET, and the
intensity of physical activity is indicated as an equivalent
number of times of this state. Generally, regular walking
is 3 METs. That is, activity intensity is about three times
that of a seated and relaxed state (1-18.0 METs.)
METs
AM-180E
The current time is displayed.
The number in the upper row indicates seconds.
※There is no past data.
Time
Timers
Blinks when there is little battery power left.
See page 9.
Blinks when 1,000 steps before the
"target number of steps" is reached.
Lights when the target is reached.
See page 19.
When there is no more battery power left, the
battery mark lights and " " is displayed.
In this state, all measurements are stopped.
See page 9.
Method of Use
Page 18

P.35
P.34
3534
The following items can be changed.
●
Date of birth ●Gender ●Height ●Weight ●Body fat (%) ●Target number of steps
Changing Settings (Modifying Personal Data)
①
Hold dow n bot h the ▲ and ▼
buttons for at least three seconds.
②
The display changes to the screen for selecting
your date of birth on page 13 "Initial Setup".
③
Refer to description s for this
screen onwards on page 13 and
change the respective values.
※
The current year, date and time cannot be changed. Note, however, that when
you have just bought the Activity Monitor or changed the battery, the current year,
date and time can be set so that the Activity Monitor can be used right away. To
correct a difference in the time, remove the battery and perform the same
procedure as in battery replacement again
Hold down both for 3 secs.
Hold down both for 3 secs.
AM-180E
Resetting the System (Returning to Factory Settings)
①
Hold down both the ▲ and ▼
buttons for at least three seconds.
To reset all settings and measured values in memory to "0"
(zero), perform a system reset.
②
The display changes to the screen for selecting
your date of birth on page 13 "Initial Setup".
③
Hold down both the ▲ and ▼
buttons for at least five seconds.
※After a system reset, the display changes to the initial setup
screen. Make the initial setup referring to page 10.
※When a system reset is performed, all measurement data for
the past year and settings are cleared.
④
" " is displayed as shown
in the figure on the left.
※To cancel the system reset,
press the ● button at this
step.
⑤Press the ▲ or ▼ button
to display " ".
⑥
Press the ● button. For about ten
seconds, all items are displayed on
the full-screen and all data is cleared.
Method of Use
Page 19

P.37
P.36
3736
※
Even if the total number of walk and run steps exceeds 99,999 steps, the display stays
at the maximum total number of 99,999 steps. When 99,999 steps are exceeded, the
display stops, although the number of steps continues to be measured and recorded.
Specifications
Detection method
Display method
Settings
Display details
3-axis acceleration sensor
LCD display
Year / month / day / time
6 to 99 years old (entered at date of birth)
Male / female
90 cm to 240 cm (1 cm increments)
20 kg to 200 kg (1 kg increments)
5.0% to 75.0% (0.1% increments)
1000 to 59000 steps
Min.: 1 kcal Max.: 99999 kcal
Min.: 1 kcal Max.: 99999 kcal
Min.: 1 kcal Max.: 99999 kcal
Min.: 1 step Max.: 99999 steps
※
Min.: 1 step Max.: 99999 steps
※
Min.: 1 step Max.: 99999 steps
※
Min.: 0.1 km Max.: 9999.9 km
Min.: 1 mins Max.: 1440 mins
Min.: 1.0 MET Max.: 18.0 METs
Date/time
Age
Gender
Height
Weight
Body fat (%)
Target number of steps
Total amount of consumed energy
Metabolic rate in rested state
Amount of activity energy
Total number of steps
Number of walked steps
Number of run steps
Distance
Time period
METs
AM-180E
Specifications
Display details
14 days (excluding METs)
1 year
Display memory
Internal memory
Number of steps precision
Clock precision
Power supply
Battery service life
Operating temperature
Body dimensions
Body weight
Main materials
Accessories
±5% (by vibration tester)
Average monthly error ±30 seconds (at air temperature of 5°C to 35°C)
3.0 VDC (coin type lithium battery CR2032 x 1)
Approx. 6 months (when operated approx. 16 hours/day)
0 to +40°C
14.5 (D) x 76.5 (W) x 30 mm (H)
Approx. 28 g (including battery)
Body: ABS Lens: PMMA
Test battery (CR2032 x 1),
screwdriver, slide clip, anti-slip strap
China
Manufacturing origin
24-hour clock
2011 to 2099
Time
Date
Appendices
Page 20

P.39
P.38
3938
The battery is running low. Replace with a new battery (CR2032).
We recommend replacing within three days. See
pages 8 and 9 of this manual.
The battery is running low. Replace with a new battery
(CR2032) soon. See pages 8 and 9 of this manual.
Check "Wearing the Activity Monitor, "Performing Measurement"
and "To Ensure Correct Use". See pages 21 to 25 of this manual
Recording is sometime s affected by when the
battery is replaced. See page 9 of this manual.
Are the settings correct? Check the settings.
See pages 10 to 20 of this manual.
Remove and insert the battery again. See pages 8 and 9 of this manual.
If past memory is damaged after this, perform a
system reset. See page 35 of this manual.
The battery has run out of power, and measurement
is no longer possible. Replace with a new battery
(CR2032). See pages 8 and 9 of this manual.
Is the battery inserted correctly?
Check the ◯and ◯ polarities of the battery.
See pages 8 and 9 of this manual.
+ −
mark flashes.
indication appears.
No displa y even
though the battery
is inserted
Low/high
Troubleshooting
AM-180E
MEMO
mark appears.
Appendices
 Loading...