

Page 1

Codian MCU 4500 Series
Codian MSE 8510 Series
Online help (printable format)
Software version 2.4(1)
Page 2

TANDBERG
Philip Pedersens vei 20
1366 Lysaker
Norway
Telephone: +47 67 125 125
Telefax: +47 67 125 234
Video: +47 67 117 777
E-mail: tandberg@tandberg.com
Page 3
1 2 3 4 5
Page 4
Page 5
Page 6
Page 7

Page 8
The Codian MCU web interface is used for administering the MCU device, managing conferences, users, and predefined endpoints. You can also perform many conference-related tasks using the web interface that you cannot
otherwise do.
When connecting to the Codian MCU web interface, you must log in so that the MCU can associate the session with
your configured user and a set of access privileges. The MCU has a set of configured users, and each user has an ID
and password that are used for logging in.
1. Using a web browser, enter the host name or IP address of the MCU.
2. Click the link on the top right of the screen.
3. To log in as the administrator, click the button and enter your assigned User name and Password.
The main menu appears, restricting the available options based on your access privileges. Administrators have full
access; standard users can create new conferences and manage their profiles; guest users typically can access publicly
available conferences.
6
Page 9
Depending on how your system administrator has configured the MCU and conferences on it, you might be able to
join conferences by simply dialing a phone number.
Your system administrator may have configured the MCU to allow you to use your video endpoint to directly dial the
conference by dialing a phone number. You will be required to enter the conference ID, and PIN if required. Or you
may be able to dial by IP address and connect to the auto attendant. See Using an auto attendant for details.
Note that some video endpoints require that you activate the keypad before dialing. For example, you might need to
press the # key.
If your phone system allows calls to the MCU, you may use your regular phone to join conferences as an audio-only
contributor. You must enter the conference ID (and PIN, if required).
If your regular phone number is linked to your video endpoint, then when you use your phone to join a conference,
the video portion of the conference will automatically appear on your video endpoint's screen. You can continue to
use your regular phone for the audio portion of the conference. To do this, the video endpoint must be configured as
that user's associated video endpoint. For more information, refer to Adding and updating users.
The advantages to this method are that you are able to use the same method and phone to make video calls as you do
traditional audio calls. You also may have improved audio signaling. However, this method requires significant
configuration and setup from the system administrator. Your company's network may not have all the components
available to support this method.
When in a conference using an audio-only phone, pressing *6 mutes your phone such that you will not be
contributing audio to the conference; pressing *6 again unmutes you phone.
Audio-only conference participants can show a recording from a Codian IP VCR as their video contribution. To do
this:
1. Either register the MCU and the IP VCR with the gatekeeper or add the IP VCR as an H.323 gateway.
2. Go to > and add the recording as an H.323 endpoint:
i. Set the address as the recording number.
ii. If you are using a gatekeeper, leave the other fields at their default settings; if the IP VCR is set up
as an H.323 gateway, choose the VCR from the H.323 gateway list and leave all other settings as
default.
3. Go to > and set up the user using Adding and updating users for more information and
setting the associated video endpoint as the IP VCR recording.
7
Page 10
Your system administrator may have set up an auto attendant for you to use to join conferences. An auto attendant
presents you with a series of menus from which you can choose a conference to join.
For further information about accessing conferences (including the use of DTMF tones), refer to the document
"Accessing Conferences", available in the Documentation area of the web site.
There are typically two ways to call an auto attendant using your video endpoint. Your system administrator should
provide you with information about which method you should use:
Enter the IP address or host name of the MCU device
Dial using a standard E.164 phone number
When you successfully connect to the MCU, the main menu displays on your video screen, and you should also hear
the audio instructions.
Navigate the auto attendant using the Far-End Camera Controls (FECC) on your video endpoint. Use the up and
down controls to highlight the option or item you require; use right to make your selection. To return to a previous
menu from a sub-menu, use left.
You can jump to the end of the menu when at the start by using the up control; similarly, you will loop back to the
start if you are at the end and use the down control. Note that there is a scroll bar in the bottom right of the video
display to indicate where you are in the auto attendant menu. From anywhere in the menu, you can jump to the first
entry with #2 and to the last entry with #8.
By default, the number keys on your endpoint are used to join a conference by dialing its numeric ID, followed by a
'#'. If a conference has both a Numeric ID and a Guest numeric ID set, you may enter either ID, and will join the
conference as either a chairperson or guest as appropriate. As you start to enter a numeric ID, the sequence you have
typed will be shown at the base of the auto attendant screen. You may cancel the numeric ID entry (for instance to
correct an error) by pressing '*'.
If you have connected to the auto attendant using an endpoint that has no FECC capability (for example many SIP
endpoints), you can use the number keys on your endpoint to navigate the menus; this is called "DTMF navigation
mode". DTMF navigation mode enables you to use the number keys: 2, 4, 6, and 8 in the place of up, left, right, and
down respectively.
To enter DTMF navigation mode:
on connecting to the auto attendant, press the pound (hash) key twice as follows:
##
The message "DTMF menu navigation enabled" appears briefly at the bottom of the auto attendant display.
To exit DTMF navigation mode:
press the pound (hash) key twice as follows:
##
The message "DTMF menu navigation disabled" appears briefly at the bottom of the auto attendant display.
8
Page 11

When in DTMF navigation mode, you will not be able to use the number keys to enter the numeric ID of a
conference.
Typically, you will have these options:
This option enables you to start a new conference that takes place immediately (an "ad hoc" conference). When
creating this conference, you'll need to add a conference ID and optional PIN (to restrict access to the conference).
Other participants are then free to join the conference as they would any other, for example by using the auto
attendant, or by calling in directly (see Calling into conferences).
As the system administrator, you can disable this option so it is not available on an auto attendant.
All permanent conferences or conferences scheduled to take place (at this time) display here, listed by the conference
name. Your system administrator can limit the conferences that display here. So, if you do not see the conference you
want to join, verify the conference name, start time, and finally verify that your system administrator has enabled the
conference here.
Your system administrator may allow this auto attendant to access additional auto attendants, giving you access to
additional conferences.
After you join a conference, the in-conference controls and features are the same regardless of how you joined the
conference (see Using in-conference features).
When you want to leave a conference, you can either simply hang up, or if you joined the conference from an auto
attendant and want to return to the auto attendant:
if you are using FECC, press zoom out. The zoom out menu is displayed; choose
if you are using DTMF tones, press 7. The zoom out menu is displayed. Press 8 to navigate down through
the options and 6 to select
9
Page 12

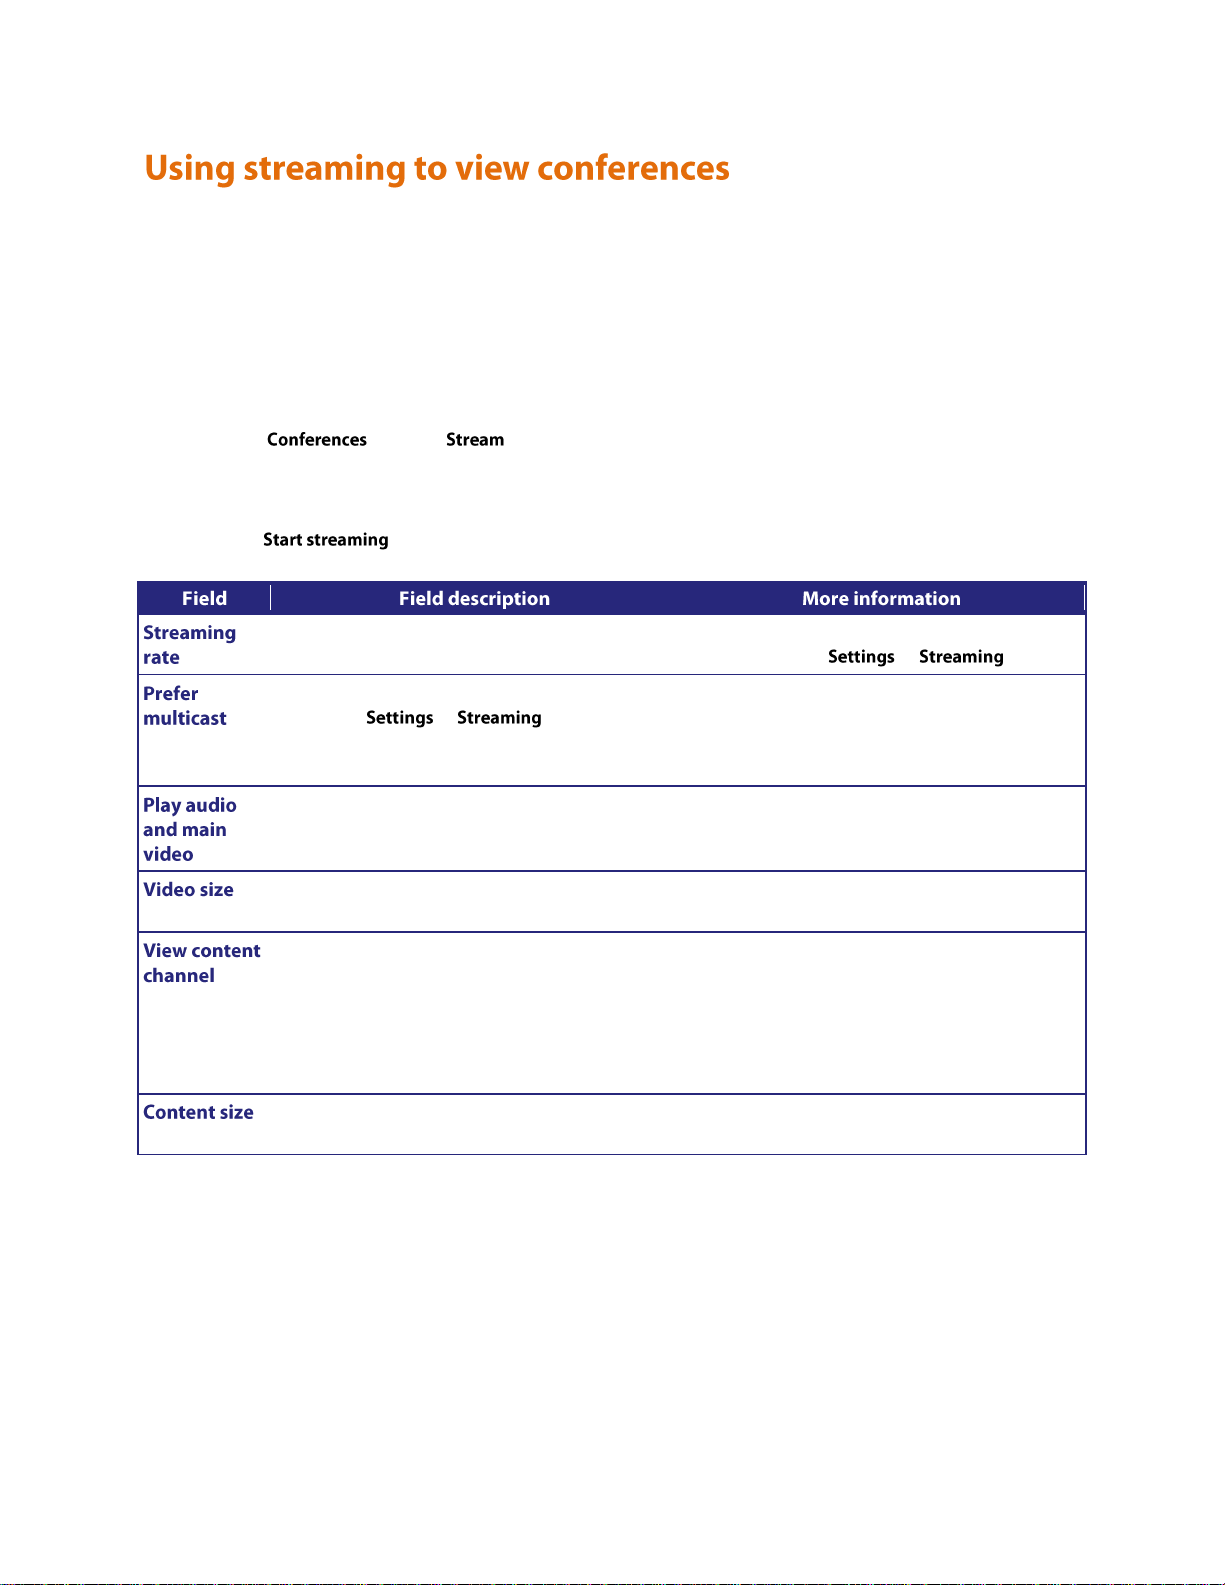
The streaming interface enables you to enter the ID of a conference and view it in a web browser on your PC. You do
A name by which you will be identified should
you use the text chat facility.
Note that text chat will not be available unless the
MCU has the Web conferencing feature key
The numeric ID that uniquely identifies the
conference you want to stream.
If the conference that you want to stream is
protected by a PIN, enter it here.
Select the streaming rate you prefer to use.
There are usually two configured options for
streaming rate from which you can choose.
When enabled, multicast will be used when
streaming this conference.
This option is not available if the streaming rate
specifies that Windows Media Player will be
used.
When enabled, the MCU's streaming page will
attempt to access the multicast meadi stream for
the chosen conference. Note that if the streaming
page fails to stream the conference, you can
return to the this page and uncheck this option;
doing so will cause the MCU to attempt to
stream the conference using unicast.
Check this option to stream the audio and video.
If you uncheck this option, then neither the audio
nor video will play.
Choose a size (resolution) for the video.
This option affects the size of the media player
when it opens.
Check this option to stream the content channel.
If you uncheck this option, the content channel
will not play. Unchecking this option also disables
text chat.
Note that text chat will not be available unless the
MCU has the Web conferencing feature key; and
that without the Web conferencing feature key,
this option is grayed out.
Choose a size for the content channel.
not have to have a user account on the MCU to be able to do this.
If you do need to log in to the MCU, use the link on the top right of the screen.
10
Page 13
The Codian MCU supports streaming, which involves sending conference media (audio and video) to a remote
The configured options for streaming video.
The two options available here have been
configured on the > page.
If multicast is enabled for the selected streaming
rate on the > page and you
select Prefer multicast, then multicast will be used
when streaming this conference.
Multicast streaming allows an unlimited number
of viewers to watch a conference on a MCU.
Note that you cannot use Windows Media Player
to stream in multicast mode on the MCU.
Check this option to stream the audio and video.
If you uncheck this option, then neither the audio
nor video will play.
Choose a size (resolution) for the video.
This option affects the size of the media player
when it opens.
Check this option to stream the content channel.
If you uncheck this option, the content channel
will not play. Unchecking this option also disables
text chat. Note that text chat will not be available
unless you have the Web conferencing feature
key; and that without the Web conferencing
feature key, this option is grayed out.
Choose a size (resolution) for the content
channel.
This option affects the size of the media player
when it opens.
computer, allowing the user to watch and listen to a conference. The media flows in just one direction, so it is not
possible to actually contribute to a conference via streaming.
The streaming video may be delayed by approximately 4-10 seconds compared to the real-time video.
To view an active conference using streaming:
1. Go to and click next to the conference name.
2. Choose the Streaming rate. Refer to the table below for tips.
3. If you want to display and choose advanced streaming settings, click the link. Choose the settings you
require, referring to the table below for tips.
4. Click to display the conference.
11
Page 14
After you join a conference, you can control many conference features directly from your video endpoint. (For
information about in-conference features using the web interface, see Controlling in-conference features).
Controlling conference views
Understanding participants status
Using far-end camera controls
Understanding in-conference status icons
The zoom out menu
The conference welcome message
For further information about accessing conferences (including the use of DTMF tones), refer to the document
"Accessing Conferences", available in the Documentation area of the web site.
Your video endpoint typically has navigation keys, such as up/down and left/right (on a keyboard or remote
control), that allow you to control the camera viewing angles. When connected to a conference, you can also use
these controls to scroll through participants and conference layout formats (see Understanding how participants
display in layout views).
When you join a conference, you will have a set of available layout options from which you can choose to display the
conference participants. Typically you can choose from two primary groupings of layouts:
— in these formats, all conference participants display in the same size pane on the video
screen and thus have the same level of focus or importance. For example, a conference with four participants
might display each in a pane sized to be a quarter (1/4) the size of your video screen.
— in these formats, conference participants display in various pane sizes on the video
screen depending on their ―importance‖. For example, a layout might display the participant who is speaking
in a pane larger than the other conference participants. Or, you might choose to focus on a particular
participant (see Selecting participants)
To switch among available conference views:
1. Change the camera control to ―far‖.
2. Use the up/down navigation keys to toggle through the available format options.
3. Refer to the table below for assistance interpreting the icons that appear on-screen.
12
Page 15

You are scrolling up through the layout views.
You are scrolling down through the layout views.
You have stopped scrolling through the layout views.
You are scrolling through the participant list in a counter-clockwise direction.
You are scrolling through the participant list in a clockwise direction.
Speaking participant has the focus.
When viewing a conference with variable-size panes (see Variable-size panes), you can choose which participant to
display in the larger panes on the video screen; when viewing a conference with equal-sized panes, you can choose
which participant displays in the top left pane. You do this by selecting the participant following these steps:
1. Change the camera control to ―far‖.
2. Choose a layout view.
3. Use the left/right navigation keys to scroll through the focused participants.
4. Refer to the table below for assistance interpreting the icons that appear on-screen.
13
Page 16
During the conference, various icons might appear in the pane of specific participants. Refer to the table below for
This participant has been given priority in the layout views.
A participant is made "important" using controls on the MCU web pages.
The audio quality from this participant is poor.
The audio quality from this participant is good.
The video quality from this participant is poor.
The video quality from this participant is good.
You are now controlling the viewing angle of the far-end video camera.
You are moving the remote far-end camera down.
You are moving the far-end video camera up.
You are moving the far-end video camera to the left.
You are moving the far-end video camera to the right.
You are zooming in with the far-end video camera.
You are zooming out with the far-end video camera.
assistance interpreting these icons.
While in a conference, you might need to change the camera settings for one of the conference participants. For
example, if you want to zoom in on a particular speaker in a large group, or if you cannot see the speaker. To do this:
1. Change the camera control to ―far‖.
2. Select the largest displayed participant pane.
3. Press Zoom. The far-end camera control icon appears, and you can now control the far-end camera.
4. Refer to the table below for assistance interpreting the icons that appear on-screen.
14
Page 17
During the conference, various icons might appear in top left of the conference display. The appearance of these icons
There are both encrypted and unencrypted participants in this conference or there are streaming viewers of
this encrypted conference.
This conference is being recorded.
There are audio-only participants in this conference. The number of audio-only participants is displayed
next to the icon.
There are streaming participants in this conference.
is controlled on the page (refer to Configuring global conference settings). Refer to the table
below for assistance interpreting these icons.
The zoom out menu provides access to a number of in-conference options. Access the following options by pressing
zoom out if you are using FECC, or 7 on a DTMF keyboard (on an endpoint that does not have an FECC channel):
widescreen mode (whether this option is available or not depends on the
setting on the page and on the capabilities of the endpoint)
borders
mute audio
mute video
clear text chat (this option only appears if there is text chat on the screen)
return to auto attendant (this option only appears if the participant joined the conference from the auto
attendant)
You can configure a welcome message on the MCU and a duration for that message. Participants joining a conference
on the MCU will see the message displayed at the bottom of their endpoint's display. After the configured message
duration has elapsed, the message will be removed.
The controls are on the page (refer to Configuring global
conference settings).
The welcome message will only be displayed to streaming viewers if the duration is configured as permanent.
If you change the welcome message when there are active participants, any participants’ currently displayed welcome
messages will only change if the new message is configured as .
15
Page 18

Depending on how your video endpoint is configured, an incoming video call might come through to your regular
phone or to your video endpoint (see Calling into conferences for a brief description of the difference). Note that
even if a video call arrives on your regular phone, the video portion of the call will appear on your associated video
endpoint (if one is configured).
As with any other type of incoming call, you can choose to answer the call or not.
16
Page 19
The default behavior of the Codian MCU is to display the "loudest" participants in the most prominent layout panes.
If there are more contributors than there are panes available, then the "quietest" participants are not shown.
However, different styles of layout introduce slight subtleties to this behavior, and in addition there are a few ways in
which participants or conference administrators may change the system used for pane assignment. In particular, you
may want to set the pane placement for a conference yourself.
In this section:
Big panes vs. small panes
Participants viewing themselves
Changing view focus
"Important" participants
"Important" participants combined with view focus
Clipped panes
Video streams vs. fixed bitmap images
Muted participants
H.243 floor control
This layout can be seen as the most traditional video-conferencing view. Each participant is displayed in the same
sized pane as the other participants. If there are more than four participants, the four most significant (the four
loudest) are displayed, with one pane each.
By contrast, these example layouts have some larger panes, and the participants shown in those panes are seen as
more significant than the other contributors. When allocating participants to panes, the MCU always fills the largest
panes first. If there are more participants than panes then there will never be empty big panes and non-empty small
panes.
To reduce the number of view changes when different participants speak (for example, when people change from
being active speakers to inactive contributors), the MCU duplicates participant views for layouts with more than four
small panes. For the three example layouts shown above, the participant(s) shown in the large pane(s) of the first two
layouts will be duplicated in the surrounding small panes. However, the four small panes of the third layout will show
different participants to those displayed in the three big panes. This reduces the impact of audio volume changes on
the composed layout while not needlessly wasting view space. However, it is possible to configure the MCU not to
duplicate participant views in this way if so desired (see Configuring global conference settings).
17
Page 20
When considering which participants to show in which panes, a participant's self view has the lowest priority. This
has two main implications:
When choosing participants to display, the MCU considers the viewer last. This prevents the participant
who is the active speaker from seeing only themselves. In this case, while everyone else will see the active
speaker, the active speaker will see the previous active speaker in their biggest view pane.
When the MCU is required to choose a layout from a view family, it does so based on the number of video
contributors to the conference. However, when calculating the number of video contributors for a
particular view, the MCU does not consider any video stream being received from the viewer.
Thus, with five participants in a conference and everyone seeing the standard equal-sized view family (2x2,
3x3 or 4x4), each of the five contributing participants will always see the 2x2 view with themselves
excluded. However, streaming viewers will see the conference display using the 3x3 view with five panes in
use.
You may configure the MCU never to show participants their own video stream in small panes (see Configuring
global conference settings). If this is the case, then participants viewing layouts with some panes larger than others
will never see their own video stream in any of the small panes, even if there are free slots. They may still appear in
large panes, for example if the view focus is manually changed to show their video.
Using the tilt (up and down) Far End Camera Controls on a connected video endpoint causes the view to change,
cycling through the available families and then the conference-wide or per-participant custom layouts (if enabled).
In addition, the pan (left and right) Far End Camera Controls on a connected video endpoint can be used to focus the
view on a particular participant, as opposed to the MCU allocating participants to panes based solely on the volume of
the audio being received from them.
To reduce the disruption of the view when cycling through conference participants, there is a short delay after
selecting a new focused participant before the rest of the view layout reverts to the "correct" arrangement of
participants in panes.
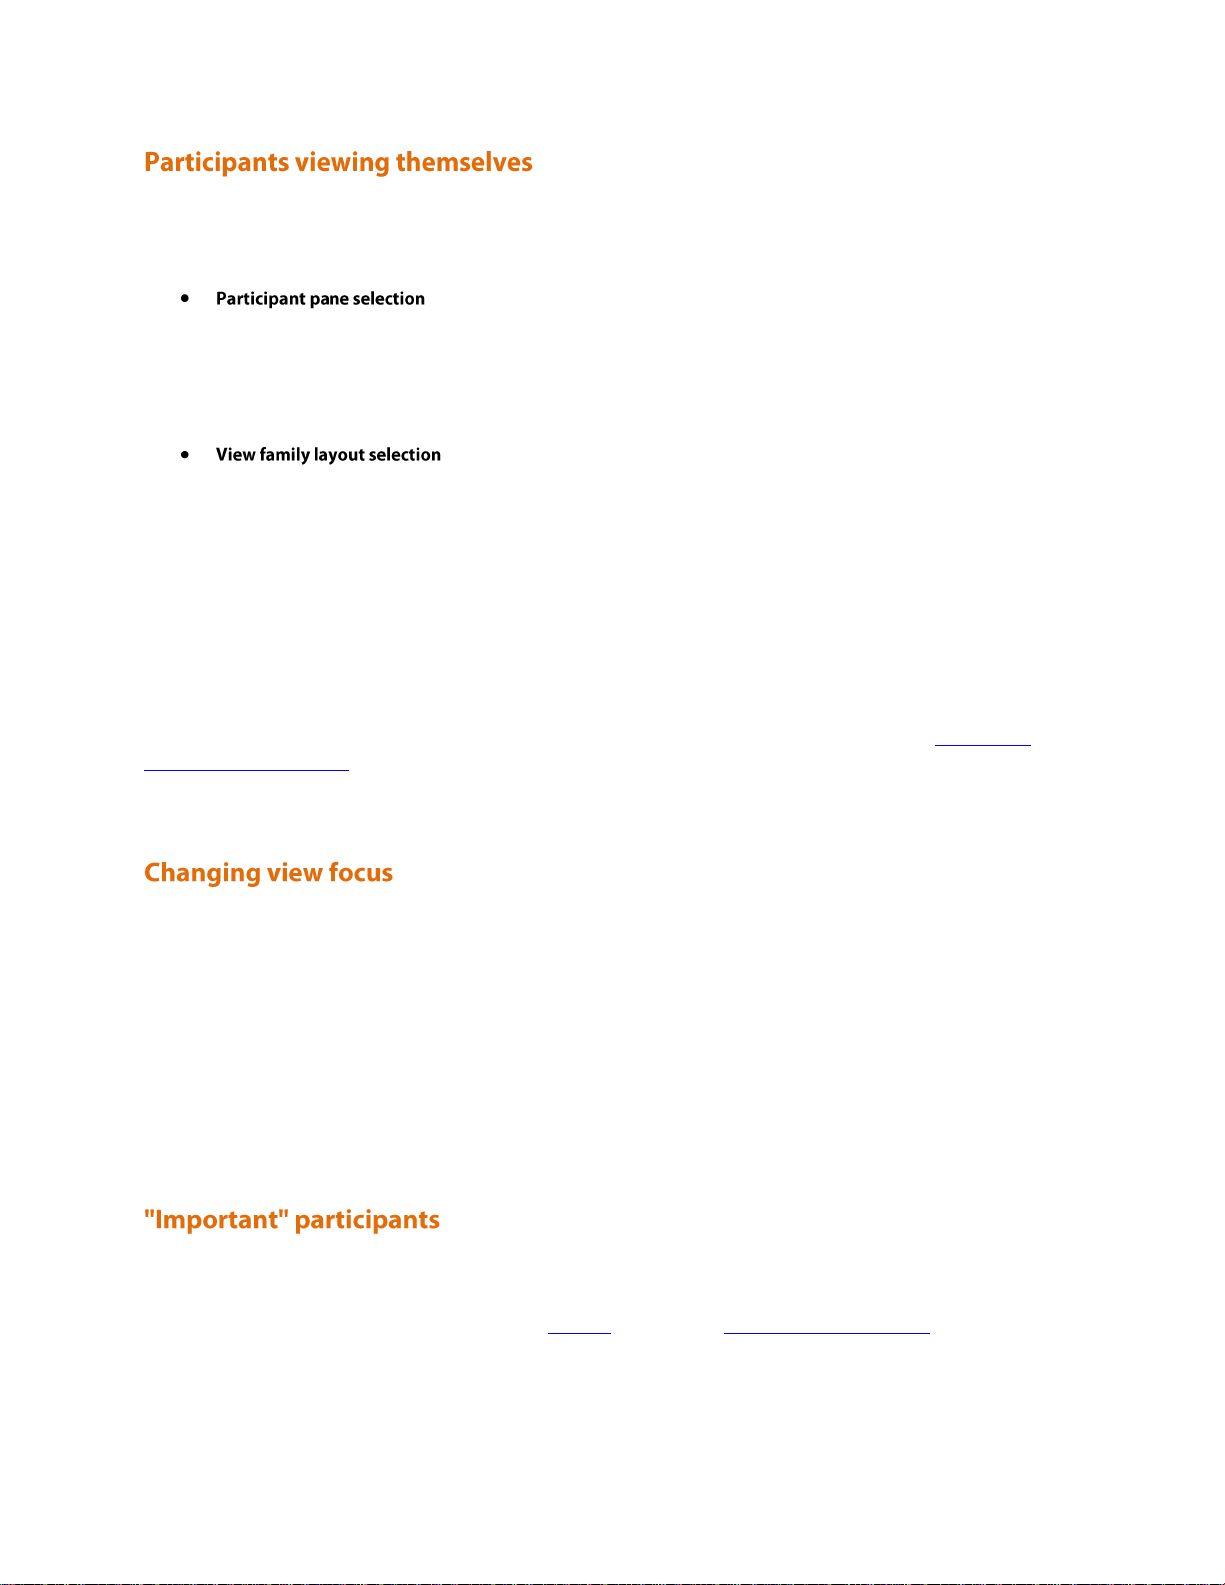
For each conference, one active participant can be set as "important". This means that the MCU considers this
participant first when deciding which contributors to show in which layout panes, rather than their position in the list
being set by how loudly they are speaking. See the Control setting in the conference participant list.
18
Page 21
Both "Changing view focus" and "Important participants" above involve a single specific participant being shown in
the biggest pane available, even if that participant is not currently the loudest speaker. This causes a potential conflict,
which is resolved dependant on the type of layout.
In this type of view (a layout in which all panes are of equal size), the focused participant is shown in the first pane,
the one at the top left. The important participant is shown in the "next" pane, normally the one immediately to the
right of the first pane.
This type of layout displays a single big pane and several small panes. If the view focus has been changed (for instance
with left and right Far End Camera Control operations), then the big pane shows the selected participant. If a
conference participant has been set to "important" then its video stream is shown in the big pane.
However, if a participant has been set to "important" and the view is focused on a (different) specific participant, the
focused participant is shown in the big pane, and the "important" participant is shown in one of the small panes.
If the view has been focused on a participant and the same participant is also set as "important" then that participant is
shown in the big pane.
These layouts have two large panes and several smaller ones. If the view focus has been changed (for instance with left
and right Far End Camera Control operations), then the upper or left large pane shows the focused participant. If a
participant has been set to "important" then that video stream appears in the lower or right large pane.
If the same participant is focused and "important", that video stream appears in the upper or left pane.
For these layouts, if the view has been focused on a particular participant, that participant appears in the upper or left
large pane. If a participant has been selected as "important", that participant will be shown in the lower or right large
pane.
In layouts with three large panes, even if the view is focused on a specific participant and another has been set to
"important", one large pane remains. This pane displays the "loudest" remaining participant.
19
Page 22
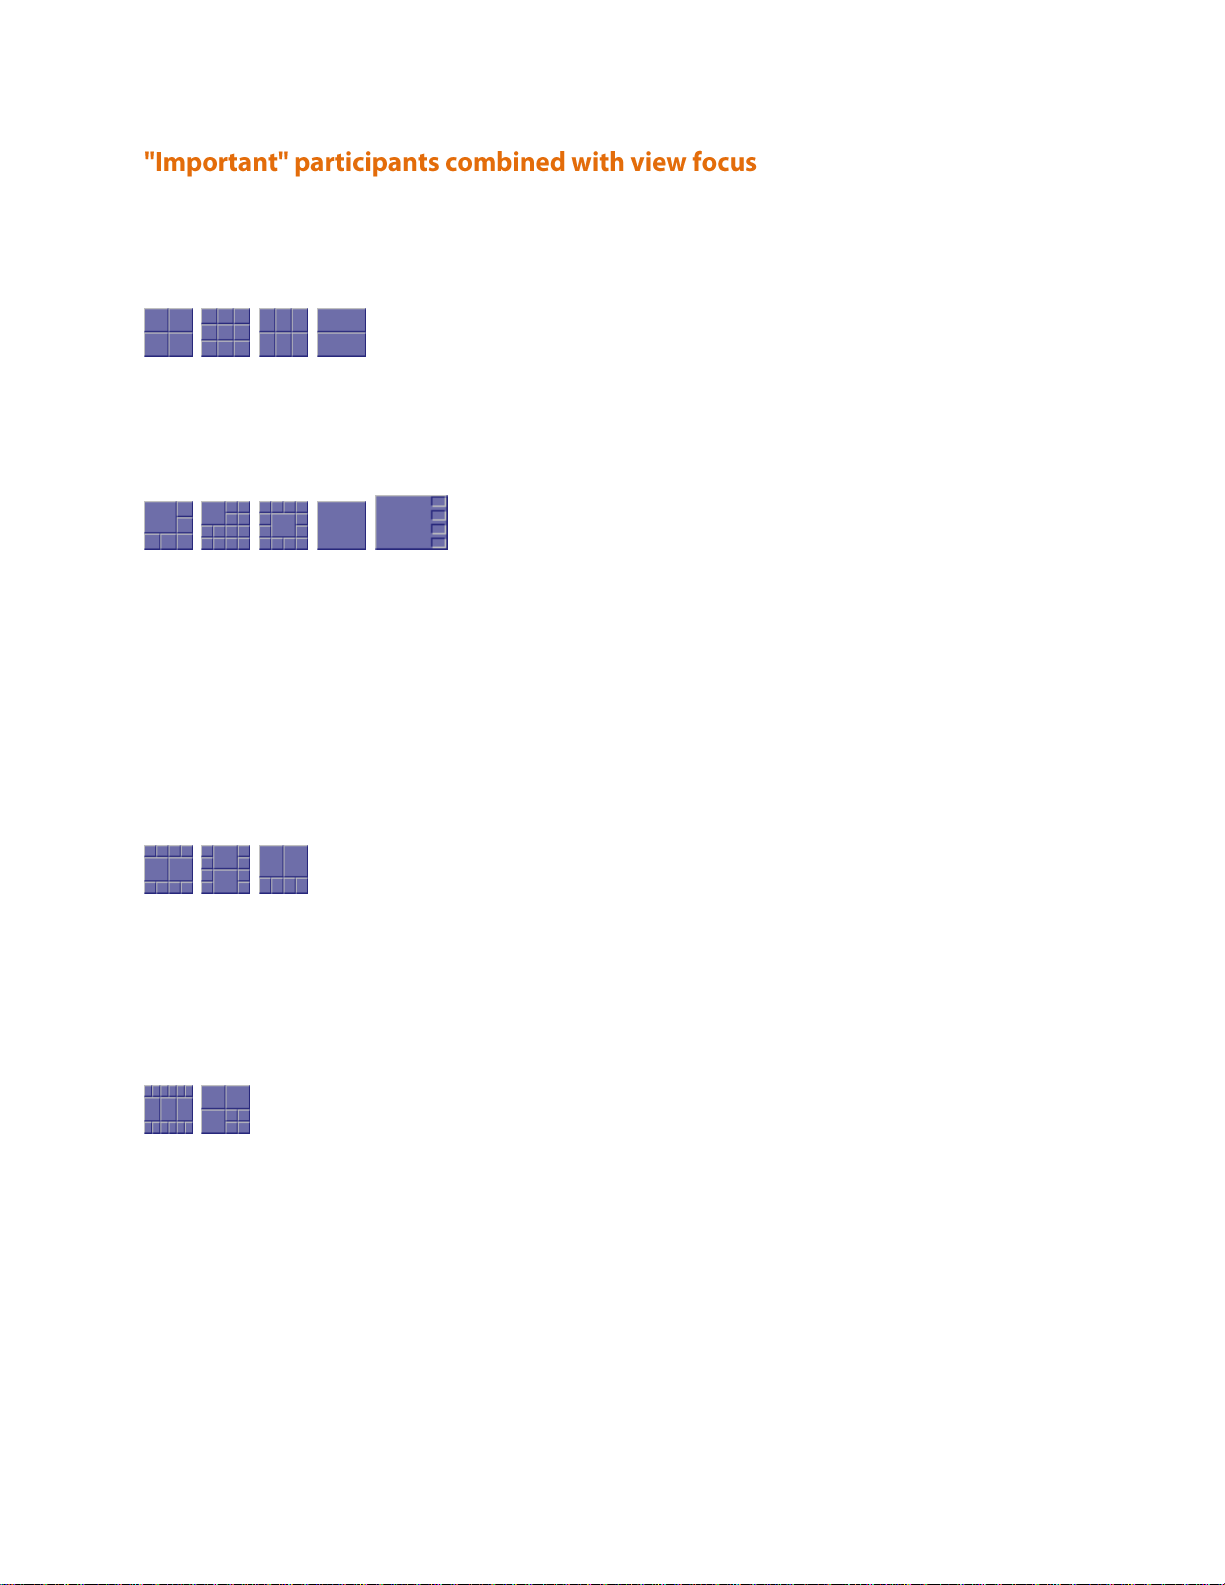
The majority of the conference layouts defined by the Codian MCU, for example:
have in common that all of their panes, whether big or small, have the same aspect ratio as the view itself. That is, the
panes' widths and heights are in the same proportion as the width and height of the encompassing view.
By comparison, there are some defined conference layouts, for example:
in which this aspect ratio preservation does not occur. In these cases, the MCU scales the participant video stream
according to the larger dimension of the pane.
For example, in the layout to the left, the size of the top left pane is one half of the view width and two thirds of the
view height. Because two thirds is greater than one half, the MCU scales the participant video stream to two thirds of
its size and thus a small amount of the left and right of the original image will not appear in the final composed layout.
For video conference participants, the image that displays in the layout view pane is either the live video stream (if
viewing from the video endpoint) or a captured video image from the current video stream (if viewing from the web
interface).
However, audio-only participants do not have any associated video to display. Instead, you can assign a fixed image
(in bitmap format) to a specific participant. When the participant joins a conference as an audio-only participant, this
image appears in the layout pane. To enable this feature, the participant must be added as a user to the MCU, have an
associated E.164 telephone, and have a designated image file uploaded. See Adding and updating users.
Participants who have had their audio muted from the web interface do not contribute audio to the conference.
Additionally, muted participants are not considered when the MCU calculates the loudest speakers to display in the
largest panes, even if the participant had previously been in one of those positions.
Note that other participants will not have an indication that a participant has been muted. They simply will no longer
hear that participant speaking.
Participants who have had their video muted from the web interface do not contribute video to the conference. They
will continue to contribute audio as normal, unless it is muted separately.
20
Page 23

Some H.323 endpoints support a feature known as floor and chair control that is encompassed by the H.243
protocol. This is not currently supported by SIP.
The MCU supports the following H.243 features:
a participant can "take the floor" in a conference. On "taking the floor" their video contribution is sent to all
conference participants as a "1 x 1 view" (full-screen view). If the active floor (temporarily or permanently)
has no video channel established to the MCU then endpoints will see their "normal" continuous presence
view; if there is a video channel from the active floor participant, everyone will see that video, and this will
override any view family or custom layout setting
a participant can "take the chair". On "taking the chair", a participant can:
o nominate a "broadcaster"; that is, they can choose which participant's video will be sent to all other
participants in "1 x 1 view" (full-screen view)
o decide to disconnect any other participant(s)
Note that the ability of a participant to "take the chair" is affected by how they joined the
conference. A participant who joined the conference as a guest will not be able to "take the chair".
an endpoint can receive the names of the other endpoints in the same conference. Different endpoints act on
this in different ways.
Whether or not these features are supported in a conference depends on the individual conference settings
( ) and the global "H.243 floor and chair control setting" ( ). Refer
to Adding and updating conferences and Global conference settings.
Where a conference supports floor and chair control, or floor control only:
the MCU will advertise the ability to handle H.243 when establishing (and receiving) H.323 connections
any H.243-capable endpoint can request the floor, and all endpoints (be they chairperson or guest) will be
granted it as long as no other endpoint in that conference has already done so
Where the conference supports floor and chair control:
any H.243-capable endpoint can request the chair, and any participant who has joined the conference as a
chairperson will be granted it as long as no other endpoint in that conference has already done so
If an active participant in a conference has taken the chair or the floor, it is indicated in the status column of the
page.
If you change the "Floor and chair control" for a conference currently taking place, there will be no immediate effect.
That is, an existing floor or chair participant will not have that status removed.
For ad hoc conferences, you can alter the "Floor and chair control" setting, which is "Allow floor control only" by
default, through that conference's configuration page when it is active.
21
Page 24
The Conference List displays information about active, scheduled, and completed conferences. To access this list,
Displays the conference streaming page. This
option is not necessarily available for every
conference; some users do not have access to
other user's conferences. Some conferences may
require a PIN to access this feature.
See Using streaming to view conferences for
more information.
The name of the conference, which is either the
name entered when the conference was
scheduled, or, in the case of certain specialized
types of conferences, a name chosen
automatically by the MCU when created.
Specialized conference types are described below
in Description.
Click the conference name to display detailed
information about the conference and
participants.
Additional information about the conference,
which can assist users joining conferences.
You can add the description when scheduling a
conference. If you do not add a description or the
conference has not been scheduled in advance, the
Description displays one of the following:
The conference has been scheduled in
advance using the MCU web interface,
but the owner has not entered a
description.
The conference was created dynamically
during an auto attendant session and will
end when the last participant using the
auto attendant exits the conference.
This type of conference indicates that a
participant is currently connected to the
auto attendant and navigating the menus.
The configured owner of the conference.
See Conference ownership for additional
information.
choose .
Review this information for explanations about the details that display:
Active conferences
Scheduled conferences
Completed conferences
Active conferences are currently in progress. The following information is displayed for each conference:
22
Page 25
The status of a conference with respect to its
H.323 gatekeeper and/or SIP registration.
Depending on the conference settings, there is a
maximum of four registrations for each
conference: H.323 numeric ID, H.323 guest
numeric ID, SIP numeric ID, and SIP guest
numeric ID. The Registration field will show
failed if any of the registrations has not completed
successfully.
This conference is not configured to be
registered with a gatekeeper or SIP
registrar; because of this, there is no
applicable registration status to show
This conference is in the process of
registering with the gatekeeper or SIP
registrar
At least one of the registrations for this
conference has failed
All IDs associated with this conference
have been registered successfully with
the gatekeeper / SIP registrar
One or more of the IDs associated with
this conference has been configured to
be registered with the gatekeeper or SIP
registrar, but that registration has not
been attempted due to another setting
taking precedence. This might occur if
either of the H.323 gatekeeper usage or ID
registration for scheduled conferences options
on the page is set
to Disabled
Note that when there is a problem with the
registration, the status is a link to the conference's
Statistics page.
If the MCU can connect to an H.323 gatekeeper,
each numeric ID (for both chairperson and guest
privileges) for a conference can be registered with
that gatekeeper as a different directory number.
This allows H.323 users to dial directly into a
particular conference (with the correct privileges)
instead of connecting first to the MCU's auto
attendant and navigating the menu system.
Likewise, if the MCU can connect to a SIP
registrar, each conference can be registered with
that registrar using either (or both) Numeric ID
and Guest ID. This allows SIP users to dial
directly into a particular conference (with the
correct privileges) instead of connecting first to
the MCU's auto attendant and navigating the
menu system. Note that for SIP, unlike H.323,
the conferences must be configured on the SIP
registrar before the MCU can register them.
There is a maximum of four registrations for each
conference: H.323 numeric ID, H.323 guest
numeric ID, SIP numeric ID, and SIP guest
numeric ID. To view further details about the
registrations for a conference, click the
conference name and then the Statistics tab to
view the conference's Statistics page.
For tips on configuring gatekeepers, see
Configuring gatekeeper settings.
For tips on configuring SIP registrars, see
Configuring SIP settings.
For more information about configuring
conferences (and chairperson and guest IDs and
PINs), refer to Adding and updating conferences.
The number of currently active contributors to
the conference. This value does not include
streaming viewers or any other endpoints that are
viewing only and not contributing any media to
the conference.
If a limit on the number of participants has been
set for the conference, the participants value is
shown as , where is the number of active
participants and is the configured limit. If it has
not been possible to reserve all of the required
If a conference is protected by a PIN, the number
of participants is hidden until the PIN is entered.
In this case, the Participants value displays as
<PIN required>.
23
Page 26
ports for a conference (for instance because of a
configuration error), this value will display in red
as an error indication.
When the conference began. If the conference
started before today, the date also displays.
How long the conference still has to run. If the
conference does not have a limited duration, this
column displays as <forever>.
Scheduled conferences are either in progress or are yet to start. You can review this list and make some changes to it:
The name of the conference chosen when the
conference was scheduled.
Click the conference name to display detailed
information about the configuration of the
conference and, if it is currently active, its
participants.
The number that you can dial to join the
conference.
Whether a PIN is required to join the conference.
The configured owner of the conference.
See Conference ownership for additional
information.
Whether a conference is:
The conference's configured start time
has not yet arrived.
The conference is running and is
available for video conferencing
endpoints to join. A scheduled
conference in this state will also appear
in the Active conferences list.
The conference is not currently running,
but has been previously active and is now
waiting to be re-activated when the time
of its next repetition is reached.
There is no explicit status for "finished" – when a
conference is not in progress and is not scheduled
to become active again then it is moved to the
Completed conferences list.
When the conference began. If the conference
started before today, the date also displays.
When the conference will end.
To remove a scheduled conference, select the conference via its associated checkbox and click
.
To schedule a new conference, click (see Adding and updating conferences).
The MCU supports up to 200 scheduled conferences.
24
Page 27
Completed conferences have finished and are not scheduled to repeat.
The name of the conference chosen when the
conference was scheduled.
Click the conference name to display detailed
information about the configuration of the
conference.
The configured owner of the conference.
See Conference ownership for additional
information.
When the conference began. If the conference
started before today, the date also displays.
When the conference ended.
To remove specific conferences from the list, select the conferences via their associated checkboxes and click
.
To remove all conferences from the list, click .
25
Page 28
The information required to add or update a conference is nearly identical. Refer to these topics for details:
Adding a conference
Updating a conference
Adding configured endpoints
Using IDs and PINs
To add a conference:
1. Go to .
2. Complete the fields referring to the table below for the most appropriate settings for the conference.
3. Click to add the conference and return to the Conference List. The recently added
conference appears either in the Active or Scheduled Conferences depending on its scheduled start time.
Ad hoc conferences (if you allow them) are added by users in the auto attendant.
To update an existing conference:
1. Go to .
2. Click a Conference name and then click the tab.
3. Edit the fields referring to the table below for the most appropriate settings for the conference.
4. Click to add the conference and return to the Conference List. The updated conference
appears either in the Active or Scheduled Conferences depending on its scheduled start time.
The following settings can also be updated for ad hoc conferences:
PIN
Layout control via FECC/DTMF
Streaming
Encryption
Floor and chair control
Mute on join
See the table below for more information:
26
Page 29
The name that users will see on auto attendant
screens and on the MCU's web interface.
Conference names must be unique; conferences
cannot share names.
Only scheduled conferences have a configurable
Name; ad hoc conferences do not have one.
Additional information about the conference,
which can assist users joining conferences.
Use the description to provide more detailed
information about the conference than the name
alone conveys.
This is an optional field for scheduled
conferences; ad hoc conferences cannot be given
a description.
The unique identifier used for dialing in to the
conference (as a chairperson participant) using an
auto attendant or through an H.323 gatekeeper or
SIP registrar. This number can also be used to
stream the conference from the Streaming-only
interface. For more information about
chairpersons and guests, refer to Using IDs and
PINs.
When connected to an auto attendant,
participants can join a conference by typing its
numeric identifier.
If you plan to allow audio-only participants, then
you will need to enter either a Numeric ID or a
Guest numeric ID.
If H.323 gatekeeper registration is enabled for a
conference, the MCU attempts to register the
conference with an E.164 telephone number,
which is comprised of the Registration prefix and
the numeric identifier.
If SIP registration is enabled for a conference,
then the Numeric ID is registered with the SIP
registrar.
Conferences that are simultaneously active must
not share a Numeric ID. For example, a conference
on a Tuesday and a conference on a Thursday can
share a Numeric ID, whereas two permanent
conferences cannot share a Numeric ID. The same
number can be used for the Guest numeric ID, if
there are two different PINs. Additionally,
because the numeric identifier is used in
gatekeeper registration, conferences and auto
attendants cannot share a numeric identifier
value.
For more information, refer to Using IDs and
PINs.
For ad hoc conferences created via the auto
attendant, the number allocated by the
conference creator becomes the Numeric ID. If ad
hoc conferences are registered with the
gatekeeper (and for this to work, the Register ad
hoc conferences with gatekeeper control must be
27
Page 30
enabled on the page),
participants can dial in using this number. Note
that the actual number that participants will dial
depends on whether prefixes are used in the
page.
For an active ad hoc conference, you cannot
configure the Numeric ID.
Provides a level of security to conference access.
If a conference has a PIN set, users cannot join
the conference or change its configuration
without entering the correct PIN. Depending on
the conference settings, it may be possible for
participants to join a conference as a chairperson
(using the Numeric ID and PIN), or as a guest
(using the Guest numeric ID and Guest PIN).
For an ad hoc conference, you can configure a
PIN while the conference is running.
The unique identifier used for dialing in to the
conference (as a guest participant) using an auto
attendant or through an H.323 gatekeeper or SIP
registrar. This number can also be used to stream
the conference from the Streaming-only interface.
For more information about chairpersons and
guests, refer to Using IDs and PINs.
When connected to an auto attendant,
participants can join a conference by typing its
Guest numeric ID.
If you plan to allow audio-only participants, then
you will need to enter either a Numeric ID or a
Guest numeric ID.
If H.323 gatekeeper registration is enabled for a
conference, and you have entered a Guest
numeric ID, the MCU attempts to register the
conference with an E.164 telephone number,
which is comprised of the Registration prefix and
the Guest numeric ID.
If SIP registration is enabled for a conference, and
you have entered a Guest numeric ID, then the
Guest numeric ID is registered with the SIP
registrar.
Conferences that are simultaneously active must
not share a Numeric ID. For example, a conference
on a Tuesday and a conference on a Thursday can
share a Numeric ID, whereas two permanent
conferences cannot share a Numeric ID. The same
number can be used for the Guest numeric ID, if
there are two different PINs. Additionally,
because the numeric identifier is used in
gatekeeper registration, conferences and auto
attendants cannot share a numeric identifier
value.
For more information, refer to Using IDs and
PINs.
Ad hoc conferences cannot be configured with
Guest numeric IDs or PINs.
28
Page 31

Provides secure access to conferences for guest
participants.
If a conference has a PIN set, users cannot join
the conference or change its configuration
without entering the correct PIN. Participants
joining as guests have restricted privileges. For
more information, refer to Using IDs and PINs.
Ad hoc conferences cannot be configured with
Guest numeric IDs or PINs.
Enables the MCU to attempt to register the
Numeric ID and/or Guest numeric ID with the
configured H.323 gatekeeper and/or SIP
registrar.
This setting applies to both the Numeric ID and
Guest numeric ID (if you have set both). For
more information, refer to Using IDs and PINs.
For ad hoc conferences, whether or not they are
registered with the gatekeeper depends on the
Register ad hoc conferences with gatekeeper setting on
the page.
Controls what happens to the conference when
the last participant with chairperson status leaves
the conference. The options are:
: this is the
default option. When the last participant
with chairperson status leaves the
conference, all other participants will be
disconnected
: all participants may
continue the conference until the last
one disconnects
This setting applies to scheduled conferences that
include guest participants (that is, those who have
joined the conference using the Guest numeric ID
(and PIN if one was set).
Controls "Floor and chair control" settings for
this conference. The options are:
: the
use of floor and chair controls is not
allowed in this conference
: only floor
control is allowed in this conference;
chair control is not allowed. Any
participant can 'take the floor' so long as
no other participant has currently 'taken
the floor'
: both floor
and chair control are allowed in this
conference. Any participant can take the
floor, and any chairperson participant
can take the chair so long as no other
participant has currently done so
Some H.323 endpoints support a feature known
as floor and chair control that is encompassed by
the H.243 protocol. For more information, refer
to H.243 floor and chair control.
If you change the "Floor and chair control"
setting for a scheduled conference currently
taking place, there will be no immediate effect.
That is, an existing floor or chair participant will
not have that status removed.
If the unit-wide "Floor and chair control" setting
on the Global conference settings page is set to
Disabled, it will not be possible to use floor or
chair control operations in any conference.
The owner of the conference, usually the user ID
of the user account that the person who scheduled
the conference logged in with.
You may or may not be able to change the
conference owner, depending on your privilege
level. See Conference ownership for additional
information.
This setting does not apply to ad hoc conferences.
29
Page 32

Indicates the visibility of the conference on the
auto attendant and the web interface. The options
are:
: the conference will be listed in
the auto attendant and be visible to all
users of the web interface
: the conference will not be listed
in any auto attendant except for auto
attendants specifically set to show it. The
conference will also only be visible in the
web interface to the conference owner
and to the admin user
For private conferences not visible on an auto
attendant, participants will still be able to join the
conference if they know the PIN.
Note that only admin users can choose which
conferences are visible on a given auto attendant.
This setting is only available for schedules
conferences. For ad hoc conferences, whether or
not they are listed on the auto attendant depends
on the settings of that auto attendant. For more
information, refer to Adding and updating an
auto attendant.
The encryption setting for this conference, if you
have the encryption feature key enabled.
If encryption is enabled unit-wide (through the
> page), you can set one of:
: encryption must be used for
this conference
: encryption is optional for this
conference
This setting is grayed-out if encryption is disabled
on the > page.
Note that to be able to use encryption, the
Encryption feature key must be present on the
MCU.
Prevents or permits conference participants
changing their view layout or focused participant
using Far-End Camera Controls or DTMF tones.
You may wish to prevent participants from
changing their view layout in a managed
conference, or classroom environment.
This is a per-conference option, but
FECC/DTMF layout control may still be enabled
or disabled on a per-participant basis using the
web interface.
When calling out to endpoints, the endpoints'
layout control configuration overrides this
setting, and therefore it applies only to endpoints
which connect to the conference via an auto
attendant or by dialing in directly.
Indicates when the MCU should invite any preconfigured endpoints into a conference. The
options are:
Pre-configured participants will be called
as soon as the conference starts.
Pre-configured endpoints will only be
called after at least one other participant
joins the conference.
Select which option fits your requirements best.
Calling pre-configured endpoints at the start of the
conference is most appropriate for repeating
conferences with a particular start time.
Calling pre-configured endpoints when at least one
other participant is present is most appropriate for
permanent conferences; such conferences are
typically un-attended for much of the time, and it
may only be useful to invite pre-configured
endpoints when others are present.
This setting only applies to scheduled
conferences.
30
Page 33

Select to initially mute audio and/or video from
all participants when they join the conference.
If you select to mute audio on join, when a
participant dials-in to a conference, he will not be
able to contribute audio to the conference. If you
select to mute video on join, when a participant
dials-in to a conference, he will not be able to
contribute video to the conference. You can mute
both audio and video if required.
This can be altered during the course of the
conference by going to and clicking
on the name of a conference and altering a
participant's settings. For more information about
altering a participant's settings during a
conference, refer to Viewing the conference
participant list.
Note that for pre-configured participants and for
participants to whom the MCU dials out, the
Initial video status and Initial audio status settings
will be used to determine whether or not audio
and video contributions are muted. For more
information about dialing out to participants,
refer to Adding participants. For more
information about pre-configured participants,
refer to Configuring an H.323 endpoint and
Configuring a SIP endpoint
For an ad hoc conference, you can configure the
Mute on join setting while the conference is active.
Individually allow unicast and multicast streaming
access to conferences.
See Configuring streaming settings for additional
information.
If Enabled, this conference is able to support an
additional video stream, sent potentially to all
connected endpoints, intended for showing
content video.
This content video is typically high resolution,
low frame rate data such as a presentation formed
of a set of slides. Such presentation data can be
sourced by:
an endpoint specifically contributing a
separate content video stream,
the MCU being configured to use an
endpoint's main video stream as the
conference's content channel,
a dedicated VNC connection,
or user-generated markup data (the
markup is normally, though not always,
used in conjunction with content video
or VNC data).
See Configuring content settings for additional
information on MCU-wide content configuration
parameters.
For ad hoc conferences, whether or not content
channel video is allowed is controlled by the
Content for ad hoc conferences setting on the
page.
31
Page 34
Whether, by default, endpoints are permitted to
contribute the content channel for a conference
through the mechanism of opening a content
video channel.
There can only be one endpoint contributing
content video at any one time, and the MCU
arbitrates between them. Therefore, even with
this parameter set to Enabled, the ability of the
endpoint to contribute content video will be
affected by other endpoints' behavior.
If this setting is Disabled, it is still possible to
enable content contribution on a per-endpoint
basis when the conference is active. Similarly, it is
possible to disable content contribution from
specific endpoints, either while they are
connected or via their configuration. For more
information about endpoint configuration, refer
to Configuring H.323 endpoints and/or
Configuring SIP endpoints.
This setting only applies to scheduled
conferences.
When the MCU is not in port reservation mode,
this parameter sets a limit on the number of
endpoints which can connect to the conference as
video participants.
A participant counts (as a single unit) towards the
video limit whether the MCU is sending a video
stream to that participant or a video stream is
being received.
If you do not want to limit the number of
participants who can join this conference and use
video, leave this field blank.
This field is only shown if the MCU is not in port
reservation mode.
This field only applies to scheduled conferences.
When the MCU is not in port reservation mode,
this parameter sets a limit on the number of
endpoints which can connect to the conference as
audio-only participants.
A participant counts (as a single unit) towards the
audio limit whether the MCU is sending an audio
stream to that participant or an audio stream is
being received.
If you do not want to limit the number of
participants who can join this conference to use
just audio, leave this field blank.
This field is only shown if the MCU is not in port
reservation mode.
This field only applies to scheduled conferences.
In port reservation mode, this parameter specifies
the number of video ports to reserve.
A participant counts (as a single unit) towards the
video reservation value whether the MCU is
sending a video stream to that participant or a
video stream is being received.
This value is both a reservation and a limit; the
MCU guarantees that this many video participants
can connect to the conference, but no more than
this will be able to join.
This field is only shown if the MCU is in port
reservation mode.
In port reservation mode, this parameter specifies
the number of audio-only ports to reserve.
A participant counts (as a single unit) towards the
audio reservation value whether the MCU is
sending an audio stream to that participant or an
audio stream is being received.
This value is both a reservation and a limit; the
MCU guarantees that this many audio-only
participants can connect to the conference, but
no more that this will be able to join.
This field is only shown if the MCU is in port
reservation mode.
The time at which the conference will begin.
The date on which the conference will begin.
32
Page 35
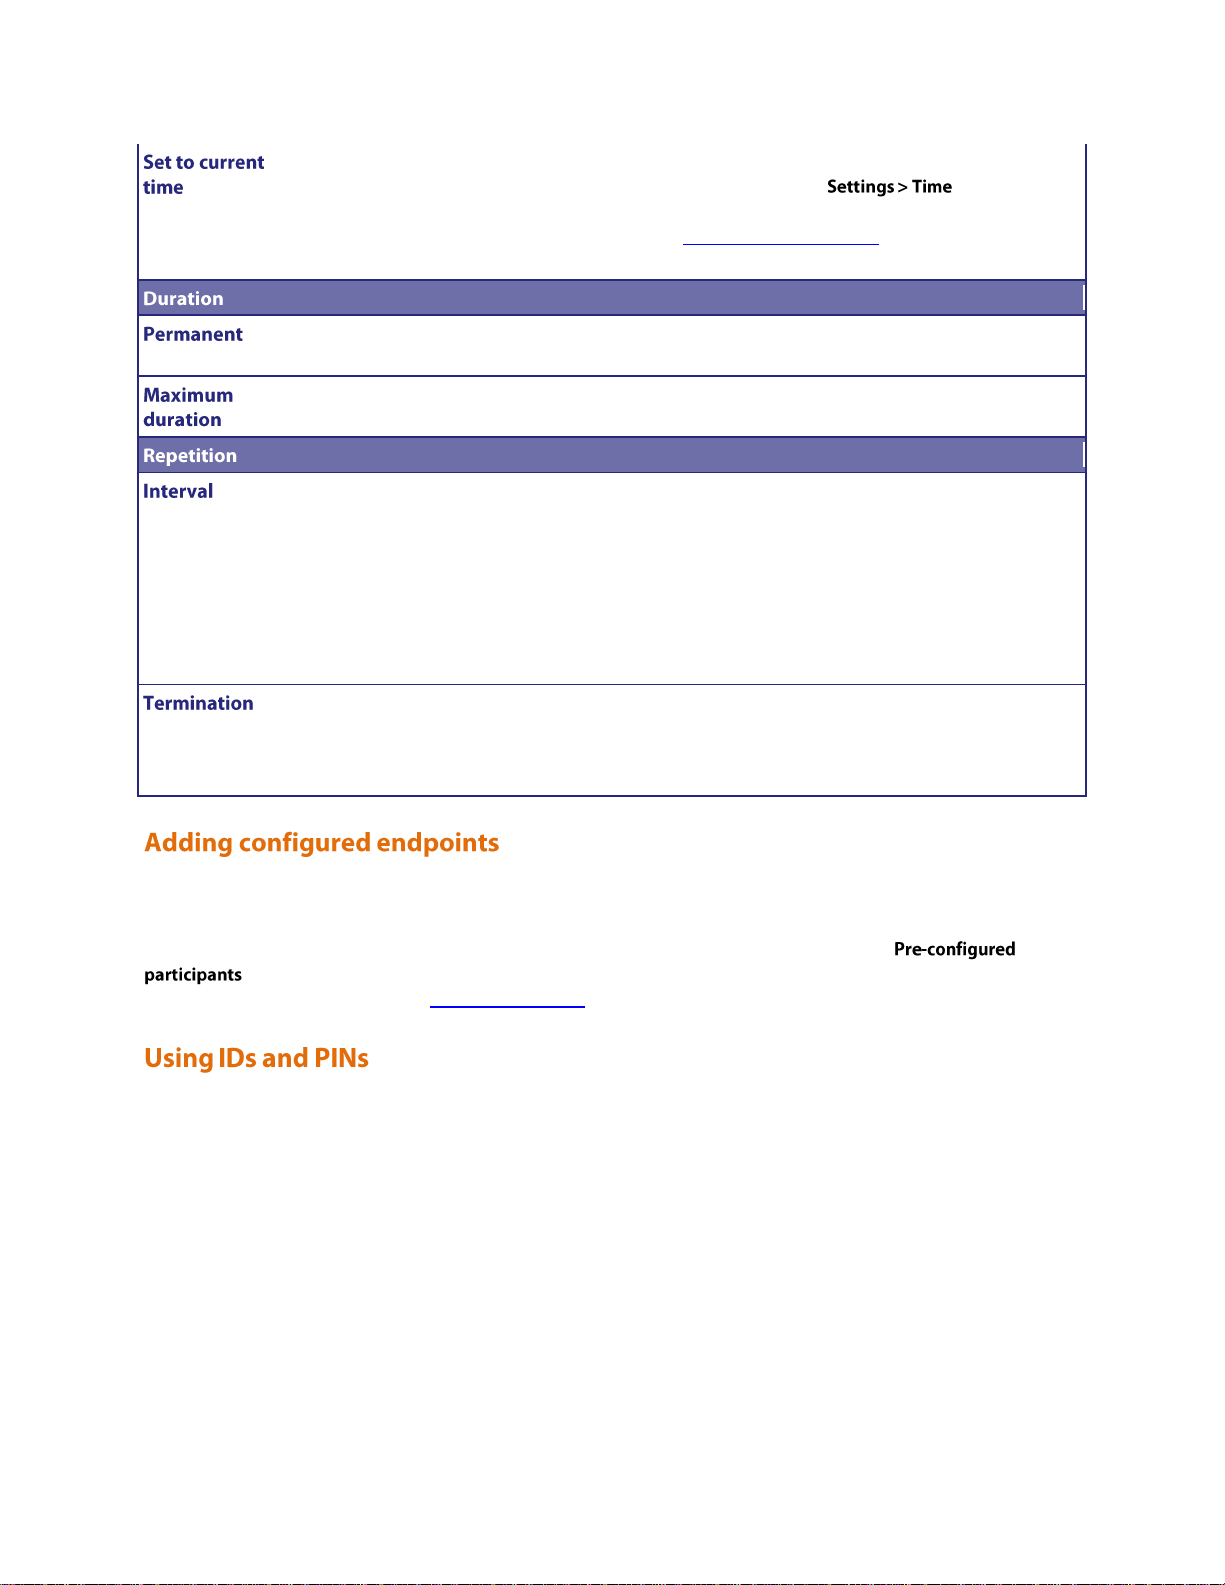
Sets the conference start time to the current time
on the MCU.
The current time on the MCU is determined by
the settings in the page, which
can only be modified by the administrator. See
Displaying general status for additional
information.
Allows you to retain a conference and its settings
for an infinite period of time.
Limits the duration of the conference for one
instance of the conference.
These fields are not available or necessary for
conferences set to permanent.
Which days and / or weeks the conference
repetitions will occur.
The repetitions will always start at the same time
of day: the conference's configured Start time (see
above), and will last for the same amount of time:
the configured Maximum duration.
The start date is taken into account when
determining when the first repetition should
occur. For instance, if the start date is a
Wednesday and the conference is scheduled to
repeat every Monday, Tuesday and Wednesday
then it will occur only on Wednesday in the first
week and on all three specified days in subsequent
weeks.
If a conference is set to repeat, its repetitions can
be configured to go on forever, stop after a
certain date, or to occur only a certain number of
times.
The first activation of a conference counts as a
"repetition", so configuring a conference to
repeat but terminate after 1 repetition is
equivalent to it not repeating at all.
You can choose to pre-configure endpoints to be part of a conference. These endpoints will be automatically invited
into the conference by the MCU. This is useful if you regularly invite the same participants into a conference. To
select which previously configured endpoints will be pre-configured for this conference, press
. (This button may also show a number in parentheses to indicate the number of participants that are
currently pre-configured). Refer to Adding participants for more details.
There are two types of conference participant: chairperson and guest. IDs and PINs allow participants to connect to
conferences as the correct participant type.
Chairperson participants use Numeric ID and optionally, PIN; guest participants use Guest numeric ID and optionally,
Guest PIN.
A conference will not begin until the first chairperson joins. This means that guests will see a black screen/hear
silence with on screen text 'Waiting for conference chairperson' and an audio prompt after five seconds and then every
minute thereafter. Streaming viewers will see a black screen/hear silence although mark-up and text chat will work.
setting). The two options are:
You can control the behavior when the last chairperson leaves the conference (that is the When only guests remain
33
Page 36
all participants are disconnected (default)
all participants may continue the conference until the last one disconnects (take no action)
If you set both Numeric ID and PIN, you must set either:
both Guest numeric ID and Guest PIN
or
neither Guest numeric ID nor Guest PIN
If you use a Guest PIN, you must use a PIN. If you use a Guest numeric ID, you must use a Numeric ID.
Note that for a conference Numeric ID and Guest numeric ID can be the same only if the two PINs are different;
likewise, both PINs can be the same if the IDs are different.
Note that participants dragged and dropped into a conference on the web interface will be chairperson participants.
Where no IDs or PINs are configured for a conference, all participants will be chairpersons regardless of how they
join.
Both Numeric ID and Guest numeric ID can be registered with an H.323 gatekeeper and/or SIP registrar to enable
participants to dial in to conferences directly and as the correct participant type. The Numeric ID registration setting
applies to both IDs.
Audio-only participants can be guest or chairperson participants by connecting to a conference using either a Guest or
Chairperson ID. In the case of an audio-only guest, if no chairperson has yet joined the conference, they will hear an
audio prompt informing them of that. The conference will start when the first chairperson joins.
34
Page 37

Each scheduled conference (i.e. conferences that are configured via the web interface with a start time and,
Users with these privilege levels are able to create and own conferences, and are
able to exercise full control of all conferences.
Users with these privilege levels are able to create and own conferences. They
have full control of conferences they own, and limited control of conferences
owned by other users.
Users with these privilege levels are able to create and own conferences. They
have full control of conferences they own, but no control of conferences owned
by other users.
Users with these privilege levels are not able to own conferences or change any
conference's configuration.
optionally, a duration and repetition) has an associated owner. This owner is the ID of a configured user, and normally
corresponds to the user who scheduled the conference.
Conference ownership affects only web interface control of conferences - in particular, it plays no part in validating
video conferencing endpoints' attempts to join conferences when they connect to the MCU via H.323. Restricting
conference entry in this situation is accomplished via conference (or auto attendant) PINs, as before.
The actual implications of conference ownership depend on the privilege of the user; specifically:
35
Page 38
As described above, a user privilege level confers a certain level of control over a conference, with that level of
This level of control permits the following operations:
With full conference control, a user is able to disconnect participants, connect
new participants to the conference, and end the conference whenever they want
to.
A user with full conference control can view and modify any aspect of the
conference's configuration. This includes the start time, end time, or repetition
characteristics, whether streaming is enabled, and which endpoints are preconfigured as participants.
When the conference is in progress, a user with full control is permitted to send a
text message to all connected participants' video displays and change the
Conference custom layout.
Additionally, full control includes all of the operations covered by limited control,
detailed below.
This level of control permits the following operations:
The participant list shows the names of the endpoints currently connected to the
conference, a summary of that endpoint's status and, if they are a video
participant, a thumbnail preview image of the video stream they are supplying.
Thumbnail previews are shown by default, but you can configure the user
interface not to show them. The setting that controls this is the Show video
thumbnail images option on the page. Note that the MCU
will not show thumbnail previews on the participant list page if encryption is
required for a conference. However, thumbnail previews will be shown for
conferences where encryption is optional and there are encrypted participants.
Via the participant list, it is also possible to mute (or stop muting) individual
endpoints' audio, change the conference's "important" participant, and enable or
disable the participants' ability to affect their own layouts via Far-End Camera
Control or DTMF tones.
This includes being able to choose what view layout (or family) is used for
constructing the conference view being sent to a participant, changing the
control possibly depending on whether that user is the conference owner or not. These conference control levels
have the following meaning:
36
Page 39

Participant custom layout, and whether to send widescreen or standard format
video to that endpoint.
The web interface can be used to send control commands (e.g. pan and tilt) to a
remote participant's camera.
Waveforms of audio channels being sent to, and received from, the participant
can be viewed, audio gain applied, and participant audio can be muted if required.
Textual messages can be sent to an individual participant, and will appear on their
displays.
This allows details of the media streams being sent to, and received from,
participants to be viewed, plus endpoint-specific characteristics to be examined.
This means that none of the above operations are possible. Depending on the
specific privilege level, either the list of scheduled conferences will not be shown
to the user, or the list will be shown but conferences over which the user has no
control will be presented as names rather than hyperlinks.
A user whose privilege level is either conference creation and full control or administrator is also able to change the owner
of a conference. A conference owner can be changed to either a user with conference creation rights or to "none",
signifying that no user should be considered the owner of that conference. Also, when scheduling new conferences,
users with these privileges are able to choose which owner is initially associated with the conference.
If a user account is deleted, any conferences owned by that user have their owner reset to "none".
37
Page 40

The MCU is able, if required, to allocate its available media ports in advance to specific conferences. This means that
it is able to guarantee that a certain number of participants will be able to join that conference, irrespective of how
many other people are using the MCU for other conferences at the same time.
There are three types of media ports available on the MCU, , , and
.
For information about the number and type of ports provided by each MCU model, refer to MCU port matrix.
The term video port refers to a port that can be used by a video-conferencing endpoint for a call. Thus, a video port
includes both video audio streams (bidirectionally) and so the number of video ports available represents the
number of "normal" video calls that the MCU is able to maintain simultaneously.
In general, each endpoint in a conference is able to use either a video port or an audio-only port, though normally the
MCU will assign video ports to video-capable devices and audio-only ports to audio-only devices.
If a video-capable device joins a conference which has just audio-only ports available, the MCU will assign it an audioonly port – that participant will be able to listen to other people and contribute their own audio to the conference but
the MCU will not transmit video to it (and will not use any video received from it). If an audio-only device such as a
simple telephone joins a conference which has just video ports available, the MCU will assign it a video port, which
includes audio capability. The video capability of that allocation will not be used, but the audio device will be able to
participate as normal in the conference. The exception to this is VNC - because this is a video-only protocol, the
MCU does not permit VNC connections to use audio-only ports.
Streaming a conference requires use of a or a . Where streaming and
content channel ports are provided, streaming viewers and conferences' content channel (H.239 or BFCP) video
allocations will use the streaming and content channel ports rather than the available video ports; where streaming
and content channel ports are not provided, streaming viewers and content channel allocations will use available
video ports.
If a streaming and content channel port or a video port is unavailable (or not allocated in advance when the MCU is in
Reserved mode), it will not be possible to stream that conference. If a video port has been allocated for streaming a
conference, any number of streaming viewers will be able to view that conference via streaming, at any combination
of available bit rates.
The total number of media ports available depends on the MCU model; refer to the product datasheets available on
the web site, or to MCU port matrix for more information.
38
Page 41

How MCU media ports are allocated, and which options and settings are available, is controlled by the Media port
reservation setting on the Conference settings page.
This is the mode that the unit runs in when the Media port reservation setting is configured as , and is the mode
that the MCU uses by default. With this scheme, you can specify a maximum value for the number of video and
audio-only ports each conference is allowed to use on the Conference configuration page. These limits are optional,
and by default there is no configured limit.
The configured limits are strictly maximum values; in particular, setting such a limit does not guarantee that that many
participants will be able to join the conference. It is perfectly possible to set these values such that the sum of the
configured limits across all active conferences exceeds the total number of ports available on the MCU.
This is the mode that the unit runs in when the Media port reservation setting is configured as . With this
scheme, each conference must be configured with a number of video ports to reserve and a number of audio-only
ports to reserve. These values differ from the maximum port values set in Unreserved mode in a number of ways:
As well as being maximum values (i.e. enforcing limits on the number of conference participants), port
reservation values also guarantee that that many endpoints are able to participate in the conference.
In unreserved mode, it is not necessary to specify a number of video or audio-only ports for a conference. In
reserved mode, however, every conference must have configured reservations for both video and audio-only
ports.
Port reservations guarantee that a certain number of participants will be able to join a conference; because of
this, the MCU will not permit these reservations to be configured such that the total number of reserved
ports at any given time exceeds the total number of ports available. See Clashing reservations for additional
information.
In order to honor configured port reservations, the MCU must ensure that at any given time the number of reserved
ports does not exceed the total media capacity. This entails some level of clash detection when conferences are
scheduled or their configuration changed.
Two conferences are considered to clash if they can ever be active simultaneously. When validating a conference
schedule, the MCU looks at the maximum number of ports reserved by other conferences which can be active at the
same time, and checks that the number of ports requested by the conference being added or changed is guaranteed to
be available. If, for instance, the MCU has 20 video ports available in total, it will not be possible to set up two
conferences which require 15 video ports each if they are scheduled such that they ever overlap.
In the simple case of conferences which start at specific times and end at specific times (or, indeed, are permanent), it
is easy to see whether they clash. The more complex cases involve repetition, and it is important to bear in mind that
39
Page 42
port reservations are only permitted when the MCU can guarantee them for repetition of a conference. As an
example, a conference scheduled to run from 08:00 to 10:00 on the second Monday of each month will be deemed to
clash with a conference configured to run from 09:00 to 09:30 every Monday, even though the former will only really
clash with the latter every fourth or fifth week.
In general, to make best use of the available MCU media ports, conferences should not be scheduled for longer than
they are needed, and repetitions should be limited, either by end date or number, wherever possible.
Because port reservations are mandatory in every active conference must have configured values for
the number of video ports and the number of audio-only ports to reserve for it. In turn this means that every active
conference must be configured, and therefore ad hoc conferences are not permitted when in .
This affects the operation of the MCU in the following ways:
In reserved mode, the Create new conference option will not be shown on video auto attendant menus,
even for auto attendants configured to display this option.
When configuring new or existing auto attendants via the web interface, the Creation of new conferences
parameter will not be available.
This setting on the Conference settings page also offers a Create new conference option. This is not available in
reserved mode and becomes equivalent to the Disconnect caller option.
If a participant calls in to the MCU and connects to an auto attendant, the MCU does not know which conference
they will join until they make a selection from the auto attendant menu.
In Unreserved mode, the auto attendant connection allocates a media port from those not currently in use. If all of
the media ports are in use, the endpoint's connection will be dropped by the MCU.
In Reserved mode, the auto attendant connection effectively "borrows" a media port from those not currently in use.
However, this borrowed media port has a lower priority than a media port used by a conference participant, and if
the auto attendant connection "borrows" the last remaining media port, then that connection will be dropped if
another endpoint connects directly to a conference and requires a reserved media port.
In general, changing port reservation mode when there are active connections is not recommended. The effects of
changing mode include, but are not necessarily limited to:
Any ad hoc conferences in progress will be destroyed when changing to port reservation mode and their
participants dropped because ad hoc conferences are not permitted in port reservation mode.
Participants in a scheduled conference may be disconnected. For each conference, the maximum port usage
values (for unreserved mode) and the ports to reserve (for reserved mode) are configured and stored
separately. Therefore when changing port reservation mode, it is possible that there are more active
participants than allowed in the particular mode. In this case, participants are disconnected to reduce the
number to that allowed.
40
Page 43
The Codian MCU supports an additional video channel known as the content channel for each conference. This feature
encompasses:
H.239 video streams sent from the MCU to viewing H.323 endpoints
Sourcing the content channel from a H.323 endpoint's H.239 video stream, a SIP endpoint supporting
content using BFCP, or a VNC connection
Showing the content as part of the main video channel, where an endpoint cannot, for whatever reason,
receive the content channel as an additional video channel. That is, the participant will see the content as a
pane in the conference layout.
Streaming the content channel to users' desktop machines as a pane in the conference view
Streaming the content channel to users' desktop machines as a separate window (where markup and text
chat can also be used)
Allowing graphical and textual "markup" of the content channel
(*)
(*)
Text chat between conference participants
(*)
- these features require the web conferencing feature key.
The H.239 protocol allow the MCU to support an additional video stream to or from each connected endpoint.
Therefore, there are potentially three media streams between each endpoint and the MCU: audio, main video and
content video.
SIP endpoints will always receive the content as part of the main video channel. That is, SIP endpoints will not receive
the content channel as a separate video channel, but will see the content as a pane in the main video channel.
The main video is the normal multi-pane conference view showing participants' video streams composed within the
selected layout. The differences between the content channel video and the main video are:
Each participant in a conference can normally select their own individual main video layout (e.g. a 2 x 2 grid
of other participants, one large focused pane plus eight smaller panes) and they are free to change this layout
as many times as desired while they are connected to the conference.
By comparison the content channel video always shows just a single video stream, "full screen", and each
viewing endpoint will see the same stream. The stream which constitutes the content channel can change any
number of times during the conference, but there can be at most one contributing stream at any given
moment.
Each participant's main video stream is encoded independently; this means that each endpoint can be
receiving its main video stream at a different bit rate, codec, or resolution to that being sent to other
participants.
However, there is a single content video stream per-conference: the MCU sends the same bit rate and
resolution to all endpoints receiving content. The bit rate and resolution used is chosen to maximize the
number of viewers - for instance the resolution might be reduced if a new endpoint joins the conference and
its content receive capabilities are more limited than those of the other participants. Note that in conferences
41
Page 44
that use encryption, the MCU can send encrypted and unencrypted content to different participants in the
same conference (albeit with the same encryption key for every participant receiving encrypted content).
The range of bit rates, resolutions and frame rates available to the MCU for sending the content channel via
H.239 to H.323 video conferencing endpoints is potentially as wide as that for the main video channel.
However, in general, the main video channel is used for motion video (i.e. high frame rate streams) and the
content channel for less dynamic video such as an accompanying presentation - typically high resolution, low
frame rate.
However, the MCU allows flexibility in terms of nominating which of the available streams forms the
content channel, as well as allowing control over which endpoints are permitted to start contributing
content video.
For the main video channel, a video conferencing endpoint would normally be both contributing (sending) a
video stream to the MCU and receiving a video stream from it.
However the content channel works differently in that an endpoint can either be sending content video or
receiving content video, but not both. A given endpoint may switch between being the contributor and a
viewer during the conference, but it will never be both simultaneously.
For H.323 endpoints, depending on the specific endpoint and how it is configured, the content video stream may be
displayed on a separate screen, or the endpoint may show the main video and the content video streams side by side
on the same screen.
Irrespective of its content receive capability, an endpoint may or may not be able to contribute the content channel typically, for this to be possible it will either need a second camera or some other video input such as a VCR or
"video in" connection.
Some H.323 endpoints may have no support for the H.239 protocol and the MCU does not send the content channel
video to SIP endpoints. However, it is still possible for such endpoints to display the content channel - the MCU is
able to show the content channel within a normal view pane in the same way as it displays other conference
participants. This ability is controlled by the unit-wide Display content in normal video channel setting (see Configuring
content settings).
As described above, a conference's content channel as sent to the set of receiving endpoints has a single source. There
are several possible content channel sources:
This is the most conventional content channel behavior - a H.323 conference participant opens a H.239
channel to the MCU and contributes a video stream, such as that supplied by a second camera or an attached
PC.
Because there can be at most one content channel source, the H.323 endpoint needs to make a request to
the MCU, and have that request accepted, before actual content channel contribution can start. If the
conference already has an active content channel (for example, another endpoint is contributing H.239
video), the new request will be rejected by the MCU - it will be necessary to wait for the active contributor
to cease sending H.239 video before the new endpoint is able to start.
BFCP (Binary Floor Control Protocol) is a protocol that allows for an additional video channel (known as the
42
Page 45

content channel) alongside the main video channel in a video-conferencing call that uses SIP. A SIP
conference participant opens a BFCP channel to the MCU and contributes a video stream, such as that
supplied by a second camera or an attached PC.
Because there can be at most one content channel source, the SIP endpoint needs to make a request to the
MCU, and have that request accepted, before actual content channel contribution can start. If the
conference already has an active content channel (for example, another endpoint is contributing content
video), the new request will be rejected by the MCU - it will be necessary to wait for the active contributor
to cease sending content video before the new endpoint is able to start. Note that the MCU does not send
the content channel to SIP endpoints as a separate video channel, but can show the content channel within a
normal view pane in the same way as it displays other conference participants. This ability is controlled by
the unit-wide Display content in normal video channel setting (see Configuring content settings).
A VNC connection is one where the MCU has made a connection to a remote device (normally a desktop
PC) and is receiving a video stream from that device - this is typically used for including a slide-based
presentation in a conference.
By default, if a conference is configured with content channel support and a VNC "participant" is added to
that conference, the MCU will attempt to use the VNC video as the content channel. This is normally the
desired behavior; however, there are a couple of caveats:
o If there is a video conferencing endpoint actively contributing content video then it will not be
possible to immediately switch over to using the VNC video instead - the switch over will occur
when the participant closes its content channel.
o With more than one active VNC connection in a conference, the first will be used as the content
channel source, and subsequent connections will be shown in main video layout panes, just as if the
conference had no content channel facility. If the currently active VNC connection is either
disconnected or its use as the content channel disabled, another VNC video stream will start to be
used as the content channel.
It is also possible for the MCU to use a endpoint's main video channel as the conference's content channel.
This has the same caveats as the use of a VNC connection for the content channel, as described above.
Whichever of the content channel sources mentioned above is active, the MCU provides the facility for users
to add markup to the video channel. This markup consists of an additional video overlay on to which graphics
may be drawn and text added - content channel viewers see the content channel source video plus this
overlay. The overlay can be cleared later leaving the source video unaltered.
At the unit-wide level, the MCU can be configured to disallow the use of conference content channels completely. If
the content channel facility is enabled, the MCU can be separately configured not to allow textual or graphical
markup of the content, and whether to make text chat visible to connected endpoints.
You can choose to enable encryption on the MCU. When encryption is used, the content channel will be encrypted.
For more information on these configuration parameters, see Configuring content settings and Configuring
encryption settings.
43
Page 46
Assuming that content is enabled on the MCU unit-wide, each scheduled conference can be independently configured
to allow content channel operations or not. If enabled, this has an impact on the conference's port usage - if disabled,
then all attempts by participants in that conference to open a content channel to the MCU will be unsuccessful.
If the MCU is configured to allow encryption, each individual conference can be configured to either require
encryption or to optionally use encryption. The MCU can send either encrypted or unencrypted content to different
participants in a conference depending on the capabilities of those participants' endpoints.
For more information on the conference configuration parameters relevant to the content channel, see Adding and
updating conferences.
Content contribution refers to the ability of video conferencing devices to contribute the content channel video for a
conference via the mechanism of opening a separate video channel, distinct from its main video stream. Specifically,
this section does not deal with the use of content by the MCU when sending content channels to viewing devices or
the use of other protocols such as VNC to supply the content channel video for a conference.
For a conference configured with content channel video enabled, each endpoint in that conference is either permitted
or prohibited from being able to contribute content video. H.239 is the protocol used by H.323 video conferencing
endpoints to supply or receive content channel video; BFCP is the protocol used by SIP video conferencing endpoints
to supply content channel video. Other content channel source configurations, such as the use of a VNC connection,
do not depend on any H.239 or BFCP contribution parameters.
Remember that what is termed Content contribution is more precisely described as the ability to contributing
content channel video via H.239/BFCP. The nature of the H.239 and BFCP protocols used between the MCU and
endpoints is such that once an endpoint has successfully become the content source for a conference, the MCU is not
then able to force that endpoint to stop contributing the content channel video.
While an endpoint is supplying the content channel for a conference, it is considered to be holding the virtual content
token for the conference - this token must be relinquished before either another endpoint can start contributing video
via H.239 or BFCP or a content channel source such as VNC become active. This token is normally released via a
specific endpoint operation (e.g. a "stop content " option) or by that endpoint leaving the conference.
By default, participants' ability to contribute content video (technically, as above, to contributing H.239 or
BFCP video) is determined by the per-conference Content contribution from endpoints setting ( >
).
The per-conference default Content contribution from endpoints setting can be overridden by individual endpoints'
configuration. If such an endpoint's Content contribution setting is <use conference default> then the endpoint's ability to
contribute content channel video will be determined initially from the conference setting. If the endpoint setting is
<enabled> or <disabled> then this will override the conference setting and that endpoint will either always be
prevented from using content, or always permitted (assuming the conference of which it is part is configured with
content channel support). As well as being part of each endpoint's configuration, the Content contribution setting can
also be specified when calling out to an endpoint by address.
44
Page 47
Irrespective of per-conference or per-endpoint configuration parameters, if a conference is configured to allow
content channel operations then it is possible to explicitly enable or disable individual conference participants' ability
to use content via the web browser interface (assuming a user login with full conference control).
To change the content contribution setting for an active conference participant via the web interface, first navigate to
that participant's page (go to and click the conference you want and then click on the name of
the participant whose settings you want to change). If the conference has content enabled and the endpoint in
question has content capabilities, you should be able to use one of the following controls:
allow participant to contribute content video
do not allow participant to contribute content video
If an endpoint's ability to contribute content video has been explicitly enabled or disabled via this mechanism, that
enablement or disablement will take precedence over any current or future conference or participant configuration,
even if the endpoint later moves to a different conference.
In addition to supporting the H.239 and BFCP protocols by which endpoints in a conference can supply the content
channel video, the MCU also allows a participant's main video channel to be used for the content stream. This is
essentially what happens by default for VNC connections in a conference configured to allow content channel video.
As detailed above, it is not possible to force an endpoint that has started to contribute content video to relinquish the
virtual token that it holds. Thus, if an endpoint's main video channel is configured to be the content channel source,
this will only take effect if no other endpoint is supplying the content channel video stream (whether by H.239,
BFCP, or through use of its main video stream).
To control the use of a participant's main video as the conference content channel source, these following controls are
displayed on the per-conference participant list (next to the preview image of the video stream to which they relate):
use this participant's main video stream as the content channel
(this is set by default for VNC connections)
stop using this participant's main video stream as the content channel
(revert to more conventional content channel behavior such as H.239)
If more than one participant's main video channel is configured to provide the content channel, then all but the active
(normally, first) one will be marked with the status:
You might also see this warning if there is more than one VNC connection in a conference, because, when
establishing a new VNC connection, the MCU will automatically configure its main (in fact, sole) video channel to be
used as the content channel source if possible. To choose between multiple potential main video channels as the
content source for the conference, ensure that you use the disablement control:
on all but the source you wish to use for this.
45
Page 48

As well as the content stream (used for sending to H.323 endpoints), the MCU also generates a Codian proprietary
format version of the content channel video which can be viewed in conjunction with PC-based video streaming. This
ensures that, if desired, all participants and viewers for a conference are able to access all of its associated media.
Content channel streaming also allows participants using H.323 video conferencing endpoints without H.239
capability, or SIP endpoints to view a high resolution version of the content channel. Content channel streaming also
provides some features not available via the H.239 protocol:
"Markup" is the overlaying of graphics and text onto the content channel video; this could be used, for instance, to
draw attention to a specific element of a presentation slide. Markup can only be performed through the content
channel streaming interface, and is accomplished via the simple mechanism of clicking and dragging with the mouse,
with extra controls for changing the drawing color or clearing the markup when its usefulness has passed.
Content channel markup also has the following characteristics:
All content streaming viewers have equal markup capabilities. This means that either all viewers are able to
perform markup on the content channel video (or clear it), or all are unable to do so - it is not possible to
restrict markup to just a subset of active viewers.
The video markup, although it can only be edited by streaming viewers, will be seen by content channel
streaming viewers, by participants connected via H.323 endpoints that are receiving the content channel,
and by any participants that are viewing the content as part of their main video.
Video markup is normally used as an overlay to content channel video as supplied by a H.239, BFCP, or
VNC connection. However, for a conference with content channel operations enabled, it is also possible to
form a content channel comprising just the markup applied to an otherwise blank video stream. This can be
accomplished simply by starting to stream the conference's content channel and performing the usual
markup operations on the (empty) content channel displayed. Adding markup to such a blank channel
"activates" it, and will cause a video channel to be opened to those H.323 conference endpoints which have
H.239 capabilities.
The ability of content channel streaming viewers to perform markup is governed by the unit-wide Markup of content
channel video setting on the page.
In parallel with, though in many senses independently of, content channel streaming, the MCU also provides a
mechanism for those streaming a conference's content channel to communicate with other conference participants via
text messages. Beneath the window showing the content channel video, streaming viewers are able to type messages
that will be sent to all other streaming viewers, as well as see messages that other users type.
In order that users contributing text messages can be identified, each content streaming viewer has an associated user
ID, and this ID is pre-pended to each message when it is sent out to other viewers' displays. If the content channel
streaming has been initiated via the streaming-only interface, each user is required to supply a Sign-in name before
streaming starts, and this sign-in is used as their text chat identifier. If streaming has been initiated via the Stream
control on the MCU conference list, the user's web interface login ID will be used as their text chat identifier.
46
Page 49
The text chat facility provided via web browser-based content streaming is two-way in that any content channel
streaming viewer is able to both contribute text and see all messages typed by other viewers. Although there is no
mechanism by which endpoints are able to contribute text chat messages, the MCU is able to display the most recent
text messages within endpoints' main video channels. This is intended to be of use when a presenter is connected to
an MCU conference via a video endpoint and wishes to field questions raised by (content channel) streaming viewers.
In this situation, the text typed by content channel streaming viewers is overlaid on the normal, multi-pane,
conference layout, though restricted to approximately the lowest 1/3 of the screen.
For streaming viewers to have the option of contributing and/or reading text messages, the View content channel
option must be selected. This option is one of the available to users when they select to
stream a conference.
The display of text chat in endpoints' views is governed by the unit-wide Content channel text chat option which is an
setting on the page. The text chat facility itself, and display of typed text to all
content channel streaming viewers' windows, cannot be disabled.
Some of the above content channel features require the MCU to have been configured with the
feature key. The following features are only available with the Web conferencing key:
Streaming the content channel to users' desktop machines as a separate window (rather than as a pane in the
conference view)
Markup of content channel video
Text chat
If the MCU is operating in reserved mode, enabling content for a conference does not use a video port; instead,
content uses one of the additional 'Streaming and content' ports provided by your MCU. A single 'Streaming and
content' port is needed for all content channel operations, irrespective of how many viewers there are; for example, a
conference involving five video endpoints (one of which is contributing a content stream and the other four viewing
it) will require five video ports and one 'Streaming and content' port - Video ports to reserve should be set to 5, and
Content channel video set to "Enabled" in this specific example.
In reserved mode, a conference with content enabled will require a 'Streaming and content' port for content
operations even if no current participants are actively making use of content.
For more information about the number and types of ports provided by your MCU, refer to MCU port matrix.
If the MCU is operating in unreserved mode, enabling content for a conference works in a similar way to streaming in
that it will require a port to be allocated when content channel operations are first attempted for that conference. For
instance, this could be when a participant opens a content channel or a user starts viewing the content channel via
their web browser. When the port is no longer needed for the conference's content channel (e.g. when the last
remaining participant disconnects) the port will be released for use by future participants or conferences.
47
Page 50

The streaming of the content channel is performed using the port allocated for content rather than the port allocated
for streaming. This means that it is possible to stream the content channel (for example, to use the video markup
feature) for conferences which do not have streaming enabled. Enabling both streaming and content for a conference
will mean that two additional ports will be required for that conference, over and above the video and audio-only
ports used by endpoints participating in that conference.
See port reservation for more information.
All of the above-mentioned features, for instance content video streams between the MCU and video conferencing
endpoints, markup of content channel video and text chat, are available for use with both scheduled and ad hoc
conferences.
However, whereas for scheduled conferences the availability of content is determined by a per-conference
configuration setting, for ad hoc conferences it is only possible to enable or disable content on a device-wide basis.
This is accomplished via the Content for ad hoc conferences option on the Content settings web page — if this is
"Enabled" then any ad hoc conference on the MCU may use content; if "Disabled" then none may do so.
In software versions prior to 1.4(1), it was not possible to use content channel features (including the H.239 protocol
between the MCU and H.323 video conferencing endpoints) with ad hoc conferences. It remains the case that ad hoc
conferences are not permitted when operating in reserved mode.
48
Page 51
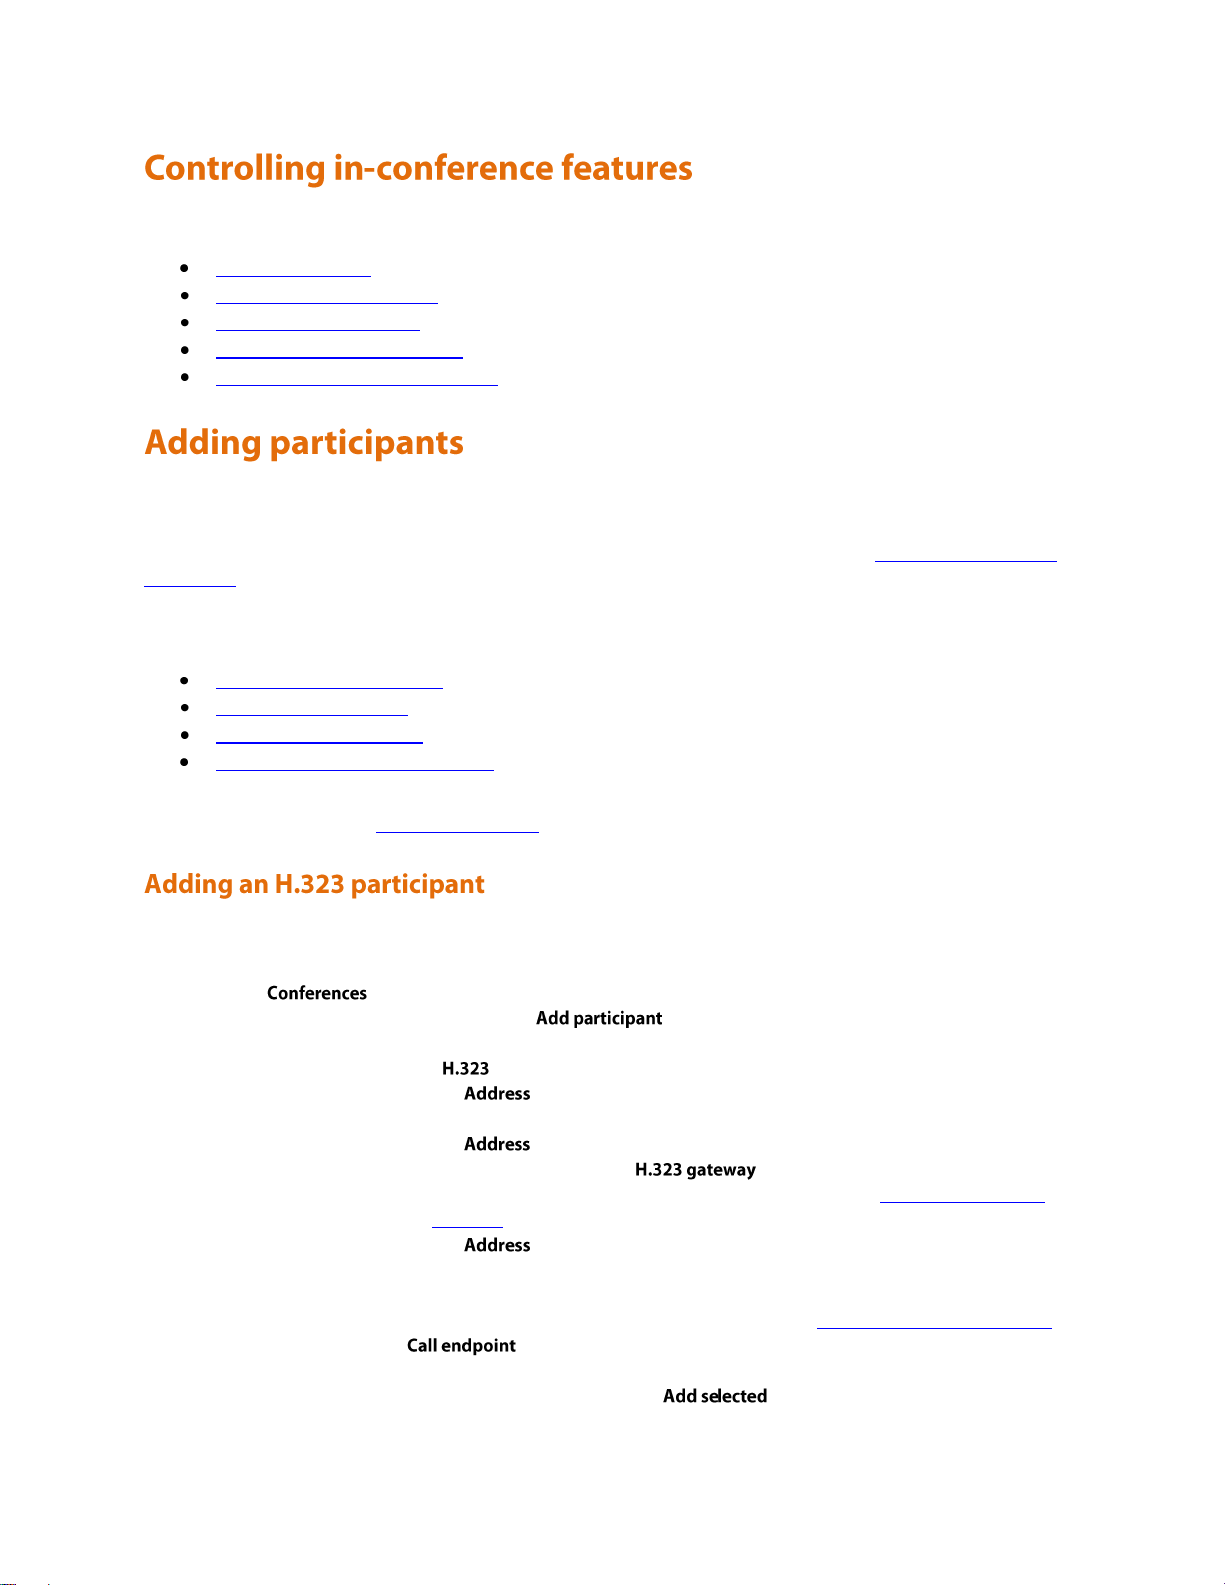
You can control many conference features from the MCU web browser:
Adding participants
Viewing the participants list
Customizing layout views
Displaying conference statistics
Sending messages to all participants
You can add a participant to a conference in two ways: either as a "one-off" participant in to an active conference now
or by adding their endpoint to the conference configuration, in which case the endpoint will be called every time the
conference occurs. Their endpoint must be pre-configured for you to be able to do this, see Adding pre-configured
participants.
To call an endpoint immediately you can either put in their endpoint details or select a pre-configured endpoint and
call out. Their endpoint can be an H.323, SIP or VNC endpoint. Refer to the first three links below for details:
Adding an H.323 participant
Adding a SIP participant
Adding a VNC participant
Adding pre-configured participants
Note that participants called by the MCU will have chairperson privileges. For more information about chairperson
and guest privileges, refer to Adding a conference.
To call a participant with an H.323 endpoint in to an active conference:
1. Go to to display the Conference List.
2. Click a Conference name and then click .
o To add a new endpoint (one that you have not added as a configured endpoint):
i. Select the radio button and do one of the following:
For , enter the IP address, E.164 number, or H.323 alias of the
participant's endpoint.
For , enter the number configured on an H.323 gateway for the
participant and select the from the drop down list. For more
information about configuring H.323 gateways, refer to Adding and updating
gateways
For , enter an H.323 gateway and E.164 number in the form <gateway
address>!<E.164 number>. This allows to you make a call via a H.323 gateway
that has not been pre-configured on the MCU.
ii. For information about other conference settings, refer to Configuring H.323 endpoints
iii. Click .
o To invite an existing (configured) H.323 endpoint, scroll down to the Endpoints section, select the
check box next to the endpoint name and click .
49
Page 52
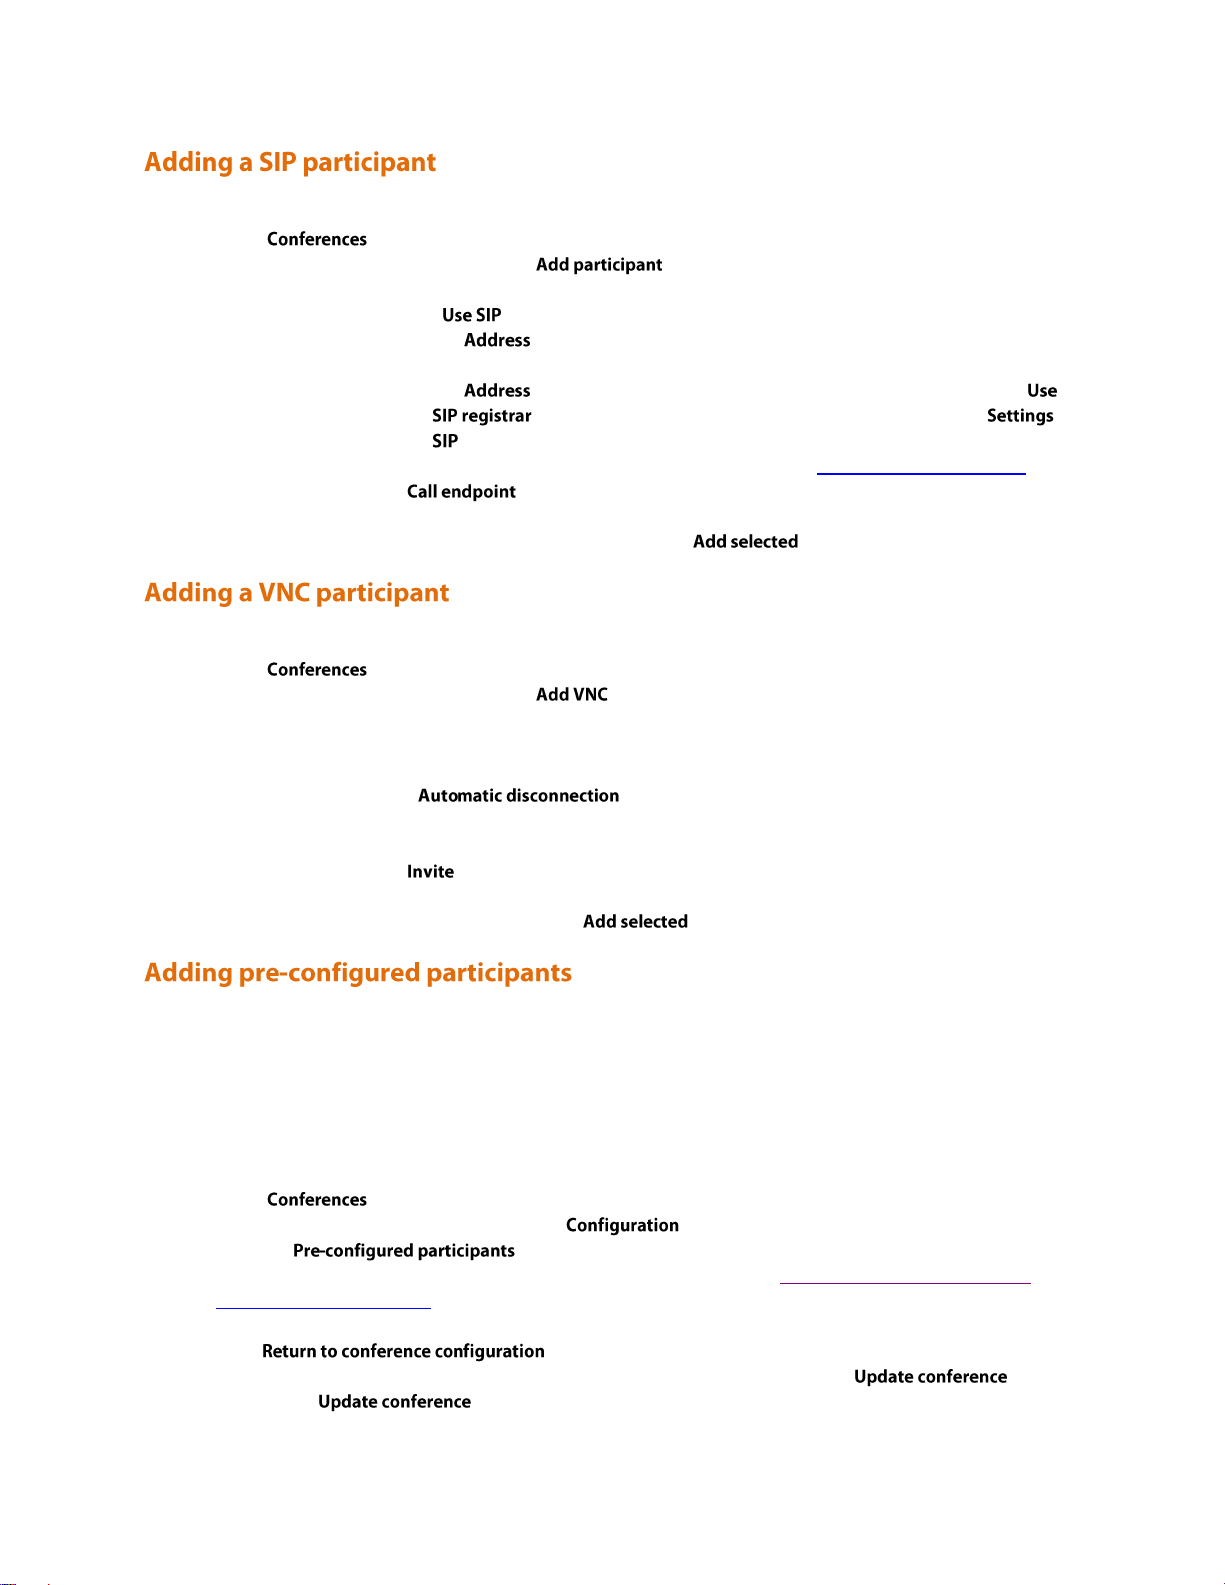
To call a participant with a SIP endpoint in to an active conference:
1. Go to to display the Conference List.
2. Click a Conference name and then click .
o To add an new endpoint (one that you have not added as a configured endpoint):
i. Select the radio button and do one of the following:
For , enter the IP address, or SIP URI of the participant's endpoint (in
the format 1234@codian.com)
For , enter the number registered with the SIP registrar and check
(ensuring that you have configured a SIP registrar on the >
page)
ii. For information about other conference settings, refer to Configuring SIP endpoints
iii. Click .
o To invite an existing (configured) SIP participant, scroll down to the Endpoints section, select the
check box next to the SIP endpoint name and click .
To call a VNC endpoint in to an active conference:
1. Go to to display the Conference List.
2. Click a Conference name and then click .
o To invite a new VNC endpoint:
i. Enter the host name or IP address of the VNC host and the VNC server password for the
computer you are adding.
ii. Enable if you want the participant to be disconnected from the
conference if another participant disconnects and only participants configured to be
automatically disconnected remain in the conference.
iii. Click .
o To invite an existing (configured) VNC endpoint, scroll down to the Endpoints section, click next
to the VNC endpoint name and click .
You can choose participants whose endpoints have been configured previously to be part of a scheduled conference.
These participants will be automatically invited into the conference by the MCU every time the conference runs. This
is useful if you regularly invite the same participants into a conference.
The MCU will attempt to call pre-configured endpoints every minute for the first 5 minutes and then every 5
minutes until 20 minutes into the conference, at which point it will stop trying.
To add previously configured endpoints to a conference:
1. Go to to display the Conference List.
2. Click a Conference name and then click the tab.
3. Click the button. The pre-configured participants page will be displayed. This
page lists all the endpoints that have been configured on the MCU (see Configuring an H.323 endpoint and
Configuring a SIP endpoint).
4. Select which endpoints you would like to add as pre-configured participants in this conference.
5. Press .
6. Make any other changes you require to the conference configuration, then press . (If you
do not press , you will lose the selections of configured endpoints made in the previous
steps.)
50
Page 53

You can select custom layouts to use for all conference participants. To use this option:
Whether a custom layout can be used for this
participant.
When you click a new layout from the Available
layouts, is automatically chosen with the
most recent layout selected.
New participants joining this conference will view
the conference with this custom layout rather
than one of the default views (see Customizing a
participant's layout display).
To force all participants to use this layout, click
.
If a participant has chosen to use a custom
conference layout (see Customizing a participant's
layout display), their view will automatically
update and switch to the new view.
Displays all the conference layouts that are
available. Click a layout to select it and make it
available.
You can only select one custom layout at a time.
1. Go to .
2. Click a Conference name and then click the tab.
3. Click on the layout you want to use from those shown in the Available layouts. There are different numbers of
panes and pane configurations to choose from.
The chosen layout is displayed enlarged to the left in the Conference custom layout section of the page and the
radio button is selected.
4. If you want to select the participants who appear in a pane manually rather than letting the MCU make the
most appropriate selection, click .
See Using pane placement below.
5. To have all participants see this layout when they join the conference click
.
6. If you also want all participants to see this view now, click .
The following table explains the details that display.
To have more control over which participant appears in which pane, you can use the Pane placement function. Pane
placement works on a per conference basis.
Pane placement works on the selected custom layout in the page - see Customizing layout
views. The chosen custom layout is shown with the panes numbered. The largest (and therefore most important)
panes have the lowest numbers. Because the largest number of panes in any custom layout is 20, there are twenty
drop down lists, one per pane. If the number of panes in the chosen layout is less than this, a gray line separates the
panes that are used from those that do not apply to this layout.
The first time you open the pane placement page for a conference all the panes are set to <default>. The MCU
decides which participant will appear in panes with this setting. See Understanding how participants display in layout
views for more information.
51
Page 54

For each pane you can select an alternative setting:
<blank>: no participant appears in this pane
<rolling>: this pane shows conference participants, automatically changing at the configured "Pane rolling
interval" frequency from the page. All participants contributing video are shown in
rolling panes except for any participants explicitly placed in other panes
<loudest speaker>: the participant who is speaking the loudest at any time appears in this pane
<content>: this pane is reserved for the content channel (see Ccontent channel video support). If the
content channel is not used in this conference, this pane will be blank.
<name>: the name of each pre-configured endpoint in this conference, and (if the conference is active) the
names of all active participants whose endpoints were not pre-configured is displayed in the lists. If you
select a specific participant (endpoint), that participant appears in this pane at all times.
To use pane placement:
1. Click .
2. For each pane that you want to control, select an entry from the drop down list.
3. For panes that you no longer want to control individually, select <default>
4. Click .
5. To return to the Custom layout page, click
When you use pane placement, bear in mind that:
Pane placement only applies to conference custom layouts. If they are disabled so is pane placement.
You can mix panes set to <default> with panes that have other settings
Any panes that you configure keep their setting even if you change the custom layout view. Therefore if you
configure all the panes in the 20 pane layout and then move to one with only five panes, panes 1 to 5 will
have the same settings as before. Panes 6 to 20 will also keep their settings, it is just that they are not used.
Therefore if you subsequently move to a layout with say 10 panes, all ten panes have their settings preconfigured.
This does mean that if you have participants who need to be seen at all times, you should configure them in
the lower numbered panes
You must set up pane placement for each conference that you want to use it with
You can set up pane placement before a conference starts and configure pre-configured endpoints in to
particular panes. However you can only configure active participants whose endpoints are not preconfigured when the conference is running
Pane placement persists over conference repetitions. If you set pane placement once, the same placements
are ready to be used when the conference next repeats
If you select a particular participant for a pane and they are disconnected for any reason, that pane appears
blank
After you set up pane placement, you can still change the layout for individual participants - and they can
change their layout using the far end camera controls unless you disable this for each participant individually.
See Customizing a participant's layout display.
The left and right controls on a participant's far end camera control, used to select a focused participant,
have no effect when pane placement is in use
Potentially, when pane placement is in use, a participant may appear in two panes at the same time. This
happens for example if a pane is configured to show a particular participant and another pane is configured to
show the loudest speaker; each time that participant is the loudest speaker, he will appear in both panes.
52
Page 55

There is a setting on the MCU's page to control this behavior called Loudest speaker
pane placement behavior
53
Page 56

When the conference started.
When the conference will complete. This will be the time at which the maximum duration of
the conference will have elapsed. This setting displays as <permanent> if it has been
configured to last forever.
The duration of this conference.
The status of a conference with respect to its H.323 gatekeeper and/or SIP registrations. The
possible states are:
This conference is not configured to be registered with a gatekeeper or SIP registrar;
because of this, there is no applicable registration status to show.
The conference has been registered successfully with the gatekeeper or SIP registrar
and can be contacted using the number indicated.
This conference is in the process of registering with the gatekeeper or SIP registrar.
The conference is in the process of unregistering with the gatekeeper or SIP
registrar. This might occur if:
o Gatekeeper registration has been turned off (either for that conference only
or for the entire MCU)
o The configured gatekeeper has just been changed and the MCU is in the
process of unregistering from the previous gatekeeper before registering its
conferences with the new one.
If the MCU fails to register a conference with the gatekeeper or SIP registrar, it
enters these states temporarily before re-attempting the registration.
This ID has been specifically configured to be registered with the gatekeeper or SIP
registrar, but some other configuration has overridden this, causing the registration
to not be attempted. This state might occur if either of the H.323 gatekeeper usage or
ID registration for scheduled conferences options on the page is set
to Disabled.
The conference is configured to register with a gatekeeper or SIP registrar, but has
not had a numeric identifier set.
You can display statistics about a conference and use the information to quickly see how many participants are
currently in the conference.
To access this option:
1. Go to .
2. Click a Conference name and then click the tab.
If the conference is active, statistics for that conference will be displayed. If the conference is completed only ―No
longer active‖ will be displayed.
Refer to the table below for information on interpreting this information.
54
Page 57

The current number of contributing audio/video participants.
The largest number of contributing audio/video participants who have been in the conference
at the same time.
The current number of contributing audio-only participants.
The largest number of contributing audio-only participants who have been in the conference
at the same time.
The current number of streaming participants watching the conference.
The largest number of streaming participants who have been watching the conference at the
same time.
55
Page 58
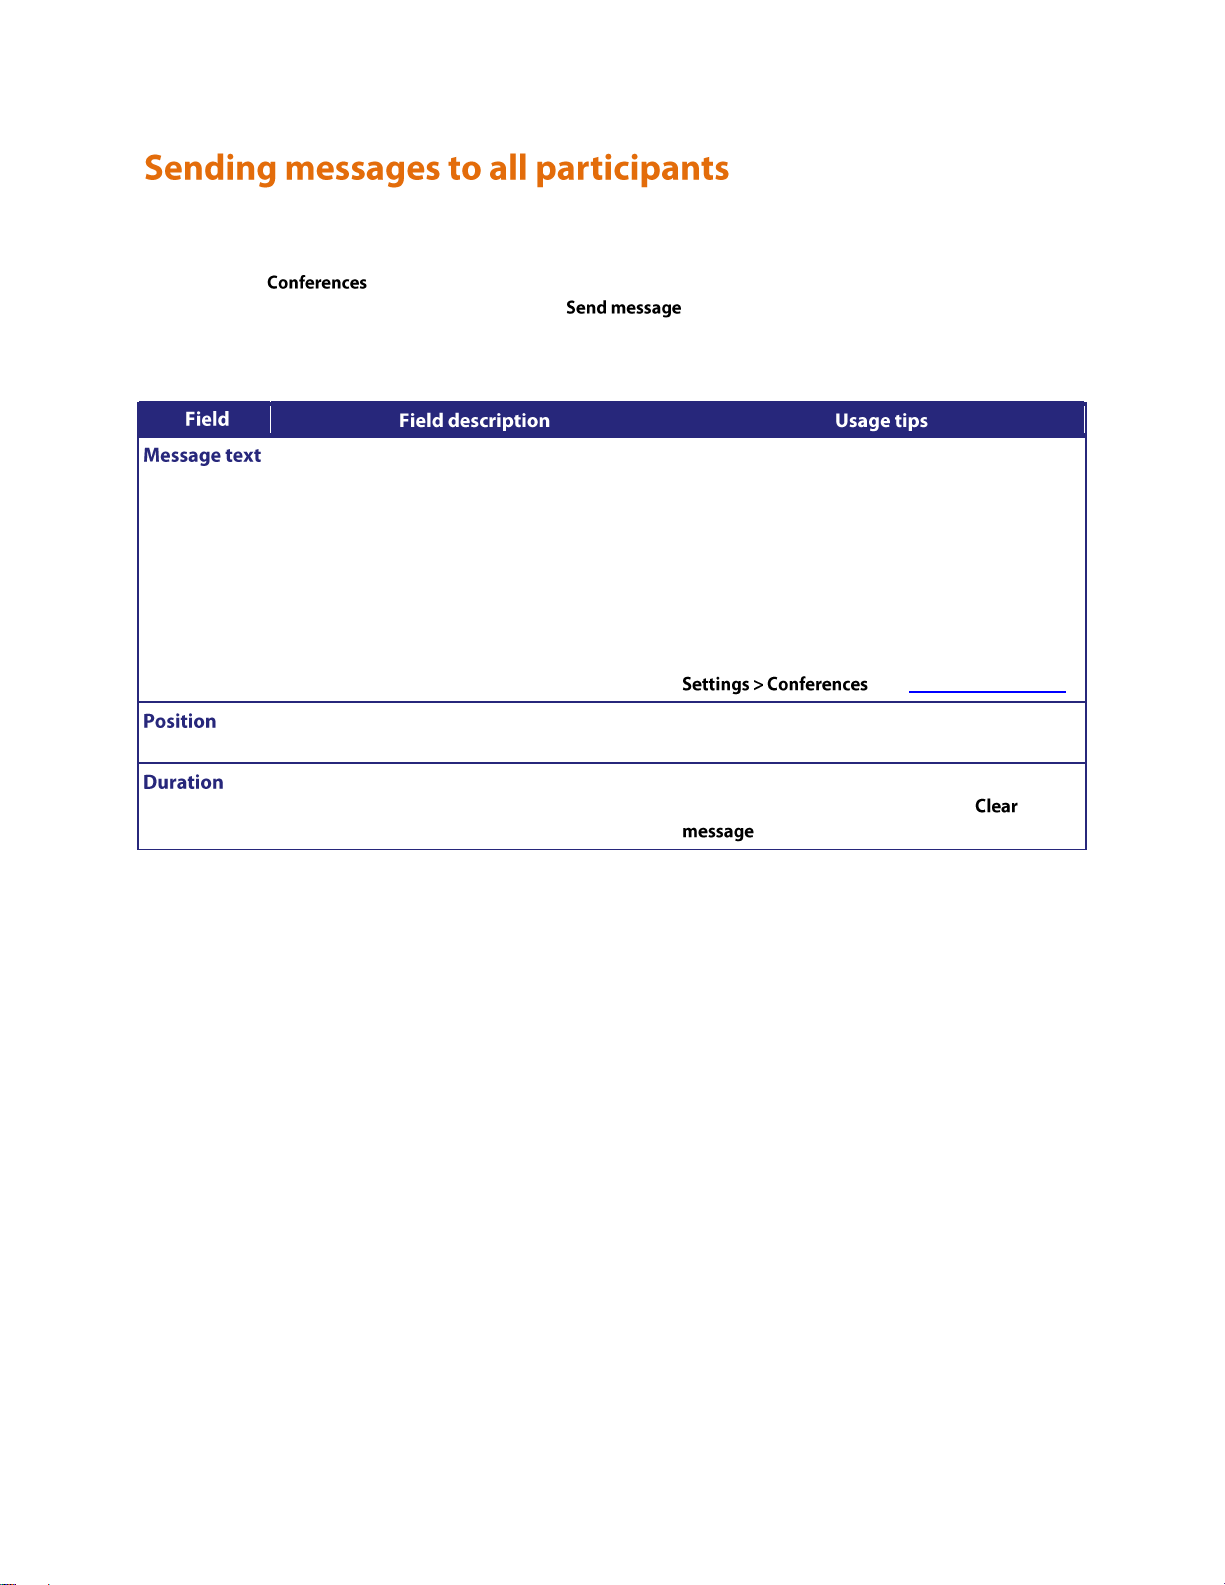
You can send messages to all participants in a conference simultaneously. To access this option:
Enter the message to send to all conference
participants.
Messages must be fewer than 256 characters, but
depending on the viewing screen, messages at the
higher-end of this limit might not display
properly. Therefore, consider limiting messages
to approximately 180 characters. Messages longer
than 256 characters will not be truncated; they
will not display at all.
You can disable this setting from
(see Conference settings).
The vertical position of the message on the
conference display.
Choose from the top, middle, or bottom of the
conference display.
How long the message appears on participants'
video screens.
The default setting is 30 seconds. To remove all
messages before they time out, click
.
1. Go to .
2. Click a Conference name and then click the tab.
This message appears overlaid on each participant's view, including participants viewing the conference via streaming.
56
Page 59

You can view detailed information about conference participants:
Viewing the conference participant list
Customizing a participant's layout display
Controlling the near-end camera
Managing a participant's audio signals
Creating a custom participant view
Displaying statistics for a participant
Sending messages to one participant
Displaying diagnostics for a participant
Moving a participant
The Participant list displays information about active and previous participants in the conference. To access this list,
go to and click a Conference name. This page explains the information available in the participant list.
Conference information
Lock conference
Active participants
All-participant controls
Previous participants
Pre-configured participants
Summary information
Watching the conference
Above the list of participants, certain information about the conference is displayed:
: If the conference is being recorded on an IP VCR, this message will
appear.
: Each conference may have either imposed limits on the maximum number of media ports it is
able to use, or a certain number of media ports reserved for its use. This section shows the video port and
audio-only port reservation or limit.
See the full description of Port reservation for additional information.
: Whether streaming is in use or not for this conference.
: Whether the content channel is in use or not for this conference.
: If you have the encryption feature key enabled, the encryption status of the conference will be
shown, which will either be not required or required.
57
Page 60
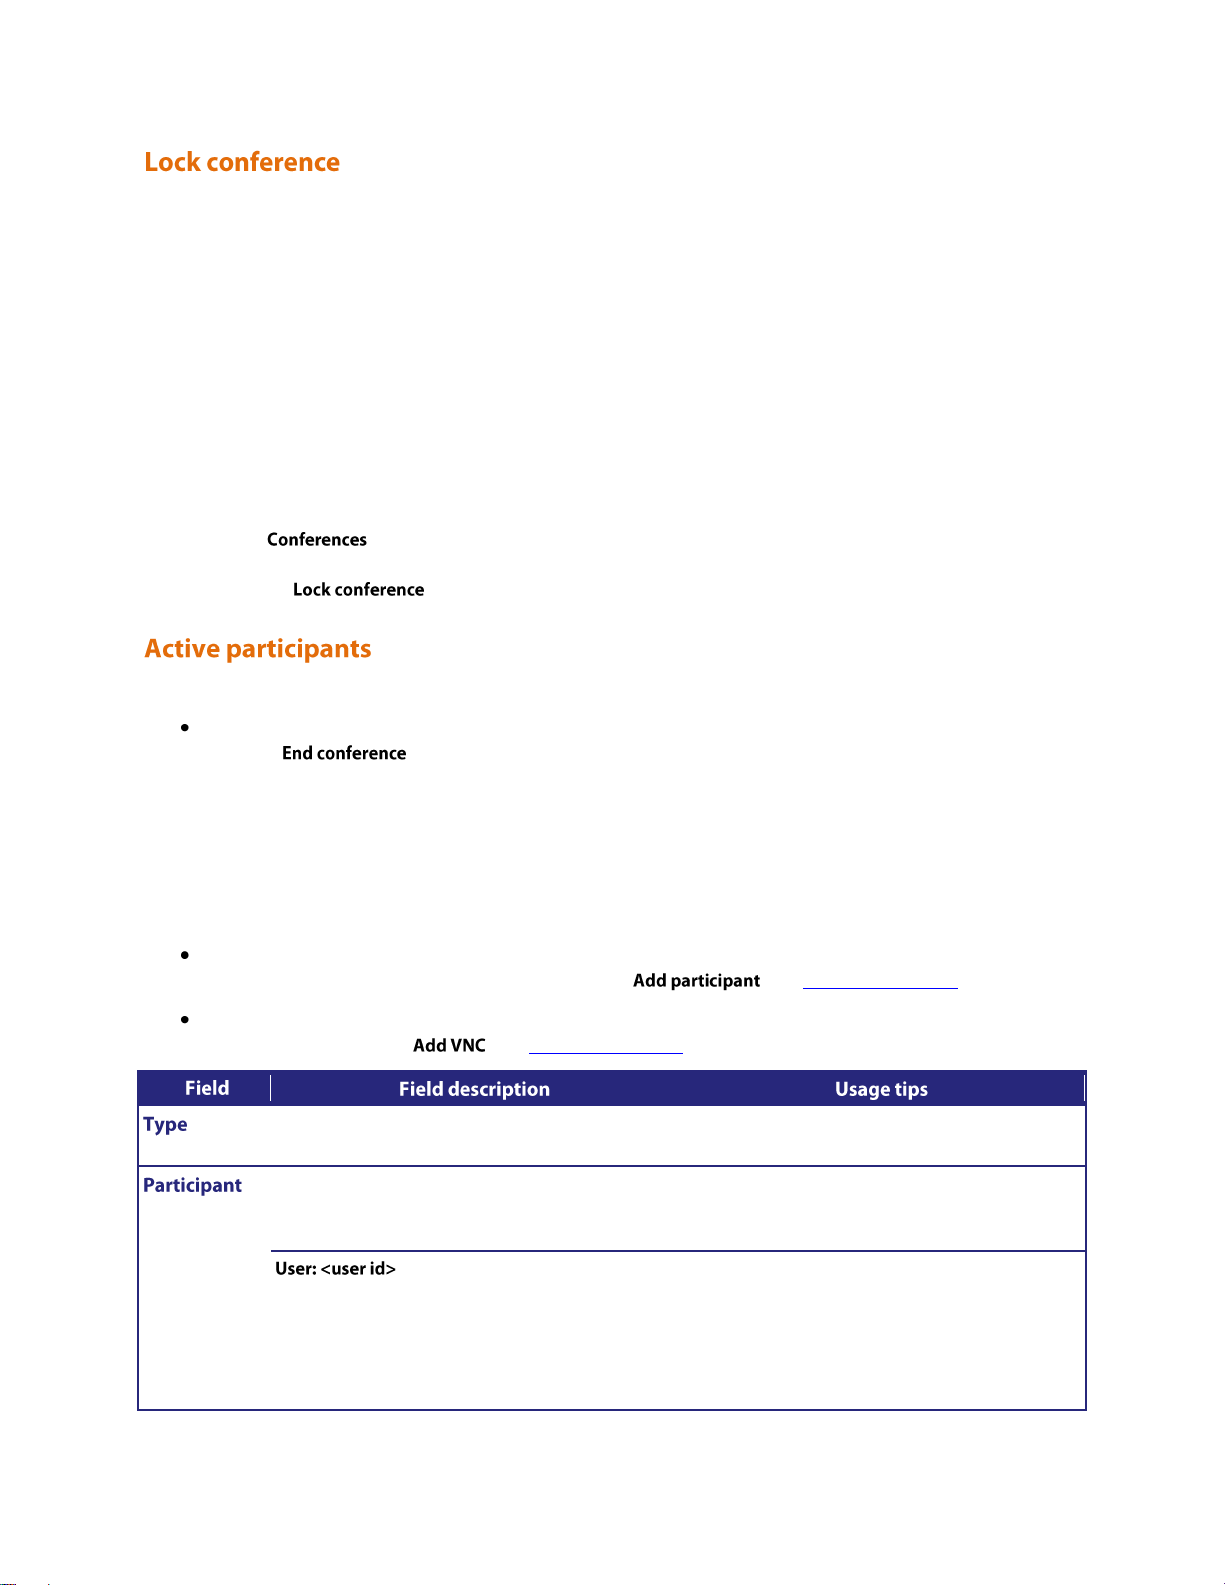
A locked conference is one where new participants cannot dial in and you cannot start to stream the conference.
Indicates whether the participant's endpoint is an
H.323, SIP, or VNC endpoint.
Displays the name of the endpoint.
The following may also be displayed:
If the participant has been resolved to a particular
configured user (for instance by matching the
participant's E.164 phone number against a
configured value), then the appropriate user id
will be shown here.
User names only display if the participant list is
being viewed by an administrator, because only
administrators have access to the configured user
database.
Existing participants and streaming viewers will maintain their connection to the conference. If a conference is
locked, an icon will indicate this on the auto attendant. The auto attendant will also display the text: 'This conference
is locked'.
Note that participants that are pre-configured via the API will be able to dial in to the conference even if it is locked.
This allows conferences to be restricted to specific participants (known as whitelisting).
Admin users and the conference owner can lock and unlock a conference. The conference will be automatically
unlocked by the MCU when the final participant leaves.
When a conference is locked, admin users and the conference owner will still be able to connect new endpoints and
disconnect participants.
To lock a conference:
1. Go to and click on the name of the conference you want to lock. The Conference's Participant
List displays.
2. Click the button in the top right-hand corner of the page.
Refer to the table below for details about the active participant list, which you can modify in the following ways:
You can end the conference, forcing all participants (including unicast streaming viewers) to be dropped, by
clicking .
For conferences that are "scheduled" rather than "ad hoc", ending the conference in this way causes any
configured repetition to be cancelled. The ended conference would move from the "Scheduled conferences"
list to the "Completed conferences" list. The configured duration of a completed conference reflects the
actual duration of the conference rather than its original configured duration. For example, if a conference
was scheduled to run from 09:00 until 10:00 (one hour) and the conference ended at 09:25, the configured
duration would be changed to 25 minutes.
You can add a new H.323 or SIP video conferencing endpoint to the conference (either creating a new
endpoint or by choosing an existing one) by clicking . See Adding participants.
You can add a new VNC endpoint to the conference (either by creating a new endpoint or by choosing an
existing one) by clicking . See Adding participants.
58
Page 61

This indicates that this participant corresponds to
a pre-defined endpoint. The <name> shown is
the endpoint's configured name.
Configured endpoint names only display if the
participant list is being viewed by a user whose
privilege level is administrator or conference creation
and full control; only users with these privilege
levels have access to the configured endpoint
database.
Makes participant important
Makes participant unimportant
When you make a participant "important", it sets
this participant as the focused participant. For
example, this participant is considered the
loudest participant even if they are not speaking.
Only one participant can be identified as
"important", and no participant is set to
"important" by default.
This option affects the layout views for the
conference and individual participants. See
Selecting a custom participant view and
Customizing layout views.
If the content channel is made "important", one
participant can still be important. On endpoints
that support content, the content channel will be
displayed in the content channel window and the
important participant will be given the focus in
the main video window. On endpoints that do
not support content, the important participant
will be ignored as the content channel will be
given the focus.
Prevents other participants from hearing
this participant (mute).
Allows other participants to hear this
participant's audio (stop muting).
Prevents others from seeing this
participant's video contribution (mute).
Allows others to see this participant's
video contribution (stop muting).
The presence of these controls is controlled by
the setting on the
page (refer to
Customizing the user interface).
Disconnects a participant from the
conference.
You can configure the MCU to require
confirmation when someone attempts to
disconnect an individual participant from a
conference. This setting is on the
page.
59
Page 62

Displays the time at which a participant
connected to the conference. If a participant is
not yet fully connected (for example, if the MCU
has called a participant but it has not yet
answered), then that is indicated here. The
resolution of the participant's video stream is also
displayed.
The following additional indications may also be
displayed:
If this column is selected as the sorting field, the
listing is ordered according to when the
participants connected to the conference.
When ClearVision is enabled on the
page, the original and enhanced
video resolutions are shown in the "Rx:" line; the
original resolution is displayed in a highlighted
form and the enhanced resolution is shown when
the user's mouse pointer is moved to this
highlighted resolution.
Indicates that the conference is being recorded.
Indicates that all media streams in both directions
(to and from the endpoint and the MCU) are
encrypted.
Indicates that all media streams received from this
participant are encrypted.
Indicates that all media streams sent to this
participant are encrypted.
Next to the encryption indication is the AES
check code. This can be used in combination with
information displayed by some endpoints to
check that the encryption is secure.
This indicates that this participant is in the
conference because of a pre-configured endpoint.
See Adding pre-configured participants for
additional information on adding endpoints to
conferences in this way.
These messages indicate that the MCU has not
opened a media channel to a participant's
endpoint because it has no capability to receive
that type of channel. For example, if the endpoint
is a simple telephone, you might expect to see
"No video capabilities" shown here.
These messages indicate that the remote endpoint
had declared media capabilities, but the MCU was
not permitted to open a channel that the endpoint
was prepared to receive.
This is most likely to occur if you have disabled
one or more codecs in the "Audio codecs from
MCU" or "Video codecs from MCU"
configuration on the Advanced conference
settings web page.
These messages indicate that the remote endpoint
had declared media capabilities including codecs
that the MCU was permitted to send, but that the
MCU was unable to transmit the specific formats
declared.
This could occur if, for instance, the far end's
advertised receive video sizes were all 4CIF (704
x 576 pixels) or above, and the MCU was set to
not transmit above CIF (352 x 288 pixels).
60
Page 63

Indicates that the MCU was unable to open a
media channel to the endpoint because the only
possible channels it would be able to open were
invalid due to a symmetry clash. This clash occurs
when the remote endpoint declared that it is only
able to receive certain types of media if it is also
sending the same format, and the format in
question is one that the MCU is able to send but
not receive.
These messages occur if a channel was unable to
be opened solely because doing so would have
exceeded the port limit. This limit may be a perconference restriction or, for those conferences
which impose no such limit, it could be that all of
the MCU's available ports were in use.
Indicates that the MCU is unable to receive the
media format that the endpoint is trying to
transmit.
These status rows show details of the audio and
(main) video streams being sent to or received
from the endpoint.
Tx refers to media streams sent by the MCU, and
Rx means media streams being received by the
MCU.
If the MCU has received information that the
endpoint has been muted at the far end, this will
be indicated in the Rx row as "muted remotely".
This row (if present) shows one of two things: the
characteristics of the content video channel being
sent by the MCU to a participant, or the reason
why no such stream is currently being
transmitted. The status values that can be shown
here are:
The MCU is able to send content video to the
participant but is not currently doing so. This is
normally because there is no active content
channel video source for the conference. This
status will also be shown for a participant which is
the content channel video source and is also
capable of receiving the currently active content
video stream.
No Content tx status will be shown if the
conference does not have content channel video
enabled, or if the endpoint has no content
capabilities.
You may change whether the MCU is prepared to
send the conference content channel stream to an
endpoint using content using the enable or disable
control here. If sending of content video to an
endpoint is currently not allowed, you will see
the enable option, otherwise you will see the
disable option.
For more information about using content, refer
to Content channel video support.
61
Page 64
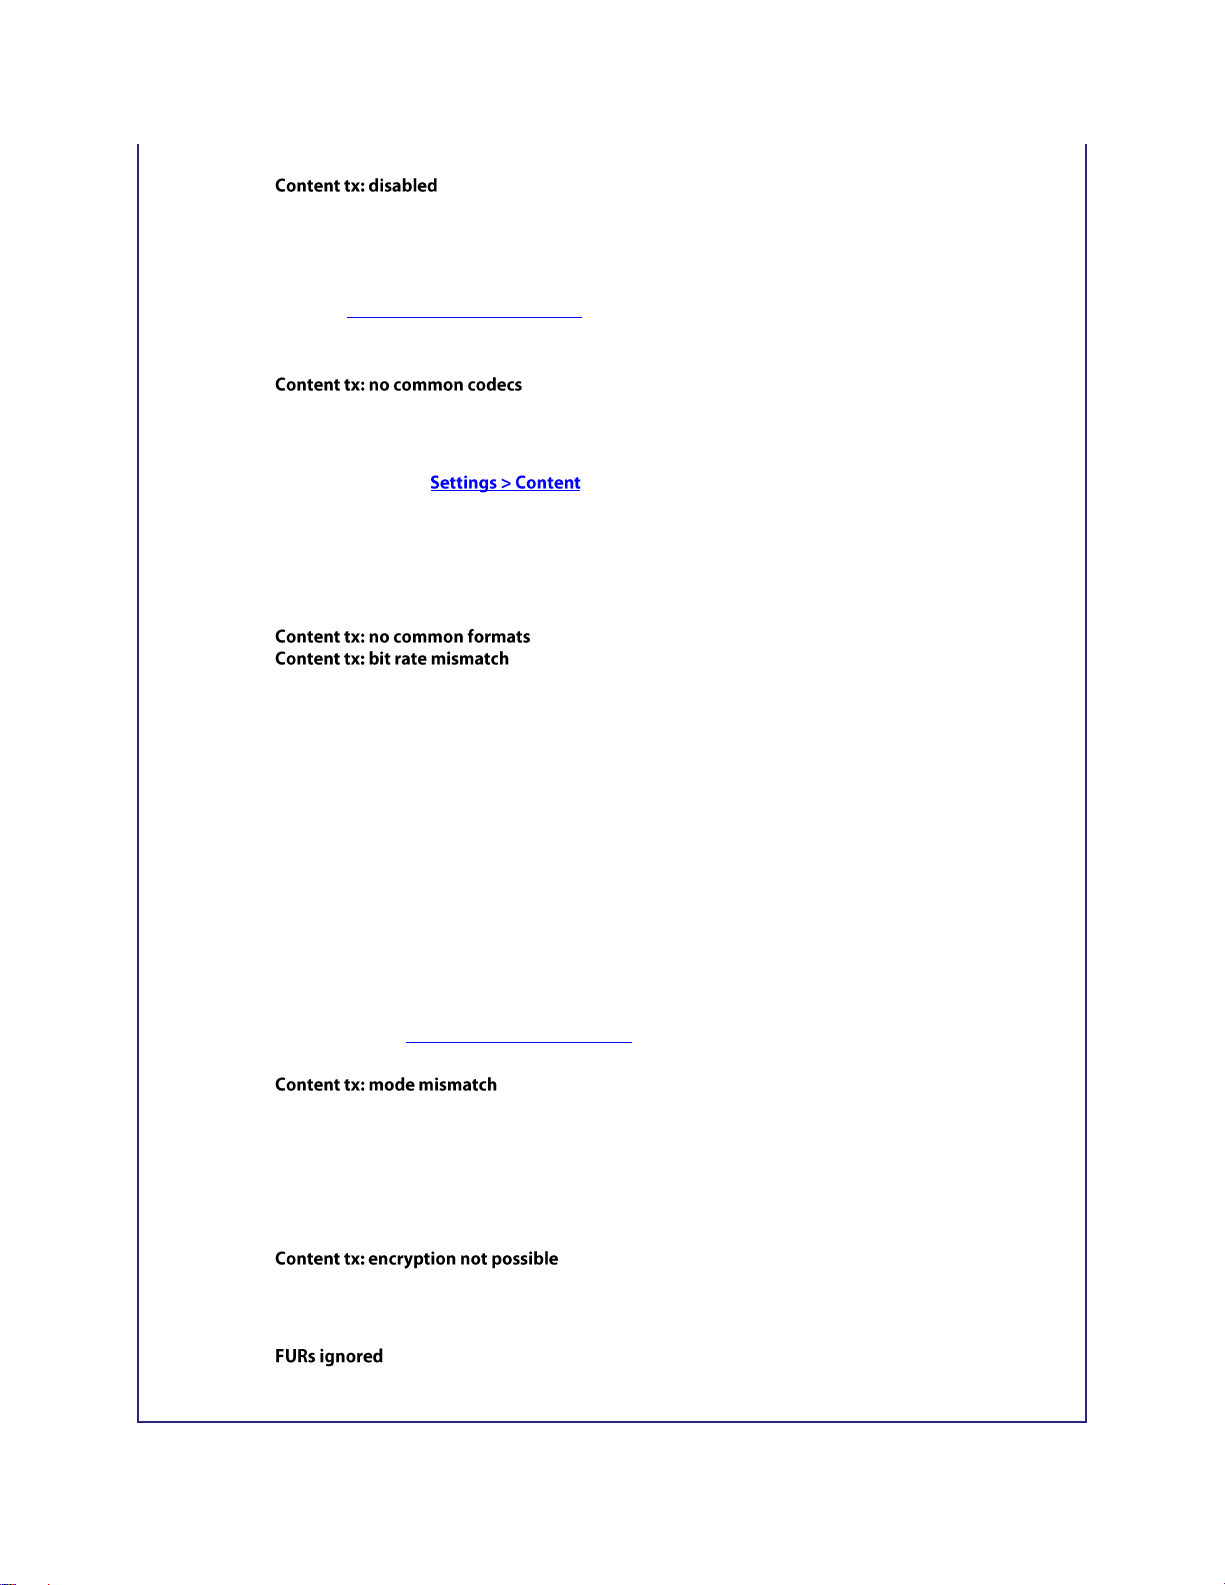
Content is enabled for this conference, but this
participant is not allowed to receive it. To enable
content for this participant, configure the Content
video receive setting for this participant's endpoint
(refer to Configuring H.323 endpoints), or use
the enable control for an active call.
There is a unit-wide setting that determines
which video codec is used by the MCU for
outgoing content channels. The Outgoing content
video codec is on the page.
This message means that the endpoint is able to
receive content video, but not using the same
codec as the MCU is configured to transmit.
For each conference, the MCU uses a single video
stream for all outgoing content connections to
endpoints. This entails considering all endpoints'
receive capabilities and deciding which resolution
and bit rate to send in order to maximize the
number of content channel viewers. These
messages mean that the MCU has been unable to
include this endpoint in the set of content viewers
because of its limitations with regard to format
(video resolution) or bit rate. Note that it is
possible to configure a lower limit on the
bandwidth of the shared content video encoding
which will cause a bit rate mismatch where an
endpoint is only able to receive a low bit rate
stream (refer to Configuring content settings).
The MCU supports only presentation mode for its
content channels; specifically, H.239 live mode is
not supported. This status message indicates that
the endpoint is content-capable but does not
support presentation mode.
The MCU is unable to send encrypted content
video to this participant.
The MCU has detected that the content link to
this endpoint is experiencing problems, and has
62
Page 65

stopped sending video keyframes in response to
Fast Update Requests (FURs) to avoid degrading
the content video sent to other conference
participants. The MCU will only enter this state if
the Video fast update request filtering setting is
Enabled (see Configuring content settings).
The associated participant is currently supplying
the conference's content channel video.
Use of this participant's main video source as the
content (content channel) source has failed. This
is normally because there is already a source for
the content channel; either another participant's
main video channel which has been configured in
the same way (VNC participants are set up this
way by default) or a content video channel
contributed by a connected endpoint.
This message appears if packet loss is detected
between the MCU and the endpoint.
Click to open the Participant statistics page
and display details about the connection, for
example the packet errors. See Displaying
statistics for a participant.
This endpoint has requested and been granted the
chair.
For more information, refer to H.243 floor and
chair control.
The endpoint has requested and been granted the
floor and its media is being broadcast to all
endpoints in the conference.
For more information, refer to H.243 floor and
chair control.
This endpoint believes it has been granted the
floor, but its media is not being shown to all
endpoints in the conference.
This situation can occur when an endpoint
requested the floor, was granted the floor, and
was then moved to another conference where
there was already an active floor participant.
For more information, refer to H.243 floor and
chair control.
This endpoint's media is being broadcast to all
endpoints in the conference, although it did not
request the floor itself.
This situation can occur if another endpoint,
while chair, has issued H.243 commands to make
that endpoint the floor.
For more information, refer to H.243 floor and
chair control.
Indicates that this connection is a cascade link to
or from another conference.
63
Page 66
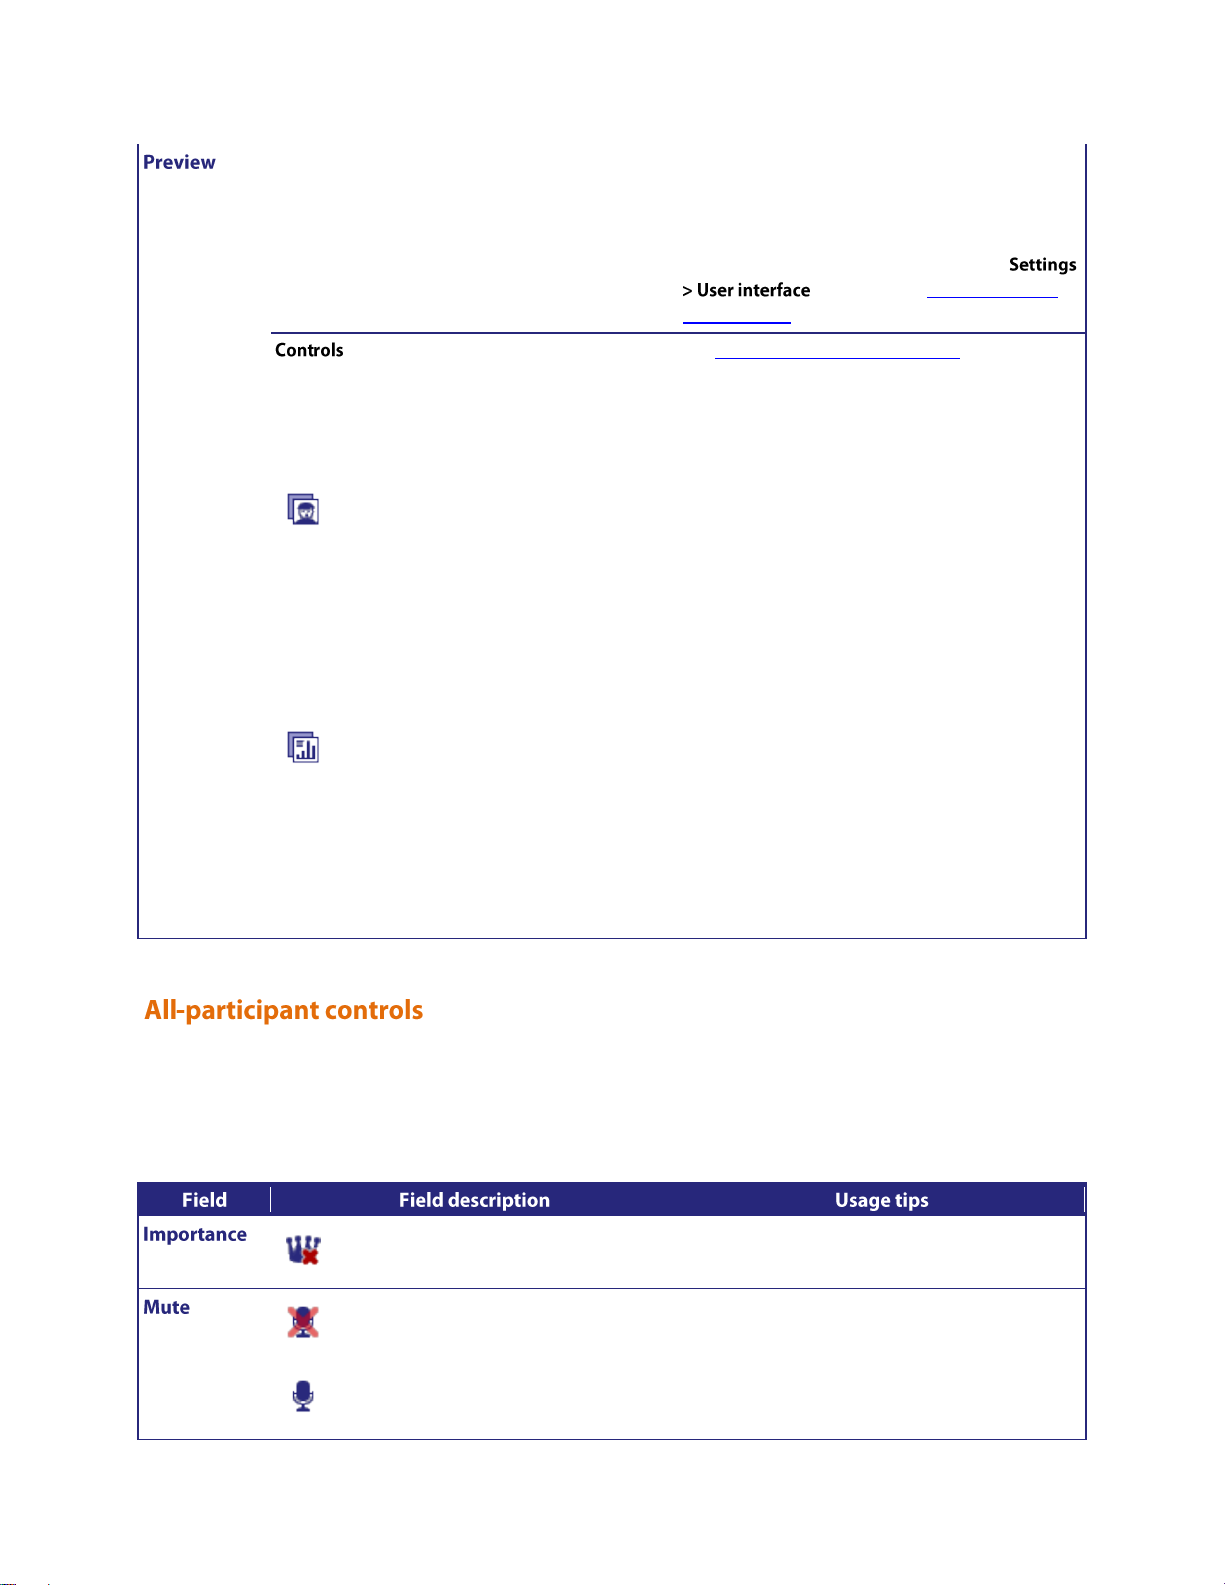
Displays a sample still video capture of the
participant.
Click the picture to update it.
Note that conferences that are configured to
require encryption do not show previews. Also
note that previews can be disabled on the
page (refer to Customizing the
user interface).
These controls are only available if the conference
is configured with content enabled, and if the
participant is contributing a main video channel.
This control causes the MCU to
attempt to use the participant's main
video channel as the conference's
content channel source. This will not
be possible if the conference already
has an active content channel source
(either an endpoint's content video
channel or another participant's main
video activated via this control).
This control causes the MCU to stop
attempting to use the participant's
main video channel as the conference's
content channel source. It is necessary
to use this control to switch to using a
different endpoint's primary video
channel or to enable content video
contribution from endpoints.
See Content channel video support for additional
information on H.239 and BFCP.
Makes all participants unimportant
If no participants are currently important, then
this control will be unavailable.
This stops all audio in the conference
(mute).
Allows all participants to hear the
If no participants are currently muted, the stop
muting controls will be unavailable. If all
participants are currently muted, the mute
controls will be unavailable.
Although you may use the controls described above to manage one participant at a time, for example to mute that
participant's audio, or to make them important, you may wish to manage all participants at once. The all-participant
controls permit you to do this. Note that you may continue to use the per-participant controls in conjunction with
the all-participant controls. Refer to the table below for details of the controls available:
64
Page 67
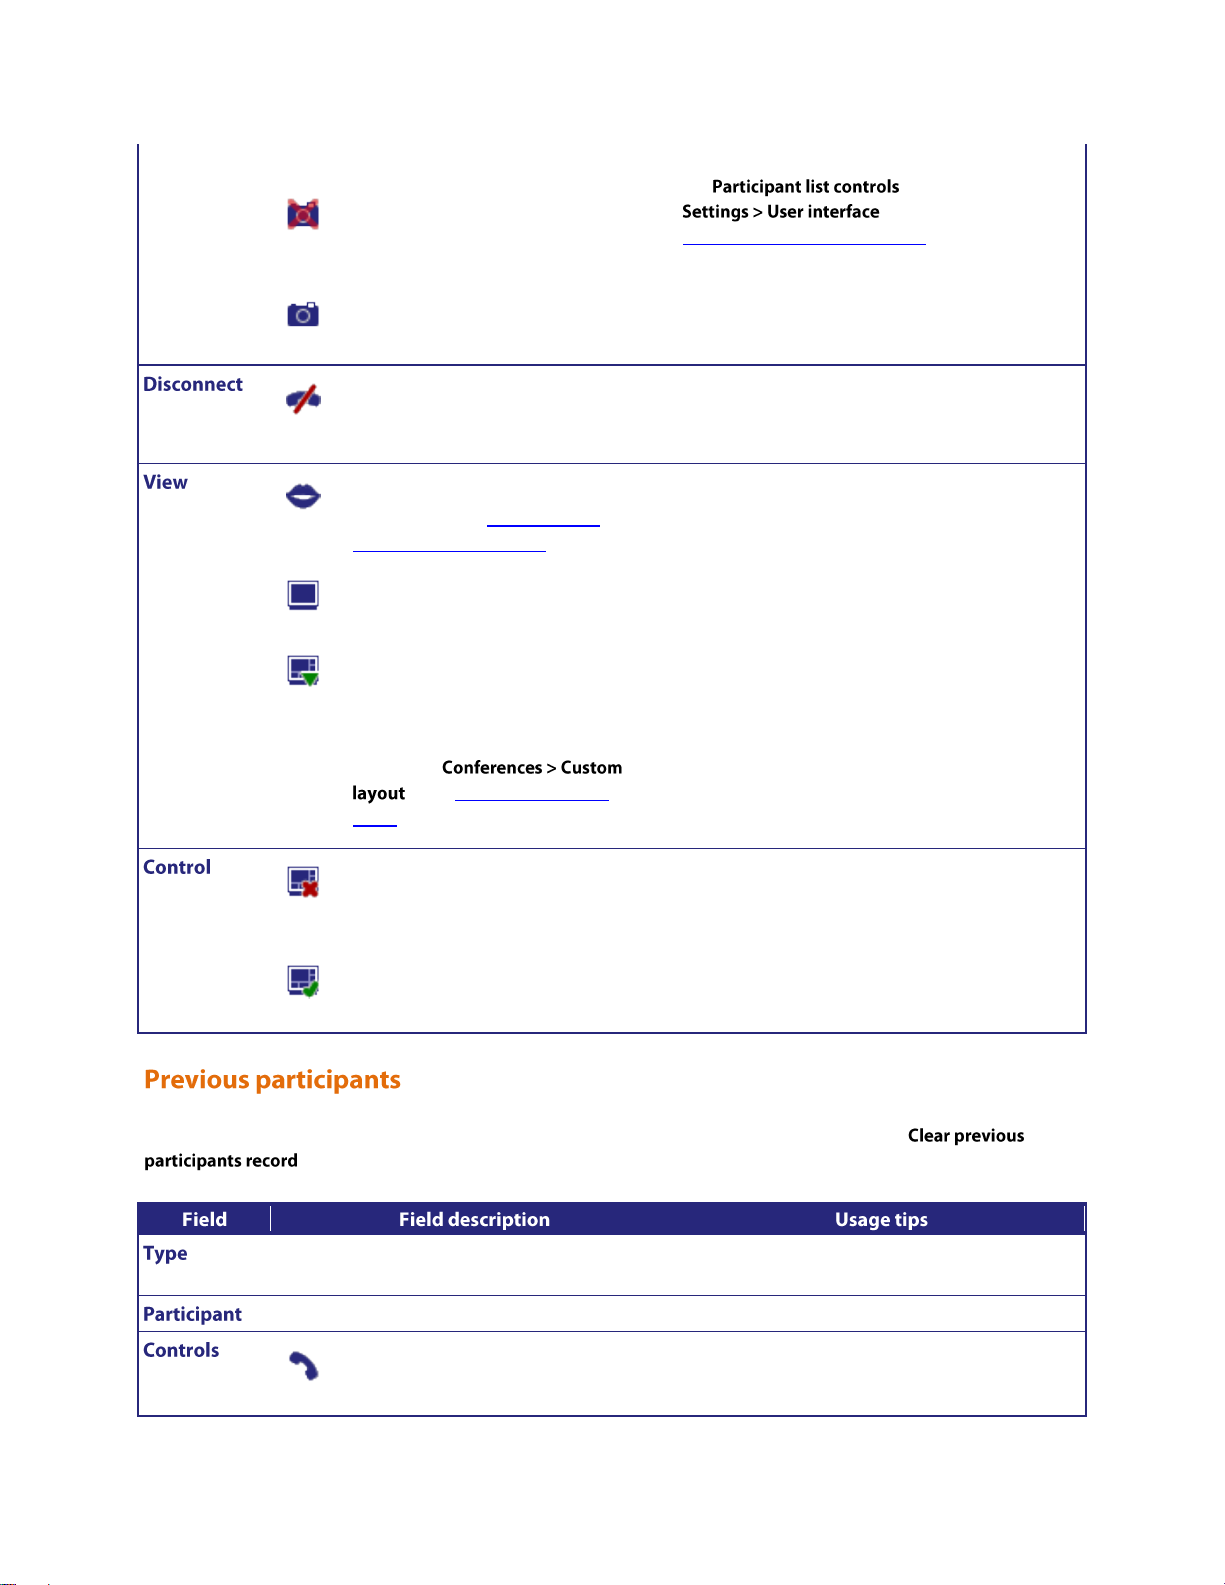
audio in the conference (stop muting).
Prevents others from seeing all
participants' video contribution
(mute).
Allows others to see all participants'
video contribution (stop muting).
The presence of these controls is controlled by
the setting on the
page (refer to
Customizing the user interface).
Disconnects all participants from the
conference.
If this conference was created ad hoc, then
disconnecting all the participants will terminate
the conference as well.
Selects voice-switched view for all
participants (see Customizing a
participant's layout view).
Selects full screen view for all
participants.
Displays the layout selection panel
from which you can select a layout
view that all current participants will
see. This panel offers the same choices
as going to
. (See Customizing layout
views).
If all participants are watching the voice-switched
view, then this control will be unavailable.
Prevents participants from changing
their own view layout from their
endpoint.
Allows participants to change their
own view layout from their endpoint.
If no participants may control their own view
layout, the prevent control will be unavailable. If
all participants may control their own layout, the
allow control will be unavailable.
Refer to the table below to get details about the previous participant list. To erase this list, click
Indicates whether the participant is an H.323,
SIP, or VNC endpoint.
Displays the name of the participant (endpoint).
Re-connects a participant to the
conference.
A previous participant can only be re-connected
to a conference if their endpoint is a pre-
.
65
Page 68

configured endpoint.
Note that if the original call to the conference was
from the endpoint rather than the endpoint being
invited by the MCU, then for the MCU to
recognize it, that endpoint must be configured
with Call-in match parameters. If the ** ERROR **
did not recognize that the call was from a preconfigured endpoint then the re-connect control
will not be available.
For more information about configuring
endpoints on the MCU refer to Configuring
H.323 endpoints and Configuring SIP endpoints.
Displays the time at which a participant
disconnected from the conference and who
initiated the disconnect.
Refer to the table below to get details about pre-configured endpoints.
Indicates whether the participant is an H.323,
SIP, or VNC endpoint.
Displays the name of the endpoint.
Displays the connection status of the preconfigured participant.
This field shows which participants have
connected, which have disconnected, and reasons
for failure if a participant has failed to connect to
the conference.
You may wish to inform participants about conference details such as start time, and so on. Click the
icon to display further details about a conference. This information may be copied to the clipboard for
convenience.
Click this icon to watch the conference. This is exactly the same as clicking the link in the Conference list.
Both take you to the conference streaming page. See Using streaming to view conferences for more information.
66
Page 69
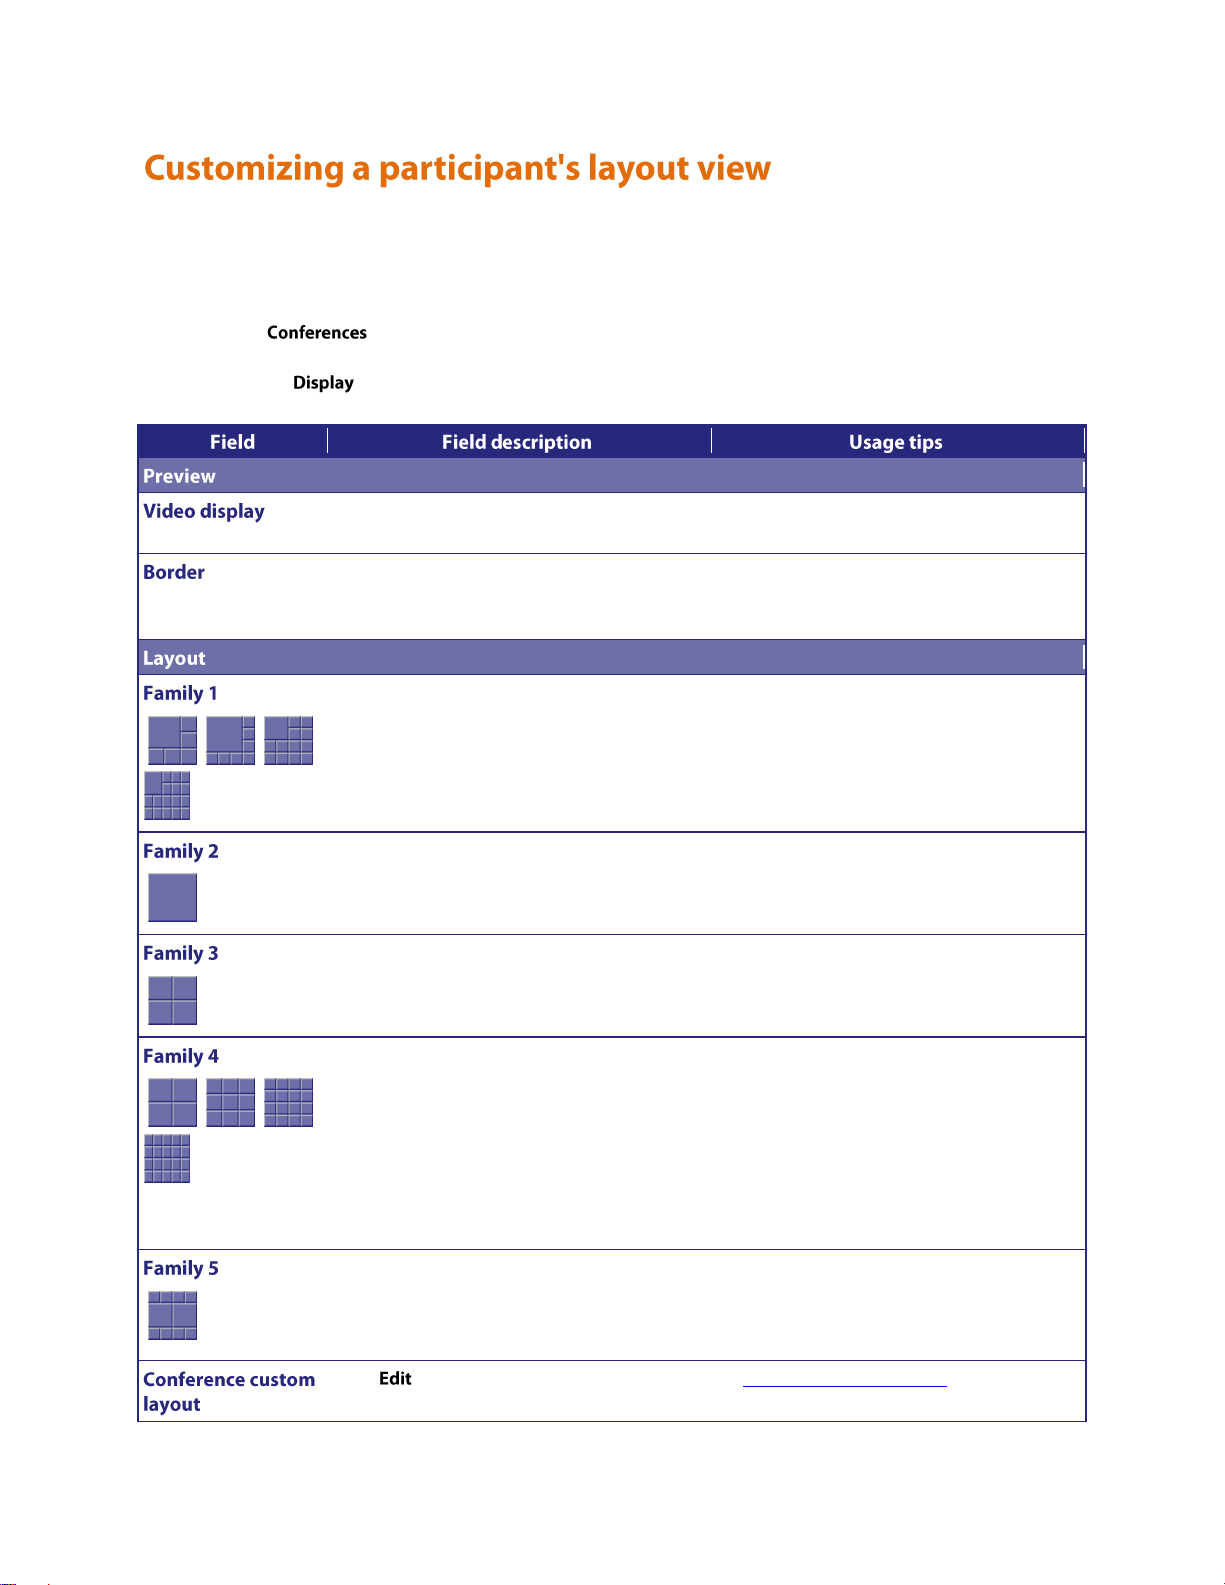
Every person viewing a conference (whether they are contributing video of their own or using streaming to watch
Displays static sample of video screen in the
currently selected layout.
Click on the image to refresh the picture
Adds a border thickness to display around the
video image.
If the image is displaying off the edges of the
participant's screen, add a border until the
image displays properly.
Give prominence to one participant over the
others.
The number of contributing conference
participants determines the size of the large
pane.
Displays a single participant.
Displays the four most active participants
without seeing them scaled down to a small
size if there are lots of other participants.
Used when there are five or more video
participants.
Gives equal prominence to up to 20
conference contributors, and is useful for a
"roll call" of active participants.
The MCU automatically changes the layout to
the 3 x 3 arrangement, and will continue to
use this layout for up to 9 participants. With
10 or more participants, the 4 x 4 view is
used, and with 17 or more participants the 5 x
4 view will be used. The MCU will then
continue to use this layout even if there are
more than 20 participants.
Gives prominence to two participants in the
center of the view while showing smaller
versions of other participants' video streams
above and below.
This view is useful for observing a dialog
between two participants or for viewing slides
and a presenter.
Click to choose or create a custom layout
to be used by any participant.
See Customizing layout views.
other participants) sees a conference layout view. This view divides the video screen into a collection of panes with
participants' video streams displayed in those panes. You can customize this view by choosing this option:
1. Go to .
2. Click a Conference name and then click on a participant's name.
3. Click the tab.
67
Page 70
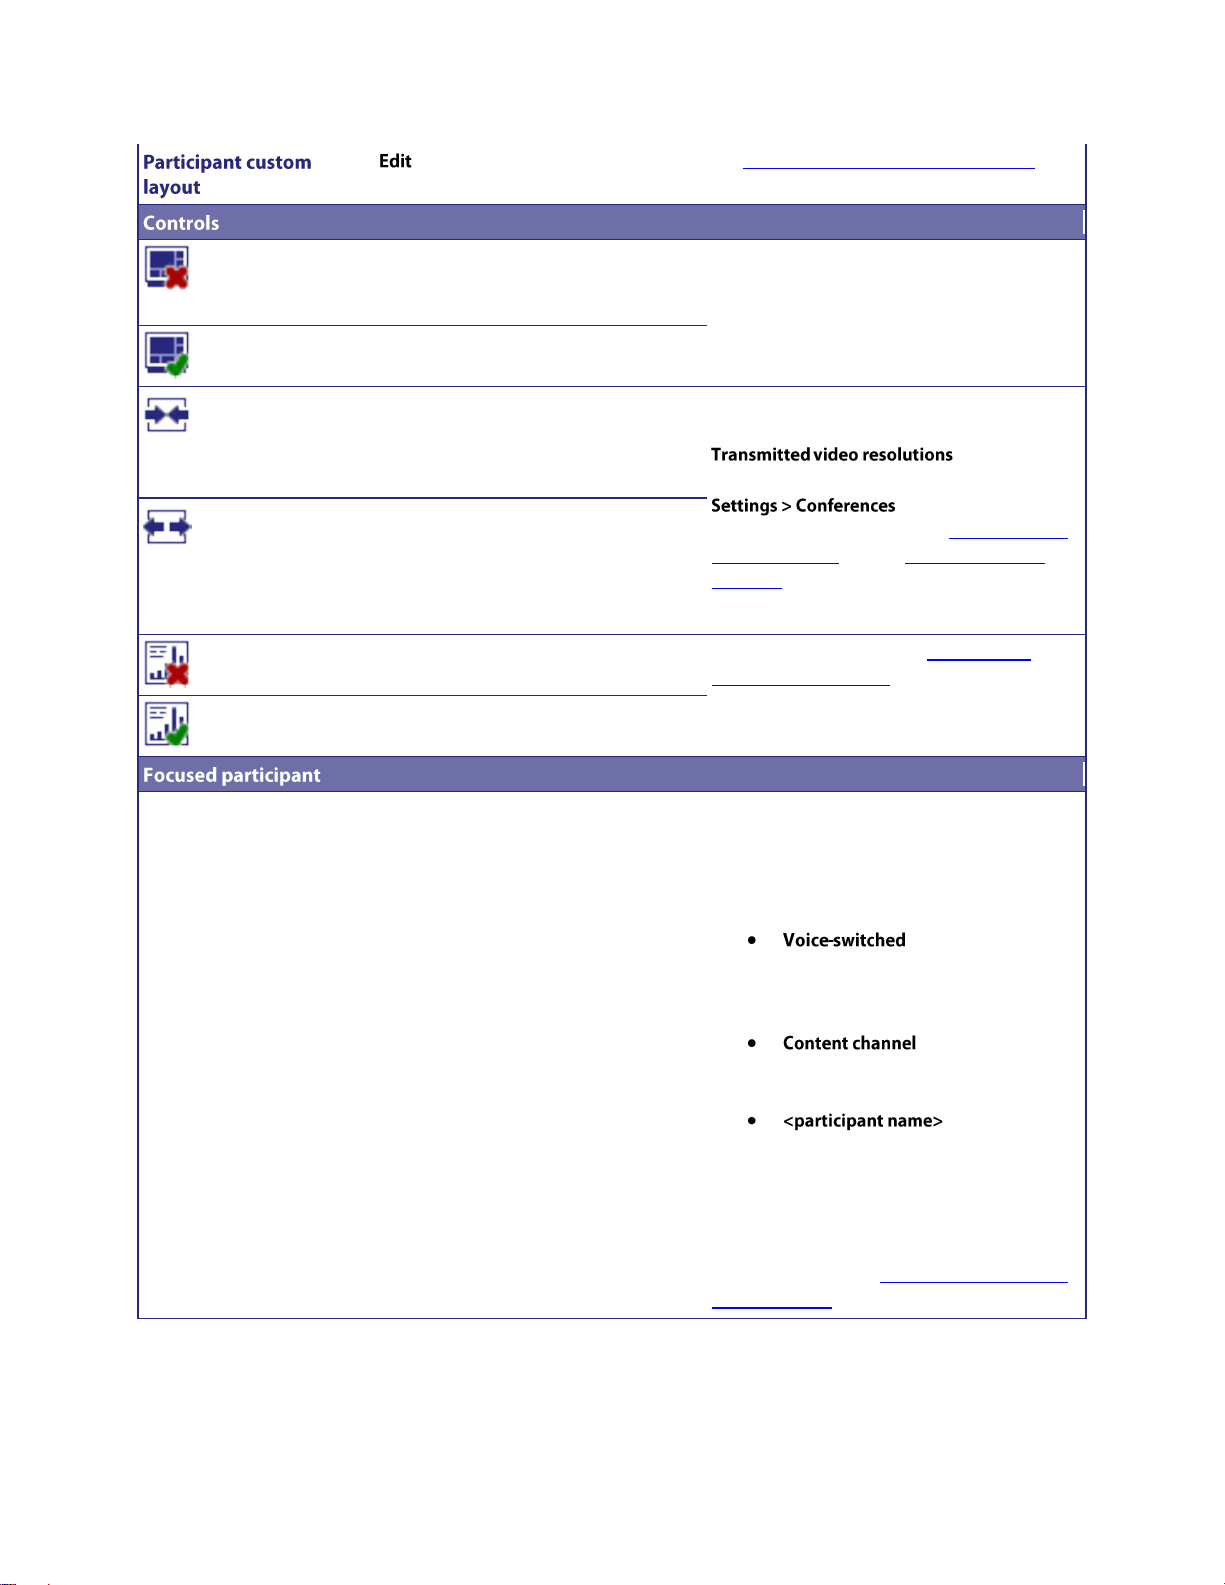
Click to choose a pre-configured custom
layout for this participant.
See Selecting a custom participant layout.
Prevents this participant from changing their
own conference layout using the far-end
camera controls on their video endpoint.
A participant can still change their layout view
using the web interface.
Allows this participant to control their own
conference view.
Send "normal" format video to this participant
- this means that the video is intended to be
displayed on a screen whose dimensions
(width and height) are in the ratio 4:3.
The available options for the resolution of
transmitted video are controlled by the
setting which
can be configured for the whole unit on the
page or per
configured endpoint (refer to Configuring an
H.323 endpoint and/or Configuring a SIP
endpoint).
Send "widescreen" format video to this
participant - this means that the video is
intended to be displayed on a screen whose
dimensions (width and height) are in the ratio
16:9.
Do not allow this participant to start
contributing content channel video.
For more information, see Content per-
participant parameters.
Allow this participant to start contributing
content channel video.
Indicates which participant appears in the
largest pane.
Depending on the types of participant in the
conference (i.e. content channel, endpoint,
audio-only participant), you can select from
these options:
: the loudest
participant will given the largest
pane in the conference (the default
setting)
: the content
channel will be given the largest pane
in the conference
: the participant
that you select will be given the
largest pane in the conference
This setting will be overridden if a participant
is identified as "important" on the Conference
Participants List (see Viewing the conference
participants list).
68
Page 71

You can control the viewing angle, zoom, and focus of the camera on a participant's video endpoint. You can
Click on one of the directional arrows to change
the view direction of the camera.
Not all endpoints will respond to these controls.
In particular, endpoints with fixed cameras such
as most webcams.
Click on one of the magnifying options to zoom
the view in or out.
Not all endpoints will respond to the zoom
controls, possibly including those that do respond
to the Movement controls
Click on one of the adjustment options to
improve the clarity of the image.
Not all endpoints will respond to the focus
controls, possibly including those that do respond
to the Movement controls
Prevents others from seeing this participant's
video in conference views (mute).
This setting applies only to conference views. The
participant's video will still appear in the
conference participant list (see Viewing
conference participants list), and in the auto
attendant if a conference is not PIN-protected
(see Using an auto attendant).
Allows others to see this participant's video in
conference views (stop muting)
customize this view by choosing this option:
1. Go to .
2. Click a Conference name and then click on a participant's name.
3. Click the tab.
You may not want a participant to be visible in a conference, for example if they are only supervising, but not
contributing. The MCU allows this. Refer to the table below for details of the controls available:
69
Page 72
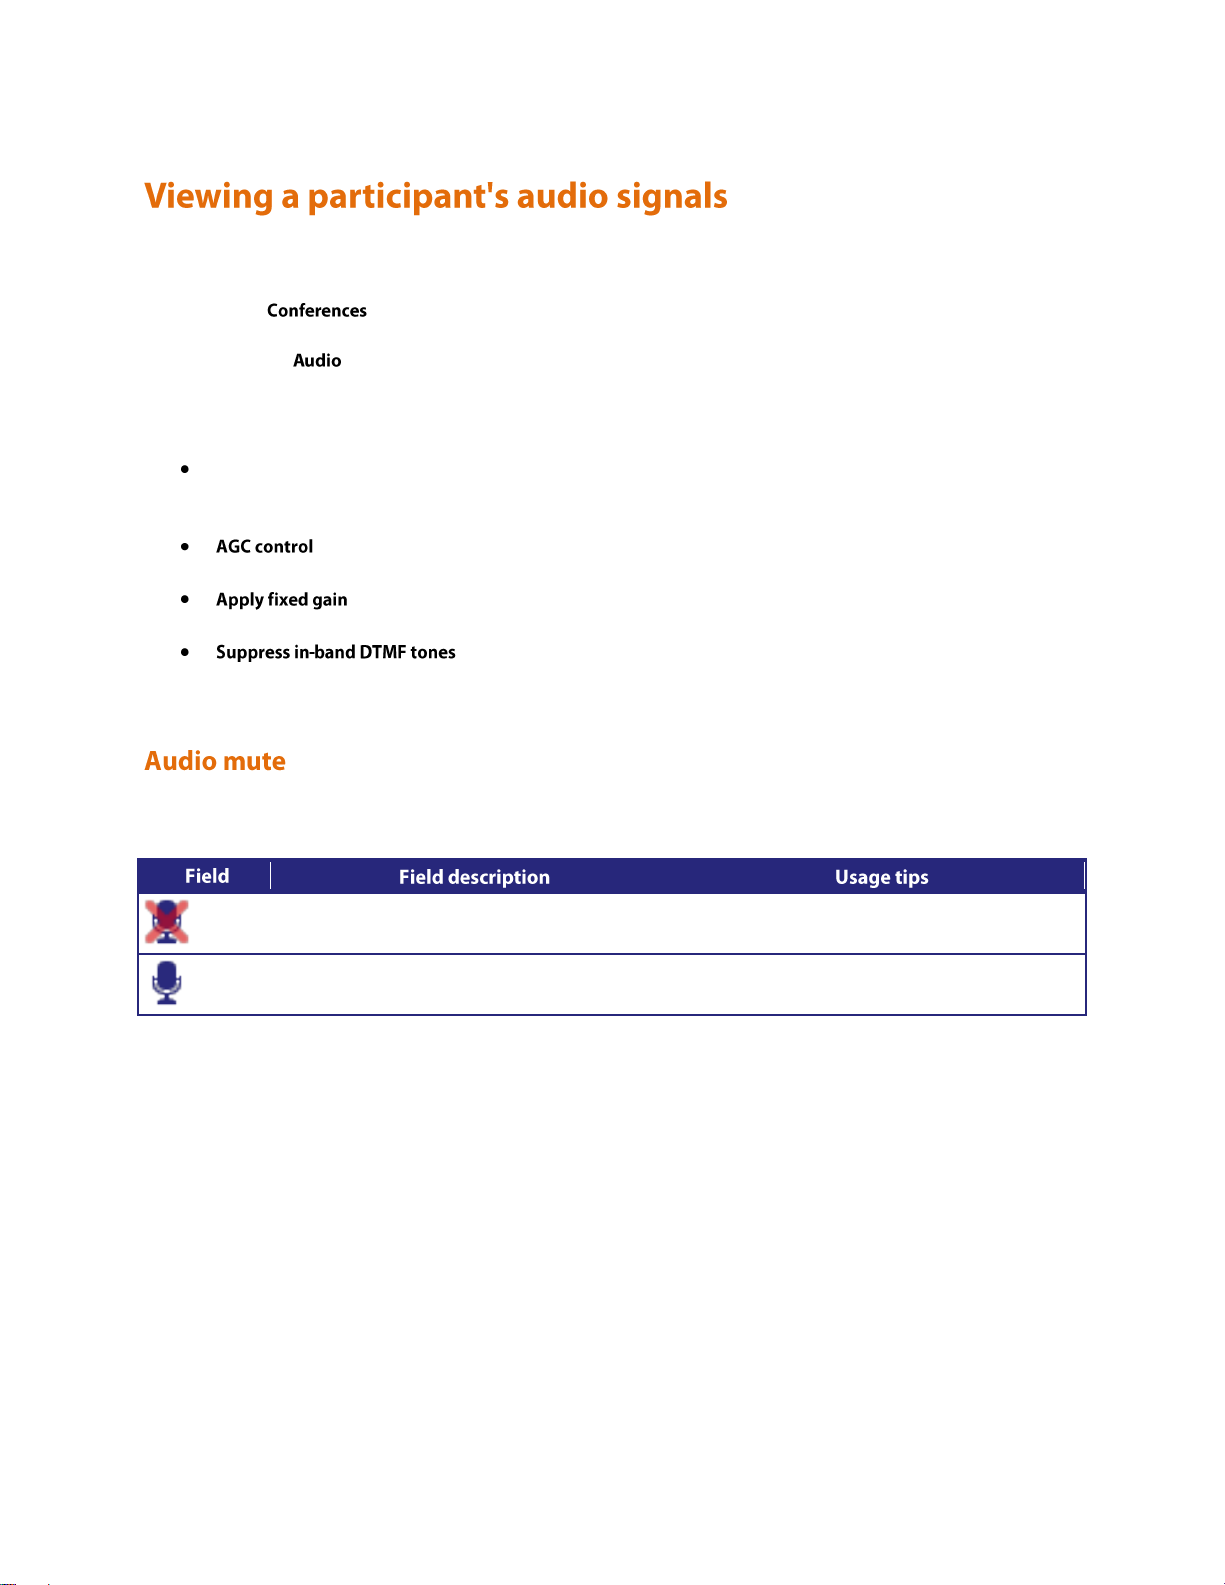
In general, the audio settings are for advanced troubleshooting. You can view these settings by selecting this option:
Prevents others from hearing this participant
(mute).
Allows others to hear this participant's audio (stop
muting).
1. Go to .
2. Click a Conference name and then click on a participant's name.
3. Click the tab.
These settings can help you resolve audio problems in conferences. For example:
Waveforms display a snapshot of the audio waveform received from the participant's endpoint. If the
participant is silent or speaking very quietly, the preview displays a horizontal green line. If the participant is
speaking, the line is wavy.
: use this setting if participants are too loud or too quiet. For example, if a participant is shouting
on the remote end, but is barely audible to others in the conference.
: a volume control which raises the decibel level by the specified amount. Enter a positive
value to raise the volume of the participant and a negative value to reduce it.
: a control to prevent DTMF tones being transmitted to other participants.
The MCU will still detect and act on the DTMF tones; this control prevents the tones from being audible to
participants.
You may mute a participant's audio. Refer to the table below for details of the controls available.
70
Page 73

You can add a custom layout to the choice of layouts available for this participant. You can customize this view by
Indicates whether a custom layout can be used for this
participant.
When you click a new layout from the Available
layouts, is automatically chosen with the
most recent layout selected.
Displays all pre-configured layouts that are available to
the participant. Click a layout to select it and make it
available for the participant.
You can only select one custom layout per
participant.
These layouts are designed to be suitable for all video conferencing situations:
These layouts are designed to be suitable for displaying composed views of standard (4:3) video streams on
widescreen (16:9) displays:
choosing this option:
1. Go to .
2. Click a Conference name and then click on a participant's name.
3. Click the tab.
Note that the layouts depicted with slightly darker shading for the 'picture in picture' participants indicate those
layouts where the non-focused participants are slightly transparent and the focused participant can be seen 'through'
the non-focused participants. These layouts are:
and
71
Page 74

You can view statistics about the video and audio streams between individual participants (endpoints) and the MCU
The audio codec in use, along with the current
packet size (in milliseconds) if known.
If the MCU has received information that an
endpoint has been muted at the far end, this
will be indicated here.
The IP address and port from which the media
is originating.
Whether or not encryption is being used on the
audio receive stream by this endpoint.
This field will only appear if the encryption
feature key is present on the MCU.
The apparent variation in arrival time from that
expected for the media packets (in
milliseconds). The current jitter buffer also
displays in parentheses.
You should expect to see small values for this
setting. Consistently large numbers typically
imply potential network problems.
The jitter buffer shows the current playout
delay added to the media to accommodate the
packet arrival jitter. Large jitter values indicate
a longer buffer.
Represents the audio volume originating from
the endpoint.
The number of audio packets destined for the
MCU from this endpoint.
by choosing this option:
1. Go to .
2. Click a Conference name and then click on a participant's name.
3. Click the tab.
If the participant is participating in the conference using audio only, the values for the video settings are not
populated.
Media statistics provide detailed information about the actual voice and video streams (Realtime Transport Protocol
(RTP) packets).
When examining media statistics for a conference's streaming viewers, there are many fewer applicable values and so
a different, more limited, set of information is displayed. In this case, the MCU shows how many streams of each
outgoing audio and video format are being transmitted.
Refer to the table below for additional information.
72
Page 75

The number of packet errors, including
sequence errors, and packets of the wrong type.
You should expect to see small values for this
setting. Consistently large numbers typically
imply potential network problems.
Frame errors, as A/B where A is the number of
frame errors, and B is the total number of
frames received.
A frame is a unit of audio, the size of which is
dependent on codec.
You should expect to see small values for this
setting. Consistently large numbers typically
imply potential network problems.
If the time stamps or marker bits (or both) are
detected to be unreliable in the incoming video
stream, information will be displayed here.
This field is not displayed when there is no
problem with the time stamps and marker bits.
Where there is a problem the following text is
displayed: "Media timestamps unreliable",
"Media marker bits unreliable", or both if both
conditions detected.
The audio codec being sent from the MCU to
the endpoint, along with the chosen packet size
in milliseconds.
The IP address and port to which the media is
being sent.
Whether or not encryption is being used on the
audio transmit stream by this endpoint.
This field will only appear if the encryption key
is present on the MCU.
A count of the number of packets that have
been sent from the MCU to the endpoint.
The codec in use and the size of the picture that
the MCU is receiving from the specific
participant. If the picture is a standard size (for
example, CIF, QCIF, 4CIF, SIF) then this name
is shown in parentheses afterwards.
If ClearVision is enabled on the
page, and if it is in use on this
video stream, then the original and enhanced
resolutions are both displayed here.
The IP address and port (<IP address>:<port>)
of the device from which video is being sent
Whether or not encryption is being used on the
video receive stream from this endpoint.
This field will only appear if the encryption key
is present on the MCU.
The negotiated bit rate available for the
endpoint to send video in.
This value represents the maximum amount of
video traffic that the remote endpoint will send
to the MCU. It may send less data than this (if it
does not need to use the full channel bit rate or
the MCU has requested a lower rate), but it
should not send more.
73
Page 76

The bit rate (in bits per second) that the MCU
has requested that the remote endpoint sends.
The most-recently measured actual bit rate
displays in parentheses.
This value might be less than the Channel bit rate
if:
the MCU detects that the network
path to the remote endpoint has
insufficient capacity to maintain a
higher traffic rate
that endpoint's video stream's position
in the active conference compositions
does not require it
it has been necessary to reduce the
video bit rate because of the overall
call bit rate; the audio bit rate plus the
video bit rate should not exceed the
call bit rate
For example, if all participants in the
conference were watching a single participant at
full screen, no other participants' video streams
would be needed at all. So the MCU would
request that those streams were sent at a low
bit rate in order to avoid needless use of
network bandwidth.
If the receive bit rate has been limited to below
the maximum channel bit rate, the reason for
this limitation can be seen by moving over the
icon.
Represents the variation in video packet at
arrival time at the MCU.
The number of video packets destined for the
MCU from this endpoint
Video packet-level errors such as sequence
discontinuities, incorrect RTP details, and so
on. This is not the same as packets where the
content (the actual video data) is somehow in
error.
This value does not represent packets in which
the actual video data in the packets is in error.
The frame rate of the video stream currently
being received from the endpoint.
The number of frames with errors versus the
total number of video frames received.
The codec, size and type of video being sent
from the MCU to the endpoint.
The IP address and port of the device to which
the MCU is sending video.
74
Page 77
Whether or not encryption is being used on the
video transmit stream to this endpoint.
This field will only appear if the encryption key
is present on the MCU.
The negotiated available bandwidth for the
MCU to send video to the endpoint in.
The bit rate the MCU is attempting to send at
this moment, which may be less than the
channel bit rate which is an effective maximum.
The actual bit rate, which is simply the
measured rate of video data leaving the MCU,
displays in parentheses.
The Transmit bit rate value might be less than the
Channel bit rate if :
the remote endpoint receiving the
video stream from the MCU has sent
flow control commands to reduce the
bit rate
it has been necessary to reduce the
primary video bit rate to allow
sufficient bandwidth for a content
video stream
If the transmit bit rate has been limited to
below the maximum channel bit rate, the
reason for this limitation can be seen by moving
over the icon.
The number of video packets sent from the
MCU to this endpoint.
The frame rate of the video stream currently
being sent to the endpoint.
A number that represents the tradeoff between
video quality and frame rate.
A smaller number implies that the MCU
prioritizes sending quality video at the expense
of a lower frame rate. A larger number implies
that the MCU is prepared to send lower quality
video at a higher frame rate.
Control statistics provide information about the control channels that are established in order that the endpoints can
The IP address and port to which RTCP (Real
Time Control Protocol) packets are being
received for the audio and video streams
A count of the number of "receiver report" type
RTCP packets seen by the MCU.
A single RTCP packet may contain more than one
report of more than one type. These are generally
sent by any device receiving RTP (Real Time
Protocol) media from the network and are used
for auditing bandwidth, errors, and so on by the
MCU.
exchange information about the voice and video streams (Real Time Control Protocol (RTCP) packets). Refer to the
table below for additional information.
75
Page 78

Media packet loss reported by receiver reports
sent to the MCU by the far end.
A count of the number of "sender report" type
RTCP packets received by the MCU.
These are typically sent by any device that is
sending RTP media.
A count of the number of reports seen by the
MCU that are neither sender nor receiver
reports.
The IP address and port to which the MCU is
sending RTCP packets about this stream.
The number of packets sent.
The IP address and port to which RTCP (Real
Time Control Protocol) packets are being sent for
the audio and video streams.
A count of the number of "receiver report" type
RTCP packets seen by the MCU.
A single RTCP packet may contain more than one
report of more than one type. These are generally
sent by any device receiving RTP (Real Time
Protocol) media from the network and are used
for auditing bandwidth, errors, and so on by the
MCU.
A count of the reported packet loss on the control
channel.
A count of the number of "sender report" type
RTCP packets sent by the MCU.
These are typically sent by any device that is
sending RTP media.
A count of the number of reports seen by the
MCU that are neither sender nor receiver
reports.
The IP address and port to which the MCU is
sending RTCP packets about this stream.
The number of packets sent.
The number of fast update requests sent and
received.
The number of flow control messages sent and
received.
76
Page 79

You can send a short text message to a specific participant currently in the conference by choosing:
Enter the message to send to this participant.
Messages must be fewer than 256 characters, but
depending on the viewing screen, messages at the
higher-end of this limit might not display
properly. So, consider limiting messages to about
180 characters. Messages longer than 256
characters will not be truncated; they will not
display at all.
You can disable this setting from
(see Conference settings).
The vertical position of the message on the
conference display.
Choose from the top, middle, or bottom of the
conference display.
Indicates how long the message appears on the
endpoint's video screen.
The default setting is 30 seconds. To remove a
message before it times out, click .
1. Go to .
2. Click a Conference name and then click on a participant's name.
3. Click the tab.
This message appears overlaid on the participant's view, even if the participant is viewing the conference via
streaming.
77
Page 80

You can view diagnostics for an individual participant's connection to the MCU by choosing this option:
1. Go to .
2. Click a conference name and then click on a participant's name.
3. Click the tab.
This page shows various low-level details pertaining to the endpoint's communication with the MCU. You are not
likely to need to use any of the information on this page except when troubleshooting specific issues under the
guidance of technical support.
78
Page 81

You can move participants between conferences. Participants can be moved to any conference, but although
participants can be moved from auto attendants they cannot be moved to them.
To move a participant:
1. Go to > .
2. Click and drag the name of the participant to the required destination conference.
Note that participants dragged and dropped into a conference on the web interface will be chairperson participants.
(For more information about chairperson and guest participants, refer to Adding and updating conferences.)
To move multiple participants:
1. Go to > .
2. Check the tick boxes for every participant you want to move and drag them to the required destination
conference.
To disconnect a participant from a conference:
1. Go to > .
2. Click and drag the name of the participant in to area at the bottom of that page.
Note that dragging and dropping a participant in to the area simply disconnects the participant
from the conference. It does not remove them from a scheduled conference. That is, when the conference next runs
that participant will be called if their endpoint is a pre-configured endpoint for that conference.
79
Page 82

The Codian MCU allows you to configure auto attendants on it, which allows users to more easily join conferences.
The name of the auto attendant
The number that you can dial to connect to the
auto attendant
The status of an auto attendant with respect to its
gatekeeper registration. The possible states are:
This auto attendant is not configured to
be registered with the gatekeeper;
because of this, there is no applicable
registration status to show.
This auto attendant is in the process of
registering with the gatekeeper.
The auto attendant is in the process of
unregistering with the gatekeeper. This
might occur if:
o Gatekeeper registration has
been turned off (either for that
auto attendant only or for the
entire MCU)
o The configured gatekeeper has
just been changed and the MCU
is in the process of
unregistering from the previous
gatekeeper before registering
its auto attendants with the new
one.
/
If the MCU fails to register an auto
For tips on configuring gatekeepers, see
Gatekeeper settings.
Displaying the auto attendant list
Adding and updating an auto attendant
Adding a custom banner
You can display an overview of the configured auto attendants on the MCU:
1. Go to .
2. Click the tab.
80
Page 83
attendant with the gatekeeper, it enters
these states temporarily before re-
attempting the registration.
The auto attendant has been registered
successfully with the gatekeeper and can
be contacted using the number
indicated.
The status of an auto attendant with respect to its
SIP registration. The possible states are:
This auto attendant is not configured to
be registered with the SIP registrar;
because of this, there is no applicable
registration status to show.
This auto attendant is in the process of
registering with the SIP registrar.
The auto attendant is in the process of
unregistering with the SIP registrar. This
might occur if:
o SIP registration has been turned
off (either for that auto
attendant only or for the entire
MCU)
o The configured SIP registrar has
just been changed and the MCU
is in the process of
unregistering from the previous
SIP registrar before registering
its auto attendants with the new
one.
/
If the MCU fails to register an auto
attendant with the SIP registrar, it enters
these states temporarily before re-
attempting the registration.
The auto attendant has been registered
successfully with the SIP registrar and
can be contacted using the number
indicated.
For tips on configuring SIP, see SIP settings.
Whether a PIN has been configured to restrict
access to the auto attendant
The total number of calls received by the auto
attendant since the last restart
A thumbnail of the custom banner, if one has
been specified
81
Page 84
Auto attendants simplify the way participants can join conferences. By calling an auto attendant using their video
The name of the auto attendant.
An optional title to be shown at the top of the
screen when an endpoint calls in to this auto
attendant.
The number with which to register the auto
attendant on the gatekeeper and/or SIP registrar.
See Gatekeeper settings and SIP settings for
details.
Check if you want the Numeric
ID registered with the H.323 gatekeeper; check
if you want the Numeric ID registered
with the SIP registrar.
Note that for SIP, you must configure the ID with
the SIP registrar for the MCU to be able to
register that ID.
Assigns a password to the auto attendant.
If you set a PIN, all participants using the auto
attendant will be required to enter this password.
Verifies the password.
If Enabled, displays the Create new conference option
on the auto attendant so that the participant can
create new ad hoc conferences using the auto
attendant.
If disabled, participants will not be able to create
new conferences from the auto attendant.
Note that this option will not be available if you
endpoint, a participant can choose from menu options and join or start conferences. No gateway or gatekeeper is
required. (The auto attendant is configured on the MCU.)
To add an auto attendant:
1. Go to .
2. Click the tab.
3. Click .
4. Refer to the table below for the most appropriate settings for the auto attendant.
5. After entering the settings, click .
To update an existing auto attendant:
1. Go to .
2. Click the tab.
3. Click the name of an auto attendant.
4. Refer to the table below for the settings to change for this auto attendant.
5. After updating the settings, click .
82
Page 85
have enabled on the
page. When using port
reservation mode, there can be no ad hoc
conferences. For more information about port
reservation, refer to Reservation of MCU media
ports.
If Enabled, displays ad hoc conferences as well as
scheduled conferences as options on the auto
attendant.
If disabled, participants can only view scheduled
conferences; ad hoc conferences will not be
shown.
Note that this option will not be available if you
have enabled on the
page. When using port
reservation mode, there can be no ad hoc
conferences. For more information about port
reservation, refer to Reservation of MCU media
ports.
Enables all auto attendant participants to join any
conferences scheduled to start while they are
using the auto attendant.
Choose the conferences to list on the auto
attendant by selecting check boxes.
If a scheduled conference has been configured as a
private conference, it will not appear in this list.
To configure a conference as private:
1. Go to the and click on
the name of the conference.
2. On the tab, set the
option to Private.
Check the name of any other configured auto attendant that you want to be accessible from the auto
attendant that you are adding.
83
Page 86
You can add a custom banner image to any auto attendant configured on the MCU as follows:
Chooses the default Codian MCU graphic to use
for your banner.
The custom banner identified for this auto
attendant. Click to remove this
graphic as the banner. Click after
uploading a new graphic.
Nothing displays here until you upload the
custom graphic as described below.
The custom graphic to be used for a banner. Click
to locate the file on your hard drive.
The image file can be a JPEG, GIF or Windows
BMP format with a maximum size of 1600 x
1200 pixels. If the file is smaller than this size, the
MCU will scale it to fit in the auto attendant's
banner area. Click to display.
1. Go to .
2. Click the tab.
3. Click the name of a configured auto attendant.
4. Click the tab.
5. Refer to the table below to determine the most appropriate settings.
84
Page 87

To display the Endpoint List, go to .
The name of the endpoint.
The IP address, host name, H.323 ID, E.164 number, or SIP URI of the endpoint.
Whether it is an H.323, SIP, or VNC endpoint.
The Endpoint List displays all endpoints that have been configured within the MCU.
To add a new H.323 endpoint, select .
To add a new SIP endpoint, select .
To add a new VNC endpoint, select .
To delete configured endpoints, check the ones you want to delete and select .
85
Page 88

You can configure H.323 endpoints to work with the MCU by choosing . This makes it easier
The name of the endpoint.
The IP address, host name, or an E.164 address
(phone number).
You can configure this endpoint as needing to be
reached via an H.323 gateway without that
gateway being already configured on the MCU.
To do this, set this field to be <gateway
address>!<E.164>.
The gateway through which the endpoint
connects.
To configure a gateway on the MCU, go to
. For more information, refer to
Adding and updating gateways.
These fields are used to identify incoming calls as
being from the endpoint:
Name: This must be the name that the
endpoint sends to the MCU
IP address: The IP address of the endpoint
E.164: The E.164 number with which
the endpoint is registered with the
gatekeeper
The endpoint is recognized if all filled-in fields in
this section are matched. Fields left blank are not
considered in the match.
When you configure Call-in match parameters, an
endpoint will be recognized as this pre-configured
endpoint and the Conferencing parameters will be
applied to a call from this endpoint.
The name that will be displayed in a conference
as a label for this endpoint.
The name you enter here will override any
default name configured on the endpoint. It will
also override any other default name that might
appear for an endpoint. For example, an
endpoint's default name can be the name of the
gateway through which the call was placed, or if
the endpoint is called-in via a gatekeeper, its
E.164 number.
Note that once an endpoint has connected, you
cannot change the display name.
to add endpoints to conferences because you can choose names from a list rather than adding network addresses.
A Codian IP VCR can be configured as an H.323 endpoint and added as a participant in a conference. If the IP VCR is
configured to do so, it will start recording as soon as the conference starts. You can also configure a folder's
Recording ID as an endpoint and in this way, when a conference starts, the IP VCR can start recording directly into a
specific folder. For more information about using the IP VCR in this way, refer to the IP VCR's online help.
Recordings on a Codian IP VCR can be configured as H.323 endpoints. In this way, an audio-only participant can
contribute an IP VCR recording as his video stream (using the associated endpoint function, see Adding and updating
users). This function is also useful where you have a recording that you might like to view within a conference.
Refer to the table below for tips on adding an H.323 endpoint to the MCU. After entering the settings, click
.
86
Page 89
Choose whether to use the unit-wide setting for
motion/sharpness trade off, or configure an
individual setting for use with this endpoint.
Choose from:
<use box-wide setting>: this is the default
value. In this case, the connection to the
endpoint will use the motion /
sharpness tradeoff setting from the
page.
Favor motion: the MCU will try and use a
high frame rate. That is, the MCU will
strongly favor a resolution of at least 25
frames per second
Favor sharpness: the MCU will use the
highest resolution that is appropriate for
what is being viewed
Balanced: the MCU will select settings
that balance resolution and frame rate
(where the frame rate will not be less
than 12 frames per second)
The settings for motion (frames per second) and
sharpness (frame size or resolution) are
negotiated between the endpoint and the MCU.
This setting controls how the MCU will negotiate
the settings to be used with this endpoint.
Choose the setting for transmitted video
resolutions from the MCU to this endpoint. This
setting overrides the unit-wide setting on the
page
Retain the default setting (use box-wide setting)
unless you are experiencing problems with the
display of certain resolutions by this endpoint.
Endpoints advertise the resolutions that they are
able to display. The MCU then chooses from
those advertised resolutions, the resolution that it
will use to transmit video. However, some
endpoints do not display widescreen resolutions
optimally. Therefore, you might want to use this
setting to restrict the resolutions available to the
MCU for transmissions to this endpoint.
Whether this endpoint is permitted to contribute
the conference content channel. Choose from:
<use conference default>: this endpoint will use the
Content contribution from endpoints setting from the
per-conference configuration.
Enabled: This endpoint is allowed to contribute
the content channel, even if content contribution
from endpoints is disabled in the per-conference
configuration.
Disabled: This endpoint is not allowed to
contribute the conference channel, even if
content contribution from endpoints is enabled in
the per-conference configuration.
This setting is provided to allow you to
individually configure whether or not an
endpoint is allowed to contribute content to a
conference.
To use the content channel, the Content status
must be enabled at the unit-wide level (on the
page) and for any given
conference Content channel video must also be
enabled in the per-conference configuration.
87
Page 90

Whether this endpoint is allowed to receive a
separate content stream when in a conference.
This setting is provided to allow you to
individually configure whether or not an
endpoint is allowed to receive content from a
conference.
To use the content channel, the Content status
must be enabled at the unit-wide level (on the
page) and for any given
conference Content channel video must also be
enabled in the per-conference configuration.
Choose a border size for video transmitted to this
endpoint.
This sets a border thickness to display around the
video image. This is useful where the image is
displaying off the edges of the participant's
screen; use a border to force the image to display
properly.
Applying a border size here means that this
border size will always be used for this endpoint's
transmitted video. Note that you can also apply a
border to a participant in a conference from the
page.
Sets the layout family to be used when calling out
to this endpoint.
If this is set to Use box-wide setting then the default
view family that has been configured via the
Conference settings page will be used.
The network capacity (measured in bits per
second) used by the media channels established by
the MCU to a single participant.
These settings take priority over the Default
bandwidth from MCU setting configured in the
global Conference settings (see Conference
settings).
The maximum combined media bandwidth
advertised by the MCU to endpoints.
These settings take priority over the Default
bandwidth to MCU setting configured in the global
Conference settings (see Conference settings).
Whether this endpoint is able to change their
view layout via Far-End Camera Controls or
DTMF tones.
This setting takes precedence over the perconference layout control setting for conferences
that the endpoint is invited into.
Set the initial audio status of an endpoint to be
either active or muted.
If set to muted, when the endpoint joins a
conference, it will not be able to contribute audio
to the conference. For example, you can mute
audio from an endpoint if somebody wants to be
seen in the conference, but does not want to
contribute verbally. You can mute both audio and
video if required. This can be altered during the
course of the conference by going to
and clicking on the name of a conference and
altering this participant's settings.
Set the initial video status of an endpoint to be
either active or muted.
If set to muted, when the endpoint joins a
conference, it will not be able to contribute video
88
Page 91
to the conference. For example, you can mute
video from an endpoint if somebody wants to see
the conference, but not be seen themselves. You
can mute both audio and video if required. This
can be altered during the course of the
conference by going to and clicking
on the name of a conference and altering this
participant's settings.
When a participant disconnects from a
conference and only endpoints set to Automatic
disconnection are left, all those participants are
disconnected.
Set to enabled if you want this endpoint to be
automatically disconnected from conferences
when only endpoints set to Automatic disconnection
remain in a conference when any other
participant has disconnected.
Note that this setting is useful where you have
configured a Codian IP VCR as an endpoint so
that the IP VCR can be automatically called into a
conference to record the session. In this case, the
IP VCR will stop recording when the conference
ends (that is, when everyone has left the
conference). For more information about using
the IP VCR in this way, refer to the IP VCR
online help.
Can be used to ensure only specific codecs are
permitted on calls to (and received from) this
endpoint.
If Enabled, you can choose which codecs are
allowed to be used when communicating with
this endpoint. When enabled this setting
overrides the unit-wide codec selection on the
page.
89
Page 92
To configure the SIP endpoints to work with the MCU, go to . This makes it easier to add
The name of the endpoint.
The IP address, host name, directory number, or
SIP URI (in the format 1234@codian.com).
The address of the SIP endpoint can be a
directory number if you are using a SIP registrar.
Allows calls to this endpoint to use a directory
number (in the Address field) and the SIP registrar.
If you have this enabled, you must configure the
SIP registrar on the page.
Select the protocol to be used for call control
messages for outgoing call connections to this
endpoint.
If you want this endpoint to use the unit-wide
outgoing transport setting, select box-wide default
transport. If this endpoint uses TCP, select TCP as
the outgoing transport. If this endpoint uses
UDP, select UDP as the outgoing transport. If
this endpoint uses TLS, select TLS. Note that if
you want the MCU to use TLS for call setup, you
must have the encryption feature key (or the
Secure management feature key) and the TLS
service must be enabled on the
page.
Using TLS for call setup is not sufficient for the
call to be considered encrypted such that it can
participate in a conference which requires
encryption. Where encryption is required in the
conference configuration, a SIP call must use
SRTP. For more information about SIP
encryption, refer to Configuring encryption
settings.
This setting overrides the unit-wide setting for
Outgoing transport on the page. For
more information about configuring SIP, refer to
Configuring SIP settings.
These fields are used to identify incoming calls as
being from the endpoint:
Username: This must be the username
that the endpoint sends to the MCU
IP address: The IP address of the endpoint
The endpoint is recognized if all filled-in fields in
this section are matched. Fields left blank are not
considered in the match.
Note that in some cases a SIP registrar can cause a
call to appear to come from the IP address of the
registrar rather than the IP address of the
endpoints to conferences because you can choose names from a list rather than adding network addresses.
Refer to the table below for tips on adding a SIP endpoint to the MCU. After entering the settings, click
.
90
Page 93

endpoint. In this case, to use call-in match
parameters, leave the IP address field blank and
enter the correct username. The call will be
matched by username.
When using LCS, the username that will be
matched is the user's display name (e.g. Peter
Rabbit) rather than the sign-in name
(bluecoat@codian.com).
The name that will be displayed in a conference
as a label for this endpoint.
The name you enter here will override any
default name configured on the endpoint. It will
also override any other default name that might
appear for an endpoint. For example, an
endpoint's default name can be the name of the
gateway through which the call was placed, or if
the endpoint is called-in via a gatekeeper, its
E.164 number.
Note that once an endpoint has connected, you
cannot change the display name.
Choose whether to use the box-wide setting for
motion/sharpness trade off, or configure an
individual setting for this endpoint. Choose from:
Use box-wide setting: this is the default
value. In this case, the endpoint will use
the motion/sharpness tradeoff setting
from the page
Favor motion: the MCU will try and use a
high frame rate. That is, the MCU will
strongly favor a resolution of at least 25
frames per second
Favor sharpness: the MCU will use the
highest resolution that is appropriate for
what is being viewed
Balanced: the MCU will select settings
that balance resolution and frame rate
(where the frame rate will not be less
than 12 frames per second)
The settings for motion (frames per second) and
sharpness (frame size or resolution) are
negotiated between the endpoint and the MCU.
This setting controls how the MCU will negotiate
the settings to be used with this endpoint.
Choose the setting for transmitted video
resolutions from the MCU to this endpoint. This
setting overrides the unit-wide setting on the
page.
Retain the default setting (use box-wide setting)
unless you are experiencing problems with the
display of certain resolutions by this endpoint.
Endpoints advertise the resolutions that they are
able to display. The MCU then chooses from
those advertised resolutions, the resolution that it
will use to transmit video. However, some
endpoints do not display widescreen resolutions
optimally. Therefore, you might want to use this
setting to restrict the resolutions available to the
MCU for transmissions to this endpoint.
91
Page 94

Whether this endpoint is permitted to contribute
the conference content channel. Choose from:
<use conference default>: this endpoint will use the
Content contribution from endpoints setting from the
per-conference configuration.
Enabled: This endpoint is allowed to contribute
the content channel, even if content contribution
from endpoints is disabled in the per-conference
configuration.
Disabled: This endpoint is not allowed to
contribute the conference channel, even if
content contribution from endpoints is enabled in
the per-conference configuration.
This setting is provided to allow you to
individually configure whether or not an
endpoint is allowed to contribute content to a
conference.
To use the content channel, the Content status
must be enabled at the unit-wide level (on the
page) and for any given
conference Content channel video must also be
enabled in the per-conference configuration.
Currently, all content is sent to SIP endpoints in
the main video channel.
Choose a border size for video transmitted to this
endpoint.
This sets a border thickness to display around the
video image. This is useful where the image is
displaying off the edges of the participant's
screen; use a border to force the image to display
properly.
Applying a border size here means that this
border size will always be used for this endpoint's
transmitted video. Note that you can also apply a
border to a participant in a conference from the
page.
Sets the layout family to be used when calling out
to this endpoint.
If this is set to Use box-wide setting then the default
view family that has been configured via the
Conference settings page will be used.
The network capacity (measured in bits per
second) used by the media channels established by
the MCU to a single participant.
These settings take priority over the Default
bandwidth from MCU setting configured in the
global Conference settings (see Conference
settings).
The maximum combined media bandwidth
advertised by the MCU to endpoints.
These settings take priority over the Default
bandwidth to MCU setting configured in the global
Conference settings (see Conference settings).
Sets whether this endpoint is able to change their
view layout via Far-End Camera Controls or
DTMF tones.
This setting takes precedence over the perconference layout control setting for conferences
that the endpoint is invited into.
Set the initial audio status of an endpoint to be
either active or muted.
If set to muted, when the endpoint joins a
conference, it will not be able to contribute audio
to the conference. For example, you can mute
audio from an endpoint if somebody wants to be
92
Page 95
seen in the conference, but does not want to
contribute verbally. You can mute both audio and
video if required. This can be altered during the
course of the conference by going to
and clicking on the name of a conference and
altering this participant's settings.
Set the initial video status of an endpoint to be
either active or muted.
If set to muted, when the endpoint joins a
conference, it will not be able to contribute video
to the conference. For example, you can mute
video from an endpoint if somebody wants to see
the conference, but not be seen themselves. You
can mute both audio and video if required. This
can be altered during the course of the
conference by going to and clicking
on the name of a conference and altering this
participant's settings.
When a participant disconnects from a
conference and only endpoints set to Automatic
disconnection are left, all those participants are
disconnected.
Set to enabled if you want this endpoint to be
automatically disconnected from conferences
when only endpoints set to Automatic disconnection
remain in a conference when any other
participant has disconnected.
Can be used to ensure only specific codecs are
permitted on calls to (and received from) this
endpoint.
If Enabled, you can choose which codecs are
allowed to be used when communicating with
this endpoint. When enabled, this setting
overrides the unit-wide codec selection on the
page.
93
Page 96
You can configure a VNC (Virtual Network Computing) endpoint on the MCU by choosing .
The name of the computer used for the VNC
application (VNC endpoint).
The IP address or host name of the computer
used for the VNC application (VNC endpoint).
The port used for communication to the VNC
endpoint.
The VNC server password for the computer
you're trying to view.
Re-enter the VNC password.
When a participant disconnects from a
conference and only endpoints set to Automatic
disconnection are left, all those participants are
disconnected.
Set to enabled if you want this endpoint to be
automatically disconnected from conferences
when only endpoints set to Automatic disconnection
remain in a conference when any other
participant has disconnected.
This makes it easier to add a VNC session to conferences because you can choose its name from a list rather than type
its network address.
You can add VNC endpoints to the MCU. This enables you to have software applications running on a remote
computer added to a conference. For example, if a speaker has a set of slides to present during a conference, you can
add them as a VNC endpoint. After entering the settings, click .
94
Page 97

You can configure the Codian MCU to work with one or more H.323 gateways. The MCU can then effectively call
The descriptive name of the gateway.
The IP address or host name of the gateway.
The configured preferred bandwidth to the MCU from the gateway, or <default value> if no
preference has been specified.
The configured preferred bandwidth from the MCU to the gateway, or <default value> if no
preference has been specified.
through these configured gateways to one or more endpoints which are registered with the gateway but would not be
reachable directly from the MCU.
For example, an IP PBX could be configured as a gateway, and the MCU could then call its registered E.164
numbers. An ISDN gateway can be configured as a gateway on the MCU allowing calls to ISDN endpoints and
telephones.
You can add a Codian IP VCR as a gateway. This enables the MCU automatically call the IP VCR into a conference
without the need for a gatekeeper; and in this way, the IP VCR can record directly into the folder you specify. For
more information about using the IP VCR in this way, refer to the IP VCR online help.
The gateway list shows all of the currently configured H.323 gateways. To access this list, go to .
To delete configured gateways, check the ones you want to delete and select .
95
Page 98
You can configure the Codian MCU with one or more H.323 gateways:
The descriptive name of the gateway.
All gateways must have a unique name.
The IP address or host name of the gateway.
Choose whether to use the unit-wide setting for
motion/sharpness trade off, or configure an
individual setting for this gateway. Choose from:
Use unit-wide setting: this is the default
value. In this case, connections to the
gateway will use the motion/sharpness
tradeoff setting from the
page
Favor motion: the MCU will try and use a
high frame rate. That is, the MCU will
strongly favor a resolution of at least 25
frames per second
Favor sharpness: the MCU will use the
highest resolution that is appropriate for
what is being viewed
Balanced: the MCU will select settings
that balance resolution and frame rate
(where the frame rate will not be less
than 12 frames per second)
The settings for motion (frames per second) and
sharpness (frame size or resolution) are
negotiated between the endpoint and the MCU.
This setting controls how the MCU will negotiate
the settings to be used with this endpoint.
The network capacity (measured in bits per
second) used by the media channels established by
the MCU to a single participant.
Sets the bandwidth that the endpoint will
advertise to the MCU when it calls it.
To add an H.323 gateway, go to . After entering the settings described
below, click .
To update an existing H.323 gateway, go to and click on a gateway name. After updating the
settings described below, click .
96
Page 99

The MCU contains a built-in gatekeeper with which devices can register multiple IDs. IDs can be numbers, H.323
Enables or disables the built-in
gatekeeper.
To use the built-in gatekeeper, you must enable it
here.
Enter the IP address(es), or
hostname(s) (or <host>:<port
number> to specify a port other than
the default of 1719 on the neighboring
gatekeeper), of the neighboring
gatekeeper(s).
These are the gatekeepers to which the built-in
gatekeeper will send an LRQ if it has received an
ARQ to resolve an ID which it does not currently
have registered. The built-in gatekeeper will then
use the information received from the neighbor(s)
to reply to the original request.
Configures the built-in gatekeeper to
reply to LRQs from other gatekeepers.
These requests can come from any gatekeeper
which has the MCU's built-in gatekeeper
configured as one of its neighbors.
IDs (e.g. Fredsendpoint) or prefixes.
Up to 25 devices can be registered without a feature key. Feature keys can be purchased to increase this number.
: The MCU can register with its own built-in gatekeeper. The MCU then counts as one registered device. See
Configuring gatekeeper settings.
To start the gatekeeper, go to and select the H.323 gatekeeper check box to open a port for the
gatekeeper. (On the MCU, ports are not open by default for security reasons.) Then go to , select Enabled
in the Status field and click . If you attempt to enable the built-in gatekeeper without opening the port,
an error message is displayed.
You can optionally configure the built-in gatekeeper with up to two neighboring gatekeepers. This means that if the
built-in gatekeeper receives a request (known as an Admission Request or ARQ) to resolve an ID to an IP address and
that ID is not currently registered with it then it will forward that request to its neighbor gatekeeper(s), as a Location
Request (LRQ). The built-in gatekeeper will then use the information received from the neighbor(s) to reply to the
original request.
You can also configure the behavior of the built-in gatekeeper on receipt of LRQs from another gatekeeper. It can:
send LRQs regarding unknown IDs to its neighbor(s)
reply to LRQs from other gatekeepers
accept LCFs (Locations Confirms) from non-neighboring gatekeepers
Refer to this table for assistance when configuring the built-in gatekeeper:
97
Page 100
Configures the built-in gatekeeper to
send (or not to send) LRQs regarding
unknown IDs to its neighbor(s).
Choose from the options:
Disabled: The MCU will only
respond to LRQs about IDs
registered with itself. It will
not forward LRQs about IDs
that are not registered with
itself to neighboring
gatekeepers.
Enabled, using local return
address: The MCU will put, in
the LRQ, its own address as
the return address for the
LCF.
Enabled, using received return
address: The MCU will put, in
the LRQ, the address of the
gatekeeper that originated the
request as the return address
for the LCF. Use this option
only if you are configuring the
MCU to operate in an
environment with a multiplelevel gatekeeper hierarchy.
For example, the 'received
address' is required by the
national gatekeepers
connected to the Global
Dialing Scheme (GDS).
Unless you have selected to Accept LRQs, you
cannot configure the MCU to forward any LRQs.
Enabling using received return address can be a
significant security risk. Only use this setting with
proper cause.
This setting enables the built-in
gatekeeper to accept LCF message
responses from any IP address.
This setting is for use in environments with a
multiple-level gatekeeper hierarchy. For
example, this feature is required by the national
gatekeepers connected to the Global Dialing
Scheme (GDS).
Enabling this setting can be a significant security
risk. Only use this setting with proper cause.
The number of registered devices is shown in the format X / Y where Y is the number of registered devices that your
built-in gatekeeper is licensed for. Equally, the total number of registered IDs is shown as Z / 1000, where 1000 is
the maximum number of registrations allowed over all registered devices.
98
 Loading...