

Page 1
XP -300
TM
Automated Hematology Analyzer
Quick Guide
Pre-operation Checks
Power On/Self Check
QC Analysis
Sample Processing
Reagent Replacement
Maintenance
Sysmex America, Inc. • Tel. 1-800-379-7639 • 1-800-3SYSMEX www.sysmex.com
Page 2

Daily Operating Procedures
Pre-Operation Checks
Verify the following before powering on the XP-300:
1. Check that the power cable is connected.
2. Check that there is sufficient printer paper.
3. Check pneumatic unit trap chamber for fluid. Empty if necessary.
4. If needed, discard any waste fluid in the waste container.
Power On/Self Check
1. Switch power on by pressing the power switch located on the right side of
the analyzer.
Three automatic rinse cycles are performed followed by a
background check.
Should any values fall outside of the acceptable limits, a maximum
of two extra background checks will be performed automatically.
Power
2. Record the background check on a daily checklist or keep a copy of the
printout for documentation. Compare the results to the acceptable
background limits.
Acceptable Background Limits
WBC ≤ 0.3 x 10³/µL
RBC ≤ 0.02 x 10⁶/µL
HGB ≤ 0.1 g/dL
PLT ≤ 10 x 103/µL
XP-300 Quick Guide-Document Number 1051-CFL, Revision 2 June/2014
Page 2
Page 3
Quality Control Analysis
Running QC
1. Verify the XP-300 is at Ready.
2. Press the [QC] button.
3. Press the Quality Control file to be analyzed.
4. Mix the control blood according to the package insert.
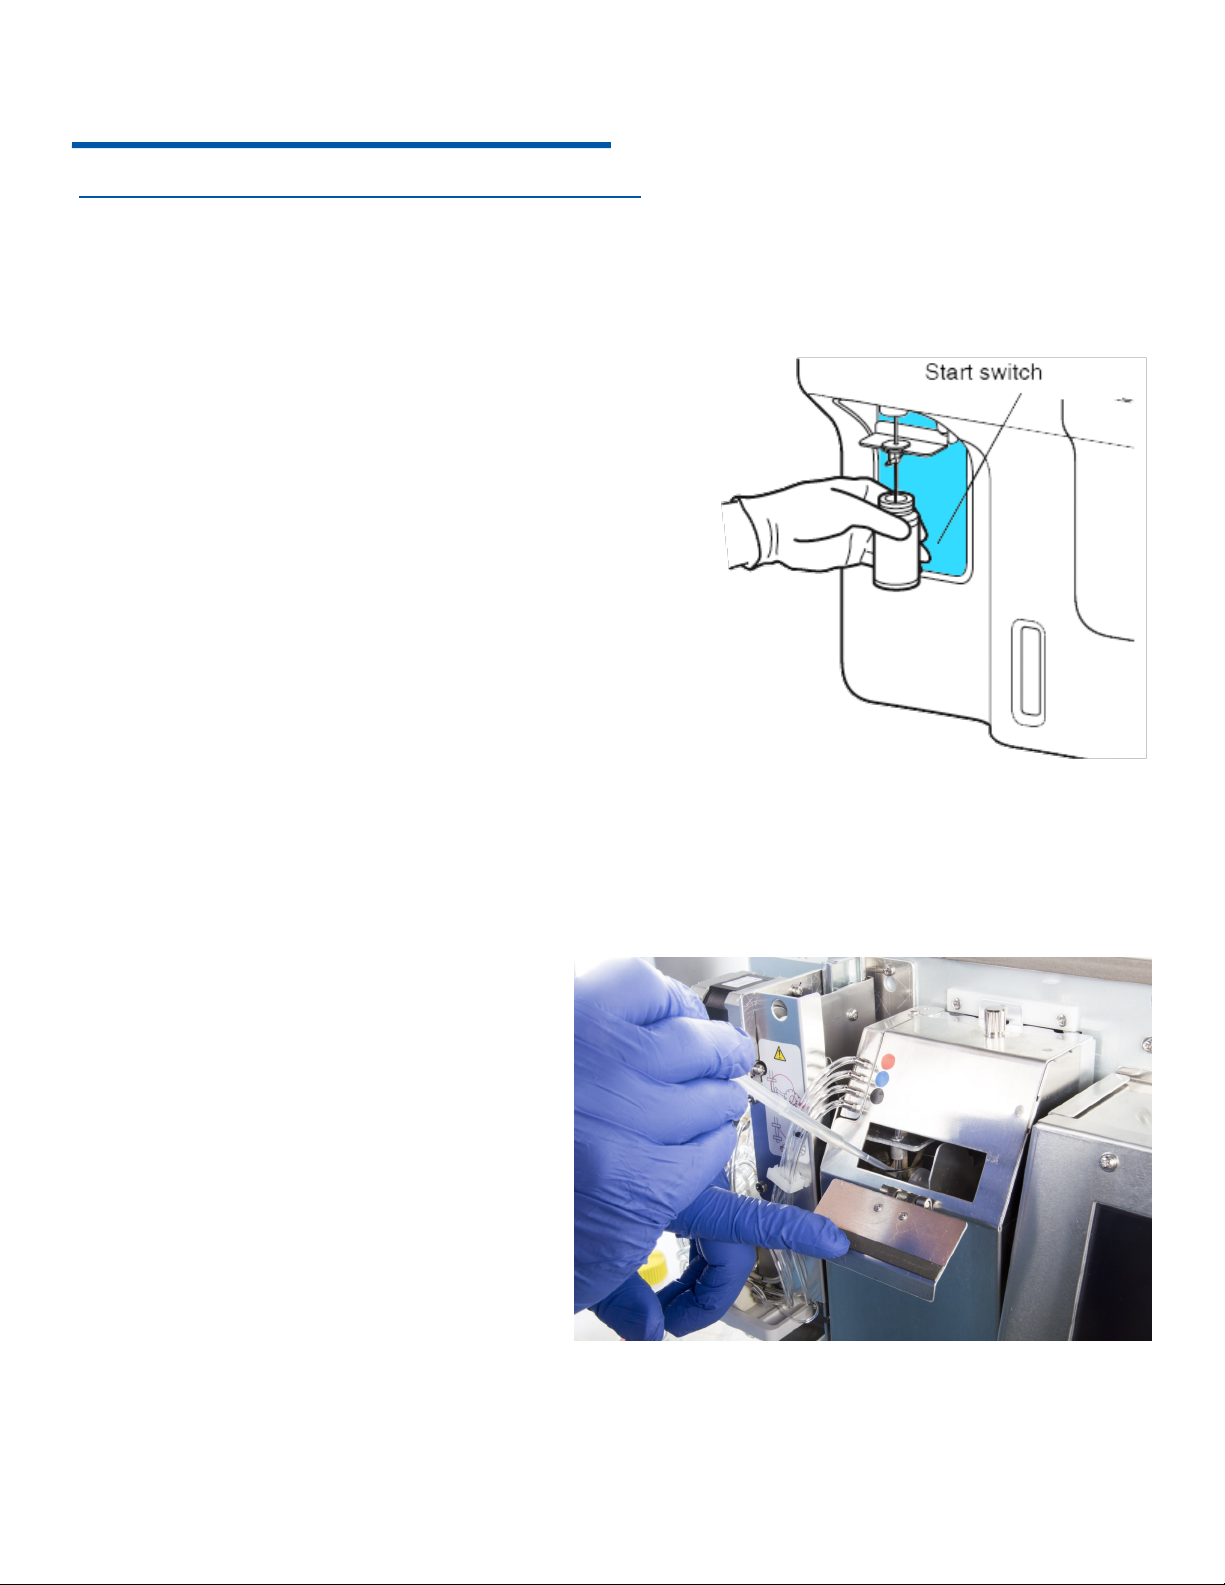
5. Remove the cap and set control blood container to the sample probe.
6. Press the Start Switch.
7. When Analyzing is displayed and two beeps sound, remove the control
blood.
8. Use the [◄] and [►] buttons to scroll through pages.
9. Press [IP] to print to internal printer. Press [NG] to reject.
10. Touch [OK]
QC File Set-Up Barcoded Entry of Target and Limit Values
1. Press [QC] on the Main screen.
2. Select the correct file corresponding to the QC vial.
3. Press [Settings].
4. Scan lot from the assay sheet. Lot number loads automatically.
5. Manually enter the expiration date.
6. Using the [→], scroll to the PARAMETER page beginning with WBC.
7. Scan in WBC. TARGET and LIMIT Values load automatically.
8. Continue to scan in all parameters.
Note: Scroll to the right to advance the screen and input data for all parameters.
9. Press [Save].
10. Touch [OK]
11. Repeat steps 1-9 above to input QC data for the remaining levels of QC.
XP-300 Quick Guide-Document Number 1051-CFL, Revision 2 June/2014
Page 3
Page 4
Quality Control Analysis
Erasing a File for a New Lot of Controls
1. Verify the XP-300 is at Ready.
2. Press the [QC] button. The QC file list will be displayed.
3. Press the [Settings] button.
4. Press the [Clear] button.
5. Press [Enter].
6. Press [OK] to erase selected file.
7. Press [Cancel] to cancel file deletion.
Refer to the Sysmex XP-300 Resource and Validation Manual for more information about QC setup.
XP-300 Quick Guide-Document Number 1051-CFL, Revision 2 June/2014
Page 4
Page 5

Sample Processing
Whole Blood (WB) Mode
1. Confirm that the XP-300 is Ready.
2. Press the [WB].
3. Press [Sample ID].
4. Enter the number using the panel keyboard, or the handheld barcode
reader.
5. Use the [C] key to clear incorrect entries.
6. Press [Ent.].
7. Mix the sample 10 times by gentle end to end inversion.
8. Remove the cap.
9. Set uncapped specimen to sample probe and press the Start Switch.
10. After the screen displays Analyzing and two audible beeps sound,
remove the sample tube.
Pre-Dilute (PD) Mode
1. Be sure the status display indicates 'Ready'.
2. Touch the [PD] button.
1
2
4
3
From Numerical Keys:
1. Touch the [Sample ID] display column on the Main screen (alphanumeric input dialog will appear).
2. Enter the Sample ID.
3. Touch the [Ent.] button.
Entering from Handheld Barcode Reader:
1. Touch the [Sample ID] display column on the Main screen (alphanumeric input dialog will appear).
2. Point and hold the barcode reader at the sample ID.
3. Press the button located on the bottom-side of the barcode reader.
4. Make sure that the displayed sample ID is correct, and press the [Ent.] button.
Note: The analysis mode selected is maintained after completion of analysis, until it is switched to the other analysis
mode. Therefore, it may not be necessary to select the Mode before each run.
XP-300 Quick Guide-Document Number 1051-CFL, Revision 2 June/2014
Page 5
Page 6

Histogram Flags
List of WBC error flags in order of priority
WL
T1
T2
F1
F2
F3
WU
RL
Relative frequency for LOWER discriminator (LD) exceeds the range. May be caused by the inclusion
of platelet clumps, large platelets, fibrin, etc.
Lower TROUGH Discriminator, that distinguishes lymphocytes and mixed cells, cannot be determined.
Higher TROUGH Discriminator, that distinguishes mixed cells and neutrophils, cannot be determined.
Small cell histogram error. Relative frequency for T1 exceeds the range.
Middle cell histogram error. Relative frequency for T1 or T2 exceeds the range.
Large cell histogram error. Relative frequency for T2 exceeds the range.
Relative frequency for UPPER discriminator (UD) exceeds the range. May be caused by lyse-resistant
red blood cells, or when numerous abnormal blood cells are present.
List of RBC error flags in order of priority
Relative frequency for LOWER discriminator (LD) exceeds the range. May be caused by changes in red
blood cell morphology, platelet clumps, or electrical noise.
RU
MP
DW
PL
PU
MP
DW
AG
Relative frequency for UPPER discriminator (UD) exceeds the range. May be caused by electrical
noise.
Two or more peaks in the histogram.
Particle distribution width error when the 20% frequency does not cross the histogram two times. The
peak is taken as 100%.
List of PLT error flags in order of priority
Relative frequency for LOWER discriminator (LD) exceeds the range. May be caused by electrical
noise.
Relative frequency for the UPPER discriminator (UD) exceeds the range. May be caused by electrical
noise, platelet clumps, etc.
Two or more peaks in the histogram.
Particle distribution width error when the 20% frequency does not cross the histogram two times. The
peak is taken as 100%.
The particle count equal to or less than the LD exceeds a prescribed range. Probable cause is platelet
agglutination, which does not alter the WBC count, but may result in decrease platelet count.
XP-300 Quick Guide-Document Number 1051-CFL, Revision 2 June/2014
Page 6
Page 7

Reagent Replacement
Reagent Replacement
1. An error message will display on the screen when one of the reagents needs to be replaced.
2. Press the [Help] key to change to the replenishment operation.
3. Obtain a new container of the reagent. Check the expiration date.
4. Remove cap from new reagent bottle.
5. Remove cap from empty container, and pull the spout kit straight out to remove.
6. Insert the container spout kit straight into the new reagent bottle, and tighten the cap.
7. Press [1] to select [Asp. Reag.]
8. The reagent is aspirated and a background check is performed automatically.
9. Document the change in the Reagent Replenishment Record.
Reagent Name Volume Open Expiration Dating
CELLPACK
CELLPACK
STROMATOLYSER-WH™ 500mL 90 days
XP-300 Quick Guide-Document Number 1051-CFL, Revision 2 June/2014
®
®
10L 60 days
20L 60 days
Page 7
Page 8
Maintenance
Shutdown—Daily Maintenance Procedure
Verify the XP-300 is at Ready.
1. Press [Shutdown].
2. Place a 5% filtered bleach solution to the sample probe and press the [Start Switch]. Continue to hold the bleach to
the probe while the analyzer is aspirating.
3. Remove the tube of bleach after two beeps.
Shutdown takes approximately five minutes.
4. When shutdown is complete, turn OFF main power switch on the
right side of the analyzer.
If the analyzer will be in use immediately following
shutdown, press [1] to re-boot.
Note: CELLCLEAN® = Filtered 5% Bleach (NaClO)
XP-300 Quick Guide-Document Number 1051-CFL, Revision 2 June/2014
Page 8
Page 9

Maintenance
Weekly Maintenance
Clean the SRV tray
1. Turn off the power of the main unit and wait approximately 30
seconds.
2. Open the front cover of the main unit.
3. Remove the SRV tray.
4. Wash the SRV tray using tap water.
5. Make sure no contaminants remain, then wipe off water.
6. Replace the SRV tray to the original state.
7. Close the front cover of the main unit.
XP-300 Quick Guide-Document Number 1051-CFL, Revision 2 June/2014
Page 9
Page 10
Maintenance
Monthly Maintenance/or Every 1,500 Samples
Clean Waste Chamber (Rinse Sequence)
When the power is turned on, a message is displayed once a month or every 1,500 samples to clean the waste
chamber. Sample analysis may continue without executing the operation by selecting [Cancel]. The message
will continue to appear at Start-Up until the operation is executed.
1. When this message displays, press [1] to select Exec. Clean.
2. Set a 5% filtered bleach solution to the sample probe and press
the Start Switch. Continue to hold the bleach to the probe while
the analyzer is aspirating.
3. Remove the tube after the two audible beeps.
Clean Waste Chamber Sequence takes approximately 15
minutes.
When the sequence is complete, the auto rinse and background
check are executed. Then the system returns to Ready. Verify
that no background error occurred. Should one occur, execute
the auto rinse.
Clean Transducer (Rinse Sequence)
When the power is turned on, a message is displayed once a month or every 1,500 samples to clean the
transducer. Sample analysis may continue without executing the operation by selecting [Cancel]. The message
will continue to appear at Start-Up until the operation is executed.
1. Open the front cover of the main unit.
2. Open the transducer cover.
3. Using the filler provided with the unit, pour
approximately 1 mL each of 5% filtered bleach into
the WBC and RBC transducer. Be careful not to
overfill.
4. Close the transducer cover.
5. Close the front cover of the main unit.
6. Press the Start Switch.
Clean Transducer Sequence takes
approximately 7 minutes.
When the cleaning is complete, the auto rinse and background check are executed. Then the system returns to
Ready. Verify that no background error occurs. Should one occur, execute the auto rinse.
XP-300 Quick Guide-Document Number 1051-CFL, Revision 2 June/2014
Page 10
Page 11
Maintenance
3-Month Maintenance/or Every 4,500 Samples
Clean the SRV
Once the counter reaches 4,500 or if three months have passed since the last maintenance, perform a SRV cleaning.
1. Touch the [OK] button on the menu screen.
2. Turn off the power of the main unit and wait
approximately 30 seconds.
3. Open the front cover of the main unit.
4. Remove the SRV tray.
5. Gently push down the rinse cup using both hands.
6. Remove the SRV fixing screw.
7. Remove entire SRV.
8. Remove the rotary valve.
9. Clean the rotary valve using distilled water or 1:10 dilution of 5% filtered bleach. After cleaning with 5% filtered
bleach, always rinse with distilled water.
10. Clean the contact surfaces of the fixed and
rotary valves using a gauze moistened with
distilled water.
11. Make sure the valve contact surfaces are
completely free from dirt or dust.
12. Assemble the SRV in the reverse order of
disassemble.
Note: Mount the rotary valve with the notch facing
upward and the metal knob coming between the
stoppers.
13. Replace the SRV tray to the original position and
gently push up the rinse cup to the top using
both hands.
14. Close the front cover of the main unit.
15. Turn on the main unit and make sure that a background error has not occurred.
16. Perform quality control and make sure the there is no functional problem.
XP-300 Quick Guide-Document Number 1051-CFL, Revision 2 June/2014
Page 11
Page 12

 Loading...