

Page 1
TEL205 · Mobile phone
English & Spanish
Page 2

2
User Manual
Dear customer:
Thank you for choosing this mobile phone. This mobile phone incorporates the latest world
advanced functions, enabling simple and convenient operation ˈ satisfying your special
requirements.
The mobile phone supports T-FLASH (memory) card and Dual SIM standby. It integrates the
following available functions: SMS, MP3, MP4, Camera, FM radio, Alarm, Video recorder and
Calendar, enabling you arranging your work, study and life freely; with long standby duration, as
well as service and calculator, your communication will be easier and smoother; powerful File
manager allows you to manage the files conveniently. In addition, the chord ringtone allows you
selecting music to set as ringtone; the personalized appearance also can satisfy your selection.
Note: User Manual is used to guide the user about the functionality of the phone. Some functions
may vary due to modifications and up gradations of software or due to print mistakes.
Page 3

3
Contents
Safety precautions ................................................................................................. 4
About the phone .................................................................................................... 6
Display settings .................................................................................................................................6
Keys functions....................................................................................................................................6
Status icons.........................................................................................................................................7
Getting started ....................................................................................................... 8
First call.................................................................................................................................................8
Installing SIM cards ..........................................................................................................................8
Installing memory card ..................................................................................................................8
Battery and charging.......................................................................................................................9
Installing the battery...................................................................................................................9
Charging the battery...................................................................................................................9
Battery status .................................................................................................................................9
Using battery .................................................................................................................................9
Switching on/off ............................................................................................................................10
Password....................................................................................................................................... 10
Phone password ........................................................................................................................ 11
SIM1 PIN........................................................................................................................................ 11
SIM2 PIN........................................................................................................................................ 11
Disabling password ..................................................................................................................11
Using hands free kit...................................................................................................................... 12
Keypad lock...................................................................................................................................... 12
Specified keys..................................................................................................................................12
Language and input methods.................................................................................................. 12
Noun................................................................................................................................................... 12
Making a DDD.............................................................................................................................12
Making an IDD............................................................................................................................ 12
Calling extension....................................................................................................................... 13
Emergency call ........................................................................................................................... 13
IMEI .................................................................................................................................................13
Calling ................................................................................................................... 13
Making Calls.....................................................................................................................................13
Making an International Call.................................................................................................13
Dialing extension ...................................................................................................................... 14
Making a call from the phonebook .................................................................................... 14
Latest numbers redial .............................................................................................................. 14
Receiving Calls................................................................................................................................14
Rejecting Calls................................................................................................................................. 14
Options in a Call ............................................................................................................................. 14
Adjust volume................................................................................................................................. 14
Menu guide........................................................................................................... 15
Phonebook....................................................................................................................................... 15
Messages .......................................................................................................................................... 15
Write message ............................................................................................................................ 15
Inbox ..............................................................................................................................................16
Drafts..............................................................................................................................................17
Page 4

4
Outbox...........................................................................................................................................17
Sent messages............................................................................................................................17
SMS settings................................................................................................................................ 17
Call center......................................................................................................................................... 17
Call logs......................................................................................................................................... 17
Call settings .................................................................................................................................18
Multimedia....................................................................................................................................... 19
Camera ..........................................................................................................................................19
Image viewer...............................................................................................................................20
Video recorder ............................................................................................................................20
Video player................................................................................................................................. 20
Audio player ................................................................................................................................ 21
Sound recorder ..........................................................................................................................21
FM radio ........................................................................................................................................ 21
Games................................................................................................................................................ 21
File Manager
.................................................................................................................................... 21
Organizer
.......................................................................................................................................... 23
Calculator .....................................................................................................................................23
Calendar........................................................................................................................................ 23
Alarm..............................................................................................................................................23
Torch .. .. .. .. .. .. .. .. .. .. .. .. .. .. .. .. .. .. .. .. .. .. .. .. .. .. .. .. .. .. .. .. .. .. .. .. .. .. .. .. .. .. .. .. .. .. .. .. .. .. .. .. .. .. .. .. .. .. .. .. .. .....................24
User profiles..................................................................................................................................... 24
Settings.............................................................................................................................................. 24
Shortcuts ...................................................................................................................................... 24
Multi SIM settings...................................................................................................................... 25
Phone settings............................................................................................................................ 25
Network settings .......................................................................................................................25
Security settings ........................................................................................................................26
Connectivity ................................................................................................................................ 26
Restore factory settings .......................................................................................................... 26
Services..............................................................................................................................................27
Appendix............................................................................................................... 27
Appendix A: Please take care of your mobile phone....................................................... 27
Maintenance ...............................................................................................................................27
Appendix B: Troubleshooting
................................................................................................... 28
Appendix C: Abbreviation and explanation
........................................................................ 28
Appendix D: Optional parts....................................................................................................... 29
Page 5
5
Safety precautions
Please read and follow these concise rules carefully to prevent danger or breaking laws.
Driving safety
Do not use mobile phone when driving. Use the hands-free accessories if you have to use the
phone. Put the mobile phone in the holder, instead of the passenger seat or any place that the
phone will fall off.
Power off in aircraft
The interference of mobile phone will affect the flight safety and it is illegal to use mobile phone
in aircraft. Please switch off you mobile phone before boarding.
Power off in the operation area of explosion
Please follow the regulations or rules and switch off your mobile phone in or near operation area
of explosion.
Power off near dangerous articles
Please turn off your mobile phone at gas station or places near fuels and chemicals.
In hospitals
Please follow the regulations or rules of hospitals when you use mobile phone there. Switch the
device off near medical equipment. Any wireless device, including mobile phone, will interfere
with the medical devices which are not fully protected. Other electronic devices also may be
affected. If you have any question, please consult your doctor or the manufacturer.
Interference
Any mobile phone might be interfered with and its performance will be affected thereby.
Professional service
Only qualified maintenance personnel can install or maintain this mobile phone. It may cause
serious danger and also violates warranty clauses if you install or maintain the mobile phone by
yourself.
Accessories and battery
Use manufacturer approved accessories and batteries only.
Rational application
Page 6
6
Use the mobile phone in normal way. Do not put your mobile phone in the environment with
too high temperature (higher than 60ć), for example, put it under the window which is
irradiated by sunshine directly. Please use wet or antistatic cloth to clean your phone. Do not use
the cloth with static to wipe the phone.
Emergency call
Make sure that the mobile phone is switched on and in service area, enter the emergency
number (e.g. 110) and press the Call key to call the number. Report your position and explain
your condition briefly. Do not end the call without permission.
Note: Like other mobile phones, the characteristics of this phone may be not supported because
of the network coverage or wireless signals transmission. Certain networks even don’t support
emergency call. Therefore, do not depend on mobile phone only for very important
communication (e.g. medical emergency). Please consult your local network operator.
About the phone
The mobile phone has 21 keys, one display, one earphone, charger/data cable port and
one external memory card (T-FLASH card) interface.
Display settings
The display area consists of three parts:
1> the top line displays icons, indicating the signal intensity and battery status.
2> the center area displays the text and figures, including numbers, words and dynamic icons.
3> the bottom line displays different options for operating, such as menu, names, ok and back.
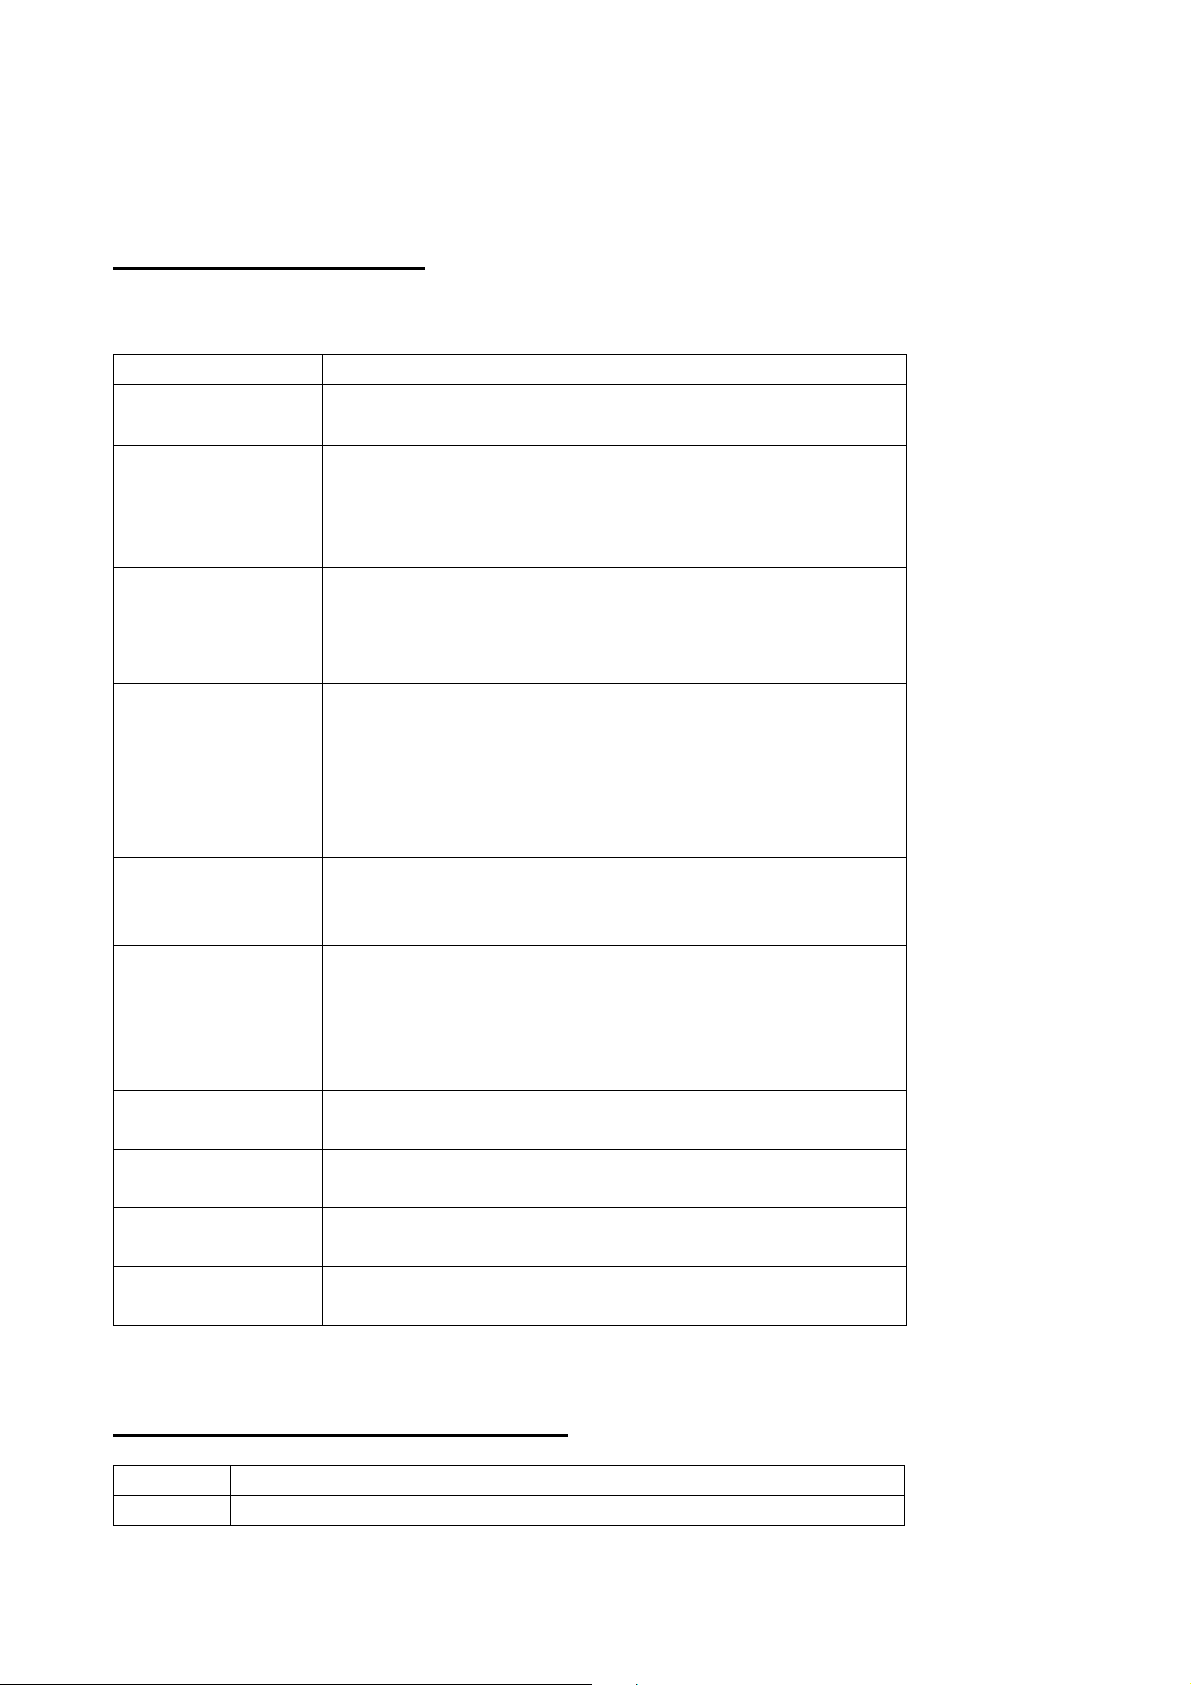
Keys functions
Keys Functions
Left soft key
Press this key to enter the main menu under standby mode;
Press this key to confirm the function you choose;
Press this key to answer a call
Right
soft key
Press this key to enter phonebook list under standby mode;
Press this key to go back to previous menu;
Press this key to reject a call.
Call key
Press this key to call out;
Press to pick up phone when there is an incoming call;
Press to enter call logs under standby mode.
End key
Power Off: Long press to power off under standby mode;
Power On: Long press to power on if the phone is power off;
Press this key to go back to standby screen.
Page 7
7
Navigation
keys
Press them to scroll the options when browsing a function list. In edit
state, press direction keys to navigate. Under standby mode, press a
direction key to enter the specified function page. You can also customize
direction keys to match the desired functions. In conversation status, press
up or down direction key to tune the sound volume.
OK key
Press OK key to confirm and enter main menu.
Number keys
Dial numbers under standby mode and enter numbers and characters in
editing mode. Under standby mode, long press 0 key to open/close the
torch.
* key
Under standby mode, press * key twice to display “+” to call international
numbers;”P” and “W” to call extension numbers. Help to lock the keypad
with pressing left soft key first. Under players and FM mode, press * key to
decrease volume.
# key
Under standby mode, press and hold this key to switch between current
profile and silent profile. Under players and FM mode, press # key to
increase volume.
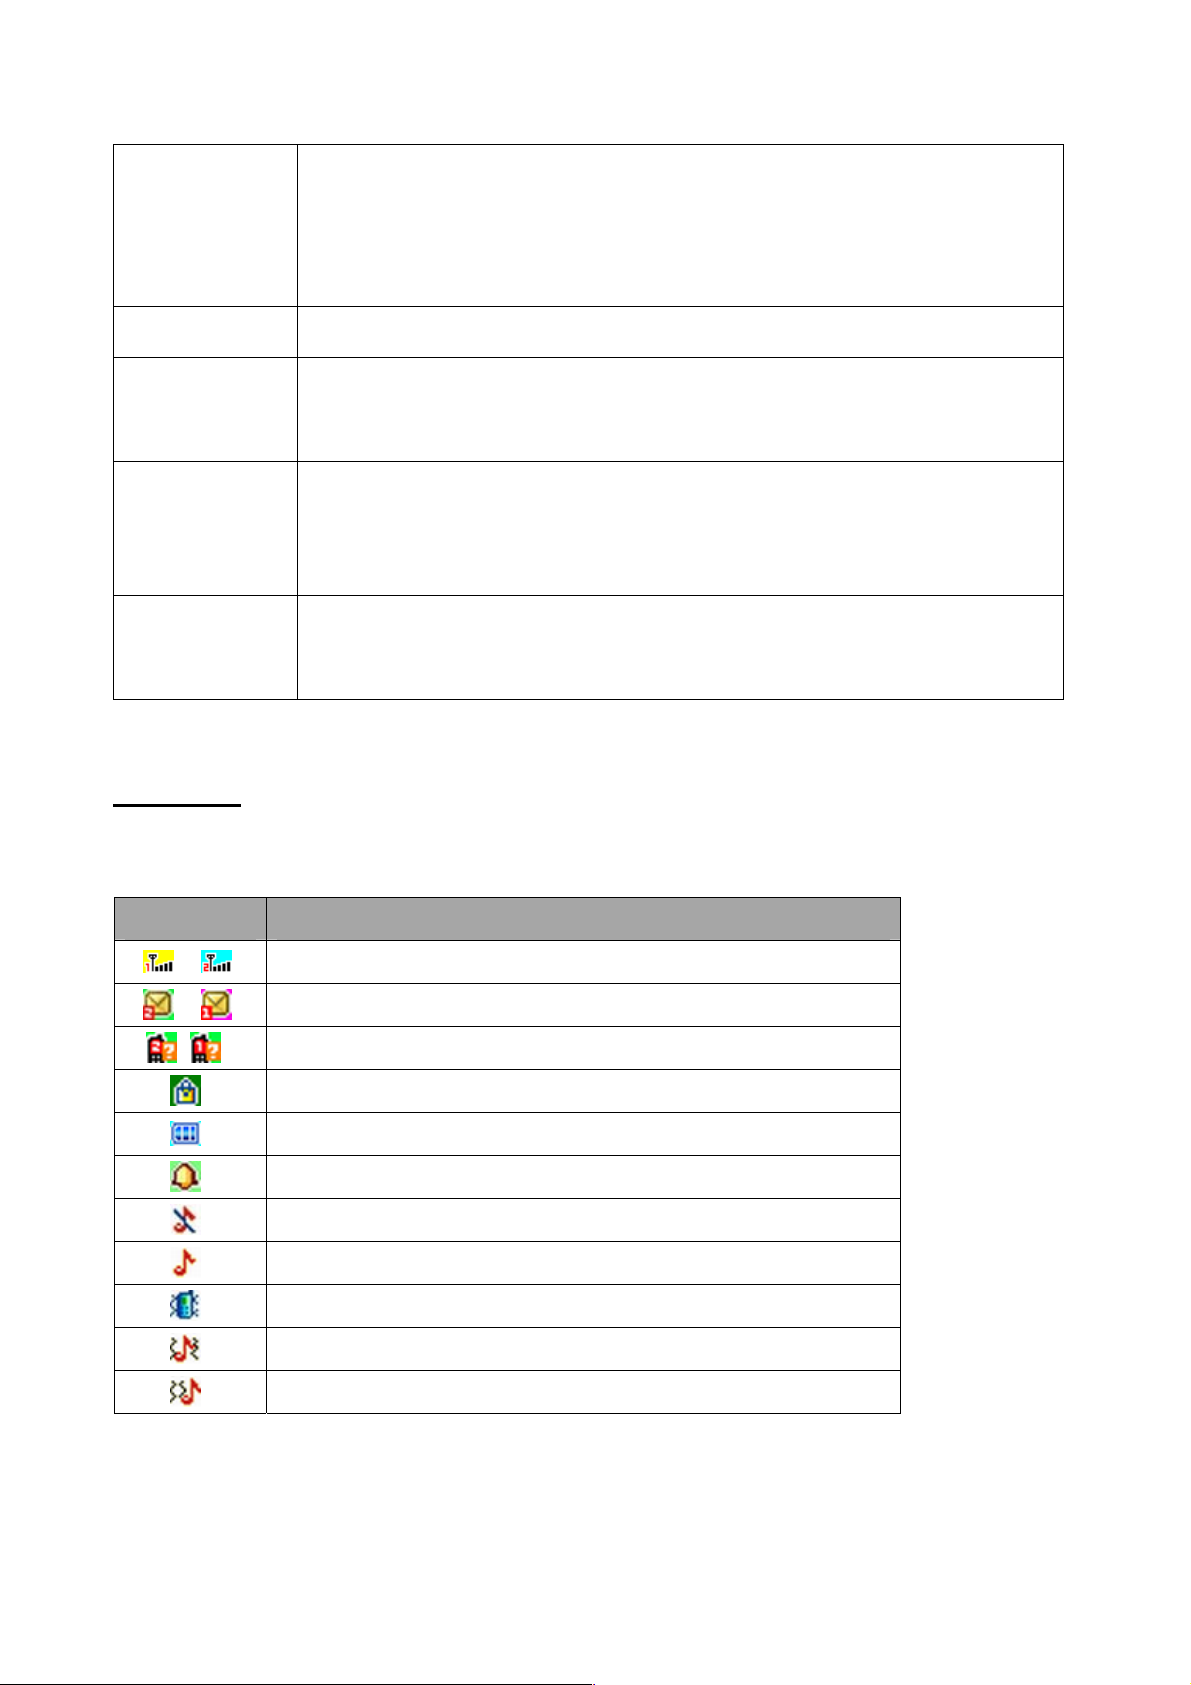
Status icons
Icons might be displayed on screen.
Icons Introductions
Signal intensity
New message
Missed calls
Keypad lock
Battery status
Alarm clock activated
Silent
Ring only
Vib. only
Vib. and ring
Vib. then ring
Page 8
8
Getting started
First call
1> Insert the SIM cards (switch off the phone at first). For detailed installation guide, please
refer to “Installing the SIM card”.
2> Charge the battery. Refer to “Battery and charging”.
3> Press and hold the End key to switch on the mobile phone.
4> If the display prompts, enter the four-digit password and press “OK “key.
5> If the display prompts, enter the PIN code (provided together with the SIM card) and press”
OK” key.
6> Enter area code and telephone number and then press the Call key or left soft key to dial
out by SIM1 or SIM2 .
Note: Before using the mobile phone, please insert valid SIM cards and charge the battery.
Installing SIM cards
When you register mobile phone, you can apply for two different telephone numbers and two
SIM cards (Subscriber Identity Module). With the two cards, you can use the functions of the
mobile phone. The SIM card saves the parameters required by the communication, and personal
information, including PIN code (personal identity number), contacts, short messages and other
system services.
Warning: Do not bend or scratch the SIM card, or contact static, dust or water; if the SIM card is
lost, please contact your network operator. Please switch off the mobile phone before
installing the SIM card. The SIM card is inserted into the rear side of the mobile phone.
Note: The T-flash card is tiny. Please keep it away from children to avoid swallowed. If the SIM
card is invalid or damaged, the phone displays “Insert SIM card”. Switch off the phone and take
out the SIM card, and then re-insert it into the slot properly. If the SIM card is damaged, please
contact your network operator. If the SIM card is locked, please contact your network operator.
Installing memory card
Since the mobile phone doesn’t have enough space, you may need to install a memory card
(T-FLASH card).
To i ns ta ll th e T-FLASH c ar d: op en th e rear cover, take out the battery, insert the T-FLASH card
into the slot, install the battery and then turn on the mobile phone.
To remove the T-FLASH card: open the buckle and take out the T-FLASH card, and then lock the
buckle.
Note: T-Flash card is tiny. Please keep it away from children. Please select qualified T-FLASH
cards, such as SANDISK, V-DATA, and Transcend. Please match with the mobile phone when
you purchase the card.
Page 9

9
Battery and charging
Installing the battery
Only use qualified battery and accessories. When the battery isn’t used, put it in the protective
case.
Note: Please operate according to the figure to avoid damaging the battery contact.
Charging the battery
The new battery will reach its optimized performance after complete charging and discharging
for several times.
Please charge in time when the battery voltage is low. Over discharging will damage the
battery. Disconnect the charger from the AC power supply and the mobile phone after
charging. While charging, the battery status icon flashes from right to left, and stops flashing
after charging. It is normal that the battery becomes warm in the charging process.
Battery status
Your mobile phone can monitor and display the battery status.
1> You can check the battery status from the icon in the upper right corner of the screen.
2> If the electricity is insufficient, the “Low Battery” prompt shows up. The mobile phone sends
warning tone if the “System alert” in Profiles is activated.
3> During charging, the icon of battery status blinks until the charging completes.
Note: The actual standby time and call time depend on the operation, local network, and
settings of the SIM card and mobile phone.
Using battery
The performance of the battery is affected by various factors, including wireless network
settings, signal intensity, environment temperature, the function or settings that you select,
accessories and the mode of voice, data or other applications that you select.
To keep the battery in optimum performance, please follow the rules below:
The charging of new battery or batteries which haven’t been used for long time may be
longer;
Keep the battery in room temperature when it is being charged;
It is normal that the charging time becomes longer after long time using. If the call time
becomes shorter and charging time becomes longer after normal charging, you need to
change a qualified battery. Unqualified battery may damage your phone and cause danger.
If the battery is left unused for too long time or the battery voltage is too low, it takes certain
period of time to display the charging interface normally when the charger is connected.
Note: To protect your safety and the environment, do not dispose the battery randomly.
Warning: The short circuit of battery may cause explosion, fire or body hurt.
ƷPrecautions of using battery
1> Switch off the phone before removing the battery.
2> Use the battery carefully. It will cause short circuit to connect the anode (+) and cathode (-)
of the battery with metal objects (coin, clip, etc.), and damage the battery and metal objects.
Page 10

10
When the battery is removed and put in the bag, do not contact the anode and cathode of
the battery with metal objects (e.g. keys).
3> Do not put the battery in fire, or use in any place with high temperature.
4> Do not disassemble or refit the battery.
5> Do not put the battery in the place with strong mechanical impact or break through with
hard object.
6> Store the battery in cool and dry place, and avoid high temperature (> 60°C) and direct
sunlight.
7> Stop using if there is any particular smell or overheating.
8> Stop using the battery if there is any crack, distortion or electrolyte leakage.
9> If the electrolyte stains the skin or clothes, please wash with soap and clean water
immediately; the electrolyte enters the eyes, wash with clean water immediately and go
to see the doctor.
10> Do not use the battery in low temperature, in which the battery can’t get the maximum
standby/call time.
11> Do not wash the battery with water or organic solvent, or put it in water.
12> Fully charge the batter y if it won't be used for a long time.
13> You are recommended to return wasted batteries to the manufacturer of mobile phone or
put them in the specified public recovery area of wasted batteries. Do not put them
together with other garbage or dispose casually.
Using 3Ʒ -in-1 charger (charger + data cable + earphone port)
The 3-in-1 charger may charge the battery through the mobile phone.
1> Connect the data cable and charger
2> Connect the data cable of the 3-in-1 charger to the I/O slot of the mobile phone.
3> Connect the charger plug of the 3-in-1 charger to the appropriate power outlet.
4> During charging, the icon of battery status blinks until the charging completes.
5> After charging, the battery icon stops flashing, and you can pull out the 3-in-1 charger.
Note: If the battery voltage is too low and can’t turn on the mobile phone, the charging icon
may appear on the screen after several minutes. The mobile phone may be turned on or off
during charging.
Warning: Make sure that the local voltage and power match the rated voltage and power of
the 3-in-1 charger.
Switching on/off
1> Press and hold the End key to switch on the mobile phone. The screen shows the power on
video.
2> If the phone lock is activated, please input the password and press “OK” key. The default
password is 1122.
3> If the PIN code is activated, please input the code and press “OK” key. The PIN code is
provided by the network operator.
4> Access to standby interface.
5> Press and hold the End key to switch off the mobile phone.
Password
The mobile phone and SIM cards have several passwords, which will prevent your mobile
Page 11

11
phone and SIM cards from illegal operation. Press “OK” key after inputting the valid password
(expressed in *). If there is misinput; please press the “Clear” key to delete the error and then
input the correct numbers. You can change the PIN code, PIN2 code and phone password in
“Settings – Security settings – SIM1/SIM2/ phone security”.
Phone password
The phone password is the phone lock, which can prevent your mobile phone from illegal
operation. The phone password is provided together with the mobile phone by the
manufacturer. The default password is 1122. If the mobile phone is locked, you need to enter
the password to turn on the mobile phone.
SIM1 PIN
PIN code: The PIN (Personal Identity Number) code is provided with the SIM card and will
prevent your SIM card from illegal operation. If the PIN lock is activated, the screen displays
“Enter PIN” when you turn on the mobile phone. While entering PIN code, the screen shows *
instead. You can get the PIN code when you get the SIM card from the network operator.
PIN2: the personal identity number required by certain functions such as call expense.
PUK and PUK2 (8-digit)
You also need to input PUK (personal unblocking key) code to change locked PIN code. To
change the locked PIN2, use PUK2. If the codes are not provided with the SIM card, please
contact local service provider.
Warning: If you enter invalid PIN code for three times consecutively, the SIM card will be
locked. In this case, please contact the local network operator. The SIM card may be damaged
permanently if you try to decode by yourself.
SIM2 PIN
PIN code: The PIN (Personal Identity Number) code is provided with the SIM2 card and will
prevent your SIM2 card from illegal operation. If the PIN lock is activated, the screen displays
“Enter SIM PIN” when you turn on the mobile phone. While entering SIM2 PIN code, the screen
shows * instead. You can get the PIN code when you get the SIM card from the network
operator.
PIN2: the personal identity number required by certain functions such as call expense.
PUK and PUK2 (8-digit)
You also need to input PUK (personal unblocking key) code to change locked SIM PIN code. To
change the locked PIN2, use PUK2. If the codes are not provided with the SIM card, please
contact local service provider.
Warning: If you enter invalid PIN code for three times consecutively, the SIM card will be
locked. In this case, please contact the local network operator. The SIM card may be damaged
permanently if you try to decode by yourself.
Disabling password
Disabling password is necessary to enable call barring. You can get this password from your
network operator when you subscribe for this function.
Page 12

12
Using hands free kit
With the hands free kit, you can make or answer calls without holding the mobile phone. When
you inert the hands free kit into the earphone port, the hands free kit can be used as the handset
and the microphone of the mobile phone.
Keypad lock
When the keypad is locked, the mobile phone will be locked automatically if there is no
operation in certain period of time. To unlock: Press the left soft key and * key.
Note: When the keypad is locked, it will be invalid. If there is new call, you can answer as usual,
and the mobile phone will resume the locked status after the call
Specified keys
1> Under standby mode, press * key/# key to decrease/increase the volume of players and FM.
2> In the dial interface, press and hold the # key to activate/deactivate the silent profile
3> In dialing interface, press and hold * key to input “+”, “P” or “W”; “+” is used to call international
numbers and “P” and “W” are used to call extension numbers.
Note: The difference between W and P: if P is pressed, it pauses for three seconds and then
sends DTMF; if W is pressed, a window pops up and asks if “Send DTMF?”
Language and input methods
The mobile phone provides English, French, Spanish and Portuguese languages. The phone
provides ABC/abc/ES/DI/di/Numeric input methods. You may need to input text when you use
the phone. For example: store a name in the phonebook or write a short message. In edit state,
press # key to switch input methods of body text. And you can press * key to enter symbol
selection screen.
Noun
Making a DDD
To make a call with SIM1 , e nt er a n um ber and pre ss the call key to call out by SIM1; the “SIM1
calling” characters appear in front of the number; to make a call with SIM2, enter a number
and press the call key to call out by SIM2; the “SIM2 calling” characters appear in front of the
number. Once the other party answers, the screen displays the call status.
Press the End key to end the call.
To make a DDD: area code + telephone number + call key
Making an IDD
If you need to make an international call, press and hold the * key until the prefix symbol “+” of
international long distance call appears on the screen , and you can make a call in any country
Page 13

13
(for example, +86 in China).
Enter the prefix number, and then enter the country code and full phone number. The country
codes are according to the international tradition, and Germany is 49, UK 44, Sweden 46, etc.
To make an IDD: “+” country code + area code +telephone number + call key
Calling extension
Some extensions of fixed telephone can’t be dialed through directly and you need to dial
through the exchange before dialing the extension. If you insert the pause symbol P
between the exchange number and the extension number when you input the phone
number, the mobile phone will complete the dialing and dial extension automatically. To
enter “P”: press and hold the stylus, or press * for three times (the symbol “P” appears on the
screen).
To call an extension of fixed telephone (excluding +): telephone number + P + extension
number + call key
Emergency call
You can always make an emergency call when you are in the coverage area of the network (you
can know by checking the indicating stripe of network signal intensity on the upper left corner
of the screen). If your network operator doesn’t provide roaming service in your area, you can
only make emergency calls. If you are located in a service area of the network, emergency calls
can also be made without a SIM card.
Note: In certain areas, 112 (emergency call) is provided by the network operator; if it is abnormal,
please contact the network operator.
IMEI
IMEI is International Mobile Equipment Identity. Turn off the mobile phone and take out the
battery, and you can find the label printed with this bar code in the rear side. This number is
also saved in the mobile phone. When the phone is turned on, enter “*#06#” to display the
number.
Calling
When the marks of network providers to appear on screen, you can call or answer the call.
The signal strength is showing on the top left corner.
Making Calls
Enter area code and phone number and press call key to dial out by SIM1/SIM2.
Use the right soft key to delete if there is wrong input. Press and hold right soft key to clear
all characters.
Note: Obstacles give lots of effects on calling quality; moving around in a small range will
improve signal strength effectively.
Making an International Call
Please refer to “Making an IDD”.
Page 14

14
Dialing extension
Please refer to “Calling extension”.
Making a call from the phonebook
Open the phonebook list, scroll to search the desired number, press call key to dial out by
SIM1/SIM2.
Latest numbers redial
Under standby mode, press call key to access the call history.
Press the up/down key to reach the desired number or name and press call key to dial out by
SIM1/SIM2.
Receiving Calls
Press call key to receive an incoming call.
During a call, you can operate by pressing Left soft key: Hold, End single call, Phonebook
and so on; and you can also set Mute on/off.
Press end key to end a call.
Rejecting Calls
Press end key to reject an incoming call.
Options in a Call
During a call, press left soft key to enter options to select Hold, End single call, Phonebook,
Call history, Messaging, Sound recorder, Mute and Volume.
Hold: This function supports two calls at the same time. You can dial another number during
a call.
Dial another number during a call (You can only dial by SIM1 when your first call is from
SIM1, to dial by SIM2 is the same to SIM1).
x Press options and select a number from Phonebook or Call history and press call key to
dial.
x Type in another number you want to dial and press call key to dial.
Mute on/off: If you set Mute function, then you can hear what that side is speaking but your
voice couldn’t be heard at that side.
Note: If the caller can be identified, the caller’s name and phone number will display. If the
caller can’t be identified, the screen will only display the caller’s number. When you use the
function list or Phonebook, you can also answer a call.
Adjust volume
You c an p re ss Up/Down navigation keys to adjust volume during a call.
Page 15

15
Menu guide
Phonebook
Contacts saved in the mobile phone contain the following information: the telephone name
and number. You can add new contacts to phone or SIM1/SIM2.
You can perform the following operations in this mode:
View: View detailed information of the contact.
Send text message: Send a message from SIM1/SIM2.
Call: Make a call from SIM1/SIM2.
Edit: Edit name and number of the contact.
Delete: Delete the contact.
Copy: Copy the contact to phone or SIM1/SIM2.
Move: Move the contact to phone or SIM1/SIM2.
Send vCard: Send vCard as text message or via Bluetooth.
Add to Blacklist: Add the contact to blacklist.
Mark several or mark all to operate.
Caller groups: You can create new group.
Phonebook settings: You can perform the following operations in this mode.
x Preferred storage: Add a new contact to the SIM1/SIM2, Phone or All.
x Speed dial: Set on/off, you can edit and alter speed dial list.
x My number: To add owner’s number and other detailed information.
x Extra numbers: To set owner numbers and Fixed dial of SIM1/SIM2.
x Memory status: To check phonebook memory status of SIM1/SIM2 and phone.
x Copy contacts: To copy contacts from SIM1/SIM2 and phone to other paths respectively.
x Move contacts: To move contacts from SIM1/SIM2 and phone to other paths
respectively.
x Delete all contacts: Delete all contacts from SIM1/SIM2 and phone.
Enter the Contacts interface to perform the following operations:
Quick search:
In the input area where the cursor locates, enter the first letter to locate the first qualified
entry in the contacts list. For example, to search for “Lisa”, enter letter “L”.
Search name:
Enter the desired name, and search the matched entry in the Contacts.
Messages
Enter this menu, you can view: Write message, Inbox, Drafts, Outbox, Sent messages and SMS
settings.
Write message
You can enter this function menu to write short messages.
Short message is a network service. To send or receive short messages, you may need to
subscribe for this service from your network operator. The short messages are sent to the
Page 16

16
message center and then to the recipients (GSM subscribers). The short messages are saved
in the network if the mobile phone of recipient isn’t switched on or can’t receive short
messages (memory is full). The validity depends on user’s settings and network operator.
With SMS, you can send and receive chain text messages, which may affect the charge of
messaging. Please contact your network operator for details.
Each message may contain 160 characters. While editing the message, select the “Input
method” option.
Press # key to switch the input method.
Press the right soft key to delete one character before the cursor, or hold right soft key long
to clear all characters; press the End key to return to standby mode; When writing messages,
you can insert number, name and bookmark in editing message.
When the editing message is finished, you can press direction up/down key to option: enter
recipient or select contacts from phonebook or call history to send.
This mobile phone supports group messages with more than 600 characters each (the
characters limit of common text message). If the message contains more than limited
characters, the phone sends it in two or more messages.
ǂIf the memory is full, an icon will flash in the top line of the screen; since the mobile phone
supports dual SIM cards, the messages are saved in SIM1 and SIM2 separately, and the
prompts appear separately. To receive new messages normally, delete the short messages in
corresponding SIM cards. If the recipient has received the message, the mobile phone sends
an alert tone of message report (report is enabled)
Note: When you send message via SMS service, the mobile phone may display “Sent”. It
indicates that the message has been sent to the SMS center. But it doesn’t mean that the
recipient has received the message. Contact your network operator for more information.
Inbox
You can read the received short messages in the Inbox, including SIM1 messages and SIM2
messages. Press left soft key of options in messages list interface, you can perform the
following operations:
View: View the info of the message.
Reply: Reply in text message by SIM1 or SIM2.
Call sender: Call the sender by SIM1 or SIM2.
Forward: Forward the message to another contact by SIM1 or SIM2.
Delete: Delete the message.
Delete all: Delete all the messages in the Inbox of corresponding SIM cards; if SIM1 is
selected.
Save to Phonebook: Save the sender’s number to phonebook of SIM1/SIM2/phone.
Filter by: Filter by SIM1/SIM2/All messages.
Page 17

17
Drafts
Save the edited text message and perform operations respectively. You can perform the
following operations to the short messages saved in Drafts: View, send, Edit, Delete and Delete
all.
Outbox
Turn on “Save sent message” in SMS settings, messages will be saved in Sent messages; if the
message isn’t sent successfully, the message will be saved in the Outbox. You can perform the
following operations to the short messages saved in Outbox: View, Resend, Edit, Delete and
Delete all.
Sent messages
Turn on “Save sent message” in SMS settings, messages will be saved in Sent messages; you can
perform the following operations to the short messages saved in sent messages: View, Forward,
Delete and Delete all.
SMS settings
You can set the SIM1/SIM2 SMS parameters in this menu.
SMSC address: Check and edit SMS center address.
Validity period: Set validity period as 1hour/6hours/12hours/1day/3days/1week/Maximum.
Message type: Set message type as Text/Fax group3/Fax group4/Page/Email.
Delivery report: The network notifies whether the recipient has received the message or not.
Reply path: Transfer the replay path to the network and this function requires the support of
SMS center.
Voicemail server: Add and call the voice mail number saved in the list.
Note: The number of SMS center is provided by the network operator.
Memory status: You can check the memory status of SIM1/SIM2 and phone in this menu.
Save sent message: Turn on/off save sent message.
Preferred storage: Set preferred storage as Phone/SIM.
Call center
Call logs
This mobile phone can register the missed calls, answered calls and dialed numbers of SIM, as
well as the time and expense of all calls. When the mobile phone is turned on in network
service area and supported by the network, it can register the missed calls and received calls. In
the lists of missed calls, received calls and dialed numbers, you can check the date and time of
the calls, edit or delete the telephone numbers in the list, save the numbers in Contacts.
Missed calls
Page 18
18
This menu displays the missed calls that you did not answer. In the missed calls list, you can
view the details of the record by pressing the Left soft key.
In the lists of missed calls, you can check the date and time of the calls, call, send message, save
to phonebook, edit before call and delete.
Note: When the mobile phone prompts missed call, you can press “View” to access the list of
missed calls. Select the desired number and press the Call key to call this number.
Dialed calls
This menu displays the recent calls you have dialed. In the dialed calls list, you can view the
details of the record by pressing left soft key.
In the lists of dialed calls, you can check the date and time of the calls, call, send message, save
to phonebook, edit before call or delete.
Received calls
This menu displays the calls you have received. In the list of received calls, you can view the
details of the record.
In the lists of received calls, you can check the date and time of the calls, call, send message,
save to phonebook, edit before call or delete.
Delete call logs
Delete call logs. You can select dialed calls, missed calls and received calls to clear. Or you can
directly select all calls to delete.
Call settings
Call waiting: Set to activate or deactivate the call waiting. For call holding and multi-party
conference, you need to activate this function first. It requires network support.
Call divert: This function is a network service and you need to subscribe from the network
operator first. This function can divert the qualified calls to specified telephone number.
Name Description
Divert all voice
calls
Divert all incoming calls
Divert if
unreachable
If the network can’t connect to your mobile phone (power off
or out of service area), it will divert the incoming calls for you.
Divert if no
answer
If you don’t answer the calls in specified time, the network
diverts the call for you.
Divert if busy When you are calling, the network diverts the incoming call.
Divert all data
calls
Need network support, divert all coming data calls.
Cancel all
diverts
Cancel all diverting settings.
Call barring:
Outgoing calls:
1. All voice calls: Set call barring for all outgoing calls of SIM.
2. International voice calls: Set call barring for international calls of SIM;
Page 19
19
3.
International voice calls except to home: When you are abroad, you can only call the
numbers from the country you locate and home country (i.e. the country where your
network operator locates).
Incoming calls:
1. All voice calls: Set call barring for all incoming calls of SIM.
2. Voice calls when roaming calls: Set call barring for all calls of SIM except the calls from
the numbers in local service area.
Cancel all: Cancel call barring settings of SIM. In this case, you can make and answer calls
normally.
Change barring password: Change the password of call barring for SIM.
Line switching: You can set Line1 or Line2. The default setting is Lin1.
Advanced settings
Blacklist: Set On/Off for blacklist and add blacklist numbers.
Auto redial: Select On or Off for auto redial in this option. If the first call isn’t connected
successfully, the mobile phone will redial for ten times at most automatically.
Auto call record: Set on/off auto call record.
Call time display: Set On/Off for call time display.
Call time reminder: Select single or periodic alert tone in the calling process so that you can
know the call time. You can also disable the alert tone.
Reject by SMS: Set on/off auto call record.
Answer mode: Turn on/off press any key to answer the phone and auto answer when
headset mode.
Note: Some settings need network support. Call barring needs local network support and you
need to apply this service first.
Multimedia
Camera
In this menu, you can take pictures with the embedded camera and adjust the camera settings.
The camera lens is in the rear side of the mobile phone and the screen is the viewfinder
window. The pictures are taken in JPG format. After downloading to PC, please view with
appropriate software. If the mobile phone memory is insufficient, please delete certain
pictures or other files in “File manager”. In the camera interface, you can perform the following
operations:
Descriptions of Camera options
Options Description
Switch to video
recorder
Switch Camera to video recorder.
Photos View the saved pictures.
LED highlight: Set LED highlight on/off.
Anti-flicker: 60Hz (default), 50Hz.
Camera settings
Delay timer: 5sec, 10sec, 15sec or Off.
Image settings
Image size: 128* 160, 160*120, 640*480.
Page 20
20
Image quality: Low, Normal, Good.
White balance
Set Auto, Daylight, Tungsten, Fluorescent, Cloudy,
Incandescent.
Scene mode Set Auto or Night.
Storage Choose Phone or Memory.
Restore default Restore the default settings.
Note: After replacing the T-Flash card, it is necessary to create Photos menu
before using the camera.
Image viewer
Image: All the pictures are saved in Album.
Description of image list options:
Options Description
View View selected image.
Image
information
Check detailed information of selected image.
Browse style Choose List/Matrix style.
Send Send via Bluetooth.
Use as Use as Wallpaper/Screen saver.
Rename Change the name of selected image.
Delete Delete the selected image.
Delete all files Delete all the images in the Album.
Storage Phone or Memory card.
Video recorder
Press OK key to start video recording. The recording time depends on the time limit and the
capacity of the memory card. Enter options to perform the following settings.
Description of video recorder options:
Options Description
Switch to
Camera
Switch to Camera.
Camcorder
settings
Anti-flicker: 60Hz (default), 50Hz.
Video settings Video quality: Set Normal; Good; Fine; Low.
Storage Phone or Memory card.
Video player
In this mode, you can also perform the following operations.
Description of video player options:
Options Description
Page 21

21
Play Support playing video files in 3gp, MP4 format.
Send Send via Bluetooth.
Rename Change the name of selected video file.
Delete Delete the selected video file.
Delete all files Delete all the files in video player folder.
Storage Phone or Memory card.
Audio player
Audio Player supports MP3, wav and AMR audio format files and so on. In the list of audio files,
you can perform the following operations:
Play: Play the selected audio file.
Details: Check Size/Time/Title/Artist/Album of the selected audio file.
Refresh list: Refresh the playlist.
Settings: In setting interface, you can perform the following operations.
Pre. playlist: Set as Phone or Memory card.
List auto gen.: Select on/off for List auto gen.
Repeat: Turn off repeat play, repeat play the selected audio file, or repeat all the audio
files in the list.
Shuffle: Play audio files randomly.
Background play: Play audio files at background.
Sound recorder
In this mode, you can perform the following operations.
New record: Record audio file.
List: View the recorder list.
Settings: Select the memory card or phone for storage; set audio quality with low/high.
FM radio
In this mode, you can perform the following operations.
Channel list: Edit the channel name and frequency in the list.
Manual input: Input a frequency as your need.
Auto search: Scan channels automatically.
Settings: Set background play on/off.
Games
Puzzle: This phone provides a Puzzle game. You can choose start game/Best grades/Help.
Games settings: You can Activate/deactivate BGM, Sound effect, Vibration and set volume
level as your need.
File Manager
Open
Page 22

22
In this menu, you can manage the pictures, MP3 files and folders in this menu.
Note: Open files in the memory card.
Audio – Audio folder
Open audio files, you can perform the following operations:
Play: Play the selected file.
Send: Send the selected audio file via Bluetooth.
New folder: Create a new folder in the directory.
Rename: Change the name.
Delete: Delete the selected file.
Mark several: Mark several files to copy, move or send via Bluetooth.
Copy: Copy files to phone or memory card.
Move: Move files to phone or memory card.
Delete all files: Delete all files in the current folder.
Details: View the date and size of selected file.
Photos – Photo folder
View: View the selected image.
Image information: Check the File name, Date, Size, Image width and Image height.
Send: Send the selected photo via Bluetooth.
Use as: Use the selected image as wallpaper or Screen saver.
New folder: Create a new folder in the directory.
Rename: Change the name.
Delete: Delete the selected file.
Mark several: Mark several files to copy, move or send via Bluetooth.
Copy: Copy files to phone or memory card.
Move: Move files to phone or memory card.
Delete all files: Delete all files in the current folder.
Details: View the date and size of selected file.
Videos – Video folder
Play: Play the selected file.
Send: Send the selected video file via Bluetooth.
New folder: Create a new folder in the directory.
Rename: Change the name.
Delete: Delete the selected file.
Mark several: Mark several files to copy, move or send via Bluetooth.
Copy: Copy files to phone or memory card.
Move: Move files to phone or memory card.
Delete all files: Delete all files in the current folder.
Details: View the date and size of selected file.
My Music – MP3 folder
Play: Play the selected music.
Page 23

23
Send: Send the selected music file via Bluetooth.
New folder: Create a new folder in the directory.
Rename: Change the name.
Delete: Delete the selected file.
Mark several: Mark several files to copy, move or send via Bluetooth.
Copy: Copy files to phone or memory card.
Move: Move files to phone or memory card.
Delete all files: Delete all files in the current folder.
Details: View the date and size of selected file.
Format
Format the memory card.
Rename
Change the name of memory card.
Details
Check Name, Total size and Free size of the memory card.
Organizer
Calculator
Press number keys 0-9 to enter the figures you need to calculate and press the # key to enter
radix point; you can also enter operators such as +, -, ×, ÷; press left soft key to clear last input
or result, press and hold left soft key to clear all the contents or results. Press OK key to get the
result.
Note: The precision of the calculator is limited and there are errors, especially when it is
indivisible.
Calendar
In the camera interface, you can perform the following operations:
Jump to date: Skip to the specified date.
Go to today: Skip to the date of today.
Go to weekly/monthly view: You can select weekly view or monthly view of calendar.
Alarm
The time format of alarm clock is the same to clock. When the mobile phone is turned off, the
alarm clock is still valid only if the battery voltage isn’t low. The mobile phone allows setting 5
alarm clocks and the default option is Off. You can customize the alarm time and date for every
alarm clock separately. When the alarm time arrives, the mobile phone rings and displays
current time and date on the screen. Press “Stop” to stop the alarm; press “Snooze”, the alarm
stops and rings again after a few minutes according to your settings.
If the mobile phone is still power off till the alarm time, the phone switches on and alarms
automatically. If you press “Stop”, the phone displays whether switch on the mobile phone or
Page 24

24
not. Press “No” to switch off, or press “Yes” to switch on.
To rc h
You can set on/off for torch.
User profiles
This mobile phone provided several profiles. You can customize the ringtone according to
events and environment. You can customize a profile and activate it. Available options are:
General, Silent, Meeting, Outdoor and My style.
General
You can customize the following items in General profile:
Alert type: Set Ring only, Vib only, Vib and ring and Vib then ring as your need.
Ring type: Repeat and Beep once.
SIM1/SIM2 incoming call: Set up the tone of incoming call of SIM1/SIM2.
Ringtone volume: Set the volume of ringtone.
SIM1/SIM2 message: You can set silent or tone1 as the message tone of SIM1/SIM2.
Message volume: Set the volume of message.
Keypad: Set Click, Tone or Silent.
Keypad volume: Set the keypad volume.
Power on/off: Set tone of power on/off.
System alert: Set On/Off.
After customized, select “Save” in “Options”.
Silent
Ring, Volume and Alert type mustn’t be set. You select “Activate” in “Options”.
Meeting
Please refer to “General” for more details.
Outdoor
Please refer to “General” for more details.
My style
Please refer to “General” for more details.
If the earphone is connected in Silent profile, the headset profile switches on, and the Silent
profile resumes when the earphone is disconnected.
In standby mode, press and hold the # key to switch to Silent mode, and press and hold this
key again to resume original profile.
Note: The Headset profile is activated automatically when the earphone is inserted and the
original profile resumes when the earphone is removed.
Settings
Shortcuts
The system default several shortcut menu, can be manually add to ten, select one menu, press
the left soft key into the “Options”, can undertake the following operation:
¾ Add: to add other menu.
Page 25

25
¾
Edit: edit the current menu.
¾ Delete: delete selected shortcut menu.
¾ Delete all: delete the entire shortcut menu.
¾ Change order: rearrange menu.
Multi SIM settings
You can set the dual SIM mobile phone accordingly:
Multi SIM open;
Only SIM1 open;
Only SIM2 open;
Phone settings
Time and date:
Set home city: You can set home city as your need.
Set time/date: Set current time and date and turn on/off Daylight saving.
Set format: Set the displaying format of time and date and Date separator with “.” “ : ” “/”
and “–”.
Update with time zone: Set on/off for this function.
Auto power on/off:
Set the time of schedule power on/off.
Language:
Select the phone language (Available options are English, French, Spanish, Portuguese). The
default language is Spanish.
Pref. input method: ABC/abc/Abc/VI/Vi/vi/Numeric.
Display:
Wallpaper: Select wallpaper from System or User defined in Phone/Memory card.
Screen saver: Set on/off and select image from System or User defined in
Phone/Memory card.
Show date and time: Turn on/off
Dedicated key:
You can configure short cut functions for the direction Up, Down, Left, and Right key
respectively. In the standby mode, press any one of them to access the appointed function.
Auto update time: you can set On/Off or first confirm.
Flight mode: Phone cannot receive any signal at Flight mode. You can set Normal mode or
Flight mode in this menu.
UART settings: Set SIM1/SIM2.
Misc. settings: LCD backlight: In this function, you can set the time of LCD backlight and the
brightness.
Press Vib setting: Set press Vib setting on/off.
Network settings
In this menu, you can set SIM1/SIM2 network and preferred networks.
Page 26

26
Names Descriptions
New search: The phone searches new network.
Select network: The phone selects available network.
Network
selection
Selection mode:
Automatic: The phone selects available network automatically.
Manual: Only register specified network. If this network is
unavailable, the phone won’t register other networks.
Security settings
SIM1/SIM2 security
PIN lock: Activate/deactivate PIN lock.
Change PIN: You can change the SIM1/SIM2 PIN to your private password in 4-8 digits.
Change PIN2: You can change the SIM1/SIM2 PIN2 to your private password in 4-8 digits.
Phone security
Phone lock: You can activate or deactivate phone lock. The phone lock is a 4-8 digit
password (default: 1122),
Change password: Change the phone lock password.
Auto keypad lock
You ca n a ct ivat e o r d ea ctiv at e k eyp ad lock . Th e keypad locks in certain time automatically
(5sec, 30sec, 1 min and 5mins).
M Tracker
Input phone password to set mobile tracker.
Connectivity
In the Bluetooth interface, you can perform the following operations:
Power: Activate/deactivate the Bluetooth.
Visibility: Set on/off.
My device: Support search new device and so on.
Search audio device: Search devices like headset. Activate the Bluetooth wireless function
before searching.
My name: Display my Bluetooth name and you can edit name as your needs.
Advanced: Set audio path, the preferred storage and view my address.
Restore factory settings
Access the setting, select Reset, enter the password, and follow the prompt to reset and
restart the mobile phone. This operation will restore all default settings.
Note: The default password is 1122. The phone will auto power on after shutdown.
Page 27

27
Services
With this function, you can access the services on the Internet, including weather, news,
financial info, etc. This service is provided by network operator. New menus appear according
to SIM cards. It is invalid if the SIM card and your network operator don’t support this function.
Please contact your network operator for more information.
Appendix
Appendix A: Please take care of your mobile phone
Maintenance
The mobile phone is made in exquisite process. Please be careful while using. The suggestions
below will help to extend the service life of the mobile phone.
1> Keep the mobile phone and all its parts and accessories away from children.
2> Keep the mobile phone dry. Keep it away from the substances such as rain, moisture and
liquids that may erode the circuits. Do not use the mobile phone at places with too much
dirt or put it at these places to avoid damaging the activate parts.
3> Do not put the mobile phone at the place with high temperature; otherwise, it will shorten
the life of the circuit, and damage the battery and plastic parts.
4> Do not put the mobile phone at cold place. When it becomes warm (normal temperature),
moisture will generate in the mobile phone and damage the circuit board.
5> Do not wash the mobile phone with corrosive chemical agent, cleaner or strong detergent.
Dip soap water with soft cloth to wipe the mobile phone.
6> If the mobile phone or any accessory can’t work normally, please send it to qualified service
center.
Note: Please dispose the used products according to local regulations.
Page 28
28
Appendix B: Troubleshooting
Failure Reason
Can’t switch on
1ǃ The battery has been run out;
2ǃ The battery isn’t installed properly.
SIM card error
1ǃ SIM card is dirty. Clean the SIM card.
2ǃ Re-install the SIM card.
3ǃ SIM card is damaged. Please change a new one.
4ǃ (SIM2 is same)
Weak signal
Check the icon of signal strength, where four strips
indicate the strongest signal and two or less strips
indicate weak signal.
(SIM2 is same)
Can’t make calls
(I) You have set to hide your own number, but the
network operator doesn’t support this service.
(II). The ambient has strong interference.
(III). You have enabled call barring.
(IV). You have activated Line 2, but the network operator
doesn’t support this service.
Can’t charge the
battery
(I). The battery may be over discharged and it takes a
while to charge after connected to the charger.
(II) Battery performance has decreased.
Can’t connect to
network
(I). The signal is too weak, or there is radio interference.
(II). Check whether the SIM card is installed properly,
whether the contact is poor or whether the card is
damaged? Please contact your network operator if the
SIM card is damaged.
The photos taken
are too dark
(I) The brightness is too low;
(II) The environment is too dark
The photos taken
are blurry
(I) The object is moving;
(II) Your hand shakes when you press the shutter
The photos taken
are distorted
The object is too close
Can’t access
service menu
The SIM card doesn’t support
Appendix C: Abbreviation and explanation
SMS Short Message Service
EMS Enhanced Message Service
Page 29

29
SIM Subscriber Identity Module
GSM Global System for Mobile Communication
PIN Personal Identity Number
PUK PIN Unblocking Key
IMEI International Mobile Equipment Identity
CB Cell Broadcast
GPRS General Packet Radio Service
MMS Multimedia Message service
Appendix D: Optional parts
T-FLASH card
This is also called as memory card, which is used to save data.
Hands free kits
The hands free kits include earphone and mini microphone, which are used for hands free call.
USB data cable
In power off state, connect the mobile phone to PC with the USB data cable to access files and
charge the battery. In power on state, connect the mobile phone to PC with the USB data cable
to access the storage device.
Travel charger
Used for travel charging
Note: Please use qualified accessories.
Made in China
Page 30
30
SAFETY AND PRECAUTION WARNINGS
www.sar-tick.com
This product can be adjusted to the SAR national limits of 2
W/Kg. The specific SAR maximum values are in the
information section of this guide.
When you hold the product or use it on your body, maintain a
distance of 1.5 cm from your body to ensure the
radiofrequency exposure standards.
This device offers communication and entertainment services that follow SUNSTECH’s high
standards and technological experience.
x The content may differ from the final product of the software provided by the suppliers of
services or transmitters and it is subject to alteration without prior notice.
x The elements that come with the device and any available accessory may vary according to
the region or supplier of the services.
x The elements provided are designed uniquely for this device and may not be compatible
with other devices.
x You may purchase additional accessories at your local SUNSTECH distributor. Ensure that
they are compatible with the device before you purchase them.
x Other accessories may not be compatible with the device.
x SUNSTECH is not held responsible for problems of insufficient return or any change to the
operating system’s software. Any attempt to personalize the operating system may cause the
device or the applications to function incorrectly.
Instruction icons
Warning: Situations that can cause injuries to yourself or
third parties.
Precaution: Situations that can cause damages to the
device or other equipment.
Note: Notes, recommendations of use or additional
information.
Copyright
Copyright 2013 Afex suns, S. A.
This guide is protected by international copyright laws.
Reproduction, distribution, translation or transmission of any part of this guide is not allowed
under any circumstances or through any means, be it electronic or mechanic. This includes
photocopies, records or storage in any information retrieval and storage systems, without
Page 31

31
previous written authorization from Afex Suns, S. A.
Safety information
This section contains safety information for mobile devices. Some of the content may not
apply to your device. In order to avoid injury to yourself or third parties or damage to the
device, read the device’s safety information before you use it.
Warning
If you do not comply with these safety regulations and warnings, you may suffer serious
injury or even death.
Do not use damaged power cords or connectors or loose sockets.
Unsafe connections may cause an electric discharge or a fire.
Do not touch the power cord if your hands are wet and do not pull the cord to disconnect
the charger.
If you do so, you may be electrocuted.
Do not bend or damage the power cord.
If you so do, this may cause an electric discharge.
Do not cause a short-circuit in the charger or the device.
If you do so, this may cause an electric discharge or the device may not function correctly.
Use batteries, chargers, accessories and supplies that have been approved by the
manufacturer.
x The use of generic batteries or chargers may shorten the useful life of the device or cause
incorrect functioning. It may also cause a fire or the battery may explode.
x Only use batteries or chargers that have been approved by SUNSTECH, specifically
designed for the device. Any non compatible batteries and chargers may cause serious
physical injuries or damage the device.
x SUNSTECH will not be held responsible for the safety of the user whenever accessories or
supplies that have not been approved by the brand are used.
Do not cut or drop the charger or the device.
When handling or disposing of the device and charger do so with caution.
x Never throw the battery or the device into the fire. Never place the battery or the device
on any sources of heat, such as, ovens, microwaves, glasshouses or radiators, etc. If it
overheats, the device may explode. Follow all local regulations with regards to disposing
of the used battery or device.
x Do not squash the device or make holes in it.
x Avoid exposing the device to high pressure because this may cause an internal
short-circuit and overheating.
Page 32

32
Protect the device, battery and charger in order to stop them from getting damaged.
x Avoid exposing the device and battery to very high or very low temperatures.
x Extreme temperatures may damage the device and reduce the charging capacity and the
duration of the device and battery.
x Avoid the battery entering into contact with metal objects because this may cause a
connection between the positive and negative terminals of the battery and damage it
temporarily or permanently.
x Never use damaged chargers or batteries.
Do not store the device in or near heaters, microwaves, heated kitchen equipment or high
pressure containers.
x The battery may have leakages.
x The device may overheat and cause a fire.
Do not use or store the device in places with a lot of dust or material transported by air.
Dust or foreign materials may cause the device to malfunction and may result in a fire or an
electric discharge.
Safety information
Do not bite or suck the device or the battery.
x This may damage the device or cause an explosion or a fire.
x Children and animals may choke on small pieces.
x When children use the device, ensure that they do so correctly.
Do not insert the device or the accessories provided into your eyes, ears or mouth.
If you do so, you make choke or suffer serious injuries.
Do not handle damaged lithium-ion batteries or batteries that show evidence of leakage.
To dispose of lithium-ion batteries safely, contact your closest authorized service centre.
PLUGGABLE EQUIPMENT: the socket-outlet shall be installed near the
equipment and shall be easily accessible.
Precaution
If you do not comply with these regulations and warnings, you may suffer injuries or cause
material damage.
Do not use the device near other electronic devices.
x Most electronic devices use radiofrequency signals. The device may interfere with other
electronic devices.
x If you use a LTE data connection, this may cause an interference with other devices, such
as audio equipment and telephones.
Page 33

33
Do not use the device in a hospital, plane or car that may be affected by interference
caused by radiofrequency.
x If possible, avoid using the device at any distance lower than 15 cm from a pacemaker,
because the device may cause interferences with it.
x To minimi ze any possibl e inter fe re nc e w it h a pacemaker, use the device only on the
opposite side of the body in relation to the position of the pacemaker.
x If you use medical equipment, contact the manufacturer of the equipment before using
the device in order to ascertain whether the equipment will be affected by the
radiofrequency emitted by the device.
x If electronic devices are used on a plane, these may interfere with the electronic
navigation instruments. Ensure that the device is turned off during take-off and landing.
After take-off you may use the device on “airplane mode” as long as this is allowed by the
cabin crew.
x The electronic devices in your car may malfunction due to the radio interference of the
device. Contact the manufacturer for further information.
Do not expose the device to smoke or strong emanations.
If you do so, you may damage the outside part of the device or cause its malfunctioning.
If you use hearing devices, contact the manufacturer for further information about radio
interference.
The radiofrequency that the device emits may interfere with some hearing devices. Before using
the device, contact the manufacturer in order to ascertain whether the hearing device will be
affected by the radiofrequency emitted by the device.
Do not use the device near other devices or apparatuses that emit radiofrequency, such as
sound systems or radio towers.
Radiofrequency may cause the malfunctioning of the device.
Turn off the device in potentially explosive atmospheres.
x Turn off the device instead of removing the battery in potentially explosive atmospheres.
x Always respect the standards, instructions and warning signs in potentially explosive
atmospheres.
x Do not use the device in petrol stations or near fuel or chemicals or in demolition areas.
x Do not store or transport flammable liquids, gases or explosive material in the same
compartment in which the device, its parts or accessories are.
If you become aware of the device or the battery letting off strange odours or sounds or if
you see smoke or liquid coming out of the device or battery, stop using the device
immediately and take it to an authorized service Centre.
If you do not do so, this may cause a fire or an explosion.
Comply with all the safety regulations and warnings related to the use of mobile devices
Page 34

34
when driving a vehicle.
When driving, your main responsibility is to control the vehicle safely. If the law does not allow
mobile phone use when driving, do not use the mobile device. For your and others’ safety use
your common sense and remember the following advice:
x Get to know the device and its operating functions, like speed dialling and recall system.
These functions allow the time necessary to make and receive calls to be reduced.
x Put the device in a place where it is easy to reach. Make sure that you can access the
wireless device without taking your eyes off the road. If you receive a telephone call at an
inconvenient time, let voice-mail answer it.
x Stop phone calls when there is heavy traffic or when there are adverse climate conditions.
Rain, sleet, snow, ice and heavy traffic can be very dangerous.
x Do not jot down or look for telephone numbers. Jotting down a task or looking at your
calendar may distract you from your main responsibility, which is to drive safely.
x Dial carefully and assess the state of the traffic. Make phone calls when you are not
moving or before hitting traffic. Try to schedule phone calls when the car is parked.
x Do not have very stressful or emotional phone calls that may distract you. Tell the person
that you are speaking to that you are driving and end any conversations that may take
away your attention from the road.
Correct use and maintenance of the mobile device.
Keep the device dry.
x Humidity and liquids may damage the parts or the electronic circuits of the device.
x Do not turn on the device if it is wet. If it is already turned on, turn it off and take the
battery out immediately (if you cannot turn it off or take the battery out, just leave it as it
is). After this, dry the device with a towel and take it to the service centre.
x Liquids will change the colour of the label which indicates the damage caused by the
water inside the device. The damage caused by the water in the device may cancel the
manufacturer’s warranty.
Place the device only on flat surfaces.
If it drops, the device may get damaged.
Do not store the device in very hot or cold places. It is recommended that you use the
device at temperatures between 5º and 35º.
x Do not store the device in places with very high temperatures, such as inside a car in the
summer. If you do so, you may cause the screen to malfunction, the device may get
damaged or the battery may explode.
x Do not expose the device to direct sunlight for long periods of time (for example, on the
dashboard of a car).
x Store the battery at temperatures between 0º and 45º.
Do not store the device with metal objects, such as coins, keys and necklaces.
Page 35

35
x The device may get scratches or stop working properly.
x If the battery terminals come into contact with metal objects, a fire may occur.
Do not store the device near magnetic fields.
x It is possible for the device to start malfunctioning and for the battery to lose power due
to being exposed to these fields.
x Cards with magnetic stripe, such as credit cards, telephone cards, travel passes may get
damaged due to the magnetic fields.
If the device overheats, stop using it and its applications for a while.
Prolonged skin exposure to a hot device may cause symptoms of burning with low temperature,
such as red spots and pigmentation.
Do not use the device if the back cover is not in place.
The battery may come out of the device, which can cause damage or malfunctioning.
If the device has a lamp or a camera flash, do not use it near people’s or animal’s eyes.
This may cause a temporary loss of vision or damage the eyes.
Be careful when exposing yourself to intermittent light.
x When you use the device, leave some lights turned on in the bedroom and do not have
the screen too close to your eyes.
x Convulsions or fainting may occur due to exposure to intermittent light when looking at
videos or playing games with intermittent lights for prolonged periods of time. If you feel
unwell, stop using the device immediately.
x If anyone close to you suffered from convulsions or fainting when using a similar device,
visit a doctor before using the device.
x If you feel discomfort, such as muscle cramps or you feel disoriented, stop using the
device immediately and visit a doctor.
x To avoid eye fatigue, have frequents breaks when using the device.
Reduce the risk of injury caused by repetitive movements.
When you carry out repeated actions, such as pressing keys, drawing characters on the touch
screen or playing a game, you may feel discomfort in your hands, neck, shoulders or other parts
of the body. When you use the device during prolonged periods of time, hold it with relaxed
hands, touch the keys lightly and rest frequently. If you continue feeling discomfort during or
after taking these steps, stop using the device and visit a doctor.
When you use earphones, protect your hearing and your ears.
Page 36

36
x Excessive exposure to loud sounds can cause damage to
hearing.
x Exposure to loud sounds while you are walking may distract
you and cause an accident.
x Always lower the sound before connecting the earphones to an audio source and use the
minimum amount of volume necessary to listen to music or have a conversation.
x In dry environments, static electricity may accumulate in the earphones. Avoid using
earphones in dry environments or touch metal objects to discharge the static electricity
before connecting the earphones to the device.
x Do not use an earphone while you are driving or riding a vehicle. If you do so you may get
distracted and cause an accident or you may be subject to legal action, depending on the
area where you are driving.
Use the device with caution while you are walking or moving.
x Always pay attention to what is happening around you to avoid physical injury to yourself
and others.
x Make sure the earphone cord does not get entangled round your arms or nearby objects.
Do not take devices in your front pockets or round your waist.
You m ay g et i nj ur ed or da ma ge the device if it falls.
Do not paint your device or put any stickers on it.
x Paint and stickers can obstruct the mobile parts and stop the device from working
properly.
x If you are allergic to paint or to the metal parts of the device, you may get a stingy feeling,
eczema or swelling. If this happens, stop using the device and visit a doctor.
Do not use the device if the screen is cracked or broken.
The broken glass can cause hand and face injuries. Take the device to an authorized service
centre to get it repaired.
Install the mobile devices and the equipment with caution.
x Make sure that the whole mobile device or related equipment that is installed in your
vehicle is assembled safely.
x Avoid placing the device and the accessories where the airbag is or next to it. Any
wireless equipment installed incorrectly can cause serious injuries when the airbags
inflate quickly.
Do not allow the product to fall or to be subject to strong impacts.
x The device may get damaged or malfunction.
Page 37

37
x If you bend or deform it the device may get damaged and its parts may malfunction.
Guarantee of the maximum duration of the battery and charger.
x Avoid charging the device for over a week, because overcharging can reduce the
battery’s service life.
x With time, the device will run out of battery (even when it is not being used) and you will
need to recharge it to use it again.
x Disconnect the charger from the power sources when it is not being used.
x Use the battery only for the purpose for which it was designed.
x If you do not use the battery for a long time, you may reduce its service life and
performance. You may also cause the malfunctioning or explosion of the battery or a fire.
x Follow all the instructions in this manual to guarantee the longest service life possible for
your device and battery. Any damage or operating problems caused by not complying
with the warnings and instructions may cancel the manufacturer’s warranty.
x With time, the device may wear out. Some parts and repairs are covered under the
warranty during the validity period; however, the damages or deterioration caused by the
use of accessories not approved by the brand are not covered.
Take the following information into account when using the device.
x Use it in a vertical position, as you would a traditional telephone.
x Speak directly into the microphone.
x Do not cover the antenna area with your hands or other objects. This may cause
connection problems or cause the battery to run down.
Do not unassembled, change or repair the device.
x Any alteration or change to the device may cancel the manufacturer’s warranty. If you
need to repair the device, take it to an authorized service centre.
x Do not disassemble or make holes in the battery, this may cause an explosion or a fire.
x Turn off the device before removing the battery. If you remove the battery while the
device is still turned on, this may cause malfunctioning.
Take the following information into account when cleaning the device.
x Use a towel or a rubber cloth to clean the device and the charger.
x Clean the battery terminals with cotton or with a towel.
x Do not use chemical substances or detergents. If you do so, you may cause discoloration
or corrosion of the outside part of the device or you may cause an electric discharge or a
fire.
Do not use it for any other purpose other than the one it was designed for.
The device may malfunction.
When you use the device in public, try not to disturb others.
Page 38

38
Only allow qualified professionals to carry out the maintenance of your device.
It is possible for damages to occur and the manufacturer’s warranty is cancelled if you allow non
qualified personnel to carry out the maintenance of the device.
Be careful when handling SIM cards, memory cards or cables.
x When inserting a card or connecting a cable to the device, make sure the card is inserted
correctly or that the cable is connected on the right side.
x Do not take the card out when the device is transferring information or it has access to it,
because you may lose data and damage the card or the device.
x Protect the cards from strong discharges, static electricity and noise generated from
other electronic devices.
x Do not touch the contacts or the gold terminals with your fingers or with metal objects. If
the card is dirty clean it with a soft cloth.
x If you insert a card or connect a cable forcefully or incorrectly you may cause damage to
the multifunctional socket or other parts of the device.
Make sure you have access to emergency services.
It is possible that in some areas or circumstances you may not be able to make emergency
phone calls. Before travelling to remote areas or developing countries, plan an alternative form
of communicating with the emergency services.
Protect your personal data and avoid confidential information from being spread or used
incorrectly.
x When you use the device, make sure you make back-up copies of important data.
SUNSTECH will not be held responsible for any loss of data.
x When you dispose of the device, make a back-up copy of all the data and after
re-establish the device to avoid personal information from being used inappropriately.
x Read the licenses screen carefully when you download applications. Be especially careful
with applications that have access to various functions or a significant amount of your
personal information.
x Control your accounts frequently to avoid any suspicious or non-authorized use. If you
find any indication of your personal information not being used appropriately, contact
your services supplier to delete or change the information in your account.
x If you lose the device or it is stolen, change the passwords of your accounts to protect
your personal information.
x Avoid using applications from unknown sources and block the device with a pattern, a
password or a PIN.
Do not distribute material protected with copyright.
Do not distribute material protected with copyright without the authorization of the content
owners. If you do so, you may violate copyright laws. The manufacturer will not be held
Page 39

39
responsible for any legal problem caused by illegal use of material protected by the user.
Malware and virus
Follow these suggestions to protect the device against malware and virus. If you do not do
so, you may cause damages or loss of data that may not be covered under the warranty.
x Do not download unknown applications.
x Do not use unreliable websites.
x Delete any suspicious text messages or emails from unknown senders.
x Create a password and change it regularly.
x Deactivate the wireless functions, such as Bluetooth, when you are not using them.
x If the device behaves strangely, execute an antivirus program to detect a possible
infection.
x Execute an antivirus program on the device before starting applications and files that you
just downloaded.
x Install anti-virus programs on your computer and execute them regularly to detect any
possible infections.
x Do not edit the registration adjustments or change the device’s operating system.
Information about the certification of the Specific Absorption Rate (SAR).
THIS DEVICE FOLLOWS INTERNATIONAL STANDARDS OF EXPOSURE TO RADIO WAVES.
Your mobile device is a radio transmitter and receiver. It was designed to not exceed the limits of
exposure to radio waves (electromagnetic fields of radiofrequency) recommended by
international standards. The standards were developed by an independent scientific
organization (ICNIRP) and include a substantial safety margin designed to ensure the safety of all
people, regardless of their age or state of health.
The exposure to radio wave standards use a measurement unit known as the Specific Absorption
Rate, SAR. The SAR limit for mobile devices is 2 W/Kg. The SAR tests are carried out using
standard operation positions with the device transmitting at its maximum certified energy level
in all frequency bands. The highest SAR amounts under the ICNIRP standards for this device
model are:
Maximum SAR for this model and conditions under which it registered
SAR for positions near the head.
0.285 W/Kg
SAR for positions near the body.
0.0399 W/Kg
During the use, the real SAR values for this device are usually a lot lower from the values
indicated previously. This is due to maximizing the system’s efficiency and to minimize the
interference with the network, the operation capacity of your mobile device reduces
automatically when the maximum power is not needed for the call. The lower the amount of
energy leaving the device, the lower the SAR amount will be.
Page 40

40
A SAR test was carried out with the device on the body with a distance of 1.5 cm. To comply with
the radiofrequency exposure requirements, while using the device on the body, the device shall
have to be at least 1.5 cm away from the body.
Some organizations, like the World Health Organization or the Food and Drug Administration of
the United States suggest that if users want to reduce exposure, they can use a hands free
accessory to main the wireless device far away from the head and body when in use, or reduce
the amount of time spent using the device.
Correct disposal of this product.
(Electronic device waste)
(This applies in countries where recollection systems happen
separately).
The presence of this symbol on the product, accessories or information
material indicates that neither the product nor its electronic
accessories (such as, the charger, helmets, USB cable) should be
disposed of with other household waste.
To avoid any possible damage to the environment or human health caused by uncontrolled
disposal of waste, separate these products from other waste and recycle them. This way, you are
promoting the sustainable reuse of material resources.
Individual users can contact the establishment where they purchased the product or the
relevant local authorities to get information about where and when they can take it in order to
submit it to ecological and safe recycling.
Business users can contact their supplier and check the purchase contract conditions. This
product and its electronic accessories should not be disposed of with other commercial waste.
Correct disposal of this product’s batteries
(This applies in countries where recollection systems happen
separately).
The presence of this mark on the batteries, manual or product
packaging indicates that when the service life of the batteries has
ended they should not be disposed of with other household waste.
The chemical symbols Hg, Cd and Pb indicate that the battery has
mercury, cadmium or lead at levels a lot higher than the reference
values admitted by the 2006/6 Directive of the European Union.
If the batteries are not disposed of correctly, these substances may cause personal injury or
damage the environment.
To protect natural resources and promote recycling, separate the batteries from other waste and
recycle them through the free collection service in your area.
Page 41

41
Exemption from responsibility clause
Part of the content and services to which you obtain access through this device belong to third
parties and are protected under copyright, patent, registered trademark and/or other intellectual
property laws. This content and services are only for personal use and not commercial use. It is
possible that the content or the services cannot be used if not authorized by the content owner
or the supplier of the services. Without prejudice to the aforementioned information, except
when expressly authorized by the content owner or service supplier, you cannot change, copy,
reedit, charge, publish, transmit, translate, sell, create derivative works, explore or distribute in
any way or by any means the content or the services shown through this device.
“THE CONTENT AND THE SERVICES OF THIRD PARTIES ARE PROVIDED “AS IS”. SUNSTECH DOES
NOT GUARANTEE THE CONTENT OR THE SERVICES PROVIDED, EITHER EXPRESSLY OR IMPLICITLY,
FOR NO PURPOSE. SUNSTECH EXPRESSLY RENOUNCES ANY IMPLICIT GUARANTEES, INCLUDING
BUT NOT LIMITED TO, MERCHANTABILITY OR SUITABILITY GUARANTEES FOR A PURPOSE IN
PARTICULAR. SUNSTECH DOES NOT GUARANTEE THE VERACITY, VALIDITY, REPRODUCTION,
LEGALITY OR INTEGRITY OF ANY TYPE OF CONTENT OR SERVICE PROVIDED THROUGH THIS
DEVICE AND UNDER NO CIRCUMSTANCES, INCLUDING NEGLIGENCE, WILL SUNSTECH BE HELD
RESPONSIBLE. BOTH IN TERMS OF CONTRACT OR PREJUDICE TO ANY DIRECT OR INDIRECT,
ACCIDENTAL, SPECIAL OR CONSEQUENTIAL DAMAGES, LAWYERS’ FEES, EXPENSES OR ANY
OTHER TYPE OF DAMAGE FROM OR IN RELATION TO ANY TYPE OF INFORMATION INCLUDED IN
OR AS A RESULT OF THE USE OF ANY TYPE OF CONTENT OR SERVICE BY YOURSELF OR A THIRD
PARTY, THE POSSIBILITY OF THE REFERRED DAMAGES IS KNOWN.”
The services of third parties may cease or be interrupted at any time and SUNSTECH does not
carry out representations or guarantees in relation to the availability of content or service for any
period of time. The content and services are transmitted by third parties through networks and
transmission locations over which SUNSTECH has no control. Without limiting the generality of
this clause, SUNSTECH expressly renounces any responsibility for any interruption or suspension
of content or service provided through this device.
SUNSTECH is not responsible for customer service regarding content and services. Any question
or request for service regarding content or services should be sent directly to the services and
content suppliers.
Page 42

42
WAR RANTY CAR D
EUROPEAN WARRANTY
1. General
This warranty is granted without prejudice and in addition to the recognized rights for
the consumer vis-à-vis the seller provided in the Royal Legislative Decree of 16 November,
approving the restated text of the General Law for the Protection of Consumers and Users
and other complementary legislation. Therefore, the recognized legal rights for the
consumer are not limited or excluded according to the relevant Regional, National or
European legislation.
This warranty shall be valid in all the European Union Member States with the limitations
that legally correspond in the country in which they are intended to be implemented in
accordance with their implementing legislation.
Notwithstanding the foregoing, SUNSTECH shall respect the rights and limitations related
to the product warranty that legally correspond in each of the States listed in the
Attachment in accordance with their implementing legislation for any product provided
that it is intended for the EU market and has been purchased or used by the consumer or
user within the EEA.
2. Legal Warranty
This SUSTECH product has a two (2) year warranty counting from the date of delivery
and/or purchase. During the above timeframe, SUNSTECH shall be held responsible for
any lack of conformity of the product in relation to the contract in accordance with the
provisions of the Law for the Protection of Consumers and Users, that shall entitle the
consumer to request the repair or replacement of the product, unless one of these
options is objectively impossible or disproportionate.
Accordingly, the remedy (i.e. the repair or replacement) shall be deemed to be
disproportionate if it imposes unreasonable costs on the seller. In order to determine this,
the following shall be considered: (i) the value of the product if there were no lack of
conformity; (ii) the relevance of the lack of conformity; and (iii) if the other form of
remedy could be carried out without major inconvenience to the consumer and user.
To determine whether the costs are unreasonable, the costs incurred by one form of
remedy must be significantly higher than the costs corresponding to the other form of
remedy.
In addition, the consumer may choose between requesting a reduction in the price or
terminating the contract, if he is not entitled to demand the repair or replacement of the
product and whenever these actions would not be completed within a reasonable
timeframe and would cause more inconvenience to the consumer and user. However,
the termination shall not take place where the lack of conformity is minor.
Page 43

43
Both the repair and the replacement of the product as result of the product’s lack of
conformity shall be free of charge for the consumer and user, including labour and
materials.
In any case, repairs under warranty shall be carried out by SUNSTECH’s Official Technical
Assistance Service or its authorized distributors.
3. Conditions for the warranty to be exercised
To exercise the legal and commercial warranty, it is necessary to submit documentary
evidence showing the delivery and/or purchase date of the product, whether the invoice,
receipt, delivery slip or sealed and dated warranty card. Documents which have been
tampered with or falsified will not be accepted.
The consumer shall contact SUNSTECH’s Customer Service Team using the website (under
the support section) and will be informed about what action to take. At that time, the
consumer shall have to provide a clear description of the malfunction or the lack of
conformity of the product with the contract.
In any case, repairs under the warranty shall be carried out by SUNSTECH’s Official
Technical Assistance Services or its authorized distributors so that SUNSTECH can be held
responsible under the legal and/or commercial warranty.
4. Exceptions
The warranty does not foresee or include periodic maintenance or product installation
revisions.
In addition, the product will not be considered as lacking conformity in relation to the
contract and therefore, it will not be covered by the legal or commercial warranty when:
x The lack of conformity corresponds to a discrepancy with the safety standards or the
local or national techniques of a different country to the one it was originally
designed and produced in;
x This product or any of its identification features (number of series, etc.) have been
partially or completely opened, assembled, unassembled, handled and/or repaired by
a person not part of SUNSTECH’s Official Technical Assistance Services team or its
authorized distributors
x The lack of conformity is a result of an incorrect installation (except if the installation
has been carried out by one of SUNSTECH’s authorized sellers or under its
responsibility, or by the consumer following SUNSTECH’s installation instructions) or
an abusive or inadequate use of the product, including but not limited to, a usage
that is not in accordance to the normal purpose of the product or the directions for
use and maintenance, as defined by SUNSTECH;
x The lack of conformity has been caused by a computer virus, an action or a
manipulation of passwords, software installation, manipulation or reinstallation, etc.;
x The lack of conformity is due to the use of accessories, chargers or consumables that
are not SUNSTECH originals and therefore are not designed for that product;
Page 44

44
x The lack of conformity is due to the use of any third party software or application that
modifies, changes or adapts the software that was approved and/or included by
SUNSTECH in the product;
x The lack of conformity is a result of downloading or using third party multimedia
services and/or contents available or accessible through the product;
x Damages in or through the battery, which are due to it being overcharged, are
produced;
x Any of the box seals or battery cells have been damaged, or there is clear evidence
that shows these were handled; and/or
x The product damages are caused by any unforeseeable or force majeur circumstances,
especially, lightning, water, fire, applying incorrect voltage or any other cause that is
not due to the product manufacturing or design.
Under no circumstances will SUNSTECH be held responsible for the loss of any data stored in the
product. The consumer will be held responsible for any back-up copies and the protection of any
data from loss, damage or destruction.
None of the warranties included here cover the replacement of parts, due to ware or rupture of
mechanisms, rubber, boxes and/or plastic, as well as any aesthetic damage resulting from the
normal use of the product, for example, if the screen loses its shine with the use of the product.
In the same way, the warranties do not cover any type of damage produced during the
transportation of the product (including but not limited to aesthetic damage, blows, lines,
scratches, stains, dents, etc.) in which case the applicable provisions under SUNSTECH’s general
contract conditions will apply.
For further information go to www.sunstech.es
You c an a lso c on ta c t:
AFEX SUNS, S.A.
Metall, 6-8
08110 Montcada i Reixac
Page 45

DECLARATION OF CONFORMITY
Council Directive(s) to which conformity is declared:
Directive (1999/5/EC) - R&TTE
Directive (2011/65/EU) - RoHS
Application of the Standards:
EN 60950-1:2006+A11:2009+A1:2010+A12:2011+A2:2013
EN 50332-1:2000 EN 50332-2:2003
EN 50566:2013 EN 50360:2001/A1:2012
EN 62209-1:2006 EN 62209-2:2010
EN 62479:2010 EN 301 489-1 V1.9.2
EN 301 489-7 V1.3.1 EN 301 489-17 V2.2.1
EN 301 511 V9.0.2 EN 300 328 V1.9.1
IEC 62321:2008 IEC 62321:2013
Manufacturer’s name:
AFEX SUNS, S.A.
Manufacturer’s address:
c/Metall 6-8, 08110, Montcada i Reixac
Type of equipment:
Mobile phone
Trade:
SUNSTECH
Model no.:
TEL205
(Serial number range:160700001 - 160705050)
We, the undersigned, hereby declare under our sole responsibility that the
specified equipment is in conformity with the above Directive(s) and
Standard(s)
Place: Barcelona ______________________________
(Signature)
Víctor Planas Bas_________
(Full name)
Date: 25 - July - 2016
General Manager __
(Position)
Page 46

TEL205 · Teléfono móvil
English & Spanish
Page 47

2
Manual del usuario
Estimado cliente:
Gracias por elegir este teléfono móvil. Este teléfono móvil incorpora las más avanzadas
funcionalidades actualmente disponibles, permitiendo una operación simple y conveniente y
satisfaciendo sus requisitos especiales.
El teléfono móvil soporta tarjetas T-FLASH (memoria) y Dual SIM standby. Incluye las siguientes
funcionalidades: SMS, MP3, MP4, Cámara, radio FM, Alarma, grabador de vídeo y calendario,
permitiendo organizar su trabajo, estudios y vida libremente; con un modo de espera
prolongado, bien como servicios y calculadora, sus comunicaciones serán más fáciles y simple; el
poderoso gestor de ficheros le permite gestionar los ficheros de forma conveniente. Además, el
tono de timbre le permite seleccionar las músicas que desea definir como tono de timbre; a
apariencia personalizada puede asimismo satisfacer su selección.
Nota: El Manual de usuario se suministra con el objetivo de orientar al usuario con respecto a las
funcionalidades del teléfono. Algunas funciones pueden ser diferentes debido a modificaciones y
actualizaciones de software o debido a errores de impresión.
Page 48

3
Contenido
Precauciones de seguridad ................................................................................... 5
Sobre el teléfono.................................................................................................... 6
Configuración de la pantalla........................................................................................................6
Funciones de teclado......................................................................................................................7
Íconos de estado...............................................................................................................................8
Primeros pasos ....................................................................................................... 9
Primera llamada ................................................................................................................................9
Instalación de las tarjetas SIM......................................................................................................9
Introducir la tarjeta de memoria.............................................................................................. 10
Batería y cargador.......................................................................................................................... 10
Instalación de las pilas............................................................................................................. 10
Carga de la batería....................................................................................................................10
Estado de la batería .................................................................................................................. 10
Utilización de la batería........................................................................................................... 11
Encender/Apagar........................................................................................................................... 12
Contraseña................................................................................................................................... 12
Contraseña del teléfono móvil.............................................................................................12
SIM1 PIN........................................................................................................................................ 12
SIM2 PIN........................................................................................................................................ 13
Contraseña de desactivación................................................................................................ 13
Utilización del kit manos-libres................................................................................................ 13
Bloqueo del teclado...................................................................................................................... 13
Teclas específicas ...........................................................................................................................14
Lengua y métodos de introducción....................................................................................... 14
Nombre .............................................................................................................................................14
Hacer un DDD............................................................................................................................. 14
Hacer una IDD.............................................................................................................................14
Llamar a una extensión........................................................................................................... 15
Llamada de emergencia ......................................................................................................... 15
IMEI .................................................................................................................................................15
Llamando .............................................................................................................. 15
Hacer llamadas ...............................................................................................................................15
Hacer una llamada internacional ........................................................................................15
Marcar una extensión .............................................................................................................. 16
Realizar una llamada desde la agenda..............................................................................16
Remarcar os últimos números.............................................................................................. 16
Recepción de llamadas................................................................................................................ 16
Rechazar una llamada..................................................................................................................16
Opciones durante una llamada................................................................................................ 16
Ajuste de volumen ........................................................................................................................17
Guía de menú........................................................................................................ 17
Directorio telefónico ....................................................................................................................17
Mensajes ...........................................................................................................................................18
Escribir un mensaje................................................................................................................... 18
Bandeja de entrada ..................................................................................................................19
Borradores.................................................................................................................................... 19
Page 49

4
Bandeja de salida....................................................................................................................... 19
Mensajes enviados.................................................................................................................... 19
configuración de SMS..............................................................................................................19
Centro de atención telefónica.................................................................................................. 20
Registros de llamadas..............................................................................................................20
Ajustes de llamada....................................................................................................................21
Multimedia....................................................................................................................................... 22
Cámara ..........................................................................................................................................22
Visualizador de Imágenes ......................................................................................................23
Grabador de video....................................................................................................................23
Reproductor de Video.............................................................................................................. 24
Reproductor audio.................................................................................................................... 24
Grabador de sonido.................................................................................................................. 24
Radio FM.......................................................................................................................................25
Juegos................................................................................................................................................ 25
Gestor de Ficheros
.........................................................................................................................25
Organizador
.....................................................................................................................................26
Calculadora.................................................................................................................................. 26
Calendario.................................................................................................................................... 27
Alarma ...........................................................................................................................................27
Linterna.........................................................................................................................................27
Perfiles de usuario .........................................................................................................................27
Configuraciones............................................................................................................................. 28
Atajos ............................................................................................................................................. 28
Definiciones Multi SIM.............................................................................................................28
Definiciones del Teléfono.......................................................................................................28
Configuración de la red...........................................................................................................29
Definiciones de Seguridad.....................................................................................................29
Conectividad ............................................................................................................................... 30
Restaure las definiciones de fábrica...................................................................................30
Asistencia.......................................................................................................................................... 30
Apéndice ............................................................................................................... 30
Apéndice A: Por favor cuide su teléfono móvil .................................................................. 30
Mantenimiento ..........................................................................................................................30
Anexo B: Solución de problemas
.............................................................................................31
Anexo C: Resumen y descripción
............................................................................................32
Anexo D: Accesorios opcionales.............................................................................................. 32
Page 50

5
Precauciones de seguridad
Lea y respecte estas reglas concisas cuidadosamente de modo a evitar peligros o
violaciones a la ley.
Conducción segura
No utilice el teléfono móvil mientras conduce. Si necesita utilizar el teléfono móvil hágalo con el
manos-libres. Coloque el teléfono móvil en el soporte y no en el banco del pasajero o en
cualquier otro lugar donde pueda caer.
Desconectar en los aviones
La interferencia del teléfono móvil afectará la seguridad del vuelo y la utilización de teléfono
móvil en el avión es ilegal. Apague el teléfono móvil antes de embarcar.
Apague en el área operacional de explosión
Respecte las regulaciones y las normas y apague el teléfono móvil en o junto a áreas
operacionales de explosión.
Apague junto a artículos peligrosos
Apague el teléfono móvil en área de servicio o en proximidad de combustibles y productos
químicos.
En hospitales
Respecte las regulaciones o normas de los hospitales cuando utiliza un teléfono móvil en estos
espacios. Apague el dispositivo en las proximidades de equipo médico. Cualquier dispositivo
móvil, incluyendo el teléfono móvil, va a interferir en los dispositivos médicos que no están
totalmente protegidos. Otros dispositivos electrónicos también podrán ser afectados. En caso de
duda, consulte su médico o el fabricante.
Interferencias
Cualquier teléfono móvil puede sufrir interferencias y ver su desempeño afectado por estas.
Servicios profesionales
Este teléfono móvil sólo se puede reparar o instalar por personal cualificado. Cualquier otra
Page 51

6
intervención puede causar graves peligros, además de violar las cláusulas de la garantía.
Accesorios y batería
Utilice únicamente accesorios y baterías aprobados por el fabricante.
Aplicación racional
Utilice el teléfono móvil normalmente. No coloque el teléfono móvil en entornos con
temperaturas demasiado altas (superiores a 60 ºC), por ejemplo, ni junto a ventanas con luz
directa del sol. Use un paño húmido o anti-estático para limpiar el móvil. No utilice un paño con
estática para limpiar el móvil.
Llamada de emergencia
Asegúrese de que el teléfono móvil está conectado y en una área de servicio, introduzca el
número de emergencia (por ejemplo, 112) y pulse la tecla de llamada para establecerla. Reporte
su posición y explique la situación resumidamente. No termine la llamada sin autorización para
ello.
Nota: Como en otros teléfonos móviles, las características de este puede que no sean
soportadas debido a la cobertura de la red o transmisión de señales inalámbricos. Determinadas
redes no soportan la llamada de emergencia. Así, no dependa sólo del teléfono móvil para
comunicaciones muy importante (por ejemplo, emergencia médica). Consulte el operador local
de red.
Sobre el teléfono
O teléfono móvil tiene 21 teclas, un visor, un auricular, puerto para cable de
cargamento/datos y un interface para tarjeta de memoria externa (tarjeta T-FLASH).
Configuración de la pantalla
El área del visor contiene tres partes:
Page 52

7
1> a primera línea presenta los íconos, indicando la intensidad de señal y el estado de la
batería.
2> el área central presenta el texto y las cifras, incluyendo números, palabras y íconos
dinámicos.
3> la última línea presenta opciones de operación diferentes, como el menú, nombres, ok y
volver..
Funciones de teclado
Tecl as Funciones
Tecl a de
función
izquierda
Pulse esta tecla para entrar en el menú principal en modo
de espera;
Pulse esta tecla para confirmar la función seleccionada;
Pulse esta tecla para contestar una llamada
Tecl a de
función
derecha
Pulse esta tecla para entrar en la lista de contactos en
modo de espera;
Pulse esta tecla para volver al menú anterior;
Pulse esta tecla para rechazar una llamada.
Tecl a de
llamada
Pulse esta tecla para hacer una llamada;
Pulse para contestar una llamada recibida;
Pulse para entrar en el registro de llamadas en modo de
espera.
Tecl a de f in
Apagar: Pulse detenidamente para apagar en modo de
espera;
Encendido: Pulse detenidamente para conectar cuando el
teléfono está apagado;
Pulse esta tecla para volver a la pantalla de espera.
Tecl as d e
navegación
Pulse para ver las opciones al navegar en una lista de
funciones. En el estado de edición, pulse las teclas de
dirección para navegar. En el modo de espera, pulse una
tecla de dirección para entrar en la página de función
especificada. Además puede personalizar las teclas de
dirección de modo a que corresponda a las funciones
deseadas. En estado de conversación, pulse las teclas de
dirección arriba o abajo para regular el volumen.
Tecl a OK
Pulse la tecla OK para confirmar y entrar en el menú
principal.
Tecl as d e
números
Marcar números en modo de espera e introducir números
y letras en modo de edición. En modo de espera, pulse
detenidamente la tecla 0 para encender/apagar la
Page 53

8
linterna.
Tecl a *
En modo de espera, pulse la tecla * dos veces para
presentar "+" para hacer llamadas para números
internacionales; "P" y "W" para hacer llamadas para
números de extensiones. Ayude a bloquear el teclado,
pulsando en primer lugar la tecla izquierda. En los modos
de lectura y FM, pulse la tecla * para bajar el volumen.
Tecl a #
En modo de espera, pulse y mantenga esta tecla para
alternar entre el perfil actual y el perfil de silencio. En los
modos de lectura y FM, pulse la tecla # para aumentar el
volumen.
Íconos de estado
Los íconos se pueden enseñar en la pantalla.
Iconos Introducción
Intensidad de la señal
Nuevo mensaje
Llamadas perdidas
Bloqueo del teclado
Estado de la batería
Alarma activada
Silencioso
Sólo timbre
Sólo vib.
Vib. y timbre
Vib. y enseguida timbre
Page 54

9
Primeros pasos
Primera llamada
1> Introduzca las tarjetas SIM (primero apague el teléfono). Para ver la guía detallada de
instalación consulte "Instalación de la tarjeta SIM".
2> Cargue la batería. Consulte "Batería y cargamento".
3> Pulse y mantenga la tecla Fin para conectar el teléfono móvil.
4> Si solicitado en la pantalla, introduzca el código de cuatro dígitos y pulse la tecla “OK".
5> Si solicitado en la pantalla, introduzca el código PIN (provisto juntamente con la tarjeta SIM)
y pulse la tecla "OK”.
6> Introduzca el código de área y el número de teléfono y pulse la tecla de llamada o la tecla
izquierda para marcar a partir del SIM1 o del SIM2 .
Nota: Antes de utilizar el teléfono móvil, introduzca tarjetas SIM válidas y cargue la batería.
Instalación de las tarjetas SIM
Registrando su teléfono móvil puede solicitar dos números de teléfono distintos y dos tarjetas
SIM (Módulo de Identidad del Subscritor). Con las dos tarjetas, puede utilizar las
funcionalidades del teléfono móvil. La tarjeta SIM guarda los parámetros requeridos por la
comunicación y las informaciones personales, incluyendo el código PIN (número personal de
identificación), contactos, mensajes cortos y otros servicios del sistema.
Advertencia: No doble ni risque la tarjeta SIM, ni ponga en contacto con estática, polvo o agua;
si pierde la tarjeta SIM contacte su operador de red. Apague el teléfono móvil antes de instalar
la tarjeta SIM. La tarjeta SIM se introduce por la lateral trasera del teléfono móvil.
Nota: La tarjeta T-flash es muy pequeña. Apártela de los niños para evitar que se trague. Si la
tarjeta SIM es inválida o está dañada, el teléfono móvil irá presentar el mensaje "Introducir
tarjeta SIM". Apague el teléfono móvil y remueva la tarjeta SIM, enseguida vuelva a inserirla
correctamente. Si la tarjeta SIM está dañada contacte su operador de red. Si la tarjeta SIM está
bloqueada contacte su operador de red.
Page 55

10
Introducir la tarjeta de memoria
Si el teléfono móvil no tiene espacio suficiente, puede instalar una tarjeta de memoria (tarjeta
T-FLASH).
Para instalar la tarjeta T-FLASH: abra la tapa trasera, retire la batería, inserte la tarjeta T-FLASH
en la ranura, coloque la batería y conecte el teléfono móvil.
Para remover la tarjeta T-FLASH: abra la tapa, remueva la tarjeta T-FLASH y vuelva a cerrar la
tapa.
Nota: La tarjeta T-flash es muy pequeña. Manténgase fuera del alcance de los niños. Elija
tarjetas T-FLASH cualificadas, como SANDISK, V-DATA o Transcend. Verifique la compatibilidad
con el teléfono móvil al comprar la tarjeta.
Batería y cargador
Instalación de las pilas
Utilice sólo batería y accesorios cualificados. Cuando la batería no está en utilización guárdela
en la caja protectora.
Nota: Opere como en la imagen para evitar dañar los contactos de la batería.
Carga de la batería
La nueva batería alcanzará su mejor desempeño tras completar el ciclo de carga y descarga
varias veces.
Cargue con antelación cuando la tensión de la batería es baja. Un exceso de descarga dañará la
batería. Desconecte el cargador de la fuente de alimentación eléctrica y del teléfono móvil
cuando a carga se completa. Durante la carga, el ícono de estado de la batería queda
intermitente de la derecha a la izquierda y cuando la carga está completa. Es normal que la
batería caliente durante el proceso de carga.
Estado de la batería
Su teléfono móvil puede controlar y visualizar el estado de la batería.
1> Puede verificar el estado de la batería a partir del ícono en la esquina superior derecha de la
pantalla.
2> Si la electricidad es insuficiente, visualizará el mensaje "Batería flaca". El teléfono móvil emite
una señal de aviso si la opción "Alertas del sistema" está activada en el Perfil.
3> Durante la carga, el ícono del estado de la batería queda intermitente hasta completar la
carga.
Nota: El tiempo real de espera y de utilización depende de la operación, red local y
definiciones en la tarjeta SIM y en el teléfono móvil.
Page 56

11
Utilización de la batería
El desempeño de la batería es afectado por diversos factores, incluyendo las definiciones de la
red inalámbrica, identidad de la señal, temperatura ambiente, las funciones o definiciones
seleccionadas, los accesorios y el modo de voz, datos u otras aplicaciones seleccionadas.
Para mantener el mejor desempeño de la batería, siga las normas que se siguen:
La carga de baterías nuevas o de baterías que no hayan sido utilizadas durante un período
de tiempo prolongado puede ser más largo;
Mantenga la batería a temperatura ambiente mientras carga;
Es normal que el tiempo de carga aumente tras largos períodos de utilización. Si el tiempo
de funcionamiento se vuelve más corto y los tiempos de carga aumentan necesita sustituir
la batería. La utilización de baterías no cualificadas puede dañar el teléfono móvil y
constituir un peligro.
Si no se utiliza la batería durante un período de tiempo muy largo o si la tensión es muy baja,
es necesario algún tiempo hasta que el interface de carga se visualice correctamente
cuando el cargador está conectado.
Nota: Para proteger su seguridad y el ambiente, no elimine la batería aleatoriamente.
Aviso: El cortocircuito de la batería puede provocar explosión, incendio o lesiones.
ƷPrecauciones de utilización de la batería
1> Apague el teléfono móvil antes de retirar la batería.
2> Utilice la batería con cuidado. La conexión del ánodo (+) y del cátodo (-) de la batería a
objetos metálicos (moneda, clip, etc.) puede provocar cortocircuito y dañar tanto la batería
como eses objetos. Cuando se remueve la batería y se pone en la maleta, no coloque el
ánodo ni el cátodo en contacto con objetos metálicos (por ej., llaves).
3> No coloque la batería en llamas ni la utilice en lugares con temperaturas elevadas.
4> No desmonte ni vuelva a montar la batería.
5> No coloque la batería en lugares con fuerte impacto mecánico ni donde se pueda atingir por
objetos rígidos.
6> Guarde la batería en entorno fresco y seco y evite temperaturas elevadas (> 60°C) y la luz
directa del sol.
7> Interrumpa la utilización si siente un olor particular o sobrecalentamiento.
8> Interrumpa la utilización en caso de futuras, distorsión o fugas del electrólito.
9> Caso el electrólito manche la piel o las ropas, lave inmediatamente con agua y jabón; si el
electrólito se pone en contacto con los ojos lave inmediatamente con agua limpia y consulte
un médico.
10> No utilice la batería con temperaturas bajas, en las que no consiga obtener el tiempo
máximo en espera/funcionamiento.
11> No lave la batería con agua ni solventes orgánicos ni la coloque en agua.
12> Cargue la batería en su totalidad si no la va a utilizar durante un largo período de tiempo.
13> Se recomienda que devuelva las baterías usadas al fabricante del teléfono móvil o que las
coloque en contenedores especiales para baterías usadas. No elimine baterías con otros
residuos ni de forma casual.
Utilización del cargador 3Ʒ -em-1 (cargador + cable de datos + puerto de auriculares)
El cargador 3 en 1 puede cargar la batería a través del teléfono móvil.
Page 57

12
1>
Conecte el cable de datos y el cargador
2> Conecte el cable de datos del cargador 3 en 1 a la ranura I/O del teléfono móvil.
3> Conecte el enchufe del cargador de viaje 3 en 1 a una toma de alimentación adecuada.
4> Durante la carga, el ícono del estado de la batería queda intermitente hasta completar la
carga.
5> Al final de la carga, el ícono de la batería ya no está intermitente y pude desconectar el
cargador 3 en 1.
Nota: Si la tensión de la batería está demasiado baja y no consigue conectar el teléfono móvil,
el ícono de carga puede surgir en la pantalla tras unos minutos. El teléfono móvil puede
conectar y desconectarse durante la carga.
Advertencia: Asegúrese de que la tensión local y la corriente corresponden a la tensión
nominal y corriente en el cargador 3 en 1.
Encender/Apagar
1> Pulse y mantenga la tecla Fin para conectar el teléfono móvil. La pantalla presenta el vídeo
de conexión.
2> Si el bloqueo del teléfono móvil está activado, introduzca la contraseña y pulse "OK". La
contraseña predeterminada es 1122.
3> Si el código PIN teléfono móvil está activado, introduzca el código y pulse "OK". El código PIN
es proporcionado por el operador de red.
4> Acceso al interfaz de espera.
5> Pulse y mantenga la tecla Fin para apagar el teléfono móvil.
Contraseña
El teléfono móvil y las tarjetas SIM tienen varias contraseñas que evitan la operación ilegal de
éstas. Pulse "OK" tras introducir la contraseña válida (expresa en *). Si se equivoca, pulse la tecla
"Limpiar" para eliminar el error e introduzca los números correctos. Puede cambiar los códigos
PIN y PIN2 y la contraseña en "Definiciones – Definiciones de seguridad – SIM1/SIM2/
seguridad del teléfono móvil”.
Contraseña del teléfono móvil
La contraseña del teléfono móvil es el bloqueo del mismo, que evita la operación ilegal del
aparato. La contraseña viene de fábrica con el teléfono móvil. La contraseña predeterminada es
1122. Si el teléfono móvil está bloqueado, ha de introducir la contraseña para utilizarlo.
SIM1 PIN
Código PIN: El código PIN (Número de Identidad Personal) es fornecido en conjunto con la
tarjeta SIM y evita que esta sea operada ilegalmente. Si el bloqueo por PIN está activado, la
pantalla presenta la imagen "Introduzca PIN" cuando conecta el teléfono móvil. Introduciendo
el código PIN, la pantalla presenta * y no los números. El código PIN se atribuye con la tarjeta
SIM del operador de la red.
PIN2: el número de identidad personal requerido para determinadas funciones, como gastos
de llamadas.
PUK y PUK2 (8-dígitos)
Page 58

13
Además necesita introducir el código PUK (llave personal de desbloqueo) para cambiar un
código PIN bloqueado. Para cambiar el PIN2, utilice el PUK2. Si los códigos no vienen con la
tarjeta SIM, póngase en contacto con el proveedor local del servicio.
Advertencia: Si introduce un PIN errado tres veces consecutivas, la tarjeta SIM se bloquea. Si
tal ocurre, póngase en contacto con el operador de red local. La tarjeta SIM puede quedar
permanentemente dañada si intenta descodificarla solo.
SIM2 PIN
Código PIN: El código PIN (Número de Identidad Personal) es fornecido en conjunto con la
tarjeta SIM2 y evita que esta sea operada ilegalmente. Si el bloqueo por PIN está activado, la
pantalla presenta la imagen "Introduzca PIN" cuando conecta el teléfono móvil. Introduciendo
el código PIN del SIM2, la pantalla presenta * y no los números. El código PIN se atribuye con la
tarjeta SIM del operador de la red.
PIN2: el número de identidad personal requerido para determinadas funciones, como gastos
de llamadas.
PUK y PUK2 (8-dígitos)
Además necesita introducir el código PUK (llave personal de desbloqueo) para cambiar un
código PIN bloqueado. Para cambiar el PIN2, utilice el PUK2. Si los códigos no vienen con la
tarjeta SIM, póngase en contacto con el proveedor local del servicio.
Advertencia: Si introduce un PIN errado tres veces consecutivas, la tarjeta SIM se bloquea. Si
tal ocurre, póngase en contacto con el operador de red local. La tarjeta SIM puede quedar
permanentemente dañada si intenta descodificarla solo.
Contraseña de desactivación
La contraseña de desactivación es necesaria para permitir el barrar llamadas. Puede obtener
esta contraseña junto de su operador de red, suscribiendo esta función.
Utilización del kit manos-libres
Con el kit manos-libres puede hacer o contestar llamadas sin coger el teléfono móvil. Cuando
inserte el kit manos-libres en el puerto para auriculares, este puede ser utilizado como
auricular y micrófono del teléfono móvil.
Bloqueo del teclado
Cuando el teclado está bloqueado, el teléfono móvil bloquea automáticamente, si no se
registra ninguna operación durante un determinado período de tiempo. Desbloquear: Pulse la
tecla y *.
Nota: Cuando el teclado está bloqueado, será inválido. Si recibe una llamada, puede
contestarla como habitualmente y el teléfono móvil vuelve al estado de bloqueado cuando
ésta termine.
Page 59

14
Teclas específicas
1> En modo de espera, pulse la tecla */# para bajar/subir el volumen del reproductor o del FM.
2> En el interfaz del marcador, pulse y mantenga la tecla # para activar/desactivar el modo
silencio
3> En el interfaz de marcación, pulse y mantenga la tecla * para introducir +”, “P” o “W”; “+” es
utilizado para marcar números internacionales y “P” y “W” se utilizan para llamar a números
de extensiones.
Nota: La diferencia entre W y P: si pulsa P, hay una pausa de tres segundos antes del envío del
DTMF; si pulsa W, se abre una ventana de diálogo con la pregunta "Enviar DTMF?"
Lengua y métodos de introducción
El teléfono móvil ofrece las lenguas inglesa, francesa, española y portuguesa. El teléfono móvil
suministra métodos de introducción ABC/abc/ES/DI/di/Numérico. Puede necesitar introducir
texto utilizando el teléfono móvil. Por ejemplo, guardar un nombre en la lista de contactos o
escribir un mensaje. En estado de edición, pulse la tecla # para alternar entre los métodos de
introducción de texto. Puede pulsar la tecla * para introducir la pantalla de selección de símbolos.
Nombre
Hacer un DDD
Para hacer una chamada con el SIM1, introduzca un número y pulse la tecla de llamada para
utilizar el SIM1; el mensaje “llamando SIM1” se enseña delante del número; para hacer una
chamada con el SIM2, introduzca un número y pulse la tecla de llamada para utilizar el SIM2; el
mensaje “llamando SIM2” se enseña delante del número Cuando la otra parte contesta, la
pantalla enseña el estado de la llamada.
Pulse la tecla End para terminar la conversación.
Para hacer un DDD: código de área + número de teléfono + tecla de llamada
Hacer una IDD
Si necesita hacer una chamada internacional, pulse y mantenga la tecla * hasta que el símbolo
de prefijo “+” de la llamada larga distancia aparezca en la pantalla y puede efectuar la llamada
en cualquier país (por ejemplo, +86 en China).
Introduzca el número del prefijo, el código del país y el número de teléfono en la íntegra. Los
códigos de los países son conformes la tradición internacional; Alemania es 49, Reino Unido
44, Suecia 46, etc.
Para hacer IDD: "+" código de país + código de área + número de teléfono + tecla de llamada
Page 60

15
Llamar a una extensión
Algunas extensiones de teléfonos fijos no pueden ser marcadas directamente y pasan por el
intercambio antes de marcar la extensión. Si introduce el símbolo de pausa P entre el
número general y el número de la extensión, el teléfono móvil completará las dos llamadas
automáticamente. Para introducir “P”: pulse y mantenga el bolígrafo o pulse * tres veces (el
símbolo “P” se enseña en la pantalla).
Para llamar a la extensión de un teléfono fijo (excluido +): número de teléfono + P + número
de la extensión + tecla de llamada
Llamada de emergencia
Puede hacer siempre llamadas de emergencia desde que esté en una área con cobertura de
red (compruébelo consultando la intensidad de señal de rede en la esquina superior izquierda
de la pantalla). Si su operador de rede no suministra servicio de roaming en su área, sólo puede
hacer llamadas de emergencia. Si se encuentra en una área de servicio de la red, las llamadas
de emergencia también se pueden hacer sin tarjeta SIM.
Nota: En determinadas áreas, el número 112 (llamadas de emergencia) se suministra por el
operador de la red; si hay anomalía póngase en contacto con el operador de la rede.
IMEI
IMEI es la sigla de International Mobile Equipment Identity (identidad internacional de equipo
móvil). Apague el teléfono móvil y remueva la batería y encontrará la etiqueta con este código
de barras en el lado trasero. Este número también está guardado en el teléfono móvil. Cuando
el teléfono móvil está conectado, introduzca "*#06#" para visualizar el número.
Llamando
Cuando el símbolo del operador de rede se visualiza en la pantalla, puede hacer o
contestar llamadas. La fuerza de la señal se enseña en la esquina superior izquierda de la
pantalla.
Hacer llamadas
Introduzca el código de área y el número de teléfono y pulse la tecla de llamada para marcar
a partir del SIM1 o del SIM2.
Utilice la tecla derecha para borrar si se equivoca. Pulse y mantenga la tecla para borrar
todos los caracteres.
Nota: Los obstáculos interfieren mucho en la calidad de la llamada; moverse ligeramente
puede mejorar la fuerza de la señal.
Hacer una llamada internacional
Consultar "Hacer una IDD".
Page 61

16
Marcar una extensión
Consultar "Llamar a una extensión".
Realizar una llamada desde la agenda
Abra la lista de contactos y busque el número deseado, pulse la tecla de llamada para marcar a
través del SIM1/SIM2.
Remarcar os últimos números
En modo de espera, pulse la tecla de llamada para acceder al histórico de llamadas.
Pulse la tecla arriba/abajo para buscar el número deseado y pulse la tecla de llamada para
marcar a través del SIM1/SIM2.
Recepción de llamadas
Pulse la tecla Llamada para responder la llamada entrante.
Durante una llamada puede usar la tecla izquierda para operar: mantener, terminar llamada,
lista de contactos, etc. y también puede silenciar/remover del silencio.
Pulse la tecla terminar para concluir una llamada.
Rechazar una llamada
Pulse la tecla Terminar para rechazar una llamada entrante.
Opciones durante una llamada
Durante una llamada, pulse la tecla de función izquierda para insertar opciones para seleccionar
Colocar Llamada en Espera, Terminar Llamada Única, Contactos, Histórico de Llamadas, Mensajes,
Grabador de Sonido, Silenciar y Volumen.
Espera: Esta función permite dos llamadas al mismo tiempo. Puede marcar otro número
durante una llamada.
Marque otro número durante una llamada (Sólo podrá marcar del SIM1 cuando su primera
llamada es del SIM1, marcar pelo SIM2 es el mismo para el SIM1).
x Pulse opciones y seleccione un número de los Contactos o Histórico de Llamadas y pulse
tecla de llamada para marcar.
x Digite el otro número que desea marcar y pulse la tecla de llamada para marcar.
Conectar/desconectar silenciar: Si define la función Silenciar, podrá escuchar quien está
hablando del otro lado, pero su voz no se podrá escuchar del otro lado.
Page 62

17
Nota: Si el llamador puede ser identificado, se enseñará el nombre y el número de teléfono del
llamador. Si el llamador no puede ser identificado, la pantalla enseñará sólo el número del
llamador. Cuando use la función lista o Contactos, también puede contestar una llamada.
Ajuste de volumen
Puede pulsar las teclas de navegación arriba/abajo para ajustar el volumen durante una
llamada.
Guía de menú
Directorio telefónico
Contactos guardados en el teléfono móvil contienen las siguientes informaciones: nombre del
teléfono y el número. Puede agregar nuevos contactos al teléfono o al SIM1/SIM2.
Puede ejecutar las siguientes operaciones en este modo:
Vistas: Ver información detallada del contacto.
Enviar mensaje de texto: Enviar un mensaje del SIM1/SIM2.
Llamar: Hacer una llamada de SIM1/SIM2.
Editar: Editar el nombre y el número del contacto.
Borrar: Eliminar el contacto.
Copiar: Copiar el contacto del teléfono o del SIM1/SIM2.
Mover: Mover el contacto de teléfono o del SIM1/SIM2.
Enviar un vCard: Enviar un vCard como mensaje de texto o vía Bluetooth.
Añadir a la lista negra: Agregar el contacto a la lista negra.
Marcar varios o marcar todos para operar.
Grupos del llamador: Puede crear nuevo grupo.
Ajustes de la agenda: Puede ejecutar las siguientes operaciones en este modo.
x Almacenamiento preferido: Agregar un nuevo contacto al SIM1/SIM2, teléfono o todos.
x Marcación rápida: Definir conectar/desconectar, puede editar y cam bia r la l ist a de
marcación rápida.
x Mi número: Para agregar el número del propietario y otras informaciones detalladas.
x Números extras: Para definir el número del propietario y marcación fija del SIM1/SIM2.
x Estado de la memoria: Para verificar el estado de la memoria de contactos del SIM1/SIM2
y teléfono.
x Copiar contactos: Para copiar contactos del SIM1/SIM2 y del teléfono para otros destinos,
respetivamente.
x Mover los contactos: Para mover contactos del SIM1/SIM2 y del teléfono a otros destinos,
Page 63

18
respetivamente.
x Eliminar todos los contactos: Eliminar todos los contactos del SIM1/SIM2 y teléfono.
Entrar en el interfaz de Contactos para ejecutar las siguientes operaciones:
Búsqueda rápida:
En el área de entrada donde se localiza el cursor, digite la primera letra para localizar la
primera entrada cualificada en la lista de contactos. Por ejemplo, para Buscar "Lisa", digite la
letra "L".
Pesquisar por nombre:
Digite el nombre deseado y busque la entrada correspondiente en los Contactos.
Mensajes
Entre en este menú, puede cambiar: Escribir mensaje, Buzón de Entrada, Borrador, Caixa de
Buzón de Salida, Mensajes enviados y configuraciones SMS.
Escribir un mensaje
Puede entrar en este menú de función para escribir mensajes cortos.
Mensaje corto es un servicio de red. Para enviar o recibir mensajes cortos, puede necesitar
suscribir este servicio en su operador de red. Los mensajes se envían al centro de mensajes y
después a los destinatarios (suscritores GSM). Los mensajes cortos se guardan en la red si el
teléfono móvil del destinatario no está conectado o no puede recibir mensajes cortos (la
memoria está llena). La validez varía según las configuraciones del usuario y del operador de
red. Con el SMS, puede enviar y recibir mensajes de texto en cadena, que pueden afectar la
carga de mensajes. Para detalles, contacte su operador de red.
Cada mensaje puede contener 160 caracteres. Al editar el mensaje, seleccione la opción
"Método de entrada".
Pulse la tecla # para alternar el método de entrada.
Pulse la tecla de función derecha para excluir un carácter antes del cursor, o sujete la tecla de
función derecha detenidamente para limpiar todos los caracteres; pulse la tecla Terminar
para volver al modo de espera; Cuando escribe mensajes, puede inserir el número, el
nombre y el indicador en Editar mensaje.
Cuando el mensaje de edición se concluye, puede pulsar la dirección arriba/abajo tecla para
opción: insertar contactos del destinatario, seleccionar de los contactos o del histórico de
llamadas.
Este teléfono móvil soporta mensajes de grupo con más de 600 caracteres cada (o límite de
caracteres de mensaje de texto común). Si el mensaje contiene más del que los caracteres
limitados, el teléfono lo envía en dos o más mensajes.
Si la memoria está llena, un ícono parpadea en la línea superior de la pantalla; si el teléfono
móvil soporta tarjetas dual SIM, los mensajes se guardan en el SIM1 y SIM2 separadamente, y
las instrucciones aparecen separadamente. Para recibir nuevos mensajes normalmente,
elimine los mensajes cortos en las tarjetas SIM correspondientes. Si el destinatario ha
recibido el mensaje, el teléfono móvil envía una señal de alerta de informe de mensaje (el
informe está habilitado)
Page 64

19
Nota: Cuando envía el mensaje a través del servicio de SMS, el teléfono móvil puede enseñar
"Enviado". Indica que el mensaje se ha enviado al centro SMS. Pero eso no significa que el
destinatario ha recibido el mensaje. Contacte su operador de red para obtener más
informaciones.
Bandeja de entrada
Puede leer los mensajes cortos recibidos en el Buzón de entrada, incluido mensajes del SIM1 y
SIM2. Pulsando la tecla de función izquierda de opciones en el interfaz de la lista de mensajes,
puede ejecutar las siguientes operaciones:
Vistas: Ver la información del mensaje.
Responder: Contestar en mensaje de texto por el SIM1 o SIM2.
Emisor de llamadas: Llamar al remitente por el SIM1 o SIM2.
Directa: Encaminar el mensaje para otro contacto por el SIM1 o SIM2.
Borrar: Eliminar el mensaje.
Eliminar Todos: Eliminar todos los mensajes del Buzón de entrada de las tarjetas SIM
correspondientes; si el SIM1 está seleccionado.
Guardar en Contactos. Guardar el número del remitente en los Contactos del
SIM1/SIM2/teléfono.
Filtrar por: Filtrar por SIM1/SIM2/Todos los mensajes.
Borradores
Salvar el mensaje de texto editado y realizar operaciones, respetivamente. Puede ejecutar las
siguientes operaciones para los mensajes cortos, guardados en Borrador: Enseñar, Enviar, Editar,
Excluir y Apagar todo.
Bandeja de salida
Conectando "Salvar mensaje enviado" en las configuraciones de SMS, los mensajes se
guardarán en mensajes enviados; si el mensaje no es enviado con éxito, el mensaje se guardará
en el Buzón de salida. Puede ejecutar las siguientes operaciones para los mensajes cortos,
guardados en el buzón de salida: Enseñar, Enviar, Editar, Excluir y Apagar todo.
Mensajes enviados
Conectando "Salvar mensaje enviado" en las configuraciones de SMS, los mensajes se
guardarán en mensajes enviados; puede ejecutar las siguientes operaciones para los mensajes
cortos guardados en el buzón de salida: Enseñar, Enviar, Editar, Excluir y Apagar todo
configuración de SMS
Puede definir los parámetros del SIM1/SIM2 SMS en este menú.
Dirección SMSC: Ver y editar la dirección del centro SMS.
Período de validez: Definir el período de validez como 1 hora/6 horas/12 horas/1 día/3 días/1
semana/Máximo.
Tipo de mensaje: Configurar el mensaje como de tipo Texto/Fax group3/Fax
group4/Página/E-mail.
Page 65

20
Informe de entrega: Será notificado por la red cuando el mensaje haya sido recibido o no.
Ruta de respuesta: Transmisión de la repetición de ruta a la red. Esta función requiere el
soporte del centro de SMS.
Servidor de correo de voz: Añadir y llamar al número del buzón de voz guardado en la lista.
Nota: El número del centro SMS es subministrado por el operador de red.
Estado de la memoria: Puede comprobar el estado de la memoria de las tarjetas SIM1/SIM2 o
del móvil en este menú.
Guardar mensaje enviado: Activar/Desactivar guardar mensaje enviado.
Almacenamiento preferido: Configurar almacenamiento preferido como Teléfono o Tarjeta
SIM.
Centro de atención telefónica
Registros de llamadas
Este móvil registra las llamadas perdidas, las llamadas recibidas y los números recientemente
marcados de la tarjeta SIM, así como la duración y coste de cada llamada. Cuando el móvil está
conectado con el área de cobertura de red y el operador cubre el servicio, puede registrar las
llamadas perdidas y las llamadas recibidas. En la lista de llamadas perdidas, llamadas recibidas
y números recientemente marcados, puede comprobar la fecha y hora de las llamadas, editar o
borrar números de teléfono de la lista o guardarlos en la lista de contactos.
Llamadas perdidas
Este menú presenta sus llamadas perdidas. En la lista de llamadas perdidas puede consultar los
detalles del registro con la tecla izquierda.
En las listas de llamadas perdidas puede comprobar la fecha y hora de las llamadas, llamar,
enviar mensajes, guardar en su directorio, editar antes de llamar y borrar.
Nota: Cuando el móvil indica una llamada perdida, pulse “Ver” para acceder a la lista de
llamadas perdidas. Seleccione el número pretendido y pulse la tecla “Llamada” para llamar a
ese número.
Llamadas realizadas
Este menú presenta las llamadas marcadas recientemente. En la lista de llamadas marcadas
recientemente, puede consultar los detalles del registro con la tecla izquierda.
En las listas de llamadas marcadas recientemente, puede comprobar la fecha y hora de las
llamadas, llamar, enviar mensajes, guardar en su directorio, editar antes de llamar y borrar.
Recepción de llamadas
Este menú presenta las llamadas recibidas. En la lista de llamadas recibidas, puede ver los
detalles del registro.
En las listas de llamadas recibidas, puede comprobar la fecha y hora de las llamadas, llamar,
enviar mensajes, guardar en su directorio, editar antes de llamar y borrar.
Eliminar registros de llamadas
Eliminar registros de llamadas. Puede seleccionar llamadas realizadas, llamadas perdidas y
Page 66

21
llamadas recibidas para borrarlas. O puede seleccionar directamente todas las llamadas para
borrarlas.
Ajustes de llamada
Llamada en espera: Configurar para activar o desactivar la opción de llamada en espera. Para
retener una llamada o efectuar una conferencia, primero debe activar la función. Requiere el
soporte de la red.
Desvío de llamadas: Esta función es un servicio de red, antes de usarla necesita subscribirse
al operador de red. Esta función puede realizar el desvío de llamadas calificadas para un
número de teléfono especificado.
Nombre Descripción
Desviar todas
las llamadas de
voz
Desviar todas las llamadas entrantes
Desviar cuando
no esté
disponible
Si su móvil no puede conectarse a la red (estando
apagado o fuera del área de cobertura) desviará las
llamadas entrantes.
Desviar cuando
no responde
Si no contesta una llamada en un determinado
período de tiempo, la red desvía la llamada.
Desviar
cuando esté
ocupado
Cuanto esté realizando una llamada, la red desvía la
llamada entrante.
Desviar todas
las llamadas de
datos
Para desviar todas las llamadas de datos necesita el
soporte de la red.
Cancelar todos
los desvíos.
Cancelar todos los ajustes de desvíos.
Bloqueo de llamadas:
Llamada saliente:
1. Todas las llamadas de voz: Configurar la restricción de llamadas para todas las llamadas
realizadas de SIM.
2. Llamadas de voz internacionales: Configurar la restricción de llamadas para las llamadas
internacionales de SIM.
3. Llamadas de voz internacionales excepto casa: Cuando se encuentre en el extranjero,
puede llamar únicamente a los números del país donde se encuentra y los de su país de
residencia (por ejemplo: el país donde se ubica su operador de red).
Llamadas entrantes:
1. Todas las llamadas de voz: Configurar la restricción de llamadas para todas las llamadas
entrantes de SIM.
2. Llamadas de voz en itinerancia: Configurar la restricción de llamadas para todas las
llamadas de SIM, excepto las llamadas de números del área de servicio local.
Cancelar todas: Cancelar la configuración de restricción de llamadas de SIM. En este caso,
puede realizar y recibir llamadas normalmente.
Cambiar restricción de contraseña: Cambiar la contraseña de la restricción de llamadas para
Page 67

22
SIM.
Cambio de línea: Puede definirlo como Línea 1 o Línea 2. La configuración por defecto es
Línea 1.
Ajustes avanzados
Lista negra: Configurar para activar o desactivar la lista negra y añadir números a la lista
negra.
Rellamada automática: Seleccionar activar o desactivar para rellamada automática en esta
opción. Si la primera llamada no puede realizarse, el teléfono móvil volverá a marcar
automáticamente el número, 10 veces como máximo.
Grabadora de llamadas automática: Configurar para activar o desactivar el registro
automático de llamadas.
Visualizar la hora de llamada: Configurar para activar o desactivar la indicación de la
duración de la llamada.
Recordatorio hora de llamada: Seleccione un tono de alerta única o periódica en el proceso
de llamada para que pueda saber la duración de la llamada. También puede deshabilitar el
tono de alerta
Rechazar de SMS: Configurar para activar o desactivar el registro automático de llamadas.
Modo de respuesta: Pulse cualquier tecla para contestar el teléfono y contestar
automáticamente en modo auriculares.
Nota: Algunos ajustes necesitan el soporte de red. La restricción de llamadas necesita el soporte
de su operador de red local, debe solicitar el servicio para poder acceder.
Multimedia
Cámara
En este menú puede realizar fotos con la cámara integrada e configurar sus ajustes. El objetivo
de la cámara se encuentra en la parte trasera del teléfono móvil y la pantalla es la ventana del
visor. Las fotos se guardan en formato JPG. Tras descargarlas a su pc, por favor use un
programa de visualización de fotos apropiado. Si la memoria de su teléfono móvil es
insuficiente, por favor borre algunas de las fotos u otros archivos en “Administrador de
Archivos”. En la interfaz de cámara puede realizar las siguientes operaciones:
Descripción de opciones de cámara
Opciones Descripción
Cambiar a
grabador de
vídeo.
Cambiar cámara a grabador de vídeo.
Fotos Ver las fotos guardadas.
Ajustes de cámara
Bombilla LED: Configurar para activar o desactivar la
bombilla LED.
Page 68

23
Anti parpadeo: 60Hz (por defecto), 50Hz.
Temporizador: 5sec, 10sec, 15sec u Off.
Tamaño de imagen: 128* 160, 160*120, 640*480.
Ajustes de
imagen:
Calidad de imagen: Baja, Normal, Buena.
Balance de
blancos
Configurar para automático, luz diurna, tungsteno,
fluorescente, nublado, incandescente.
Modo de escena Configurar para automático o luz nocturna.
Almacenamiento Elegir Teléfono o memoria.
Restaurar valores
predeterminados
Restaurar la configuración predeterminada.
Nota: Después de substituir la tarjeta T-Flash necesita crear un menú de fotos antes
de utilizar la cámara.
Visualizador de Imágenes
Imagen: Todas las imágenes se guardan en el Álbum.
Descripción de opciones de lista de imágenes:
Opciones Descripción
Vista Ver imagen seleccionada
Información
de la imagen
Consultar información detallada de la imagen
seleccionada.
Explorar estilo Elegir estilo lista o matriz.
Enviar Enviar por Bluetooth.
Usar como
Usar como fondo de pantalla o como protector de
pantalla.
Cambiar el
nombre
Cambiar el nombre de la imagen seleccionada.
Eliminar Eliminar la imagen seleccionada.
Borrar todos
los archivos
Borrar todas las imágenes del álbum.
Almacenamien
to
Teléfono o tarjeta de memoria.
Grabador de video
Pulse OK para iniciar la grabación de vídeo. El tiempo de grabación depende del tiempo límite
y de la capacidad de la tarjeta de memoria. Entre en opciones para efectuar los siguientes
ajustes
Descripción de las opciones de grabación de vídeo:
Opciones Descripción
Cambiar a
cámara
Cambiar a cámara.
Page 69

24
Configuración
de la
videocámara
Anti parpadeo: 60Hz (por defecto), 50Hz.
Configuracion
es de video
Calidad de vídeo: Configure para: Bueno, Excelente, Bajo.
Almacenamien
to
Teléfono o tarjeta de memoria.
Reproductor de Video
En este modo también puede efectuar las siguientes operaciones:
Descripción de las opciones de reproducción de vídeo:
Opciones Descripción
Reproducción
Admite archivos de reproducción de vídeo en formato
3gp y MP4.
Enviar Enviar por Bluetooth.
Cambiar el
nombre
Cambiar el nombre del archivo de vídeo seleccionado.
Eliminar Borrar el archivo de vídeo seleccionado.
Borrar todos
los archivos
Borrar todos los archivos de la carpeta de reproducción
de vídeo.
Almacenamie
nto
Teléfono o tarjeta de memoria.
Reproductor audio
El reproductor de audio admite archivos de formato MP3, wav y AMR, entre otros. En la lista de
archivos audio puede realizar las siguientes operaciones:
Play: Reproducir el archivo de audio seleccionado.
Detalles: Comprobar en el archivo de audio seleccionado: tamaño, tiempo título, artista y
álbum.
Actualizar la lista. Actualizar la lista de reproducción.
Configuraciones: En la interfaz de configuración puede realizar las siguientes operaciones:
Lista de reproducción favorita: Configurar como teléfono o tarjeta de memoria.
Generar Lista automáticamente: Seleccionar on/off para lista auto generada.
Repetir: Desactivar la repetición de reproducción; repetir la reproducción del archivo de
audio seleccionado; repetir todos los archivos de audio de la lista.
Modo entremezclado: Reproducir archivos de audio aleatoriamente
Fondo: Reproducir archivos de audio en música de fondo.
Grabador de sonido
En este modo puede efectuar las siguientes operaciones:
Nueva grabación: Grabar un archivo de audio.
Lista: Ver la lista de grabaciones.
Configuraciones: Seleccionar la tarjeta de memoria o del teléfono para almacenamiento;
configurar la calidad del audio: Bajo o Alto.
Page 70

25
Radio FM
En este modo puede efectuar las siguientes operaciones:
Listado de canales: Edite el nombre del canal y la frecuencia en la lista.
Introducción manual: Introducir la frecuencia pretendida.
Búsqueda automática: Buscar emisoras de modo automático.
Configuraciones: Establecer música de fondo on/off.
Juegos
Puzzle: Este teléfono tiene un juego de puzle. Puede escoger entre Iniciar juego/Mejores
clasificaciones/Ayuda.
Configuración de los juegos: Puede activar/desactivar BGM, efectos de sonido y vibración,
así como definir el volumen como lo desee.
Gestor de Ficheros
Abiertos
En este menú puede gestionar sus fotos, archivos y carpetas de MP3.
Nota: Abrir archivos de la tarjeta de memoria.
Audio – Carpeta de Audio
Abrir archivos audio, puede efectuar las siguientes operaciones:
Play: Reproducir el archivo seleccionado.
Enviar: Enviar el archivo seleccionado por Bluetooth.
Nueva carpeta: Crear nueva carpeta en el directorio.
Cambiar el nombre: Cambiar el nombre.
Borrar: Borrar el archivo seleccionado.
Marcar varios: Marcar varios archivos para copiar; mover o enviar por Bluetooth.
Copiar: Copiar archivos para el teléfono o la tarjeta de memoria.
Mover: Mover archivos para el teléfono o la tarjeta de memoria.
Borrar todos los archivos: Borrar todos los archivos de esta carpeta:
Detalles: Ver la información y tamaño del archivo seleccionado.
Fotos – Carpeta de fotos
Vistas: Ver la imagen seleccionada.
Información de la imagen: Consultar el nombre del archivo, fecha, tamaño, altura y ancho de
la imagen.
Enviar: Enviar la foto seleccionada por Bluetooth.
Usar como: Usar la imagen seleccionada como fondo o protector de pantalla.
Nueva carpeta: Crear nueva carpeta en el directorio.
Cambiar el nombre: Cambiar el nombre.
Borrar: Borrar el archivo seleccionado.
Marcar varios: Marcar varios archivos para copiar; mover o enviar por Bluetooth.
Page 71

26
Copiar: Copiar archivos para el teléfono o la tarjeta de memoria.
Mover: Mover archivos para el teléfono o la tarjeta de memoria.
Borrar todos los archivos: Borrar todos los archivos de esta carpeta:
Detalles: Ver la información y tamaño del archivo seleccionado.
Vídeos – Carpeta de vídeos
Play: Reproducir el archivo seleccionado.
Enviar: Enviar el vídeo seleccionado por Bluetooth.
Nueva carpeta: Crear nueva carpeta en el directorio.
Cambiar el nombre: Cambiar el nombre.
Borrar: Borrar el archivo seleccionado.
Marcar varios: Marcar varios archivos para copiar; mover o enviar por Bluetooth.
Copiar: Copiar archivos para el teléfono o la tarjeta de memoria.
Mover: Mover archivos para el teléfono o la tarjeta de memoria.
Borrar todos los archivos: Borrar todos los archivos de esta carpeta:
Detalles: Ver la información y tamaño del archivo seleccionado.
Mi música – Carpeta de MP3
Play: Reproducir la música seleccionada.
Enviar: Enviar la música seleccionada por Bluetooth.
Nueva carpeta: Crear nueva carpeta en el directorio.
Cambiar el nombre: Cambiar el nombre.
Borrar: Borrar el archivo seleccionado.
Marcar varios: Marcar varios archivos para copiar; mover o enviar por Bluetooth.
Copiar: Copiar archivos para el teléfono o la tarjeta de memoria.
Mover: Mover archivos para el teléfono o la tarjeta de memoria.
Borrar todos los archivos: Borrar todos los archivos de esta carpeta:
Detalles: Ver la información y tamaño del archivo seleccionado.
Formato
Formatear la tarjeta de memoria.
Cambiar el nombre
Cambiar el nombre de la tarjeta de memoria.
Detalles
Consultar el nombre, espacio total y espacio libre de la tarjeta de memoria.
Organizador
Calculadora
Pulse las teclas numéricas de 0-9 para introducir las cifras que necesita calcular y luego pulse la
tecla # para introducir el punto base; también puede introducir las operaciones “ +, -, ×, ÷; “;
Page 72

27
pulse la tecla izquierda para para borrar el último resultado; pulse y mantenga la tecla
izquierda para para borrar todos los resultados. Pulse OK para terminar.
Nota: La precisión de la calculadora es limitada, puede cometer errores especialmente con las
cifras indivisibles.
Calendario
En la interfaz de cámara puede realizar las siguientes operaciones:
Saltar a fecha: Saltar/Ir a la fecha definida.
Ir a hoy: Saltar/Ir a la fecha de hoy.
Ir para ver Puede seleccionar ver el calendario: semanalmente o mensualmente.
Alarma
El formato hora de la alarma del reloj es el mismo del reloj. Cuando el móvil está apagado, la
alarma sonará igualmente si la carga de la batería no está baja. El teléfono móvil permite elegir
5 tipos de alarma de reloj y la opción por defecto está desactivada. Puede personalizar la fecha
y hora de cada alarma por separado. Cuando llegue la hora definida, el móvil suena y enseña en
la pantalla la hora y fecha actual. Pulse “Stop” para detener la alarma; “Snooze”, para volver a
sonar tras los minutos definidos en sus definiciones.
Si el móvil está apagado hasta la hora de la alarma, se conectará automáticamente y sonará la
alarma. Al pulsar “Stop” el móvil enseña las opciones de conectar o desconectar el móvil. Pulse
“No” para desconectar o “Si” para conectar.
Linterna
Puede activar o desactivar la linterna.
Perfiles de usuario
Este teléfono móvil genera varios perfiles. Puede Personalizar el tono de llamada según sus
eventos y ubicación. Personalizar su perfil y activarlo. Opciones disponibles: General, Silencio,
Cita, Exterior y Mi estilo.
General
Puede personalizar los siguientes elementos en su Perfil General:
Tipo de alerta: Definir Solo timbre, Solo vibración, Vibración y timbre, y vibración y después
timbre, según sus necesidades.
Tipo de timbre: Repetir y bip una vez.
Llamada entrante SIM1/SIM2: Definir el tono de la llamada entrante de la SIM1/SIM2.
Volumen del tono de llamada: Definir el volumen del tono de llamada.
Mensaje SIM1/SIM2: Puede elegir el tono1 del mensaje de SIM1/SIM2 o el modo silencioso
Volumen de los mensajes: Definir el volumen de los mensajes.
Teclado: Definir clic, tono o silencio.
Volumen del teclado Definir el volumen del teclado.
Page 73

28
Encendido/apagado: Configurar tono activado o desactivado
Alerta del sistema: Programar encendido/apagado.
Tras personalizar, seleccione “Guardar” en “Opciones”.
Silencioso
El timbre, volumen y tipo de alerta no pueden definirse. Seleccione “Activar” en “Opciones”.
Reunión
Consulte “General” para obtener más detalles.
Exterior
Consulte “General” para obtener más detalles.
Mi estilo
Consulte “General” para obtener más detalles.
Si los auriculares se conectan en Modo Silencio, el perfil de auriculares se activa y el Modo
Silencio vuelve a activarse cuando los auriculares se desconectan.
En Modo Espera, pulse y mantenga la tecla # para cambiar al Modo Silencio; pulse y mantenga
la misma tecla para volver al perfil inicial.
Nota: El perfil se activa automáticamente al introducir los auriculares y el perfil inicial se vuelve
a activar cuándo sean removidos.
Configuraciones
Atajos
Por defecto, el sistema tiene varios menús rápidos, puede añadir hasta diez menús
manualmente. Pulse la tecla izquierda en “Opciones” y podrá usar las siguientes operaciones:
¾ Añadir: añadir otro menú.
¾ Editar: editar el menú actual.
¾ Borrar: Borrar el menú rápido seleccionado.
¾ Borrar todo: Borrar totalmente el menú rápido.
¾ Cambiar el orden: reorganizar menú
Definiciones Multi SIM
Puede configurar la SIM dual de su teléfono móvil, respectivamente:
Definiciones Multi SIM;
Abrir solo la SIM1;
Abrir solo la SIM2;
Definiciones del Teléfono
Hora y fecha:
Ajustar ciudad: Puede seleccionar la ciudad dónde esté.
Definir hora/fecha: Establecer hora y fecha y active/desactive el horario de verano.
Configurar formato: Establecer el formato de presentación de hora, fecha y separador de
fecha con “.” “:” “/” y “ –”.
Actualizar con el huso horario: Activar/desactivar esta función.
ON/OFF automático:
Ajuste la hora de programación de encendido/apagado.
Idioma:
Page 74

29
Seleccione el idioma del teléfono (dispone de inglés, francés, español y portugués). El
idioma predeterminado es el español.
Pref. método de entrada: ABC/abc/Abc/VI/Vi/vi/Numérico.
Pantalla:
Fondo de pantalla: Seleccione el fondo de pantalla del sistema, definido en su tarjeta de
memoria o teléfono.
Protector de pantalla: Elija on u off y seleccione la imagen del sistema, definido en su
tarjeta de memoria o teléfono.
Mostrar hora y fecha: Encender / apagar
Teclas dedicadas:
Puede configurar las funciones de acceso rápido con las teclas de dirección arriba/abajo e
izquierda/derecha, respectivamente. Estando en el modo de espera, pulse cualquiera de
ellas para acceder a la función designada.
Función de actualización automática: Seleccione on u off y confirme.
Modo avión: El teléfono no recibe señal en modo avión. En este menú puede elegir el modo
normal o el modo avión.
Ajustes UART: Configurar SIM1/SIM2.
Ajustes Misc.: Retroiluminación del LCD: Con esta función puede ajustar el tiempo de
retroiluminación de la pantalla LCD y la luminosidad.
Pulse en los ajustes Vib: Configurar pulsando la opción de Vib on/off.
Configuración de la red
En este menú puede configurar la red para SIM1 y SIM2 y las redes preferidas.
Nombre
s
Descripciones
Nueva búsqueda: El teléfono está buscando nueva red.
Seleccionar red: El teléfono selecciona la red disponible.
Selección
de red
Modo de selección:
Automático: El teléfono selecciona automáticamente la red
disponible.
Manual: Únicamente redes específicas habilitadas. Si la red no se
encuentra disponible, el teléfono no habilitará otras redes.
Definiciones de Seguridad
Seguridad SIM1/SIM2
Bloqueo del PIN: Activar y desactivar el bloqueo mediante PIN.
Cambiar el PIN: Puede cambiar el PIN de las tarjetas SIM1 y SIM2 por una contraseña
personal entre 4 y 8 dígitos.
Cambiar el PIN2: Puede cambiar el PIN2 de las tarjetas SIM1 y SIM2 por una contraseña
personal entre 4 y 8 dígitos.
Seguridad del Teléfono
Bloqueo de teléfono: Puede activar o desactivar el bloqueo del teléfono. Por defecto, el
bloqueo del teléfono se hace mediante una contraseña de 4 a 8 dígitos. 1122),
Cambiar contraseña: Cambiar la contraseña de bloqueo del teléfono.
Bloqueo automático del teclado.
Page 75

30
Puede activar o desactivar el bloqueo del teclado. El teclado se bloquea automáticamente
tras transcurrido un determinado período de tiempo (5sec, 30sec, 1 min y 5mins).
Rastreador M
Introducir la contraseña del teléfono para activar el rastreador.
Conectividad
En la interfaz de Bluetooth puede realizar las siguientes operaciones:
Alimentación: Activar/desactivar el Bluetooth.
Visibilidad: Programar encendido/apagado.
Mi dispositivo: Buscará los dispositivos disponibles.
Buscar dispositivo de audio: Buscar dispositivos, como por ejemplo, auriculares. Activar la
función Bluetooth antes de la búsqueda.
Mi nombre: En mostrar mi nombre de Bluetooth puede editar el nombre según sus
necesidades.
Avanzado: Ajustar la señal de audio, almacenamiento preferido y visualizar mi dirección.
Restaure las definiciones de fábrica
Acceda a la configuración, seleccione Restaurar, introduzca la contraseña y siga la indicación
para restablecer y reiniciar el teléfono. Esta operación restaurará por completo la
configuración predeterminada.
Nota: La contraseña predeterminada es 1122. El teléfono se encenderá automáticamente
después de apagarse.
Asistencia
Con esta función podrá acceder a los servicios de Internet: clima, noticias, información
financiera, etc. Este servicio es suministrado por el operador de red. Según la tarjeta SIM,
aparecen distintos menús. Si su tarjeta SIM o el operador de red no admiten esta función,
quedará invalidada. Para más información, por favor contacte su operador de red.
Apéndice
Apéndice A: Por favor cuide su teléfono móvil
Mantenimiento
Este teléfono se ha fabricado por un excelente proceso. Por favor úselo cuidadosamente. Las
recomendaciones a continuación, le ayudarán a aumentar la vida útil de su teléfono.
1> Mantenga alejado de los niños el teléfono móvil, así como todas sus piezas.
2> Mantenga el teléfono móvil seco. Aléjelo de la lluvia, humedad o líquidos que puedan dañar
Page 76

31
los circuitos. No use el teléfono en lugares polvorientos o demasiado sucios
3> No deje el móvil en lugares con altas temperaturas, de lo contrario, acortará la vida útil del
circuito y dañará la batería, así como las piezas de plástico.
4> No guarde el teléfono móvil en un entorno frío. Al enfriar, se genera humedad en el teléfono,
que puede dañar la placa del circuito.
5> No limpie el teléfono con productos químicos corrosivos o detergentes demasiado fuertes
Para limpiar el teléfono, use un paño suave, humedecido en agua jabonosa.
6> Si el teléfono móvil o cualquier otro accesorio no funcionan normalmente, por favor envíelo
a un centro de servicio certificado.
Nota: Por favor, utilice el producto de acuerdo con las normativas locales
Anexo B: Solución de problemas
Fallo Causa
No se puede
encender
1ǃ La batería se ha agotado;
2ǃ La batería no se encuentra correctamente instalada.
Error de la tarjeta
SIM
1ǃ La tarjeta SIM está sucia. Limpiar la tarjeta SIM.
2ǃ Reinstalar la tarjeta SIM.
3ǃ La tarjeta SIM está dañada. Reemplácela por una
nueva.
4ǃ (SIM2 también)
Señal débil
Compruebe el icono de intensidad de señal, las cuatro
barras indican la señal más fuerte, mientras que menos
de dos barras indican señal débil.
(SIM2 también)
No puede realizar
llamadas
(I) Ha elegido ocultar su número, pero el operador de
red no admite este servicio.
(II). Hay demasiadas interferencias.
(III). Ha activado las llamadas restringidas.
(IV). Ha activado la Línea 2, pero el operador de red no
admite este servicio.
La batería no se
puede cargar
(I). La batería puede estar agotada y tardará un poco en
cargar tras iniciar la carga.
(II) El rendimiento de la batería se ha reducido.
No puede
conectarse a la red
(I). La señal es demasiado débil o existe una
interferencia de radio.
(II). Asegúrese que la tarjeta SIM está adecuadamente
introducida, si la conexión es baja o la tarjeta está
dañada. Si la tarjeta SIM se encuentra dañada, por favor
contacte su operador de red.
Page 77

32
Las fotos
realizadas son
demasiado
oscuras
(I) La luminosidad es demasiado baja
(II) El entorno es demasiado oscuro
Las fotos
realizadas están
borrosas
(I) El objeto se encuentra en movimiento
(II) Sus manos tiemblan cuando pulsa el disparador
Las fotos
realizadas están
desenfocadas
El objeto está demasiado cerca
No puede acceder
al menú
La tarjeta SIM no tiene capacidad
Anexo C: Resumen y descripción
SMS Servicio de SMS
EMS Servicio de Mensajería Mejorada
SIM Tarjeta SIM
GSM Sistema Mundial de Comunicación Móvil
PIN Número de Identidad Personal
PUK Clave de desbloqueo del PIN
IMEI Identidad Internacional de Equipos móviles
CB Difusión Celular
GPRS Servicio General de Paquetes Vía Radio.
MMS Servicio de Mensajes Multimedia
Anexo D: Accesorios opcionales
Tar jet a T- FL AS H
También llamada tarjeta de memoria, se utiliza para guardar datos o información.
Kit manos libres.
El kit manos libres incluye auriculares y con un mini micrófono para las llamadas en modo de
manos libres.
Cable de datos USB
Si el teléfono está apagado, conéctelo al pc, a través del cable USB, para acceder a los archivos
y cargar la batería. Estando encendido, conecte el móvil al pc, a través del cable USB, para
acceder al dispositivo de almacenamiento.
Cargador de viaje
Para cargar en sus desplazamientos.
Nota: Por favor use los accesorios adecuados.
Hecho en China
Page 78

33
ADVERTENCIAS DE SEGURIDAD Y PRECAUCIÓN
www.sar-tick.com
Este producto se ajusta a los límites nacionales de SAR de
2,0W/Kg. Los valores máximos específicos de SAR figuran en
la sección de información de esta guía.
Cuando sostenga el producto o lo utilice sobre el cuerpo,
mantenga una distancia de 1,5 cm del cuerpo para asegurar
el cumplimiento con los requisitos de exposición a
radiofrecuencia.
Este dispositivo ofrece servicios de comunicación y entretenimiento bajo los altos estándares y la
experiencia tecnológica de SUNSTECH.
x El contenido puede diferir del producto final del software proporcionado por los
proveedores de servicios o transmisores y se encuentra sujeto a cambio sin previo aviso.
x Los elementos que vienen con el dispositivo y cualquier accesorio disponible pueden variar
según la región o el proveedor de servicios.
x Los elementos suministrados están diseñados sólo para este dispositivo y podrían no ser
compatibles con otros.
x Podrá comprar accesorios adicionales en su distribuidor local de SUNSTECH. Asegúrese de
que sean compatibles con el dispositivo antes de comprarlos.
x Otros accesorios podrían no ser compatibles con el dispositivo.
x SUNSTECH no se hace responsable de los problemas de rendimiento o la alteración del
software del sistema operativo. El intento de personalizar el sistema operativo puede
provocar que el dispositivo o las aplicaciones funcionen de forma incorrecta.
Iconos instructivos
Advertencia: Situaciones que pueden provocarle lesiones a
usted o a otras personas.
Precaución: Situaciones que pueden provocar daños al
dispositivo o a otros equipos.
Nota: Notas, consejos de uso o información adicional
Copyright
Copyright 2013 Afex suns, S. A.
Esta guía se encuentra protegida por las leyes internacionales de derechos de autor.
No está permitido reproducir, distribuir, traducir o transmitir ninguna parte de esta guía de
ningún modo o por ningún medio, ya sea electrónico o mecánico, incluyendo fotocopias,
Page 79

34
grabaciones o almacenamiento en cualquier sistema de almacenamiento y recuperación de
información, sin el permiso previo por escrito de Afex Suns, S. A.
Información sobre seguridad
Esta sección contiene información sobre seguridad para dispositivos móviles. Algunos de
los contenidos podrían no aplicarse a su dispositivo. A fin de evitar lesiones a usted mismo
y a otras personas o daños al dispositivo, lea la información sobre seguridad del
dispositivo antes de utilizarlo.
Advertencia
En caso de no cumplir con estas normas y advertencias de seguridad, el usuario podría
sufrir lesiones graves o muerte.
No utilice cables de alimentación o conectores dañados ni enchufes sueltos
Las conexiones inseguras pueden provocar una descarga eléctrica o incendio
No toque el cable de alimentación con las manos mojadas ni tire del cable para
desconectar el cargador
Si lo hace, podría resultar electrocutado.
No doble ni dañe el cable de alimentación
Si lo hace, podría provocar una descarga eléctrica
No cause un cortocircuito en el cargador ni en el dispositivo
Si lo hace, podría provocar una descarga eléctrica, o el dispositivo podría no funcionar
correctamente.
Use baterías, cargadores, accesorios y suministros aprobados por el fabricante
x El uso de baterías o cargadores genéricos puede acortar la vida útil del dispositivo o
provocar el funcionamiento incorrecto. También puede provocar un incendio o la
explosión de la batería.
x Use sólo baterías y cargadores aprobados por SUNSTECH, específicamente diseñados
para el dispositivo. Las baterías y cargadores no compatibles pueden causarle lesiones
físicas graves o dañar el dispositivo.
x SUNSTECH no se hace responsable de la seguridad del usuario en casos en que se utilicen
accesorios o suministros que no estén aprobados por la marca.
No golpee ni deje caer el cargador o el dispositivo
Manipule y deseche el dispositivo y el cargador con precaución
x Nunca arroje la batería o el dispositivo al fuego. No coloque nunca la batería o el
dispositivo sobre aparatos de calor, como hornos, microondas, estufas o radiadores. Si se
Page 80

35
sobrecalienta, el dispositivo podría explotar. Siga todas las normas locales para desechar
la batería o el dispositivo usados.
x Nunca aplaste ni perfore el dispositivo
x Evite exponer el dispositivo a presiones externas altas, ya que puede producirse un
cortocircuito interno y sobrecalentamiento.
Proteja el dispositivo, la batería y el cargador para evitar que se dañen
x Evite exponer el dispositivo y la batería a temperaturas muy altas o muy bajas.
x Las temperaturas extremas pueden dañar el dispositivo y reducir la capacidad de carga y
la duración del dispositivo y la batería.
x Evite que la batería entre en contacto con objetos metálicos, ya que esto puede crear una
conexión entre los terminales positivo y negativo de la batería y dañarla de forma
permanente o temporal.
x Nunca utilice cargadores ni baterías dañados.
No guarde el dispositivo en calefactores, microondas, equipamientos de cocina caliente ni
contenedores de alta presión, ni cerca de ellos.
x La batería puede presentar fugas
x El dispositivo puede sobrecalentarse y producir un incendio.
No utilice ni guarde el dispositivo en zonas con altas concentraciones de polvo o
materiales transportados por el aire
El polvo o los materiales extraños pueden provocar el mal funcionamiento del dispositivo y
pueden resultar en un incendio o una descarga eléctrica.
Información sobre seguridad
No muerda ni chupe el dispositivo ni la batería
x Esto puede dañar el dispositivo o causar una explosión o un incendio
x Los niños o animales pueden ahogarse con las piezas pequeñas
x Cuando sean niños los que utilicen el dispositivo, asegúrese de que lo hagan
correctamente.
No introduzca el dispositivo o los accesorios suministrados en sus ojos, oídos o boca
Si lo hace podría ahogarse o sufrir lesiones serias.
No manipule baterías de iones de litio dañadas o que presenten fugas
Para desechar la batería de iones de litio de la manera más segura, comuníquese con el centro de
servicio autorizado más próximo.
EQUIPAMIENTO ENCHUFABLE: el enchufe debe estar instalado cerca del
equipo y tener un acceso fácil.
Precaución
En caso de no cumplir con estas normas y advertencias de precaución, el usuario podría
Page 81

36
sufrir lesiones o provocar daños materiales
No utilice el dispositivo cerca de otros dispositivos electrónicos
x La mayoría de los dispositivos electrónicos utilizan señales de radiofrecuencia. El
dispositivo puede interferir con otros dispositivos electrónicos.
x Si utiliza una conexión de datos LTE, podría provocar la interferencia con otros
dispositivos, tales como equipos de audio y teléfonos.
No utilice el dispositivo en un hospital, en un avión o en automóvil que pudiese sufrir
interferencias causadas por radiofrecuencia.
x Si es posible, evite usar el dispositivo a una distancia inferior a 15 cm de un marcapasos,
ya que el dispositivo puede interferir con él.
x Para minimizar la posible interferencia con un marcapasos, utilice el dispositivo sólo del
lado opuesto del cuerpo respecto de la posición del marcapasos.
x Si utiliza equipos médicos, comuníquese con el fabricante de los equipos antes de utilizar
el dispositivo, a fin de determinar si el equipo se verá afectado por la radiofrecuencia
emitida por el dispositivo.
x Si se utilizan dispositivos electrónicos en un avión, estos pueden interferir con los
instrumentos electrónicos de navegación. Asegúrese de que el dispositivo se encuentre
apagado durante los procedimientos de despegue y aterrizaje. Después del despegue,
podrá utilizar el dispositivo en modo avión, siempre y cuando se lo permita el personal
del avión.
x Los dispositivos electrónicos de su automóvil pueden funcionar de forma incorrecta a
causa de la interferencia de radio del dispositivo. Comuníquese con el fabricante para
obtener más información.
No exponga el dispositivo al humo o a emanaciones pesadas
Si lo hace, podría dañar la parte externa del dispositivo o provocar su mal funcionamiento.
Si utiliza audífonos, comuníquese con el fabricante para obtener información a cerca de la
interferencia de radio
La radiofrecuencia que el dispositivo emite puede interferir con algunos audífonos. Antes de
utilizar el dispositivo, comuníquese con el fabricante a fin de determinar si el audífono se verá
afectado por la radiofrecuencia emitida por el dispositivo.
No utilice el dispositivo cerca de otros dispositivos o aparatos que emitan frecuencia de
radio, como sistemas de sonido o torres de radiotransmisión
Las frecuencias de radio pueden provocar el mal funcionamiento del dispositivo.
Apague el dispositivo en entornos potencialmente explosivos
x En entornos potencialmente explosivos, apague el dispositivo, en lugar de quitarle la
batería.
x Respete siempre las normas, las instrucciones y las señales de aviso en entornos
potencialmente explosivos.
Page 82

37
x No use el dispositivo en puntos de carga de combustible (gasolineras) ni cerca de
combustibles o químicos o en áreas de demolición.
x No almacene ni lleve líquidos inflamables, gases o materiales explosivos en el mismo
compartimiento en el que está el dispositivo, sus piezas o sus accesorios.
Si percibe que el dispositivo o la batería emiten olores o sonidos raros o si ve humo o
líquidos salir del dispositivo o la batería, interrumpa el uso del dispositivo
inmediatamente y llévelo a un Centro de servicios autorizado.
Si no lo hace, podría provocar un incendio o una explosión.
Cumpla con todas las advertencias y normas de seguridad relacionadas con el uso de
dispositivos móviles, mientras conduce un vehículo.
Mientras conduce, su responsabilidad principal es controlar el vehículo de forma segura. Si la ley
lo prohíbe, no utilice el dispositivo móvil mientras conduce. Por su seguridad y la de los demás,
utilice su sentido común y recuerde los siguientes consejos:
x Conozca el dispositivo y sus funciones de practicidad, como la marcación rápida y la
rellamada. Estas funciones le permiten reducir el tiempo necesario para realizar o recibir
llamadas con el dispositivo móvil.
x Coloque el dispositivo en un lugar de fácil alcance. Asegúrese de poder tener acceso al
dispositivo inalámbrico sin quitar los ojos del camino. Si recibe una llamada en un
momento inapropiado, deje que el buzón de voz conteste por usted.
x Interrumpa las llamadas en situaciones de tráfico denso o en condiciones meteorológicas
adversas. La lluvia, el aguanieve, la nieve, el hielo o el tráfico denso pueden ser peligrosos.
x No anote ni busque números de teléfono. Anotar alguna tarea o mirar la agenda lo
distrae de su responsabilidad principal que es conducir de forma segura.
x Marque prudentemente y evalúe el tráfico. Realice llamadas cuando no se esté
desplazando o antes de incorporarse al tráfico. Intente programar las llamadas cuando el
automóvil se encuentre estacionado.
x No mantenga conversaciones estresantes ni emotivas que puedan distraerle. Hágale
saber a su interlocutor que está conduciendo y termine las conversaciones que puedan
desviar su atención del camino.
Uso y mantenimiento correctos del dispositivo móvil
Mantenga el dispositivo seco
x La humedad y los líquidos pueden dañar las partes o los circuitos electrónicos del
dispositivo.
x No encienda el dispositivo si está mojado. Si ya está encendido, apáguelo y quite
inmediatamente la batería (si no puede apagarlo ni quitarle la batería, déjelo como está).
Después, seque el dispositivo con una toalla y llévelo al centro de servicio.
x Los líquidos cambiarán el color de la etiqueta que indica el daño causado por el agua
dentro del dispositivo. El daño causado por agua en el dispositivo puede anular la
garantía del fabricante.
Page 83

38
Guarde el dispositivo sólo sobre superficies planas
Si se cae, el dispositivo podría dañarse.
No guarde el dispositivo en áreas de calor o frío. Se recomienda utilizar el dispositivo en
temperaturas de entre 5 ºC y 35 ºC
x No almacene el dispositivo en zonas de temperaturas muy elevadas, como por ejemplo
dentro de un automóvil en verano. Si lo hace, podría provocar el mal funcionamiento de
la pantalla, daños al dispositivo o la explosión de la batería.
x No exponga el dispositivo a la luz directa del sol durante largos períodos (por ejemplo,
sobre el salpicadero de un automóvil).
x Guarde la batería a temperaturas de entre 0 ºC y 45 ºC
No guarde el dispositivo con objetos metálicos, tales como monedas, llaves y collares
x El dispositivo podría rayarse o funcionar de forma incorrecta
x Si los terminales de la batería entran en contacto con objetos metálicos, puede
producirse un incendio
No guarde el dispositivo cerca de campos magnéticos
x Es posible que el dispositivo comience a funcionar mal y que se descargue la batería a
causa de la exposición a estos.
x Las tarjetas con banda magnética, como tarjetas de crédito, tarjetas de teléfono, libretas
de ahorros y pases de embarque, pueden dañarse a causa de los campos magnéticos.
Si el dispositivo se calienta, interrumpa el uso del dispositivo o las aplicaciones durante un
tiempo
La exposición prolongada de la piel a un dispositivo caliente puede provocar síntomas de
quemaduras con baja temperatura, como manchas rojas y pigmentación.
No utilice el dispositivo si la tapa posterior no está colocada
La batería podría salirse del dispositivo, lo cual podría provocar daños o el funcionamiento
incorrecto
Si su dispositivo posee una lámpara o un flash para la cámara, no lo utilice cerca de los ojos
de personas o mascotas
Puede producir una pérdida temporal de la visión o dañar los ojos.
Te ng a c ui d ad o a l ex po ne rs e a luce s inte rm ite nt es
x Cuando utilice el dispositivo, deje algunas luces encendidas en la habitación y no
sostenga la pantalla demasiado cerca de los ojos.
Page 84

39
x Pueden ocurrir convulsiones o desmayos debido a la exposición a luces intermitentes
cuando se miran vídeos o se juegan juegos con luces intermitentes por períodos
prolongados. Si siente algún malestar, deje de utilizar el dispositivo inmediatamente.
x Si cualquier persona cercana a usted ha sufrido convulsiones o desmayos al utilizar un
dispositivo similar, consulte con un médico antes de utilizar el dispositivo.
x Si siente molestias, tales como calambres musculares, o si se siente desorientado,
interrumpa el uso del dispositivo inmediatamente y consulte con un médico.
x Para evitar el cansancio de la vista, interrumpa el uso del dispositivo con frecuencia.
Reduzca el riesgo de lesiones por movimientos repetitivos
Cuando realiza repetidamente acciones, tales como pulsar teclas, dibujar caracteres en la
pantalla táctil con los dedos o jugar, puede sentir ocasionalmente molestias en sus manos, cuello,
hombros u otras partes del cuerpo. Cuando utilice el dispositivo durante lapsos prolongados,
sosténgalo de forma relajada, pulse ligeramente las teclas y descanse frecuentemente. Si sigue
sintiendo malestar durante o después de realizar estas acciones, deje de utilizar el dispositivo y
consulte a un médico.
Cuando utilice auriculares, proteja su audición y sus oídos
x La exposición excesiva a sonidos fuertes puede ocasionar
lesiones auditivas
x La exposición a sonidos altos mientras camina puede distraer
su atención y provocar un accidente.
x Siempre baje el volumen antes de conectar los auriculares a una fuente de audio y use la
configuración de volumen mínimo necesaria para escuchar música o una conversación.
x En ambientes secos, se puede acumular electricidad estática en los auriculares. Evite
utilizar auriculares en ambientes secos o toque algún objeto metálico para descargar la
electricidad estática antes de conectar los auriculares al dispositivo.
x No utilice un auricular mientras conduce o monta. Si lo hace, podría distraerse y provocar
un accidente o podría incurrir en acciones ilegales, según su región.
Use el dispositivo con precaución mientras camina o se mueve
x Siempre preste atención a los alrededores para evitar provocar lesiones físicas a usted y a
los demás
x Asegúrese de que el cable del auricular no se le enrede en los brazos o en objetos
cercanos.
No traslade dispositivos en los bolsillos posteriores ni alrededor de su cintura
Podría lesionarse o dañar el dispositivo si se cae.
No pinte su dispositivo ni le coloque autoadhesivos
Page 85

40
x La pintura y los autoadhesivos pueden obstruir las partes móviles y evitar un
funcionamiento adecuado
x Si es alérgico a la pintura o a las partes metálicas del dispositivo, podrá sufrir picazón,
eccema o hinchazón en la piel. Si esto sucede, deje de utilizar el dispositivo y consulte a
su médico.
No utilice el dispositivo si la pantalla está quebrada o rota
El vidrio roto puede causar lesiones en las manos y el rostro. Lleve el dispositivo a un centro de
servicios autorizado para hacerlo reparar.
Instale los dispositivos móviles y el equipo con precaución
x Asegúrese de que todo dispositivo móvil o equipo relacionado que se instale en su
vehículo esté montado de manera segura.
x Evite colocar el dispositivo y los accesorios en el área de despliegue del airbag o cerca de
él. Los equipos inalámbricos instalados incorrectamente pueden provocar lesiones graves
cuando los airbags se inflan rápidamente.
No permita que el producto se caiga ni lo someta a impactos fuertes
x El dispositivo podría dañarse o funcionar de forma incorrecta.
x Si lo dobla o deforma, el dispositivo puede dañarse y sus piezas pueden funcionar de
forma incorrecta.
Garantice la máxima duración de la batería y el cargador
x Evite cargar el dispositivo por más de una semana, ya que la sobrecarga puede acortar la
vida útil de la batería.
x Con el tiempo, el dispositivo sin usar se descarga y es necesario volver a cargarlo para
usarlo.
x Desconecte el cargador de las fuentes de alimentación cuando no esté en uso.
x Use la batería sólo para los fines para los que fue diseñada.
x Si no utiliza la batería durante mucho tiempo, podría acortar su vida útil y su rendimiento.
También podría provocar el funcionamiento incorrecto o la explosión de la batería, o un
incendio.
x Siga todas las instrucciones de este manual para garantizar la mayor vida útil posible del
dispositivo y la batería. Los daños o lo fallos de funcionamiento provocados por la falta de
cumplimiento con estas advertencias e instrucciones podrían anular la garantía del
fabricante.
x Con el tiempo, el dispositivo puede desgastarse. Algunas piezas y reparaciones están
cubiertas por la garantía dentro del período de validez, sin embargo los daños o el
deterioro provocados por el uso de accesorios no aprobados no poseen cobertura.
Tenga en cuenta la siguiente información al utilizar el dispositivo
x Manténgalo en posición vertical, tal como lo haría con un teléfono tradicional.
Page 86

41
x Hable directamente cerca del micrófono
x No cubra el área de la antena con las manos u otros objetos. Esto podría provocar
problemas de conectividad o agotar la batería.
No desarme, modifique ni repare el dispositivo
x Cualquier cambio o modificación en el dispositivo puede anular la garantía del fabricante.
Sin necesita reparar el dispositivo, llévelo a un centro de servicios autorizado.
x No desarme ni perfore la batería, esto puede provocar una explosión o un incendio.
x Apague el dispositivo antes de retirar la batería. Si retira la batería mientras el dispositivo
está encendido, podría provocar fallos en el funcionamiento.
Te ng a e n c ue nt a la s igu ie nte i nf o rmación al limpiar el dispositivo
x Utilice una toalla o un paño de goma para limpiar el dispositivo o el cargador.
x Limpie los terminales de la batería con algodón o con una toalla
x No utilice sustancias químicas ni detergentes. Si lo hace, podría provocar la decoloración
o la corrosión de la parte externa del dispositivo o podría provocar una descarga eléctrica
o un incendio.
No lo utilice para ningún fin que no sea aquél para el que se lo diseñó
El dispositivo podría no funcionar correctamente.
Cuando utilice el dispositivo en público, trate de no molestar a los demás
Permita que sólo personal cualificado realice el mantenimiento de su dispositivo
Es posible que se produzcan daños y se anule la garantía del fabricante si permite que personal
no calificado realice el mantenimiento del dispositivo.
Tenga cuidado al manipular las tarjetas SIM, las tarjetas de memoria o los cables
x Al insertar una tarjeta o conectar un cable en el dispositivo, asegúrese de que la tarjeta
esté insertada o el cable esté conectado del lado correcto.
x No extraiga la tarjeta mientras el dispositivo transfiere información o tiene acceso a ella,
ya que podría perder datos y dañar la tarjeta o el dispositivo.
x Proteja las tarjetas de descargas fuertes, electricidad estática y ruido eléctrico
provenientes de otros dispositivos.
x No toque los contactos o los terminales dorados con los dedos o con objetos metálicos. Si
la tarjeta está sucia, límpiela con un paño suave.
x Si inserta una tarjeta o conecta un cable a la fuerza o en forma incorrecta podría provocar
daños en la toma multifuncional u otras partes del dispositivo.
Asegúrese de tener acceso a los servicios de emergencia
Es posible que, en algunas áreas o circunstancia, no pueda efectuar llamadas de emergencia.
Page 87

42
Antes de viajar a zonas remotas o en vías de desarrollo, planifique un método alternativo para
comunicarse con el personal de los servicios de emergencia.
Proteja sus datos personales y evite la divulgación o el uso incorrecto de información
confidencial
x Cuando utilice el dispositivo, asegúrese de realizar copias de seguridad de los datos
importantes. SUNSTECH no se responsabiliza de la pérdida de ningún dato.
x Cuando deseche el dispositivo, realice una copia de seguridad de todos los datos y,
después, restablezca el dispositivo para evitar el uso indebido de su información
personal.
x Lea la pantalla de permisos cuidadosamente al descargar aplicaciones. Tenga particular
cuidado con las aplicaciones que tienen acceso a varias funciones o a una cantidad
importante de su información personal.
x Controle sus cuentas regularmente para descartar el uso sospechosos o no autorizado. Si
encuentra algún signo de mal uso de su información personal, contacte a su proveedor
de servicios para eliminar o cambiar la información de su cuenta.
x En caso de perder el dispositivo o que se lo roben, cambie las contraseñas de sus cuentas
para proteger su información personal.
x Evite el uso de aplicaciones de fuentes desconocidas y bloquee el dispositivo con un
patrón, una contraseña o un PIN.
No distribuya material protegido por derechos de autor
No distribuyas material protegido por las leyes de derecho de autor sin el permiso de los
propietarios del contenido. Al hacer esto, podría violar las leyes de derechos de autor. El
fabricante no será responsable de ningún problema legal provocado por el uso ilegal de material
protegido por parte del usuario.
Malware y virus
Siga las siguientes sugerencias a fin de proteger el dispositivo contra malware y virus. Si
no lo hace, podría provocar daños o la pérdida de datos, los cuales podrían no estar
cubiertos por la garantía
x No descargue aplicaciones desconocidas.
x No entre en sitios Web poco fiables
x Elimine los mensajes de texto o de correo electrónico sospechosos de remitentes
desconocidos.
x Establezca una contraseña y modifíquela con regularidad
x Desactive las funciones inalámbricas, tales como Bluetooth, cuando no las utilice.
x Si el dispositivo se comporta de modo extraño, ejecute un programa de antivirus para
detectar una posible infección.
x Ejecute un programa de antivirus en el dispositivo antes de iniciar aplicaciones y archivos
que acaba de descargar.
x Instale programas de antivirus en su ordenador y ejecútelos con regularidad para
detectar posibles infecciones.
Page 88

43
x No edite los ajustes de registro ni modifique el sistema operativo del dispositivo.
Información sobre la certificación de la tasa de absorción específica (SAR, Specific
Absorption Rate)
ESTE DISPOSITIVO CUMPLE CON LAS NORMAS INTERNACIONALES DE EXPOSICIÓN A
ONDAS DE RADIO
Su dispositivo móvil es un transmisor y receptor de radio. Esta diseñado para no exceder los
límites de exposición a ondas de radios (campos electromagnéticos de radiofrecuencia)
recomendados por las normas internacionales. Las normas fueron desarrolladas por una
organización científica independiente (ICNIRP) e incluyen un margen de seguridad sustancial
diseñado para asegurar la seguridad de todas las personas, sin importar su edad o salud.
Las normas de exposición a ondas de radio utilizan una unidad de medida conocida como
Coeficiente de Absorción Específica o SAR. El límite de SAR para dispositivos móviles es de
2,0W/Kg. Las pruebas de SAR se realizan utilizando posiciones de operación estándar con el
dispositivo transmitiendo a su máximo nivel de energía certificado en todas las bandas de
frecuencia. Los valores de SAR más altos bajo las normas ICNIRP para este modelo de dispositivo
son:
SAR máxio para este modelo y condiciones bajo las cuales se registró
SAR para posiciones cerca de la
cabeza
0,285 W/Kg
SAR para posiciones cerca del cuerpo
0,0399 W/Kg
Durante el uso, los valores reales de SAR para este dispositivo suelen encontrarse muy por
debajo de los valores indicados anteriormente. Esto se debe a que para propósitos de eficiencia
del sistema y para minimizar la interferencia con la red, el poder de operación de su dispositivo
móvil disminuye automáticamente cuando no se necesita la potencia máxima para la llamada.
Cuanto menor sea la salida de energía del dispositivo, menor será el valor de SAR.
Se ha realizado una prueba SAR con el dispositivo sobre el cuerpo con una separación de 1,5cm.
Para cumplir con los requisitos de exposición a radiofrecuencia, mientras use el dispositivo sobre
el cuerpo, el dispositivo debe situarse a, por lo menos, 1,5cm del cuerpo.
Algunas organizaciones, como la Organización Mundial de la Salud o la Administración de
Alimentos y Medicamentos de los Estados Unidos, han sugerido que, si las personas desean
reducir la exposición, podrían utilizar un accesorio de manos libres para mantener el dispositivo
inalámbrico lejos de su cabeza y su cuerpo mientras lo utilizan, o reducir la cantidad de tiempo
que pasan utilizando el dispositivo.
Eliminación correcta de este producto
Page 89

44
(Residuos de aparatos eléctricos)
(Se aplica en países con sistemas de recolección por separado)
La presencia de este símbolo en el producto, accesorios o material
informativo que lo acompañan, indica que ni el producto ni sus
accesorios electrónicos (como el cargador, cascos, cable USB) deberán
eliminarse junto con otros residuos domésticos.
Para evitar los posibles daños al medio ambiente o a la salud humana que representa la
eliminación incontrolada de residuos, separe estos productos de otros tipos de residuos y
recíclelos correctamente. De esta forma, se promueve la reutilización sostenible de recursos
materiales.
Los usuarios particulares pueden contactar con el establecimiento donde adquirieron el
producto o con las autoridades locales pertinentes para informarse sobre cómo y dónde pueden
llevarlo para que sea sometido a un reciclaje ecológico y seguro.
Los usuarios comerciales pueden contactar con su proveedor y consultar las condiciones del
contrato de compra. Este producto y sus accesorios electrónicos no deben eliminarse junto a
otros residuos comerciales.
Eliminación correcta de las baterías de este producto
(Se aplica en países con sistemas de recolección por separado)
La presencia de esta marca en las baterías, el manual o el paquete del
producto indica que cuando haya finalizado la vida útil de las baterías,
no deberán eliminarse junto con otros residuos domésticos. Los
símbolos químicos Hg, Cd o Pb, si aparecen, indican que la batería
contiene mercurio, cadmio o plomo en niveles superiores a los valores
de referencia admitidos por la Directiva 2006/66 de la Unión Europea.
Si las baterías no se desechan correctamente, estas sustancias podrían provocar lesiones
personales o dañar el medioambiente.
Para proteger los recursos naturales y promover el reciclaje, separe las baterías de los demás
residuos y recíclelas mediante el sistema de recogida gratuito de su localidad.
Cláusula de exención de responsabilidad
Parte del contenido y de los servicios a los que se obtiene acceso mediante este dispositivo
pertenecen a terceros y están protegidos por derechos de autor, patente, marca registrada y/u
otras leyes de propiedad intelectual. Dicho contenido y dichos servicios se proporcionan
únicamente para uso personal y no comercial. Es posible que no puedan utilizar el contenido o
los servicios de forma que no haya sido autorizada por el propietario de contenido o proveedor
de servicios. Sin perjuicio de lo anterior, excepto que sea autorizado expresamente por el
propietario de contenido o proveedor de servicios, no puede modificar, copiar, reeditar, cargar,
publicar, transmitir, traducir, vender , crear obras derivadas, explotar ni distribuir de ninguna
manera ni por ningún medio el contenido o los servicios exhibidos mediante este dispositivo.
“EL CONTENIDO Y LOS SERVICIOS DE TERCEROS SE PROPORCIONAN “TAL CUAL”. SUNSTECH NO
Page 90

45
GARANTIZA EL CONTENIDO NI LOS SERVICIOS PROPORCIONADOS, YA SEA EXPRESAMENTE O
IMPLÍCITAMENTE, PARA NINGÚN FIN, SUNSTECH RENUNCIA EXPRESAMENTE A CUALESQUIERA
GARANTIAS IMPLICITAS, INCLUYENDO, PERO NO LIMITANDO A ELLO, GARANTÍAS DE
COMERCIABILIDAD O IDONEIDAD PARA UN FIN EN PARTICULAR. SUNSTECH NO GARANTIZA LA
VERACIDAD, VALIDEZ, REPRODUCCIÓN, LEGALIDAD O INTEGRIDAD DE CUALQUIER TIPO DE
CONTENIDO O SERVICIO PROPORCIONADO MEDIANTE ESTE DISPOSITIVO Y, BAJO NINGUNA
CIRCUNSTANCIA, INCLUYENDO NEGLIGENCIA, SUNSTECH SERA RESPONSABLE. YA SEA EN
TÉRMINOS DE CONTRATO O AGRAVIO, DE CUALQUIER DAÑO DIRECTO, INDIRECTO, INCIDENTAL,
ESPECIAL O CONSECUENCIAL, HONORARIOS DE ABOGADOS, GASTOS O CUALQUIER OTRO DAÑO
QUE DERIVE DE, O EN REALCIÓN CON, CUALQUIER TIPO DE INFORMACIÓN INCLUIDA EN, O
COMO RESULTADO DEL USO DE CUALQUIER TIPO DE CONTENIDO O SERVICIO POR USTED O UN
TERCERO, AUN SI CONOCE LA POSIBILIDAD DE DICHOS DAÑOS”.
Los servicios de terceros pueden finalizar o interrumpirse en cualquier momento y SUNSTECH no
ofrece representación ni garantía respecto de la disponibilidad de contenido o servicio para
ningún período de tiempo. El contenido y los servicios son transmitidos por terceros mediante
redes e instalaciones de transmisión sobre las cuales SUNSTECH no tiene control. Sin limitar la
generalidad de esta cláusula, SUNSTECH renuncia expresamente a cualquier responsabilidad por
cualquier interrupción o suspensión de contenido o servicio proporcionado mediante este
dispositivo.
SUNSTECH no es responsable de la atención al cliente relacionada con el contenido y los
servicios. Cualquier pregunta o solicitud de servicio en relación con el contenido o los servicios
deben enviarse directamente a los proveedores de servicios y contenido.
Page 91

46
WAR RANTY CAR D
GARANTÍA EUROPEA
1. General
La presente garantía se otorga sin perjuicio y además de los derechos reconocidos al
consumidor frente al vendedor por el Real Decreto Legislativo 1/2007 de 16 de
noviembre por el que se aprueba el texto refundido de la Ley General para la Defensa de
Consumidores y Usuarios (la “LCU”) y demás legislación complementaria. Por lo tanto, no
se excluyen, ni limitan los derechos legales reconocidos al consumidor en virtud de la
legislación autonómica, nacional o europea aplicable.
La presente garantía será válida en todos los Estados Miembros de la Unión Europea con
las limitaciones que correspondan legalmente en el país en que se pretendan ejercitar de
conformidad con su normativa de aplicación.
Sin perjuicio de lo anterior, SUNSTECH respetará los derechos y limitaciones en materia
de garantía de producto que correspondan legalmente en cada uno de los estados
enumerados en el Anexo de conformidad con su normativa de aplicación para cualquier
producto siempre que el mismo esté destinado al mercado de la UE y fuera adquirido y
usado por un consumidor o usuario dentro del EEE.
2. Garantía Legal
Este producto SUNSTECH está garantizado por un plazo de dos (2) años a partir de la
fecha de entrega y/o compra. Durante dicho plazo, SUNSTECH responderá de las faltas de
conformidad del producto con el contrato de acuerdo con lo dispuesto en la LCU, lo que
dará derecho al consumidor a solicitar la reparación o sustitución del producto, salvo que
una de estas dos opciones resulte objetivamente imposible o desproporcionada.
En este sentido, se considerará desproporcionada la forma de saneamiento, es decir, la
reparación o sustitución, cuando ésta imponga al vendedor costes que no sean
razonables. Para determinar esto, se tendrá en cuenta lo siguiente: (i) el valor del
producto si no hubiera falta de conformidad; (ii) la relevancia de la falta de conformidad;
y (iii) si la forma de saneamiento alternativa se pudiese realizar sin inconvenientes
mayores para el consumidor y usuario.
Para determinar si los costes no son razonables, los gastos correspondientes a una forma
de saneamiento deben ser, además, considerablemente más elevados que los gastos
correspondientes a la otra forma de saneamiento.
Adicionalmente, el consumidor podrá optar entre solicitar la rebaja del precio o la
resolución del contrato, cuando no pudiera exigir la reparación o la sustitución y en los
casos en que éstas no se hubieran llevado a cabo en plazo razonable o si mayores
inconvenientes para el consumidor y usuario. No obstante, la resolución no procederá
cuando la falta de conformidad sea de escasa importancia.
Tanto la reparación como la sustitución del producto como consecuencia de la falta de
conformidad del producto serán gratuitas para el consumidor y usuario, incluyendo
Page 92

47
mano de obra y materiales.
En todo caso, las reparaciones en garantía deben ser efectuadas por Servicio de
Asistencia Técnica Oficial de SUNSTECH o distribuidores autorizados.
3. Condiciones para el ejercicio de la Garantía
Para ejercer tanto la garantía legal como la garantía comercial, es indispensable presentar
justificación documental que acredite la fecha de entrega y/o compra del producto, ya
sea la factura, ticket de compra, albarán de entrega o tarjeta de garantía sellada y fechada.
No se aceptarán aquellos documentos que hayan sido manipulados o falsificados.
El consumidor deberá ponerse en contacto con el Servicio de Atención al Cliente de
SUNSTECH accediendo a la pagina web apartado soporte, donde se le informará del
proceso a seguir. En ese momento, el consumidor deberá proporcionar una descripción
clara de la avería o de la falta de conformidad del producto con el contrato.
En todo caso, las reparaciones en garantía deberán ser efectuadas por Servicios de
Asistencia Técnica Oficial de SUNSTECH o distribuidores autorizados para que SUNSTECH
responda por la garantía legal y/o la garantía comercial.
4. Exclusiones
La garantía no prevé, ni incluye las revisiones periódicas , de mantenimiento o la
instalación del producto.
Además, no podrá entenderse que existe falta de conformidad del producto con el
contrato y, por lo tanto, éste no estará cubierto ni por la garantía legal, ni por la comercial
cuando:
x la falta de conformidad corresponda a una discrepancia con las normas de seguridad
o técnicas locales o nacionales de un país distinto al cual originalmente fue diseñado
y producido;
x dicho producto o cualquiera de sus identificativos (número de serie, etc) hayan sido,
total o parcialmente, abiertos, montados, desmontados, manipulados y/o reparados
por persona ajena a los Servicios de Asistencia Técnica Oficial o distribuidores
autorizados de SUNSTECH
x la falta de conformidad sea consecuencia de una instalación incorrecta (salvo que la
instalación haya sido realizada por el vendedor autorizado de SUNSTECH o bajo su
responsabilidad, o por el consumidor siguiendo las instrucciones de instalación de
SUNSTECH) o de un uso abusivo o indebido del producto, incluyéndose, a título
enunciativo y no limitativo, un uso que no se ajuste a las finalidades normales del
producto o que no sea acorde con las instrucciones de uso y mantenimiento y
definidas por SUNSTECH;
x la falta de conformidad haya sido causada por un virus informático, una acción o una
manipulación de contraseñas, una instalación, manipulación o reinstalación de
software, etc;
x la falta de conformidad se deba al uso de accesorios, cargadores o consumibles que
no sean originales de SUNSTECH y diseñados para el producto;
Page 93

48
x la falta de conformidad se deba al uso de cualquier software o aplicación de terceros
que modifique, altere o adapte el software aprobado y/o incluido en el producto por
SUNSTECH;
x la falta de conformidad sea consecuencia de la descarga o el uso de servicios
multimedia de terceros y/o contenidos de terceros disponibles o accesibles a través
del producto;
x se produzcan daños en o por la batería cuya causa sea una sobrecarga de la misma;
x haya rotura de cualquiera de los sellos de la carcasa o celdas de la batería, o bien,
indicios evidentes de manipulación en los mismos; y/o
x los daños que se produjeran en el producto fueran causados por cualquier causa de
fuerza mayor o caso fortuito, en especial, por rayos, agua, fuego, aplicación del voltaje
incorrecto, ventilación incorrecta o cualquier otra causa no atribuible a la fabricación y
al diseño del mismo.
SUNSTECH no será responsable, bajo ningún concepto, por la pérdida de cualesquiera datos
almacenados en el producto. El consumidor será responsable por las copias de seguridad y la
protección de sus datos frente a pérdidas, daños y destrucción de los mismos.
Ninguna de las garantías aquí recogidas cubre la sustitución de piezas, debido al desgaste o
rotura de mecanismos, gomas, carcasas y/o plásticos, así como los deterioros estéticos, debidos
al uso normal del producto, a efectos aclarativos, la pantalla pierde el brillo con el uso del propio
producto. Del mismo modo, las garantías no cubren ningún tipo de daño producido durante el
transporte del producto (incluyendo, a título enunciativo y no limitativo, daños estéticos, golpes,
rayas, arañazos, manchas, abolladuras, etc), en cuyo caso serán de aplicación las disposiciones
recogidas en las condiciones generales de contratación de SUNSTECH que sean aplicables.
Para más información visite www.sunstech.es
También puede ponerse en contacto con:
AFEX SUNS, S.A.
Metall, 6-8
08110 Montcada i Reixac
Page 94

DECLARACIÓN DE CONFORMIDAD
Directiva(s) del Consejo con la(s) que se declara conformidad:
Directiva (1999/5/EC) - R&TTE
Directiva (2011/65/EU) - RoHS
Aplicación de las Normas:
EN 60950-1:2006+A11:2009+A1:2010+A12:2011+A2:2013
EN 50332-1:2000 EN 50332-2:2003
EN 50566:2013 EN 50360:2001/A1:2012
EN 62209-1:2006 EN 62209-2:2010
EN 62479:2010 EN 301 489-1 V1.9.2
EN 301 489-7 V1.3.1 EN 301 489-17 V2.2.1
EN 301 511 V9.0.2 EN 300 328 V1.9.1
IEC 62321:2008 IEC 62321:2013
Fabricante:
AFEX SUNS, S.A.
Dirección:
c/Metall 6-8, 08110, Montcada i Reixac
Tipo de equipo:
Teléfono móvil
Marca:
SUNSTECH
Modelo.:
TEL205
(rango de números de serie:160700001 - 160705050)
Nosotros, los abajo firmantes, declaramos bajo nuestra exclusiva
responsabilidad que el equipo especificado cumple con la(s) Directiva(s) y
Norma(s) mencionadas
Lugar: Barcelona ______________________________
(Firma)
Víctor Planas Bas_________
(Nombre)
Fecha: 25 - Julio - 2016
Director General ________
(Cargo)
Page 95

Page 96

TEL205·Téléphone portable
French & Portuguese
Page 97

2
Manuel utilisateur
Cher client :
Nous vous remercions d'avoir choisi ce téléphone portable. Ce téléphone portable intègre les
dernières fonctions avancées au monde, ce qui permet une utilisation simple et pratique, pour
satisfaire aux besoins particuliers.
Le téléphone mobile prend en charge une carte (mémoire)T-FLASHet accueille deux cartes SIM
en mode veille. Il intègre les fonctions supplémentaires suivantes : SMS, MP3, MP4, appareil
photo, radio FM, alarme, enregistreur vidéo et calendrier, vous permettant d’organiser vos
activités, vos études et de vivre simplement ; avec une longue durée de veille, ainsi que le service
et la calculatrice, et communiquer avec cet appareil sera plus facile et plus fluide ; puissant
gestionnaire de fichiers vous permet de gérer facilement les fichiers. En outre, la liste de sonnerie
vous permet de choisir une musique à définir comme sonnerie; l'aspect personnalisé peut
également satisfaire votre sélection.
Remarque : Le manuel utilisateur est utilisé pour guider l'utilisateur concernant la fonctionnalité du
téléphone. Certaines fonctions peuvent varier en raison des modifications et lever des gradations de
logiciel ou en raison d'erreurs d'impression.
Page 98

3
!
Contenu
Consignes de sécurité ............................................................................................ 5
À propos du téléphone .......................................................................................... 7
Paramètres d'affichage...................................................................................................................7
Fonctions Clés....................................................................................................................................7
Icônes d'état .......................................................................................................................................9
Premier appel .....................................................................................................................................9
Insertion des cartes SIM ..............................................................................................................10
Insertion de la carte mémoire................................................................................................... 10
Batterie et charge ..........................................................................................................................10
Installation de la batterie........................................................................................................ 10
Charger la batterie .................................................................................................................... 10
État de la batterie ......................................................................................................................11
Utilisation de la batterie.......................................................................................................... 11
Mise en marche / arrêt.................................................................................................................12
Mot de passe...............................................................................................................................13
Mot de passe de téléphone................................................................................................... 13
PIN de la SIM1 ............................................................................................................................. 13
PIN de la SIM2 ............................................................................................................................. 13
Désactiverle mot de passe..................................................................................................... 14
Utilisation de kit mains libres.................................................................................................... 14
Verrou du clavier ............................................................................................................................14
Touches spécifiques......................................................................................................................14
Langue et méthodes d'entrée ..................................................................................................15
Nom .................................................................................................................................................... 15
Effectuer un appel interurbain automatique (DDD) ....................................................15
Effectuer un appel international (IDD) ..............................................................................15
Appeler un numéro de poste ............................................................................................... 15
Appel d’urgence ........................................................................................................................15
IMEI (identité internationale d'équipement mobile)................................................... 16
Appel ..................................................................................................................... 16
Passer des appels........................................................................................................................... 16
Faire un appel international..................................................................................................16
Composer le numéro d’un poste.........................................................................................16
Faire un appel à partir du répertoire.................................................................................. 16
Derniers numéros recomposés............................................................................................ 16
Appels entrants ..............................................................................................................................17
Rejet des appels............................................................................................................................. 17
Options lors d’un appel
...............................................................................................................17
Régler le volume
............................................................................................................................17
Guide menu .......................................................................................................... 18
Répertoire.........................................................................................................................................18
Messages .......................................................................................................................................... 19
Écrire un message ..................................................................................................................... 19
Page 99

4
Boîte de réception..................................................................................................................... 20
Brouillons...................................................................................................................................... 20
Corbeille de départ................................................................................................................... 20
Messages envoyés.....................................................................................................................20
Paramètres SMS ......................................................................................................................... 20
Centre d'appel ................................................................................................................................21
Journaux d'appels..................................................................................................................... 21
Paramètres d'appel...................................................................................................................22
Multimédia....................................................................................................................................... 23
Caméra ..........................................................................................................................................23
Visionneuse d'images.............................................................................................................. 24
Enregistreur-vidéo ....................................................................................................................25
Lecteur vidéo .............................................................................................................................. 25
Lecteur audio.............................................................................................................................. 25
Enregistreur audio.....................................................................................................................26
Radio FM.......................................................................................................................................26
Jeux..................................................................................................................................................... 26
Gestionnaire de fichiers ..............................................................................................................26
Agenda électronique ...................................................................................................................28
Calculatrice ..................................................................................................................................28
Calendrier..................................................................................................................................... 28
Alarme ...........................................................................................................................................28
Torche . .. .. .. .. .. .. .. .. .. .. .. .. .. .. .. .. .. .. .. .. .. .. .. .. .. .. .. .. .. .. .. .. .. .. .. .. .. .. .. .. .. .. .. .. .. .. .. .. .. .. .. .. .. .. .. .. .. .. .. .. ...................29
Profils d'utilisateurs....................................................................................................................... 29
Paramètres .......................................................................................................................................30
Raccourcis ....................................................................................................................................30
Paramètrespour plusieurs SIM..............................................................................................30
Paramètres du téléphone....................................................................................................... 30
Paramètres réseau.....................................................................................................................31
Paramètres de sécurité............................................................................................................ 31
Connectivité ................................................................................................................................31
Paramètres de réinitialisation ............................................................................................... 32
Services..............................................................................................................................................32
Annexe .................................................................................................................. 32
Annexe A : Veuillez prendre soin de votre téléphone mobile
......................................32
Entretien .......................................................................................................................................32
Annexe B : Dépannage
................................................................................................................33
Annexe C : Abréviation et définition...................................................................................... 34
Annexe D : Parties en option.....................................................................................................34
CARTE DE GARANTIE............................................................................................ 49
GARANTIE EUROPÉENNE ............................................................................................................49
Page 100

5
Consignes de sécurité
!
Veuillez lire attentivement et assimiler les instructions de ce manuel pour éviter tout
risque de dommage ou enfreindre les lois.
Sécurité routière
Ne pas utiliser votre téléphone portable lorsque vous conduisez. Utilisez les accessoires mains
libres si vous devez utiliser le téléphone. Placez le téléphone portable dans son support, au lieu
du siège du passager ou tout autre surface où le téléphone pourra tomber.
Mise hors tension à bord d’un avion
L' i n t e r f é re n c e d u t é l é p h o ne p o r t a b l e a u r a u n e i n c idence sur la sécurité du vol et il est illégal
d'utiliser un téléphone portable à bord d’un avion. Veuillez mettre votre téléphone hors tension
avant d'embarquer à bord d'un avion.
Mise hors tension dans la zone exposée aux risques d’explosion
Veuillez suivre les règlements ou règles et éteindre votre téléphone mobile dans la zone exposée
aux risques d’explosion ou à proximité.
Mise hors tension à proximité des articles dangereux
Veuillez éteindre votre téléphone mobile dans une station-service ou des endroits à proximité de
carburants et de produits chimiques.
Dans les hôpitaux
Veuillez suivre les règlements ou règles des hôpitaux lorsque vous utilisez un téléphone mobile
au sein des établissements. Eteignez l'appareil à proximité d'équipements médicaux. Tout
périphérique sans fil, y compris le téléphone mobile, risque de nuire les appareils médicaux qui
ne sont pas entièrement protégés. D'autres appareils électroniques peuvent également être
affectées. Si vous avez des questions, veuillez consulter votre médecin ou le fabricant.
!
 Loading...