

Page 1

KnucKlehead
Operating Instructions
99 Washington Street
Melrose, MA 02176
Phone 781-665-1400
Toll Free 1-800-517-8431
Page 2
ENGLISH
OPERATING INSTRUCTIONS FO R
STREAMLIGHT KNUCKLEHEAD
Than k you for selectin g the K nucklehea d, a trul y remark able por table light . As with any pr ofessional t ool, reason able care and mainte nance of t his p roduct will provide
year s of dependab le service .
Pleas e read th is manual b efore using your K nucklehe ad. It
includ es impor tant safe ty and o perating instruct ions and
should b e saved.
The Knuc klehead must be charge d be fore first use if a
rech argeable ba ttery pa ck is used.
SAFET Y
CAU TION : LE D R ADIAT ION (R G-2) – D O N OT
STA RE INTO B EAM. M ay Be Harmfu l To Eyes.
A. S AVE THES E INSTR UCTI ONS. This gui de contains
impor tant s afety and op erating instruc tions f or your
Knuc klehead and c harger (if a pplicable) .
B. Befo re using a b attery charge r, r ead all instru ctions
and cau tionary m arkings on th e charger.
C. Don’t abuse the cord. Never carr y a charg er by the
cord or use the c ord to disc onnect t he charger from a
rece ptacle.
D. Pl ug AC charg ers direct ly into an ele ctrical o utlet. Do
not use a n extensio n cord.
E. Do not o perate any da maged c harger. R eplace d am-
aged co rds or plugs im mediately.
Page 3

F. D o not put any meta l objec ts on to the chargin g termi-
nals located in the charger holder. A lthough there is
no e lectrica l shock hazard, this a ction co uld caus e a
burn inj ury.
G. Re move the Kn ucklehea d from the ch arger holde r be-
fore at temptin g any routine c leaning or main tenance.
H. Se e the pr oduct ma rkings f or the sp ecific ba ttery re-
quired fo r your light. Do not op en batt ery, dispose of in
fire, o r short ci rcuit – may ignite, ex plode, leak or get
hot cau sing person al injury.
I. Do n ot shor t the batter y pack as it m ay crea te a fir e
hazar d. For transp ort or stora ge, place prote ctive cap
or tap e over reces sed batt ery conta cts.
J. A small lea kage of liquid from the bat tery cells can oc -
cur under e xtreme usage or temp erature conditi ons.
This do es not neces sarily indic ate a failure. H owever,
if the ou ter case seal is b roken and the ch emical leakage get s on your skin :
1) Any liquid c hemical must be flushed off the skin
with a generous amount of water. Brush any d ry
or pow dered chemic als thoroug hly, before flus hing
the are a with prof use amount s of water.
2) If batte ry liquid get s into the eye s, flush them wit h
clear water for a mini mum of thirt y ( 30) minutes
and seek immedia te m edical attent ion. (Medical
note : The liquid is a 25 -35 % solution of po tassium
hydro xide.)
K. Do not charge th e Knuckle head in pot entially ha zard-
ous loc ations.
L. D o not attemp t to repair or r eplace any comp onents in
pote ntially haza rdous loca tions.
USING THE LIGHT
• The pu shbutton s witch is loc ated on the b ody of the
light.
• Depre ss the but ton moment arily to turn t he
light on o r off.
Page 4

• From the “on” mode de press an d hold t he but ton for
one seco nd to dim, two secon ds to acti vate the strob e
mode, an d eight secon ds to enter the mo onlight mode
with ext ended runtime. An additional pre ss of the
swit ch from any of th ese modes will t urn the light of f.
• The head of the Knuck lehead can turn 360º on the
body a nd will pivot 210 º from side to si de.
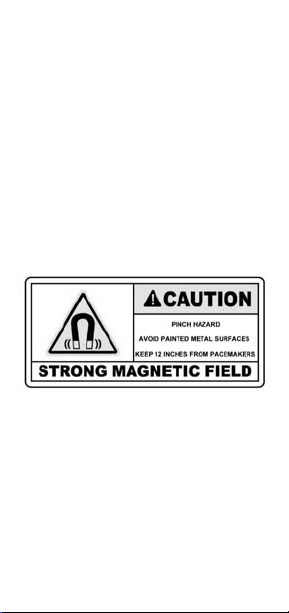
• Use t he magnet o n any conv enient fer rous surf ace to
prov ide task-spe cific illumina tion.
NOT E: The magnet should be a ttached caref ully to sur-
face s as it is very po werful.
• Lif t an d s lide out the integr ated hook to hang th e
Knuc klehead.
ATTACHING THE MAGN ET
The Knuck lehead ships with the m agnet detache d fro m
the light . Th e a ttachme nt s crew is locate d un der the label
of the sil ver shipping wa sher. Slide off th e s ilver shippin g
washe r and buf fer ring and discard b oth part s. Place t he
magne t ont o the bac k of the Knuckl ehead ensuring the
post on the b ack of t he light e ngages w ith the blind hole
in the back of t he magnet . Secure the magne t by inst alling and tightening the att achment sc rew with a 9/64 he x
head w rench.
CHARGING THE LIGHT (If Applicable)
The Knuckleh ead shou ld be f ully char ged bef ore use. Insert the base of the flashligh t into the ch arger (do or latch
face s out) . Sev eral ch arge an d disch arge cy cles m ay be
neede d to achieve f ull batter y capacit y. The Knuc klehead
is desig ned to be char ged continu ously betw een uses.
Charger Description
Ther e are tw o ba sic c harger options , FAS T C HARGERS
[one (1) hour recharge ] and the STEA DY CH ARGER [ten
(10) hour rechar ge]. FAST CHAR GERS have either a DC
cord or an AC transfo rmer wire d directl y into a strain r elief on th e charg er housi ng. Th e STE ADY C HARGER has
inter changeabl e A C and DC power cor ds which allow con nect ion to a variet y of AC and DC po wer source s.
Page 5

Fast Charger
When the Knuck lehead is p laced into the charg er the re d
LED ligh ts and the bat tery is fast- charging. W hen the batter y is f ully cha rged ( appx.1 ho ur or less) the gr een LE D
will light and th e char ger sw itches to a trick le (ma intenance ) charge.
Optim al batte ry life ca n be achiev ed if the b atter y is fast
charg ed in mo derate temperat ures. F ast char ging at low
tempe rature may cau se t he batter y to lose som e c apacity.
The DC FAS T CHA RGER is equippe d with a tem perature
sensin g system t hat autom atically ad justs the c urrent for
low t emperatu re chargin g. This sy stem wor ks best when
the c harger an d the lig ht are clo se to th e same te mperature. Av oid taking a Knu cklehead fr om a cold enviro nment
such a s 40°F or lower and pl acing it int o a warm ch arger.
Allow the Kn ucklehead to war m up for about a half h our
befor e placing it in the charg er. If the ligh t a nd charger are
colder than 40 °F, the charg e indicator s will not lig ht until
the sy stem warms .
Steady Charger
The red L ED ind icates that t he bat tery is bein g char ged
at a s teady rat e. Chargin g will cont inue as long as power
is applied to the charge r. The light may be contin uously
charg ed in t he stea dy charg er at a ny tempe rature above
0°F.
WARNI NG: Us e only gen uine St reamlight® c hargerholder s and c ords. D O NOT r emove th e wall t ransfor mer
from a n AC FAST CH ARGER an d connect it to a DC pow er
sourc e; the char ger will be des troyed.
MOUNTING TH E CHARGER (VEHIC LES)
The chargers are desi gned to be used in many positions.
Decid e on a conv enient l ocation and m ake sur e there is
enoug h clearance to inse rt and remo ve the flashli ght.
Use the charge r bas e as a template , mar k th e loc ation
of the mount ing h oles and mount the charg er s ecurely
with ap propriat e h ardware. C onnect the ch arger to an approp riate p ower so urce. T he hou sing of all Kn ucklehea d
charg ers is elect rically isolated and may be mount ed to
the ve hicle chassis.
Page 6

IMPO RTANT: Before makin g ele ctrical conne ctions in a
vehicl e, keep in mind tha t a shorted a uto batte ry can eas ily s tart a fire. Ma ke all co nnections with t ype-ap proved
conne ctors int ended for suc h service .
DC Fast Charger
For maximum flashlight batte ry life, connec t the DC fast
charg er directly t o the 12V vehicl e batter y or the unswit ched side of the ignitio n swi tch. This w ill minim ize
unnec essary c harge cycle s which would b e initiated e ach
time the ig nition switc h i s t urned on. DC FAS T C HARGER S
charg e th e ba ttery quickl y bu t dra w a minimum of current a fter cha rge. The D C #1 charge r feature s a cigaret te
lighte r plug . The DC #2 charger (dire ct wi re) is use d to
perm anently mount a Knuckl ehead in a vehi cle. Con nect
the wi res to the ve hicle batt ery or to th e unswitch ed side
of the i gnition switch throug h a 5-amp fuse; slow-b low
is bes t. Multiple DC #2 inst allations s hould be con nected
as abo ve but using a separat e fuse for e ach light. T he DC
FAST CHAR GER s ystems do no t draw any current when
the ligh t is not inser ted in the char ger.
DC Steady Charger
This cha rger is available wi th two (2) plug -in power cord s:
a cigaret te lig hter plug or dir ect wire. The charger can
be c onnected directly to the vehicle ba ttery or in the unswit ched side of t he ignition s witch if t he vehicle is o perated every few d ays. If the vehicle d oes not operat e for
perio ds of longer th an a few days or mult iple installa tions
are planned , the charg er(s) should be connec ted t o the
swit ched side of t he ignition o r master pow er switch ; the
vehicl e b attery co uld also be connect ed to a supplem ental
charg ing system .
Each charger s hould be c onnected through a 1-amp fus e;
slow- blow is best . M ultiple inst allations sh ould use a
separ ate fus e for ea ch charg er. Each STEADY CHARG ER
with a light ins erted cont inuously draw s a bout .2 ampere s
while on e without a lig ht inserte d draws no cur rent.
Vehicle Polarization
The chassis on mos t vehic les is negative ground . In t his
case, the charger ’s strip ed lea d should be connect ed to
Page 7

the output side of t he fuse . The u nmarked negative lead
should be con nected to the c hassis. I f the c hassis of the
vehicl e is positiv e gro und, t he st riped lead of th e cha rger sh ould conne ct to the chassis an d the unm arked lead
should g o to the outpu t side of the fu se.
BATTERY PACK REPLACEMENT
When repl acing the batter y pa ck; note the orientati on.
The pack is k eyed; t he base will only c lose if t he batt ery
pack is i nserted p roperly. Do no t force the b ase closed.
Alkaline
Remov e t he alkaline batt ery pack. Depr ess the tabs on the
outsi de edge of the alk aline batt ery pack and p ull the two
halve s a part. Use fre sh replaceme nt cells and obser ve the
polar ity in dicated in t he tra y. Snap t he pac k close d and
reins ert. It is key ed; the bas e will only close if t he batter y
pack i s inserte d with the proper or ientation . Do not for ce
the ba se closed.
NOT E: Do not mix old and new b atteries , t ypes or bran ds.
NOT E: Th e rechar geable b atter y contain ed in t his prod -
uct is recy clable. At the end of its useful lif e, u nder various
count ry and sta te laws, it may b e illegal to dispo se of this
bat tery in the m unicipal solid was te str eam. Che ck wit h
your l ocal solid w aste of ficials for d etails in yo ur area for
recy cling option s or proper dis posal (In US A: ABRC ).
PROD UCT REGIS TRATIO N: To register your pr oduct, go
to ww w.streamlig ht.com (Onl ine Product Reg istratio n).
Retai n your receip t or any proof o f purchase.
PROD UCT USE : Stre amlight flash lights are intended for
use a s high in tensity, heavy d uty, por table lig ht sourc es.
Use o f Streamli ght flashlig hts for an y purpos e other t han
as ligh t sourc es is spec ifically dis couraged by the ma nufact urer.
WARN ING: Be sure to use only genuin e St reamlight®
repla cement par ts.
Impor tant: To assure pro duct safet y a nd r eliability, repa irs
other than thos e listed bel ow should be perform ed at the
Stre amlight fac tory. Alwa ys use Stre amlight appr oved
Page 8

repla cement p arts, s ubstitut ion may i nvalidate underwrit er’s approv al
SERVI CE
The Knuck lehead ha s user-ser viceable par ts includi ng
bat tery, lens, ho ok and magnet c over.
LIMITED LIFETIME WARRANTY
Streamlight warrants this product to be free of defect,
including the LED, for a lifetime of use. We will repair,
replace or refund the purchase price, at our option, of any
Streamlight product that does not work as a result of a
manufacturing defect for as long as you own it. This limited lifetime warranty excludes abuse, batteries, chargers,
switches, electronics and normal wear and tear. Rechargeable batteries, chargers, switches and electronics have a
two (2) year warranty with proof of purchase.
Serial # ____________________________________
Date of Purchase_________________
©2010 997637 Rev A 12/10
 Loading...