

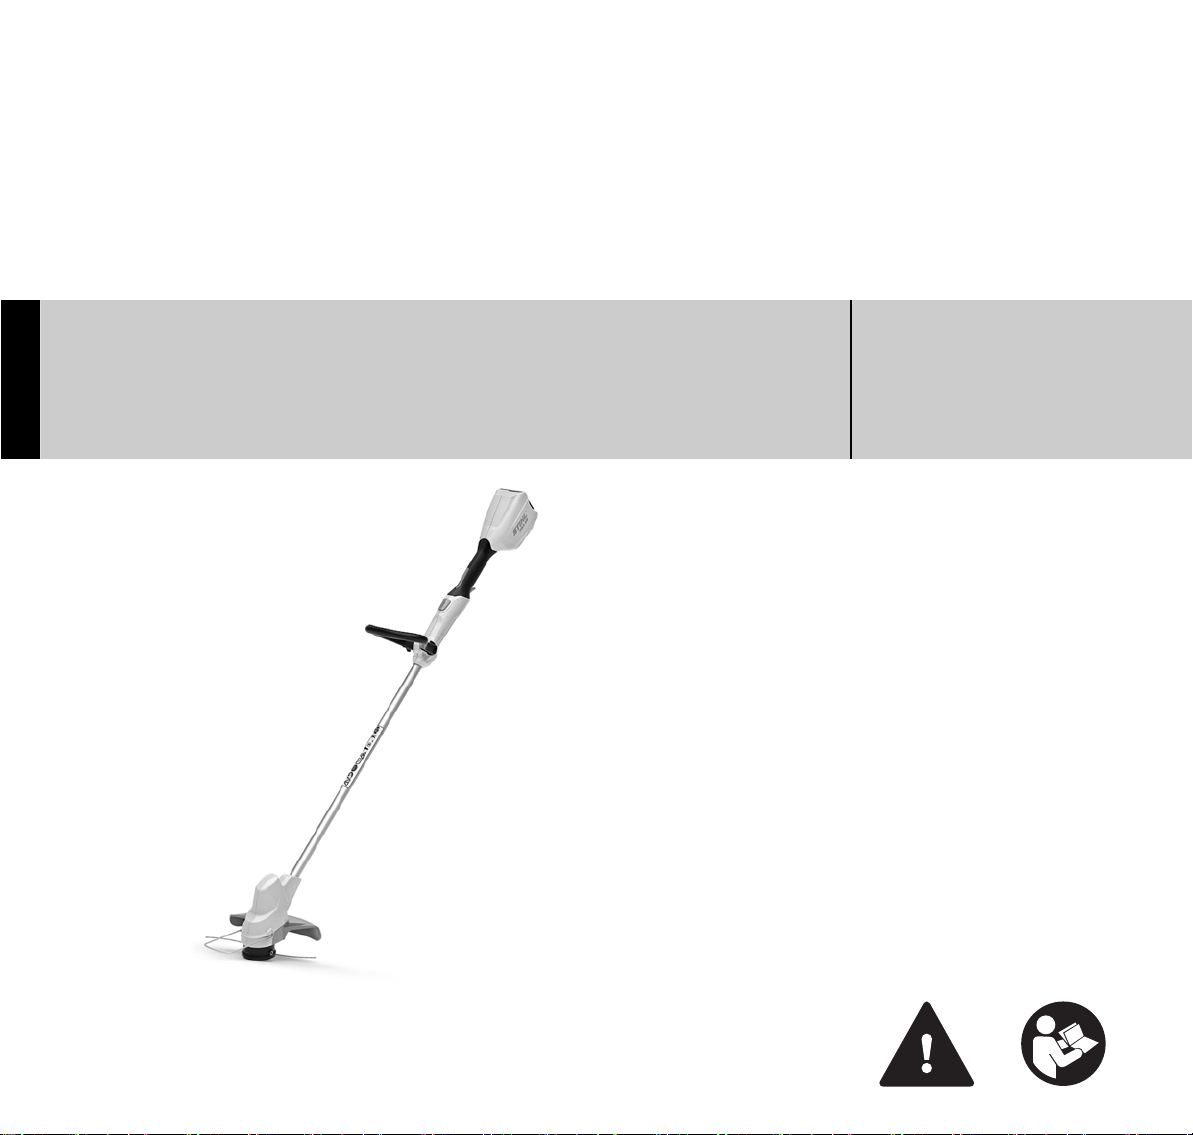
STIHL FSA 56
{
Gebrauchsanleitung
Instruction Manual
Notice d’emploi
Istruzioni d’uso
Handleiding

D Gebrauchsanleitung
1 - 27
G Instruction Manual
28 - 52
F Notice d’emploi
53 - 80
I Istruzioni d’uso
81 - 106
n Handleiding
107 - 132

Inhaltsverzeichnis
deutsch
1 Vorwort
. . . . . . . . . . . . . . . . . . . . . . . . . . . . . . . . . . . . . . . . . . . . .
2 Informationen zu dieser Gebrauchsanleitung
2.1 Geltende Dokumente
. . . . . . . . . . . . . . . . . . . . . . . . . . . . . . . .
2.2 Kennzeichnung der Warnhinweise im Text
2.3 Symbole im Text
3 Übersicht
. . . . . . . . . . . . . . . . . . . . . . . . . . . . . . . . . . . . . . . . . . . .
. . . . . . . . . . . . . . . . . . . . . . . . . . . . . . . . . . . .
3.1 Motorsense, Akku und Ladegerät
3.2 Schneidwerkzeuge
3.3 Symbole
Original-GebrauchsanleitungGedruckt auf chlorfrei gebleichtem Papier.
4 Sicherheitshinweise
4.1 Warnsymbole
. . . . . . . . . . . . . . . . . . . . . . . . . . . . . . . . . . . . . . . . . . . .
. . . . . . . . . . . . . . . . . . . . . . . . . . . . . . . . . .
. . . . . . . . . . . . . . . . . . . . . . . . . . . . . . . . .
. . . . . . . . . . . . . . . . . . . . . . . . . . . . . . . . . . . . . . .
4.2 Bestimmungsgemäße Verwendung
4.3 Anforderungen an den Benutzer
4.4 Bekleidung und Ausstattung
. . . . . . . . . . . . . . . . . . . . . . . . .
4.5 Arbeitsbereich und Umgebung
4.6 Sicherheitsgerechter Zustand
4.7 Arbeiten
4.8 Laden
4.9 Transportieren
4.10 Aufbewahren
. . . . . . . . . . . . . . . . . . . . . . . . . . . . . . . . . . . . . . . . . . . .
. . . . . . . . . . . . . . . . . . . . . . . . . . . . . . . . . . . . . . . . . . . . . .
. . . . . . . . . . . . . . . . . . . . . . . . . . . . . . . . . . . . .
. . . . . . . . . . . . . . . . . . . . . . . . . . . . . . . . . . . . . . .
. . . . . . . . . . . . . . . . . . . . . . .
4.11 Reinigen, Warten und Reparieren
5 Motorsense einsatzbereit machen
5.1 Motorsense einsatzbereit machen
Druckfarben enthalten pflanzliche Öle, Papier ist recycelbar.
6 Akku laden und LEDs
6.1 Akku laden
. . . . . . . . . . . . . . . . . . . . . . . . . . . . . . . . . . . . . . . . .
6.2 Ladezustand anzeigen
6.3 LEDs am Akku
6.4 LED am Ladegerät
7 Motorsense zusammenbauen
7.1 Schutz anbauen
7.2 Mähkopf AutoCut 2-2
7.3 Rundumgriff anbauen
. . . . . . . . . . . . . . . . . . . . . . . . . . . . . .
. . . . . . . . . . . . . . . . . . . . . . . . . . . . .
. . . . . . . . . . . . . . . . . . . . . . . . . . . . . . . . . . . . .
. . . . . . . . . . . . . . . . . . . . . . . . . . . . . . . . .
. . . . . . . . . . . . . . . . . . . . . .
. . . . . . . . . . . . . . . . . . . . . . . . . . . . . . . . . . . .
. . . . . . . . . . . . . . . . . . . . . . . . . . . . . . .
. . . . . . . . . . . . . . . . . . . . . . . . . . . . . .
8 Motorsense für den Benutzer einstellen
. . . . . . . .
. . . . . . . . . . .
. . . . . . . . . . . . . . . . . . . .
. . . . . . . . . . . . . . . . . .
. . . . . . . . . . . . . . . . . . . . .
. . . . . . . . . . . . . . . . . . . . . .
. . . . . . . . . . . . . . . . . .
. . . . . . . . . . . . . . . . . .
. . . . . . . . . . . . . . . . . .
. . . . . . . . . . . .
8.1 Schaftlänge einstellen
2
8.2 Rundumgriff einstellen
2
9 Akku einsetzen und herausnehmen
2
9.1 Akku einsetzen
3
9.2 Akku herausnehmen
3
10 Motorsense einschalten und ausschalten
3
10.1 Motorsense einschalten
3
10.2 Motorsense ausschalten
4
11 Motorsense und Akku prüfen
4
11.1 Bedienungselemente prüfen
5
11.2 Akku prüfen
5
12 Mit der Motorsense arbeiten
6
12.1 Motorsense halten und führen
6
12.2 Mähen
6
12.3 Mähfäden nachstellen
7
8
13 Nach dem Arbeiten
10
13.1 Nach dem Arbeiten
11
14 Transportieren
12
14.1 Motorsense transportieren
12
14.2 Akku transportieren
13
15 Aufbewahren
14
15.1 Motorsense aufbewahren
14
15.2 Akku aufbewahren
14
15.3 Ladegerät aufbewahren
14
16 Reinigen
15
16.1 Motorsense reinigen
15
16.2 Schutz und Schneidwerkzeug reinigen
15
16.3 Akku reinigen
15
16.4 Ladegerät reinigen
15
17 Warten und Reparieren
16
17.1 Motorsense warten und reparieren
16
17.2 Akku warten und reparieren
17
17.3 Ladegerät warten und reparieren
. . . . . . . . . . . . . . . . . . . . . . . . . . . . . . . . . . . . . . . .
. . . . . . . . . . . . . . . . . . . . . . . . . . . . . . . . . . . . . . . . . . . . .
. . . . . . . . . . . . . . . . . . . . . . . . . . . . . . . . . . . . .
. . . . . . . . . . . . . . . . . . . . . . . . . . . . . . . . . . . . . . .
. . . . . . . . . . . . . . . . . . . . . . . . . . . . . . . . . . . . . . . . . . .
. . . . . . . . . . . . . . . . . . . . . . . . . . . . . . . . . . . . . .
. . . . . . . . . . . . . . . . . . . . . . . . . . . . . .
. . . . . . . . . . . . . . . . . . . . . . . . . . . . .
. . . . . . . . . . . . . . . . . . . . . . . . . . . . . . . . . . . . .
. . . . . . . . . . . . . . . . . . . . . . . . . . . . . . .
. . . . . . . . . . . . . . . . . . . . . . . . . . . .
. . . . . . . . . . . . . . . . . . . . . . . . . . .
. . . . . . . . . . . . . . . . . . . . . . . . . . . . .
. . . . . . . . . . . . . . . . . . . . . . . . . . . . . . . . .
. . . . . . . . . . . . . . . . . . . . . . . . . . . . . . . .
. . . . . . . . . . . . . . . . . . . . . . . . . . . . . . . .
. . . . . . . . . . . . . . . . . . . . . . . . . . . . . . . . .
. . . . . . . . . . . . . . . . . . . . . . . . . . . .
. . . . . . . . . . . . . . . . . . . . . . . . . . . . . . .
. . . . . . . . . . . . . . . . . . . . . . . . . . . . . . . . .
. . . . . . . . . . . . . . . . . . . . . . . . . . . .
. . . . . . . . . . . . . . . .
. . . . . . . . . . .
. . . . . . . . . . . . . . . . . . . . . . .
. . . . . . . . . . . . . . . . . . . . . . .
. . . . . . . . . . . . . . . . . . . . . . . .
. . . . . . . . . . . . . . . . . . . . .
. . . . . . . . . . . . . . . . . . . . . . . . .
. . . . . . . . . . . . . . . . . . . . . . . . . .
. . . . . . . . . . . . .
. . . . . . . . . . . . . . . . .
. . . . . . . . . . . . . . . . . . . . . . . .
. . . . . . . . . . . . . . . . . . .
17
17
17
17
18
18
18
18
18
18
19
19
19
19
20
20
20
20
20
20
20
20
21
21
21
21
21
21
21
21
21
22
22
{
© ANDREAS STIHL AG & Co. KG 2017
0458-713-9621-C. VA1.H17.
0000008095_001_D
0458-713-9621-C
Diese Gebrauchsanleitung ist urheberrechtlich geschützt. Alle Rechte bleiben vorbehalten, besonders das Recht der Vervielfältigung, Übersetzung und der Verarbeitung mit elektronischen Systemen.
1
deutsch
1 Vorwort
18 Störungen beheben
18.1 Störungen der Motorsense oder des Akkus
beheben
18.2 Störungen des Ladegeräts beheben
19 Technische Daten
19.1 Motorsense STIHL FSA 56
19.2 Akku STIHL AK
19.3 Ladegerät STIHL AL 101
19.4 Schallwerte und Vibrationswerte
19.5 REACH
20 Kombinationen aus Schneidwerkzeugen und
Schutzen
20.1 Motorsense STIHL FSA 56
21 Ersatzteile und Zubehör
21.1 Ersatzteile und Zubehör
22 Entsorgen
22.1 Motorsense, Akku und Ladegerät entsorgen
23 EU-Konformitätserklärung
23.1 Motorsense STIHL FSA 56
23.2 Konformitätshinweis Ladegerät STIHL AL 101
24 Anschriften
24.1 STIHL Hauptverwaltung
24.2 STIHL Vertriebsgesellschaften
24.3 STIHL Importeure
. . . . . . . . . . . . . . . . . . . . . . . . . . . . . . . . . . . . . . . . . . .
. . . . . . . . . . . . . . . . . . . . . . . . . . . . . . . . . . . . . . . . . . . .
. . . . . . . . . . . . . . . . . . . . . . . . . . . . . . . . . . . . . . . . . . .
. . . . . . . . . . . . . . . . . . . . . . . . . . . . . . . . . . . . . . . . . .
. . . . . . . . . . . . . . . . . . . . . . . . . . . . . . . . . . . . . . . . .
. . . . . . . . . . . . . . . . . . . . . . . . . . . . . . . .
. . . . . . . . . . . . . . . .
. . . . . . . . . . . . . . . . . . . . . . . . . . . . . . . . . .
. . . . . . . . . . . . . . . . . . . . . . . . .
. . . . . . . . . . . . . . . . . . . . . . . . . . . . . . . . . . . .
. . . . . . . . . . . . . . . . . . . . . . . . . . .
. . . . . . . . . . . . . . . . . . .
. . . . . . . . . . . . . . . . . . . . . . . . .
. . . . . . . . . . . . . . . . . . . . . . . . . . . .
. . . . . . . . . . . . . . . . . . . . . . . . . . . .
. . . . . . . . . . . . . . . . . . . . . . . . . .
. . . . . . . . . . . . . . . . . . . . . . . . .
. . . . . . . . . . . . . . . . . . . . . . . . . . . .
. . . . . . . . . . . . . . . . . . . . .
. . . . . . . . . . . . . . . . . . . . . . . . . . . . . . . . . .
. . . . . . . .
. . . . . .
23
1Vorwort
23
Liebe Kundin, lieber Kunde,
24
es freut uns, dass Sie sich für STIHL entschieden haben.
25
Wir entwickeln und fertigen unsere Produkte in
25
Spitzenqualität entsprechend der Bedürfnisse unserer
25
Kunden. So entstehen Produkte mit hoher Zuverlässigkeit
25
auch bei extremer Beanspruchung.
25
STIHL steht auch für Spitzenqualität beim Service. Unser
25
Fachhandel gewährleistet kompetente Beratung und
Einweisung sowie eine umfassende technische Betreuung.
25
Wir danken Ihnen für Ihr Vertrauen und wünschen Ihnen viel
25
Freude mit Ihrem STIHL Produkt.
26
26
26
26
26
26
Dr. Nikolas Stihl
26
27
WICHTIG! VOR GEBRAUCH LESEN UND
27
AUFBEWAHREN.
27
27
2 Informationen zu dieser
Gebrauchsanleitung
2.1 Geltende Dokumente
Es gelten die lokalen Sicherheitsvorschriften.
► Zusätzlich zu dieser Gebrauchsanleitung folgende
Dokumente lesen, verstehen und aufbewahren:
– Sicherheitshinweise Akku STIHL AK
– Sicherheitsinformation für STIHL Akkus und Produkte
mit eingebautem Akku: www.stihl.com/safety-datasheets
2
0458-713-9621-C
3 Übersicht
deutsch
2.2 Kennzeichnung der Warnhinweise im Text
WARNUNG
Der Hinweis weist auf Gefahren hin, die zu schweren
Verletzungen oder zum Tod führen können.
► Die genannten Maßnahmen können schwere
Verletzungen oder Tod vermeiden.
HINWEIS
Der Hinweis weist auf Gefahren hin, die zu Sachschaden
führen können.
► Die genannten Maßnahmen können Sachschaden
vermeiden.
2.3 Symbole im Text
Dieses Symbol verweist auf ein Kapitel in dieser
Gebrauchsanleitung.
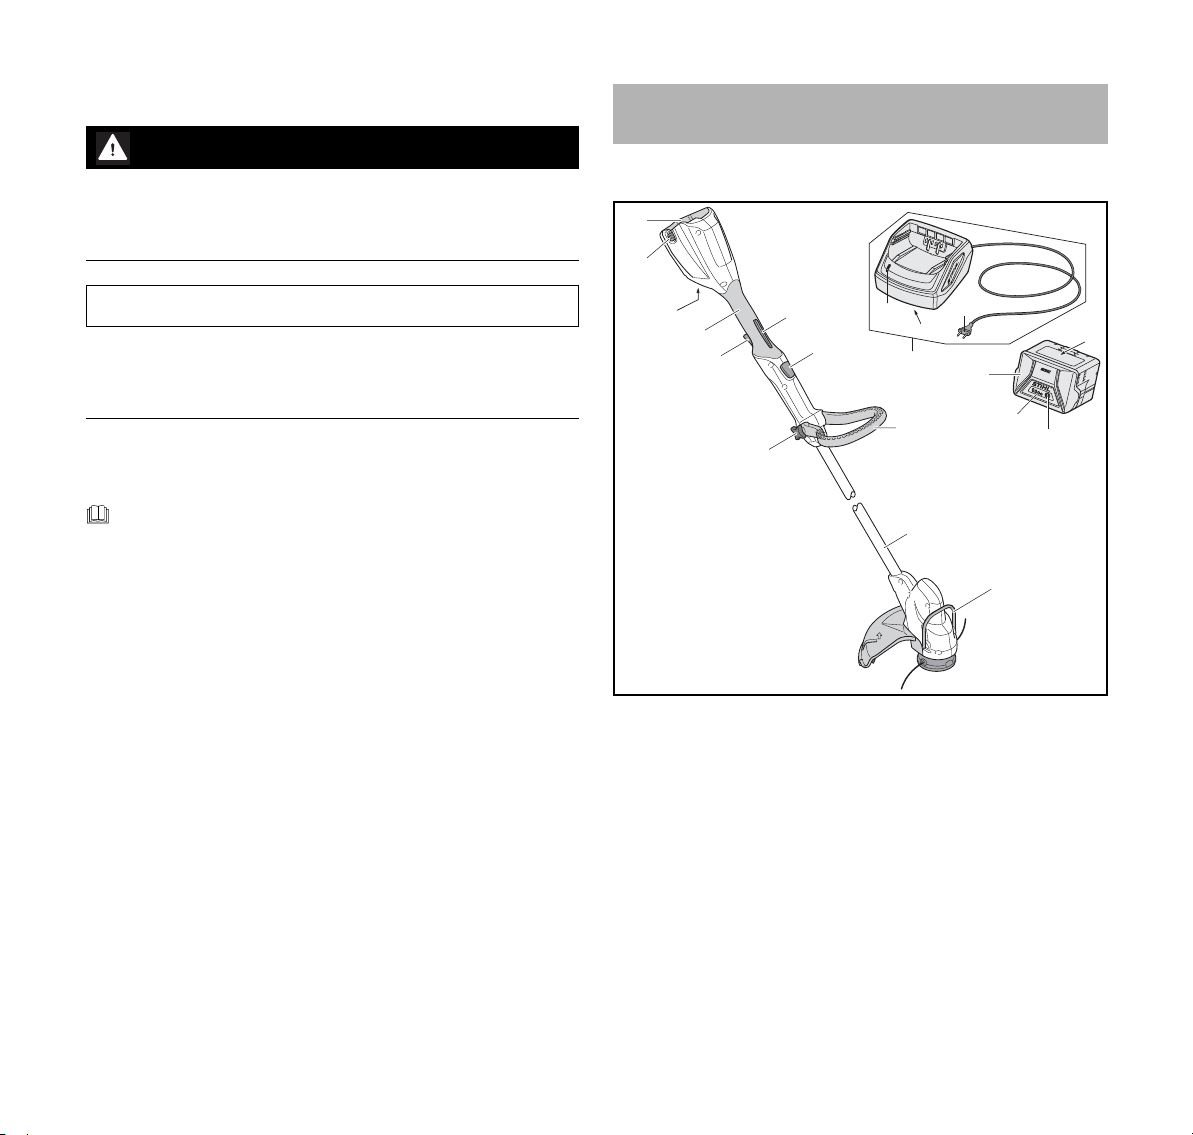
3Übersicht
3.1 Motorsense, Akku und Ladegerät
1
2
14
8
12
#
15
9
#
3
5
11
6
4
7
16
10
13
#
17
0458-713-9621-C
0000-GXX-1482-A2
1 Akku-Schacht
Der Akku-Schacht nimmt den Akku auf.
2 Sperrhebel
Der Sperrhebel hält den Akku im Akku-Schacht.
3 Bedienungsgriff
Der Bedienungsgriff dient zum Bedienen, Halten und
Führen der Motorsense.
4 Schalthebel
Der Schalthebel schaltet die Motorsense ein und aus.
5 Schalthebelsperre
Die Schalthebelsperre entsperrt den Schalthebel.
3
deutsch
1
2
3
4
0000-GXX-1483-A0
3 Übersicht
6 Sperrknopf
Der Sperrknopf blockiert die Längenverstellung des
Schafts.
7 Sterngriffmutter
Die Sterngriffmutter klemmt den Rundumgriff auf dem
Schaft fest.
8 Rundumgriff
Der Rundumgriff dient zum Halten und Führen der
Motorsense.
9Schaft
Der Schaft verbindet alle Bauteile.
10 LED
Die LED zeigt den Status des Ladegeräts an.
11 Abstandhalter
Der Abstandhalter schützt Gegenstände vor Kontakt mit
dem Schneidwerkzeug.
12 Netzstecker
Der Netzstecker verbindet die Anschlussleit ung m it e iner
Steckdose
13 Anschlussleitung
Die Anschlussleitung verbindet das Ladegerät mit dem
Netzstecker.
14 Ladegerät
Das Ladegerät lädt den Akku.
15 Akku
Der Akku versorgt die Motorsense mit Energie.
16 LEDs
Die LEDs zeigen den Ladezustand des Akkus und
Störungen an.
17 Drucktaste
Die Drucktaste aktiviert die LEDs am Akku.
3.2 Schneidwerkzeuge
1Schutz
Der Schutz schützt den Benutzer vor
hochgeschleuderten Gegenständen und vor Kontakt mit
dem Schneidwerkzeug.
2 Ablängmesser
Das Ablängmesser kürzt die Mähfäden während der
Arbeit auf die richtige Länge.
3Mähkopf
Der Mähkopf hält die Mähfäden.
4 Mähfäden
Die Mähfäden schneiden Gras.
3.3 Symbole
Die Symbole können auf der Motorsense, dem Akku und
dem Ladegerät sein und bedeuten Folgendes:
Dieses Symbol gibt die Nenndrehzahl des
Schneidwerkzeugs an.
1 LED leuchtet rot. Der Akku ist zu warm oder zu
kalt.
# Leistungsschild mit Maschinennummer
4
0458-713-9621-C
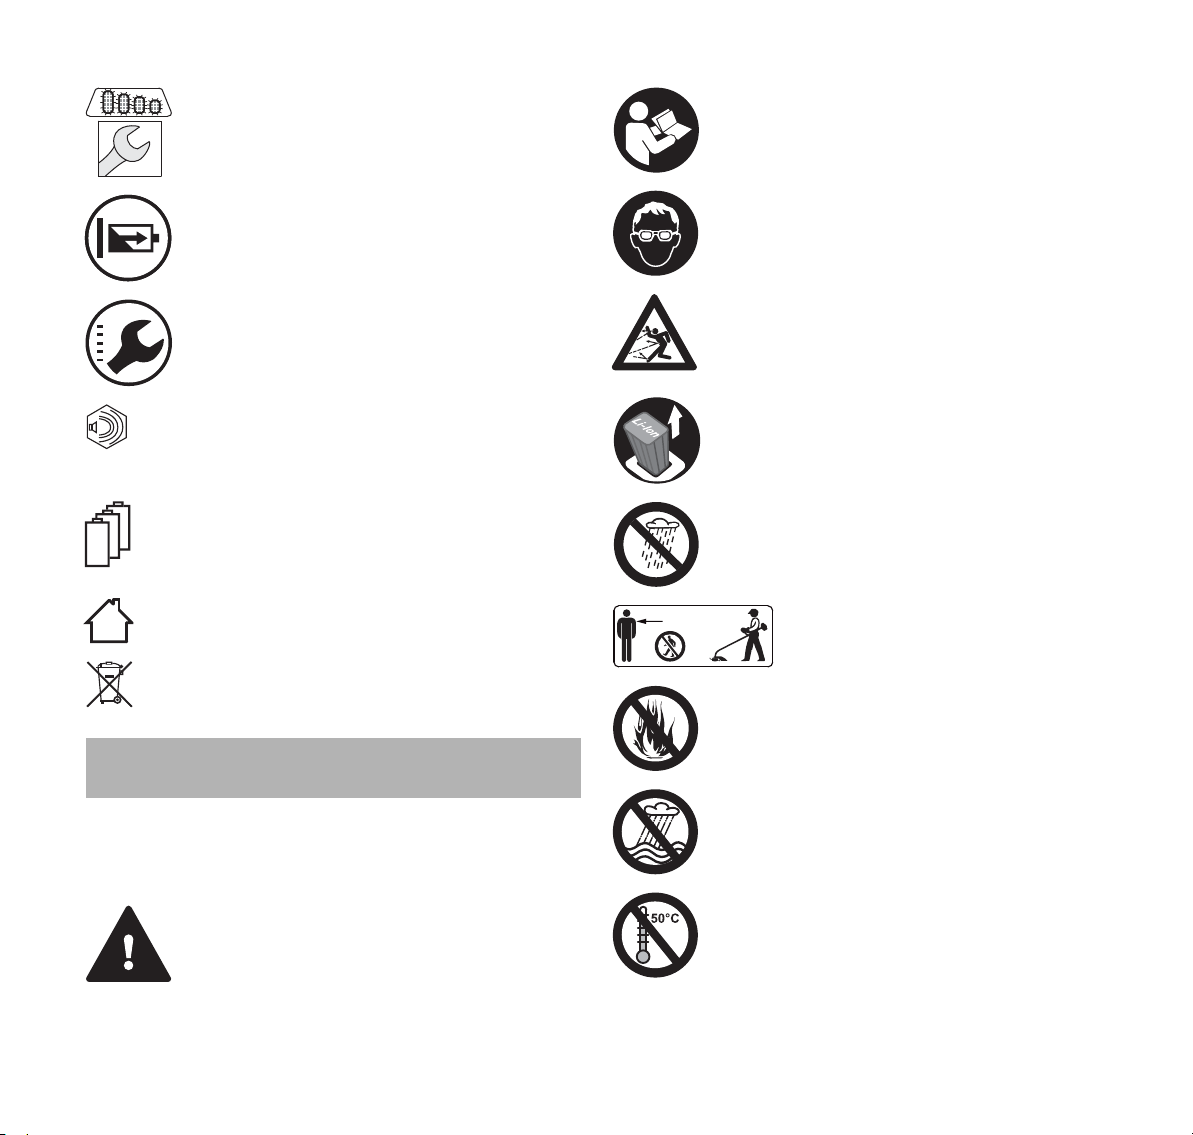
4 Sicherheitshinweise
L
WA
deutsch
4 LEDs blinken rot. Im Akku besteht eine
Störung.
Die LED leuchtet grün und die LEDs am Akku
leuchten oder blinken grün. Der Akku wird
geladen.
Die LED blinkt rot. Zwischen dem Akku und dem
Ladegerät besteht kein elektrischer Kontakt oder
im Akku oder im Ladegerät besteht eine
Störung.
Garantierter Schallleistungspegel nach
Richtlinie 2000/14/EG in dB(A) um
Schallemissionen von Produkten vergleichbar
zu machen.
Die Angabe neben dem Symbol weist auf den
Energieinhalt des Akkus nach Spezifikation des
Zellenherstellers hin. Der in der Anwendung zur
Verfügung stehende Energieinhalt ist geringer.
Elektrogerät in einem geschlossenen und trockenen
Raum betreiben.
Produkt nicht mit dem Hausmüll entsorgen.
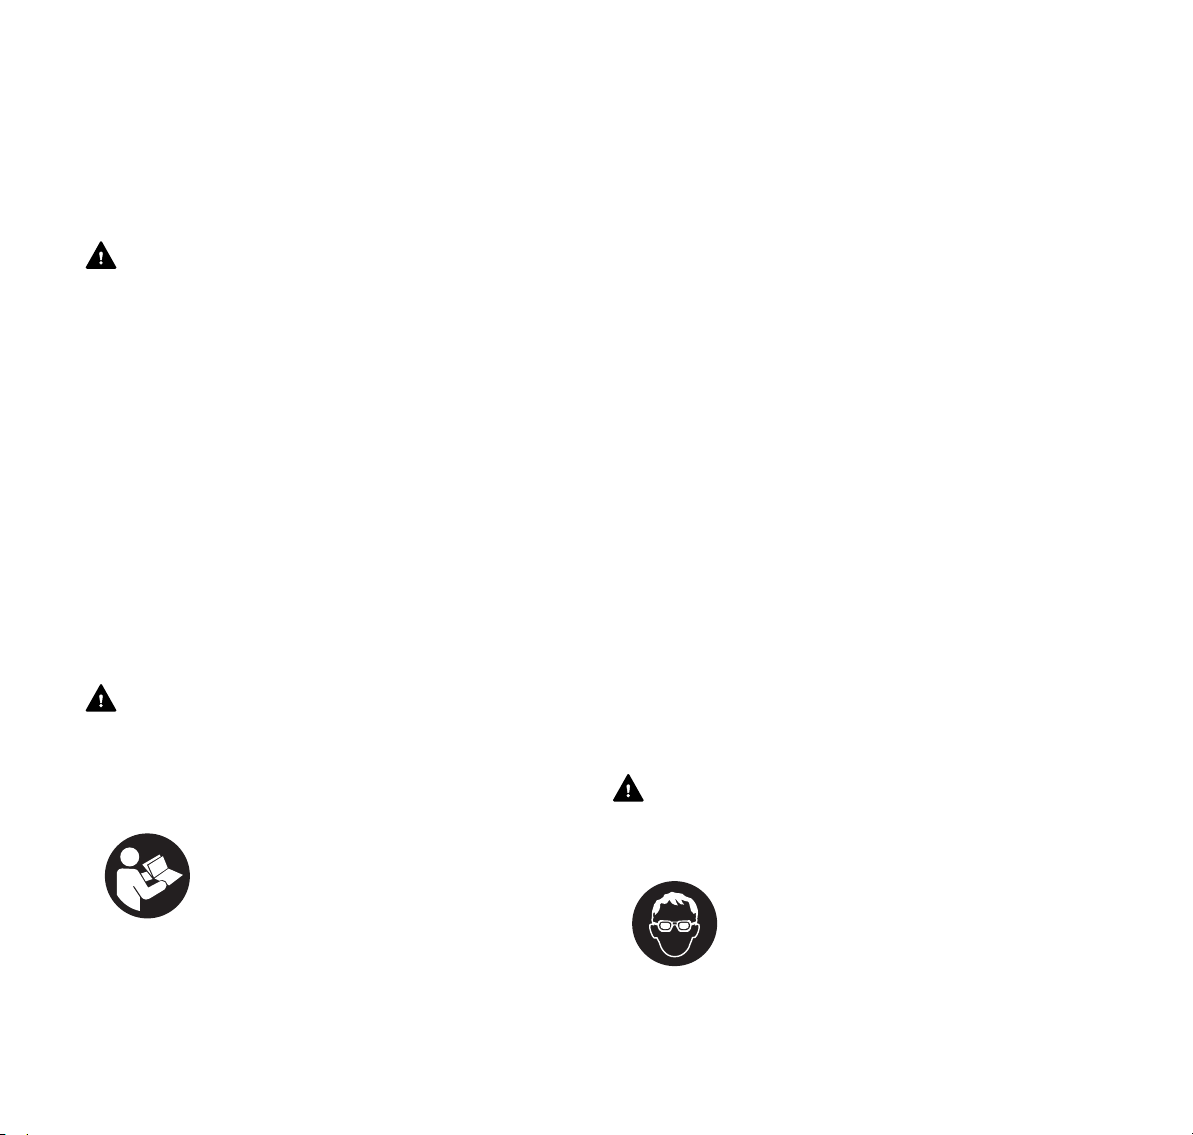
Gebrauchsanleitung lesen, verstehen und
aufbewahren.
Schutzbrille tragen.
Sicherheitshinweise zu hochgeschleuderten
Gegenständen und deren Maßnahmen
beachten.
Akku während Arbeitsunterbrechungen, des
Transports, der Aufbewahrung, Wartung oder
Reparatur herausnehmen.
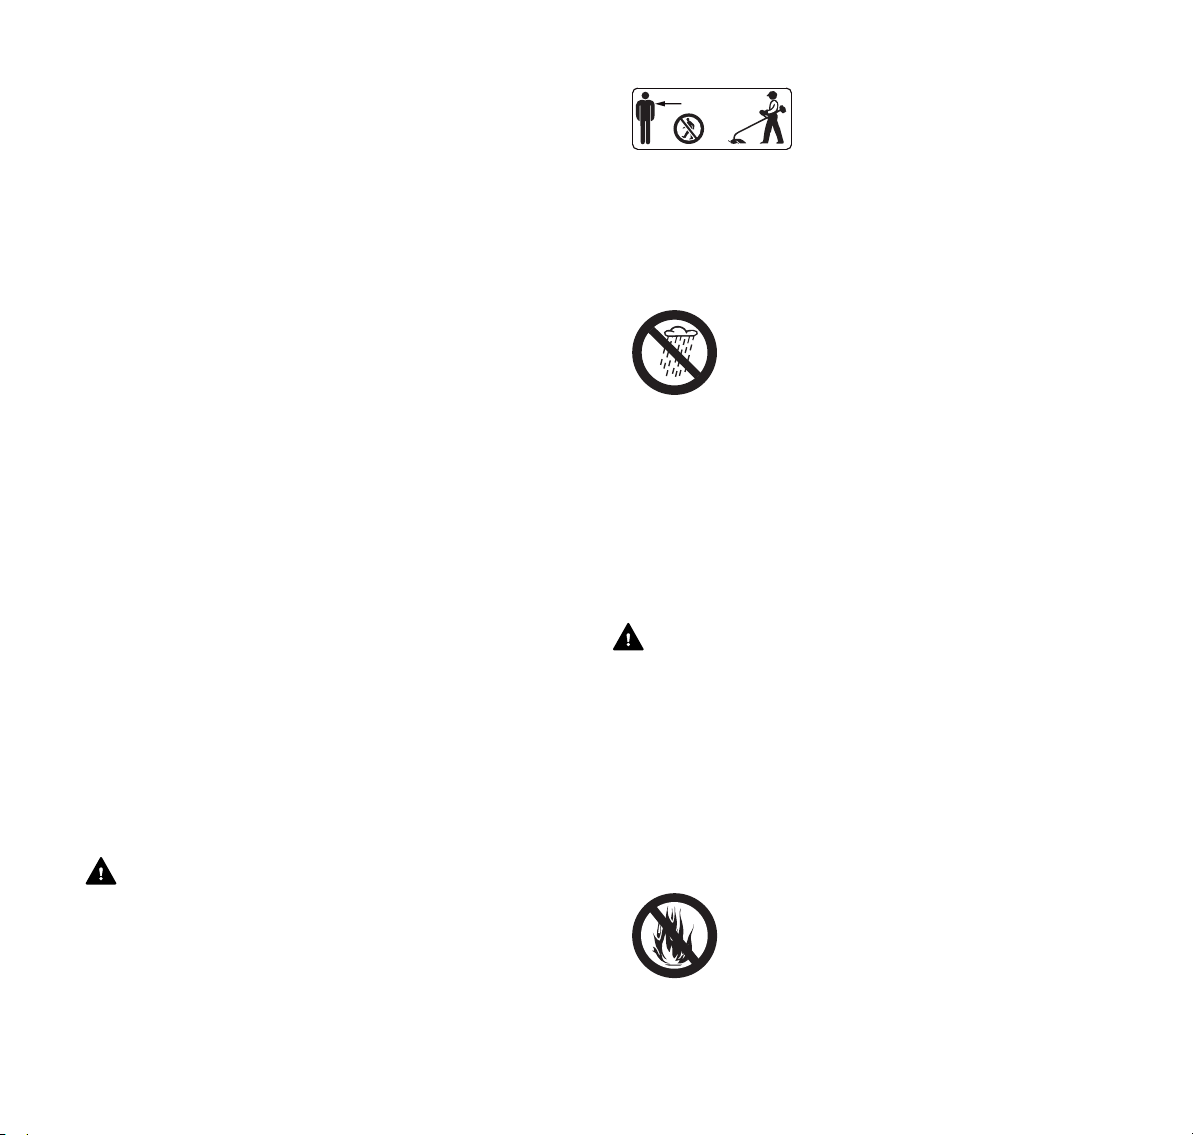
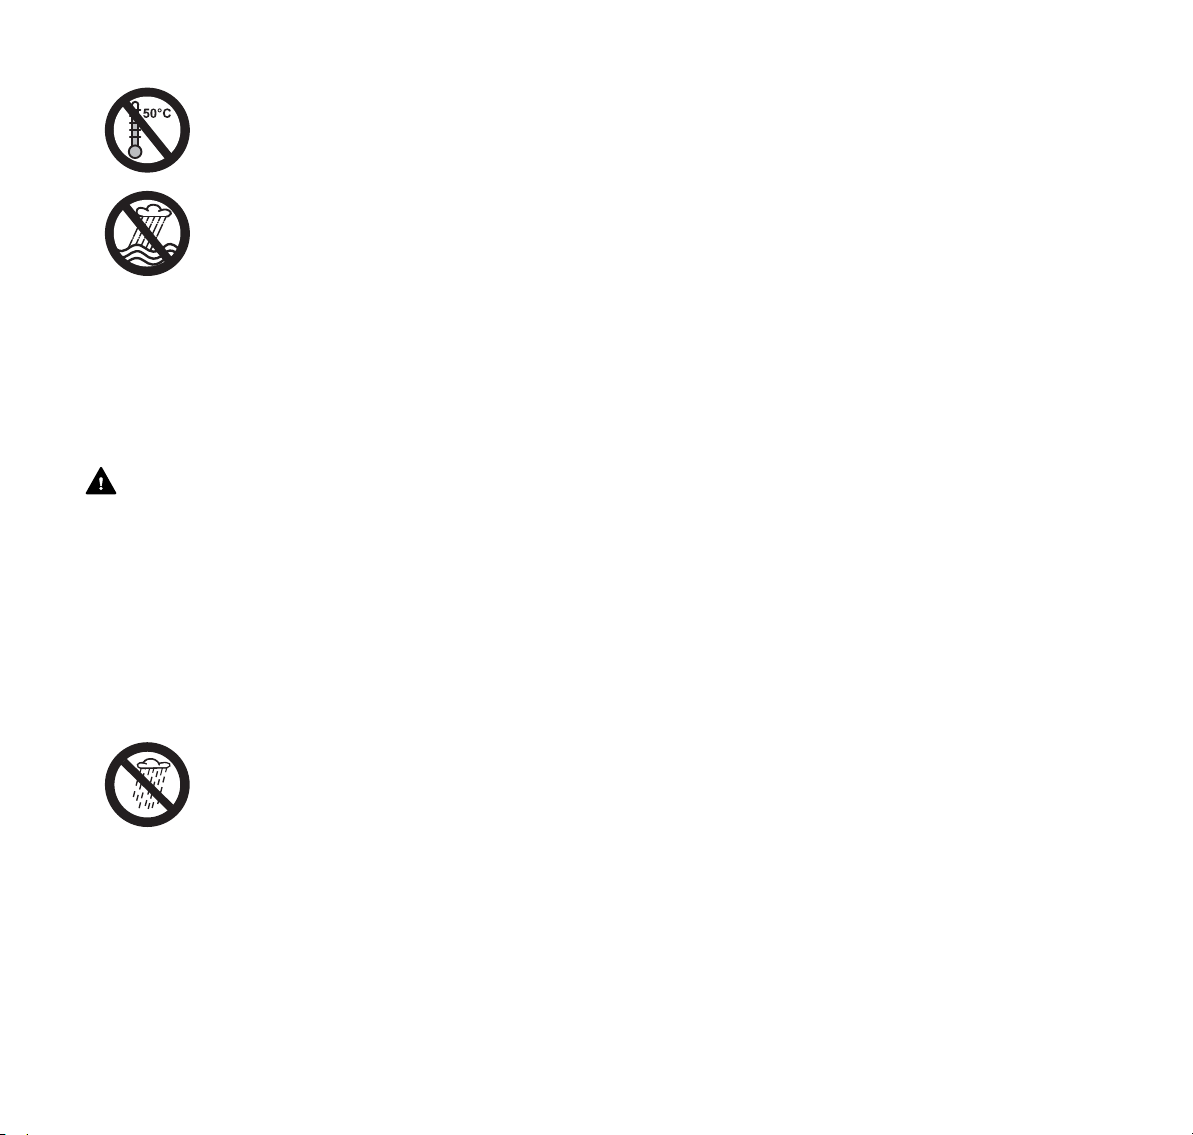
Motorsense und Ladegerät vor Regen und
Feuchtigkeit schützen.
15m (50ft)
Akku vor Hitze und Feuer schützen.
Sicherheitsabstand einhalten.
4 Sicherheitshinweise
4.1 Warnsymbole
Die Warnsymbole auf der Motorsense, dem Akku und dem
Ladegerät bedeuten Folgendes:
Sicherheitshinweise und deren Maßnahmen
beachten.
0458-713-9621-C
Akku vor Regen und Feuchtigkeit schützen und
nicht in Flüssigkeiten tauchen.
Zulässigen Temperaturbereich des Akkus
einhalten.
5
deutsch
4 Sicherheitshinweise
4.2 Bestimmungsgemäße Verwendung
Die Motorsense STIHL FSA 56 dient zum Mähen von Gras.
Die Motorsense darf bei Regen nicht verwendet werden.
Der Akku STIHL AK versorgt die Motorsense mit Energie.
Das Ladegerät STIHL AL 101 lädt den Akku STIHL AK.
WARNUNG
■ Akkus und Ladegeräte, die nicht von STIHL für die
Motorsense freigegeben sind, können Brände und
Explosionen auslösen. Personen können schwer verletzt
oder getötet werden und Sachschaden kann entstehen.
► Motorsense mit einem Akku STIHL AK verwenden.
►Akku STIHL AK mit einem Ladegerät
STIHL AL 101, AL 300 oder AL 500
laden.
■ Falls die Motorsense, der Akku oder das Ladegerät nicht
bestimmungsgemäß verwendet werden, können
Personen schwer verletzt oder getötet werden und
Sachschaden kann entstehen.
► Motorsense, Akku und Ladegerät so verwenden, wie es
in dieser Gebrauchsanleitung beschrieben ist.
4.3 Anforderungen an den Benutzer
WARNUNG
■ Benutzer ohne eine Unterweisung können die Gefahren
der Motorsense, des Akkus und des Ladegeräts nicht
erkennen oder nicht einschätzen. Der Benutzer oder
andere Personen können schwer verletzt oder getötet
werden.
► Gebrauchsanleitung lesen, verstehen und
aufbewahren.
► Falls die Motorsense, der Akku oder das Ladegerät an
eine andere Person weitergegeben wird:
Gebrauchsanleitung mitgeben.
► Falls Unklarheiten bestehen: Einen STIHL Fachhändler
aufsuchen.
► Sicherstellen, dass der Benutzer folgende
Anforderungen erfüllt:
– Der Benutzer ist ausgeruht.
– Der Benutzer ist körperlich, sensorisch
und geistig fähig, die Motorsense, den
Akku und das Ladegerät zu bedienen
und damit zu arbeiten. Falls der
Benutzer körperlich, sensorisch oder
geistig eingeschränkt dazu fähig ist,
darf der Benutzer nur unter Aufsicht
oder nach Anweisung durch eine
verantwortliche Person damit arbeiten.
– Der Benutzer ist volljährig.
– Der Benutzer hat eine Unterweisung
von einem STIHL Fachhändler oder
einer fachkundigen Person erhalten,
bevor er das erste Mal mit der
Motorsense arbeitet und das Ladegerät
verwendet.
– Der Benutzer ist nicht durch Alkohol, Medikamente
oder Drogen beeinträchtigt.
4.4 Bekleidung und Ausstattung
WARNUNG
■ Während der Arbeit können Gegenstände mit hoher
Geschwindigkeit hochgeschleudert werden. Der Benutzer
kann verletzt werden.
► Eine eng anliegende Schutzbrille tragen.
Geeignete Schutzbrillen sind nach Norm
EN 166 oder nach nationalen Vorschriften
geprüft und mit der entsprechenden
Kennzeichnung im Handel erhältlich.
► Einen Gesichtsschutz tragen.
6
0458-713-9621-C
4 Sicherheitshinweise
15m (50ft)
deutsch
► Eine lange Hose aus widerstandsfähigem Material
tragen.
■ Während der Arbeit kann Staub aufgewirbelt werden.
Eingeatmeter Staub kann die Gesundheit schädigen und
allergische Reaktionen auslösen.
► Eine Staubschutzmaske tragen.
■ Ungeeignete Bekleidung kann sich in Holz, Gestrüpp und
in der Motorsense verfangen. Benutzer ohne geeignete
Bekleidung können schwer verletzt werden.
► Eng anliegende Bekleidung tragen.
► Schals und Schmuck ablegen.
■ Während der Arbeit kann der Benutzer in Kontakt mit dem
rotierenden Schneidwerkzeug kommen. Der Benutzer
kann schwer verletzt werden.
► Schuhwerk aus widerstandsfähigem Material tragen.
► Eine lange Hose aus widerstandsfähigem Material
tragen.
■ Während der Reinigung oder Wartung kann der Benutzer
in Kontakt mit dem Schneidwerkzeug oder dem
Ablängmesser kommen. Der Benutzer kann verletzt
werden.
► Arbeitshandschuhe aus widerstandsfähigem Material
tragen.
■ Falls der Benutzer ungeeignetes Schuhwerk trägt, kann er
ausrutschen. Der Benutzer kann verletzt werden.
► Festes, geschlossenes Schuhwerk mit griffiger Sohle
tragen.
4.5 Arbeitsbereich und Umgebung
4.5.1 Motorsense
WARNUNG
■ Unbeteiligte Personen, Kinder und Tiere können die
Gefahren der Motorsense und hochgeschleuderter
Gegenstände nicht erkennen und nicht einschätzen.
Unbeteiligte Personen, Kinder und Tiere können schwer
verletzt werden.
► Unbeteiligte Personen, Kinder und Tiere im
Umkreis von 15 m um den Arbeitsbereich
fernhalten.
► Einen Abstand von 15 m zu Gegenständen einhalten.
■ Die Motorsense ist nicht wassergeschützt. Falls im Regen
oder in feuchter Umgebung gearbeitet wird, kann es zu
einem elektrischen Schlag kommen. Der Benutzer kann
verletzt werden und die Motorsense kann beschädigt
werden.
► Nicht im Regen und nicht in feuchter
Umgebung arbeiten.
■ Der Elektromotor der Motorsense kann Funken erzeugen.
Funken können in leicht brennbarer oder explosiver
Umgebung Brände und Explosionen auslösen. Personen
können schwer verletzt oder getötet werden und
Sachschaden kann entstehen.
► Nicht in einer leicht brennbaren und nicht in einer
explosiven Umgebung arbeiten.
4.5.2 Akku
WARNUNG
■ Kinder können die Gefahren des Akkus nicht erkennen
und nicht einschätzen. Kinder können schwer verletzt
werden.
► Kinder fernhalten.
■ Der Akku ist nicht gegen alle Umgebungseinflüsse
geschützt. Falls der Akku bestimmten
Umgebungseinflüssen ausgesetzt ist, kann der Akku in
Brand geraten oder explodieren. Personen können
schwer verletzt werden und Sachschaden kann
entstehen.
► Akku vor Hitze und Feuer schützen.
► Akku nicht ins Feuer werfen.
0458-713-9621-C
7
deutsch
4 Sicherheitshinweise
► Akku im Temperaturbereich zwischen -
10 °C und + 50 °C einsetzen und
aufbewahren.
► Akku vor Regen und Feuchtigkeit schützen
und nicht in Flüssigkeiten tauchen.
► Akku von metallischen Gegenständen fernhalten.
► Akku nicht hohem Druck aussetzen.
► Akku nicht Mikrowellen aussetzen.
► Akku vor Chemikalien und vor Salzen schützen.
4.5.3 Ladegerät
WARNUNG
■ Kinder können die Gefahren des Ladegeräts und des
elektrischen Stroms nicht erkennen und nicht
einschätzen. Kinder können schwer verletzt oder getötet
werden.
►Kinder fernhalten.
■ Das Ladegerät ist nicht wassergeschützt. Falls im Regen
oder in feuchter Umgebung gearbeitet wird, kann es zu
einem elektrischen Schlag kommen. Der Benutzer kann
verletzt werden und das Ladegerät kann beschädigt
werden.
► Nicht im Regen und nicht in feuchter
Umgebung betreiben.
■ Das Ladegerät ist nicht gegen alle Umgebungseinflüsse
geschützt. Falls das Ladegerät bestimmten
Umgebungseinflüssen ausgesetzt ist, kann das Ladegerät
in Brand geraten oder explodieren. Personen können
schwer verletzt werden und Sachschaden kann
entstehen.
► Ladegerät in einem geschlossenen und trockenen
Raum betreiben.
► Ladegerät nicht in einer leicht brennbaren und nicht in
einer explosiven Umgebung betreiben.
► Ladegerät nicht auf einem leicht brennbaren
Untergrund betreiben.
► Ladegerät im Temperaturbereich zwischen + 5 °C und
+ 40 °C einsetzen und aufbewahren.
■ Personen können über die Anschlussleitung stolpern.
Personen können verletzt werden und das Ladegerät
kann beschädigt werden.
► Anschlussleitung flach auf dem Boden verlegen.
4.6 Sicherheitsgerechter Zustand
4.6.1 Motorsense Die Motorsense ist im sicherheitsgerechten Zustand, falls
folgende Bedingungen erfüllt sind:
– Die Motorsense ist unbeschädigt.
– Die Motorsense ist sauber und trocken.
– Die Bedienungselemente funktionieren und sind
unverändert.
– Eine in dieser Gebrauchsanleitung angegebene
Kombination aus Schneidwerkzeug und Schutz ist
angebaut.
– Das Schneidwerkzeug und der Schutz sind richtig
angebaut.
– Nur original STIHL Zubehör für diese Motorsense ist
angebaut.
– Das Zubehör ist richtig angebaut.
8
0458-713-9621-C

4 Sicherheitshinweise
deutsch
WARNUNG
■ In einem nicht sicherheitsgerechten Zustand können
Bauteile nicht mehr richtig funktionieren und
Sicherheitseinrichtungen außer Kraft gesetzt werden.
Personen können schwer verletzt oder getötet werden.
► Mit einer unbeschädigten Motorsense arbeiten.
► Falls die Motorsense verschmutzt oder nass ist:
Motorsense reinigen und trocknen lassen.
► Motorsense nicht verändern. Ausnahme: Anbau einer in
dieser Gebrauchsanleitung angegebenen Kombination
aus Schneidwerkzeug und Schutz.
► Falls die Bedienungselemente nicht funktionieren: Nicht
mit der Motorsense arbeiten.
► Schneidwerkzeuge aus Metall nicht anbauen.
► Nur original STIHL Zubehör für diese Motorsense
anbauen.
► Schneidwerkzeug und Schutz so anbauen, wie es in
dieser Gebrauchsanleitung beschrieben ist.
► Zubehör so anbauen, wie es in dieser
Gebrauchsanleitung oder in der Gebrauchsanleitung
des Zubehörs beschrieben ist.
► Gegenstände nicht in die Öffnungen der Motorsense
stecken.
► Falls Unklarheiten bestehen: Einen STIHL Fachhändler
aufsuchen.
4.6.2 Schutz
Der Schutz ist im sicherheitsgerechten Zustand, falls
folgende Bedingungen erfüllt sind:
– Der Schutz ist unbeschädigt.
– Das Ablängmesser ist richtig angebaut.
WARNUNG
■ In einem nicht sicherheitsgerechten Zustand können
Bauteile nicht mehr richtig funktionieren und
Sicherheitseinrichtungen außer Kraft gesetzt werden. Der
Benutzer kann schwer verletzt werden.
► Mit einem unbeschädigten Schutz arbeiten.
► Mit einem richtig angebauten Ablängmesser arbeiten.
► Falls Unklarheiten bestehen: Einen STIHL Fachhändler
aufsuchen.
4.6.3 Mähkopf
Der Mähkopf ist im sicherheitsgerechten Zustand, falls
folgende Bedingungen erfüllt sind:
– Der Mähkopf ist unbeschädigt.
– Der Mähopf ist nicht blockiert.
– Die Mähfäden sind richtig angebaut.
WARNUNG
■ In einem nicht sicherheitsgerechten Zustand können sich
Teile des Mähkopfs oder der Mähfäden lösen und
weggeschleudert werden. Personen können schwer
verletzt werden.
► Mit einem unbeschädigten Mähkopf arbeiten.
► Mähfäden nicht durch Gegenstände aus Metall
ersetzen.
► Falls Unklarheiten bestehen: Einen STIHL Fachhändler
aufsuchen.
4.6.4 Akku
Der Akku ist im sicherheitsgerechten Zustand, falls folgende
Bedingungen erfüllt sind:
– Der Akku ist unbeschädigt.
– Der Akku ist sauber und trocken.
– Der Akku funktioniert und ist unverändert.
0458-713-9621-C
9

deutsch
4 Sicherheitshinweise
WARNUNG
■ In einem nicht sicherheitsgerechten Zustand kann der
Akku nicht mehr sicher funktionieren. Personen können
schwer verletzt werden.
► Mit einem unbeschädigten und funktionierenden Akku
arbeiten.
► Einen beschädigten oder defekten Akku nicht laden.
► Falls der Akku verschmutzt oder nass ist: Akku reinigen
und trocknen lassen.
► Akku nicht verändern.
► Gegenstände nicht in die Öffnungen des Akkus
stecken.
► Elektrische Kontakte des Akkus nicht mit metallischen
Gegenständen verbinden und kurzschließen.
► Akku nicht öffnen.
■ Aus einem beschädigten Akku kann Flüssigkeit austreten.
Falls die Flüssigkeit mit der Haut oder den Augen in
Kontakt kommt, können die Haut oder die Augen gereizt
werden.
► Kontakt mit der Flüssigkeit vermeiden.
► Falls Kontakt mit der Haut aufgetreten ist: Betroffene
Hautstellen mit reichlich Wasser und Seife abwaschen.
► Falls Kontakt mit den Augen aufgetreten ist: Augen
mindestens 15 Minuten mit reichlich Wasser spülen und
einen Arzt aufsuchen.
■ Ein beschädigter oder defekter Akku kann ungewöhnlich
riechen, rauchen oder brennen. Personen können schwer
verletzt oder getötet werden und Sachschaden kann
entstehen.
► Falls der Akku ungewöhnlich riecht oder raucht: Akku
nicht verwenden und von brennbaren Stoffen
fernhalten.
► Falls der Akku brennt: Versuchen, den Akku mit einem
Feuerlöscher oder Wasser zu löschen.
4.6.5 Ladegerät
Das Ladegerät ist im sicherheitsgerechten Zustand, falls
folgende Bedingungen erfüllt sind:
– Das Ladegerät ist unbeschädigt.
– Das Ladegerät ist sauber und trocken.
WARNUNG
■ In einem nicht sicherheitsgerechten Zustand können
Bauteile nicht mehr richtig funktionieren und
Sicherheitseinrichtungen außer Kraft gesetzt werden.
Personen können schwer verletzt oder getötet werden.
► Ein unbeschädigtes Ladegerät verwenden.
► Falls das Ladegerät verschmutzt oder nass ist:
Ladegerät reinigen und trocknen lassen.
► Ladegerät nicht verändern.
► Gegenstände nicht in die Öffnungen des Ladegeräts
stecken.
►Elektrische Kontakte des Ladegeräts
nicht mit metallischen Gegenständen
verbinden und kurzschließen.
► Ladegerät nicht öffnen.
4.7 Arbeiten
WARNUNG
■ Der Benutzer kann in bestimmten Situationen nicht mehr
konzentriert arbeiten. Der Benutzer kann stolpern, fallen
und schwer verletzt werden.
► Ruhig und überlegt arbeiten.
► Falls die Lichtverhältnisse und Sichtverhältnisse
schlecht sind: Nicht mit der Motorsense arbeiten.
► Motorsense alleine bedienen.
► Schneidwerkzeug bodennah führen.
► Auf Hindernisse achten.
10
0458-713-9621-C

4 Sicherheitshinweise
deutsch
► Auf dem Boden stehend arbeiten und das
Gleichgewicht halten.
► Falls Ermüdungserscheinungen auftreten: Eine
Arbeitspause einlegen.
■ Das sich drehende Schneidwerkzeug kann den Benutzer
schneiden. Der Benutzer kann schwer verletzt werden.
► Sich drehendes Schneidwerkzeug nicht berühren.
► Falls das Schneidwerkzeug durch einen Gegenstand
blockiert ist: Motorsense ausschalten und Akku
herausnehmen. Erst dann den Gegenstand beseitigen.
■ Falls sich die Motorsense während der Arbeit verändert
oder sich ungewohnt verhält, kann die Motorsense in
einem nicht sicherheitsgerechten Zustand sein. Personen
können schwer verletzt werden und Sachschaden kann
entstehen.
► Arbeit beenden, Akku herausnehmen und einen STIHL
Fachhändler aufsuchen.
■ Während der Arbeit können Vibrationen durch die
Motorsense entstehen.
► Handschuhe tragen.
► Arbeitspausen machen.
► Falls Anzeichen einer Durchblutungsstörung auftreten:
Einen Arzt aufsuchen.
■ Wenn der Schalthebel losgelassen wird, dreht sich das
Schneidwerkzeug noch kurze Zeit weiter. Personen
können schwer verletzt werden.
► Warten, bis das Schneidwerkzeug sich nicht mehr
dreht.
4.8 Laden
WARNUNG
Kontakt mit stromführenden Bauteilen kann durch folgende
Ursachen entstehen:
– Die Anschlussleitung ist beschädigt.
– Der Netzstecker ist beschädigt.
– Die Steckdose ist nicht richtig installiert.
■ Kontakt mit stromführenden Bauteilen kann zu einem
Stromschlag führen. Der Benutzer kann schwer verletzt
oder getötet werden.
► Sicherstellen, dass die Anschlussleitung und der
Netzstecker unbeschädigt sind.
► Netzstecker in eine richtig installierte Steckdose
stecken.
■ Während des Ladens kann eine falsche Netzspannung
oder eine falsche Netzfrequenz zu einer Überspannung im
Ladegerät führen. Das Ladegerät kann beschädigt
werden.
► Sicherstellen, dass die Netzspannung und die
Netzfrequenz des Stromnetzes mit den Angaben auf
dem Leistungsschild des Ladegeräts übereinstimmen.
■ Während des Ladens kann ein beschädigtes oder ein
defektes Ladegerät ungewöhnlich riechen oder rauchen.
Personen können verletzt werden und Sachschaden kann
entstehen.
► Netzstecker aus der Steckdose ziehen.
■ Das Ladegerät kann bei unzureichender Wärmeabfuhr
überhitzen und einen Brand auslösen. Personen können
schwer verletzt oder getötet werden und Sachschaden
kann entstehen.
► Ladegerät nicht abdecken.
■ Falls mehrere Ladegeräte an einer Steckdose
angeschlossen sind, können während des Ladens
elektrische Leitungen überlastet werden. Die elektrischen
Leitungen können sich erwärmen und einen Brand
auslösen. Personen können schwer verletzt oder getötet
werden und Sachschaden kann entstehen.
► Ladegerät einzeln an eine Steckdose anschließen.
► Ladegerät nicht an Mehrfach-Steckdosen anschließen.
■ Falls elektrische Leitungen und Rohre in der Wand
verlaufen, können diese beschädigt werden, wenn das
Ladegerät an der Wand montiert wird. Kontakt mit
0458-713-9621-C
11
deutsch
4 Sicherheitshinweise
elektrischen Leitungen kann zu einem Stromschlag
führen. Personen können schwer verletzt werden und
Sachschaden kann entstehen.
► Sicherstellen, dass an der vorgesehenen Stelle keine
elektrische Leitungen und Rohre in der Wand verlaufen.
■ Falls das Ladegerät nicht wie in dieser
Gebrauchsanleitung beschrieben an der Wand montiert
ist, kann das Ladegerät oder der Akku herunterfallen oder
das Ladegerät zu heiß werden. Personen können verletzt
werden und Sachschaden kann entstehen.
► Ladegerät so an eine Wand montieren, wie es in dieser
Gebrauchsanleitung beschrieben ist.
■ Falls das Ladegerät mit eingesetztem Akku an eine Wand
montiert wird, kann der Akku aus dem Ladegerät fallen.
Personen können verletzt werden und Sachschaden kann
entstehen.
► Zuerst Ladegerät an die Wand montieren und dann
Akku einsetzen.
4.9 Transportieren
4.9.1 Motorsense
WARNUNG
■ Während des Transports kann die Motorsense umkippen
oder sich bewegen. Personen können verletzt werden und
Sachschaden kann entstehen.
► Akku herausnehmen.
4.9.2 Akku
WARNUNG
■ Der Akku ist nicht gegen alle Umgebungseinflüsse
geschützt. Falls der Akku bestimmten
Umgebungseinflüssen ausgesetzt ist, kann der Akku
beschädigt werden und Sachschaden kann entstehen.
► Einen beschädigten Akku nicht transportieren.
► Akku in einer elektrisch nicht leitfähigen Verpackung
transportieren.
■ Während des Transports kann der Akku umkippen oder
sich bewegen. Personen können verletzt werden und
Sachschaden kann entstehen.
► Akku in der Verpackung so verpacken, dass er sich
nicht bewegen kann.
► Verpackung so sichern, dass sie sich nicht bewegen
kann.
4.10 Aufbewahren
4.10.1 Motorsense
WARNUNG
■ Kinder können die Gefahren der Motorsense nicht
erkennen und nicht einschätzen. Kinder können schwer
verletzt werden.
► Akku herausnehmen.
► Motorsense so sichern, dass sie nicht umkippen und
sich nicht bewegen kann.
12
► Motorsense außerhalb der Reichweite von Kindern
aufbewahren.
■ Die elektrischen Kontakte an der Motorsense und
metallische Bauteile können durch Feuchtigkeit
korrodieren. Die Motorsense kann beschädigt werden.
0458-713-9621-C
4 Sicherheitshinweise
deutsch
► Akku herausnehmen.
► Motorsense sauber und trocken aufbewahren.
4.10.2 Akku
WARNUNG
■ Kinder können die Gefahren des Akkus nicht erkennen
und nicht einschätzen. Kinder können schwer verletzt
werden.
► Akku außerhalb der Reichweite von Kindern
aufbewahren.
■ Der Akku ist nicht gegen alle Umgebungseinflüsse
geschützt. Falls der Akku bestimmten
Umgebungseinflüssen ausgesetzt ist, kann der Akku
beschädigt werden.
► Akku sauber und trocken aufbewahren.
► Akku in einem geschlossenen Raum aufbewahren.
► Akku getrennt von der Motorsense und dem Ladegerät
aufbewahren.
► Akku in einer elektrisch nicht leitfähigen Verpackung
aufbewahren.
► Akku im Temperaturbereich zwischen - 10 °C und
+ 50 °C aufbewahren.
4.10.3 Ladegerät
WARNUNG
■ Kinder können die Gefahren eines Ladegeräts nicht
erkennen und nicht einschätzen. Kinder können schwer
verletzt oder getötet werden.
► Akku herausnehmen.
► Ladegerät außerhalb der Reichweite von Kindern
aufbewahren.
■ Das Ladegerät ist nicht gegen alle Umgebungseinflüsse
geschützt. Falls das Ladegerät bestimmten
Umgebungseinflüssen ausgesetzt ist, kann das Ladegerät
beschädigt werden.
► Akku herausnehmen.
► Falls das Ladegerät warm ist: Ladegerät abkühlen
lassen.
►Ladegerät sauber und trocken
aufbewahren.
►Ladegerät in einem geschlossenen Raum
aufbewahren.
► Ladegerät im Temperaturbereich zwischen + 5 °C und
+ 40 °C aufbewahren.
■ Die Anschlussleitung ist nicht dafür bestimmt, das
Ladegerät daran zu tragen oder aufzuhängen. Die
Anschlussleitung und das Ladegerät können beschädigt
werden.
► Ladegerät am Gehäuse greifen und festhalten. Eine
Griffmulde zum einfachen Anheben des Ladegeräts ist
am Ladegerät angebracht.
► Ladegerät an der Wandhalterung aufhängen.
4.11 Reinigen, Warten und Reparieren
WARNUNG
■ Falls während der Reinigung, Wartung oder Reparatur der
Akku eingesetzt ist, kann die Motorsense unbeabsichtigt
eingeschaltet werden. Personen können schwer verletzt
werden und Sachschaden kann entstehen.
► Akku herausnehmen.
■ Scharfe Reinigungsmittel, Hochdruckreiniger oder spitze
Gegenstände können die Motorsense, den Schutz, das
Schneidwerkzeug, den Akku und das Ladegerät
beschädigen. Falls die Motorsense, der Schutz, das
Schneidwerkzeug, der Akku oder das Ladegerät nicht
0458-713-9621-C
13

deutsch
5 Motorsense einsatzbereit machen
richtig gereinigt werden, können Bauteile nicht mehr
richtig funktionieren und Sicherheitseinrichtungen außer
Kraft gesetzt werden. Personen können schwer verletzt
werden.
► Motorsense, Schutz, Schneidwerkzeug, Akku und
Ladegerät so reinigen, wie es in dieser
Gebrauchsanleitung beschrieben ist.
■ Falls die Motorsense, der Schutz, das Schneidwerkzeug,
der Akku oder das Ladegerät nicht richtig gewartet oder
repariert werden, können Bauteile nicht mehr richtig
funktionieren und Sicherheitseinrichtungen außer Kraft
gesetzt werden. Personen können schwer verletzt oder
getötet werden.
► Motorsense, Schutz, Schneidwerkzeug, Akku und
Ladegerät nicht selbst warten oder reparieren.
► Falls die Motorsense, der Schutz, das
Schneidwerkzeug, der Akku oder das Ladegerät
gewartet oder repariert werden müssen: Einen STIHL
Fachhändler aufsuchen.
5 Motorsense einsatzbereit machen
5.1 Motorsense einsatzbereit machen
Vor jedem Arbeitsbeginn müssen folgende Schritte
durchgeführt werden:
► Sicherstellen, dass sich folgende Bauteile im
sicherheitsgerechten Zustand befinden:
– Motorsense, @ 4.6.1.
– Schutz, @ 4.6.2.
– Mähkopf, @ 4.6.3.
– Akku, @ 4.6.4.
– Ladegerät, @ 4.6.5.
► Akku prüfen, @ 11.2.
► Akku vollständig laden, @ 6.1.
► Motorsense reinigen, @ 16.1.
► Schutz anbauen, @ 7.1.
► Spulenkörper einbauen, @ 7.2.1.
► Rundumgriff anbauen, @ 7.3.
► Schaftlänge einstellen, @ 8.1.
► Rundumgriff einstellen, @ 8.2.
► Bedienungselemente prüfen, @ 11.1.
► Falls während der Prüfung der Bedienungselemente
3 LEDs rot blinken: Akku herausnehmen und einen
STIHL Fachhändler aufsuchen.
In der Motorsense besteht eine Störung.
► Falls die Schritte nicht durchgeführt werden können:
Motorsense nicht verwenden und einen STIHL
Fachhändler aufsuchen.
6 Akku laden und LEDs
6.1 Akku laden
Die Ladezeit hängt von verschiedenen Einflüssen ab, z. B.
von der Temperatur des Akkus oder von der
Umgebungstemperatur. Die tatsächliche Ladezeit kann von
der angegebenen Ladezeit abweichen. Die Ladezeit ist
unter www.stihl.com/charging-times angegeben.
Wenn der Netzstecker in einer Steckdose
eingesteckt ist und der Akku in das
Ladegerät eingesetzt wird, startet der
Ladevorgang automatisch. Wenn der Akku
vollständig geladen ist, schaltet sich das
Ladegerät automatisch ab.
Während des Ladens erwärmen sich der Akku und das
Ladegerät.
14
0458-713-9621-C
7 Motorsense zusammenbauen
7
6
5
3
2
4
1
0000-GXX-0628-A0
1
0000-GXX-0629-A0
20-40%
40-60%
60-80%
80-100%
0-20%
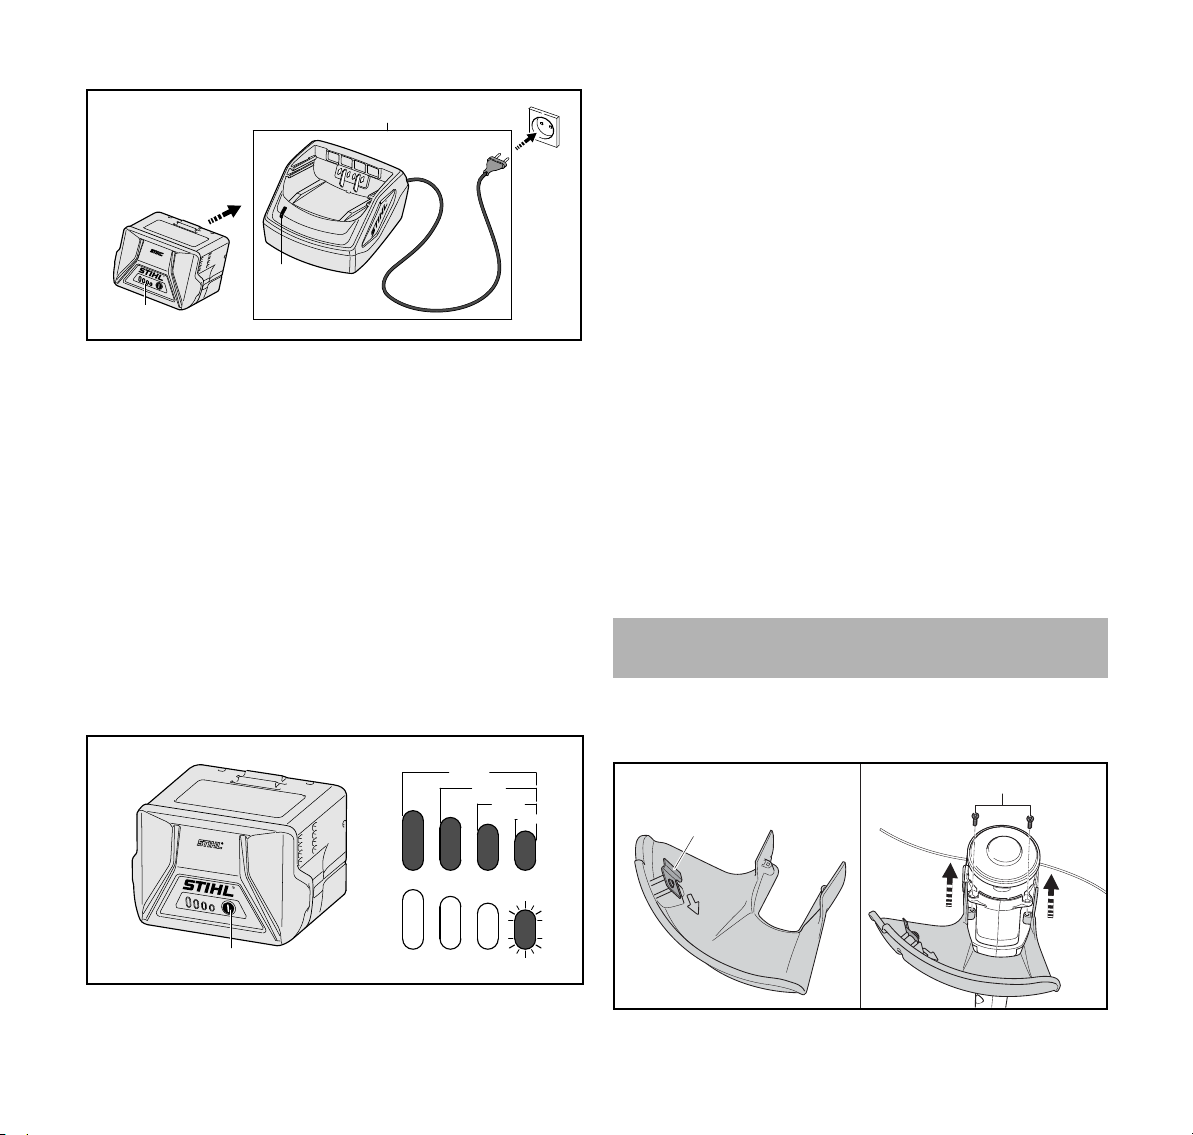
► Netzstecker (6) in eine gut zugängliche Steckdose (7)
stecken.
Das Ladegerät (3) führt einen Selbsttest durch. Die
LED (4) leuchtet ca. 1 Sekunde lang grün und
ca. 1 Sekunde lang rot.
► Anschlussleitung (5) verlegen.
► Akku (2) in die Führungen des Ladegeräts (3) einsetzen
und bis zum Anschlag drücken.
Die LED (4) leuchtet grün. Die LEDs (1) leuchten grün und
der Akku (2) wird geladen.
► Falls die LED (4) und die LEDs (1) nicht mehr leuchten:
Netzstecker (6) aus der Steckdose (7) ziehen.
Der Akku ist vollständig geladen.
► Akku (2) herausnehmen.
deutsch
► Drucktaste (1) drücken.
Die LEDs leuchten ca. 5 Sekunden lang grün und zeigen
den Ladezustand an.
► Falls die rechte LED grün blinkt: Akku laden.
6.3 LEDs am Akku
Die LEDs können den Ladezustand des Akkus oder
Störungen anzeigen. Die LEDs können grün oder rot
leuchten oder blinken.
Falls die LEDs grün leuchten oder blinken, wird der
Ladezustand angezeigt.
► Falls die LEDs rot leuchten oder blinken: Störungen
beheben, @ 18.
In der Motorsense oder im Akku besteht eine Störung.
6.4 LED am Ladegerät
Die LED zeigt den Status des Ladegeräts an.
Falls die LED grün leuchtet, wird der Akku geladen.
► Falls die LED rot blinkt: Störungen beheben.
Im Ladegerät besteht eine Störung.
7 Motorsense zusammenbauen
6.2 Ladezustand anzeigen
0458-713-9621-C
7.1 Schutz anbauen
► Motorsense ausschalten und Akku herausnehmen.
3
1
2 2
0000-GXX-1486-A1
15
deutsch
Das Ablängmesser (1) ist bereits in den Schutz (2)
eingebaut und darf nicht ausgebaut werden.
► Schutz (2) bis zum Anschlag in die Führungen am
Gehäuse schieben.
Der Schutz (2) schließt bündig mit dem Gehäuse ab.
► Schrauben (3) eindrehen und anziehen.
Der Schutz (2) darf nicht wieder abgebaut werden.
7.2 Mähkopf AutoCut 2-2
7.2.1 Spulenkörper einbauen ► Motorsense ausschalten und Akku herausnehmen. ► Spulenkörper zwischen 12 Stunden und 24 Stunden lang
in einen Behälter mit Wasser legen.
Die Mähfäden werden elastisch.
7 Motorsense zusammenbauen
1
1
2
3
► Laschen (1) drücken und Abdeckung (3) abnehmen.
► Spulenkörper (2) herausnehmen.
7.3 Rundumgriff anbauen
► Motorsense ausschalten und Akku herausnehmen.
0000-GXX-1484-A0
4
1
5
2
3
► Fadenenden (4) des Spulenkörpers (2) durch die
Öffnungen (1) im Mähkopf (5) führen.
► Spulenkörper (2) in den Mähkopf (5) einsetzen.
► Abdeckung (7) so auf den Mähkopf (5) setzen, dass die
Laschen (3) der Abdeckung (7) und die Öffnungen (6) im
Mähkopf (4) fluchten.
► Abdeckung (7) bis zum Anschlag auf den Mähkopf (5)
drücken.
Die Laschen (3) rasten hörbar ein.
7.2.2 Spulenkörper ausbauen
► Motorsense ausschalten und Akku herausnehmen.
16
6
7
2
0000-GXX-1485-A1
► Rundumgriff (2) so ausrichten, dass die Aufnahme für die
Sterngriffmutter (1) rechts vom Bedienungsgriff ist und die
Öffnungen im Rundumgriff (2) in Richtung des Benutzers
zeigen.
► Schenkel des Rundumgriffs (2) auseinander drücken und
den Rundumgriff (2) auf den Bedienungsgriff setzen bis
der Bügelgriff (2) einrastet.
► Schraube (3) durch die Bohrung schieben.
► Sterngriffmutter (1) aufdrehen und anziehen.
Der Rundumgriff (2) muss nicht wieder abgebaut werden.
1
0458-713-9621-C
3
0000-GXX-1488-A0
8 Motorsense für den Benutzer einstellen
1
2
0000-GXX-1489-A0
1
2
3
0000-GXX-1491-A0
8 Motorsense für den Benutzer
einstellen
8.1 Schaftlänge einstellen
Der Schaft kann abhängig von der Körpergröße des
Benutzers in verschiedene Längen eingestellt werden.
► Motorsense ausschalten und Akku herausnehmen.
► Schaft festhalten.
► Sperrknopf (1) drücken und gedrückt halten.
► Bedienungsgriff (2) in die gewünschte Position ziehen
oder schieben.
► Sperrknopf (1) loslassen.
► Bedienungsgriff (2) etwas verschieben, dass er einrastet.
deutsch
2
1
0000-GXX-1490-A0
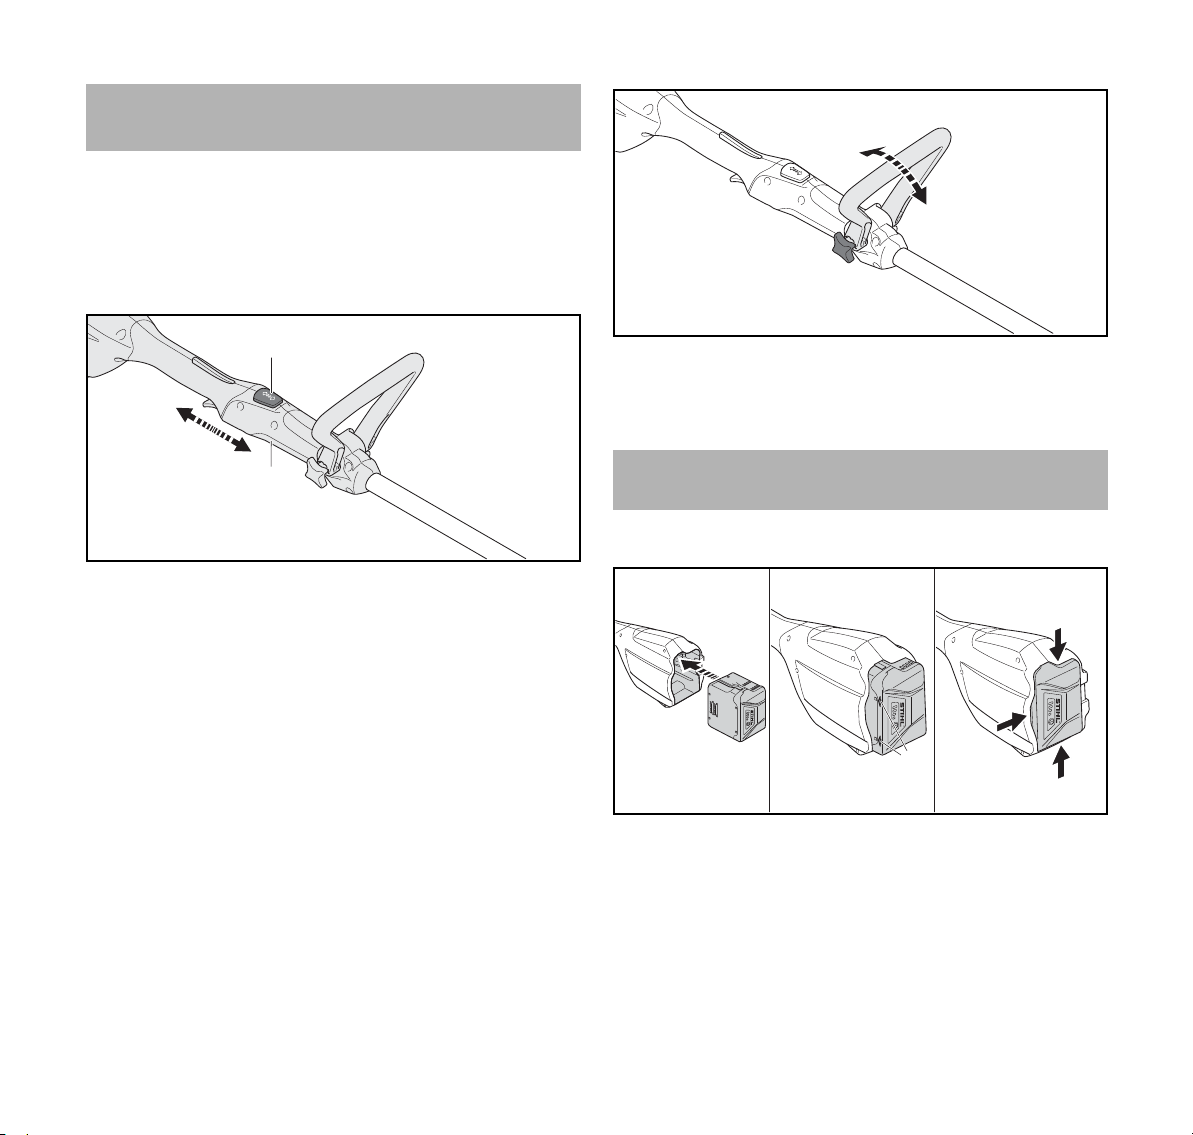
► Sterngriffmutter (1) lösen.
► Rundumgriff (2) in die gewünschte Position kippen.
► Sterngriffmutter (1) fest anziehen.
9 Akku einsetzen und herausnehmen
9.1 Akku einsetzen
8.2 Rundumgriff einstellen
Der Rundumgriff kann abhängig von der Körpergröße des
Benutzers in verschiedene Positionen eingestellt werden.
► Motorsense ausschalten und Akku herausnehmen.
0458-713-9621-C
► Akku (1) so lange in den Akku-Schacht (2) drücken, bis
ein Klick zu hören ist.
Die Pfeile (3) am Akku (1) sind noch sichtbar und der
Akku (1) ist im Akku-Schacht (2) gesichert. Zwischen der
Motorsense und dem Akku (1) besteht kein elektrischer
Kontakt.
17
deutsch
► Akku (1) bis zum Anschlag in den Akku-Schacht (2)
drücken.
Der Akku (1) rastet mit einem zweiten Klick ein und
schließt bündig mit dem Gehäuse der Motorsense ab.
9.2 Akku herausnehmen
► Motorsense auf eine ebene Fläche legen.
► Eine Hand so vor den Akku-Schacht halten, dass der
Akku (2) nicht herunterfallen kann.
2
10 Motorsense einschalten und ausschalten
1
2
0000-GXX-1493-A0
► Schalthebelsperre (1) mit der Hand drücken und gedrückt
halten.
► Schalthebel (2) mit dem Zeigefinger drücken und gedrückt
halten.
Die Motorsense beschleunigt und das Schneidwerkzeug
dreht sich.
1
► Sperrhebel (1) mit der anderen Hand drücken.
Der Akku (2) ist entriegelt und kann herausgenommen
werden.
10 Motorsense einschalten und
ausschalten
10.1 Motorsense einschalten
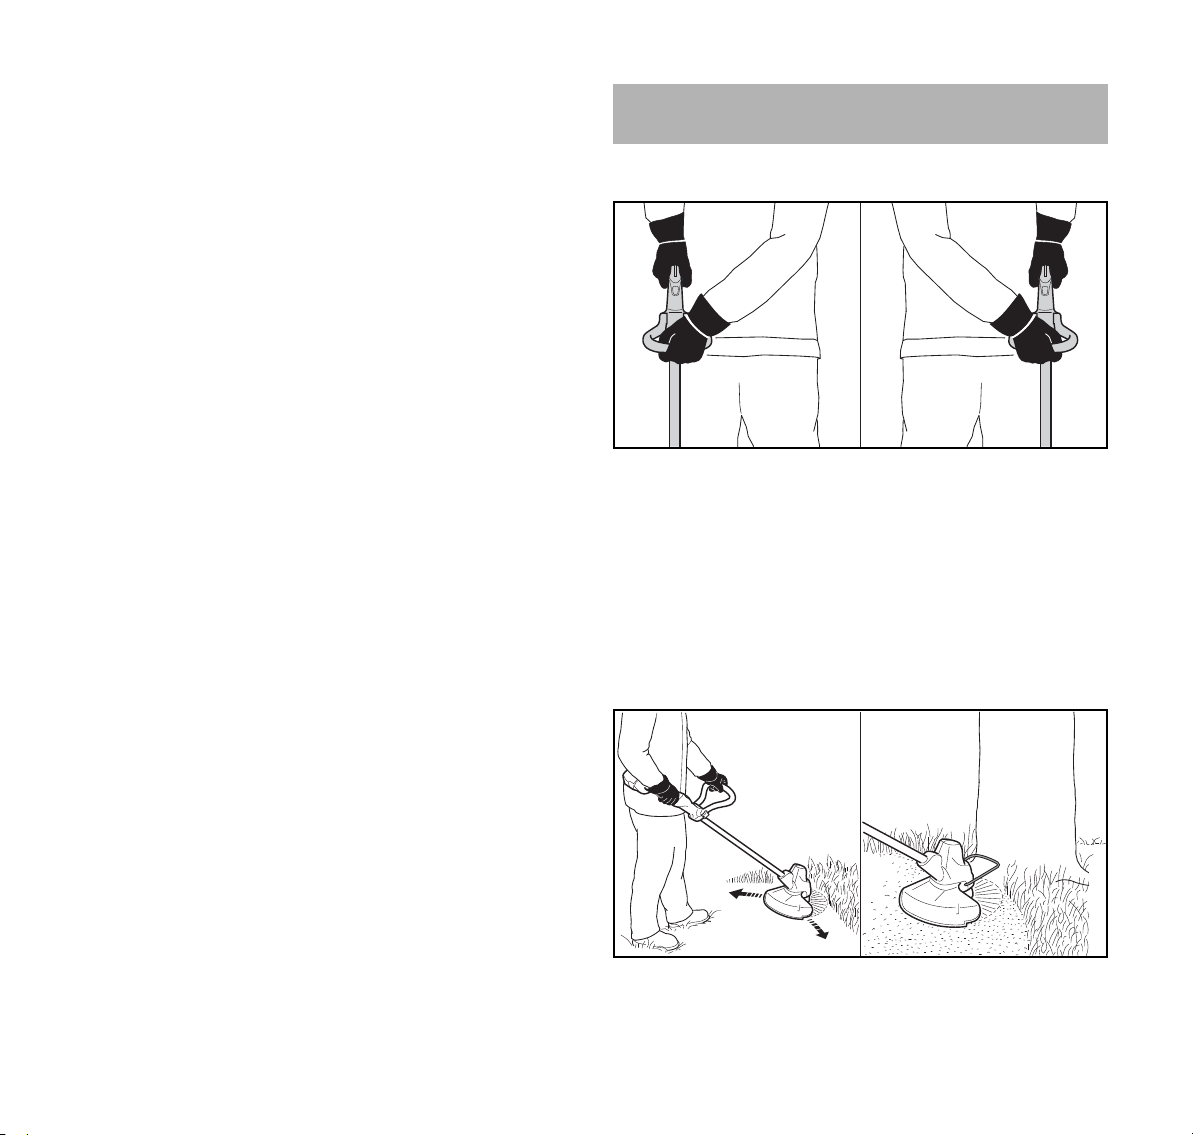
► Motorsense mit einer Hand am Bedienungsgriff so
festhalten, dass der Daumen den Bedienungsgriff
umschließt.
► Motorsense mit der anderen Hand am Rundumgriff so
festhalten, dass der Daumen den Rundumgriff
umschließt.
18
10.2 Motorsense ausschalten
0000-GXX-1492-A0
► Schalthebel und Schalthebelsperre loslassen.
► Warten, bis sich das Schneidwerkzeug nicht mehr dreht.
► Falls sich das Schneidwerkzeug weiter dreht: Akku
herausnehmen und einen STIHL Fachhändler aufsuchen.
Die Motorsense ist defekt.
11 Motorsense und Akku prüfen
11.1 Bedienungselemente prüfen
Schalthebelsperre und Schalthebel
► Akku herausnehmen.
► Versuchen, den Schalthebel zu drücken, ohne die
Schalthebelsperre zu drücken.
► Falls sich der Schalthebel drücken lässt: Einen STIHL
Fachhändler aufsuchen.
Die Schalthebelsperre ist defekt.
► Schalthebelsperre drücken und gedrückt halten.
0458-713-9621-C
12 Mit der Motorsense arbeiten
0000-GXX-1494-A0
1
0000-GXX-1495-A1
deutsch
► Schalthebel drücken und wieder loslassen.
► Falls der Schalthebel oder die Schalthebelsperre
schwergängig sind oder nicht in die Ausgangsposition
zurückfedert: Motorsense nicht verwenden und einen
STIHL Fachhändler aufsuchen.
Der Schalthebel oder die Schalthebelsperre ist defekt.
Motorsense einschalten
► Akku einsetzen.
► Schalthebelsperre drücken und gedrückt halten.
► Schalthebel drücken und gedrückt halten.
Das Schneidwerkzeug dreht sich.
► Falls 3 LEDs rot blinken: Akku herausnehmen und einen
STIHL Fachhändler aufsuchen.
In der Motorsense besteht eine Störung.
► Schalthebel loslassen.
Das Schneidwerkzeug dreht sich nach kurzer Zeit nicht
mehr.
► Falls sich das Schneidwerkzeug weiter dreht: Akku
herausnehmen und einen STIHL Fachhändler aufsuchen.
Die Motorsense ist defekt.
11.2 Akku prüfen
► Drucktaste am Akku drücken.
Die LEDs leuchten oder blinken.
► Falls die LEDs nicht leuchten oder blinken: Akku nicht
verwenden und einen STIHL Fachhändler aufsuchen.
Im Akku besteht eine Störung.
12 Mit der Motorsense arbeiten
12.1 Motorsense halten und führen
► Motorsense mit einer Hand am Bedienungsgriff so
festhalten, dass der Daumen den Bedienungsgriff
umschließt.
► Motorsense mit der anderen Hand am Rundumgriff so
festhalten, dass der Daumen den Rundumgriff
umschließt.
12.2 Mähen
Der Abstand des Schneidwerkzeugs vom Boden bestimmt
die Schnitthöhe.
0458-713-9621-C
► Motorsense gleichmäßig hin und her bewegen.
► Langsam und kontrolliert vorwärts gehen.
19

deutsch
13 Nach dem Arbeiten
► Falls mit einem Abstandhalter gearbeitet wird:
Abstandhalter (1) vollständig ausklappen.
12.3 Mähfäden nachstellen
► Sich drehenden Mähkopf kurz auf dem Boden auftippen.
Es werden ungefähr 30 mm nachgestellt.
Das Ablängmesser im Schutz längt die Mähfäden
automatisch auf die richtige Länge ab.
Falls die Mähfäden kürzer als 25 mm sind, können sie nicht
automatisch nachgestellt werden.
► Motorsense ausschalten und Akku herausnehmen.
► Knopf am Mähkopf drücken und gedrückt halten.
► Mähfäden von Hand herausziehen.
► Falls die Mähfäden nicht mehr herausgezogen werden
können: Spulenkörper mit Mähfäden ersetzen.
Der Spulenkörper ist leer.
13 Nach dem Arbeiten
13.1 Nach dem Arbeiten
► Motorsense ausschalten und Akku herausnehmen.
► Falls die Motorsense nass ist: Motorsense trocknen
lassen.
► Falls der Akku nass ist: Akku trocknen lassen.
► Motorsense reinigen.
►Schutz reinigen.
► Schneidwerkzeug reinigen.
► Akku reinigen.
14 Transportieren
► Motorsense mit einer Hand so am Schaft tragen, dass das
Schneidwerkzeug nach hinten zeigt und die Motorsense
ausbalanciert ist.
► Falls die Motorsense in einem Fahrzeug transportiert wird:
Sicherstellen, dass die Motorsense nicht umkippen und
sich nicht bewegen kann.
14.2 Akku transportieren
► Motorsense ausschalten und Akku herausnehmen.
► Sicherstellen, dass der Akku im sicherheitsgerechten
Zustand ist.
► Akku so verpacken, dass folgende Bedingungen erfüllt
sind:
– Die Verpackung ist elektrisch nicht leitfähig.
– Der Akku kann sich in der Verpackung nicht bewegen.
► Verpackung so sichern, dass sie sich nicht bewegen kann.
Der Akku unterliegt den Anforderungen zum Transport
gefährlicher Güter. Der Akku ist als UN 3480 (Lithium-IonenBatterien) eingestuft und wurde gemäß UN Handbuch
Prüfungen und Kriterien Teil III, Unterabschnitt 38.3 geprüft.
Die Transportvorschriften sind unter www.stihl.com/safetydata-sheets angegeben.
15 Aufbewahren
15.1 Motorsense aufbewahren
► Motorsense ausschalten und Akku herausnehmen.
► Spulenkörper abbauen.
► Motorsense so aufbewahren, dass folgende Bedingungen
erfüllt sind:
– Die Motorsense ist außerhalb der Reichweite von
Kindern.
– Die Motorsense ist sauber und trocken.
14.1 Motorsense transportieren
► Motorsense ausschalten und Akku herausnehmen.
► Schaft auf die kleinste Länge einstellen.
20
0458-713-9621-C
16 Reinigen
2
1
0000-GXX-0592-A0
deutsch
15.2 Akku aufbewahren
STIHL empfiehlt, den Akku in einem Ladezustand zwischen
40 % und 60 % (2 grün leuchtende LEDs) aufzubewahren.
► Akku so aufbewahren, dass folgende Bedingungen erfüllt
sind:
– Der Akku ist außerhalb der Reichweite von Kindern.
– Der Akku ist sauber und trocken.
– Der Akku ist in einem geschlossenen Raum.
– Der Akku ist getrennt von der Motorsense und dem
Ladegerät.
– Der Akku ist in einer elektrisch nicht leitfähigen
Verpackung.
– Der Akku ist im Temperaturbereich zwischen - 10 °C
und + 50 °C.
15.3 Ladegerät aufbewahren
► Netzstecker aus der Steckdose ziehen.
► Akku herausnehmen.
– Das Ladegerät ist nicht an der Anschlussleitung
aufgehängt.
– Das Ladegerät ist im Temperaturbereich zwischen
+ 5 °C und + 40 °C.
16 Reinigen
16.1 Motorsense reinigen
► Motorsense ausschalten und Akku herausnehmen.
► Motorsense mit einem feuchten Tuch reinigen.
► Fremdkörper aus dem Akku-Schacht entfernen und den
Akku-Schacht mit einem feuchten Tuch reinigen.
► Elektrische Kontakte im Akku-Schacht mit einem Pinsel
oder einer weichen Bürste reinigen.
16.2 Schutz und Schneidwerkzeug reinigen
► Motorsense ausschalten und Akku herausnehmen.
► Schutz und Schneidwerkzeug mit einem feuchten Tuch
oder einer weichen Bürste reinigen.
16.3 Akku reinigen
► Akku mit einem feuchten Tuch reinigen.
16.4 Ladegerät reinigen
► Netzstecker aus der Steckdose ziehen.
► Ladegerät mit einem feuchten Tuch reinigen.
► Elektrische Kontakte des Ladegeräts mit einem Pinsel
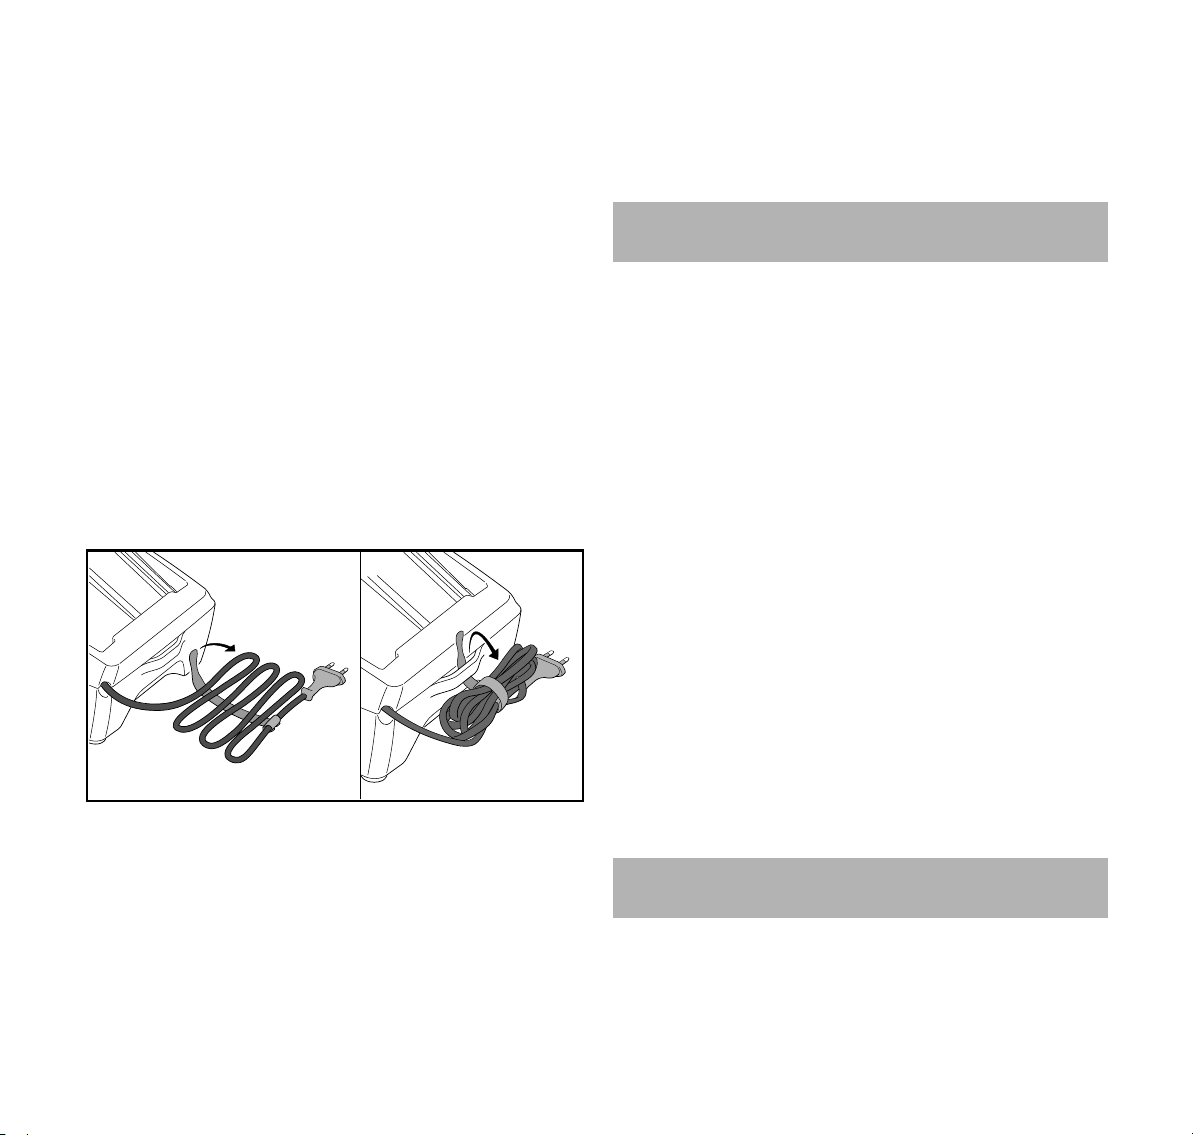
► Anschlussleitung aufwickeln und am Ladegerät
befestigen.
► Ladegerät so aufbewahren, dass folgende Bedingungen
erfüllt sind:
– Das Ladegerät ist außerhalb der Reichweite von
Kindern.
– Das Ladegerät ist sauber und trocken.
– Das Ladegerät ist in einem geschlossenen Raum.
– Das Ladegerät ist getrennt vom Akku.
0458-713-9621-C
oder einer weichen Bürste reinigen.
17 Warten und Reparieren
17.1 Motorsense warten und reparieren
Der Benutzer kann die Motorsense nicht selbst warten und
nicht reparieren.
21

deutsch
► Falls die Motorsense gewartet werden muss oder defekt
oder beschädigt ist: Einen STIHL Fachhändler aufsuchen.
17.2 Akku warten und reparieren
Der Akku muss nicht gewartet werden und kann nicht
repariert werden.
► Falls der Akku defekt oder beschädigt ist: Akku ersetzen.
17.3 Ladegerät warten und reparieren
Das Ladegerät muss nicht gewartet werden und kann nicht
repariert werden.
► Falls das Ladegerät defekt oder beschädigt ist: Ladegerät
ersetzen.
► Falls die Anschlussleitung defekt oder beschädigt ist:
Ladegerät nicht verwenden und Anschlussleitung von
einem STIHL Fachhändler ersetzen lassen.
17 Warten und Reparieren
22
0458-713-9621-C

18 Störungen beheben
18 Störungen beheben
18.1 Störungen der Motorsense oder des Akkus beheben
Störung LEDs am Akku Ursache Abhilfe
Die Motorsense läuft
beim Einschalten
nicht an.
Die Motorsense
schaltet im Betrieb
ab.
1 LED blinkt grün. Der Ladezustand des
Akkus ist zu gering.
1 LED leuchtet rot. Der Akku ist zu warm oder
zu kalt.
3 LEDs blinken rot. In der Motorsense besteht
eine Störung.
3 LEDs leuchten
rot.
4 LEDs blinken rot. Im Akku besteht eine
3 LEDs leuchten
rot.
Die Motorsense ist zu
warm.
Störung.
Die elektrische Verbindung
zwischen der Motorsense
und dem Akku ist
unterbrochen.
Die Motorsense oder der
Akku sind feucht.
Die Motorsense ist zu
warm.
Es besteht eine elektrische
Störung.
► Akku laden.
► Akku herausnehmen.
► Akku abkühlen oder erwärmen lassen.
► Akku herausnehmen.
► Elektrische Kontakte im Akku-Schacht reinigen.
► Akku einsetzen.
► Motorsense einschalten.
► Falls weiterhin 3 LEDs rot blinken: Motorsense
nicht verwenden und einen STIHL Fachhändler
aufsuchen.
► Akku herausnehmen.
► Motorsense abkühlen lassen.
► Akku herausnehmen und erneut einsetzen.
► Motorsense einschalten.
► Falls weiterhin 4 LEDs rot blinken: Akku nicht
verwenden und einen STIHL Fachhändler
aufsuchen.
► Akku herausnehmen.
► Elektrische Kontakte im Akku-Schacht reinigen.
► Akku einsetzen.
► Motorsense oder Akku trocknen lassen.
► Akku herausnehmen.
► Motorsense abkühlen lassen.
► Akku herausnehmen und erneut einsetzen.
► Motorsense einschalten.
deutsch
0458-713-9621-C
23

deutsch
Störung LEDs am Akku Ursache Abhilfe
Die Betriebszeit der
Motorsense ist zu
kurz.
Nach dem Einsetzen
des Akkus in das
Ladegerät startet der
Ladevorgang nicht.
1 LED leuchtet rot. Der Akku ist zu warm oder
Der Akku ist nicht
vollständig geladen.
Die Lebensdauer des
Akkus ist überschritten.
zu kalt.
► Akku vollständig laden.
► Akku ersetzen.
► Akku im Ladegerät eingesetzt lassen.
Der Ladevorgang startet automatisch, sobald der
zulässige Temperaturbereich erreicht ist.
18.2 Störungen des Ladegeräts beheben
Störung LED am Ladegerät Ursache Abhilfe
Der Akku wird nicht
geladen.
Die LED blinkt rot. Die elektrische Verbindung
zwischen dem Ladegerät
und dem Akku ist
unterbrochen.
Im Ladegerät besteht eine
Störung.
► Akku herausnehmen.
► Elektrische Kontakte am Ladegerät reinigen.
► Akku einsetzen.
► Ladegerät nicht verwenden und einen STIHL
Fachhändler aufsuchen.
18 Störungen beheben
24
0458-713-9621-C

19 Technische Daten
deutsch
19 Technische Daten
19.1 Motorsense STIHL FSA 56
– Zulässiger Akku: STIHL AK
– Gewicht ohne Akku, Schneidwerkzeug und Schutz: 2,1 kg
– Länge ohne Schneidwerkzeug: 1470 mm bis 1670 mm
19.2 Akku STIHL AK
– Akku-Technologie: Lithium-Ionen
– Spannung: 36 V
– Kapazität in Ah: siehe Leistungsschild
– Energieinhalt in Wh: siehe Leistungsschild
– Gewicht in kg: siehe Leistungsschild
– Zulässiger Temperaturbereich für Verwendung und
Aufbewahrung: - 10 °C bis + 50 °C
19.3 Ladegerät STIHL AL 101
– Nennspannung: siehe Leistungsschild
– Frequenz: siehe Leistungsschild
– Nennleistung: siehe Leistungsschild
– Ladestrom: siehe Leistungsschild
– Zulässiger Temperaturbereich für Verwendung und
Aufbewahrung: + 5 °C bis + 40 °C
Die Ladezeiten sind unter www.stihl.com/charging-times
angegeben.
– Schalldruckpegel L
72 dB(A). Der K-Wert für den Schalldruckpegel beträgt
2dB(A).
– Schallleistungspegel L
91: 86 dB(A). Der K-Wert für den Schallleistungspegel
beträgt 2 dB(A).
– Vibrationswert a
Bedienungsgriff und Rundumgriff: 3,5 m/s². Der KWert für den Vibrationswert beträgt 2 m/s².
Die angegebenen Vibrationswerte wurden nach einem
genormten Prüfverfahren gemessen und können zum
Vergleich von Elektrogeräten herangezogen werden. Die
tatsächlich auftretenden Vibrationswerte können von den
angegebenen Werten abweichen, abhängig von der Art der
Anwendung. Die angegebenen Vibrationswerte können zu
einer ersten Einschätzung der Vibrationsbelastung
verwendet werden. Die tatsächliche Vibrationsbelastung
muss eingeschätzt werden. Dabei können auch die Zeiten
berücksichtigt werden, in denen das Elektrogerät
abgeschaltet ist, und solche, in denen es zwar eingeschaltet
ist, aber ohne Belastung läuft.
gemessen nach EN 50636-2-91:
pA
gemessen nach EN 50636-2-
wA
gemessen nach EN 50636-2-91,
hv
19.5 REACH
REACH bezeichnet eine EG-Verordnung zur Registrierung,
Bewertung und Zulassung von Chemikalien.
Informationen zur Erfüllung der REACH Verordnung sind
unter www.stihl.com/reach angegeben.
20 Kombinationen aus
Schneidwerkzeugen und Schutzen
19.4 Schallwerte und Vibrationswerte
STIHL empfiehlt, einen Gehörschutz zu tragen.
0458-713-9621-C
20.1 Motorsense STIHL FSA 56
Folgende Mähköpfe dürfen zusammen mit dem Schutz für
Mähköpfe angebaut werden:
– Mähkopf AutoCut 2-2 mit Mähfäden „rund, leise“ mit
einem Durchmesser von 1,6 mm
Der Benutzer kann einen Mähkopf nicht selbst anbauen.
25

deutsch
21 Ersatzteile und Zubehör
► Gewünschten Mähkopf von einem STIHL Fachhändler
anbauen lassen.
21 Ersatzteile und Zubehör
21.1 Ersatzteile und Zubehör
Diese Symbole kennzeichnen original STIHL
Ersatzteile und original STIHL Zubehör.
STIHL empfiehlt, original STIHL Ersatzteile und original
STIHL Zubehör zu verwenden.
Original STIHL Ersatzteile und original STIHL Zubehör sind
bei einem STIHL Fachhändler erhältlich.
22 Entsorgen
22.1 Motorsense, Akku und Ladegerät entsorgen
Informationen zur Entsorgung sind bei einem STIHL
Fachhändler erhältlich.
► Motorsense, Schutz, Schneidwerkzeug, Akku, Ladegerät,
Zubehör und Verpackung vorschriftsmäßig und
umweltfreundlich entsorgen.
– Typ: FSA 56
– Serienidentifizierung: 4522
den einschlägigen Bestimmungen der Richtlinien 2011/65/
EU, 2006/42/EG, 2014/30/EU und 2000/14/EG entspricht
und in Übereinstimmung mit den jeweils zum
Produktionsdatum gültigen Versionen der folgenden
Normen entwickelt und gefertigt worden ist: EN 55014- 1,
EN 55014-2, EN 60335-1 und EN ISO 12100 unter
Berücksichtigung der Norm EN 50636-2-91.
Zur Ermittlung des gemessenen und des garantierten
Schallleistungspegels wurde nach Richtlinie 2000/14/EG,
Anhang VIII verfahren.
Beteiligte benannte Stelle: TÜV Rheinland Product Safety
GmbH, Am Grauen Stein, 51105 Köln, Deutschland
– Gemessener Schallleistungspegel: 86 dB(A)
– Garantierter Schallleistungspegel: 88 dB(A)
Die Technischen Unterlagen sind bei der Produktzulassung
der ANDREAS STIHL AG & Co. KG aufbewahrt.
Das Baujahr, das Herstellungsland und die
Maschinennummer sind auf der Motorsense angegeben.
Waiblingen, 01.03.2017
ANDREAS STIHL AG & Co. KG
i. V.
23 EU-Konformitätserklärung
23.1 Motorsense STIHL FSA 56
ANDREAS STIHL AG & Co. KG
Badstraße 115
D-71336 Waiblingen
Deutschland
erklärt in alleiniger Verantwortung, dass
– Bauart: Akku-Motorsense
– Fabrikmarke: STIHL
26
Thomas Elsner, Leiter Produktmanagement und Services
23.2 Konformitätshinweis Ladegerät STIHL AL 101
Dieses Ladegerät ist in Übereinstimmung mit folgenden
Richtlinien gefertigt und in Verkehr gebracht worden: 2014/
35/EU, 2014/30/EU und 2011/65/EU.
Das Baujahr, das Herstellungsland und die
Maschinennummer sind auf dem Ladegerät angegeben.
0458-713-9621-C

24 Anschriften
deutsch
Die vollständige EG-Konformitätserklärung ist bei der Firma
ANDREAS STIHL AG & Co. KG, Badstraße 115,
71336 Waiblingen, Deutschland erhältlich.
24 Anschriften
24.1 STIHL Hauptverwaltung
ANDREAS STIHL AG & Co. KG
Postfach 1771
D-71307 Waiblingen
24.2 STIHL Vertriebsgesellschaften
DEUTSCHLAND
STIHL Vertriebszentrale AG & Co. KG
Robert-Bosch-Straße 13
64807 Dieburg
Telefon: +49 6071 3055358
ÖSTERREICH
STIHL Ges.m.b.H.
Fachmarktstraße 7
2334 Vösendorf
Telefon: +43 1 86596370
24.3 STIHL Importeure
BOSNIEN-HERZEGOWINA
UNIKOMERC d. o. o.
Bišće polje bb
88000 Mostar
Telefon: +387 36 352560
Fax: +387 36 350536
KROATIEN
UNIKOMERC - UVOZ d.o.o.
Sjedište:
Amruševa 10, 10000 Zagreb
Prodaja:
Ulica Kneza Ljudevita Posavskog 56, 10410 Velika Gorica
Telefon: +385 1 6370010
Fax: +385 1 6221569
TÜRKEI
SADAL TARIM MAKİNALARI DIŞ TİCARET A.Ş.
Alsancak Sokak, No:10 I-6 Özel Parsel
34956 Tuzla, İstanbul
Telefon: +90 216 394 00 40
Fax: +90 216 394 00 44
SCHWEIZ
STIHL Vertriebs AG
Isenrietstraße 4
8617 Mönchaltorf
Telefon: +41 44 9493030
TSCHECHISCHE REPUBLIK
Andreas STIHL, spol. s r.o.
Chrlická 753
664 42 Modřice
0458-713-9621-C
27

Contents
English
1 Introduction
2 Guide to Using this Manual
2.1 Applicable Documentation
. . . . . . . . . . . . . . . . . . . . . . . . . . . . . . . . . . . . . . . .
. . . . . . . . . . . . . . . . . . . . . . . . .
. . . . . . . . . . . . . . . . . . . . . . . . . .
2.2 Symbols used with warnings in the text
2.3 Symbols in Text
3 Overview
3.1 Trimmer, Battery and Charger
3.2 Cutting Attachments
3.3 Symbols
. . . . . . . . . . . . . . . . . . . . . . . . . . . . . . . . . . . . . . . . . . .
4 Safety Precautions
4.1 Warning Signs
4.2 Intended Use
4.3 The Operator
4.4 Clothing and Equipment
4.5 Work Area and Surroundings
4.6 Safe Condition
4.7 Operation
4.8 Charging
4.9 Transporting
4.10 Storing
. . . . . . . . . . . . . . . . . . . . . . . . . . . . . . . . . . . . . . . . . . . . .
4.11 Cleaning, Maintenance and Repairs
5 Preparing Trimmer for Operation
5.1 Preparing Trimmer for Operation
6 Charging the Battery, LEDs
6.1 Charging the Battery
6.2 State of Charge
6.3 LEDs on Battery
6.4 LED on Charger
7 Assembling the Trimmer
7.1 Mounting the Deflector
7.2 STIHL AutoCut 2-2 Mowing Head
7.3 Mounting the Loop Handle
8 Adjusting Trimmer for User
. . . . . . . . . . . . . . . . . . . . . . . . . . . . . . . . . . . .
. . . . . . . . . . . . . . . . . . . . . . . . . . . . . . . . . . . . . . . . . . .
. . . . . . . . . . . . . . . . . . . . . .
. . . . . . . . . . . . . . . . . . . . . . . . . . . . . . . .
. . . . . . . . . . . . . . . . . . . . . . . . . . . . . . . . .
. . . . . . . . . . . . . . . . . . . . . . . . . . . . . . . . . . . . .
. . . . . . . . . . . . . . . . . . . . . . . . . . . . . . . . . . . . . . .
. . . . . . . . . . . . . . . . . . . . . . . . . . . . . . . . . . . . . . .
. . . . . . . . . . . . . . . . . . . . . . . . . . . .
. . . . . . . . . . . . . . . . . . . . . . .
. . . . . . . . . . . . . . . . . . . . . . . . . . . . . . . . . . . . .
. . . . . . . . . . . . . . . . . . . . . . . . . . . . . . . . . . . . . . . . . .
. . . . . . . . . . . . . . . . . . . . . . . . . . . . . . . . . . . . . . . . . . .
. . . . . . . . . . . . . . . . . . . . . . . . . . . . . . . . . . . . . . .
. . . . . . . . . . . . . . . .
. . . . . . . . . . . . . . . . . . .
. . . . . . . . . . . . . . . . . . .
. . . . . . . . . . . . . . . . . . . . . . . .
. . . . . . . . . . . . . . . . . . . . . . . . . . . . . . .
. . . . . . . . . . . . . . . . . . . . . . . . . . . . . . . . . . . .
. . . . . . . . . . . . . . . . . . . . . . . . . . . . . . . . . . . .
. . . . . . . . . . . . . . . . . . . . . . . . . . . . . . . . . . . .
. . . . . . . . . . . . . . . . . . . . . . . . . . .
. . . . . . . . . . . . . . . . . . . . . . . . . . . . .
. . . . . . . . . . . . . . . . . .
. . . . . . . . . . . . . . . . . . . . . . . . .
. . . . . . . . . . . . . . . . . . . . . . . . .
. . . . . . . . . . . . .
8.1 Adjusting Length of Shaft
29
8.2 Adjusting the Loop Handle
29
9 Removing and Fitting the Battery
29
9.1 Fitting the Battery
30
9.2 Removing the Battery
30
10 Switching the Trimmer On/Off
30
10.1 Switching On
30
10.2 Switching Off
31
11 Testing the Trimmer and Battery
31
11.1 Checking the Controls
32
11.2 Testing the Battery
32
12 Operating the Trimmer
32
12.1 Holding and Controlling the Trimmer
33
12.2 Mowing
33
12.3 Adjusting Nylon Line
34
35
13 After Finishing Work
37
13.1 After Finishing Work
37
14 Transporting
38
14.1 Transporting the Trimmer
38
14.2 Transporting the Battery
39
15 Storing
40
15.1 Storing the Trimmer
40
15.2 Storing the Battery
40
15.3 Storing the Charger
40
16 Cleaning
41
16.1 Cleaning the Trimmer
41
16.2 Cleaning the Deflector and Cutting Attachment
41
16.3 Cleaning the Battery
41
16.4 Cleaning the Charger
41
17 Maintenance and Repairs
41
17.1 Servicing and Repairing the Trimmer
42
17.2 Servicing and Repairing the Battery
42
17.3 Servicing and Repairing the Charger
. . . . . . . . . . . . . . . . . . . . . . . . . . . . . . . . . . . . . .
. . . . . . . . . . . . . . . . . . . . . . . . . . . . . . . . . . . . . .
. . . . . . . . . . . . . . . . . . . . . . . . . . . . . . . . . . . . . . . . . . . .
. . . . . . . . . . . . . . . . . . . . . . . . . . . . . . . . . . . . . . .
. . . . . . . . . . . . . . . . . . . . . . . . . . . . . . . . . . . . . . . . . . . . .
. . . . . . . . . . . . . . . . . . . . . . . . . . . . . . . . . . . . . . . . . . .
. . . . . . . . . . . . . . . . . . . . . . . . . . .
. . . . . . . . . . . . . . . . . . . . . . . . .
. . . . . . . . . . . . . . . . . . . . . . . . . . . . . . . . . .
. . . . . . . . . . . . . . . . . . . . . . . . . . . . . .
. . . . . . . . . . . . . . . . . . . . . .
. . . . . . . . . . . . . . . . . . . . . . . . . . . . .
. . . . . . . . . . . . . . . . . . . . . . . . . . . . . . . . .
. . . . . . . . . . . . . . . . . . . . . . . . . . . . .
. . . . . . . . . . . . . . . . . . . . . . . . . . . . . . .
. . . . . . . . . . . . . . . . . . . . . . . . . . . . . . .
. . . . . . . . . . . . . . . . . . . . . . . . . . . . . . .
. . . . . . . . . . . . . . . . . . . . . . . . . .
. . . . . . . . . . . . . . . . . . . . . . . . . . .
. . . . . . . . . . . . . . . . . . . . . . . . . . . . . . . .
. . . . . . . . . . . . . . . . . . . . . . . . . . . . . . . . .
. . . . . . . . . . . . . . . . . . . . . . . . . . . . . . . .
. . . . . . . . . . . . . . . . . . . . . . . . . . . . . .
. . . . . . . . . . . . . . . . . . . . . . . . . . . . . . .
. . . . . . . . . . . . . . . . . . . . . . . . . . . . . .
. . . . . . . . . . . . . . . . . . . . . . . . . .
. . . . . . . . . . . . . . . . . . .
. . . . . . . . . . . . . . . . . . .
. . . . . . . . . . . . . . .
. . . . .
. . . . . . . . . . . . . . .
. . . . . . . . . . . . . . . .
. . . . . . . . . . . . . . .
42
43
43
43
43
44
44
44
44
44
45
45
45
45
45
45
45
46
46
46
46
46
46
46
47
47
47
47
47
47
47
47
47
0000008093_001_GB
Translation of Original Instruction
Manual
Printed on chlorine-free paper
Printing inks contain vegetable oils, paper can be recycled.
© ANDREAS STIHL AG & Co. KG 2017
0458-713-9621-C. VA1.H17.
{
28
This instruction manual is protected by copyright. All rights reserved, especially the rights to reproduce, translate and process
with electronic systems.
0458-713-9621-C

1 Introduction
English
18 Troubleshooting
18.1 Troubleshooting Trimmer or Battery
18.2 Troubleshooting Charger
19 Specifications
19.1 STIHL FSA 56 Trimmer:
19.2 STIHL AK Battery
19.3 Charger STIHL AL 101
19.4 Noise and Vibration Data
19.5 REACH
20 Combinations of Cutting Attachments and
Deflectors
20.1 STIHL FSA 56 Trimmer
21 Spare Parts and Accessories
21.1 Spare Parts and Accessories
22 Disposal
22.1 Disposal of Trimmer, Battery and Charger
23 EC Declaration of Conformity
23.1 STIHL FSA 56 Trimmer
23.2 STIHL AL 101 Charger Conformity Notice
. . . . . . . . . . . . . . . . . . . . . . . . . . . . . . . . . . . . . . . . . . . .
. . . . . . . . . . . . . . . . . . . . . . . . . . . . . . . . . . . . . . . . . . .
. . . . . . . . . . . . . . . . . . . . . . . . . . . . . . . . . . . .
. . . . . . . . . . . . . . . .
. . . . . . . . . . . . . . . . . . . . . . . . . . .
. . . . . . . . . . . . . . . . . . . . . . . . . . . . . . . . . . . . . .
. . . . . . . . . . . . . . . . . . . . . . . . . . . .
. . . . . . . . . . . . . . . . . . . . . . . . . . . . . . . . . .
. . . . . . . . . . . . . . . . . . . . . . . . . . . . .
. . . . . . . . . . . . . . . . . . . . . . . . . . .
. . . . . . . . . . . . . . . . . . . . . . . . . . . . . . . . . . . . . . . . . .
. . . . . . . . . . . . . . . . . . . . . . . . . . . .
. . . . . . . . . . . . . . . . . . . . . . .
. . . . . . . . . . . . . . . . . . . . . . .
. . . . . . . . . . . . . . . . . . . . . . .
. . . . . . . . . . . . . . . . . . . . . . . . . . . .
. . . . . . . . . .
. . . . . . . . . .
48
1 Introduction
48
49
Dear Customer,
50
Thank you for choosing STIHL. We develop and
50
manufacture our quality products to meet our customers’
50
requirements. The products are designed for reliability even
50
under extreme conditions.
50
STIHL also stands for premium service quality. Our
50
specialist dealers guarantee competent advice and
instruction as well as comprehensive service support.
50
We thank you for your confidence in us and hope you will
50
enjoy working with your STIHL product.
51
51
51
51
51
51
Dr. Nikolas Stihl
51
IMPORTANT: READ BEFORE USE AND KEEP IN A SAFE
PLACE.
2 Guide to Using this Manual
0458-713-9621-C
2.1 Applicable Documentation
Local safety regulations apply.
► Read, understand and save the following documents in
addition to this instruction manual:
– Safety notes and precautions for STIHL AK battery.
– Safety information for STIHL batteries and products
with built in batteries: www.stihl.com/safety-data-sheets
29

English
3 Overview
2.2 Symbols used with warnings in the text
WARNING
This symbol indicates dangers that can cause serious
injuries or death.
► The measures indicated can avoid serious injuries or
death.
NOTICE
This symbol indicates dangers that can cause damage to
property.
► The measures indicated can avoid damage to property.
2.3 Symbols in Text
This symbol refers to a chapter in this instruction
manual.
3Overview
3.1 Trimmer, Battery and Charger
1
2
#
3
4
5
11
#
6
14
8
7
9
12
15
16
10
13
#
17
30
0000-GXX-1482-A2
1 Battery Compartment
Accommodates the battery.
2 Locking Lever
Secures the battery in the battery compartment.
3 Control Handle (Top Handle)
For operating, holding and controlling the trimmer.
4 Trigger
The trigger switches the motor on and off.
5 Trigger Lockout
Locks trigger in position.
0458-713-9621-C

3 Overview
1
2
3
4
0000-GXX-1483-A0
English
6 Lock Button
Locks the shaft at the required length.
7 Star Knob Nut
Secures loop handle to shaft.
8 Loop handle
For holding and controlling the trimmer.
9Drive Tube
Connects all components.
10 LED
The LED indicates the operating status of the charger.
11 Bump Guard
Helps protect objects from contact with the cutting
attachment.
12 Appliance Plug
Connects cable to wall outlet.
13 Connecting Cable
Connects charger to appliance plug.
14 Charger
Charges the battery.
15 Battery
Supplies power to the trimmer.
16 LEDs
Indicate battery’s state of charge and malfunctions.
17 Button
Activates the LEDs on the battery.
# Rating label with serial number
3.2 Cutting Attachments
1 Deflector
Protects user from flying debris and contact with the
cutting attachment.
2 Line Limiter Blade
Trims surplus mowing line to correct length.
3 Mowing Head
The mowing head contains the mowing line.
4 Mowing Line
The mowing lines cut grass.
3.3 Symbols
Meanings of symbols that may be on the trimmer, battery
and charger:
This symbol shows the rated speed of the cutting
attachment.
1 LED glows red. Battery too hot or too cold.
0458-713-9621-C
4 LEDs flash red. There is a malfunction in the
battery.
31

English
A
4 Safety Precautions
LED glows green and LEDs on battery glow or
flash green. Battery is being charged.
LED flashes red. No electrical contact between
battery and charger or malfunction in battery or
charger.
Guaranteed sound power level according to
L
W
directive 2000/14/EC in dB(A) in order to make
sound emissions of products comparable.
The data next to this symbol indicates the energy
content of the battery according to the cell
manufacturer’s specification. The energy content
available during operation is lower.
Operate the electric appliance in a dry place, indoors
only.
Do not dispose of the product with your household
waste.
4 Safety Precautions
Wear safety glasses.
Observe safety notices on flying debris and take
the necessary precautions.
Always remove the battery during work breaks,
transport, storage, maintenance or repairs.
Protect trimmer and charger from rain and
dampness.
15m (50ft)
Protect battery from heat and fire.
Maintain safe distance.
4.1 Warning Signs
Meanings of warning signs and labels on the trimmer,
battery and charger:
Observe safety notices and take the necessary
precautions.
Read, understand and save the instruction
manual.
32
Protect the battery from rain and damp – do not
immerse it in fluids.
Observe battery’s specified temperature range.
4.2 Intended Use
The STIHL FSA 56 trimmer is designed for mowing grass.
The trimmer must not be used in the rain.
The STIHL AK battery supplies power to the trimmer.
0458-713-9621-C

4 Safety Precautions
English
The STIHL AL 101 charger recharges the STIHL AK battery.
WARNING
■ Batteries and chargers not explicitly approved for the
trimmer by STIHL may cause a fire or explosion. This can
result in serious or fatal injuries and damage to property.
► Use the trimmer with a STIHL AK battery.
►Recharge the STIHL AK battery with a
STIHL AL 101, AL 300 or AL 500 charger.
■ Using the trimmer, battery or the charger for purposes for
which they were not designed may result in serious or fatal
injuries, and damage to property may occur.
► Use the trimmer, charger and battery as described in
this instruction manual.
4.3 The Operator
WARNING
■ Users without adequate training or instruction cannot
recognize or assess the risks involved in using the
trimmer, battery and charger. The user or other persons
may sustain serious or fatal injuries.
► Read, understand and save the instruction
manual.
► If you pass the trimmer, battery and charger on to
another person: Always give them the instruction
manual.
► If you have any queries: Contact your STIHL servicing
dealer for assistance.
► Make sure the user meets the following requirements:
– The user must be rested.
– The user must be in good physical
condition and mental health to operate
and work with the trimmer, battery and
charger. If the user’s physical, sensory
or mental ability is restricted, he or she
may work only under the supervision of
or as instructed by a responsible
person.
– The user must be legally recognized as
an adult.
– The user has received instruction from a
STIHL servicing dealer or other
experienced user before working with
the trimmer for the first time.
– The user must not be under the influence of alcohol,
medication or drugs.
4.4 Clothing and Equipment
WARNING
■ Objects can be thrown through the air at high speed
during operation. This can result in personal injury.
► Wear close-fitting safety glasses. Suitable
safety glasses that have been tested and
labeled in accordance with EN 166 or
national standards are available from
retailers.
► Wear a face shield.
► Wear long trousers made of durable material.
■ Dust can be whipped up during operation: Whipped up
dust can damage the respiratory passages and cause
allergic reactions.
► Wear a respirator.
■ Inappropriate clothing can snag on wood, brush or the
trimmer. Not wearing personal protective equipment may
result in serious injury.
► Wear snug-fitting clothing.
► Do not wear a scarf or jewelry.
0458-713-9621-C
33

English
4 Safety Precautions
■ The user can come into contact with the rotating cutting
attachment during operation. This can result in serious
injuries.
► Wear footwear made of durable material.
► Wear long trousers made of durable material.
■ The user can come into contact with the cutting
attachment or line limiting blade during cleaning and
maintenance work. This can result in personal injury.
► Wear work gloves made of durable material.
■ Wearing unsuitable footwear may cause you to slip or
stumble. This can result in personal injury.
► Wear sturdy enclosed footwear with non-slip soles.
4.5 Work Area and Surroundings
4.5.1 Trimmer
WARNING
■ Bystanders, children and animals are not aware of the
dangers of the trimmer or flying debris. Innocent
bystanders, children and animals may be seriously
injured.
► Do not allow bystanders, children or animals
15m (50ft)
within 15 meters of the work area.
► Maintain a clearance of 15 meters from objects.
■ The trimmer is not waterproof. Working in the rain or a
damp location may result in an electric shock. This can
result in injuries to the user and may damage the trimmer.
► Do not work in the rain or a damp location.
■ The trimmer’s electric motor may produce sparks. Sparks
may cause a fire or an explosion in an easily combustible
or explosive environment. This can result in serious or
fatal injuries and damage to property.
► Do not work in an easily combustible or explosive
environment.
4.5.2 Battery
WARNING
■ Children are not aware of and cannot assess the dangers
of the battery. Children can be seriously injured.
► Keep children away.
■ The battery is not protected against all ambient
conditions. If the battery is exposed to certain ambient
conditions, it may catch fire or explode. This can result in
serious injuries and damage to property.
► Protect the battery from heat and fire.
► Do not throw the battery into a fire.
► Use and store the battery at temperatures
between - 10 °C and + 50 °C.
► Protect the battery from rain and moisture
and do not immerse it in liquids.
► Keep the battery away from metal objects.
► Do not expose the battery to high pressure.
► Do not expose the battery to microwaves.
► Protect the battery from chemicals and salts.
4.5.3 Charger
WARNING
■ Children are not aware of and cannot assess the dangers
of a charger or electric current. Children may sustain
serious or fatal injuries.
►Keep children away from the work area.
■ The charger is not waterproof. Working in the rain or a
damp location may result in an electric shock. This can
result in injuries to the user and may damage the charger.
34
0458-713-9621-C

4 Safety Precautions
English
► Do not operate it in the rain or a damp
location.
■ The charger is not protected against all ambient
conditions. If the charger is exposed to certain ambient
conditions, it may catch fire or explode. This can result in
serious injuries and damage to property.
► Operate the charger in a dry place, indoors only.
► Do not operate the charger in an easily combustible or
explosive environment.
► Do not operate the charger on an easily combustible
surface.
► Use and store the charger at a temperature
between +5°C and +40°C.
■ Persons may trip over the connecting cable. This can
result in injuries and may damage the charger.
► Lay the connecting cable flat on the floor.
4.6 Safe Condition
4.6.1 Trimmer The trimmer is in a safe condition if the following points are
observed:
– The trimmer is not damaged.
– The trimmer is clean and dry.
– The controls function properly and have not been
modified.
– A combination of cutting attachment and deflector
recommended in this instruction manual is mounted.
– Cutting attachment and deflector are properly mounted.
– Only original STIHL accessories designed for this trimmer
are fitted.
– Accessories are properly mounted.
WARNING
■ If components do not comply with safety requirements,
they will no longer function properly and safety devices
may be rendered inoperative. This can result in serious or
fatal injuries.
► Work only with an undamaged trimmer.
► If the trimmer is dirty or wet: Clean the trimmer and allow
it to dry.
► Never attempt to modify your trimmer. Exception:
Mounting one of the combinations of cutting attachment
and deflector recommended in this instruction manual.
► If the controls do not function properly: Do not use your
trimmer.
► Never mount metal cutting attachments.
► Only fit original STIHL accessories designed for this
trimmer.
► Mount the cutting attachment and deflector as
described in this instruction manual.
► Mount accessories as described in this instruction
manual or the instructions supplied with the accessory.
► Never insert objects in the trimmer’s openings.
► If you have any queries: Contact your STIHL servicing
dealer for assistance.
4.6.2 Deflector
The deflector is in a safe condition if the following points are
observed:
– The deflector is not damaged.
– The line limiter blade is correctly installed.
0458-713-9621-C
35

English
4 Safety Precautions
WARNING
■ If the product does not comply with safety requirements,
components will no longer function properly or safety
devices may be rendered inoperative. This can result in
serious injuries.
► Work only with an undamaged deflector.
► Work with a correctly installed line limiter blade.
► If you have any queries: Contact your STIHL servicing
dealer.
4.6.3 Mowing Head
The mowing head is in a safe condition if the following points
are observed:
– The mowing head is not damaged.
– The mowing head is not jammed.
– The mowing lines are properly installed.
WARNING
■ If they are in an unsafe condition, parts of the mowing
head or mowing lines may come off and be thrown at high
speed. This can result in serious injuries.
► Work only with an undamaged mowing head.
► Never use metal elements in place of the nylon mowing
lines.
► If you have any queries: Contact your STIHL servicing
dealer for assistance.
4.6.4 Battery
The battery is in a safe condition if the following points are
observed:
– Battery is undamaged.
– Battery is clean and dry.
– Battery functions properly and has not been modified.
WARNING
■ A battery that is not in a safe condition cannot operate
safely. This can result in serious injuries.
► Never work with a damaged battery.
► Never attempt to charge a damaged or defective
battery.
► If the battery is dirty or wet: Clean the battery and allow
it to dry.
► Never attempt to modify the battery.
► Never insert objects in the battery’s openings.
► Never bridge the battery's contacts with metallic objects
(short circuit).
► Do not open the battery.
■ Fluid may escape from a damaged battery. The fluid can
cause irritation if it contacts the skin or eyes.
► Avoid contact with the fluid.
► In case of contact with the skin: Wash affected areas
with plenty of water and soap.
► In case of contact with the eyes: Rinse eyes with plenty
of water for at least 15 minutes and seek medical
advice.
■ A damaged or defective battery may smell unusual, emit
smoke or burn. This can result in serious or fatal injuries
and damage to property.
► If the battery smells unusual or emits smoke: Do not use
the battery and keep it away from combustible
substances.
► If the battery catches fire: Attempt to extinguish the
battery with a fire extinguisher or water.
4.6.5 Charger
The charger is in a safe condition if the following points are
observed:
– Charger is undamaged.
– Charger is clean and dry.
36
0458-713-9621-C

4 Safety Precautions
English
WARNING
■ If the product does not comply with safety requirements,
components will no longer function properly or safety
devices may be rendered inoperative. This can result in
serious or fatal injuries.
► Do not use a damaged charger.
► If the charger is dirty or wet: Clean the charger and allow
it to dry.
► Never attempt to modify the charger.
► Never insert objects in the charger’s openings.
►Never bridge the charger's contacts with
metallic objects (short circuit).
► Do not open the charger.
4.7 Operation
WARNING
■ The user cannot concentrate on the work in certain
situations. The user may stumble, fall and be seriously
injured.
► Work calmly and carefully.
► If light and visibility are poor: Do not use your trimmer.
► Operate the trimmer alone.
► Keep the cutting attachment close to the ground.
► Watch out for obstacles.
► Stand on the ground while working and keep a good
balance.
► If you begin to feel tired: Take a break.
■ The rotating cutting attachment can cut the user. This can
result in serious injuries.
► Do not touch the rotating cutting attachment.
► If the cutting attachment is blocked by an object: Switch
off the trimmer and remove the battery. Then remove
the object causing the blockage.
■ If the behavior of the trimmer changes during operation or
feels unusual, it may no longer be in a safe condition. This
can result in serious injuries and damage to property.
► Stop work, remove the battery and contact your STIHL
servicing dealer for assistance.
■ Trimmer vibrations may occur during operation.
► Wear gloves.
► Take regular breaks.
► If signs of circulation problems occur: Seek medical
advice.
■ Note that the cutting attachment continues to rotate for a
short period after you release the trigger. This can result
in serious injuries.
► Wait until the cutting attachment comes to a complete
stop.
4.8 Charging
WARNING
Contact with live parts can occur for the following reasons:
– The connecting cord is damaged.
– The mains plug is damaged.
– The socket is not properly installed.
■ Contact with live parts can result in electric shock. The
user may be seriously injured or killed.
► Make sure that the connecting cord and mains plug are
undamaged.
► Plug the mains plug into a correctly installed socket.
0458-713-9621-C
37

English
4 Safety Precautions
■ During charging, an incorrect mains voltage or incorrect
mains frequency may result in an overvoltage in the
charger. The charger may be damaged.
► Make sure that the mains voltage and the mains
frequency of the power supply match the data on the
rating plate of the charger.
■ During charging, a damaged or defective charger may
give off an unusual smell or smoke. This can result in
injuries and damage to property.
► Disconnect the mains plug from the mains power
supply.
■ Insufficient heat dissipation may cause the charger to
overheat and a fire to break out. This can result in serious
injuries or death and damage to property.
► Do not cover the charger.
■ Wiring may be overloaded during charging if more than
one charger is connected to the same socket. The wiring
may heat up and a fire may break out. This can result in
serious injuries or death and damage to property.
► Only ever connect one charger to one socket.
► Do not connect chargers to multiple sockets.
■ If wiring and pipes are laid in the wall, they may be
damaged if the charger is mounted on the wall. Contact
with wiring can result in electric shock. This can result in
serious injuries and damage to property.
► Make sure there is no wiring or pipes in the wall at the
proposed mounting site.
■ If the charger is not mounted on the wall as described in
this Instruction Manual, the charger or the battery may fall
or the charger may overheat. This can result in injuries
and damage to property.
► Mount the charger on a wall as described in this
Instruction Manual.
■ If the charger is mounted on a wall with the battery
inserted, the battery may fall out of the charger. This can
result in injuries and damage to property.
► Mount the charger on the wall first before inserting the
battery.
4.9 Transporting
4.9.1 Trimmer
WARNING
■ The trimmer may turn over or shift during transport. This
may result in personal injuries and damage to property.
► Remove the battery.
► Secure the trimmer to prevent turnover and movement.
4.9.2 Battery
WARNING
■ The battery is not protected against all ambient
conditions. The battery may be damaged if it is exposed to
certain ambient conditions and damage to property may
occur.
► Never transport a damaged battery.
► Store the battery in non-conductive packaging.
■ The battery may turn over or shift during transport. This
may result in personal injuries and damage to property.
► Pack the battery in packaging in such a way that it
cannot move.
► Secure the packaging so that it cannot move.
4.10 Storing
4.10.1 Trimmer
WARNING
■ Children are not aware of and cannot assess the dangers
of a trimmer and can be seriously injured.
38
0458-713-9621-C

4 Safety Precautions
English
► Remove the battery.
► Store the trimmer out of the reach of children.
■ Dampness can corrode the electrical contacts on the
trimmer and metal components. This can damage the
trimmer.
► Remove the battery.
► Store the trimmer in a clean and dry condition.
4.10.2 Battery
WARNING
■ Children are not aware of and cannot assess the dangers
of the battery and can be seriously injured.
► Store the battery out of the reach of children.
■ The battery is not protected against all ambient
conditions. The battery may be damaged if it is exposed to
certain ambient conditions.
► Store the battery in a clean and dry condition.
► Store the battery in a confined space.
► Store the battery separately from the trimmer and
charger.
► Store the battery in non-conductive packaging.
► Use and store the battery at temperatures between -
10°C and +50°C.
4.10.3 Charger
WARNING
■ Children are not aware of and cannot assess the dangers
of a charger. Children may sustain serious or fatal injuries.
► Remove the battery.
► Store the charger out of the reach of children.
■ The charger is not protected against all ambient
conditions. The charger may be damaged if it is exposed
to certain ambient conditions.
► Remove the battery.
► If the charger is hot: Allow charger to cool down.
►Store the charger in a clean and dry
condition.
►Store the charger in a confined space.
► Store the charger at a temperature between +5°C and
+40°C.
■ The connecting cable must not be used for carrying or
hanging up the charger. The connecting cable and the
charger may be damaged.
► Hold the charger by the housing. A recessed handle is
provided on the back of the charger.
► Hang the charger on the wall bracket.
4.11 Cleaning, Maintenance and Repairs
WARNING
■ The trimmer may start unintentionally if the battery is left
in place during cleaning, maintenance or repair
operations. This can result in serious injuries and damage
to property.
► Remove the battery.
0458-713-9621-C
39

English
7
6
5
3
2
4
1
0000-GXX-0628-A0
5 Preparing Trimmer for Operation
■ Aggressive cleaning agents, high pressure cleaners or
pointed objects can damage the trimmer, deflector, cutting
attachment, battery and charger. If the trimmer, deflector,
cutting attachment, battery or charger are not cleaned
correctly, components may no longer function properly or
safety devices may be rendered inoperative. This can
result in serious injuries.
► Clean the trimmer, deflector, cutting attachment, battery
and charger as described in this instruction manual.
■ If the trimmer, deflector, cutting attachment, battery and
charger are not properly serviced or repaired, components
may no longer function properly or safety devices may be
rendered inoperative. This can result in serious or fatal
injuries.
► Do not attempt to service or repair the trimmer,
deflector, cutting attachment, battery or charger.
► If the trimmer, deflector, cutting attachment, battery or
the charger require servicing or repairs: Contact your
STIHL servicing dealer.
5 Preparing Trimmer for Operation
5.1 Preparing Trimmer for Operation
Perform the following steps before starting work:
► Make sure the following components are in a safe
condition:
– Trimmer, @ 4.6.1.
– Deflector, @ 4.6.2.
– Mowing head, @ 4.6.3.
– Battery, @ 4.6.4.
– Charger, @ 4.6.5.
► Check the battery, @ 11.2.
► Fully charge the battery, @ 6.1.
► Clean the trimmer, @ 16.1.
► Mount the deflector, @ 7.1.
► Fit the spool, @ 7.2.1.
► Mount the loop handle, @ 7.3.
► Adjust length of shaft, @ 8.1.
► Adjust the loop handle, @ 8.2.
► Check the controls, @ 11.1.
► If 3 LEDs flash red while you are checking the controls:
Remove the battery and contact your STIHL servicing
dealer.
There is a malfunction in the trimmer.
► If you cannot carry out this work: Do not use your trimmer
and contact your STIHL servicing dealer.
6 Charging the Battery, LEDs
6.1 Charging the Battery
The charging time depends on several factors, e.g.
temperature of the battery or the ambient temperature. The
actual charging time may differ from the specified charging
time. For specified charging times see www.stihl.com/
charging-times.
The charging process starts automatically
when the plug is inserted in a wall outlet and
the battery is fitted in the charger. The
charger switches itself off automatically when
the battery is fully charged.
The battery and charger heat up during the charging
process.
40
0458-713-9621-C

7 Assembling the Trimmer
1
0000-GXX-0629-A0
20-40%
40-60%
60-80%
80-100%
0-20%
English
► Insert the plug (6) in a convenient wall outlet (7).
The charger (3) runs a self test. The LED (4) glows green
for about 1 second and then red for about 1 second.
► Lay the connecting cable (5).
► Insert the battery (2) in the guides in the charger (3) and
press it home as far as stop.
The LED (4) glows green. The LEDs (1) glow green and
the battery (2) is being charged.
► If the LED (4) and the LEDs (1) stop glowing: Disconnect
the plug (6) from the wall outlet (7).
Battery is fully charged.
► Remove the battery (2).
6.2 State of Charge
► Press the button (1).
The LEDs (5) glow green for about 5 seconds and indicate
the state of charge.
► If the LED on the right flashes green: Charge the battery.
6.3 LEDs on Battery
The LEDs can show the state of charge or malfunctions. The
LEDs can glow or flash green or red.
The state of charge is indicated when the LEDs glow or flash
green.
► If the LEDs glow or flash red: Troubleshooting, @ 18.
Malfunction in trimmer or battery.
6.4 LED on Charger
The LED indicates the operating status of the charger.
If the LED glows green, the battery is being charged.
► If the LED flashes red: Rectify the malfunction.
Malfunction in charger.
7 Assembling the Trimmer
7.1 Mounting the Deflector
► Switch off the trimmer and remove the battery.
3
1
2 2
0000-GXX-1486-A1
The line limiting blade (1) is already installed in the deflector
(2) and must not be removed.
► Push the deflector (2) into the guides on the housing as far
as stop.
The deflector (2) is tight against the housing.
► Insert and tighten down the screws (3) firmly.
The deflector (2) must not be removed again.
7.2 STIHL AutoCut 2-2 Mowing Head
7.2.1 Installing the Spool ► Switch off the trimmer and remove the battery. ► Place spools in a container filled with water for 12 to 24
hours before installing.
This makes the nylon mowing lines supple.
0458-713-9621-C
41

English
8 Adjusting Trimmer for User
2
4
1
3
5
2
6
3
► Thread the ends of the nylon lines (4) from the spool (2)
through the openings (1) in the mowing head (5).
► Insert the spool (2) in the mowing head (5).
► Fit the cover (7) on the mowing head (5) so that its tabs
(3) line up with the openings (6) in the mowing head (4).
► Push the cover (7) onto the mowing head (5) as far as
stop.
The tabs (3) engage audibly.
7.2.2 Removing the Spool
► Switch off the trimmer and remove the battery.
1
1
2
7
3
► Press in the tabs (1) and remove the cover (3).
► Remove the spool (2).
0000-GXX-1485-A1
1
► Line up the loop handle (2) so that the recess for the star
knob nut (1) is on the right of the control handle and the
openings in the loop handle (2) are facing the operator.
► Ease the ends of the loop handle (2) apart and push it onto
the control handle until it engages in position.
► Insert the screw (3) through the hole.
► Fit the star knob nut (1) and tighten it down.
The loop handle (2) must not be removed again.
8 Adjusting Trimmer for User
8.1 Adjusting Length of Shaft
The length of the shaft can be adjusted to suit the height and
reach of the user.
► Switch off the trimmer and remove the battery.
► Hold the shaft firmly.
0000-GXX-1484-A0
0000-GXX-1488-A0
7.3 Mounting the Loop Handle
► Switch off the trimmer and remove the battery.
42
0458-713-9621-C

9 Removing and Fitting the Battery
English
1
2
► Depress lock button (1) and hold it in that position.
► Pull or push the control handle (2) to the required position.
► Release the lock button (1).
► Move the control handle (2) back and forth until it
engages.
8.2 Adjusting the Loop Handle
The loop handle can be set in different positions to suit the
height and reach of the user.
► Switch off the trimmer and remove the battery.
2
9 Removing and Fitting the Battery
9.1 Fitting the Battery
0000-GXX-1489-A0
2
1
► Insert the battery (1) in the battery compartment (2) and
press it home until you hear a click.
Arrows (3) on battery (1) are still visible and battery (1) is
held securely in battery compartment (2). There is no
electrical contact between the trimmer and battery (1).
► Push the battery (1) into the battery compartment (2) as
far as stop.
The battery (1) engages with a second click and is flush
with the trimmer’s housing.
3
0000-GXX-1491-A0
1
► Loosen the star knob nut (1).
► Swing the loop handle (2) to the required position.
► Tighten down the star knob nut (1) firmly.
0458-713-9621-C
9.2 Removing the Battery
► Stand the trimmer on a level surface.
► Hold one hand in front of the battery compartment to
ensure the battery does not fall out.
0000-GXX-1490-A0
43

English
10 Switching the Trimmer On/Off
10.2 Switching Off
► Release the trigger and lockout lever at the same time.
► Wait for the cutting attachment to come to a standstill.
► If the cutting attachment continues to rotate: Remove the
battery and contact your STIHL servicing dealer.
2
The trimmer has a malfunction.
11 Testing the Trimmer and Battery
1
► Press the locking lever (1) with your other hand.
The battery (2) is unlocked and can be removed.
10 Switching the Trimmer On/Off
10.1 Switching On
► Hold the trimmer with one hand on the control handle -
wrap your thumb around the control handle.
► Hold the trimmer with the other hand on the loop handle -
wrap your thumb around the loop handle.
1
2
► Depress the trigger lockout (1) with your hand and hold it
there.
► Pull the trigger (2) with your index finger and hold it there.
The motor accelerates and the cutting attachment rotates.
0000-GXX-1492-A0
11.1 Checking the Controls
Trigger lockout lever and trigger
► Remove the battery.
► Attempt to pull the trigger without depressing the lockout
lever.
► If the trigger can be pulled: Contact your STIHL servicing
dealer for assistance.
The trigger lockout is faulty.
► Depress the trigger lockout lever and hold it in that
position.
► Pull the trigger and then let it go.
► If the trigger or trigger lockout is stiff or does not spring
back to the idle position: Do not use your trimmer and
contact your STIHL dealer for assistance.
Trigger or trigger lockout is faulty.
Switching On
► Fit the battery.
► Depress the trigger lockout lever and hold it in that
position.
► Pull the trigger and hold it there.
0000-GXX-1493-A0
The cutting attachment rotates.
► If 3 LEDs flash red: Remove the battery and contact your
STIHL dealer for assistance.
There is a malfunction in the trimmer.
► Release the trigger.
The cutting attachment stops rotating after a brief delay.
44
0458-713-9621-C

12 Operating the Trimmer
► If the cutting attachment continues to rotate: Remove the
battery and contact your STIHL dealer for assistance.
The trimmer has a malfunction.
11.2 Testing the Battery
► Press button on battery.
The LEDs glow or flash.
► If the LEDs do not glow or flash: Do not use the battery
and contact your STIHL servicing dealer.
There is a malfunction in the battery.
12 Operating the Trimmer
12.1 Holding and Controlling the Trimmer
► Hold the trimmer with one hand on the control handle -
wrap your thumb around the control handle.
► Hold the trimmer with the other hand on the loop handle -
wrap your thumb around the loop handle.
1
► Swing the trimmer back and forth in an arc.
► Walk slowly and steadily forwards.
► If you work with a bump guard: Extend the bump guard (1)
fully.
12.3 Adjusting Nylon Line
► Tap the rotating mowing head on the ground.
About 30 mm of fresh nylon line is advanced.
The line limiting blade in the deflector trims the mowing
lines to the correct length.
Automatic feed does not operate if the mowing lines are
shorter than 25 mm.
► Switch off the trimmer and remove the battery.
0000-GXX-1494-A0
► Press the button on the mowing head and hold it
depressed.
► Pull out the mowing lines.
► If the mowing lines cannot be pulled out to required length:
Install a new spool with mowing line.
The spool is empty.
English
0000-GXX-1495-A1
12.2 Mowing
The cutting height is determined by the distance of the
cutting attachment from the ground.
0458-713-9621-C
13 After Finishing Work
13.1 After Finishing Work
► Switch off the trimmer and remove the battery.
► If the trimmer is wet: Allow the trimmer to dry.
45

English
14 Transporting
► If the battery is wet: Allow the battery to dry.
► Clean the trimmer.
► Clean the deflector.
► Clean the cutting attachment.
► Clean the battery.
14 Transporting
14.1 Transporting the Trimmer
► Switch off the trimmer and remove the battery.
► Adjust shaft to its shortest length.
► Carry the trimmer properly balanced by the shaft with the
cutting attachment behind you.
► Transporting the trimmer in a vehicle: Secure the trimmer
to prevent it turning over or shifting.
14.2 Transporting the Battery
► Switch off the trimmer and remove the battery.
► Make sure the battery is in a safe condition.
► Observe the following points when packing the battery:
– The packaging must be non-conductive.
– Make sure the battery cannot shift inside the packaging.
► Secure the packaging so that it cannot move.
The battery is subject to the requirements for the transport
of dangerous goods. The battery is classified as UN 3480
(lithium-ion batteries) and has been tested in accordance
with UN Manual of Tests and Criteria, Part III, sub-section
38.3.
For transport regulations see www.stihl.com/safety-data-
sheets
15 Storing
15.1 Storing the Trimmer
► Switch off the trimmer and remove the battery.
► Remove the spool.
► Observe the following points when storing the trimmer:
– The trimmer is out of the reach of children.
– The trimmer is clean and dry.
15.2 Storing the Battery
STIHL recommends that you store the battery with a charge
between 40 % and 60 % (2 LEDs glow green).
► Observe the following points when storing the battery:
– Battery is out of the reach of children.
– Battery is clean and dry.
– Battery is in an enclosed space.
– Store the battery separately from the trimmer and
charger.
– Battery is in non-conductive packaging.
– Battery is in a temperature range between -10°C and
+50°C.
15.3 Storing the Charger
► Unplug the mains plug from the socket.
► Remove the battery.
46
0458-713-9621-C

16 Cleaning
2
1
0000-GXX-0592-A0
► Roll up the connecting cord and attach it to the charger.
► The charger should be stored in such a way that the
following conditions are met:
– The charger is out of the reach of children.
– The charger is clean and dry.
– The charger is in an enclosed room.
– The charger is separate from the battery.
– The charger is not hung up by the connecting cord.
– The charger is stored at temperatures between + 5 °C
and + 40 °C.
English
16.3 Cleaning the Battery
► Clean the battery with a damp cloth.
16.4 Cleaning the Charger
► Disconnect the plug from the wall outlet.
► Clean the charger with a damp cloth.
► Clean the charger’s electrical contacts with a soft brush.
17 Maintenance and Repairs
17.1 Servicing and Repairing the Trimmer
The trimmer cannot be serviced or repaired by the user.
► If your trimmer has a malfunction or is damaged or
requires servicing: Contact your STIHL servicing dealer.
17.2 Servicing and Repairing the Battery
The battery requires no servicing and cannot be repaired.
► If the battery has a malfunction or is damaged: Replace
the battery.
16 Cleaning
16.1 Cleaning the Trimmer
► Switch off the trimmer and remove the battery.
► Clean the trimmer with a damp cloth.
► Remove foreign matter from the battery compartment and
clean the battery compartment with a damp cloth.
► Clean electrical contacts in the battery compartment with
a soft brush.
17.3 Servicing and Repairing the Charger
The charger requires no servicing and cannot be repaired.
► If the charger has a malfunction or is damaged: Replace
the charger.
► If the connecting cable has a malfunction or is damaged:
Do not use the charger and have connecting cable
replaced by a STIHL servicing dealer.
16.2 Cleaning the Deflector and Cutting Attachment
► Switch off the trimmer and remove the battery.
► Clean the deflector and cutting attachment with a damp
cloth or a soft brush.
0458-713-9621-C
47

English
18 Troubleshooting
18.1 Troubleshooting Trimmer or Battery
Condition LEDs on Battery Cause Remedy
Trimmer does not
start when switched
on.
Trimmer cuts out
during operation.
1 LED flashes
green
1 LED glows red. Battery too hot or too cold. ► Remove the battery.
3 LEDs flash red. There is a malfunction in
3 LEDs glow red Trimmer is too hot. ► Remove the battery.
4 LEDs flash red There is a malfunction in
3 LEDs glow red Trimmer is too hot. ► Remove the battery.
Battery has low charge ► Charge the battery.
► Allow battery to cool down / warm up.
► Remove the battery.
the trimmer.
the battery.
No electrical contact
between trimmer and
battery.
Trimmer or battery damp. ► Allow trimmer or battery to dry.
There is a electrical
malfunction.
► Clean contacts in battery compartment.
► Fit the battery.
► Switch on the trimmer:
► If 3 LEDs continue to flash red: Do not use your
trimmer and contact your STIHL servicing dealer.
► Allow trimmer to cool down.
► Remove battery and insert it again.
► Switch on the trimmer:
► If 4 LEDs continue to flash red: Do not use the
battery and contact your STIHL servicing dealer.
► Remove the battery.
► Clean contacts in battery compartment.
► Fit the battery.
► Allow trimmer to cool down.
► Remove battery and insert it again.
► Switch on the trimmer:
18 Troubleshooting
48
0458-713-9621-C

18 Troubleshooting
Condition LEDs on Battery Cause Remedy
Trimmer runtime is
too short.
Charge process does
not start when
battery is inserted in
the charger.
1 LED glows red. Battery too hot or too cold. ► Leave battery in the charger.
Battery not fully charged ► Fully charge the battery.
Normal battery life has
been exceeded.
► Replace the battery.
Charge process starts automatically as soon as
permissible temperature range is reached.
18.2 Troubleshooting Charger
Condition LED on Charger Cause Remedy
Battery not being
charged.
LED flashes red. No electrical contact
between charger and
battery.
Malfunction in charger. ► Do not use the charger and contact your STIHL
► Remove the battery.
► Clean contacts on charger.
► Fit the battery.
servicing dealer.
English
0458-713-9621-C
49

English
19 Specifications
19 Specifications
19.1 STIHL FSA 56 Trimmer:
– Approved battery: STIHL AK
– Weight without battery, cutting attachment and deflector:
2.1 kg
– Length without cutting attachment: 1470 mm to 1670 mm
19.2 STIHL AK Battery
– Battery technology: Lithium-ion
– Voltage: 36 V
– Capacity in Ah: see rating label
– Energy content in Wh: see rating label
– Weight in kg: see rating label
– Permissible temperature range for operation and storage:
-10°C to +50°C
19.3 Charger STIHL AL 101
– Rated voltage: see rating plate
– Frequency: see rating plate
– Rated power: see rating plate
– Charging current: see rating plate
– Permissible temperature range for use and storage:
+5°C to +40°C
– Sound pressure level L
EN 50636-2-91: 72 dB(A) K-value for noise pressure level
is 2 dB(A).
– Sound power level L
2-91: 86 dB(A) K-value for sound power level is 2 dB(A).
– Vibration measurement a
EN 50636-2-91; control handle and loop handle: 3.5 m/s²
K-value for vibration level is 2 m/s².
The vibration values quoted above have been measured
according to a standardized test procedure and may be used
to compare electric power tools. Depending on the type of
usage, the vibrations that actually occur may differ from the
values quoted. The vibration values quoted may be used for
an initial assessment of the user's exposure to vibrations.
The actual exposure to vibrations has to be estimated. This
process may also take into account times during which the
electric power tool is switched off and times during which it
is switched on but running off load.
measured according to
p
measured according to EN 50636-
w
measured according to
hv
19.5 REACH
REACH is an EC regulation and stands for the Registration,
Evaluation, Authorisation and Restriction of Chemical
substances.
For information on compliance with the REACH regulation
see www.stihl.com/reach.
20 Combinations of Cutting Attachments
and Deflectors
The charging times are indicated at www.stihl.com/
charging-times.
19.4 Noise and Vibration Data
STIHL recommends that you wear hearing protection.
50
20.1 STIHL FSA 56 Trimmer
The following mowing heads may be mounted together with
the deflector for mowing heads:
– AutoCut 2-2 mowing head with 1.6 mm diameter “round,
quiet” nylon line
Mowing head cannot be installed by the user.
0458-713-9621-C

21 Spare Parts and Accessories
English
► Have the required mowing head installed by a STIHL
servicing dealer.
21 Spare Parts and Accessories
21.1 Spare Parts and Accessories
These symbols identify original STIHL
replacement parts and original STIHL
accessories.
STIHL recommends the use of original STIHL replacement
parts and accessories.
Original STIHL replacement parts and original STIHL
accessories are available from STIHL servicing dealers.
22 Disposal
22.1 Disposal of Trimmer, Battery and Charger
Contact your STIHL servicing dealer for information on
disposal.
► Dispose of the trimmer, deflector, cutting attachment,
battery, charger, accessories and packaging in
accordance with local regulations and environmental
requirements.
– Category: Cordless electric trimmer
–Make: STIHL
– Model: FSA 56
– Serial identification: 4522
conforms to the relevant provisions of Directives 2011/65/
EU, 2006/42/EC, 2014/30/EU and 2000/14/EC and has
been developed and manufactured in compliance with the
following standards in the versions valid on the date of
production: EN 55014-1, EN 55014-2, EN 60335-1 and
EN ISO 12100 taking EN 50636-2- 91 into account.
The measured and guaranteed sound power levels were
determined according to Directive 2000/14/EC, Annex V.
Notified body involved: TÜV Rheinland Product Safety
GmbH, Am Grauen Stein, 51105 Cologne, Germany
– Measured sound power level: 86 dB(A)
– Guaranteed sound power level: 88 dB(A)
Technical documents are deposited at ANDREAS STIHL AG
& Co. KG Produktzulassung (Product Licensing).
The year of manufacture, country of manufacture and serial
number are applied to the trimmer.
Done at Waiblingen, 01.03.2017
ANDREAS STIHL AG & Co. KG
23 EC Declaration of Conformity
23.1 STIHL FSA 56 Trimmer
ANDREAS STIHL AG & Co. KG
Badstrasse 115
D-71336 Waiblingen
Germany
declare in exclusive responsibility that
0458-713-9621-C
Thomas Elsner, Director Product Management and Services
23.2 STIHL AL 101 Charger Conformity Notice
This charger has been manufactured and put on the market
in accordance with the following directives: 2014/35/EU,
2014/30/EU and 2011/65/EU.
The year of manufacture, country of manufacture and serial
number are applied to the blower.
51

English
The complete EC Declaration of Conformity is available from
ANDREAS STIHL AG & Co. KG, Badstrasse 115,
71336 Waiblingen, Germany.
23 EC Declaration of Conformity
52
0458-713-9621-C

Table des matières
français
1 Préface
. . . . . . . . . . . . . . . . . . . . . . . . . . . . . . . . . . . . . . . . . . . .
2 Informations concernant la présente Notice
d'emploi
2.1 Autres documents afférents
. . . . . . . . . . . . . . . . . . . . . . . . . . . . . . . . . . . . . . . . . . . .
. . . . . . . . . . . . . . . . . . . . . . . .
2.2 Marquage des avertissements dans le texte
2.3 Symboles employés dans le texte
3 Vue d'ensemble
. . . . . . . . . . . . . . . . . . . . . . . . . . . . . . . . . . . .
3.1 Débroussailleuse, batterie et chargeur
3.2 Outils de coupe
Traduction de la Notice d'emploi
d'origine
3.3 Symboles
4 Prescriptions de sécurité
4.1 Symboles d'avertissement
. . . . . . . . . . . . . . . . . . . . . . . . . . . . . . . . . . . .
. . . . . . . . . . . . . . . . . . . . . . . . . . . . . . . . . . . . . . . . . .
. . . . . . . . . . . . . . . . . . . . . . . . . . .
. . . . . . . . . . . . . . . . . . . . . . . . . .
4.2 Utilisation conforme à la destination prévue
4.3 Exigences posées à l'utilisateur
4.4 Vêtements et équipement
4.5 Aire de travail et voisinage
. . . . . . . . . . . . . . . . . . . . . . . . . .
. . . . . . . . . . . . . . . . . . . . . . . . .
4.6 Bon état pour une utilisation en toute sécurité
4.7 Utilisation
4.8 Recharge
4.9 Transport
4.10 Rangement
. . . . . . . . . . . . . . . . . . . . . . . . . . . . . . . . . . . . . . . . . .
. . . . . . . . . . . . . . . . . . . . . . . . . . . . . . . . . . . . . . . . . .
. . . . . . . . . . . . . . . . . . . . . . . . . . . . . . . . . . . . . . . . . .
. . . . . . . . . . . . . . . . . . . . . . . . . . . . . . . . . . . . . . . .
4.11 Nettoyage, maintenance et réparation
5 Préparatifs avant l'utilisateur de la
Imprimé sur papier blanchi sans chlore
L'encre d'imprimerie contient des huiles végétales, le papier
est recyclable.
débroussailleuse
. . . . . . . . . . . . . . . . . . . . . . . . . . . . . . . . . . .
5.1 Préparatifs avant l'utilisation de la
débroussailleuse
6 Recharge de la batterie et DEL
6.1 Recharge de la batterie
6.2 Affichage du niveau de charge
6.3 DEL sur la batterie
6.4 DEL sur le chargeur
. . . . . . . . . . . . . . . . . . . . . . . . . . . . . . . . . . .
. . . . . . . . . . . . . . . . . . . . .
. . . . . . . . . . . . . . . . . . . . . . . . . . . .
. . . . . . . . . . . . . . . . . . . . .
. . . . . . . . . . . . . . . . . . . . . . . . . . . . . . . . .
. . . . . . . . . . . . . . . . . . . . . . . . . . . . . . . .
7 Assemblage de la débroussailleuse
7.1 Montage du capot protecteur
7.2 Tête faucheuse AutoCut 2-2
. . . . . . . . . . . . . . . . . . . . . . .
. . . . . . . . . . . . . . . . . . . . . . . .
. . . . . . . .
. . . . . . . . . . . . . . . . . .
. . . . . . . . . . . . . .
. . . . . . . .
. . . . . . . . . . . . . . . . . . . .
. . . . . .
. . . . . . . . . . . . . .
. . . . . . . . . . . . . . . .
7.3 Montage de la poignée circulaire
54
. . . . . . . . . . . . . . . . . . .
8 Réglage de la débroussailleuse selon l'utilisateur
8.1 Réglage de la longueur du tube
54
8.2 Réglage de la poignée circulaire
54
9 Introduction et extraction de la batterie
55
9.1 Introduction de la batterie
55
9.2 Extraction de la batterie
55
10 Mise en marche et arrêt de la débroussailleuse
55
10.1 Mise en marche de la débroussailleuse
56
10.2 Arrêt de la débroussailleuse
56
11 Contrôle de la débroussailleuse et de la batterie
57
11.1 Contrôle des éléments de commande
57
11.2 Contrôle de la batterie
58
58
12 Travail avec la débroussailleuse
59
12.1 Prise en mains et utilisation de la
59
61
63
64
65
65
66
débroussailleuse
12.2 Fauchage
. . . . . . . . . . . . . . . . . . . . . . . . . . . . . . . . . . . . . . . . . .
12.3 Ajustage des fils de coupe
13 Après le travail
13.1 Après le travail
14 Transport
. . . . . . . . . . . . . . . . . . . . . . . . . . . . . . . . . . . . .
. . . . . . . . . . . . . . . . . . . . . . . . . . . . . . . . . . . . .
. . . . . . . . . . . . . . . . . . . . . . . . . . . . . . . . . . . . . . . . . .
. . . . . . . . . . . . . . . . . . . . . . . . . . . .
. . . . . . . . . . . . . . . . . . . . . . . . . . . . .
. . . . . . . . . . . . . . . . . . . . . . . . . . . . . . . . . . .
. . . . . . . . . . . . . . . . . . . .
. . . . . . . . . . . . . . . . . . .
. . . . . . . . . . . . . . . . . . . . . . . . . .
. . . . . . . . . . . . . . . . . . . . . . .
. . . . . . . . . . . . . . . . . . .
. . . . . . . . . . . . . . . . . . . . . . . . .
14.1 Transport de la débroussailleuse
14.2 Transport de la batterie
67
15 Rangement
67
15.1 Rangement de la débroussailleuse
15.2 Rangement de la batterie
67
15.3 Rangement du chargeur
67
68
16 Nettoyage
68
16.1 Nettoyage de la débroussailleuse
68
16.2 Nettoyage du capot protecteur et de l'outil de
68
68
69
coupe
16.3 Nettoyage de la batterie
16.4 Nettoyage du chargeur
. . . . . . . . . . . . . . . . . . . . . . . . . . . . . . . . . . . . . . . .
. . . . . . . . . . . . . . . . . . . . . . . . . . . . . . . . . . . . . . . . . .
. . . . . . . . . . . . . . . . . . . . . . . . . . . . . . . . . . . . . . . . . . . . . .
. . . . . . . . . . . . . . . . . . . . . . . . . . . .
. . . . . . . . . . . . . . . . . . . . . . . . . .
. . . . . . . . . . . . . . . . . . . . . . . . . . .
. . . . . . . . . . . . . . . . . . . . . . . . . . .
. . . . . . . . . . . . . . . . . . . . . . . . . . . . .
. . .
. . . . . . . . . . . . .
. . . .
. . . . . . . . . . . .
. . .
. . . . . . . . . . . . . .
. . . . . . . . . . . . . . . . . . .
. . . . . . . . . . . . . . . . .
. . . . . . . . . . . . . . . . . .
69
70
70
70
71
71
71
71
71
72
72
72
72
72
72
73
73
73
73
73
73
74
74
74
74
74
75
75
75
75
75
{
© ANDREAS STIHL AG & Co. KG 2017
0458-713-9621-C. VA1.H17.
0000008093_001_F
0458-713-9621-C
La présente Notice d'emploi est protégée par des droits d'auteur. Tous droits réservés, en particulier tout droit de copie, de traduction et de traitement avec des systèmes électroniques quelconques.
53

français
1 Préface
17 Maintenance et réparation
17.1 Maintenance et réparation de la
débroussailleuse
17.2 Maintenance et réparation de la batterie
17.3 Maintenance et réparation du chargeur
18 Dépannage
18.1 Élimination des dérangements de la
débroussailleuse ou de la batterie
18.2 Élimination des dérangements du chargeur
19 Caractéristiques techniques
19.1 Débroussailleuse STIHL FSA 56
19.2 Batterie STIHL AK
19.3 Chargeur STIHL AL 101
19.4 Niveaux sonores et taux de vibrations
19.5 REACH
20 Combinaisons d'outils de coupe et de capots
protecteurs
20.1 Débroussailleuse STIHL FSA 56
21 Pièces de rechange et accessoires
21.1 Pièces de rechange et accessoires
22 Mise au rebut
22.1 Mise au rebut de la débroussailleuse, de la
batterie et du chargeur
23 Déclaration de conformité UE
23.1 Débroussailleuse STIHL FSA 56
23.2 Remarque concernant la conformité du chargeur
STIHL AL 101
. . . . . . . . . . . . . . . . . . . . . . . . . . . . . . . . . . . . . . . . . . . .
. . . . . . . . . . . . . . . . . . . . . . . . . . . . . . . . . . .
. . . . . . . . . . . . . . . . . . . . . . . . . . . . . . . . . . . . . . . .
. . . . . . . . . . . . . . . . . . . . . . . . . . . . . . . . .
. . . . . . . . . . . . . . . . . . . . . . . . . . . . . . . . . . . . . . . . .
. . . . . . . . . . . . . . . . . . . . . . . . . . . . . . . . . . . . . .
. . . . . . . . . . . . . . . . . . . . . . . . . . . . . . . . . . . . . .
. . . . . . . . . . . . . . . . . . . . . . . . . .
. . . . . . . . . . .
. . . . . . . . . . . . .
. . . . . . . . . . . . . . . . . .
. . . . . . . .
. . . . . . . . . . . . . . . . . . . . . . . .
. . . . . . . . . . . . . . . . . . .
. . . . . . . . . . . . . . . . . . . . . . . . . . . .
. . . . . . . . . . . . . .
. . . . . . . . . . . . . . . . . . .
. . . . . . . . . . . . . . . . .
. . . . . . . . . . . . . . . . .
. . . . . . . . . . . . . . . . . . . . . . . . . . . . .
. . . . . . . . . . . . . . . . . . . . . .
. . . . . . . . . . . . . . . . . . .
75
1Préface
75
Chère cliente, cher client,
75
75
Nous sommes très heureux que vous ayez choisi un produit
STIHL. Dans le développement et la fabrication de nos
76
produits, nous mettons tout en œuvre pour garantir une
excellente qualité répondant aux besoins de nos clients.
76
Nos produits se distinguent par une grande fiabilité, même
77
en cas de sollicitations extrêmes.
78
STIHL garantit également la plus haute qualité au niveau du
78
service après-vente. Nos revendeurs spécialisés
78
fournissent des conseils compétents, aident nos clients à se
78
familiariser avec nos produits et assurent une assistance
78
technique complète.
78
Nous vous remercions de votre confiance et vous
souhaitons beaucoup de plaisir avec votre produit STIHL.
79
79
79
79
79
Dr. Nikolas Stihl
79
79
IMPORTANT ! LIRE CETTE NOTICE AVANT D'UTILISER
79
CE PRODUIT ET LA CONSERVER PRÉCIEUSEMENT.
80
2 Informations concernant la présente
Notice d'emploi
54
2.1 Autres documents afférents
Les prescriptions de sécurité locales doivent être
respectées.
► En plus de la présente Notice d'emploi, il faut lire, bien
comprendre et conserver les documents suivants :
0458-713-9621-C

3 Vue d'ensemble
français
– Consignes de sécurité concernant la batterie STIHL AK
– Information de sécurité concernant les batteries STIHL
et les produits à batterie intégrée : www.stihl.com/
safety-data-sheets
2.2 Marquage des avertissements dans le texte
AVERTISSEMENT
Attire l'attention sur des dangers qui peuvent causer des
blessures graves, voire mortelles.
► Les mesures indiquées peuvent éviter des blessures
graves, voire mortelles.
AVIS
Attire l'attention sur des dangers pouvant causer des dégâts
matériels.
► Les mesures indiquées peuvent éviter des dégâts
matériels.
2.3 Symboles employés dans le texte
Ce symbole renvoie à un chapitre de la présente Notice
d'emploi.
3 Vue d'ensemble
3.1 Débroussailleuse, batterie et chargeur
1
2
14
8
12
#
15
16
9
10
#
3
5
11
6
4
7
13
#
17
0000-GXX-1482-A2
0458-713-9621-C
1 Logement pour batterie
Logement dans lequel on introduit la batterie.
2 Levier de verrouillage
Le levier de verrouillage immobilise la batterie dans le
logement pour batterie.
3 Poignée de commande
La poignée de commande sert à commander, tenir et
mener la débroussailleuse.
4 Gâchette de commande
La gâchette de commande met la débroussailleuse en
marche et l'arrête.
55

français
3 Vue d'ensemble
5 Blocage de gâchette de commande
Le blocage de gâchette de commande déverrouille la
gâchette de commande.
6 Bouton de verrouillage
Le bouton de verrouillage bloque le mécanisme de
réglage en longueur du tube.
7Écrou étoile
L'écrou étoile immobilise la poignée circulaire sur le
tube.
8 Poignée circulaire
La poignée circulaire sert à tenir et mener la
débroussailleuse.
9Tube
Le tube relie les différents composants.
10 DEL
La diode électroluminescente (DEL) indique l'état du
chargeur.
11 Pièce d'écartement
La pièce d'écartement évite que l'outil de coupe entre en
contact avec des objets et risque de les endommager.
12 Fiche de branchement sur le secteur
La fiche de branchement sur le secteur relie le cordon
d'alimentation électrique avec une prise de courant.
13 Cordon d'alimentation électrique
Le cordon d'alimentation électrique relie le chargeur
avec la fiche de branchement sur le secteur.
14 Chargeur
Le chargeur recharge la batterie.
15 Batterie
La batterie fournit à la débroussailleuse l'énergie
nécessaire au fonctionnement.
16 DEL
Des diodes électroluminescentes (DEL) indiquent le
niveau de charge de la batterie et signalent des
dérangements.
17 Touche
La touche active les DEL qui se trouvent sur la batterie.
# Plaque signalétique avec numéro de machine
3.2 Outils de coupe
1
2
4
3
1 Capot protecteur
Le capot protecteur protège l'utilisateur contre les objets
projetés par l'outil de coupe et contre le risque de contact
avec l'outil de coupe.
2 Couteau rogneur
Au cours du travail, le couteau rogneur rogne les fils de
coupe de telle sorte qu'ils ne dépassent pas la longueur
correcte.
3 Tête faucheuse
La tête faucheuse porte les fils de coupe.
4 Fils de coupe
Les fils de coupe coupent l'herbe.
3.3 Symboles
Les symboles d'avertissement appliqués sur la
débroussailleuse, la batterie et le chargeur ont les
significations suivantes :
Ce symbole indique la vitesse nominale de l'outil de
coupe.
0000-GXX-1483-A0
56
0458-713-9621-C

4 Prescriptions de sécurité
A
français
1 DEL est allumée de couleur rouge. La batterie
est trop chaude ou trop froide.
4 DEL clignotent de couleur rouge. Il y a un
dérangement dans la batterie.
La DEL est allumée de couleur verte et les DEL
de la batterie sont allumées ou clignotent de
couleur verte. La recharge de la batterie est en
cours.
La DEL clignote de couleur rouge. Il n'y a pas de
contact électrique entre la batterie et le chargeur
ou bien il y a un dérangement dans la batterie ou
dans le chargeur.
Niveau de puissance acoustique garanti selon la
L
W
directive 2000/14/CE, en dB(A), pour permettre
la comparaison des émissions sonores de
différents produits.
Le chiffre situé à côté du symbole indique la capacité
énergétique de la batterie suivant la spécification du
fabricant des cellules. À l'utilisation pratique, la
capacité énergétique réellement disponible est
inférieure.
Utiliser l'appareil électrique dans un local fermé et
sec.
4 Prescriptions de sécurité
4.1 Symboles d'avertissement
Les symboles d'avertissement appliqués sur la
débroussailleuse, la batterie et le chargeur ont les
significations suivantes :
Respecter les consignes de sécurité et les
mesures à prendre.
Il est nécessaire de lire, de bien comprendre et
de conserver précieusement cette Notice
d'emploi.
Porter des lunettes de protection.
Respecter les consignes de sécurité concernant
la projection d'objets et les mesures à prendre.
Retirer la batterie pour les pauses de travail, le
transport, le rangement, la maintenance ou la
réparation de la machine.
Ne pas jeter ce produit à la poubelle.
0458-713-9621-C
Préserver la débroussailleuse et le chargeur de
la pluie et de l'humidité.
15m (50ft)
Respecter la distance de sécurité
indiquée.
57

français
4 Prescriptions de sécurité
Préserver la batterie de la chaleur et du feu.
Préserver la batterie de la pluie et de l'humidité,
et ne pas la plonger dans un liquide quelconque.
Respecter la plage de températures admissibles
pour la batterie.
4.2 Utilisation conforme à la destination prévue
La débroussailleuse STIHL FSA 56 sert au fauchage de
l'herbe.
Le débroussailleuse ne doit pas être utilisée sous la pluie.
La batterie STIHL AK fournit à la débroussailleuse l'énergie
nécessaire au fonctionnement.
Le chargeur STIHL AL 101 recharge la batterie STIHL AK.
AVERTISSEMENT
■ L'utilisation de batteries et de chargeurs qui ne sont pas
autorisés par STIHL pour cette débroussailleuse risque de
causer des incendies et des explosions. Cela peut causer
des dégâts matériels et des personnes risquent de subir
des blessures très graves, voire mortelles.
► Utiliser la débroussailleuse avec une batterie
STIHL AK.
►Recharger la batterie STIHL AK avec un
chargeur STIHL AL 101, AL 300 ou
AL 500.
■ Si la débroussailleuse, la batterie ou le chargeur n'est pas
utilisé conformément à la destination prévue, cela peut
causer des dégâts matériels et des personnes risquent de
subir des blessures très graves, voire mortelles.
► Utiliser la débroussailleuse, la batterie et le chargeur
comme décrit dans cette Notice d'emploi.
4.3 Exigences posées à l'utilisateur
AVERTISSEMENT
■ Les personnes qui n'ont pas reçu de formation adéquate
ne peuvent pas reconnaître ou évaluer les dangers de la
débroussailleuse, de la batterie et du chargeur.
L'utilisateur ou d'autres personnes risquent de subir des
blessures graves, voire mortelles.
► Il est nécessaire de lire, de bien comprendre
et de conserver précieusement cette Notice
d'emploi.
► Si l'on confie la débroussailleuse, la batterie ou le
chargeur à une autre personne : il faut y joindre la
Notice d'emploi.
► Au moindre doute : consulter un revendeur spécialisé
STIHL.
► S'assurer que l'utilisateur remplit les conditions
suivantes :
– L'utilisateur est reposé.
– L'utilisateur doit disposer de toute son
intégrité physique, sensorielle et
mentale pour être capable d'utiliser
correctement la débroussailleuse, la
batterie et le chargeur et de travailler
avec la débroussailleuse. Si l'utilisateur
ne dispose pas de toute l'intégrité
physique, sensorielle et mentale
requise, il ne doit travailler avec cet
équipement que sous la surveillance
d'une personne responsable ou après
58
0458-713-9621-C

4 Prescriptions de sécurité
français
avoir reçu, de cette personne
responsable, toutes les instructions
nécessaires.
– L'utilisateur est majeur.
– Avant de travailler pour la première fois
avec la débroussailleuse et d'utiliser le
chargeur pour la première fois,
l'utilisateur a reçu les instructions
nécessaires, du revendeur spécialisé
STIHL ou d'une autre personne
compétente.
– L'utilisateur ne se trouve pas sous l'influence de
l'alcool, de drogues ou de médicaments.
4.4 Vêtements et équipement
AVERTISSEMENT
■ Au cours du travail, des objets peuvent être soulevés et
projetés à haute vitesse. L'utilisateur risque d'être blessé.
► Porter des lunettes de protection couvrant
étroitement les yeux. Des lunettes de
protection appropriées sont testées suivant
la norme EN 166 ou suivant les
prescriptions nationales spécifiques et
vendues dans le commerce avec le
marquage respectif.
► Porter une visière pour se protéger le visage.
► Porter un pantalon long en matière résistante.
■ Au cours du travail, de la poussière peut être soulevée. La
poussière inhalée peut nuire aux voies respiratoires et
déclencher des réactions allergiques.
► Porter un masque antipoussière.
■ Des vêtements mal appropriés risquent de se prendre
dans le bois, les broussailles ou la débroussailleuse. Les
utilisateurs qui ne portent pas de vêtements appropriés
risquent d'être grièvement blessés.
► Porter des vêtements de coupe assez étroite.
► Ne porter ni châle, ni bijoux.
■ Au cours du travail, l'utilisateur peut entrer en contact
avec l'outil de coupe en rotation. L'utilisateur risque alors
de subir des blessures graves.
► Porter des chaussures en matière résistante.
► Porter un pantalon long en matière résistante.
■ Au cours du nettoyage ou de la maintenance, l'utilisateur
peut entrer en contact avec l'outil de coupe ou avec le
couteau rogneur. L'utilisateur risque d'être blessé.
► Porter des gants de travail en matière résistante.
■ Si l'utilisateur porte des chaussures mal appropriées, il
risque de déraper. L'utilisateur risque d'être blessé.
► Porter des chaussures fermées, robustes et à semelle
crantée antidérapante.
4.5 Aire de travail et voisinage
4.5.1 Débroussailleuse
AVERTISSEMENT
■ Des passants, des enfants et des animaux ne peuvent pas
reconnaître et évaluer les dangers de la débroussailleuse
et des objets soulevés et projetés par la débroussailleuse.
Des passants, des enfants ou des animaux risquent d'être
grièvement blessés.
0458-713-9621-C
59

français
15m (50ft)
4 Prescriptions de sécurité
► Veiller à ce que les passants, les enfants et
les animaux respectent une distance de
sécurité de 15 m tout autour de l'aire de
travail.
► Toujours respecter une distance de 15 m par rapport à
tout objet.
■ La débroussailleuse n'est pas protégée contre l'eau. Si
l'on travaille sous la pluie ou dans une atmosphère
humide, un choc électrique peut se produire. L'utilisateur
risque de subir des blessures et la débroussailleuse
risque d'être endommagée.
► Ne pas travailler sous la pluie ou dans une
atmosphère humide.
■ Le moteur électrique de la débroussailleuse peut produire
des étincelles. Dans un environnement présentant des
risques d'explosion ou à proximité de matières facilement
inflammables, les étincelles peuvent causer des incendies
ou des explosions. Cela peut causer des dégâts matériels
et des personnes risquent de subir des blessures très
graves, voire mortelles.
► Ne pas travailler dans un environnement présentant des
risques d'explosion ou à proximité de matières
facilement inflammables.
4.5.2 Batterie
AVERTISSEMENT
■ Les enfants ne peuvent pas reconnaître et évaluer les
dangers de la batterie. Les enfants risquent d'être
grièvement blessés.
► Veiller à ce que des enfants ne s'approchent pas.
■ La batterie n'est pas protégée contre toutes les influences
de l'environnement. Si la batterie est exposée à certaines
influences de l'environnement, la batterie risque de
prendre feu ou d'exploser. Cela peut causer des dégâts
matériels et des personnes risquent d'être grièvement
blessées.
► Préserver la batterie de la chaleur et du feu.
► Ne jamais jeter la batterie au feu.
► Utiliser et ranger la batterie dans la plage de
températures de - 10 °C à + 50 °C.
► Préserver la batterie de la pluie et de
l'humidité, et ne pas la plonger dans un
liquide quelconque.
► Tenir la batterie à l'écart de tout objet métallique.
► Ne pas soumettre la batterie à une forte pression.
► Ne pas exposer la batterie aux micro-ondes.
► Tenir la batterie à l'écart des produits chimiques et des
sels.
4.5.3 Chargeur
AVERTISSEMENT
■ Les enfants ne peuvent pas reconnaître et évaluer les
dangers du chargeur et du courant électrique. Les enfants
risquent de subir des blessures graves, voire mortelles.
►Veiller à ce que des enfants ne
s'approchent pas.
■ Le chargeur n'est pas protégé contre l'eau. Si l'on travaille
sous la pluie ou dans une atmosphère humide, un choc
électrique peut se produire. L'utilisateur risque de subir
des blessures et le chargeur risque d'être endommagé.
► Ne pas l'utiliser sous la pluie ou dans une
atmosphère humide.
■ Le chargeur n'est pas protégé contre toutes les influences
de l'environnement. Si le chargeur est exposé à certaines
influences de l'environnement, le chargeur risque de
60
0458-713-9621-C

4 Prescriptions de sécurité
français
prendre feu ou d'exploser. Cela peut causer des dégâts
matériels et des personnes risquent d'être grièvement
blessées.
► Utiliser le chargeur dans un local fermé et sec.
► Ne pas faire fonctionner le chargeur dans un
environnement présentant des risques d'explosion ou à
proximité de matières facilement inflammables.
► Ne pas faire fonctionner le chargeur sur une surface
facilement inflammable.
► Utiliser et ranger le chargeur dans la plage de
températures de + 5 °C à + 40 °C.
■ Des personnes risquent de trébucher sur le cordon
d'alimentation électrique. Des personnes pourraient se
blesser et le chargeur pourrait être endommagé.
► Poser le cordon d'alimentation électrique bien à plat sur
le sol.
4.6 Bon état pour une utilisation en toute sécurité
4.6.1 Débroussailleuse La débroussailleuse se trouve en bon état pour une
utilisation en toute sécurité si les conditions suivantes sont
remplies :
– La débroussailleuse ne présente aucun
endommagement.
– La débroussailleuse est propre et sèche.
– Les éléments de commande fonctionnent et n'ont subi
aucune modification.
– Une combinaison d'outil de coupe et de capot protecteur
indiquée dans la présente Notice d'emploi est montée.
– L'outil de coupe et le capot protecteur sont montés
correctement.
– Seuls des accessoires d'origine STIHL destinés à cette
débroussailleuse sont montés.
– Les accessoires sont montés correctement.
AVERTISSEMENT
■ Si l'état impeccable requis pour la sécurité n'est pas
garanti, il est possible que des composants ne
fonctionnent plus correctement et que des dispositifs de
sécurité soient mis hors service. Des personnes risquent
de subir des blessures graves, voire mortelles.
► Ne travailler qu'avec une débroussailleuse qui ne
présente aucun endommagement.
► Si la débroussailleuse est encrassée ou mouillée :
nettoyer la débroussailleuse et la faire sécher.
► N'apporter aucune modification à la débroussailleuse.
Exception : montage d'une combinaison d'outil de
coupe et de capot protecteur indiquée dans la présente
Notice d'emploi.
► Si les éléments de commande ne fonctionnent pas : ne
pas travailler avec la débroussailleuse.
► Ne pas monter d'outils de coupe métalliques.
► Ne monter que des accessoires d'origine STIHL
destinés à cette débroussailleuse.
► Monter l'outil de coupe et le capot protecteur comme
décrit dans la présente Notice d'emploi.
► Monter les accessoires comme décrit dans la présente
Notice d'emploi ou dans la Notice d'emploi de
l'accessoire respectif.
► N'introduire aucun objet dans les orifices de la
débroussailleuse.
► Au moindre doute : consulter un revendeur spécialisé
STIHL.
4.6.2 Capot protecteur
Le capot protecteur se trouve en bon état pour une
utilisation en toute sécurité si les conditions suivantes sont
remplies :
– Le capot protecteur ne présente aucun endommagement.
– Le couteau rogneur est monté correctement.
0458-713-9621-C
61

français
4 Prescriptions de sécurité
AVERTISSEMENT
■ Si l'état impeccable requis pour la sécurité n'est pas
garanti, il est possible que des composants ne
fonctionnent plus correctement et que des dispositifs de
sécurité soient mis hors service. L'utilisateur pourrait alors
subir des blessures graves.
► Travailler uniquement avec un capot protecteur qui ne
présente aucun endommagement.
► Ne pas travailler avec un couteau rogneur pas
correctement monté.
► Au moindre doute : consulter un revendeur spécialisé
STIHL.
4.6.3 Tête faucheuse
La tête faucheuse se trouve en bon état pour une utilisation
en toute sécurité si les conditions suivantes sont remplies :
– La tête faucheuse ne présente aucun endommagement.
– La tête faucheuse n'est pas bloquée.
– Les fils de coupe sont montés correctement.
AVERTISSEMENT
■ Si l'état impeccable requis pour la sécurité n'est pas
garanti, il est possible que des composants de la tête
faucheuse ou des morceaux de fil de coupe se détachent
et soient projetés au loin. Des personnes risquent d'être
grièvement blessées.
► Ne travailler qu'avec une tête faucheuse qui ne
présente aucun endommagement.
► Ne pas remplacer les fils de coupe par des objets
métalliques.
► Au moindre doute : consulter un revendeur spécialisé
STIHL.
– La batterie est propre et sèche.
– La batterie fonctionne et n'a subi aucune modification.
AVERTISSEMENT
■ Si la batterie n'est pas dans l'état impeccable requis pour
la sécurité, elle ne peut plus fonctionner correctement.
Des personnes risquent d'être grièvement blessées.
► Ne travailler qu'avec une batterie qui ne présente aucun
endommagement et fonctionne correctement.
► Ne pas recharger une batterie endommagée ou
défectueuse.
► Si la batterie est encrassée ou mouillée : nettoyer la
batterie et la faire sécher.
► N'apporter aucune modification à la batterie.
► N'introduire aucun objet dans les orifices de la batterie.
► Ne pas court-circuiter les contacts de la batterie avec
des objets métalliques.
► Ne pas ouvrir la batterie.
■ En cas d'endommagement de la batterie, du liquide peut
s'écouler. Si le liquide entre en contact avec la peau ou les
yeux, il peut causer une irritation de la peau ou des yeux.
► Éviter tout contact avec ce liquide.
► En cas de contact accidentel avec la peau : les surfaces
de la peau touchées doivent être savonnées et lavées à
grande eau.
► En cas de contact accidentel avec les yeux : se rincer
les yeux à grande eau pendant au moins 15 minutes et
consulter un médecin.
4.6.4 Batterie
La batterie se trouve en bon état pour une utilisation en toute
sécurité si les conditions suivantes sont remplies :
– La batterie ne présente aucun endommagement.
62
0458-713-9621-C

4 Prescriptions de sécurité
français
■ Une batterie endommagée ou défectueuse peut dégager
une odeur inhabituelle ou de la fumée, ou s'enflammer.
Cela peut causer des dégâts matériels et des personnes
risquent de subir des blessures très graves, voire
mortelles.
► Si la batterie dégage une odeur inhabituelle ou de la
fumée : ne pas utiliser la batterie, la tenir à l'écart de
toute matière inflammable.
► Si la batterie brûle : essayer d'éteindre la batterie avec
un extincteur ou de l'eau.
4.6.5 Chargeur
Le chargeur se trouve en bon état pour une utilisation en
toute sécurité si les conditions suivantes sont remplies :
– Le chargeur ne présente aucun endommagement.
– Le chargeur est propre et sec.
AVERTISSEMENT
■ Si l'état impeccable requis pour la sécurité n'est pas
garanti, il est possible que des composants ne
fonctionnent plus correctement et que des dispositifs de
sécurité soient mis hors service. Des personnes risquent
alors de subir des blessures graves, voire mortelles.
► N'utiliser le chargeur que s'il ne présente aucun
endommagement.
► Si le chargeur est encrassé ou mouillé : nettoyer le
chargeur et le faire sécher.
► N'apporter aucune modification au chargeur.
► N'introduire aucun objet dans les orifices du chargeur.
►Ne pas court-circuiter les contacts du
chargeur avec des objets métalliques.
► Ne pas ouvrir le chargeur.
4.7 Utilisation
AVERTISSEMENT
■ Dans certaines situations, l'utilisateur ne peut plus
travailler avec la concentration nécessaire. L'utilisateur
risque alors de trébucher, de tomber et de subir des
blessures graves.
► Travailler calmement et de façon réfléchie.
► Si les conditions d'éclairage et de visibilité sont
mauvaises : ne pas travailler avec la débroussailleuse.
► La débroussailleuse ne doit être maniée que par une
seule personne.
► Mener l'outil de coupe à proximité du sol.
► Faire attention aux obstacles.
► Travailler en se tenant debout sur le sol et veiller à ne
pas risquer de perdre l'équilibre.
► Si l'on constate des signes de fatigue : faire une pause.
■ L'outil de coupe en rotation risque de couper l'utilisateur.
L'utilisateur risque alors de subir des blessures graves.
► Ne pas toucher à l'outil de coupe en rotation.
► Si l'outil de coupe est bloqué par un objet quelconque :
arrêter la débroussailleuse et retirer la batterie. Enlever
seulement ensuite l'objet coincé.
■ Si, au cours du travail, l'on constate un changement d'état
ou un comportement inhabituel de la débroussailleuse, il
est possible que la débroussailleuse ne soit plus dans
l'état requis pour une utilisation en toute sécurité. Cela
peut causer des dégâts matériels et des personnes
risquent d'être grièvement blessées.
► Arrêter le travail, retirer la batterie et consulter un
revendeur spécialisé STIHL.
■ Au cours du travail, la débroussailleuse peut produire des
vibrations.
► Porter des gants.
► Faire des pauses.
0458-713-9621-C
63

français
4 Prescriptions de sécurité
► Si l'on constate des symptômes qui pourraient signaler
une perturbation de l'irrigation sanguine des mains :
consulter un médecin.
■ Lorsqu'on relâche la gâchette de commande, l'outil de
coupe continue de tourner pendant quelques instants.
Des personnes risquent d'être grièvement blessées.
► Attendre que l'outil de coupe ne tourne plus.
4.8 Recharge
AVERTISSEMENT
Un contact avec des composants sous tension peut se
produire dans les cas suivants :
– Le cordon d'alimentation électrique est endommagé.
– La fiche du cordon d'alimentation électrique est
endommagée.
– La prise de courant n'est pas correctement installée.
■ Un contact avec des composants sous tension peut
causer une électrocution. L'utilisateur peut alors subir des
blessures graves, voire mortelles.
► S'assurer que le cordon d'alimentation électrique et sa
fiche ne sont pas endommagés.
► Introduire la fiche dans une prise de courant installée
correctement.
■ Au cours de la recharge, une tension ou une fréquence
incorrecte du secteur peut produire une surtension dans le
chargeur. Cela risquerait d'endommager le chargeur.
► S'assurer que la tension et la fréquence du secteur
d'alimentation électrique correspondent aux indications
de la plaque signalétique du chargeur.
■ Au cours de la recharge, un chargeur endommagé ou
défectueux peut dégager une odeur inhabituelle ou de la
fumée. Cela peut causer des dégâts matériels et des
personnes risquent d'être blessées.
► Débrancher la fiche de la prise de courant.
■ Une dissipation de chaleur insuffisante peut entraîner une
surchauffe du chargeur et risque de causer un incendie.
Cela peut causer des dégâts matériels et des personnes
risquent de subir des blessures très graves, voire
mortelles.
► Ne pas recouvrir le chargeur.
■ Si plusieurs chargeurs sont branchés sur la même prise
de courant, au cours de la recharge, des câbles
électriques peuvent être soumis à des surcharges. Les
câbles électriques peuvent chauffer et causer un incendie.
Cela peut causer des dégâts matériels et des personnes
risquent de subir des blessures très graves, voire
mortelles.
► Ne brancher qu'un seul chargeur sur une prise de
courant.
► Ne pas brancher le chargeur sur une prise de courant
multiple.
■ Si des câbles électriques ou des conduites sont posés
dans le mur, on risque de les endommager en fixant le
chargeur au mur. Un contact avec des câbles électriques
64
0458-713-9621-C

4 Prescriptions de sécurité
français
peut causer un choc électrique. Cela peut causer des
dégâts matériels et des personnes risquent d'être
grièvement blessées.
► S'assurer qu'il n'y a pas de câbles électriques, ni de
conduites dans le mur, à l'endroit prévu pour la fixation.
■ Si le chargeur n'est pas fixé au mur comme décrit dans la
présente Notice d'emploi, le chargeur ou la batterie risque
de tomber, ou bien le chargeur risque de trop chauffer.
Cela peut causer des dégâts matériels et des personnes
risquent d'être blessées.
► Fixer le chargeur au mur comme décrit dans la présente
Notice d'emploi.
■ Si l'on fixe le chargeur au mur après avoir introduit une
batterie, la batterie risque de tomber du chargeur. Cela
peut causer des dégâts matériels et des personnes
risquent d'être blessées.
► C'est pourquoi il faut tout d'abord fixer le chargeur au
mur et introduire ensuite la batterie.
4.9 Transport
4.9.1 Débroussailleuse
AVERTISSEMENT
■ Au cours du transport, la débroussailleuse risque de se
renverser ou de se déplacer. Cela peut causer des dégâts
matériels et des personnes risquent d'être blessées.
► Retirer la batterie.
4.9.2 Batterie
AVERTISSEMENT
■ La batterie n'est pas protégée contre toutes les influences
de l'environnement. Si la batterie est exposée à certaines
influences de l'environnement, elle risque d'être
endommagée et cela peut causer des dégâts matériels.
► Ne pas transporter une batterie endommagée.
► Transporter la batterie dans un emballage non-
conducteur d'électricité.
■ Au cours du transport, la batterie risque de se renverser
ou de se déplacer. Cela peut causer des dégâts matériels
et des personnes risquent d'être blessées.
► Immobiliser la batterie dans l'emballage de telle sorte
qu'elle ne puisse pas se déplacer.
► Assurer l'emballage de telle sorte qu'il ne puisse pas se
déplacer.
4.10 Rangement
4.10.1 Débroussailleuse
AVERTISSEMENT
■ Les enfants ne peuvent pas reconnaître et évaluer les
dangers de la débroussailleuse. Les enfants risquent
d'être grièvement blessés.
► Retirer la batterie.
► Assurer la débroussailleuse de telle sorte qu'elle ne
puisse pas se renverser ou se déplacer.
0458-713-9621-C
► Conserver la débroussailleuse hors de portée des
enfants.
■ L'humidité risque d'entraîner une corrosion des contacts
électriques de la débroussailleuse et des composants
métalliques. Cela risque d'endommager la
débroussailleuse.
65

français
4 Prescriptions de sécurité
► Retirer la batterie.
► Conserver la débroussailleuse au propre et au sec.
4.10.2 Batterie
AVERTISSEMENT
■ Les enfants ne peuvent pas reconnaître et évaluer les
dangers de la batterie. Les enfants risquent d'être
grièvement blessés.
► Conserver la batterie hors de portée des enfants.
■ La batterie n'est pas protégée contre toutes les influences
de l'environnement. Si la batterie est exposée à certaines
influences de l'environnement, elle risque d'être
endommagée.
► Conserver la batterie au propre et au sec.
► Conserver la batterie dans un local fermé.
► Conserver la batterie séparément de la
débroussailleuse et du chargeur.
► Conserver la batterie dans un emballage non-
conducteur d'électricité.
► Conserver la batterie dans la plage de températures de
-10°C à +50°C.
4.10.3 Chargeur
AVERTISSEMENT
■ Les enfants ne peuvent pas reconnaître et évaluer les
dangers d'un chargeur. Les enfants risquent de subir des
blessures graves, voire mortelles.
► Retirer la batterie.
► Conserver le chargeur hors de portée des enfants.
■ Le chargeur n'est pas protégé contre toutes les influences
de l'environnement. Si le chargeur est exposé à certaines
influences de l'environnement, le chargeur risque d'être
endommagé.
► Retirer la batterie.
► Si le chargeur est chaud : laisser le chargeur refroidir.
►Conserver le chargeur au propre et au
sec.
►Conserver le chargeur dans un local
fermé.
► Utiliser le chargeur dans la plage de températures de
+ 5 °C à + 40 °C.
■ Le cordon d'alimentation électrique n'est pas prévu pour
porter ou suspendre le chargeur. Le cordon d'alimentation
électrique et le chargeur risqueraient d'être endommagés.
► Saisir et tenir le chargeur par le boîtier. Pour faciliter la
prise en main du chargeur, un creux faisant office de
poignée est moulé dans le chargeur.
► Suspendre le chargeur au support mural.
4.11 Nettoyage, maintenance et réparation
AVERTISSEMENT
■ Si l'on ne retire pas la batterie avant le nettoyage, la
maintenance ou la réparation, la débroussailleuse risque
d'être mise en marche par mégarde. Cela peut causer des
dégâts matériels et des personnes risquent d'être
grièvement blessées.
► Retirer la batterie.
■ Des détergents agressifs, un nettoyeur haute pression ou
des objets pointus peuvent endommager la
débroussailleuse, le capot protecteur, l'outil de coupe, la
batterie et le chargeur. Si la débroussailleuse, le capot
protecteur, l'outil de coupe, la batterie ou le chargeur ne
sont pas correctement nettoyés, il est possible que des
66
0458-713-9621-C

5 Préparatifs avant l'utilisateur de la débroussailleuse
français
composants ne fonctionnent plus correctement et que des
dispositifs de sécurité soient mis hors service. Des
personnes risquent d'être grièvement blessées.
► Nettoyer la débroussailleuse, le capot protecteur, l'outil
de coupe, la batterie et le chargeur comme décrit dans
la présente Notice d'emploi.
■ Si l'utilisateur procède lui-même à la maintenance ou à la
réparation de la débroussailleuse, du capot protecteur, de
l'outil de coupe, de la batterie et du chargeur, il est
possible que des composants ne fonctionnent plus
correctement et que des dispositifs de sécurité soient mis
hors service. Des personnes risquent alors de subir des
blessures graves, voire mortelles.
► Ne pas effectuer soi-même la maintenance ou la
réparation de la débroussailleuse, du capot protecteur,
de l'outil de coupe, de la batterie et du chargeur.
► Si une maintenance ou une réparation de la
débroussailleuse, du capot protecteur, de l'outil de
coupe, de la batterie ou du chargeur s'avère
nécessaire : consulter un revendeur spécialisé STIHL.
5 Préparatifs avant l'utilisateur de la
débroussailleuse
5.1 Préparatifs avant l'utilisation de la débroussailleuse
Chaque fois, avant de commencer le travail, il faut effectuer
les opérations suivantes :
► S'assurer que les composants suivants se trouvent dans
l'état impeccable requis pour la sécurité :
– Débroussailleuse, @ 4.6.1.
– Capot protecteur, @ 4.6.2.
– Tête faucheuse, @ 4.6.3.
– Batterie, @ 4.6.4.
– Chargeur, @ 4.6.5.
► Contrôler la batterie, @ 11.2.
► Recharger complètement la batterie, @ 6.1.
► Nettoyer la débroussailleuse, @ 16.1.
► Monter le capot protecteur, @ 7.1.
► Monter la bobine, @ 7.2.1.
► Monter la poignée circulaire, @ 7.3.
► Régler la longueur du tube, @ 8.1.
► Régler la poignée circulaire, @ 8.2.
► Contrôler les éléments de commande, @ 11.1.
► Si au cours du contrôle des éléments de commande
3 DEL clignotent de couleur rouge : retirer la batterie et
consulter un revendeur spécialisé STIHL.
Il y a un dérangement dans la débroussailleuse.
► Si ces opérations ne peuvent pas être exécutées : ne pas
utiliser la débroussailleuse, mais consulter un revendeur
spécialisé STIHL.
6 Recharge de la batterie et DEL
6.1 Recharge de la batterie
Le temps de recharge dépend de différents facteurs, par ex.
de la température de la batterie ou de la température
ambiante. Le temps de recharge réel peut donc différer du
temps de recharge indiqué dans la documentation. Pour le
temps de recharge, voir www.stihl.com/charging-times.
Lorsque la fiche secteur est branchée sur
une prise de courant et que l'on introduit la
batterie dans le chargeur, la recharge
démarre automatiquement. Une fois que la
batterie est rechargée à fond, le chargeur
s'éteint automatiquement.
Au cours de la recharge, la batterie et le chargeur se
réchauffent.
0458-713-9621-C
67

français
7
6
5
3
2
4
1
0000-GXX-0628-A0
1
0000-GXX-0629-A0
20-40%
40-60%
60-80%
80-100%
0-20%
► Introduire la fiche (6) dans une prise de courant (7)
aisément accessible.
Le chargeur (3) effectue un autotest. La DEL (4) s'allume
env. 1 seconde de couleur verte et env. 1 seconde de
couleur rouge.
► Poser le cordon d'alimentation électrique (5).
► Engager la batterie (2) dans les pièces de guidage du
chargeur (3) et l'enfoncer jusqu'en butée.
La DEL (4) est allumée de couleur verte. Les DEL (1) sont
allumées de couleur verte et la batterie (2) se recharge.
► Une fois que la DEL (4) et les DEL (1) ne sont plus
allumées : retirer la fiche (6) de la prise de courant (7).
La batterie est complètement rechargée.
► Retirer la batterie (2).
6.2 Affichage du niveau de charge
7 Assemblage de la débroussailleuse
► Enfoncer la touche (1).
Les diodes électroluminescentes (DEL) s'allument de
couleur verte pendant env. 5 secondes et indiquent le
niveau de charge actuel.
► Si la DEL droite clignote de couleur verte : recharger la
batterie.
6.3 DEL sur la batterie
Les diodes électroluminescentes (DEL) peuvent indiquer le
niveau de charge de la batterie ou signaler des
dérangements. Les DEL peuvent être allumées
continuellement ou clignoter de couleur verte ou rouge.
Si les DEL sont allumées ou clignotent de couleur verte,
elles indiquent le niveau de charge actuel.
► Si les LED sont allumées ou clignotent de couleur rouge :
éliminer les dérangements, @ 18.
Il y a un dérangement dans la débroussailleuse ou dans la
batterie.
6.4 DEL sur le chargeur
La DEL indique l'état du chargeur.
Si la DEL est continuellement allumée de couleur verte, la
recharge de la batterie est en cours.
► Si la DEL clignote de couleur rouge : éliminer le
dérangement.
Il y a un dérangement dans le chargeur.
7 Assemblage de la débroussailleuse
7.1 Montage du capot protecteur
► Arrêter la débroussailleuse et retirer la batterie.
68
0458-713-9621-C

7 Assemblage de la débroussailleuse
français
3
1
2 2
Le couteau rogneur (1) est déjà monté dans le capot
protecteur (2) et il ne doit pas être démonté.
► Pousser le capot protecteur (2) à fond dans les pièces de
guidage prévues sur le carter.
Le capot protecteur (2) affleure avec le carter.
► Insérer les vis (3) et les serrer.
Le capot protecteur (2) ne doit plus être démonté.
7.2 Tête faucheuse AutoCut 2-2
7.2.1 Montage de la bobine de fil de coupe ► Arrêter la débroussailleuse et retirer la batterie. ► Plonger la bobine dans un bain d'eau pendant une période
de 12 à 24 heures.
Ainsi, les fils de coupe deviennent plus souples.
► Passer les extrémités des fils de coupe (4) de la
bobine (2) à travers les orifices (1) de la tête
faucheuse (5).
► Mettre la bobine (2) dans la tête faucheuse (5).
► Positionner le recouvrement (7) sur la tête faucheuse (5 )
de telle sorte que les languettes (3) du recouvrement (7)
coïncident avec les orifices (6) de la tête faucheuse (4).
► Presser le recouvrement (7) sur la tête faucheuse (5),
jusqu'en butée.
Les languettes (3) s'encliquettent avec un déclic audible.
0000-GXX-1486-A1
7.2.2 Démontage de la bobine
► Arrêter la débroussailleuse et retirer la batterie.
1
1
2
3
► Appuyer sur les languettes (1) et enlever le
recouvrement (3).
► Sortir la bobine (2).
0000-GXX-1484-A0
0458-713-9621-C
4
7.3 Montage de la poignée circulaire
► Arrêter la débroussailleuse et retirer la batterie.
1
5
2
3
6
7
0000-GXX-1485-A1
69

français
8 Réglage de la débroussailleuse selon l'utilisateur
2
3
1
► Présenter la poignée circulaire (2) de telle sorte que le
logement prévu pour l'écrou étoile (1) se trouve à droite
de la poignée de commande et que les orifices de la
poignée circulaire (2) soient orientés en direction de
l'utilisateur.
► Écarter les branches de la poignée circulaire (2) et
presser la poignée circulaire (2) sur la poignée de
commande jusqu'à ce que la poignée circulaire (2)
s'encliquette.
► Glisser la vis (3) à travers le trou.
► Visser et serrer l'écrou étoile (1).
La poignée circulaire (2) ne doit plus être démontée.
8 Réglage de la débroussailleuse selon
l'utilisateur
1
2
0000-GXX-1488-A0
► Appuyer sur le bouton de verrouillage (1) et le maintenir
enfoncé.
► Tirer ou pousser la poignée de commande (2) dans la
position souhaitée.
► Relâcher le bouton de verrouillage (1).
► Faire légèrement coulisser la poignée de commande (2)
jusqu'à ce qu'elle s'encliquette.
8.2 Réglage de la poignée circulaire
La poignée circulaire peut être réglée dans différentes
positions, suivant la taille de l'utilisateur.
► Arrêter la débroussailleuse et retirer la batterie.
2
0000-GXX-1489-A0
8.1 Réglage de la longueur du tube
Le tube peut être réglé à différentes longueurs, suivant la
taille de l'utilisateur.
► Arrêter la débroussailleuse et retirer la batterie.
► Tenir fermement le tube.
70
1
0000-GXX-1490-A0
► Desserrer l'écrou étoile (1).
► Faire pivoter la poignée circulaire (2) dans la position
souhaitée.
► Serrer fermement l'écrou étoile (1).
0458-713-9621-C

9 Introduction et extraction de la batterie
9 Introduction et extraction de la batterie
9.1 Introduction de la batterie
français
2
2
1
► Introduire la batterie (1) dans le logement pour batterie (2)
et l'enfoncer jusqu'à ce qu'un déclic soit audible.
Les flèches (3) de la batterie (1) sont encore visibles et la
batterie (1) est retenue dans le logement pour batterie (2).
Il n'y a pas de contact électrique entre la débroussailleuse
et la batterie (1).
► Enfoncer la batterie (1) à fond dans le logement pour
batterie (2).
La batterie (1) s'encliquette avec un second déclic et
affleure avec le carter de la débroussailleuse.
9.2 Extraction de la batterie
► Placer la débroussailleuse sur une surface plane.
► Tenir une main devant le logement pour batterie, de telle
sorte que la batterie (2) ne risque pas de tomber.
3
1
► Enfoncer le levier de verrouillage (1) avec l'autre main.
La batterie (2) est déverrouillée et peut être retirée.
0000-GXX-1491-A0
10 Mise en marche et arrêt de la
débroussailleuse
10.1 Mise en marche de la débroussailleuse
► Tenir la débroussailleuse d'une main, par la poignée de
commande, en entourant la poignée de commande avec
le pouce.
► Avec l'autre main, tenir la débroussailleuse par la poignée
circulaire, en entourant la poignée circulaire avec le
pouce.
1
2
► Enfoncer le blocage de gâchette de commande (1) avec la
main et le maintenir enfoncé.
0000-GXX-1492-A0
0000-GXX-1493-A0
0458-713-9621-C
71

français
11 Contrôle de la débroussailleuse et de la batterie
► Enfoncer la gâchette de commande (2) avec l'index et la
maintenir enfoncée.
La débroussailleuse accélère et l'outil de coupe est
entraîné.
10.2 Arrêt de la débroussailleuse
► Relâcher la gâchette de commande et le blocage de
gâchette de commande.
► Attendre que l'outil de coupe ne tourne plus.
► Si l'outil de coupe continue de tourner : retirer la batterie
et consulter un revendeur spécialisé STIHL.
La débroussailleuse est défectueuse.
11 Contrôle de la débroussailleuse et de
la batterie
11.1 Contrôle des éléments de commande
Blocage de gâchette de commande et gâchette de
commande
► Retirer la batterie.
► Essayer d'enfoncer la gâchette de commande sans
enfoncer le blocage de gâchette de commande.
► S'il est possible d'enfoncer la gâchette de commande :
consulter un revendeur spécialisé STIHL.
Le blocage de gâchette de commande est défectueux.
► Enfoncer le blocage de gâchette de commande et le
maintenir enfoncé.
► Enfoncer la gâchette de commande et la relâcher.
► Si la gâchette de commande ou le blocage de gâchette de
commande fonctionne difficilement ou ne revient pas dans
sa position initiale, sous l'effet de son ressort : ne pas
utiliser la débroussailleuse, mais consulter un revendeur
spécialisé STIHL.
La gâchette de commande ou le blocage de gâchette de
commande est défectueux.
► Enfoncer le blocage de gâchette de commande et le
maintenir enfoncé.
► Enfoncer la gâchette de commande et la maintenir
enfoncée.
L'outil de coupe tourne.
► Si 3 DEL clignotent de couleur rouge : retirer la batterie et
consulter un revendeur spécialisé STIHL.
Il y a un dérangement dans la débroussailleuse.
► Relâcher la gâchette de commande.
L'outil de coupe s'arrête au bout de quelques instants.
► Si l'outil de coupe continue de tourner : retirer la batterie
et consulter un revendeur spécialisé STIHL.
La débroussailleuse est défectueuse.
11.2 Contrôle de la batterie
► Appuyer sur la touche de la batterie.
Les DEL sont allumées continuellement ou clignotent.
► Si les DEL ne sont pas allumées continuellement et ne
clignotent pas non plus : ne pas utiliser la batterie, mais
consulter un revendeur spécialisé STIHL.
Il y a un dérangement dans la batterie.
12 Travail avec la débroussailleuse
12.1 Prise en mains et utilisation de la débroussailleuse
Mise en marche de la débroussailleuse
► Introduire la batterie.
72
0000-GXX-1494-A0
0458-713-9621-C

13 Après le travail
1
0000-GXX-1495-A1
français
► Tenir la débroussailleuse d'une main, par la poignée de
commande, en entourant la poignée de commande avec
le pouce.
► Avec l'autre main, tenir la débroussailleuse par la poignée
circulaire, en entourant la poignée circulaire avec le
pouce.
12.2 Fauchage
La distance de l'outil de coupe par rapport à la surface de
gazon détermine la hauteur de coupe.
► Mener la débroussailleuse en décrivant un mouvement de
va-et-vient régulier.
► Avancer lentement et en restant concentré sur le travail.
► Si l'on travaille avec une pièce d'écartement : il faut
déplier complètement la pièce d'écartement (1).
Si la longueur des fils de coupe qui dépasse est inférieure à
25 mm, une sortie automatique des fils n'est pas possible.
► Arrêter la débroussailleuse et retirer la batterie.
► Appuyer sur le bouton de la tête faucheuse et le maintenir
enfoncé.
► Faire sortir les fils de coupe en tirant à la main.
► S'il n'est plus possible de faire sortir les fils de coupe :
remplacer la bobine par une bobine neuve munie de fils de
coupe.
La bobine est vide.
13 Après le travail
13.1 Après le travail
► Arrêter la débroussailleuse et retirer la batterie.
► Si la débroussailleuse est mouillée : laisser sécher la
débroussailleuse.
► Si la batterie est mouillée : laisser sécher la batterie.
► Nettoyer la débroussailleuse.
► Nettoyer le capot protecteur.
► Nettoyer l'outil de coupe.
► Nettoyer la batterie.
14 Transport
12.3 Ajustage des fils de coupe
► Frapper brièvement la tête faucheuse en rotation sur le
sol.
Cela fait sortir les fils d'une longueur d'env. 30 mm.
Le couteau rogneur situé dans le capot protecteur rogne
automatiquement les fils de coupe de telle sorte qu'ils ne
dépassent pas la longueur correcte.
0458-713-9621-C
14.1 Transport de la débroussailleuse
► Arrêter la débroussailleuse et retirer la batterie.
► Ajuster le tube à la longueur minimale.
► Tenir la débroussailleuse d'une main, par le tube, de telle
sorte que l'outil de coupe soit orienté vers l'arrière et que
la débroussailleuse soit bien équilibrée.
► Si l'on doit transporter la débroussailleuse dans un
véhicule : veiller à ce que la débroussailleuse ne puisse
pas se renverser ou se déplacer.
73

français
2
1
0000-GXX-0592-A0
15 Rangement
14.2 Transport de la batterie
► Arrêter la débroussailleuse et retirer la batterie.
► S'assurer que la batterie se trouve dans l'état impeccable
requis pour la sécurité.
► Emballer la batterie de telle sorte que les conditions
suivantes soient remplies :
– L'emballage n'est pas conducteur d'électricité.
– La batterie ne peut pas se déplacer dans l'emballage.
► Assurer l'emballage de telle sorte qu'il ne puisse pas se
déplacer.
La batterie est soumise aux exigences applicables au
transport de marchandises dangereuses. La batterie est
classée dans la catégorie ONU 3480 (batteries lithium-ion)
et elle a été testée conformément aux prescriptions du
« Manuel d'épreuves et de critères », partie III, soussection 38.3 de l'ONU.
Pour les prescriptions relatives au transport, voir :
www.stihl.com/safety-data-sheets.
– La batterie se trouve hors de portée des enfants.
– La batterie est propre et sèche.
– La batterie est conservée dans un local fermé.
– La batterie est séparée de la débroussailleuse et du
chargeur.
– La batterie se trouve dans un emballage non-
conducteur d'électricité.
– La batterie se trouve dans une plage de températures
de - 10 °C à + 50 °C.
15.3 Rangement du chargeur
► Débrancher la fiche de la prise de courant.
► Retirer la batterie.
15 Rangement
15.1 Rangement de la débroussailleuse
► Arrêter la débroussailleuse et retirer la batterie.
► Démonter la bobine de fil de coupe.
► Ranger la débroussailleuse de telle sorte que les
conditions suivantes soient remplies :
– La débroussailleuse se trouve hors de portée des
enfants.
– La débroussailleuse est propre et sèche.
15.2 Rangement de la batterie
STIHL conseille de conserver la batterie avec un niveau de
charge compris entre 40 % et 60 % (2 DEL allumées de
couleur verte).
► Ranger la batterie de telle sorte que les conditions
suivantes soient remplies :
► Enrouler le cordon d'alimentation électrique et le fixer au
chargeur.
► Ranger le chargeur de telle sorte que les conditions
suivantes soient remplies :
– Le chargeur se trouve hors de portée des enfants.
– Le chargeur est propre et sec.
– Le chargeur est conservé dans un local fermé.
– Le chargeur est séparé de la batterie.
– Le chargeur n'est pas suspendu au cordon
d'alimentation électrique.
– Le chargeur se trouve dans une plage de températures
de + 5 °C à + 40 °C.
74
0458-713-9621-C

16 Nettoyage
français
16 Nettoyage
16.1 Nettoyage de la débroussailleuse
► Arrêter la débroussailleuse et retirer la batterie.
► Nettoyer la débroussailleuse avec un chiffon humide.
► Extraire les corps étrangers qui pourraient se trouver dans
le logement pour batterie et nettoyer le logement pour
batterie avec un chiffon humide.
► Nettoyer les contacts électriques du logement pour
batterie à l'aide d'un pinceau ou d'une brosse douce.
16.2 Nettoyage du capot protecteur et de l'outil de coupe
► Arrêter la débroussailleuse et retirer la batterie.
► Nettoyer le capot protecteur et l'outil de coupe à l'aide d'un
chiffon humide ou d'une brosse douce.
16.3 Nettoyage de la batterie
► Nettoyer la batterie avec un chiffon humide.
16.4 Nettoyage du chargeur
► Débrancher la fiche de la prise de courant.
► Nettoyer le chargeur avec un chiffon humide.
► Nettoyer les contacts électriques du chargeur à l'aide d'un
pinceau ou d'une brosse douce.
► Si une maintenance s'avère nécessaire ou si la
débroussailleuse est endommagée ou défectueuse :
consulter un revendeur spécialisé STIHL.
17.2 Maintenance et réparation de la batterie
La batterie ne nécessite aucune maintenance et elle ne peut
pas être réparée.
► Si la batterie est défectueuse ou endommagée :
remplacer la batterie.
17.3 Maintenance et réparation du chargeur
Le chargeur ne nécessite aucune maintenance et il ne peut
pas être réparé.
► Si le chargeur est défectueux ou endommagé : remplacer
le chargeur.
► Si le cordon d'alimentation électrique est défectueux ou
endommagé : ne pas utiliser le chargeur, mais faire
remplacer le cordon d'alimentation électrique par un
revendeur spécialisé STIHL.
17 Maintenance et réparation
17.1 Maintenance et réparation de la débroussailleuse
L'utilisateur ne peut pas procéder lui même à la
maintenance de la débroussailleuse, et il ne peut pas non
plus la réparer.
0458-713-9621-C
75

français
18 Dépannage
18.1 Élimination des dérangements de la débroussailleuse ou de la batterie
Dérangement DEL sur la batterie Cause Remède
La débroussailleuse
ne démarre pas à la
mise en circuit.
La débroussailleuse
s'arrête au cours de
l'utilisation.
1 DEL clignote de
couleur verte.
1 DEL est allumée
de couleur rouge.
3 DEL clignotent
de couleur rouge.
3 DEL sont
allumées de
couleur rouge.
4 DEL clignotent
de couleur rouge.
3 DEL sont
allumées de
couleur rouge.
Le niveau de charge de la
batterie est trop faible.
La batterie est trop chaude
ou trop froide.
Il y a un dérangement dans
la débroussailleuse.
La débroussailleuse est
trop chaude.
Il y a un dérangement dans
la batterie.
La connexion électrique
entre la débroussailleuse
et la batterie est coupée.
La débroussailleuse ou la
batterie est humide.
La débroussailleuse est
trop chaude.
Il y a un dérangement
électrique.
► Recharger la batterie.
► Retirer la batterie.
► Laisser la batterie se refroidir ou se réchauffer.
► Retirer la batterie.
► Nettoyer les contacts électriques du logement
pour batterie.
► Introduire la batterie.
► Mettre la débroussailleuse en marche.
► Si 3 DEL clignotent encore de couleur rouge : ne
pas utiliser la débroussailleuse, mais consulter un
revendeur spécialisé STIHL.
► Retirer la batterie.
► Laisser la débroussailleuse refroidir.
► Retirer la batterie et la remettre en place.
► Mettre la débroussailleuse en marche.
► Si 4 DEL clignotent encore de couleur rouge : ne
pas utiliser la batterie, mais consulter un
revendeur spécialisé STIHL.
► Retirer la batterie.
► Nettoyer les contacts électriques du logement
pour batterie.
► Introduire la batterie.
► Faire sécher la débroussailleuse ou la batterie.
► Retirer la batterie.
► Laisser la débroussailleuse refroidir.
► Retirer la batterie et la remettre en place.
► Mettre la débroussailleuse en marche.
18 Dépannage
76
0458-713-9621-C

18 Dépannage
Dérangement DEL sur la batterie Cause Remède
Le temps de
fonctionnement de la
débroussailleuse est
trop court.
Après l'introduction
de la batterie dans le
chargeur, la recharge
ne démarre pas.
1 DEL est allumée
de couleur rouge.
La batterie n'est pas
complètement chargée.
La durée de vie de la
batterie est dépassée.
La batterie est trop chaude
ou trop froide.
► Recharger la batterie à fond.
► Remplacer la batterie.
► Laisser la batterie dans le chargeur.
La recharge commence automatiquement, dès
que la batterie se trouve dans la plage de
températures admissibles.
18.2 Élimination des dérangements du chargeur
Dérangement DEL sur le
chargeur
La batterie n'est pas
rechargée.
La DEL clignote de
couleur rouge.
Cause Remède
La connexion électrique
entre le chargeur et la
batterie est coupée.
Il y a un dérangement dans
le chargeur.
► Retirer la batterie.
► Nettoyer les contacts électriques du chargeur.
► Introduire la batterie.
► Ne pas utiliser le chargeur, mais consulter un
revendeur spécialisé STIHL.
français
0458-713-9621-C
77

français
19 Caractéristiques techniques
19 Caractéristiques techniques
19.1 Débroussailleuse STIHL FSA 56
– Batterie autorisée : STIHL AK
– Poids sans batterie, outil de coupe ni capot protecteur :
2,1 kg
– Longueur hors tout sans outil de coupe : de 1470 mm à
1670 mm
19.2 Batterie STIHL AK
– Technologie de batterie : lithium-ion
– Tension : 36 V
– Capacité en Ah : voir plaque signalétique
– Capacité énergétique en Wh : voir plaque signalétique
– Poids en kg : voir plaque signalétique
– Plage de températures admissibles pour l'utilisation et le
rangement : de - 10 °C à + 50 °C
19.3 Chargeur STIHL AL 101
– Tension nominale : voir la plaque signalétique
– Fréquence : voir la plaque signalétique
– Puissance nominale : voir la plaque signalétique
– Intensité du courant de charge : voir la plaque
signalétique
– Plage de températures admissibles pour l'utilisation et le
rangement : de + 5 °C à + 40 °C
– Niveau de pression sonore L
72 dB(A). La valeur K pour le niveau de pression sonore
est de 2 dB(A).
– Niveau de puissance acoustique L
91 : 86 dB(A). La valeur K pour le niveau de puissance
acoustique est de 2 dB(A).
– Taux de vibrations a
poignée de commande et à la poignée circulaire : 3,5 m/
s². La valeur K pour le taux de vibrations est de 2 m/s².
Les taux de vibrations indiqués ont été mesurés suivant une
procédure de contrôle normalisée et ils peuvent être utilisés
pour la comparaison d'appareils électriques. Les vibrations
engendrées dans la pratique peuvent différer des valeurs
indiquées, suivant le genre d'utilisation. Les taux de
vibrations indiqués peuvent servir de référence pour une
première évaluation de l'exposition de l'utilisateur aux
vibrations. L'exposition aux vibrations réelle ne peut être
quantifiée que par une estimation. On peut alors également
prendre en compte les temps durant lesquels la machine
électrique est arrêtée et les temps durant lesquels la
machine est en marche, mais fonctionne sans charge.
suivant EN 50636-2-91, à la
hv
suivant EN 50636-2-91 :
pA
suivant EN 50636-2-
wA
19.5 REACH
REACH (enRegistrement, Evaluation et Autorisation des
substances CHimiques) est le nom d'un règlement CE qui
couvre le contrôle de la fabrication, de l'importation, de la
mise sur le marché et de l'utilisation des substances
chimiques.
Pour obtenir de plus amples informations sur le respect du
règlement REACH, voir www.stihl.com/reach.
Pour les temps de recharge, voir www.stihl.com/
charging-times.
19.4 Niveaux sonores et taux de vibrations
STIHL recommande de porter une protection auditive.
78
0458-713-9621-C

20 Combinaisons d'outils de coupe et de capots protecteurs
français
20 Combinaisons d'outils de coupe et de
capots protecteurs
20.1 Débroussailleuse STIHL FSA 56
Il est permis de monter les têtes faucheuses suivantes, avec
le capot protecteur pour têtes faucheuses :
– Tête faucheuse AutoCut 2-2 avec fils de coupe « ronds,
silencieux » de 1,6 mm de diamètre
L'utilisateur ne peut pas monter lui-même une tête
faucheuse.
► Faire monter la tête faucheuse souhaitée par un
revendeur spécialisé STIHL.
21 Pièces de rechange et accessoires
21.1 Pièces de rechange et accessoires
Ces symboles identifient les pièces de rechange
d'origine STIHL et les accessoires d'origine
STIHL.
STIHL recommande d'utiliser des pièces de rechange
d'origine STIHL et des accessoires d'origine STIHL.
Pour obtenir des pièces de rechange d'origine STIHL et des
accessoires d'origine STIHL, s'adresser à un revendeur
spécialisé STIHL.
22 Mise au rebut
22.1 Mise au rebut de la débroussailleuse, de la batterie et du chargeur
Pour obtenir de plus amples informations concernant la mise
au rebut, consulter le revendeur spécialisé STIHL.
► La débroussailleuse, le capot protecteur, l'outil de coupe,
la batterie, le chargeur, les accessoires et leur emballage
doivent être éliminés conformément à la réglementation
pour la protection de l'environnement.
23 Déclaration de conformité UE
23.1 Débroussailleuse STIHL FSA 56
ANDREAS STIHL AG & Co. KG
Badstraße 115
D-71336 Waiblingen
Allemagne
déclare, sous sa seule responsabilité, que le produit suivant
– Genre de produit : débroussailleuse à batterie
– Marque de fabrique : STIHL
–Type: FSA56
– Numéro d'identification de série : 4522
est conforme à toutes les prescriptions applicables des
directives 2011/65/UE, 2006/42/CE, 2014/30/UE et 2000/
14/CE et a été développé et fabriqué conformément à la
version des normes suivantes respectivement valable à la
date de fabrication : EN 55014-1, EN 55014-2, EN 60335-1
et EN ISO 12100, compte tenu de la norme EN 50636-2- 91.
Le calcul du niveau de puissance acoustique mesuré et du
niveau de puissance acoustique garanti a été effectué
suivant une procédure conforme à la directive 2000/14/CE,
annexe VIII.
Organisme notifié concerné : TÜV Rheinland Product Safety
GmbH, Am Grauen Stein, 51105 Köln, Allemagne
– Niveau de puissance acoustique mesuré : 86 dB(A)
– Niveau de puissance acoustique garanti : 88 dB(A)
Conservation des documents techniques :
ANDREAS STIHL AG & Co. KGProduktzulassung
(Service Homologation Produits).
0458-713-9621-C
79

français
L'année de fabrication, le pays de fabrication et le numéro
de machine sont indiqués sur la débroussailleuse.
Waiblingen, le 01/03/2017
ANDREAS STIHL AG & Co. KG
Thomas Elsner, Chef de la Division Produits et Services
23.2 Remarque concernant la conformité du chargeur STIHL AL 101
Ce chargeur a été fabriqué et commercialisé en conformité
avec les directives suivantes : 2014/35/UE, 2014/30/UE et
2011/65/UE.
L'année de fabrication, le pays de fabrication et le numéro
de machine sont indiqués sur le chargeur.
La déclaration de conformité CE intégrale peut être fournie
par la société ANDREAS STIHL AG & Co. KG, Badstraße
115, 71336 Waiblingen, Allemagne.
23 Déclaration de conformité UE
80
0458-713-9621-C

Indice
italiano
1 Premessa
. . . . . . . . . . . . . . . . . . . . . . . . . . . . . . . . . . . . . . . . . .
2 Informazioni sulle presenti Istruzioni d’uso
2.1 Documenti validi
. . . . . . . . . . . . . . . . . . . . . . . . . . . . . . . . . . .
2.2 Contrassegno delle avvertenze nel testo
2.3 Simboli nel testo
3 Sommario
. . . . . . . . . . . . . . . . . . . . . . . . . . . . . . . . . . .
. . . . . . . . . . . . . . . . . . . . . . . . . . . . . . . . . . . . . . . . . .
3.1 Decespugliatore, batteria e caricabatteria
3.2 Attrezzi di taglio
Traduzione delle istruzioni per
l'uso originali
3.3 Simboli
. . . . . . . . . . . . . . . . . . . . . . . . . . . . . . . . . . . . . . . . . . . . .
4 Avvertenze di sicurezza
4.1 Simboli di avvertimento
. . . . . . . . . . . . . . . . . . . . . . . . . . . . . . . . . . . .
. . . . . . . . . . . . . . . . . . . . . . . . . . . .
. . . . . . . . . . . . . . . . . . . . . . . . . . . . .
4.2 Impiego secondo la destinazione
4.3 Requisiti dell'utente
. . . . . . . . . . . . . . . . . . . . . . . . . . . . . . . .
4.4 Abbigliamento ed equipaggiamento
4.5 Zona di lavoro e area circostante
4.6 Condizioni di sicurezza
4.7 Impiego
4.8 Carica
4.9 Trasporto
4.10 Conservazione
. . . . . . . . . . . . . . . . . . . . . . . . . . . . . . . . . . . . . . . . . . . .
. . . . . . . . . . . . . . . . . . . . . . . . . . . . . . . . . . . . . . . . . . . . . .
. . . . . . . . . . . . . . . . . . . . . . . . . . . . . . . . . . . . . . . . . .
. . . . . . . . . . . . . . . . . . . . . . . . . . . . . . . . . . . . .
. . . . . . . . . . . . . . . . . . . . . . . . . . . . .
4.11 Pulizia, manutenzione e riparazione
5 Preparare il decespugliatore per l'esercizio
5.1 Preparare il decespugliatore per l'esercizio
Stampato su carta candeggiata senza cloro.
I colori di stampa contengono oli vegetali; la carta è riciclabile.
6 Carica della batteria e LED
6.1 Caricare la batteria
. . . . . . . . . . . . . . . . . . . . . . . . . . . . . . . . .
. . . . . . . . . . . . . . . . . . . . . . . . .
6.2 Visualizzazione dello stato di carica
6.3 LED sulla batteria
6.4 LED sul caricabatteria
. . . . . . . . . . . . . . . . . . . . . . . . . . . . . . . . . .
. . . . . . . . . . . . . . . . . . . . . . . . . . . . . .
7 Assemblare il decespugliatore
7.1 Montaggio del riparo
7.2 Testa falciante AutoCut 2-2
. . . . . . . . . . . . . . . . . . . . . . . . . . . . . . .
. . . . . . . . . . . . . . . . . . . . . . . .
7.3 Montaggio dell’impugnatura circolare
8 Regolare il decespugliatore per l'utente
. . . . . . . . . .
. . . . . . . . . . .
. . . . . . . . . .
. . . . . . . . . . . . . . . . . . .
. . . . . . . . . . . . . . . . .
. . . . . . . . . . . . . . . . . . .
. . . . . . . . . . . . . . . .
. . . . . . . . .
. . . . . . . . .
. . . . . . . . . . . . . . . .
. . . . . . . . . . . . . . . . . . . . . .
. . . . . . . . . . . . . . .
. . . . . . . . . . . .
8.1 Impostare la lunghezza dello stelo
82
8.2 Regolazione dell’impugnatura circolare
82
9 Inserire e togliere la batteria
82
9.1 Introduzione della batteria
83
9.2 Estrarre la batteria
83
10 Accendere e spegnere il decespugliatore
83
10.1 Accendere il decespugliatore
83
10.2 Spegnere il decespugliatore.
84
11 Controllo di decespugliatore e batteria
84
11.1 Controllare gli elementi di comando
85
11.2 Controllare la batteria
85
12 Lavorare con il decespugliatore
86
12.1 Tenuta e guida del decespugliatore
86
12.2 Falciatura
86
12.3 Allungamento del filo
87
88
13 Dopo il lavoro
90
13.1 Dopo il lavoro
91
14 Trasporto
91
14.1 Trasportare il decespugliatore
92
14.2 Trasporto della batteria
93
15 Conservazione
93
15.1 Conservare il decespugliatore
93
15.2 Conservazione della batteria
94
15.3 Conservazione del caricabatteria
94
16 Pulizia
94
16.1 Pulire il decespugliatore
94
16.2 Pulire il riparo dell'attrezzo da taglio
94
16.3 Pulizia della batteria
95
16.4 Pulizia del caricabatteria
95
17 Manutenzione e riparazione
95
17.1 Manutenzione e riparazione del decespugliatore
95
17.2 Manutenzione e riparazione della batteria
96
17.3 Manutenzione e riparazione del caricabatteria
. . . . . . . . . . . . . . . . . . . . . . . . . . . . . . . . . . . . . . . . . .
. . . . . . . . . . . . . . . . . . . . . . . . . . . . . . . . . . . . . . . . . .
. . . . . . . . . . . . . . . . . . . . . . . . . . . . . . . . . . . . . . . . . . . .
. . . . . . . . . . . . . . . . . . . . . . . . . . . . . . . . .
. . . . . . . . . . . . . . . . . . . . . . . . . . . . . . . . . . . . . .
. . . . . . . . . . . . . . . . . . . . . . . . . . . . . . . . . . . . . .
. . . . . . . . . . . . . . . . . . . . . . . . . . . . . . . . . . . .
. . . . . . . . . . . . . . . . . . . . . . . . . . . . . .
. . . . . . . . . . . . . . . . . . . . . . . .
. . . . . . . . . . . . . . . . . . . . . . . . . .
. . . . . . . . . . . . . . . . . . . . . .
. . . . . . . . . . . . . . . . . . . . . . .
. . . . . . . . . . . . . . . . . . . . . . . . . . . . . .
. . . . . . . . . . . . . . . . . . . .
. . . . . . . . . . . . . . . . . . . . . . . . . . . . . . .
. . . . . . . . . . . . . . . . . . . . . .
. . . . . . . . . . . . . . . . . . . . . . . . . . . .
. . . . . . . . . . . . . . . . . . . . .
. . . . . . . . . . . . . . . . . . . . . .
. . . . . . . . . . . . . . . . . . . . . . . . . .
. . . . . . . . . . . . . . . . . . . . . . . . . .
. . . . . . . . . . . . . . . . . . . . . . .
. . . . . . . . . . . . . . . . .
. . . . . . . . . . . . .
. . . . . . . . . . .
. . . . . . . . . . . . .
. . . . . . . . . . . . . . . .
. . . . . . . . . . . . . . . .
. . . . . . . . . . . . . . . . . .
. . . . . . . . . . . . . . .
. .
. . . . . . . . .
. . . . .
96
96
97
97
97
97
97
98
98
98
98
98
98
98
99
99
99
99
99
99
100
100
100
100
100
100
100
101
101
101
101
101
101
{
© ANDREAS STIHL AG & Co. KG 2017
0458-713-9621-C. VA1.H17.
0000008093_001_I
0458-713-9621-C
Le presenti Istruzioni d’uso sono tutelate dai diritti d'autore. Tutti i diritti sono riservati, specialmente quelli di riproduzione, traduzione ed elaborazione con sistemi elettronici.
81

italiano
1 Premessa
18 Eliminazione dei guasti
18.1 Eliminare i guasti del decespugliatore o della
batteria
18.2 Eliminazione dei guasti del caricabatteria
19 Dati tecnici
19.1 Decespugliatore STIHL FSA 56
19.2 Batteria STIHL AK
19.3 Caricabatteria STIHL AL 101
19.4 Valori acustici e vibratori
19.5 REACH
20 Combinazioni di attrezzi di taglio e ripari
20.1 Decespugliatore STIHL FSA 56
21 Ricambi e accessori
21.1 Ricambi e accessori
22 Smaltimento
22.1 Smaltimento di decespugliatore, batteria e
caricabatteria
23 Dichiarazione di conformità UE
23.1 Decespugliatore STIHL FSA 56
23.2 Indicazione sulla conformità del caricabatteria
STIHL AL 101
. . . . . . . . . . . . . . . . . . . . . . . . . . . . . . . . . . . . . . . . . . . .
. . . . . . . . . . . . . . . . . . . . . . . . . . . . . . . . . . . . . . . .
. . . . . . . . . . . . . . . . . . . . . . . . . . . . . . . . . . . . . . . . . . .
. . . . . . . . . . . . . . . . . . . . . . . . . . . . . . . . . . . . . . .
. . . . . . . . . . . . . . . . . . . . . . . . . . . . . . . . . . . . .
. . . . . . . . . . . . . . . . . . . . . . . . . . . . . . . . . . . . .
. . . . . . . . . . . . . . . . . . . . . . . . . . . .
. . . . . . . . .
. . . . . . . . . . . . . . . . . . .
. . . . . . . . . . . . . . . . . . . . . . . . . . . . . . . .
. . . . . . . . . . . . . . . . . . . . . .
. . . . . . . . . . . . . . . . . . . . . . . . . .
. . . . . . . . . . .
. . . . . . . . . . . . . . . . . . .
. . . . . . . . . . . . . . . . . . . . . . . . . . . . . . .
. . . . . . . . . . . . . . . . . . . . . . . . . . . . . .
. . . . . . . . . . . . . . . . . . . .
. . . . . . . . . . . . . . . . . . .
102
102
103
104
104
104
104
104
104
104
104
105
105
105
105
105
105
106
1 Premessa
Gentile cliente,
congratulazioni per aver scelto STIHL. Progettiamo e
fabbrichiamo prodotti della massima qualità secondo le
esigenze della nostra clientela. I nostri prodotti risultano
altamente affidabili anche in caso di sollecitazioni estreme.
STIHL offre la massima qualità anche nell'assistenza. I
nostri rivenditori garantiscono consulenza e istruzioni
competenti e un'assistenza tecnica completa.
La ringraziamo per la fiducia e le auguriamo buon lavoro con
il Suo prodotto STIHL.
Dr. Nikolas Stihl
IMPORTANTE! LEGGERE PRIMA DELL'USO E
CONSERVARE.
2 Informazioni sulle presenti Istruzioni
d’uso
82
2.1 Documenti validi
Si applicano le disposizioni di legge nazionali.
► Oltre alle presenti istruzioni per l'uso, leggere,
comprendere e conservare i seguenti documenti:
– Avvertenze di sicurezza batteria da STIHL AK
– Informazioni sulla sicurezza per batterie STIHL e
prodotti con batteria integrata: www.stihl.com/safetydata-sheets
0458-713-9621-C

3 Sommario
italiano
2.2 Contrassegno delle avvertenze nel testo
AVVERTENZA
L'avvertenza si riferisce a pericoli che possono provocare
gravi lesioni o la morte.
► Le misure indicate possono consentire di evitare gravi
lesioni o la morte.
AVVISO
L'avvertenza si riferisce a pericoli che possono provocare
danni materiali.
► Le misure menzionate possono evitare danni materiali.
2.3 Simboli nel testo
Questo simbolo rimanda ad un capitolo nelle Istruzioni
per l'uso.
3Sommario
3.1 Decespugliatore, batteria e caricabatteria
1
2
#
3
4
5
11
#
6
14
8
7
9
13
12
15
16
10
#
17
0458-713-9621-C
0000-GXX-1482-A2
1 Vano batteria
Il vano batteria accoglie la batteria.
2 Leva di bloccaggio
La leva di bloccaggio mantiene la batteria nel vano.
3 Impugnatura di comando
L'impugnatura di comando serve per controllare,
sostenere e guidare il decespugliatore.
4 Leva di comando
La leva di comando accende e spegne il
decespugliatore.
83

italiano
1
2
3
4
0000-GXX-1483-A0
3 Sommario
5 Bloccaggio leva di comando
Il bloccaggio leva di comando sblocca la leva di
comando.
6 Pulsante d’arresto
Il pulsante di arresto blocca la regolazione in lunghezza
del gambo.
7 Dado con testa a stella
Il dado con testa a stella blocca l'impugnatura circolare
sul gambo.
8 Impugnatura circolare
L'impugnatura circolare serve per tenere e guidare il
decespugliatore.
9Stelo
Lo stelo unisce tutti i componenti.
10 LED
Il LED indica lo stato del caricabatteria.
11 Distanziatore
Il distanziatore protegge gli oggetti dal contatto con
l'attrezzo di taglio.
12 Spina di rete
La spina di rete collega il cavo di collegamento ad una
presa.
13 Cavo di collegamento
Il cavo di collegamento unisce il caricabatteria alla spina
di rete.
14 Caricabatteria
Il caricabatteria carica la batteria.
15 Batteria
La batteria alimenta di energia il decespugliatore.
16 LED
I LED indicano lo stato di carica della batteria e le
anomalie.
17 Pulsante
Il pulsante attiva i LED sulla batteria.
3.2 Attrezzi di taglio
1 Riparo
Il riparo protegge l'utente da oggetti proiettati ad alta
velocità e dal contatto con l'attrezzo da taglio.
2 Coltello tranciafilo
Il coltello tranciafilo taglia il filo durante lavoro alla
lunghezza corretta.
3 Testa falciante
La testa falciante regge il filo.
4Filo
I fili tagliano l'erba.
3.3 Simboli
I simboli possono essere applicati sul decespugliatore, la
batteria e il caricabatteria e hanno i seguenti significati:
Questo simbolo indica la velocità nominale
dell’attrezzo di taglio.
1 LED si accende con luce rossa fissa. La
batteria è troppo calda o troppo fredda.
# Targhetta dati tecnici con numero di matricola
84
0458-713-9621-C

4 Avvertenze di sicurezza
L
WA
italiano
4 LED con luce rossa lampeggiante. Nella
batteria vi è un malfunzionamento.
Il LED si accende con luce verde e i LED sulla
batteria si accendono con luce verde fissa o
lampeggiante. La batteria è in carica.
Il LED lampeggia con luce rossa. Tra la batteria
e il caricabatteria non è presente alcun contatto
elettrico oppure nella batteria o nel
caricabatteria è presente un guasto.
Livello di potenza acustica garantito secondo la
Direttiva 2000/14/CE in dB(A) per rendere
confrontabili le emissioni acustiche dei prodotti.
L'indicazione accanto al simbolo si riferisce al
contenuto energetico della batteria secondo le
specifiche del fabbricante delle celle. La capacità di
energia disponibile nell’applicazione è inferiore.
Azionare l'apparecchio elettrico in un ambiente
chiuso e asciutto.
Non smaltire il prodotto con i rifiuti domestici.
Leggere, comprendere e conservare le istruzioni
per l'uso.
Indossare occhiali protettivi.
Rispettare le avvertenze di sicurezza sugli
oggetti scagliati ad alta velocità e sui rispettivi
interventi.
Estrarre la batteria durante le interruzioni del
lavoro, durante il trasporto, la conservazione, la
manutenzione o la riparazione.
Proteggere il decespugliatore e il caricabatteria
dalla pioggia e dall'umidità.
15m (50ft)
Mantenere la distanza di sicurezza.
4 Avvertenze di sicurezza
4.1 Simboli di avvertimento
I simboli di avvertimento su decespugliatore, batteria e
caricabatteria hanno i seguenti significati:
Rispettare le avvertenze di sicurezza e le
rispettive misure.
0458-713-9621-C
Proteggere la batteria da calore e fiamme.
Proteggere la batteria dalla pioggia e non
immergerla in liquidi.
Rispettare l'intervallo di temperatura consentito
per la batteria.
85

italiano
4 Avvertenze di sicurezza
4.2 Impiego secondo la destinazione
Il decespugliatore STIHL FSA 56 serve per tagliare l’erba.
Il decespugliatore non deve essere usato in caso di pioggia.
La batteria STIHL AK alimenta il decespugliatore.
Il caricabatteria STIHL AL 101 carica la batteria STIHL AK.
AVVERTENZA
■ Le batterie e i caricabatteria non approvati da STIHL per
l'uso con il decespugliatore possono provocare incendi ed
esplosioni. Sussiste il rischio di gravi lesioni o di morte
oppure di provocare danni materiali.
► Utilizzare il decespugliatore con una batteria STIHL AK.
►Caricare la batteria STIHL AK con un
caricabatteria STIHL AL 101, AL 300 o AL
500.
■ Se il decespugliatore, la batteria o il caricabatteria non
sono utilizzati in modo non conforme, sussiste il rischio di
ferimento o morte delle persone e di danni materiali.
► Pulire il decespugliatore, la batteria e il caricabatteria
seguendo le indicazioni di queste istruzioni per l'uso.
4.3 Requisiti dell'utente
AVVERTENZA
■ Gli utenti che non abbiano ricevuto istruzioni potrebbero
non riconoscere o non valutare correttamente i rischi del
decespugliatore, delle batterie e del caricabatteria.
L'utente o altre persone rischiano gravi lesioni o la morte.
► Leggere, comprendere e conservare le
istruzioni per l'uso.
► Se il decespugliatore, la batteria o il caricabatteria
vengono consegnati ad un'altra persona: Consegnare a
corredo anche le istruzioni per l'uso.
► In caso di dubbi: Rivolgersi ad un rivenditore STIHL.
► Accertarsi che l'utente abbia i seguenti requisiti:
– L'utente è riposato.
– L'utente dovrà avere le capacità fisiche,
sensoriali e intellettuali tali da poter
controllare il decespugliatore, la batteria
e il caricabatteria e quindi da poter
lavorare. Se l'utente ha limitazioni
fisiche, sensoriali e intellettuali, potrà
lavorare soltanto sotto la sorveglianza o
dietro la guida di una persona
responsabile.
– L'utente è maggiorenne.
– L'utente ha ricevuto istruzioni da un
rivenditore STIHL o da una persona
esperta prima di iniziare a lavorare con
il decespugliatore e con il caricabatteria.
– L'utente non è sotto l'effetto di alcol, farmaci o
droghe.
4.4 Abbigliamento ed equipaggiamento
AVVERTENZA
■ Durante il lavoro potrebbero essere scagliati oggetti ad
alta velocità. L'utente può ferirsi.
► Indossare occhiali protettivi aderenti. Gli
occhiali di protezione adatti sono reperibili
in commercio con il marchio di conformità
con la norma EN 166 o con le disposizioni
nazionali.
► Portare una visiera.
► Indossare pantaloni lunghi in materiale resistente.
86
0458-713-9621-C

4 Avvertenze di sicurezza
italiano
■ Durante il lavoro potrebbe essere sollevata polvere a
mulinello. La polvere inalata può danneggiare la salute e
provocare reazioni allergiche.
► Indossare una mascherina antipolvere.
■ Se inadeguato, l'abbigliamento può impigliarsi nel legno,
nella sterpaglia e nel decespugliatore. Gli utenti senza
abbigliamento adeguato possono ferirsi gravemente.
► Indossare capi d'abbigliamento aderenti.
► Togliere foulard e gioielli.
■ Durante il lavoro, l'utente può entrare in contatto con
l'attrezzo da taglio rotante. L'utente potrebbe ferirsi
gravemente.
► Indossare calzature in materiale resistente.
► Indossare pantaloni lunghi in materiale resistente.
■ Durante la pulizia o manutenzione, l'utente può entrare in
contatto con l'attrezzo da taglio o il coltello tagliafilo.
L'utente può ferirsi.
► Indossare guanti di lavoro in materiale resistente.
■ Se l'utente indossa scarpe inadeguate, rischia di
scivolare. L'utente può ferirsi.
► Indossare scarpe stabili, chiuse, con suola antiscivolo.
4.5 Zona di lavoro e area circostante
4.5.1 Decespugliatore a motore
AVVERTENZA
■ Le persone estranee, i bambini e gli animali potrebbero
non riconoscere e non valutare i pericoli del
decespugliatore e degli oggetti scagliati ad alta velocità.
Sussiste il rischio di ferire le persone estranee, i bambini
e gli animali.
► Tenere le persone estranee, i bambini e gli
15m (50ft)
animali ad una distanza di 15 m attorno
all'area di lavoro.
■ Il decespugliatore non è protetto dall'acqua. Se si lavora
sotto la pioggia o in ambienti umidi, sussiste il rischio di
scossa elettrica. L’utente può rimanere ferito e la
motosega può essere danneggiata.
► Non lavorare nella pioggia o in un ambiente
umido.
■ L'elettromotore del decespugliatore può provocare
scintille. Le scintille possono provocare incendi ed
esplosioni in ambienti facilmente infiammabili o esplosivi.
Sussiste il rischio di gravi lesioni o di morte oppure di
provocare danni materiali.
► Non lavorare in ambienti facilmente infiammabili o in
ambienti esplosivi.
4.5.2 Batteria
AVVERTENZA
■ I bambini potrebbero non essere in grado di riconoscere e
valutare i pericoli derivanti dalla batteria. Sussiste il
pericolo per i bambini di ferirsi gravemente.
► Tenere lontani i bambini.
■ La batteria non è protetta da tutte le condizioni ambientali.
Se la batteria viene esposta a determinate condizioni
ambientali, può incendiarsi o esplodere. Sussiste il rischio
di ferire gravemente persone oppure di provocare danni
materiali.
► Proteggere la batteria da calore e fiamme.
► Non gettare la batteria nel fuoco.
► Utilizzare e conservare la batteria ad una
temperatura compresa tra i - 10 °C e i
+50°C.
► Mantenere una distanza di 15 m dagli oggetti.
0458-713-9621-C
87

italiano
4 Avvertenze di sicurezza
► Proteggere la batteria dalla pioggia e non
immergerla in liquidi.
► Tenere la batteria lontana da oggetti metallici.
► Non esporre la batteria ad alta pressione.
► Non esporre la batteria alle microonde.
► Proteggere la batteria da sostanze chimiche e sali.
4.5.3 Caricabatteria
AVVERTENZA
■ I bambini potrebbero non essere in grado di riconoscere e
valutare i pericoli derivanti dal caricabatteria e dalla
corrente elettrica. I bambini sono esposti al rischio di gravi
lesioni o morte.
►Tenere lontani i bambini.
■ Il caricabatteria non è protetto dall'acqua. Se si lavora
sotto la pioggia o in ambienti umidi, sussiste il rischio di
scossa elettrica. L’utente può rimanere ferito e il
caricabatteria può essere danneggiato.
► Non azionarlo nella pioggia o in un
ambiente umido.
■ Il caricabatteria non è protetto da tutte le condizioni
ambientali. Se il caricabatteria viene esposto a
determinate condizioni ambientali, può incendiarsi o
esplodere. Sussiste il rischio di ferire gravemente persone
oppure di provocare danni materiali.
► Azionare il caricabatteria in un ambiente chiuso e
asciutto.
► Non azionare il caricabatteria in ambienti facilmente
infiammabili o esplosivi.
► Non azionare il caricabatteria su una superficie
facilmente infiammabile.
► Utilizzare e conservare il caricabatteria ad una
temperatura compresa tra i + 5 °C e i + 40 °C.
■ Le persone potrebbero inciampare nel cavo di
collegamento Le persone possono rimanere ferite e il
caricabatterie potrebbe rimanere danneggiato.
► Posare il cavo di collegamento piatto sul pavimento.
4.6 Condizioni di sicurezza
4.6.1 Decespugliatore a motore Il decespugliatore si può considerare in condizioni di
sicurezza quando sono soddisfatte le seguenti condizioni:
– Il decespugliatore non è danneggiato.
– Il decespugliatore è pulito e asciutto.
– Gli elementi di comando funzionano e non sono alterati.
– Una combinazione indicata sulle presenti istruzioni per
l’uso di attrezzo da taglio e riparo è montata.
– L'attrezzo di taglio e il riparo sono correttamente montati.
– Sono montati soltanto accessori originali STIHL appositi
per questo decespugliatore.
– Gli accessori sono montati correttamente.
AVVERTENZA
■ In mancanza delle condizioni di sicurezza, i componenti
possono non più funzionare più correttamente e i
dispositivi di sicurezza risultare compromessi. Sussiste il
rischio di gravi lesioni o morte.
► Lavorare con il decespugliatore solo se non è
danneggiato.
► Se il decespugliatore è sporco o bagnato: Pulire e
lasciare asciugare il decespugliatore.
► Non alterare il decespugliatore. Eccezione: montaggio
di una combinazione indicata sulle presenti istruzioni
per l’uso di attrezzo da taglio e riparo.
► Se gli elementi di comando non funzionano: Non
lavorare con il decespugliatore.
► Non montare attrezzi di taglio in metallo.
88
0458-713-9621-C

4 Avvertenze di sicurezza
italiano
► Montare soltanto accessori originali STIHL appositi per
il decespugliatore.
► Montare l'attrezzo di taglio e il riparo come descritto
nelle presenti istruzioni per l'uso.
► Applicare gli accessori come descritto sulle presenti
istruzioni per l'uso o sulle istruzioni per l’uso degli
accessori.
► Non inserire oggetti nelle feritoie del decespugliatore.
► In caso di dubbi: Rivolgersi ad un rivenditore STIHL.
4.6.2 Riparo
Il riparo si può considerare in condizioni di sicurezza quando
sono soddisfatte le seguenti condizioni:
– Il riparo non è danneggiato.
– Il coltello tagliafilo è montato correttamente.
AVVERTENZA
■ In mancanza delle condizioni di sicurezza, i componenti
possono non più funzionare più correttamente e i
dispositivi di sicurezza risultare compromessi. L'utente
può ferirsi gravemente.
► Lavorare con il riparo solo se non è danneggiato.
► Lavorare con un coltello tagliafilo montato
correttamente.
► In caso di dubbi: Rivolgersi ad un rivenditore STIHL.
4.6.3 Testa falciante
La testa falciante si può considerare in condizioni di
sicurezza quando sono soddisfatte le seguenti condizioni:
– La testa falciante non è danneggiata.
– La testa falciante non è bloccata.
– I fili sono montati correttamente.
AVVERTENZA
■ In mancanza di condizioni di sicurezza, potrebbero
staccarsi parti della testa falciante o dei fili ed essere
scagliati via. Pericolo di gravi lesioni a persone.
► Lavorare con la testa falciante solo se non è
danneggiata.
► Non sostituire i fili con oggetti metallici.
► In caso di dubbi: Rivolgersi ad un rivenditore STIHL.
4.6.4 Batteria
La batteria si può considerare in condizioni di sicurezza
quando sono soddisfatte le seguenti condizioni:
– La batteria non è danneggiata.
– La batteria è pulita e asciutta.
– La batteria funziona e non è stata alterata.
AVVERTENZA
■ In condizioni non sicure, la batteria può non funzionare più
correttamente. Pericolo di gravi lesioni a persone.
► Lavorare con una batteria non danneggiata e
funzionante.
► Non caricare una batteria danneggiata o difettosa.
► Se la batteria è sporca o bagnata: Pulire e lasciare
asciugare la batteria
► Non alterare la batteria.
► Non inserire oggetti nelle feritoie della batteria.
► Non collegare i contatti elettrici della batteria con oggetti
metallici né cortocircuitarli.
► Non aprire la batteria.
■ Da una batteria danneggiata può fuoriuscire del liquido.
Se il liquido entra in contatto con la pelle o gli occhi, può
irritarli.
► Evitare contatti con il liquido.
► In caso di contatto con la pelle: Lavare la parte
interessata con abbondante acqua e sapone.
0458-713-9621-C
89

italiano
4 Avvertenze di sicurezza
► In caso di contatto con gli occhi: Sciacquare gli occhi
per almeno 15 minuti con abbondante acqua e rivolgersi
ad un medico.
■ Una batteria difettosa o danneggiata può avere un odore
insolito, emettere fumo oppure bruciare. Sussiste il rischio
di gravi lesioni o di morte oppure di provocare danni
materiali.
► Se la batteria ha un odore inconsueto oppure emette
fumo: Non utilizzarla e tenerla lontana da sostanze
infiammabili.
► Se la batteria si incendia: Spegnere l'incendio nella
batteria con un estintore oppure acqua.
4.6.5 Caricabatteria
Il caricabatteria si può considerare in condizioni di sicurezza
quando sono soddisfatte le seguenti condizioni:
– Il caricabatteria non è danneggiato.
– Il caricabatteria è pulito e asciutto.
AVVERTENZA
■ In mancanza delle condizioni di sicurezza, i componenti
possono non più funzionare più correttamente e i
dispositivi di sicurezza risultare compromessi. Sussiste il
rischio di gravi lesioni o morte.
► Utilizzare un caricabatteria che non sia danneggiato.
► Se il caricabatteria è sporco o bagnato: pulirlo e
lasciarlo asciugare.
► Non alterare il caricabatteria.
► Non inserire oggetti nelle feritoie del caricabatteria.
►Non collegare i contatti elettrici del
caricabatteria con oggetti metallici né
cortocircuitarli.
► Non aprire il caricabatteria.
4.7 Impiego
AVVERTENZA
■ L'utente potrebbe non lavorare più con la dovuta
concentrazione in determinate situazioni. L'utente può
inciampare, cadere e ferirsi gravemente.
► Lavorare calmi e concentrati.
► Se le condizioni di luminosità e di visibilità sono scarse:
Non lavorare con il decespugliatore.
► Comandare solo il decespugliatore.
► Guidare l’attrezzo di taglio vicino al terreno.
► Prestare attenzione agli ostacoli.
► Lavorare in piedi sul pavimento e mantenere l'equilibrio.
► Se compaiono sintomi di affaticamento: Fare una pausa
di lavoro.
■ L'attrezzo da taglio che ruota può tagliare l'utente.
L'utente potrebbe ferirsi gravemente.
► Non toccare l'attrezzo da taglio in rotazione.
► Se l’attrezzi di taglio è bloccato da un oggetto:
Disinserire il decespugliatore ed estrarre la batteria.
Solo a questo punto rimuovere l’oggetto.
■ Se il decespugliatore durante l'uso si modifica oppure si
comporta in modo anomalo, è possibile che non sia in
condizioni di sicurezza. Sussiste il rischio di ferire
gravemente persone oppure di provocare danni materiali.
► Terminare il lavoro, togliere la batteria e rivolgersi ad un
rivenditore STIHL.
■ Durante il lavoro si possono produrre vibrazioni attraverso
il decespugliatore.
► Indossare i guanti.
► Fare delle pause di lavoro.
► In caso di segni di disturbi alla circolazione sanguigna:
rivolgersi ad un medico.
■ Se viene rilasciata la leva di comando, l'attrezzo da taglio
continua a girare per breve tempo. Pericolo di gravi lesioni
a persone.
► Attendere che l'attrezzo da taglio non giri più.
90
0458-713-9621-C

4 Avvertenze di sicurezza
italiano
4.8 Carica
AVVERTENZA
Il contatto con componenti conduttori può essere provocato
dalle seguenti cause:
– Il cavo di collegamento è danneggiato.
– La spina di rete è danneggiata.
– La presa non è installata correttamente.
■ Il contatto con componenti conduttori può provocare una
scossa elettrica. L'utente rischia gravi lesioni o la morte.
► Accertarsi che il cavo di collegamento e la spina non
siano danneggiati.
► Innestare la spina di rete in una presa installata
correttamente.
■ Durante il caricamento, una tensione di rete o una
frequenza di rete errate possono provocare una
sovratensione nel caricabatteria. Il caricabatteria può
essere danneggiato.
► Accertarsi che la tensione di rete e la frequenza della
rete elettrica corrispondano a quanto riportato sulla
targhetta dati tecnici del caricabatteria.
■ Durante la carica è possibile che un caricabatteria
danneggiato o difettoso abbia un odore anomalo oppure
emetta fumo. Sussiste il rischio di ferire persone oppure di
provocare danni materiali.
► Staccare la spina dalla presa.
■ Il caricabatteria può surriscaldarsi e provocare un
incendio in caso di deviazione del calore insufficiente.
Sussiste il rischio di gravi lesioni o di morte oppure di
provocare danni materiali.
► Non coprire il caricabatteria.
■ Se sono collegati ad una presa più caricabatteria, durante
la carica potrebbero essere sovraccaricati i cavi elettrici. I
cavi elettrici possono riscaldarsi e provocare un incendio.
Sussiste il rischio di gravi lesioni o di morte oppure di
provocare danni materiali.
► Collegare il caricabatteria singolarmente ad una presa.
► Non collegare il caricabatteria a prese multiple.
■ Se sulla parete scorrono cavi elettrici e tubi, sussiste il
rischio di danneggiarli se il caricabatteria viene montato
sulla parete. Il contatto con i cavi elettrici può provocare
una scossa elettrica. Sussiste il rischio di ferire
gravemente persone oppure di provocare danni materiali.
► Accertarsi che nel punto previsto non scorrano cavi
elettrici e tubi nella parete.
■ Se il caricabatteria non viene montato alla parete come
descritto sulle presenti istruzioni per l’uso, il caricabatteria
o la batteria potrebbero cadere oppure il caricabatteria
potrebbe surriscaldarsi. Sussiste il rischio di ferire
persone oppure di provocare danni materiali.
► Montare sulla parete il caricabatteria nel modo descritto
nelle presenti istruzioni per l’uso.
■ Se il caricabatteria con la batteria inserita è montato ad
una parete, la batteria rischia di cadere dal caricabatteria.
Sussiste il rischio di ferire persone oppure di provocare
danni materiali.
► Innanzitutto montare il caricabatteria alla parete, poi
inserire la batteria.
4.9 Trasporto
4.9.1 Decespugliatore a motore
AVVERTENZA
■ Durante il trasporto il decespugliatore può ribaltarsi o
muoversi. Sussiste il rischio di ferire persone oppure di
provocare danni materiali.
► Estrarre la batteria.
► Fissare il decespugliatore in modo tale da evitare che si
ribalti o che si muova.
0458-713-9621-C
91

italiano
4 Avvertenze di sicurezza
4.9.2 Batteria
AVVERTENZA
■ La batteria non è protetta da tutte le condizioni ambientali.
Se la batteria viene esposta a determinate condizioni
ambientali, può danneggiarsi e provocare danni materiali.
► Non trasportare batterie danneggiate.
► Trasportare la batteria in un imballaggio non conduttivo.
■ Durante il trasporto la batteria può ribaltarsi o muoversi.
Sussiste il rischio di ferire persone oppure di provocare
danni materiali.
► Confezionare la batteria nell'imballaggio o nel
contenitore di trasporto in modo tale che non si muova.
► Fissare l'imballaggio in modo tale da evitare che si
ribalti o che si muova.
4.10 Conservazione
4.10.1 Decespugliatore a motore
AVVERTENZA
■ I bambini potrebbero non essere in grado di riconoscere e
valutare i pericoli derivanti dal decespugliatore. Sussiste il
pericolo per i bambini di ferirsi gravemente.
► Estrarre la batteria.
► Conservare il decespugliatore fuori dalla portata dei
bambini.
■ I contatti elettrici sul decespugliatore e i componenti
metallici possono corrodersi in caso di umidità. Il
decespugliatore può essere danneggiato.
► Estrarre la batteria.
4.10.2 Batteria
AVVERTENZA
■ I bambini potrebbero non essere in grado di riconoscere e
valutare i pericoli derivanti dalla batteria. Sussiste il
pericolo per i bambini di ferirsi gravemente.
► Conservare la batteria fuori dalla portata dei bambini.
■ La batteria non è protetta da tutte le condizioni ambientali.
Se la batteria viene esposta a determinate condizioni
ambientali, può danneggiarsi.
► Conservare la batteria in luogo pulito e asciutto.
► Conservare la batteria in un ambiente chiuso.
► Conservare la batteria separata dal decespugliatore e
dal caricabatteria.
► Conservare la batteria in un imballaggio non conduttivo.
► Conservare la batteria ad una temperatura compresa
tra i - 10 °C e i + 50 °C.
4.10.3 Caricabatteria
AVVERTENZA
■ I bambini potrebbero non essere in grado di riconoscere e
valutare i pericoli derivanti da un caricabatteria. I bambini
sono esposti al rischio di gravi lesioni o morte.
► Estrarre la batteria.
► Conservare il caricabatteria fuori dalla portata di
bambini.
■ Il caricabatteria non è protetto da tutte le condizioni
ambientali. Se il caricabatteria viene esposto a
determinate condizioni ambientali, può danneggiarsi.
► Estrarre la batteria.
► Se il caricabatteria è caldo: lasciarlo raffreddare.
►Conservare il caricabatteria in luogo
pulito e asciutto.
► Conservare il decespugliatore in luogo pulito e asciutto.
92
►Conservare il caricabatteria in un
ambiente chiuso.
0458-713-9621-C

5 Preparare il decespugliatore per l'esercizio
italiano
► Conservare il caricabatteria ad una temperatura
compresa tra i + 5 °C e i + 40 °C.
■ Il cavo di collegamento non è destinato a trasportare o ad
appendere il caricabatteria. Il cavo di collegamento e il
caricabatteria possono rimanere danneggiati.
► Prendere il caricabatteria dall'alloggiamento e tenerlo
saldamente. Sul caricabatteria è presente
un'impugnatura incassata per sollevare il caricabatteria
comodamente.
► Appendere il caricabatteria al supporto a parete.
4.11 Pulizia, manutenzione e riparazione
AVVERTENZA
■ Se durante la pulizia, la manutenzione o la riparazione è
inserita la batteria, il decespugliatore potrebbe accendersi
accidentalmente. Sussiste il rischio di ferire gravemente
persone oppure di provocare danni materiali.
► Estrarre la batteria.
■ L'uso di detergenti corrosivi, idropulitrici od oggetti
appuntiti può danneggiare il decespugliatore, il riparo,
l'attrezzo da taglio, la batteria e il caricabatteria. Se il
decespugliatore, il riparo, l'attrezzo di taglio,la batteria o il
caricabatteria non vengono sottoposti a manutenzione o a
pulizia corrette, i componenti potrebbero non funzionare
più correttamente e i dispositivi di sicurezza potrebbero
risultare compromessi. Pericolo di gravi lesioni a persone.
► Pulire decespugliatore, riparo, attrezzo da taglio,
batteria e caricabatteria seguendo scrupolosamente le
indicazioni di queste istruzioni per l'uso.
■ Se il decespugliatore, il riparo, l'attrezzo da taglio, la
batteria e il caricabatteria non vengono sottoposti a
manutenzione o a riparazione corrette, i componenti
potrebbero non funzionare più correttamente e i dispositivi
di sicurezza potrebbero risultare compromessi. Sussiste il
rischio di gravi lesioni o morte.
► Non sottoporre il decespugliatore, l'attrezzo da taglio, la
batteria e il caricabatteria a manutenzione o riparazione
autonome.
► Se il decespugliatore, il riparo, l'attrezzo da taglio, la
batteria o il caricabatteria devono essere sottoposti a
manutenzione o riparazione: Rivolgersi ad un
rivenditore STIHL.
5 Preparare il decespugliatore per
l'esercizio
5.1 Preparare il decespugliatore per l'esercizio
Prima di iniziare il lavoro, occorre eseguire le seguenti
operazioni:
► Accertarsi che i seguenti componenti siano in condizioni di
sicurezza:
– Decespugliatore, @ 4.6.1.
– Riparo, @ 4.6.2.
– Testa falciante, @ 4.6.3.
– Batteria, @ 4.6.4.
– Caricabatteria, @ 4.6.5.
► Controllare la batteria, @ 11.2.
► Caricare completamente la batteria, @ 6.1.
► Pulire il decespugliatore, @ 16.1.
► Montare il riparo, @ 7.1.
► Montare i corpi bobina, @ 7.2.1.
► Montare l’impugnatura circolare, @ 7.3.
► Regolare la lunghezza dello stelo, @ 8.1.
► Regolare l’impugnatura circolare, @ 8.2.
► Controllare gli elementi di comando, @ 11.1.
► Se durante la verifica degli elementi di comando
lampeggiano 3 LED rossi: Togliere la batteria e
rivolgersi ad un rivenditore STIHL.
Il decespugliatore è danneggiato.
0458-713-9621-C
93

italiano
7
6
5
3
2
4
1
0000-GXX-0628-A0
1
0000-GXX-0629-A0
20-40%
40-60%
60-80%
80-100%
0-20%
6 Carica della batteria e LED
► Se non è possibile eseguire queste operazioni: Non usare
il decespugliatore e rivolgersi ad un rivenditore STIHL.
6 Carica della batteria e LED
6.1 Caricare la batteria
Il tempo di carica dipende da diverse condizioni, ad esempio
dalla temperatura della batteria o dalla temperatura
ambiente. Il tempo di carica effettivo può differire dal tempo
di carica indicato. Il tempo di carica è indicato in
www.stihl.com/charging-times.
Se si inserisce la spina in una presa e la
batteria viene impiegata nella stazione di
carica, la carica avviene automaticamente.
Quando la batteria è completamente carica,
il caricabatteria si spegne automaticamente.
Durante il processo di carica la batteria e il caricabatteria si
scaldano.
► Inserire la batteria (2) nelle guide del caricabatteria (3) e
spingerla fino all’arresto.
Il LED (4) si accende con luce verde fissa. I LED (1) si
accendono con luce verde e la batteria (2) viene caricata.
► Se i LED (4) e i LED (1) non si accendono più: Scollegare
la spina di rete (6) dalla presa (7).
La batteria è completamente carica.
► Estrarre la batteria (2).
6.2 Visualizzazione dello stato di carica
► Premere il pulsante (1).
I LED si con luce verde fissa per ca. 5 secondi e indicano
lo stato di carica.
► Se il LED destro verde lampeggia: Caricare la batteria.
► Inserire la spina di rete (6) in una presa accessibile (7).
Il caricabatteria (3) esegue un autotest. Il LED (4) si
accende per ca. 1 secondo con luce verde e per
ca. 1 secondo con luce rossa.
► Posare il cavo di collegamento (5).
94
6.3 LED sulla batteria
I LED indicano lo stato di carica della batteria o le anomalie.
I LED possono accendersi o lampeggiare con luce verde o
rossa.
Se i LED lampeggiano o rimangono accesi con luce verde,
viene indicato il livello di carica.
► Se i LED lampeggiano o rimangono accesi con colore
rosso: Eliminare i guasti, @ 18.
Nel decespugliatore o nella batteria è presente un guasto.
6.4 LED sul caricabatteria
Il LED indica lo stato del caricabatteria.
0458-713-9621-C

7 Assemblare il decespugliatore
Se il LED verde si accende, la batteria viene caricata.
► Se il LED rosso lampeggia: Eliminare i guasti.
Nel caricabatteria è presente un guasto.
italiano
4
7 Assemblare il decespugliatore
7.1 Montaggio del riparo
► Disinserire il decespugliatore ed estrarre la batteria.
3
1
2 2
Il coltello tagliafilo (1) è già montato nel riparo (2) e non deve
essere smontato.
► Spingere il riparo (2) fino all’arresto nelle guide
sull'alloggiamento
Il riparo (2) si chiude a filo con l'alloggiamento.
► Avvitare e serrare le viti (3).
Il riparo (2) non deve essere rimontato.
1
5
2
3
► Introdurre le estremità del filo (4) del corpo bobina (2)
attraverso le aperture (1) nella testa falciante (5).
► Inserire il corpo bobina (2) nella testa falciante (5)
► Applicare il coperchio (7) sulla testa falciante (5) in modo
tale che le linguette (3) del coperchio (7) e le aperture (6)
nella testa falciante (4) corrispondano.
► Premere il coperchio (7) fino al riscontro sulla testa
falciante (5).
Le linguette (3) si incastrano in modo udibile.
0000-GXX-1486-A1
7.2.2 Smontare il corpo bobina
► Disinserire il decespugliatore ed estrarre la batteria.
6
7
0000-GXX-1485-A1
7.2 Testa falciante AutoCut 2-2
7.2.1 Montaggio del corpo bobina ► Disinserire il decespugliatore ed estrarre la batteria. ► Immergere il corpo bobina per 12-24 ore in un contenitore
con acqua.
I fili diventano elastici.
0458-713-9621-C
1
1
2
3
► Premere le linguette (1) e togliere il coperchio (3).
► Estrarre il corpo bobina (2).
7.3 Montaggio dell’impugnatura circolare
► Disinserire il decespugliatore ed estrarre la batteria.
0000-GXX-1484-A0
95

italiano
8 Regolare il decespugliatore per l'utente
2
3
1
► Allineare l'impugnatura circolare (2) in modo tale che
l'attacco per il dado con testa a stella (1) sia a destra
dell'impugnatura di comando e le aperture
nell'impugnatura circolare (2) siano rivolte in direzione
dell'operatore.
► Allontanare premendo il gambo dell'impugnatura
circolare (2) e applicare l'impugnatura circolare (2)
sull'impugnatura di comando fino allo scatto
dell'impugnatura a staffa (2).
► Spingere la vite (3) attraverso il foro.
► Avvitare e stringere il dado con testa (1).
L’impugnatura circolare (2) non deve essere rimontata.
8 Regolare il decespugliatore per
l'utente
1
2
0000-GXX-1488-A0
► Premere e tenere premuto il pulsante di arresto (1).
► Tirare o spingere l'impugnatura di comando (2) nella
posizione desiderata.
► Rilasciare il pulsante di bloccaggio (1).
► Spingere un poco l’impugnatura di comando (2) fino allo
scatto.
8.2 Regolazione dell’impugnatura circolare
L'impugnatura circolare può essere regolata in diverse
posizioni in base alla statura dell'operatore.
► Disinserire il decespugliatore ed estrarre la batteria.
2
0000-GXX-1489-A0
8.1 Impostare la lunghezza dello stelo
Il gambo può essere regolato in diverse lunghezze in base
alla statura dell'operatore.
► Disinserire il decespugliatore ed estrarre la batteria.
► Tenere fermo il gambo.
96
1
0000-GXX-1490-A0
► Allentare il dado con testa a stella (1).
► Piegare l’impugnatura circolare (2) nella posizione
desiderata.
► Stringere forte il dado con testa a stella (1).
0458-713-9621-C

9 Inserire e togliere la batteria
9 Inserire e togliere la batteria
9.1 Introduzione della batteria
italiano
2
2
1
► Premere la batteria (1) nel vano (2) fino a sentire un clic.
Le frecce (3) sulla batteria (1) sono ancora visibili e la
batteria (1) è fissata nel vano batteria (2). Tra il
decespugliatore e la batteria (1) non c'è alcun contatto
elettrico.
► Premere la batteria (1) fino al riscontro nel vano batteria
(2).
La batteria (1) scatta con un secondo clic e chiude il
decespugliatore a filo con l'alloggiamento.
9.2 Estrarre la batteria
► Sistemare il decespugliatore su una superficie piana.
► Tenere una mano davanti al vano batteria di modo che la
batteria (2) non cada.
3
1
► Premere la leva di bloccaggio (1) con l'altra mano.
La batteria (2) è sbloccata e può essere estratta.
0000-GXX-1491-A0
10 Accendere e spegnere il
decespugliatore
10.1 Accendere il decespugliatore
► Tenere il decespugliatore con una mano sull'impugnatura
di comando di modo che il pollice stringa l'impugnatura di
comando.
► Tenere il decespugliatore con l'altra mano
sull'impugnatura circolare di modo che il pollice la stringa.
1
2
► Premere e tenere premuto il bloccaggio leva di comando
(1).
► Premere e tenere premuta la leva di comando (2) con
l'indice.
Il decespugliatore accelera e l’attrezzo di taglio gira.
0000-GXX-1492-A0
0000-GXX-1493-A0
0458-713-9621-C
97

italiano
0000-GXX-1494-A0
11 Controllo di decespugliatore e batteria
10.2 Spegnere il decespugliatore.
► Rilasciare la leva di comando e il blocco della leva di
comando.
► Attendere che l’attrezzo da taglio non giri più.
► Se l'attrezzo da taglio continua a girare: Togliere la
batteria e rivolgersi ad un rivenditore STIHL.
Il decespugliatore è difettoso.
11 Controllo di decespugliatore e batteria
11.1 Controllare gli elementi di comando
Bloccaggio e la leva di comando
► Estrarre la batteria.
► Tentare di premere la leva di comando senza premere il
bloccaggio leva di comando.
► Se non si riesce a premere la leva: Rivolgersi ad un
rivenditore STIHL.
Il bloccaggio leva di comando è difettoso.
► Premere a fondo il bloccaggio leva di comando e tenerlo
premuto.
► Premere a fondo e poi rilasciare la leva di comando.
► Se la leva di comando o il bloccaggio leva di comando
sono difficili da muovere o non ritornano nella posizione di
partenza: Non usare il decespugliatore e rivolgersi ad un
rivenditore STIHL.
La leva di comando o il bloccaggio leva di comando sono
difettosi.
Accendere il decespugliatore
► Introdurre la batteria.
► Premere a fondo il bloccaggio leva di comando e tenerlo
premuto.
► Premere a fondo e tenere premuta la leva di comando.
L'attrezzo da taglio gira.
► Se lampeggiano 3 LED rossi: Togliere la batteria e
rivolgersi ad un rivenditore STIHL.
Il decespugliatore è danneggiato.
► Rilasciare la leva.
L’attrezzo di taglio dopo poco tempo non gira più.
► Se l'attrezzo da taglio continua a girare: Togliere la
batteria e rivolgersi ad un rivenditore STIHL.
Il decespugliatore è difettoso.
11.2 Controllare la batteria
► Premere il tasto sulla batteria.
I LED si accendono o lampeggiano.
► Se i LED non si accendono o lampeggiano: Non usare la
batteria e rivolgersi ad un rivenditore STIHL.
Nella batteria vi è un malfunzionamento.
12 Lavorare con il decespugliatore
12.1 Tenuta e guida del decespugliatore
► Tenere il decespugliatore con una mano sull'impugnatura
di comando di modo che il pollice stringa l'impugnatura di
comando.
► Tenere il decespugliatore con l'altra mano
sull'impugnatura circolare di modo che il pollice la stringa.
12.2 Falciatura
La distanza dell'attrezzo da taglio dal terreno determina
l’altezza di taglio
98
0458-713-9621-C
 Loading...