

{
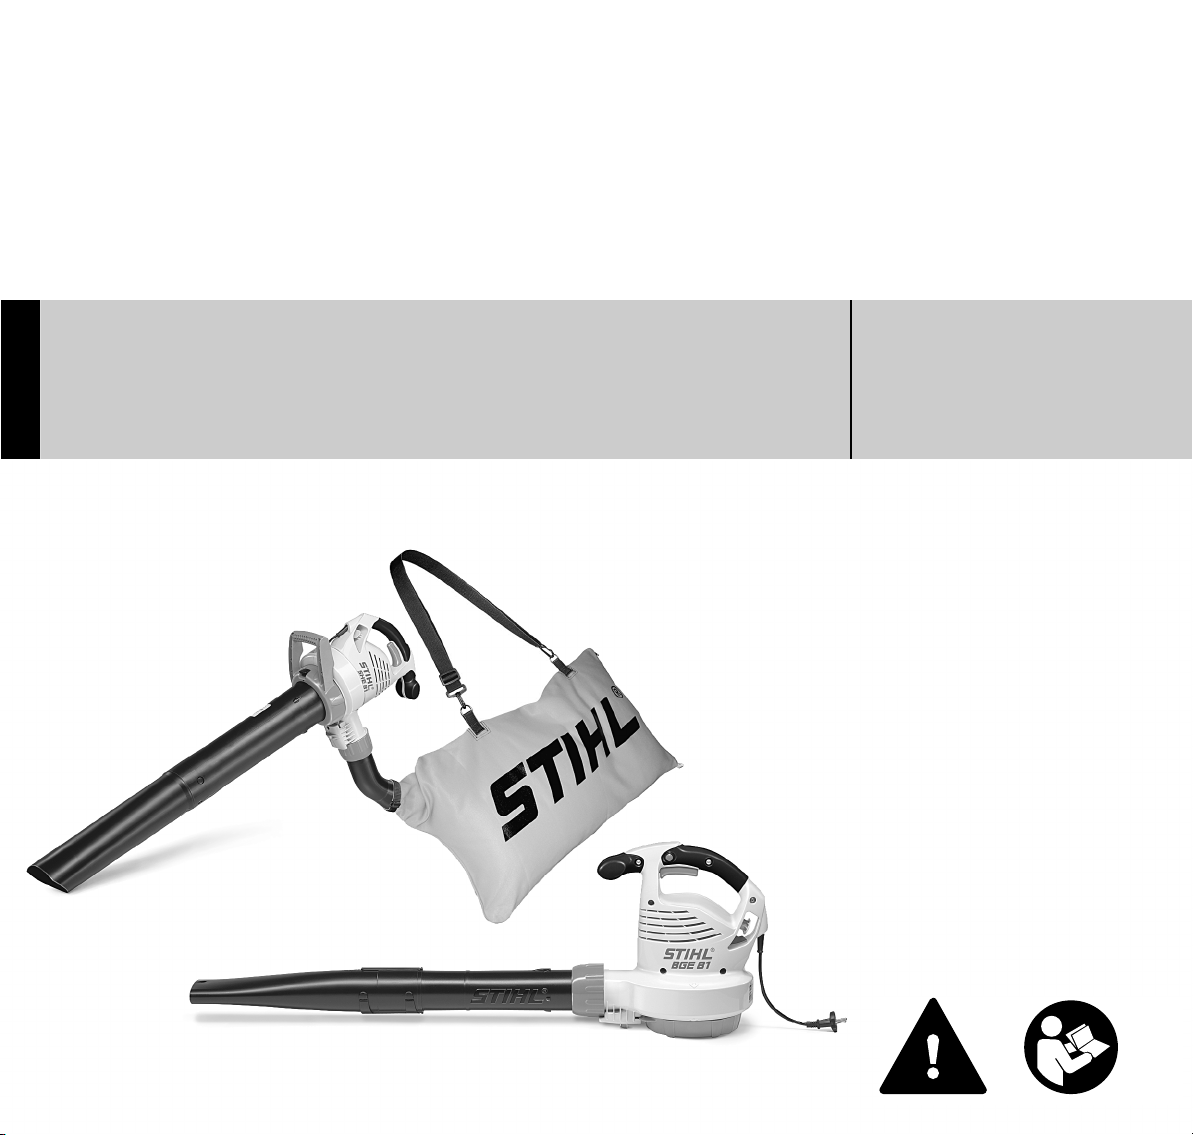
STIHL BGE 61, 71, 81, SHE 71, 81
Instruction Manual

Contents
English
Guide to Using this Manual 2
Safety Precautions and Working
Techniques 2
Assembling the Blower 8
Assembling the Vacuum Shredder 8
Connecting to Power Supply 10
Switching On 11
Switching Off 12
Original Instruction ManualPrinted on chlorine-free paper
Storing the Machine 12
Maintenance and Care 13
Minimize Wear and Avoid Damage 14
Main Parts 15
Specifications 16
Maintenance and Repairs 17
Disposal 18
EC Declaration of Conformity 18
Printing inks contain vegetable oils, paper can be recycled.
Dear Customer,
Thank you for choosing a quality
engineered STIHL product.
It has been built using modern
production techniques and
comprehensive quality assurance.
Every effort has been made to ensure
your satisfaction and trouble-free use of
the product.
Please contact your dealer or our sales
company if you have any queries
concerning this product.
Your
Dr. Nikolas Stihl
{
© ANDREAS STIHL AG & Co. KG, 2018
0458-290-0121-B. VA1.F18.
0000007626_004_GB
BGE 61, BGE 71, BGE 81, SHE 71, SHE 81
This instruction manual is protected by copyright. All rights reserved, especially the rights to reproduce, translate and process
with electronic systems.
1
English
Guide to Using this Manual Safety Precautions and
Working Techniques
Pictograms
All the pictograms attached to the
machine are shown and explained in this
manual.
Symbols in text
WARNING
Warning where there is a risk of an
accident or personal injury or serious
damage to property.
NOTICE
Caution where there is a risk of
damaging the machine or its individual
components.
Engineering improvements
STIHL's philosophy is to continually
improve all of its products. For this
reason we may modify the design,
engineering and appearance of our
products periodically.
Therefore, some changes, modifications
and improvements may not be covered
in this manual.
WARNING
– Minors should never be allowed to
operate this machine. Watch
children to be sure that they do not
play with the power tool.
– This power tool may be operated
only by persons who have been
instructed in its use and proper
handling.
– Persons who are not able to operate
the power tool safely due to limited
physical, sensory or mental ability
may work with it only under
supervision or after being instructed
appropriately by a responsible
person.
Special safety precautions must be observed
when working with this
power tool. The power
supply is a particular
source of danger.
It is important that you
read the instruction manual before first use and
keep it in a safe place for
future reference. Nonobservance of the
instruction manual may
result in serious or even
fatal injury.
– Lend or rent your power tool only
together with this instruction manual
and only to persons who are familiar
with this model and its operation.
– Disconnect plug from wall outlet
before performing any work on the
machine, e.g. cleaning,
maintenance, replacing parts.
Observe all applicable local safety
regulations, standards and ordinances.
When the power tool is not in use, put it
in a place where it does not endanger
others. Secure it against unauthorized
use, disconnect the plug from the power
supply.
The user is responsible for avoiding
injury to third parties or damage to their
property.
If you have not used this model before:
Have your dealer or a trained expert
show you how to operate it properly and
safely.
The use of noise emitting power tools
may be restricted to certain times by
national or local regulations.
Before each use, check that your power
tool is in good condition. Pay special
attention to the power cord, mains plug
and safety devices.
Do not operate your power tool if any of
its components are damaged.
Do not use the power cord to pull or
carry the power tool.
Do not use a pressure washer to clean
your power tool. The solid jet of water
may damage parts of the power tool.
Never spray water on the unit – risk of
short circuit!
2
BGE 61, BGE 71, BGE 81, SHE 71, SHE 81
English
Physical Condition
To operate this power tool you must be
rested, in good physical condition and
mental health.
If you have any condition that might be
aggravated by strenuous work, check
with your doctor before operating a
power tool.
Do not operate the machine if you are
under the influence of any substance
(alcohol, drugs) which might impair
vision, dexterity or judgment.
Intended Use
The blower is designed for blowsweeping leaves, grass, paper and
similar materials, e.g. in gardens, sports
stadiums, car parks and driveways.
The vacuum shredder is designed for
picking up dry leaves and other
lightweight, loose and non-combustible
debris.
Do not blow-sweep or vacuum
hazardous materials.
Do not operate your power tool indoors.
Do not use your power tool for any other
purpose because of the increased risk of
accidents and damage to the power tool
itself. Never attempt to modify the
product in any way since this may result
in accidents or damage to the product.
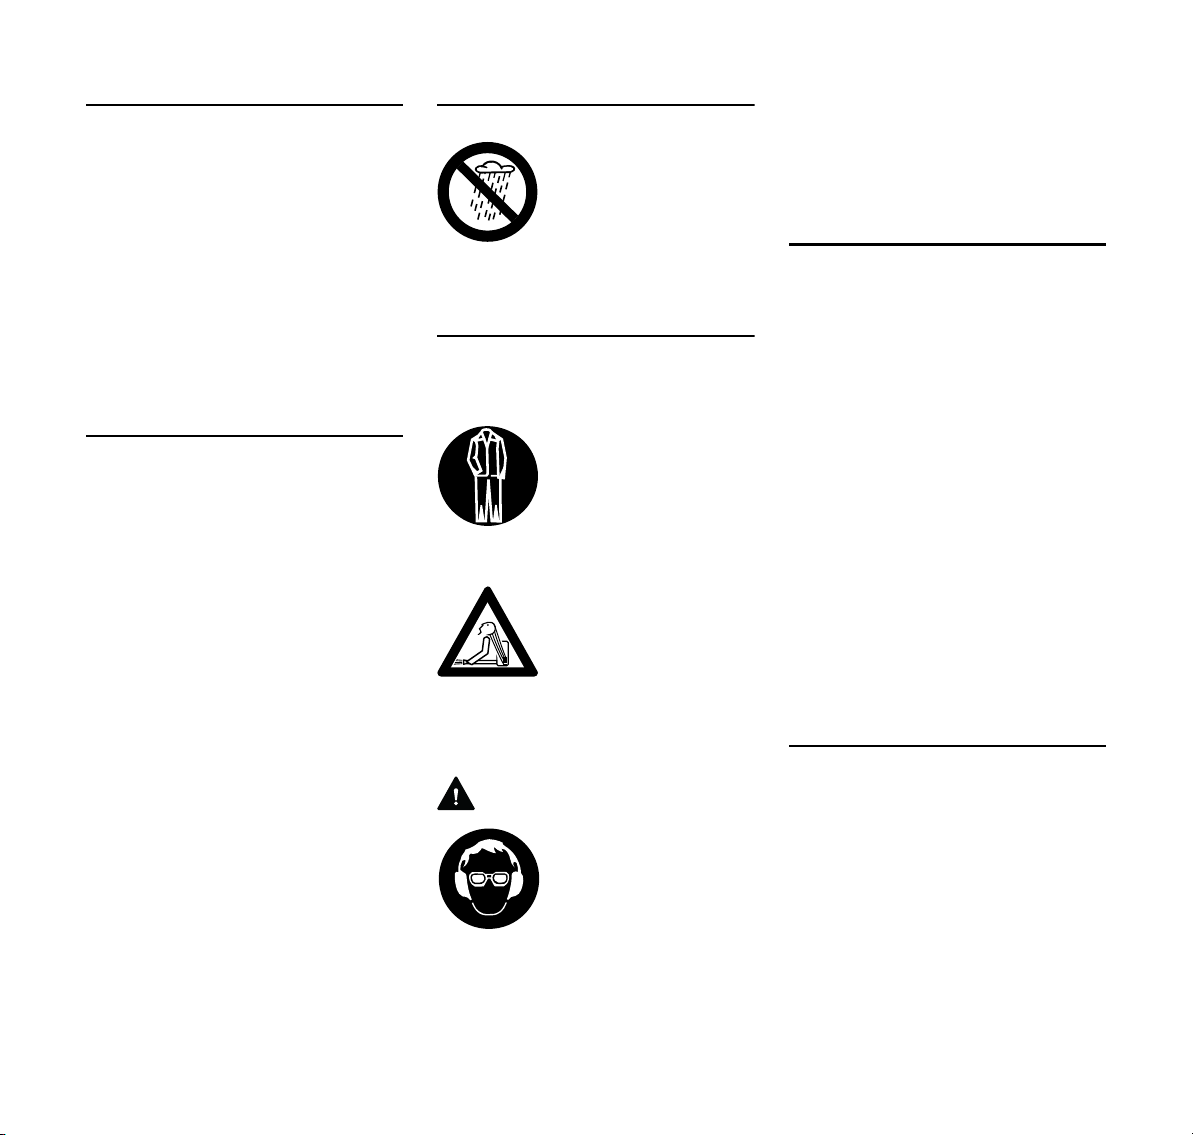
Operating Conditions
Never work with the
power tool in the rain,
snow or in wet or very
damp locations. Do not
leave the power tool outdoors in the rain.
Clothing and Equipment
Wear proper protective clothing and
equipment.
Clothing must be sturdy
but allow complete freedom of movement. Wear
snug-fitting clothing, an
overall and jacket combination, do not wear a
work coat.
Avoid any clothing,
scarves, neckties, jewellery or anything that could
get into the air intake. Tie
up and confine long hair
(e.g. with a hair net, cap,
hard hat, etc.).
Wear sturdy shoes with non-slip soles.
WARNING
To reduce the risk of eye
injuries, wear close-fitting safety glasses in
accordance with European Standard EN 166.
Make sure the safety
glasses are a comfortable and snug fit.
Wear hearing protection, e.g. earplugs
or ear muffs.
STIHL offers a comprehensive range of
personal protective clothing and
equipment.
Accessories
Only use parts and accessories that are
explicitly approved for this power tool by
STIHL or are technically identical. If you
have any questions in this respect,
consult a servicing dealer. Use only high
quality parts and accessories in order to
avoid the risk of accidents and damage
to the machine.
STIHL recommends the use of original
STIHL replacement parts and
accessories. They are specifically
designed to match the product and meet
your performance requirements.
Never attempt to modify your machine in
any way since this may increase the risk
of personal injury. STIHL excludes all
liability for personal injury and damage
to property caused while using
unauthorized attachments.
Before Starting Work
Inspect the power tool.
– Trigger switch/switch lever must
move easily to STOP or 0
– The trigger/switch lever must be on
STOP or 0.
– The blower tubes must be properly
assembled.
BGE 61, BGE 71, BGE 81, SHE 71, SHE 81
3
English
290BA001 KN
– Handles must be clean and dry, free
from oil and dirt, for safe control.
– Check condition of blower wheel
and blower housing – see chapter
on "Using the Vacuum Attachment".
To reduce the risk of accidents, do not
operate your power tool if it is not
properly assembled and in good
condition.
Do not operate your power tool if any of
its components are damaged or not
properly mounted.
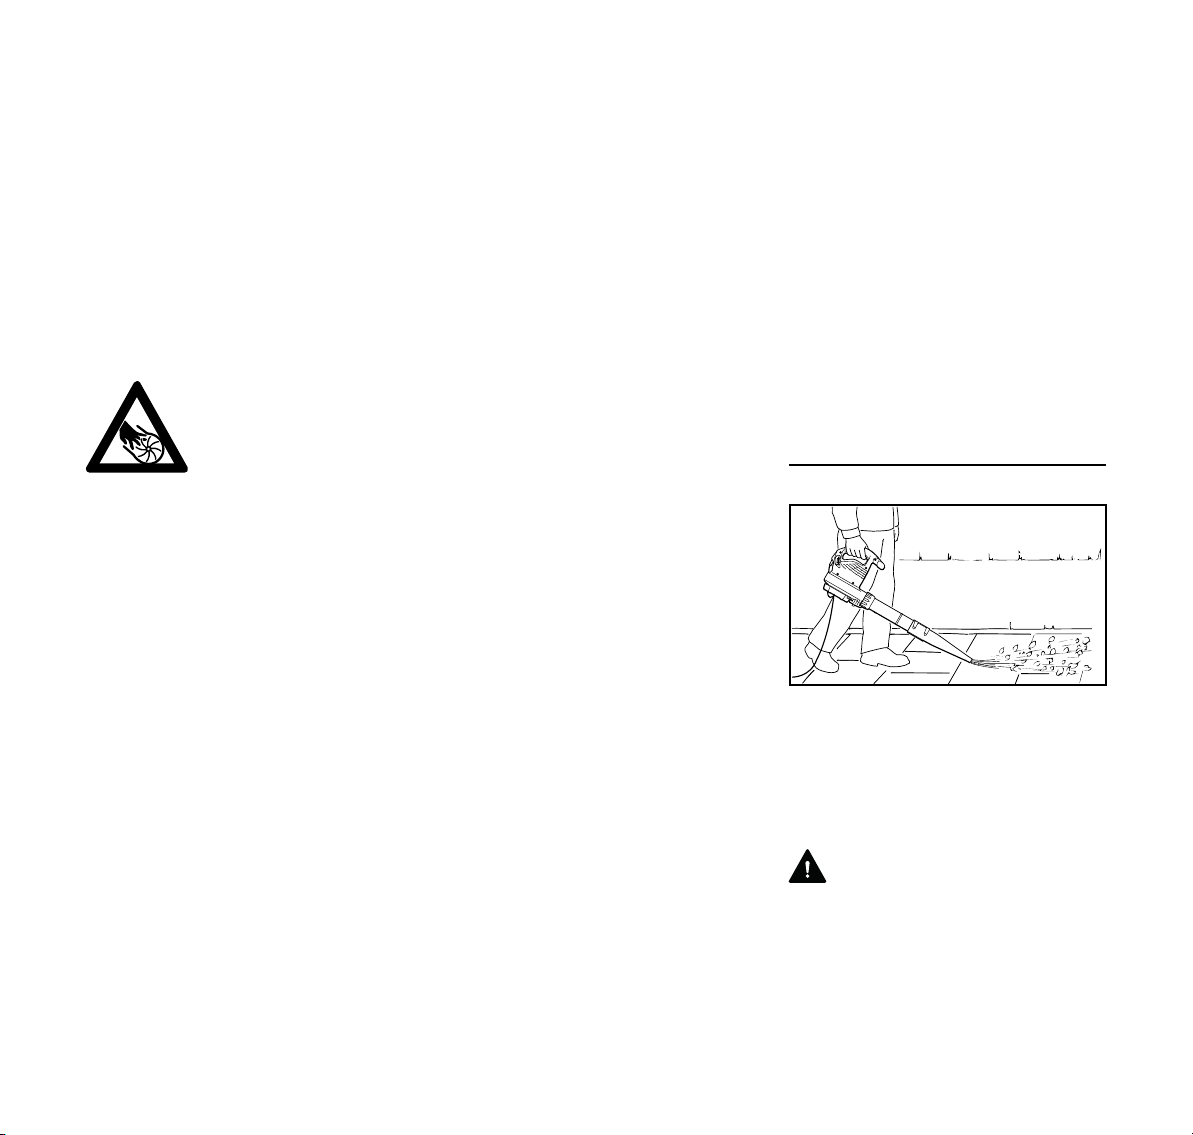
Risk of injury from contact with rotating blower
wheel. Always switch off
the motor and disconnect the plug from the
power supply before
removing the intake
screen, suction tube,
blower tube or elbow.
Wait for the blower wheel
to come to a complete
standstill.
A worn blower housing (cracks, nicks,
chips) may result in an increased risk of
injury from thrown foreign objects. If the
blower housing is damaged, consult
your dealer – STIHL recommends you
contact a STIHL servicing dealer.
Never attempt to modify the controls or
the safety devices in any way.
Electrical Connection
Reduce the risk of electric shock:
– Voltage and frequency of the power
tool (see rating plate) and the
voltage and frequency of your
power supply must be the same.
– Check the connecting cord, plug
and extension cord for damage.
Never use damaged cords,
couplings and plugs or connecting
cords that do not comply with
regulations.
– Always connect the power tool to a
properly installed wall outlet.
– Check that the insulation of the
power cord, extension cord, plug
and coupling is in good condition.
– Never touch the mains plug,
connecting cord, extension cord or
electrical connections with wet
hands.
Position the connecting and extension
cords correctly:
– Check minimum cross section of
wires (wire gauge) – see
"Connecting to Power Supply".
– To reduce the risk of stumbling,
position and mark the connecting
cord so that it cannot be damaged
or endanger others.
– Using unsuitable extension cords
can be dangerous. Use only
extension cords approved for
outdoor use which are labeled as
such and have the appropriate wire
gauge.
– The plug and coupling of the
extension cord must be water-proof
and must never be immersed in
water.
– Do not chafe on edges, pointed or
sharp objects
– Do not squeeze through gaps in
doors or windows
– If cords are twisted – unplug the
power tool and straighten them out
– Always unwind the extension cord
completely from the cable drum to
reduce the risk of fire from
overheating.
Holding and Controlling the Power Tool
Your blower is designed for one-handed
operation. It can be carried by the
control handle in either the right or left
hand.
Always hold the power tool firmly in your
hand.
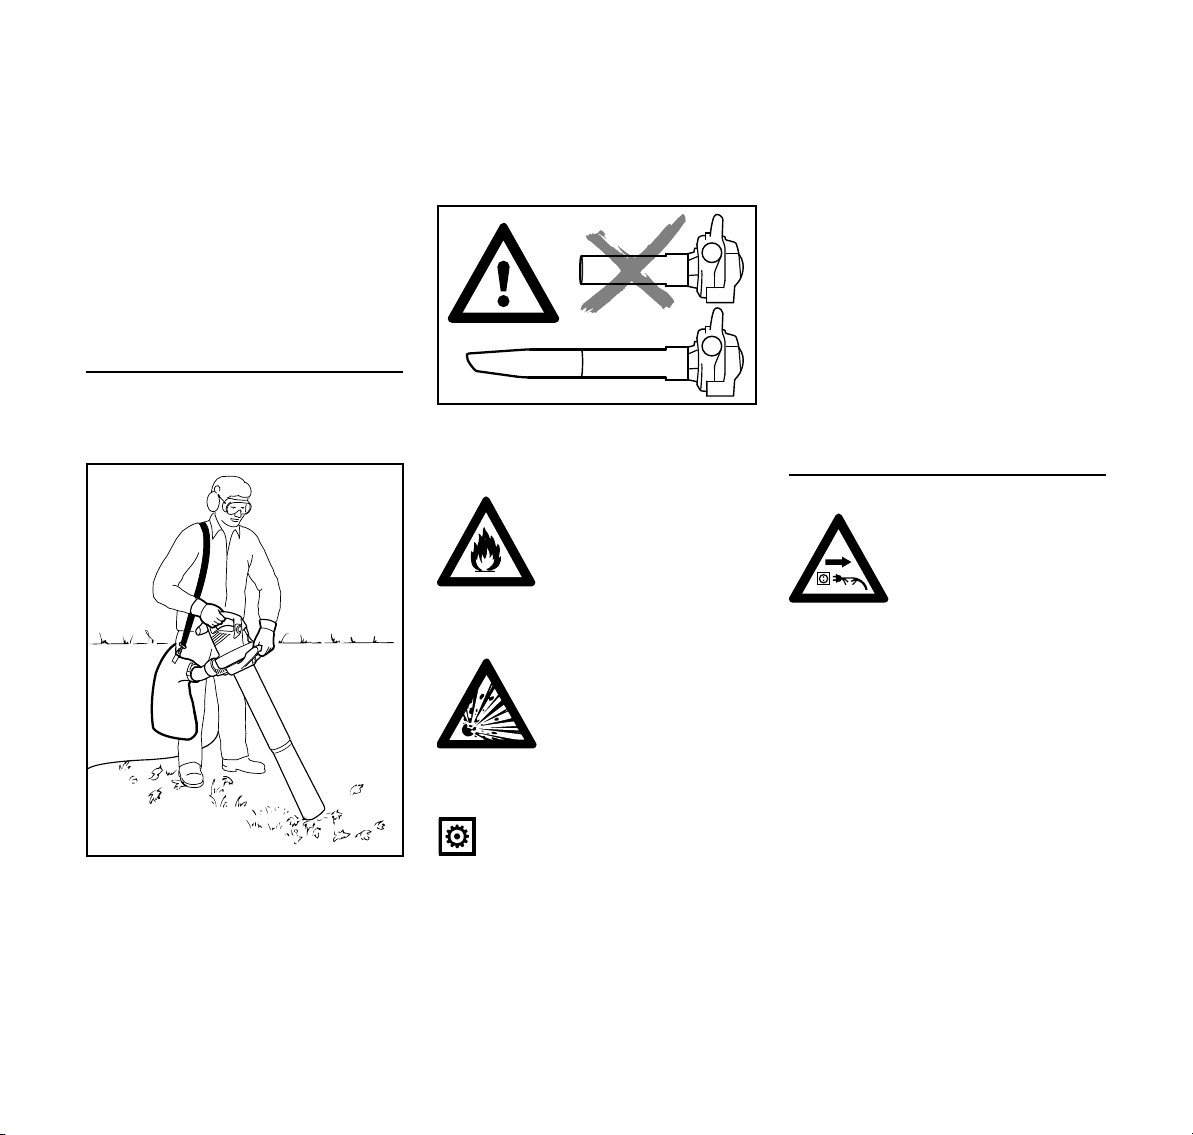
WARNING
To reduce the risk of injury, operate the
unit only with a properly mounted blower
tube.
4
BGE 61, BGE 71, BGE 81, SHE 71, SHE 81
English
290BA002 KN
The round nozzle is particularly suitable
for use on uneven surfaces (e.g. fields
and lawns).
The fan nozzle (either included with
power tool or available as special
accessory) produces a broad and
powerful airstream at ground level. It can
be aimed and controlled very accurately.
This nozzle is highly effective for blowsweeping sawdust, leaves, grass
cuttings, etc. on flat surfaces.
Using the Vacuum Attachment
For specific assembling instructions,
see appropriate chapter in this manual.
Your vacuum shredder is designed for
two-handed operation. Hold and operate
the power tool with your right hand on
the control handle and your left hand on
the assist handle (union nut).
Wear the catcher bag shoulder strap
over your right shoulder, not across your
chest. This enables you to quickly
remove the power tool and catcher bag
in an emergency.
To reduce the risk of injury, operate your
power tool only with a properly mounted
suction tube and closed catcher bag.
To reduce the risk of personal injury from fire,
never attempt to pick up
hot or burning substances (e.g. smoldering
ashes, glowing
cigarettes).
To reduce the risk of fatal
injury from fire or explosion, never attempt to
pick up combustible fluids
(e.g. gasoline) or materials soaked in
combustible fluids.
NOTICE
Vacuuming abrasive material (such as
grit, stone chips, etc.) causes the blower
wheel and blower housing to wear at a
rapid rate. This results in a considerable
loss of suction power. In such a case
you should contact your dealer. STIHL
recommends an authorized STIHL
servicing dealer.
Take particular care when vacuuming
wet leaves since they may block the
blower wheel and elbow.
To clear a blockage in the machine:
– Switch off the motor and disconnect
the plug from the power supply.
– Remove the elbow and suction tube
– see "Assembling the Shredder
Vacuum".
– Clean the elbow and blower
housing.
During Operation
If the power cord is damaged, immediately
disconnect the plug from
the power supply to avoid
the risk of electrocution.
Avoid damage to the power supply cord.
Do not drive over it, pinch or tug it.
Never jerk the connecting cord to
disconnect it from the wall outlet. To
unplug, grasp the plug, not the cord.
Be sure your hands are dry before
touching the plug or power cord.
In case of imminent danger or in an
emergency, move the switch
lever/trigger switch to STOP or 0 .
Your power tool is designed to be
operated by one person only. Do not
allow other persons in the work area.
Keep bystanders, especially children,
and animals away from the work area.
BGE 61, BGE 71, BGE 81, SHE 71, SHE 81
5
English
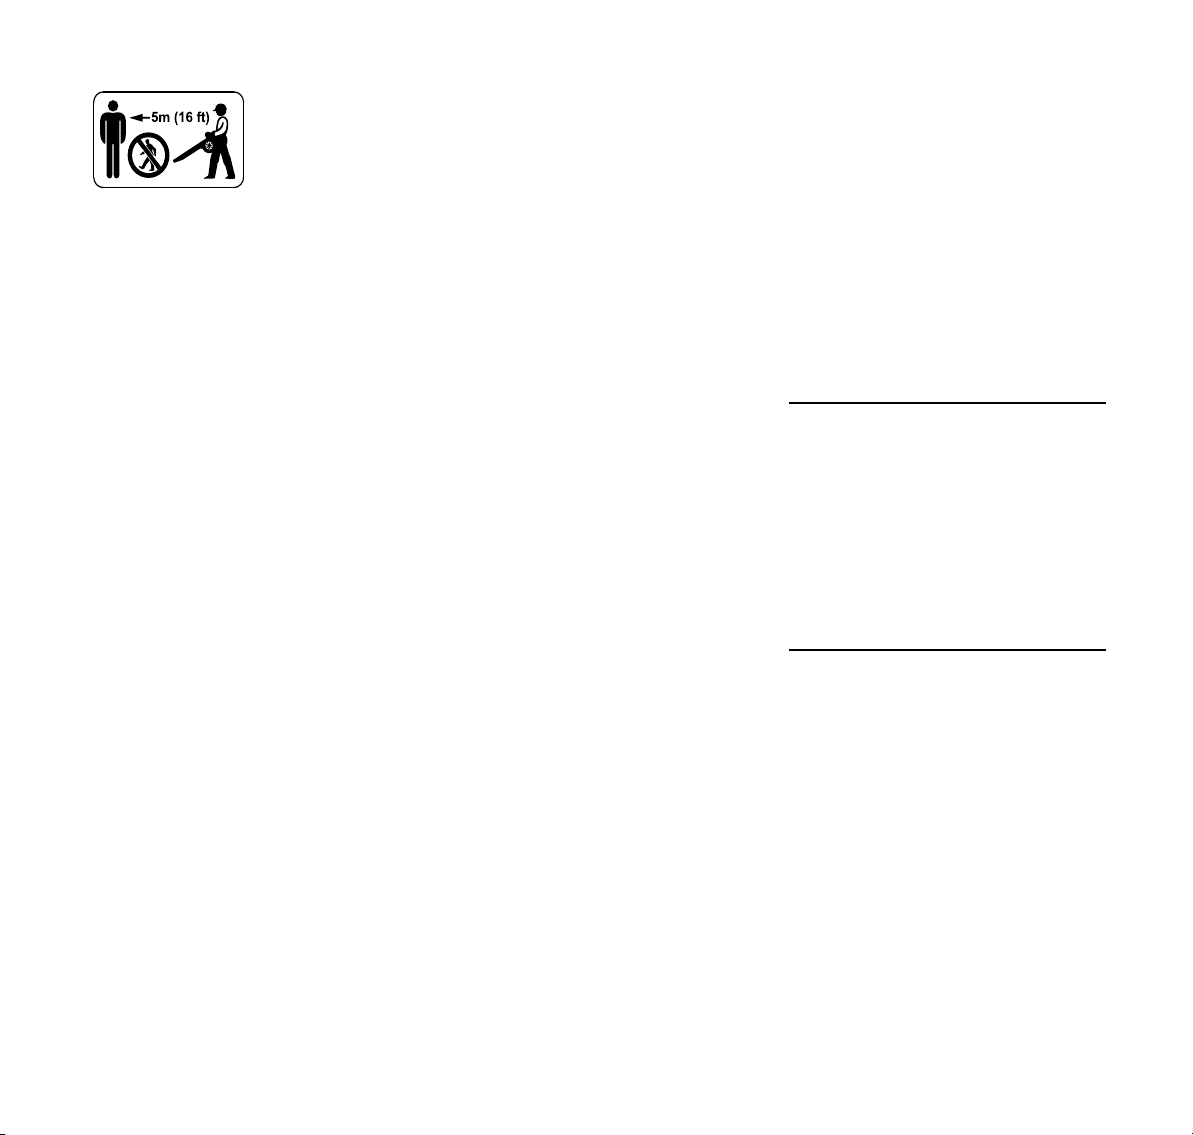
To reduce the risk
of injury from
thrown objects, do
not allow any other
persons within a
radius of 5 meters
of your own
position.
To reduce the risk of damage to
property, also maintain this distance
from other objects (vehicles, windows).
Do not direct the air blast towards
bystanders or animals since the air flow
can blow small objects at great speed.
When blow-sweeping and vacuum
shredding (in open ground and
gardens), watch out for small animals to
avoid harming them.
Never leave a running machine
unattended.
Walk slowly forwards as you work –
observe the nozzle outlet at all times –
do not walk backwards – risk of
stumbling.
Keep the connecting cord behind the
power tool at all times – do not walk
backwards – risk of stumbling.
Hold your power tool in a normal,
relaxed working position. Make sure you
always have good balance and secure
footing.
Take care in slippery conditions – on
slopes and uneven ground.
Watch out for obstacles: Be careful of
refuse, tree stumps, roots and ditches
which could cause you to trip or stumble.
Never work on a ladder or any other
insecure support.
Be particularly alert and cautious when
wearing hearing protection because
your ability to hear warnings (shouts,
alarms, etc.) is restricted.
Work calmly and carefully – in daylight
conditions and only when visibility is
good. Stay alert so as not to endanger
others.
To reduce the risk of accidents, take a
break in good time to avoid tiredness or
exhaustion.
Static electricity may build-up while
blow-sweeping large quantities of very
dusty material and suddenly discharge
in certain unfavorable conditions (e.g.
very dry work area).
If dust levels are very high, always wear
a suitable respirator.
Vacuuming unsuitable materials may
block the blower wheel. Switch off the
unit immediately and disconnect the
plug from the power supply. Then clear
the blockage.
Never attempt to insert objects into the
blower housing through the intake
screen or the nozzle. They may be
expelled at very high speed by the
blower – risk of injury.
If there is a noticeable change in running
behavior (e.g. higher vibrations), stop
work and rectify the cause of the
problem.
If your power tool is subjected to
unusually high loads for which it was not
designed (e.g. heavy impact or a fall),
always check that it is in good condition
before continuing work – see also
"Before Starting Work". Make sure the
safety devices are working properly. Do
not continue operating your power tool if
it is damaged. In case of doubt, consult
your servicing dealer.
If the machine continues to run (does not
switch off) after the trigger switch is
released, disconnect the plug from the
wall outlet and consult your STIHL
servicing dealer. The machine has a
malfunction.
Before leaving the power tool
unattended: Switch it off and disconnect
the plug from the power supply.
After Finishing Work
Disconnect the plug from the wall outlet.
Never jerk the connecting cord to
disconnect it from the wall outlet. To
unplug, grasp the plug, not the cord.
Always clean dust and dirt off the power
tool – do not use any grease solvents for
this purpose.
Vibrations
Prolonged use of the power tool may
result in vibration-induced circulation
problems in the hands (whitefinger
disease).
No general recommendation can be
given for the length of usage because it
depends on several factors.
The period of usage is prolonged by:
– Hand protection (wearing warm
gloves)
– Work breaks
6
BGE 61, BGE 71, BGE 81, SHE 71, SHE 81

English
The period of usage is shortened by:
– Any personal tendency to suffer
from poor circulation (symptoms:
frequently cold fingers, tingling
sensations).
– Low outside temperatures.
– The force with which the handles
are held (a tight grip restricts
circulation).
Continual and regular users should
monitor closely the condition of their
hands and fingers. If any of the above
symptoms appear (e.g. tingling
sensation in fingers), seek medical
advice.
Maintenance and repairs
WARNING
Before starting any
work on the
machine: Always
disconnect the
machine from the
mains power
supply.
– Use only high-quality
spare parts. Otherwise,
there may be a risk of
accidents and damage to
the unit. If you have any
questions in this respect,
consult a servicing dealer.
– To avoid risks, work on the
machine (e. g. replacing a
damaged power cord) may
only be carried out by
authorized dealers or
qualified electricians.
Clean plastic parts with a
cloth. Harsh detergents can
damage the plastic.
Clean ventilation slots in
motor housing as needed.
The machine must be
serviced regularly. Do not
attempt any maintenance or
repair work not described in
the Instruction Manual. All
other work should be carried
out by a servicing dealer.
authorized STIHL dealers.
STIHL dealers receive regular
training and are supplied with
technical information.
BGE 61, BGE 71, BGE 81, SHE 71, SHE 81
STIHL recommends the use
of genuine STIHL spare parts.
Such parts have been
optimized for the machine and
the user's requirements.
STIHL recommends that
maintenance and repair work
be carried out only by
7

English
a
290BA004 KN
6
b
4
290BA015 KN
3
2
1
Assembling the Blower
N Disconnect the plug from the power
supply.
Mounting the Blower Tube
BGE 71, BGE 81:
Your blower can be switched on only
when the blower tube is properly
mounted. The union nut activates a
switch which closes the circuit to allow
the motor to be switched on.
2
4
5
1
3
6
N Line up the recesses. The arrow (2)
must be on the top of the blower
tube (1).
N Push the blower tube (1) into the
blower housing stub (3) as far as the
stop.
N Push the union nut (4) over the
blower housing stub (3) and turn it in
the direction of the arrow until the
tab (5) engages the opening (6) in
the union nut.
BGE 71, BGE 81:
N You will hear the safety switch being
activated.
Mounting the Nozzle
N Push the nozzle (5) onto the blower
tube (1) as far as lug (6),
position (a) (long) or position (b)
(short), and rotate the nozzle in the
direction of the arrow to it lock in
position.
Removing the Blower Tube
0000-GXX-2307-A0
4
N Switch off the motor.
N Press down the lock button by
inserting a suitable tool through the
opening in the union nut.
N Rotate the union nut (4) in the
direction of arrow as far as the stop.
N Remove the blower tube (1).
1
Assembling the Vacuum
Shredder
Your vacuum shredder can be switched
on only when the elbow and suction tube
are properly mounted. The union nuts
activate a switch which closes the circuit
to allow the motor to be switched on.
N Disconnect the plug from the power
supply.
Mounting the Elbow
WARNING
Make sure the zipper on the catcher bag
is closed.
N Push the elbow (1) into the catcher
0000-GXX-2308-A0
bag (2) as far as the mark (smaller
arrow).
N Tighten strap (3) on catcher bag
and press down the buckle tab (4).
8
BGE 61, BGE 71, BGE 81, SHE 71, SHE 81

English
295BA080 KN
2
1
290BA009 KN
290BA018 KN
5
0000-GXX-2556-A0
Mounting the Suction Tube
7
5
6
0000-GXX-2309-A0
N Line up the recesses.
N Push the elbow (5) into the blower
housing stub (6) as far as stop.
N Push the union nut (7) over the
blower housing stub (6) and turn it in
the direction of the arrow as far as
the stop. You will hear the safety
switch being activated.
Assembling the Suction Tube
N Line up the arrows on the suction
tube and extension tube. Push
together and lock in position.
N Switch off the motor.
N Press down the lock button (1) by
inserting a suitable tool through the
opening.
N Push lug (arrow) against blower
housing and hold it there.
N Rotate the intake screen (2) in the
direction of arrow as far as the stop
and lift it away.
N Line up the arrows (3).
N Push the suction tube into the intake
opening as far as the stop.
N Push the handle (4) over the intake
opening.
N Line up the arrows (3 and 5).
N Rotate the handle (4) in direction of
arrow until the lever (6) engages
audibly on the blower housing.
Lock button (arrow) must engage in
position.
BGE 61, BGE 71, BGE 81, SHE 71, SHE 81
9

English
2
1
0000-GXX-2557-A0
5
4
290BA017 KN
0000-GXX-2556-A0
Removing the Elbow
N Shut off the engine.
N Press down the lock button (1) by
inserting a suitable tool through the
opening.
N Rotate the union nut (1) in the
direction of arrow as far as the stop.
N Remove the elbow (2).
Removing the Suction Tube
2
1
N Shut off the engine.
N Press down the lock button (1) by
inserting a suitable tool through the
opening.
N Depress lever (1) and rotate handle
(2) in direction of ar row a s far as th e
stop.
N Remove the handle together with
the suction tube.
N Position the intake screen (3) on the
intake opening.
N Line up the arrows (4).
N Rotate the intake screen (3) in
direction of arrow until the lug (5)
engages audibly on the blower
housing.
Lock button (arrow) must engage in
position.
0000-GXX-2311-A0
Connecting to Power Supply
The voltage and frequency of the
machine (see rating plate) must match
the voltage and frequency of the power
connection.
The minimum fuse protection of the
power connection must comply with the
specifications – see "Specifications".
The machine must be connected to the
power supply via an earth-leakage
circuit breaker to disconnect the power
supply if the differential current to earth
exceeds 30 mA.
The power connection must correspond
to IEC 60364 and relevant national
regulations.
Extension cord
The design of the extension cord must at
least fulfill the same features as the
connecting cord on the machine.
Observe the design marking (type
designation) on the connecting cord.
The cores in the cord must have the
following minimum cross-section
depending on the mains voltage and
cord length.
Cord length Minimum cross-
section
220 V – 240 V:
Up to 20 m 1.5 mm
20 m to 50 m 2.5 mm
100 V – 127 V:
Up to 10 m AWG 14 / 2.0 mm
10 m to 30 m AWG 12 / 3.5 mm
2
2
2
2
10
BGE 61, BGE 71, BGE 81, SHE 71, SHE 81

English
290BA012 KN
2
1
4
290BA013 KN
3
5
1
290BA016 KN
2
3
290BA007 KN
Strain relief (cord retainer)
The strain relief protects the appliance
cord against damage.
N Insert the plug (1) into the extension
cord coupling (2).
N Make a loop in the extension cord.
N Pass the loop (3) through the
opening (4).
N Slip the loop over the hook (5) and
pull it tight.
Switching On
N Make sure you have a secure and
balanced footing.
N Hold the unit in the normal working
position.
BGE 61, BGE 71, SHE 71
N Move switch (1) to I or II (position II
depends on model).
Units with single switch setting (I):
I = full power
Units with two switch settings (I and II):
I = half power
II = full power
BGE 81, SHE 81
Press in the lock button (3) to lock the
trigger switch (2) in the maximum power
position in the blower and vacuum
modes.
Connecting to Wall Outlet
Make sure your machine is switched off
before you connect it to the power
supply – see "Switching Off".
N Connect the extension cord plug to
a properly installed wall outlet.
BGE 61, BGE 71, BGE 81, SHE 71, SHE 81
N Squeeze trigger switch (2) on
control handle.
Blowing and suction power are infinitely
variable.
11

English
1
290BA016 KN
2
3
290BA007 KN
Switching Off
During long work breaks – disconnect
the plug from the power supply.
When the machine is not in use, shut it
off so that it does not endanger others.
Secure it against unauthorized use.
BGE 61, BGE 71, SHE 71
N Move the switch (1) to 0
BGE 81, SHE 81
Storing the Machine
N Thoroughly clean the machine.
N Store the machine in a dry, high or
locked location, out of the reach of
children and other unauthorized
persons.
N Release trigger switch (2) on control
handle.
If the lock button (3) is engaged,
squeeze the trigger switch briefly and let
it go.
12
BGE 61, BGE 71, BGE 81, SHE 71, SHE 81

Maintenance and Care
The following intervals apply to normal operating conditions only. If your daily working
time is longer or operating conditions are difficult (very dusty work area, etc.), shorten
the specified intervals accordingly.
before starting work
after finishing work or daily
weekly
monthly
yearly
if problem
if damaged
Complete machine
Control handle Check operation x
Cooling inlets Clean x
Safety labels Replace x
Visual inspection (condition) x
Clean x
English
if required
BGE 61, BGE 71, BGE 81, SHE 71, SHE 81
13

English
Minimize Wear and Avoid
Damage
Observing the instructions in this manual
helps reduce the risk of unnecessary
wear and damage to the power tool.
The power tool must be operated,
maintained and stored with the due care
and attention described in this
instruction manual.
The user is responsible for all damage
caused by non-observance of the safety
precautions, operating and maintenance
instructions in this manual. This includes
in particular:
– Alterations or modifications to the
product not approved by STIHL.
– Using tools or accessories which
are neither approved or suitable for
the product or are of a poor quality.
– Using the product for purposes for
which it was not designed.
– Using the product for sports or
competitive events.
– Consequential damage caused by
continuing to use the product with
defective components.
Maintenance Work
All the operations described in the
"Maintenance Chart" must be performed
on a regular basis. If these maintenance
operations cannot be performed by the
owner, they should be performed by a
servicing dealer.
STIHL recommends that you have
servicing and repair work carried out
exclusively by an authorized STIHL
servicing dealer. STIHL dealers are
regularly given the opportunity to attend
training courses and are supplied with
the necessary technical information.
If these maintenance operations are not
carried out as specified, the user
assumes responsibility for any damage
that may occur. Among other things,
this includes:
– Damage to the motor due to neglect
or deficient maintenance (e.g. not
cleaning cooling air inlets).
– Damage due to incorrect electrical
connection (voltage, inadequately
rated connecting cords).
– Corrosion and other consequential
damage resulting from improper
storage.
– Damage to the product resulting
from the use of poor quality
replacement parts.
Parts Subject to Wear and Tear
Some parts of the power tool are subject
to normal wear and tear even during
regular operation in accordance with
instructions and, depending on the type
and duration of use, have to be replaced
in good time. Among other parts, this
includes:
– Fanwheel
– Catcher bag
14
BGE 61, BGE 71, BGE 81, SHE 71, SHE 81

Main Parts
2
10
6
5
1
3
4
7
8
9
11
12
13
14
#
3
15
290BA023 KN
English
1 Fan nozzle
2 Blower tube
3 Union nut
4 Cooling inlets
5 Trigger (BGE 81, SHE 81 only)
6 Switch (BGE 61, BGE 71, SHE 71
only)
7 Lock button (BGE 81, SHE 81 only)
8 Control handle
9 Strain relief hook (cord retainer)
10 Appliance plug
11 Protective screen
12 Union nut with handle*
13 Suction tube*
14 Elbow*
15 Catcher bag*
# Serial number
BGE 61, BGE 71, BGE 81, SHE 71, SHE 81
*
Standard on SHE, special
accessory for BGE
15

English
Specifications
Motor (BGE 61)
120V version
Power supply 120 V, 60 Hz,
9.2 A
Fuse 15 A
Rating 1100 W
Insulation II E
240V version
Power supply 240 V, 50 Hz,
4.8 A
Fuse 10 A
Rating 1100 W
Insulation II E
Motor (BGE 71 / SHE 71)
120V version
Power supply 120 V, 60 Hz,
9.2 A
Fuse 15 A
Rating 1100 W
Insulation II E
230V version
Power supply 230 V, 50 Hz,
4.8 A
Fuse 10 A
Rating 1100 W
Insulation II E
230V - 240V version
Power supply 230 V - 240 V,
50 Hz, 4.8 A
Fuse 10 A
Rating 1100 W
Insulation II E
Motor (BGE 81 / SHE 81)
230V version
Power supply 230 V, 50 Hz,
6.1 A
Fuse 10 A
Rating 1400 W
Insulation II E
230V - 240V version
Power supply 230 V - 240 V,
50 Hz, 6.1 A
Fuse 10 A
Rating 1400 W
Insulation II E
Maximum air flow rate
Vacuum
Blower mode
BGE 61 670 m
BGE 71 670 m
BGE 81 750 m
3
3
3
mode
/h - - /h 580 m3/h
/h 650 m3/h
SHE 71 670 m3/h 580 m3/h
3
SHE 81 750 m
/h 650 m3/h
Air velocity with nozzle
Blower mode
BGE 61 66 m/s
BGE 71 66 m/s
BGE 81 76 m/s
SHE 71 66 m/s
SHE 81 76 m/s
Dimensions
Width 210 mm
Height 334 mm
Depth 330 mm
Weight
BGE 61 3.0 kg
BGE 71 3.0 kg
BGE 81 3.3 kg
SHE 71 4.1 kg
SHE 81 4.4 kg
Noise and Vibration Data
Noise and vibration data are determined
on the basis of the rated maximum
speed.
For further details on compliance with
Vibration Directive 2002/44/EC visit
www.stihl.com/vib.
16
BGE 61, BGE 71, BGE 81, SHE 71, SHE 81

English
Sound pressure level L
p
to
EN 506362100
Vacuum
Blower mode
mode
BGE 71 85 dB(A) 85 dB(A)
BGE 81 89 dB(A) 88 dB(A)
SHE 71 85 dB(A) 85 dB(A)
SHE 81 89 dB(A) 88 dB(A)
Sound power level L
to EN 506362100
w
Vacuum
Blower mode
mode
BGE 71 100 dB(A) 101 dB(A)
BGE 81 103 dB(A) 103 dB(A)
SHE 71 100 dB(A) 101 dB(A)
SHE 81 103 dB(A) 103 dB(A)
Vibration level ahv to EN 506362100
Blower mode
Handle, right
BGE 71 1 m/s
BGE 81 4.1 m/s
SHE 71 1 m/s
SHE 81 4.1 m/s
2
2
2
2
Vacuum mode
Handle, right Handle, left
BGE 71 0.8 m/s
BGE 81 2.6 m/s
SHE 71 0.8 m/s
SHE 81 2.6 m/s
2
2
2
2
1.2 m/s
5.6 m/s
1.2 m/s
5.6 m/s
2
2
2
2
The K-factor in accordance with
Directive 2006/42/EC is 2.0 dB(A) for
the sound pressure level and sound
power level; the K-factor in accordance
with Directive 2006/42/EC is 2.0 m/s
2
for the vibration level.
REACH
REACH is an EC regulation and stands
for the Registration, Evaluation,
Authorisation and Restriction of
Chemical substances.
For information on compliance with the
REACH regulation (EC) No. 1907/2006
see www.stihl.com/reach.
Maintenance and Repairs
Users of this machine may only carry out
the maintenance and service work
described in this user manual. All other
repairs must be carried out by a
servicing dealer.
STIHL recommends that you have
servicing and repair work carried out
exclusively by an authorized STIHL
servicing dealer. STIHL dealers are
regularly given the opportunity to attend
training courses and are supplied with
the necessary technical information.
When repairing the machine, only use
replacement parts which have been
approved by STIHL for this power tool or
are technically identical. Only use highquality replacement parts in order to
avoid the risk of accidents and damage
to the machine.
STIHL recommends the use of original
STIHL replacement parts.
Original STIHL parts can be identified by
the STIHL part number, the {
logo and the STIHL parts symbol K
(the symbol may appear alone on small
parts).
BGE 61, BGE 71, BGE 81, SHE 71, SHE 81
17

English
000BA073 KN
Disposal
Observe all country-specific waste
disposal rules and regulations.
STIHL products must not be thrown in
the garbage can. Take the product,
accessories and packaging to an
approved disposal site for environmentfriendly recycling.
Contact your STIHL servicing dealer for
the latest information on waste disposal.
EC Declaration of Conformity
ANDREAS STIHL AG & Co. KG
Badstr. 115
D-71336 Waiblingen
Germany
declare in exclusive responsibility that
Category: Electric blower, elec-
tric vacuum shredder
Make: STIHL
Model: BGE 61
BGE 71
BGE 81
SHE 71
SHE 81
Serial
identification: 4811
conforms to the relevant provisions of
Directives 2011/65/EU, 2006/42/EC,
2000/14/EU and 2014/30/EC and has
been developed and manufactured in
compliance with the following standards
in the versions valid on the date of
production:
EN 50636-2-100, EN 55014-1,
EN 55014-2, EN 60335-1,
EN 61000-3-2, EN 61000-3-3
The measured and guaranteed sound
power levels were determined according
to Directive 2000/14/EC, Annex V.
Measured sound power level
Guaranteed sound power level
BGE 71: 100 dB(A)
BGE 81: 103 dB(A)
SHE 71: 100 dB(A)
SHE 81: 102 dB(A)
Technical documents deposited at:
ANDREAS STIHL AG & Co. KG
Produktzulassung (Product Licensing)
The year of manufacture, country of
manufacture and serial number are
applied to the product.
Done at Waiblingen, 01.03.2017
ANDREAS STIHL AG & Co. KG
Thomas Elsner
Director Product Management and
Services
18
BGE 71: 98 dB(A)
BGE 81: 101 dB(A)
SHE 71: 98 dB(A)
SHE 81: 100 dB(A)
BGE 61, BGE 71, BGE 81, SHE 71, SHE 81

English
BGE 61, BGE 71, BGE 81, SHE 71, SHE 81
19

English
20
BGE 61, BGE 71, BGE 81, SHE 71, SHE 81


0458-290-0121-B
englisch
G
www.stihl.com
*04582900121B*
0458-290-0121-B
 Loading...