

Page 1
Mounting the Presenter PR921
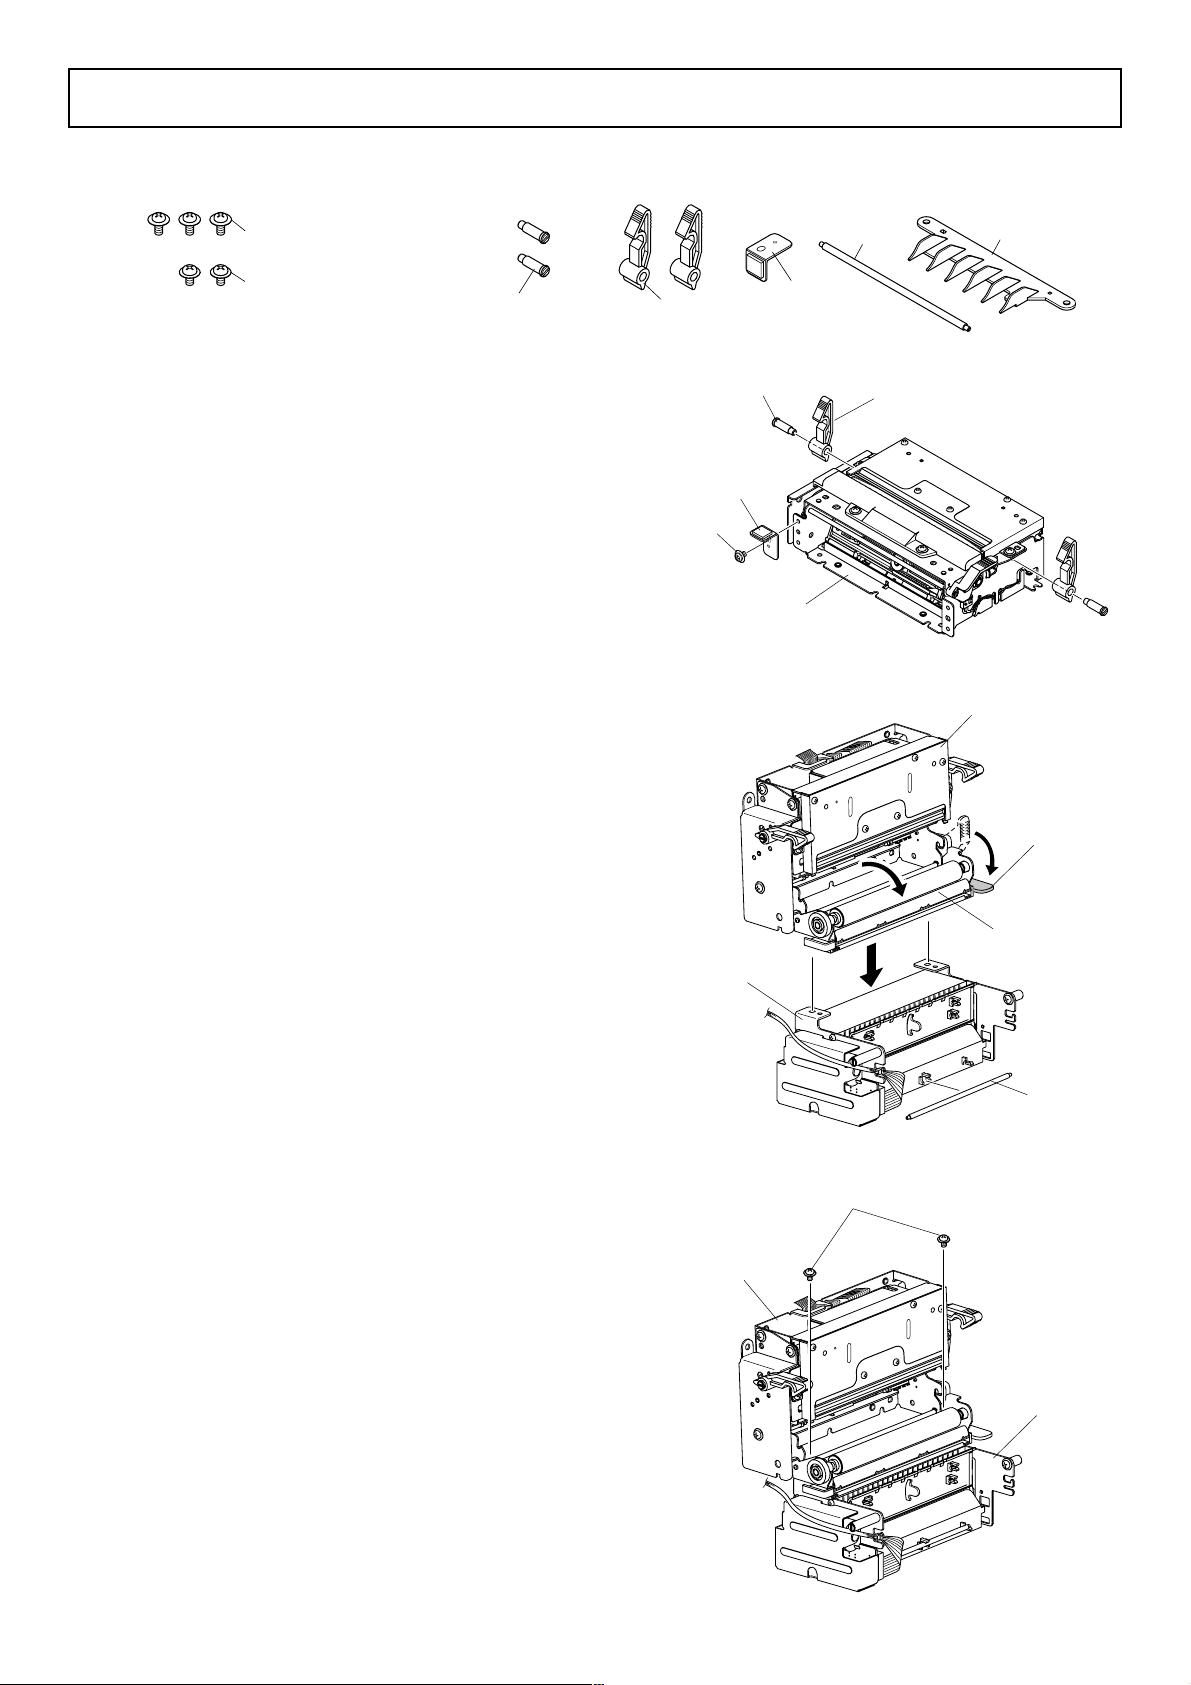
1. Opening the Package : Check that all of the accessories are included.
M3 × 6 screws (3)
(For Presenter/
M3
×
4 screws (2)
(For Loop Guide Mounting)
Stopper Mounting)
Lever screw × 2
2. Mounting Procedures :
2-1 Mounting the Lock Lever
Screw in the two lock levers into the presenter with
the two lever screws.
2-2 Mounting the Stopper
Screw in the stopper into the presenter with the
screw.
2-3 Mounting the Presenter
1 Install the shaft in the presenter.
2 Lay the release lever on the mechanism side down
and open the mechanism platen holder toward the
direction of the arrow.
Lock lever × 2
Lever screw
Stopper
Screw
Stopper
Presenter
Shaft
Loop guide
Lock lever
Mechanism
Release lever
3 Position the screw holes, as shown in the figure, and
place the mechanism on top of the presenter.
4 Fasten the presenter to the mechanism using the two
screws.
Platen holder
Presenter
Shaft
Screw
Mechanism
Presenter
80871281 PR921
Page 2
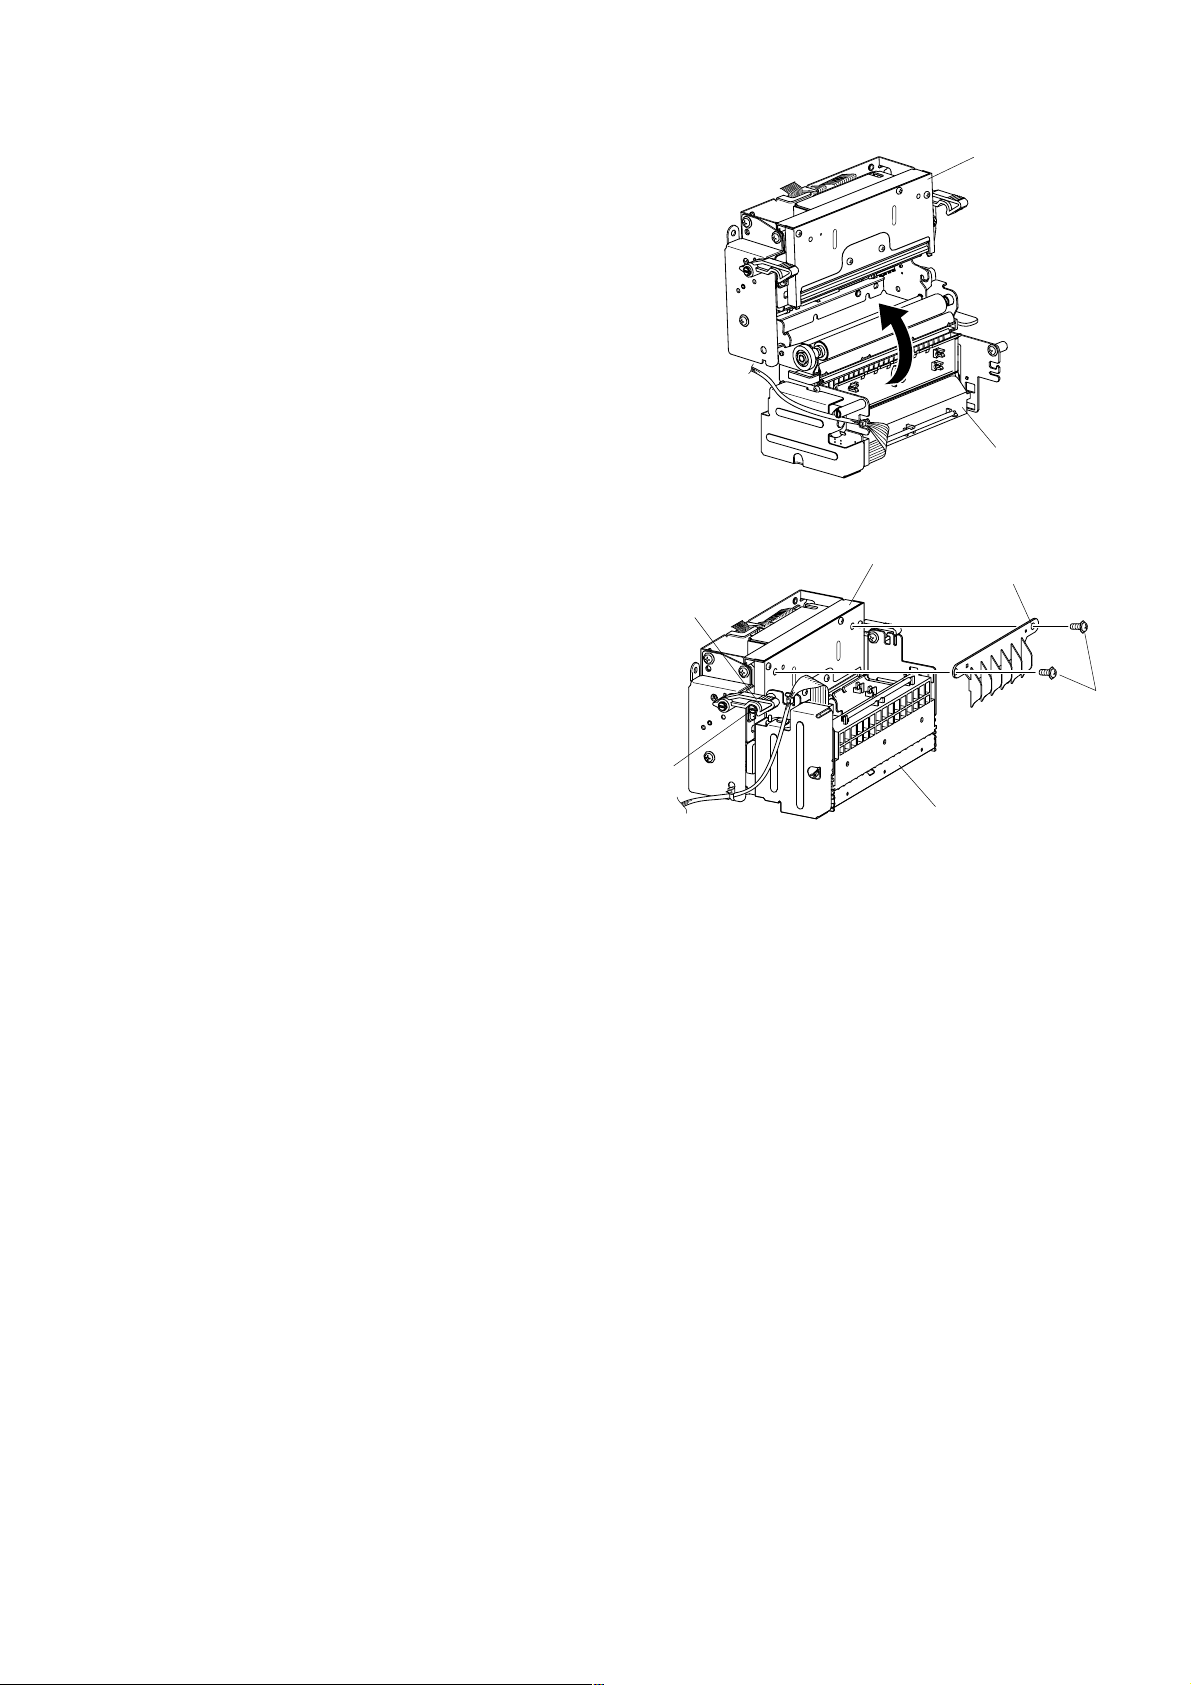
5 Lift the presenter in the direction of the arrow to
close.
Mechanism
Presenter
6 Close the right and left sides lock shafts with the
lock lever.
7 It is recommended that the presenter cable be set in
the position shown in the drawing on the mechanism
side using the Fastener.
(Customers must supply the Fastener.)
Note: Set the Fastener after checking that the
cable is not pinched when opening or
closing the presenter.
8 If a loop guide is necessary, mount it to the
mechanism using the two screws.
Lock lever
Lock shaft
Mechanism
Loop guide
Screw
Presenter
 Loading...