


Quick Consumer
Manual

Welcome
Thank you for purchasing a Speed Queen® appliance. We value you as a customer.
At Speed Queen, leading performance is our daily reality. We seek to deliver an outstanding experience in every aspect of laundry. Your machine was built to last 25 years in your home and
Speed Queen support has been built to provide you with the best service in the industry.
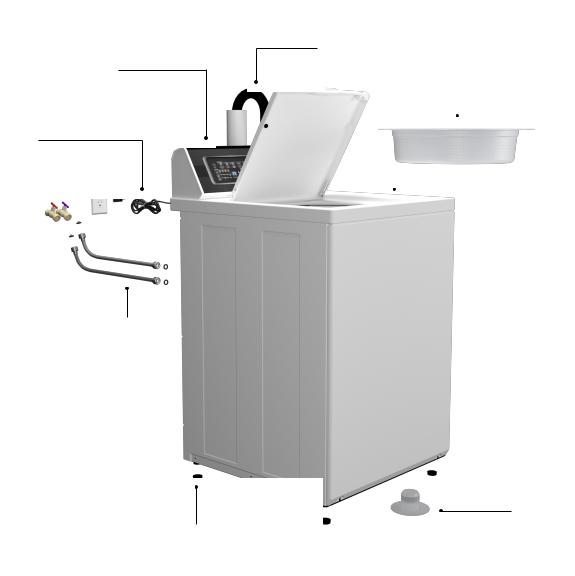
Installation
Parts included:
Two (2) filter |
Two (2) plain |
Four (4) rubber Beaded strap |
screen washers |
rubber washers |
feet |
1.Remove shipping brace and shipping plug.
2.Wipe out inside of washtub.
3.Connect fill hoses – water pressure = 20-120 psi [138-827 kPa].
•Two required, sold separately
•Flush water supply lines
•Use two filter screen washers with screen facing faucet
•Use two rubber washers in end of hose connecting to the machine
4.Connect drain hose to drain receptacle – 36 in. [91 cm] recommended height.
•Use beaded strap to secure drain hose to drain receptacle
5.Position and level washer – adjust front two legs. Tilt washer forward and back to set rear legs.
•Place four rubber feet on leveling legs
6.Connect washer to electrical power – on individual branch circuit. Refer to serial plate for electrical ratings.
7.Run washer through one complete cycle to make sure it is operating properly.
8.Check for leaks.
4.
7.
 1.
1.
6.
 2.
2.
3.
1.
5. 
 Loading...